The story of how the freelancers team writes full-stack JavaScript applications
- Transfer
The author of the material, the translation of which we publish today, says that the GitHub repository , on which he worked and several other freelancers, received, for various reasons, about 8,200 stars in 3 days. This repository came in first place on HackerNews and GitHub Trending, and 20,000 Reddit users voted for it.
This repository reflects the methodology for developing full-stack applications, which this article is devoted to.

I was going to write this material for quite some time. I believe that I can’t find a better moment than this when our repository is very popular.
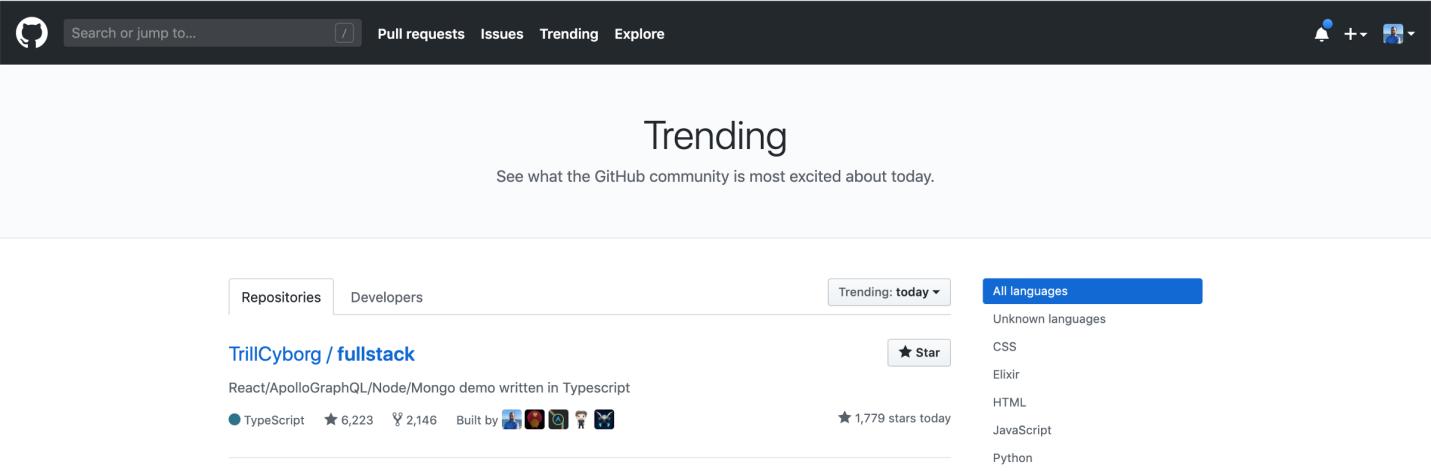
No. 1 on GitHub Trending
I work in a team of freelancers . Our projects use React / React Native, NodeJS, and GraphQL. This material is intended for those who want to learn about how we develop applications. In addition, it will be useful to those who will join our team in the future.
Now I will talk about the basic principles that we use when developing projects.
“The simpler the better” is easier said than done. Most developers are aware that simplicity is an important principle in software development. But this principle is not always easy to follow. If the code is simple, it facilitates project support and simplifies team work on this project. In addition, adherence to this principle helps in working with code that was written, say, six months ago.
Here are the errors I have come across regarding this principle:
Many of the ideas that will be discussed below are aimed at making the code base as simple as possible and maintaining it in this state.
This principle, the “colocation principle,” applies to many parts of the application. This is the structure of the folders in which the client and server code is stored, this is the storage of the project code in one repository, this is also the decision-making about which code is in a certain file.
It is recommended that you keep the client and server code in the same repository. It's simple. Do not complicate what is not necessary to complicate. With this approach, it is convenient to organize a coordinated team work on a project. I worked on projects that used various repositories to store materials. This is not a disaster, but mono-repositories make life much easier.
We are writing full-stack applications. That is, both the client code and the server code. The folder structure of a typical client project includes separate directories for components, containers, actions, reducers, and routes.
Actions and reducers are present in those projects that use Redux. I strive to do without this library. I am sure that there are high-quality projects that use the same structure. Some of my projects have separate folders for components and containers. A component folder can store something like files with the code of entities such as
This is a working structure. It is at least homogeneous, and this is very important. This leads to the fact that the developer, who joined the work on the project, will quickly understand what is happening in it and what role its individual parts play. The disadvantage of this approach, because of which I recently try to not use it, is that it forces the programmer to constantly move around the code base. For example, entities
For some time now, I have been striving to place files whose contents are planned to be shared in the same folders. This approach to project structuring is based on the grouping of files based on their capabilities. Thanks to this approach, you can greatly simplify your life if, for example, you place the parent component and its “stupid” child component in the same folder.
Usually we use folders
Within the route folder, you can create additional folders in which the code responsible for the formation of different parts of the page is grouped. This makes sense in cases where the route is represented by a large amount of code. Here, however, I would like to warn the reader that it is not worth creating structures from folders with a very high level of nesting. This complicates the movement of the project. Deep nested folder structures are one of the signs of overcomplicating a project. It should be noted that the use of specialized tools, such as search commands, gives the programmer convenient tools for working with the project code and for finding what he needs. But the file structure of the project also affects the usability of it.
Structuring the project code, you can group files based not on the route, but on the project capabilities implemented by these files. In my case, this approach shows itself perfectly on single-page projects that implement many features on their only page. But it should be noted that grouping project materials by route is easier. This approach does not require special mental efforts in order to make decisions about which entities should be placed next to each other, and in order to search for something.
If we go the way of grouping the code further, we can decide that the code of containers and components will justifiably be placed in the same file. And you can go even further - put the code of two components in one file. I suppose you may well be thinking now that recommending such things is just blasphemy. But in reality, everything is far from so bad. In fact, this approach is fully justified. And if you use React hooks, or generated code (or both), I would recommend this approach.
In fact, the question of how to decompose the code into files is not of primary importance. The real question is why you might need to divide the components into smart and stupid. What are the benefits of this separation? There are several answers to this question:
All these are real arguments in favor of dividing the components into “smart” and “stupid”, but they are not applicable to all situations. For example, we often, when creating projects, use the Apollo Client with hooks. In order to test such projects, you can either create Apollo response mocks, or hook mocks. The same goes for the Storybook. If we talk about mixing and sharing “smart” and “stupid” components, then, in fact, I have never met this in practice. Regarding cross-platform use of the code, there was one project in which I was going to do something similar, but never did. It was supposed to be the Lerna monorepository . Nowadays, instead of this approach, you can choose React Native Web.
As a result, we can say that in the separation of components into “smart” and “stupid” there is a certain meaning. This is an important concept worth knowing. But often, you don’t need to worry much about it, especially considering the recent appearance of React hooks.
The strong point of combining the capabilities of “smart” and “stupid” components in one entity is that it speeds up development and that it simplifies the structure of the code.
Moreover, if such a need arises, a certain component can always be divided into two separate components - “smart” and “stupid”.
We use emotion / styled components for styling applications . There is always the temptation to separate styles into a separate file. I have seen some developers do this. But, after I tried both approaches, I eventually did not find a reason to move the styles to a separate file. As in the case of many other things, which we are talking about here, a developer can make his life easier by combining the styles and components to which they relate in one file.
All of the above is true in relation to structuring the server-side code of the application. A typical structure that I personally try to avoid might look something like this :
We usually use GraphQL in our projects. Therefore, they use files that store models, services, and recognizers. Instead of scattering them in different places of the project, I collect them in one folder. Most often, these files will be shared, and it will be easier to work with them if they are stored in the same folder.
We use a lot of solutions in our projects, one way or another related to data types. These are TypeScript, GraphQL, database schemas, and sometimes MobX. As a result, it may turn out that the types for the same entities are described 3-4 times. Things like this should be avoided. We should strive to use tools that automatically generate type descriptions.
On the server, a combination of TypeORM / Typegoose and TypeGraphQL can be used for this purpose. This is enough to describe all the types used. TypeORM / Typegoose allows you to describe the database schema and the corresponding TypeScript types. TypeGraphQL will help in creating the types of GraphQL and TypeScript.
Here is an example of determining the types of TypeORM (MongoDB) and TypeGraphQL in one file:
GraphQL Code Generator can also generate many different types. We use this tool to create TypeScript types on the client, as well as React hooks that access the server.
If you use MobX to control the state of the application, then using a couple of lines of code, you can get automatically generated TS types. If you also use GraphQL, then you should take a look at the new package - MST-GQL , which generates a state tree from the GQL scheme.
Using these tools together will save you from rewriting large amounts of code and help you avoid common mistakes.
Other solutions like Prisma , Hasura and AWS AppSynccan also help avoid duplicate type declarations. The use of such tools, of course, has its pros and cons. In the projects we create, such tools are not always used, since we need to deploy the code on our own servers of organizations.
If you look at the code that you create without using the above tools to automatically generate code, it turns out that programmers constantly have to write the same thing. The main advice I can give about this is that you need to create snippets for everything that you often use. If you often enter the command
There are many packages with snippets, but it’s easy to create your own snippets. For example, using the Snippet generator .
Here is the code that allows me to add some of my favorite snippets to VS Code:
In addition to snippets, code generators can help save time. You can create them yourself. I like to use plop for this .
Angular has its own built-in code generators. Using the command line tools, you can create a new component, consisting of 4 files, which presents everything that you can expect to find in the component. It is a pity that React does not have such a standard feature, but something similar can be created independently using plop. If each new component you create should be presented in the form of a folder containing a file with the component code, a test file and a Storybook file, the generator will help to create all this with one command. This in many cases greatly facilitates the life of the developer. For example, when adding a new feature to the server, just run one command on the command line. After that, files of the entity, services and recognizers will automatically be created, containing all the necessary basic structures.
Another strength of code generators is that they contribute to uniformity in team development. If everyone uses the same plop generator, then the code will be very uniform for everyone.
Formatting the code is a simple task, but, unfortunately, it is not always solved correctly. Do not waste time manually aligning the code or inserting semicolons into it. Use Prettier to automatically format code when committing.
In this article I told you about some things that we learned about over the years of work, over the years of trial and error. There are many approaches to structuring the code base of projects. But among them there is no one that can be called the only right one.
The most important thing that I wanted to convey to you is that the programmer should strive for the simplicity of organizing projects, for their homogeneity, for using an understandable structure that is easy to work with. This simplifies team development projects.
Dear readers! What do you think of the ideas for developing full-stack JavaScript applications outlined in this article?


Background
I was going to write this material for quite some time. I believe that I can’t find a better moment than this when our repository is very popular.
No. 1 on GitHub Trending
I work in a team of freelancers . Our projects use React / React Native, NodeJS, and GraphQL. This material is intended for those who want to learn about how we develop applications. In addition, it will be useful to those who will join our team in the future.
Now I will talk about the basic principles that we use when developing projects.
The simpler the better
“The simpler the better” is easier said than done. Most developers are aware that simplicity is an important principle in software development. But this principle is not always easy to follow. If the code is simple, it facilitates project support and simplifies team work on this project. In addition, adherence to this principle helps in working with code that was written, say, six months ago.
Here are the errors I have come across regarding this principle:
- Unjustified desire to fulfill the DRY principle. Sometimes copying and pasting code is quite normal. No need to abstract every 2 code fragments that are somewhat similar to each other. I myself made this mistake. All, perhaps, committed it. DRY is a good approach to programming, but choosing a failed abstraction can only worsen the situation and complicate the code base. If you want to know more about these ideas, I recommend reading Kent A Dodds ' AHA Programming .
- Refusal to use the available tools. One example of this error is using
reduceinstead ofmaporfilter. Of course, with the helpreduceyou can reproduce the behaviormap. But this is likely to lead to an increase in the size of the code, and to the fact that it will be more difficult for other people to understand this code, given that “simplicity of code” is a subjective concept. Sometimes it may be necessary to use itreduce. And if you compare the processing speed of the data set using the combined callsmapandfilter, and usingreduce, it turns out that the second option is faster. In the variant withreducea set of values has to be viewed once, not two. Before us is a debate about productivity and simplicity. In most cases, I would prefer simplicity and strive to avoid premature code optimization, that is, I would choose a pairmap/filterinsteadreduce. And if it turned out that the construction ofmapandfilterbecame the bottleneck of the system, it would translate the code toreduce.
Many of the ideas that will be discussed below are aimed at making the code base as simple as possible and maintaining it in this state.
Keep similar entities close to each other
This principle, the “colocation principle,” applies to many parts of the application. This is the structure of the folders in which the client and server code is stored, this is the storage of the project code in one repository, this is also the decision-making about which code is in a certain file.
▍ Repository
It is recommended that you keep the client and server code in the same repository. It's simple. Do not complicate what is not necessary to complicate. With this approach, it is convenient to organize a coordinated team work on a project. I worked on projects that used various repositories to store materials. This is not a disaster, but mono-repositories make life much easier.
▍ Project structure of the client part of the application
We are writing full-stack applications. That is, both the client code and the server code. The folder structure of a typical client project includes separate directories for components, containers, actions, reducers, and routes.
Actions and reducers are present in those projects that use Redux. I strive to do without this library. I am sure that there are high-quality projects that use the same structure. Some of my projects have separate folders for components and containers. A component folder can store something like files with the code of entities such as
BlogPostand Profile. In the container folder there are files that store the container code BlogPostContainerandProfileContainer. The container receives data from the server and passes it to the "stupid" child component, whose task is to display this data on the screen. This is a working structure. It is at least homogeneous, and this is very important. This leads to the fact that the developer, who joined the work on the project, will quickly understand what is happening in it and what role its individual parts play. The disadvantage of this approach, because of which I recently try to not use it, is that it forces the programmer to constantly move around the code base. For example, entities
ProfileContainerand BlogPostContainerhave nothing in common, but their files are located next to each other and at the same time away from those files in which they are really used.For some time now, I have been striving to place files whose contents are planned to be shared in the same folders. This approach to project structuring is based on the grouping of files based on their capabilities. Thanks to this approach, you can greatly simplify your life if, for example, you place the parent component and its “stupid” child component in the same folder.
Usually we use folders
routes/ screensand folder components. The component folder usually stores code for items such as ButtonorInput. This code can be used on any page of the application. Each folder located in the folder for routes is a separate page of the application. In this case, the files with the component code and the application logic code related to this route are located inside the same folder. And the code of the components that are used on several pages gets into the folder components.Within the route folder, you can create additional folders in which the code responsible for the formation of different parts of the page is grouped. This makes sense in cases where the route is represented by a large amount of code. Here, however, I would like to warn the reader that it is not worth creating structures from folders with a very high level of nesting. This complicates the movement of the project. Deep nested folder structures are one of the signs of overcomplicating a project. It should be noted that the use of specialized tools, such as search commands, gives the programmer convenient tools for working with the project code and for finding what he needs. But the file structure of the project also affects the usability of it.
Structuring the project code, you can group files based not on the route, but on the project capabilities implemented by these files. In my case, this approach shows itself perfectly on single-page projects that implement many features on their only page. But it should be noted that grouping project materials by route is easier. This approach does not require special mental efforts in order to make decisions about which entities should be placed next to each other, and in order to search for something.
If we go the way of grouping the code further, we can decide that the code of containers and components will justifiably be placed in the same file. And you can go even further - put the code of two components in one file. I suppose you may well be thinking now that recommending such things is just blasphemy. But in reality, everything is far from so bad. In fact, this approach is fully justified. And if you use React hooks, or generated code (or both), I would recommend this approach.
In fact, the question of how to decompose the code into files is not of primary importance. The real question is why you might need to divide the components into smart and stupid. What are the benefits of this separation? There are several answers to this question:
- Applications built in this way are easier to test.
- Developing such applications makes it easier to use tools like the Storybook.
- Stupid components can be used with many different smart components (and vice versa).
- Smart components can be used on different platforms (for example, on React and React Native platforms).
All these are real arguments in favor of dividing the components into “smart” and “stupid”, but they are not applicable to all situations. For example, we often, when creating projects, use the Apollo Client with hooks. In order to test such projects, you can either create Apollo response mocks, or hook mocks. The same goes for the Storybook. If we talk about mixing and sharing “smart” and “stupid” components, then, in fact, I have never met this in practice. Regarding cross-platform use of the code, there was one project in which I was going to do something similar, but never did. It was supposed to be the Lerna monorepository . Nowadays, instead of this approach, you can choose React Native Web.
As a result, we can say that in the separation of components into “smart” and “stupid” there is a certain meaning. This is an important concept worth knowing. But often, you don’t need to worry much about it, especially considering the recent appearance of React hooks.
The strong point of combining the capabilities of “smart” and “stupid” components in one entity is that it speeds up development and that it simplifies the structure of the code.
Moreover, if such a need arises, a certain component can always be divided into two separate components - “smart” and “stupid”.
Stylization
We use emotion / styled components for styling applications . There is always the temptation to separate styles into a separate file. I have seen some developers do this. But, after I tried both approaches, I eventually did not find a reason to move the styles to a separate file. As in the case of many other things, which we are talking about here, a developer can make his life easier by combining the styles and components to which they relate in one file.
▍Project structure of the server part of the application
All of the above is true in relation to structuring the server-side code of the application. A typical structure that I personally try to avoid might look something like this :
src
 │ app.js # Точка входа в приложение
 └───api # Контроллер маршрутов Express для всех конечных точек приложения
 └───config # Переменные среды и средства конфигурирования
 └───jobs # Объявление заданий для agenda.js
 └───loaders # Разделение кода на модули
 └───models # Модели баз данных
 └───services # Бизнес-логика
 └───subscribers # Обработчики событий для асинхронных задач
 └───types # Файлы объявлений типов (d.ts) для Typescript
We usually use GraphQL in our projects. Therefore, they use files that store models, services, and recognizers. Instead of scattering them in different places of the project, I collect them in one folder. Most often, these files will be shared, and it will be easier to work with them if they are stored in the same folder.
Do not overwrite type definitions many times
We use a lot of solutions in our projects, one way or another related to data types. These are TypeScript, GraphQL, database schemas, and sometimes MobX. As a result, it may turn out that the types for the same entities are described 3-4 times. Things like this should be avoided. We should strive to use tools that automatically generate type descriptions.
On the server, a combination of TypeORM / Typegoose and TypeGraphQL can be used for this purpose. This is enough to describe all the types used. TypeORM / Typegoose allows you to describe the database schema and the corresponding TypeScript types. TypeGraphQL will help in creating the types of GraphQL and TypeScript.
Here is an example of determining the types of TypeORM (MongoDB) and TypeGraphQL in one file:
import { Field, ObjectType, ID } from 'type-graphql'
import {
  Entity,
  ObjectIdColumn,
  ObjectID,
  Column,
  CreateDateColumn,
  UpdateDateColumn,
} from 'typeorm'
@ObjectType()
@Entity()
export default class Policy {
  @Field(type => ID)
  @ObjectIdColumn()
  _id: ObjectID
  @Field()
  @CreateDateColumn({ type: 'timestamp' })
  createdAt: Date
  @Field({ nullable: true })
  @UpdateDateColumn({ type: 'timestamp', nullable: true })
  updatedAt?: Date
  @Field()
  @Column()
  name: string
  @Field()
  @Column()
  version: number
}
GraphQL Code Generator can also generate many different types. We use this tool to create TypeScript types on the client, as well as React hooks that access the server.
If you use MobX to control the state of the application, then using a couple of lines of code, you can get automatically generated TS types. If you also use GraphQL, then you should take a look at the new package - MST-GQL , which generates a state tree from the GQL scheme.
Using these tools together will save you from rewriting large amounts of code and help you avoid common mistakes.
Other solutions like Prisma , Hasura and AWS AppSynccan also help avoid duplicate type declarations. The use of such tools, of course, has its pros and cons. In the projects we create, such tools are not always used, since we need to deploy the code on our own servers of organizations.
Whenever possible, resort to means of automatic code generation
If you look at the code that you create without using the above tools to automatically generate code, it turns out that programmers constantly have to write the same thing. The main advice I can give about this is that you need to create snippets for everything that you often use. If you often enter the command
console.log- create a snippet, like cl, which automatically turns into console.log(). If you don’t do this and ask me to help you with code debugging, it will upset me a lot. There are many packages with snippets, but it’s easy to create your own snippets. For example, using the Snippet generator .
Here is the code that allows me to add some of my favorite snippets to VS Code:
{
  "Export default": {
    "scope": "javascript,typescript,javascriptreact,typescriptreact",
    "prefix": "eid",
    "body": [
      "export { default } from './${TM_DIRECTORY/.*[\\/](.*)$$/$1/}'",
      "$2"
    ],
    "description": "Import and export default in a single line"
  },
  "Filename": {
    "prefix": "fn",
    "body": ["${TM_FILENAME_BASE}"],
    "description": "Print filename"
  },
  "Import emotion styled": {
    "prefix": "imes",
    "body": ["import styled from '@emotion/styled'"],
    "description": "Import Emotion js as styled"
  },
  "Import emotion css only": {
    "prefix": "imec",
    "body": ["import { css } from '@emotion/styled'"],
    "description": "Import Emotion css only"
  },
  "Import emotion styled and css only": {
    "prefix": "imesc",
    "body": ["import styled, { css } from ''@emotion/styled'"],
    "description": "Import Emotion js and css"
  },
  "Styled component": {
    "prefix": "sc",
    "body": ["const ${1} = styled.${2}`", "  ${3}", "`"],
    "description": "Import Emotion js and css"
  },
  "TypeScript React Function Component": {
    "prefix": "rfc",
    "body": [
      "import React from 'react'",
      "",
      "interface ${1:ComponentName}Props {",
      "}",
      "",
      "const ${1:ComponentName}: React.FC<${1:ComponentName}Props> = props => {",
      "  return (",
      "    ",
      "      ${1:ComponentName}",
      "    ",
      "  )",
      "}",
      "",
      "export default ${1:ComponentName}",
      ""
    ],
    "description": "TypeScript React Function Component"
  }
}
In addition to snippets, code generators can help save time. You can create them yourself. I like to use plop for this .
Angular has its own built-in code generators. Using the command line tools, you can create a new component, consisting of 4 files, which presents everything that you can expect to find in the component. It is a pity that React does not have such a standard feature, but something similar can be created independently using plop. If each new component you create should be presented in the form of a folder containing a file with the component code, a test file and a Storybook file, the generator will help to create all this with one command. This in many cases greatly facilitates the life of the developer. For example, when adding a new feature to the server, just run one command on the command line. After that, files of the entity, services and recognizers will automatically be created, containing all the necessary basic structures.
Another strength of code generators is that they contribute to uniformity in team development. If everyone uses the same plop generator, then the code will be very uniform for everyone.
Auto code formatting
Formatting the code is a simple task, but, unfortunately, it is not always solved correctly. Do not waste time manually aligning the code or inserting semicolons into it. Use Prettier to automatically format code when committing.
Summary
In this article I told you about some things that we learned about over the years of work, over the years of trial and error. There are many approaches to structuring the code base of projects. But among them there is no one that can be called the only right one.
The most important thing that I wanted to convey to you is that the programmer should strive for the simplicity of organizing projects, for their homogeneity, for using an understandable structure that is easy to work with. This simplifies team development projects.
Dear readers! What do you think of the ideas for developing full-stack JavaScript applications outlined in this article?