VS Code Extension - Snippets - I Will Tell How To Save Time
- Tutorial
- Recovery mode
Working for a long time on a project, one often encounters the need to copy some part of the typical code and paste it in the right place. In such situations, snippets help out by the way. It is on their example that I will tell you how to build an extension for my own needs in VS Code.
Concerning the creation of extensions, VS Code has documentation , but here I will try to more concisely show the creation process.
I work on a Mac so the commands will be appropriate ...
And so, what do we need?
The process of installing the necessary tools.
Congratulations. Template created. Let's move on to the code.
Seems to be good? Save time, people ... Time is $
Concerning the creation of extensions, VS Code has documentation , but here I will try to more concisely show the creation process.
I work on a Mac so the commands will be appropriate ...
And so, what do we need?
- Actually VS Code
- Node.js, or rather, its file manager - nmp
- VS code generator
Straight arms
The process of installing the necessary tools. Caution! Used by Terminal!
- Installing Node.js (can be skipped if already available)
- Installing brew (can be skipped if already available)
/usr/bin/ruby -e "$(curl -fsSL https://raw.githubusercontent.com/Homebrew/install/master/install)" - Install Node.js
brew install node
- Installing brew (can be skipped if already available)
- Install VS code generator
npm install -g yo generator-code
Creating Extension Template
- Working all in the same console, execute the command
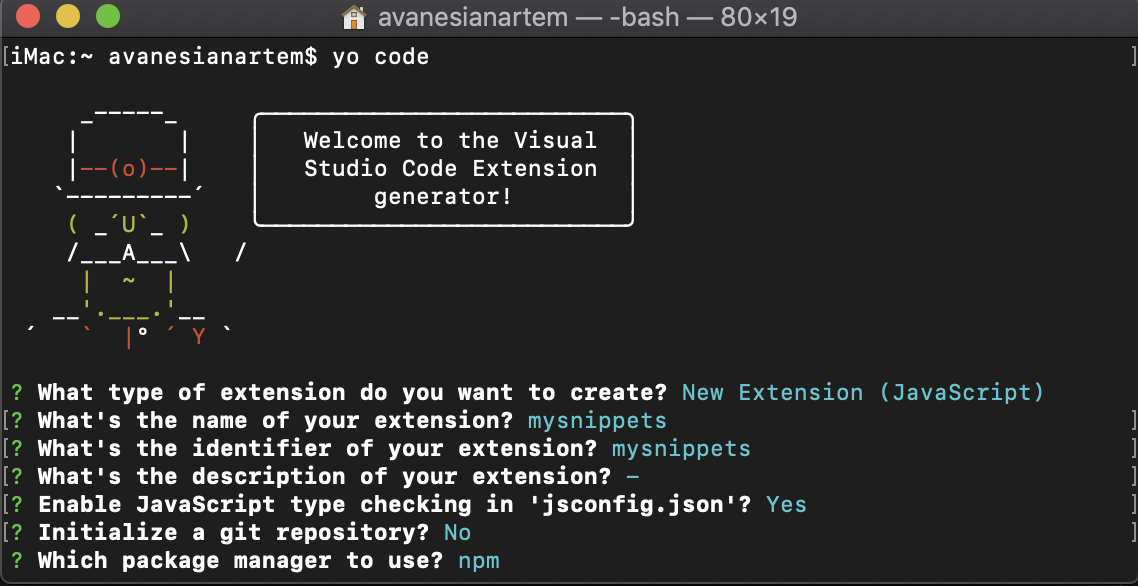
yo code
You will see the following picture: You
must select JavaScript - Then the mechanism will prompt you to fill in a few more fields, after which the creation process will begin
Congratulations. Template created. Let's move on to the code.
Creating Extension
- Open the created folder. Her name matches the extension identifier that you specified earlier)
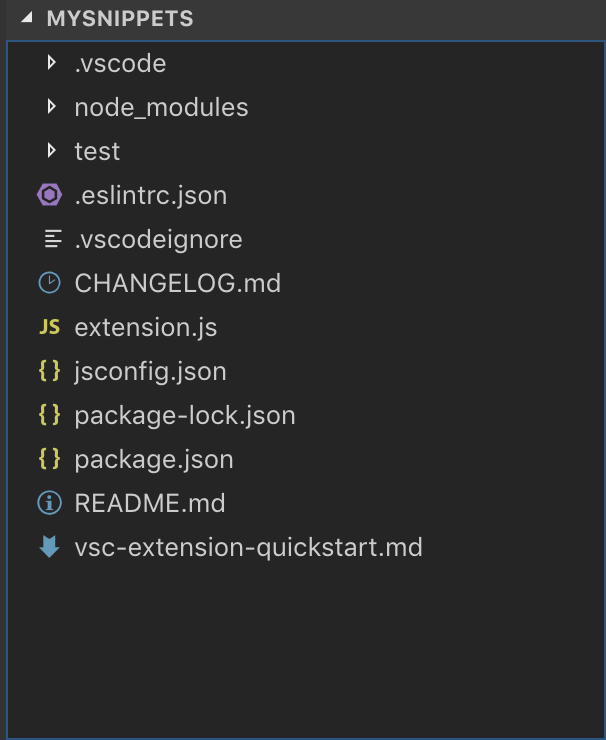
- Create a snippets folder with an embedded json file (om / s). The point is that for each vs editor language you can use your own set of snippets, in order to do this, you need to register your own snippets file for each of the languages you need. For example, I use sql and js, so I will make 2 files for myself

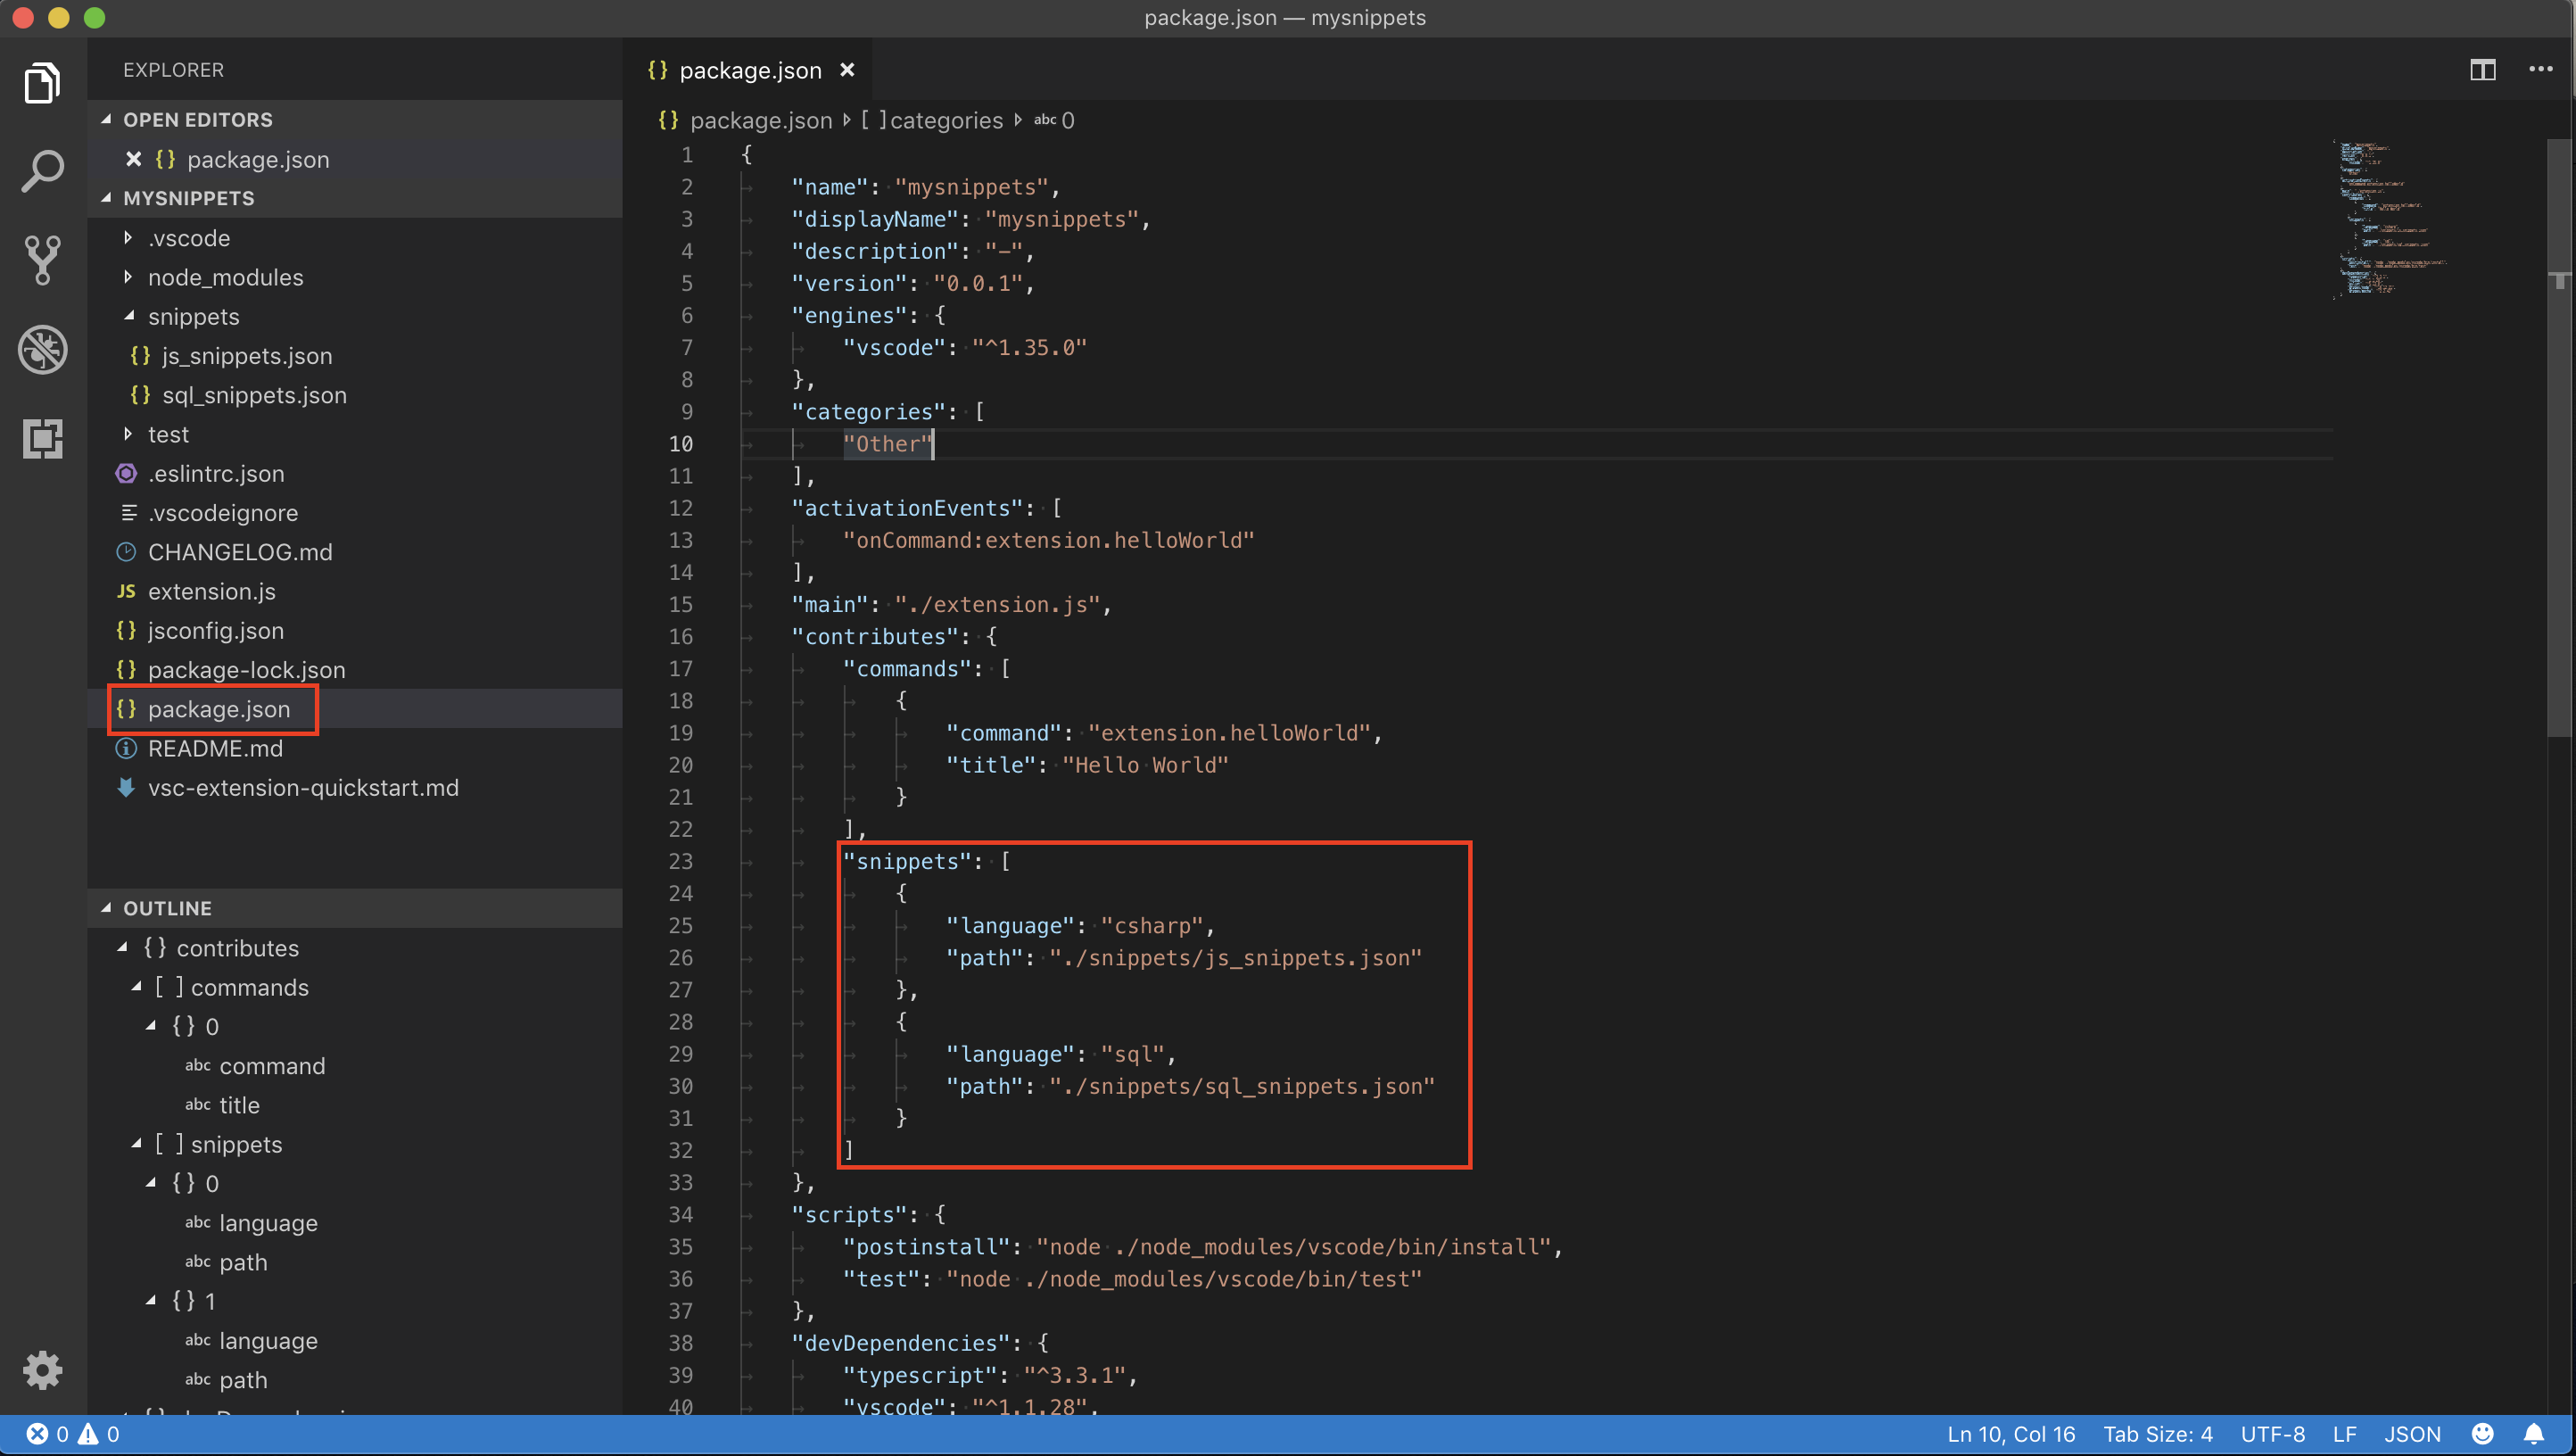
- Register snippets in Extension. Register the Snippet files and bind them to the languages to which they will be applied. To do this, add the following simple construct in the package.json file, which indicates which language corresponds to which snippet
 Code for the lazy
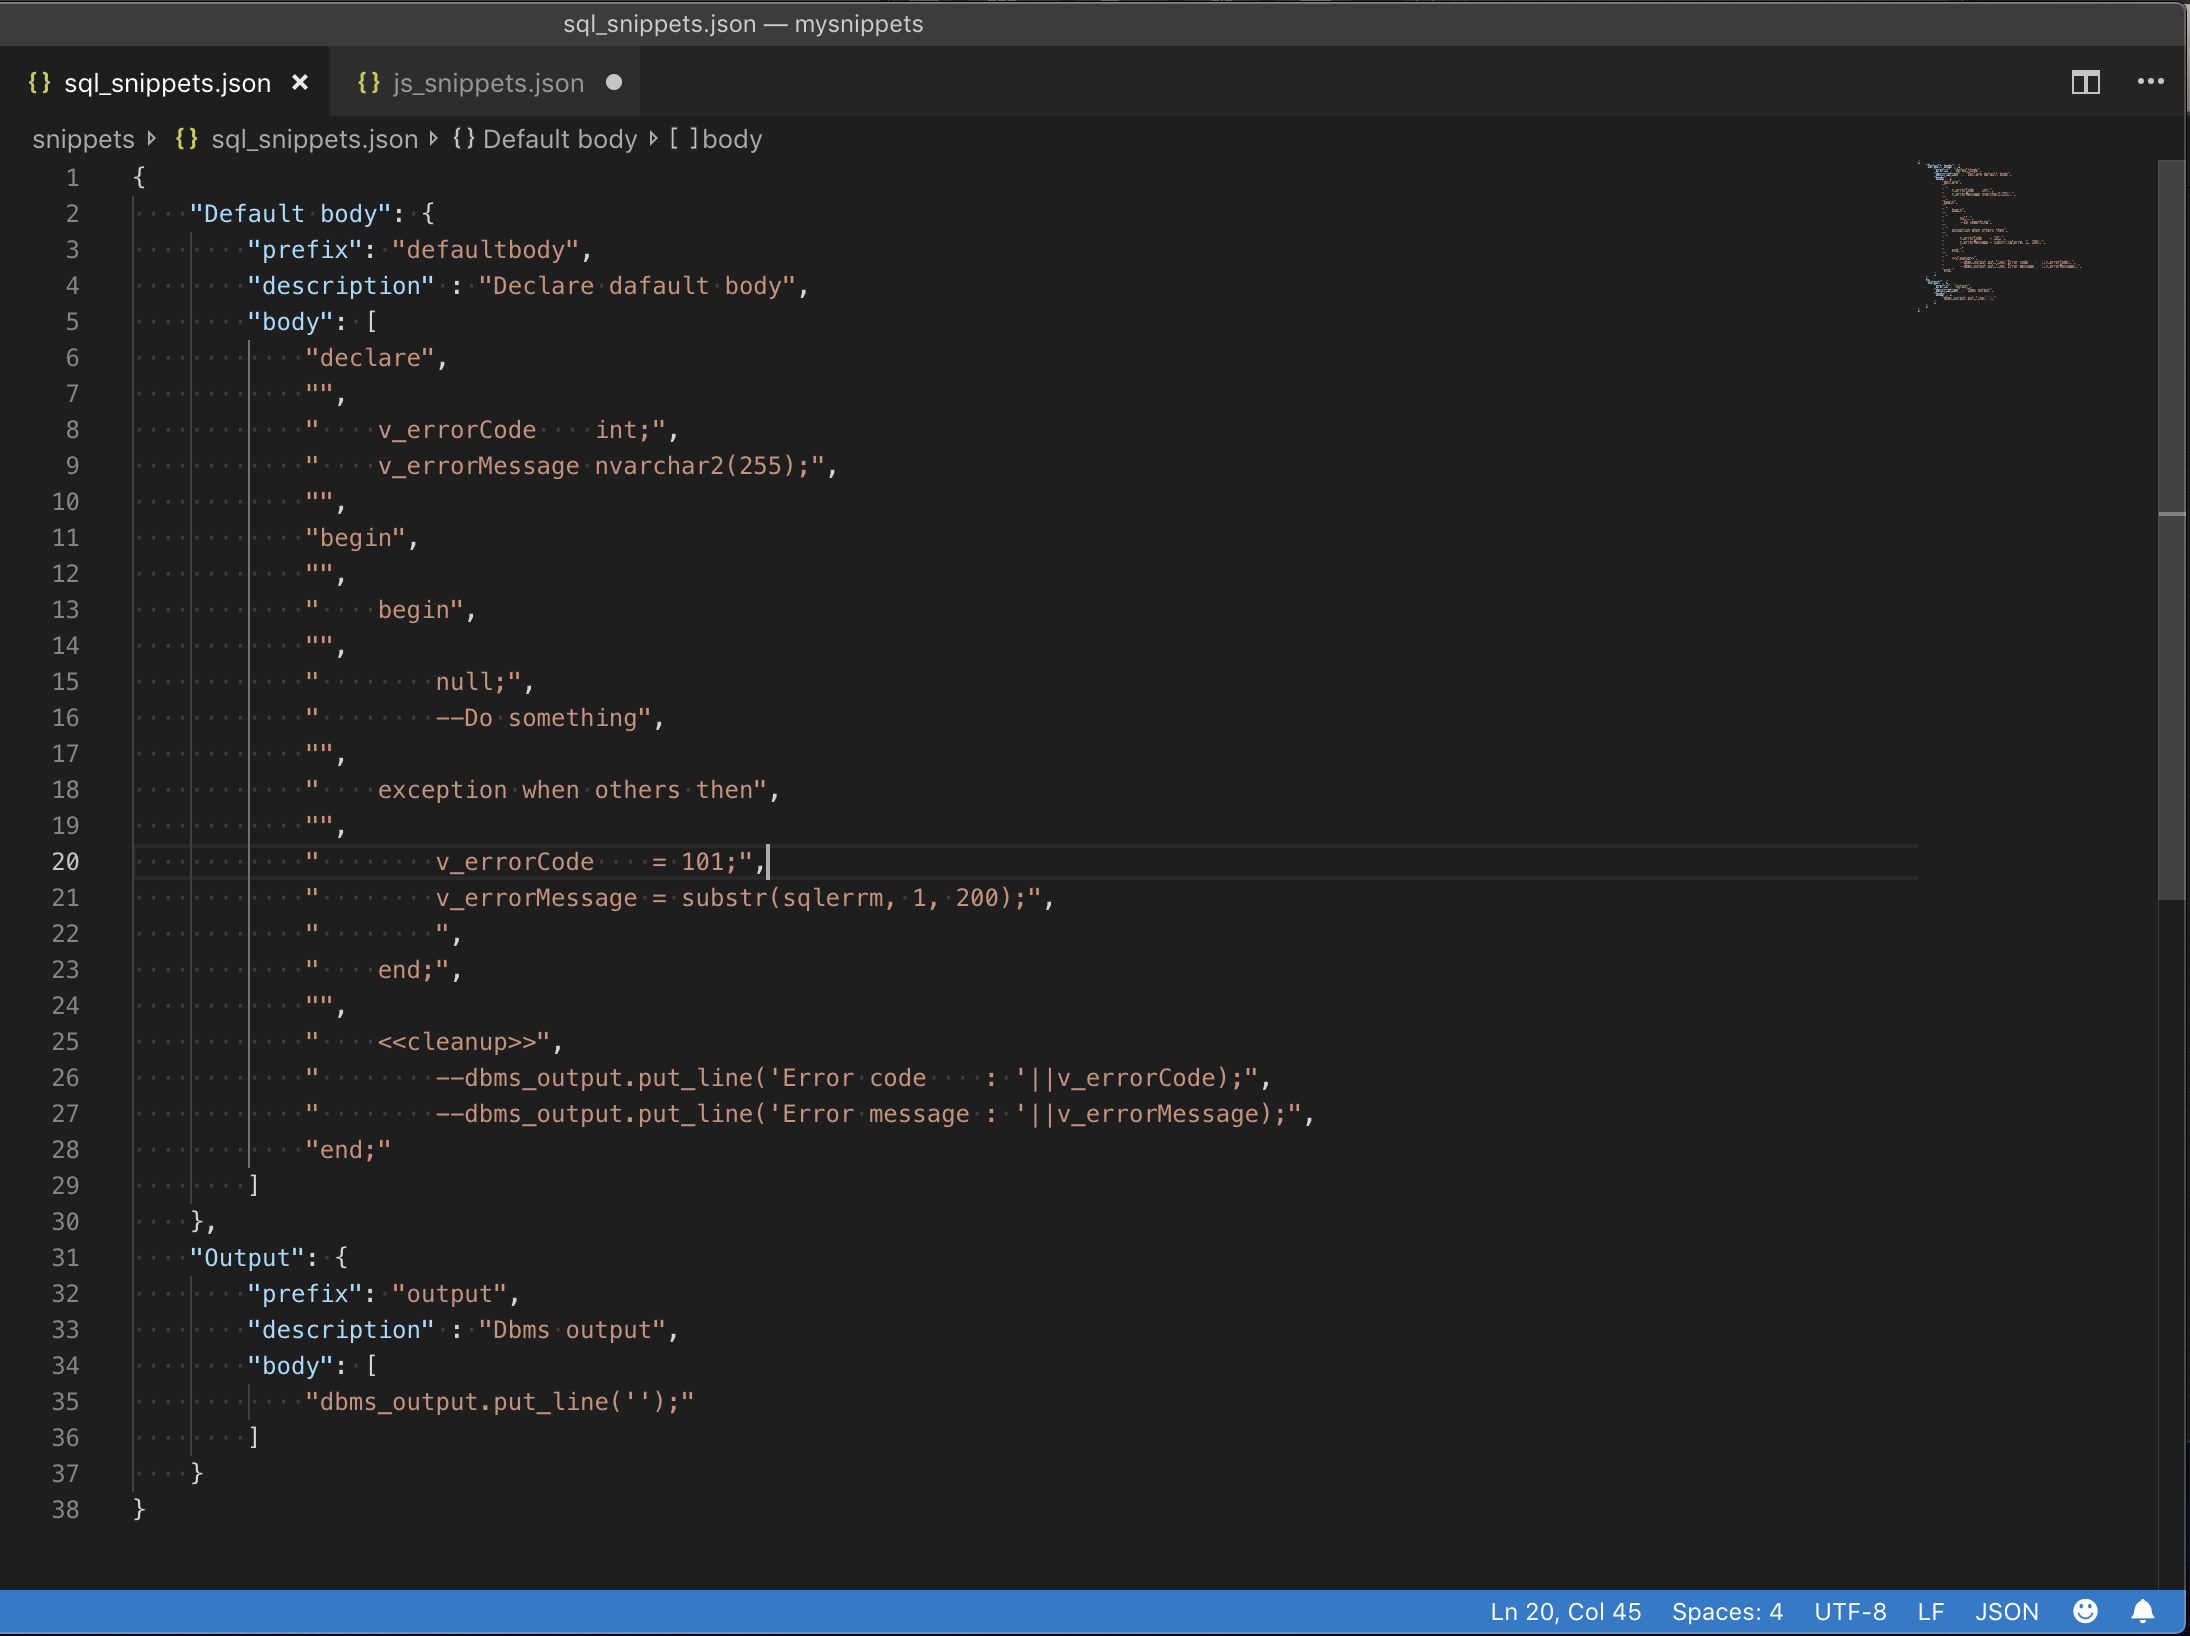
"snippets": [ { "language": "csharp", "path": "./snippets/js_snippets.json" }, { "language": "sql", "path": "./snippets/sql_snippets.json" } ] - Description of the body of snippets. The body must be in json format as previously indicated. For example, I created two templates for myself (snippet-a). One of them creates the body of the pl sql program, and the second simply contains the output snippet. Each snippet consists of:
- json object snippet-a - definitions of its name;
- prefix - a team thanks to which we can find snippet;
- body - the body to be inserted into the editor;
- description - description of snippet-a.
 And again the code
{ "Default body": { "prefix": "defaultbody", "description" : "Declare dafault body", "body": [ "declare", "", " v_errorCode int;", " v_errorMessage nvarchar2(255);", "", "begin", "", " begin", "", " null;", " --Do something", "", " exception when others then", "", " v_errorCode = 101;", " v_errorMessage = substr(sqlerrm, 1, 200);", " ", " end;", "", " <>", " --dbms_output.put_line('Error code : '||v_errorCode);", " --dbms_output.put_line('Error message : '||v_errorMessage);", "end;" ] }, "Output": { "prefix": "output", "description" : "Dbms output", "body": [ "dbms_output.put_line('');" ] } } - Launch. Produced using the same vs code, after which a new instance vs code is opened
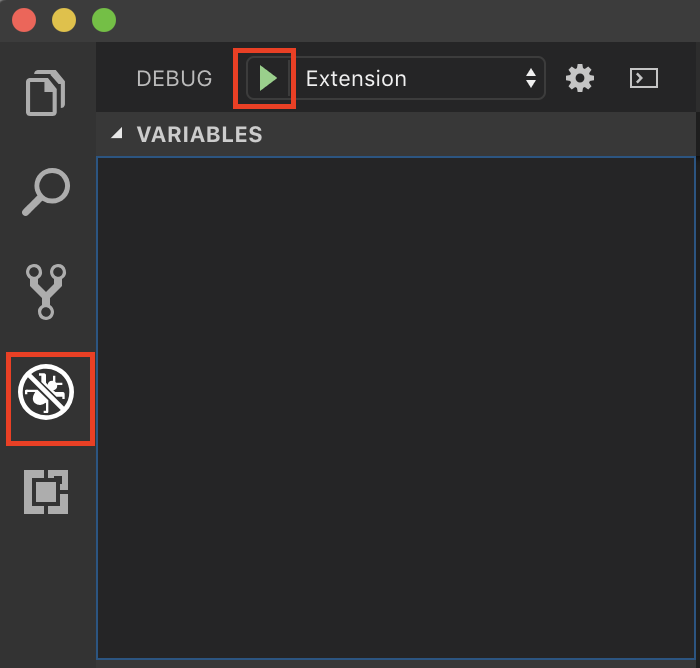
- Verification In the new instance, we need to choose the language for writing the sql code and start writing the prefix of one of the snippets corresponding to the selected language and this is what we get
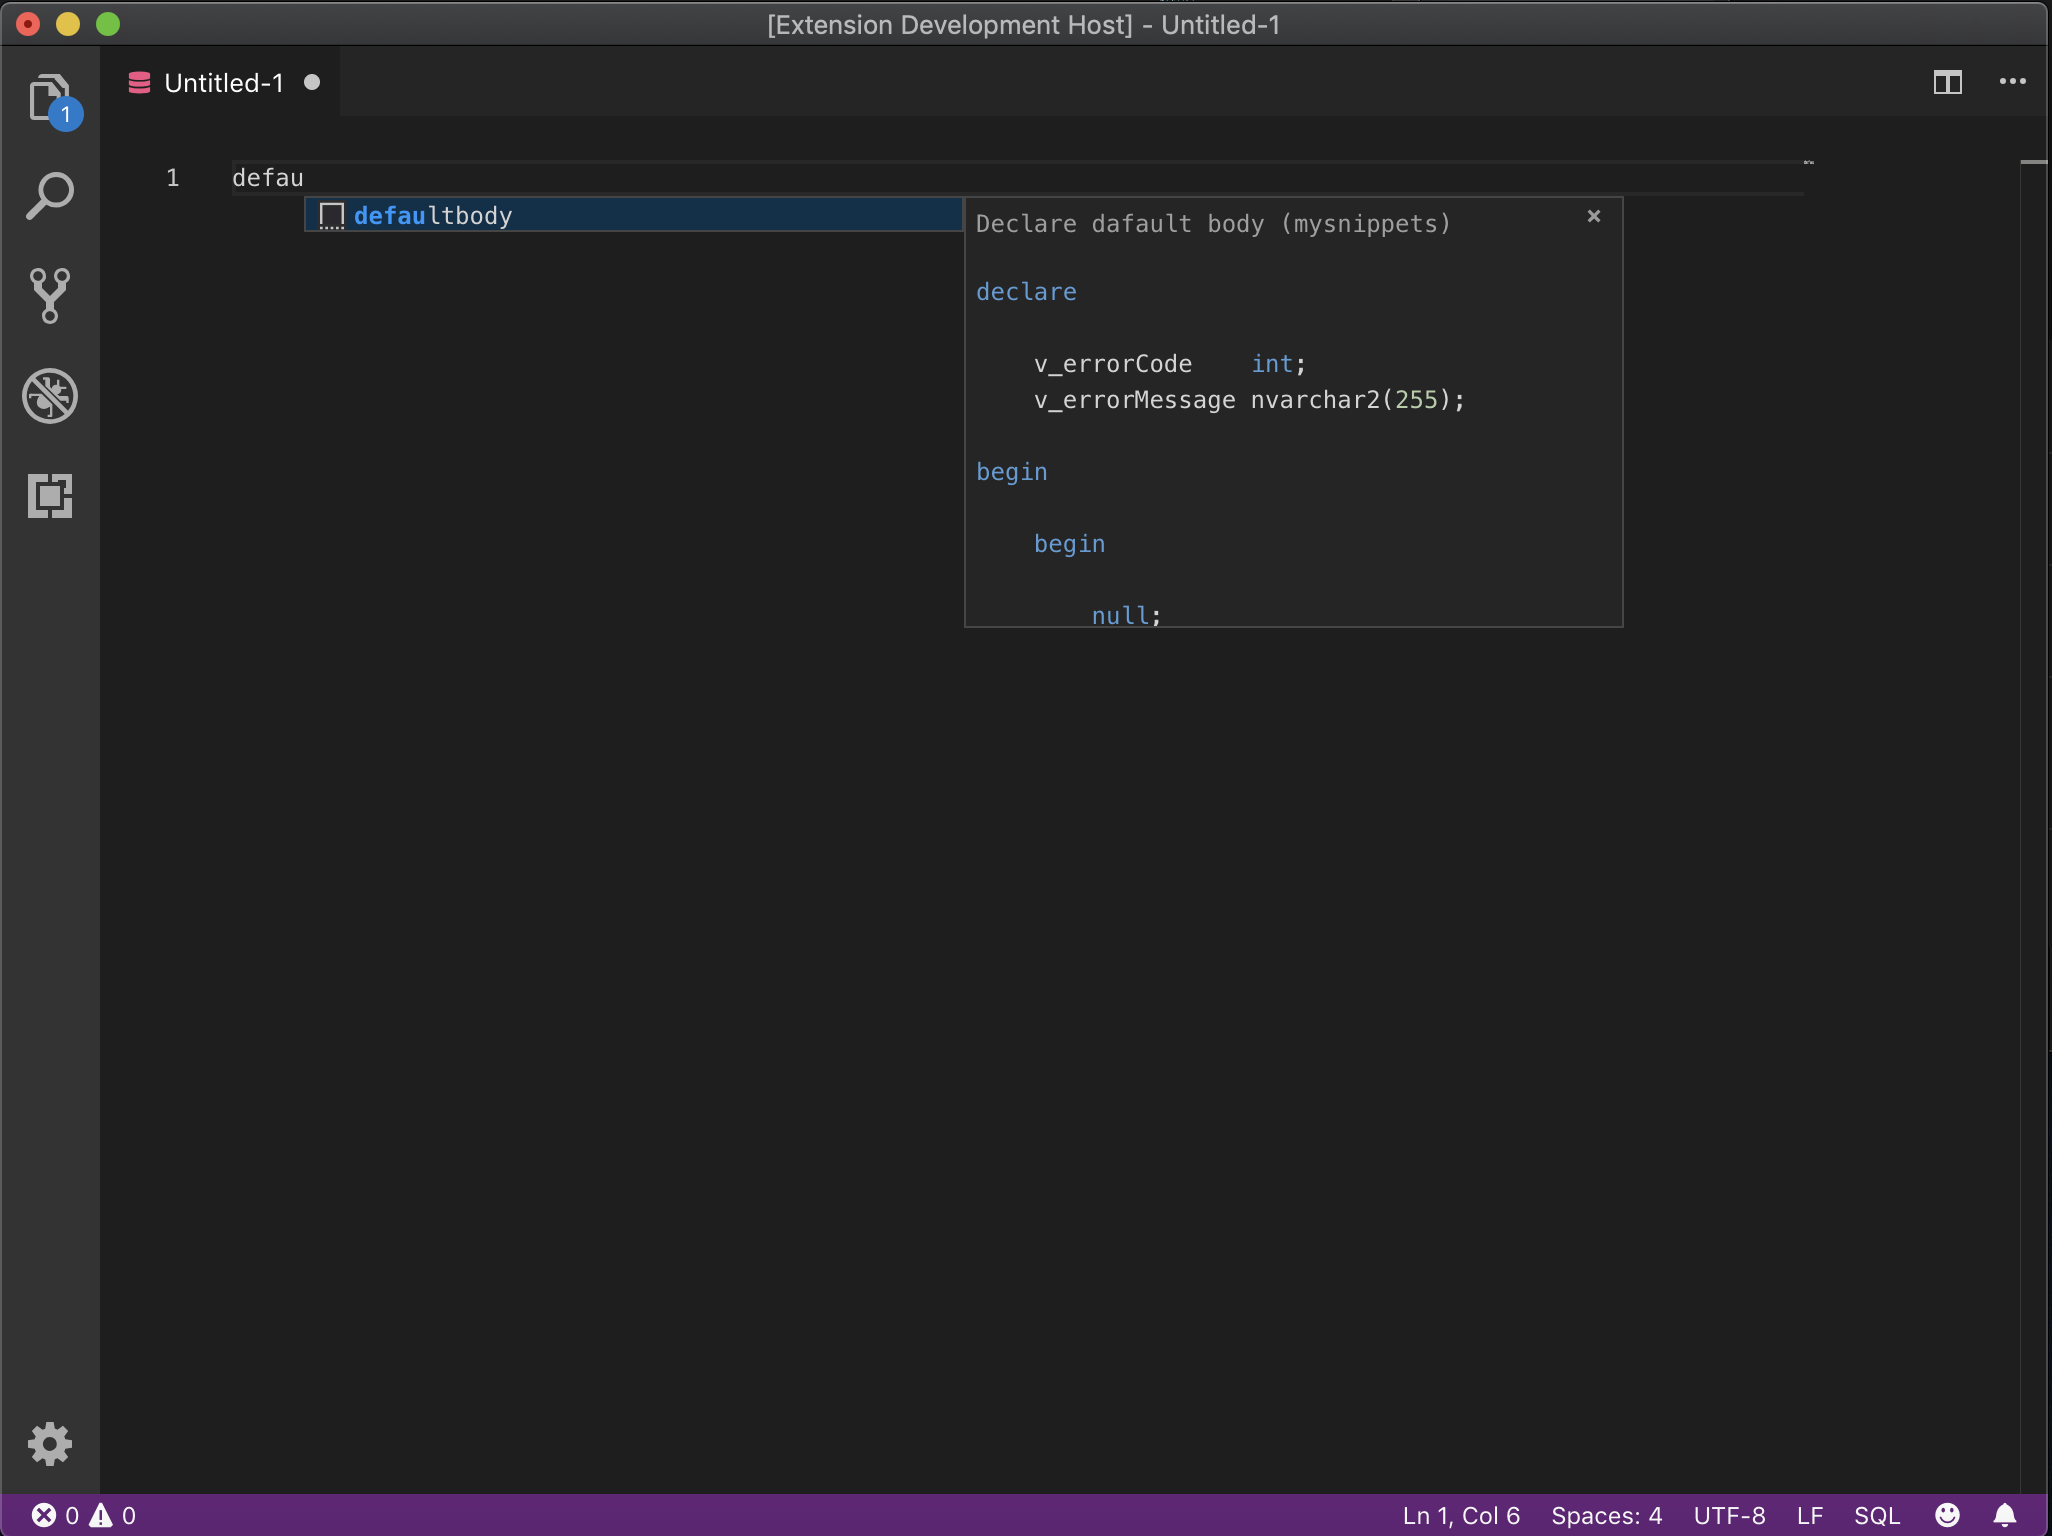

Application. To leave extension on your tarantass and so that it always works, you need to move the project folder touser/.vscode/extensions/
Seems to be good? Save time, people ... Time is $
