How to quickly increase the size of a disk partition on a server
Hello! Recently I came across a simple at first glance task - to increase the "hot" disk size on a Linux server.
There is a server in the cloud. In my case, this is Google Cloud - Compute Engine. Operating system - Ubuntu, ext4 file system (suitable for all ext). A 30 GB drive is currently connected. The base is growing, the files are swelling, so you need to increase the disk size, for example, up to 50 GB. At the same time, we do not disconnect anything, we do not restart anything.
Attention! Before you start, we backup all the important information!
1. First, let's check how much free space we have. In the Linux console, write:
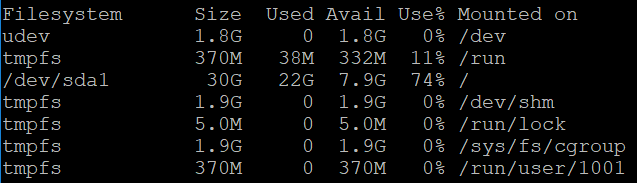
In simple words, I have 30 GB total and 7.9 GB free now. Need to increase.
2. Then I go and through the console of my hoster I connect a little more GB. On Google Cloud, this is easy without rebooting. I go to the Compute Engine -> Disks -> I select the drive of my server - and change the size of it: I
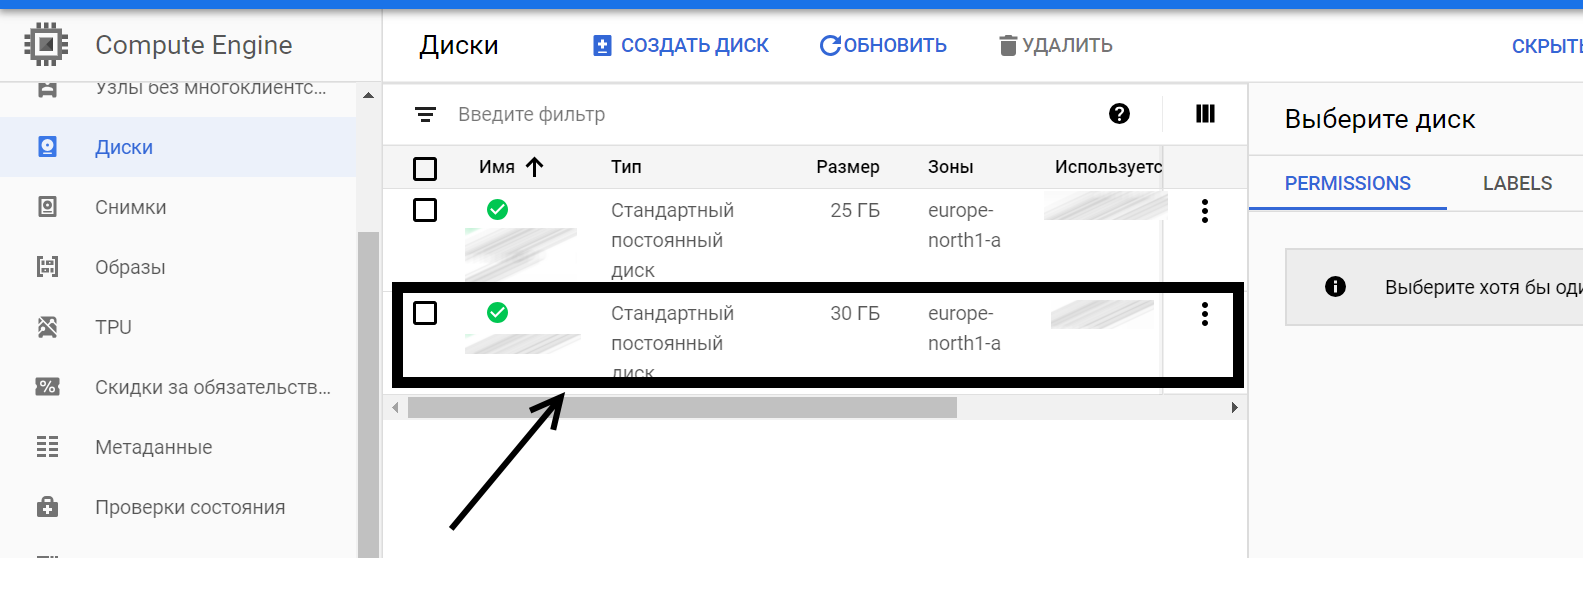
go inside, click "Edit" and increase the disk size to the size I need (in my case, up to 50 GB).
3. So, now we have 50 GB. Check this on the server with the command:
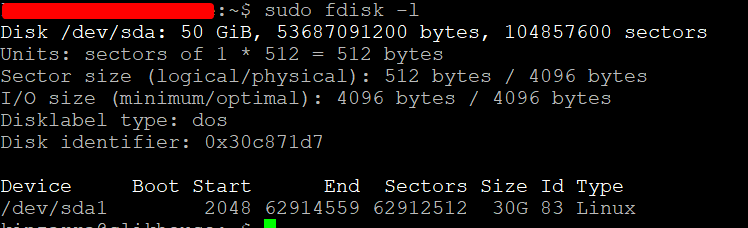
We see our new 50 GB, but so far we can only use 30 GB.
4. Now delete the current 30 GB disk partition, create a new 50 GB one. You may have several sections. You may need to create several new partitions. For this operation, we will use the fdisk program , which allows you to manage hard disk partitions. It is also important to understand what disk partitions are and why they are needed - read here . To run the fdisk program, use the command:
5. Inside the interactive mode of the fdisk program, we perform several operations.
First drive in:
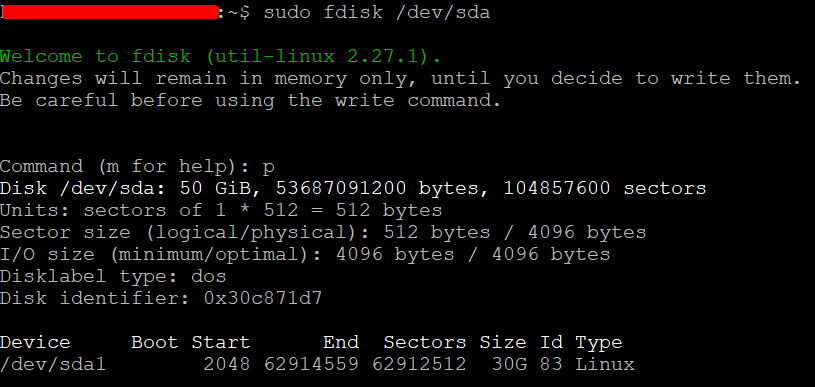
The team lists our current sections. In my case, one 30 GB partition and another 20 GB free float, so to speak.
6. Then drive in:
We delete the current section in order to create a new one for all 50 GB. Before the operation, we check again whether we made backup of important information!
7. Next, indicate the program:
The command creates a new section. All parameters should be set by default - you can just press Enter. If you have some special case, then indicate your parameters. As you can see from the screenshot, I created a 50 GB partition - what I need.
8. As a result, I indicate to the program:

This command records the changes and exits fdisk . We are not afraid that reading the partition table failed. The following command will help fix this. Left just a little bit.
9. We left fdisk and returned to the main Linux line. Then drive in, as we were advised earlier:
If everything went well, then you will not see any message. If you do not have partprobe installed , install it. It partprobe update the partition table that will allow us to expand the partition to 50 GB online. Move on.
Hint! You can install partprobe like this:
10. Now it remains to redefine the partition size using the resize2fs program . She will do this online - even at this moment my scripts worked and wrote to disk.
Program resize2fs overwrite the file system metadata. To do this, use the following command:

Here sda1 is the name of your partition. In most cases, this is sda1, but exceptions are possible. Be careful. As a result, the program changed the size of the partition for us. I think this is a success.
11. Now let's make sure that the partition size has changed and now we have 50 GB. For this, we repeat the very first command:
Task description
There is a server in the cloud. In my case, this is Google Cloud - Compute Engine. Operating system - Ubuntu, ext4 file system (suitable for all ext). A 30 GB drive is currently connected. The base is growing, the files are swelling, so you need to increase the disk size, for example, up to 50 GB. At the same time, we do not disconnect anything, we do not restart anything.
Attention! Before you start, we backup all the important information!
1. First, let's check how much free space we have. In the Linux console, write:
df -hIn simple words, I have 30 GB total and 7.9 GB free now. Need to increase.
2. Then I go and through the console of my hoster I connect a little more GB. On Google Cloud, this is easy without rebooting. I go to the Compute Engine -> Disks -> I select the drive of my server - and change the size of it: I
go inside, click "Edit" and increase the disk size to the size I need (in my case, up to 50 GB).
3. So, now we have 50 GB. Check this on the server with the command:
sudo fdisk -lWe see our new 50 GB, but so far we can only use 30 GB.
4. Now delete the current 30 GB disk partition, create a new 50 GB one. You may have several sections. You may need to create several new partitions. For this operation, we will use the fdisk program , which allows you to manage hard disk partitions. It is also important to understand what disk partitions are and why they are needed - read here . To run the fdisk program, use the command:
sudo fdisk /dev/sda5. Inside the interactive mode of the fdisk program, we perform several operations.
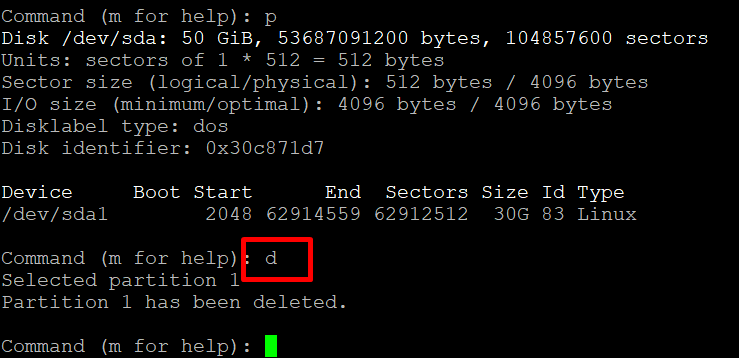
First drive in:
pThe team lists our current sections. In my case, one 30 GB partition and another 20 GB free float, so to speak.
6. Then drive in:
dWe delete the current section in order to create a new one for all 50 GB. Before the operation, we check again whether we made backup of important information!
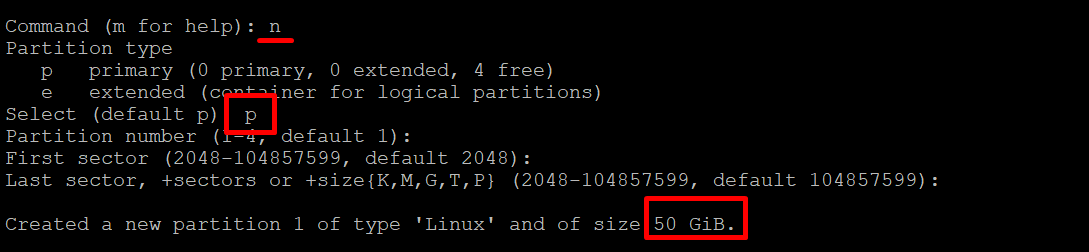
7. Next, indicate the program:
nThe command creates a new section. All parameters should be set by default - you can just press Enter. If you have some special case, then indicate your parameters. As you can see from the screenshot, I created a 50 GB partition - what I need.
8. As a result, I indicate to the program:
wThis command records the changes and exits fdisk . We are not afraid that reading the partition table failed. The following command will help fix this. Left just a little bit.
9. We left fdisk and returned to the main Linux line. Then drive in, as we were advised earlier:
sudo partprobe /dev/sdaIf everything went well, then you will not see any message. If you do not have partprobe installed , install it. It partprobe update the partition table that will allow us to expand the partition to 50 GB online. Move on.
Hint! You can install partprobe like this:
apt-get install partprobe10. Now it remains to redefine the partition size using the resize2fs program . She will do this online - even at this moment my scripts worked and wrote to disk.
Program resize2fs overwrite the file system metadata. To do this, use the following command:
sudo resize2fs /dev/sda1Here sda1 is the name of your partition. In most cases, this is sda1, but exceptions are possible. Be careful. As a result, the program changed the size of the partition for us. I think this is a success.
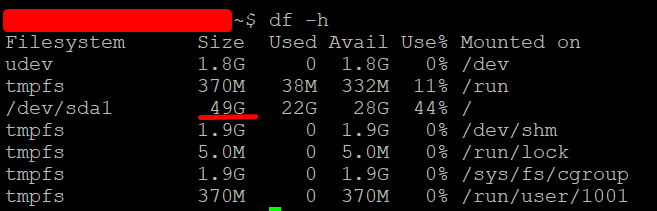
11. Now let's make sure that the partition size has changed and now we have 50 GB. For this, we repeat the very first command:
df -h