Case for "raspberry" with RetroPie - from a device for viewing slides
- Transfer
- Tutorial

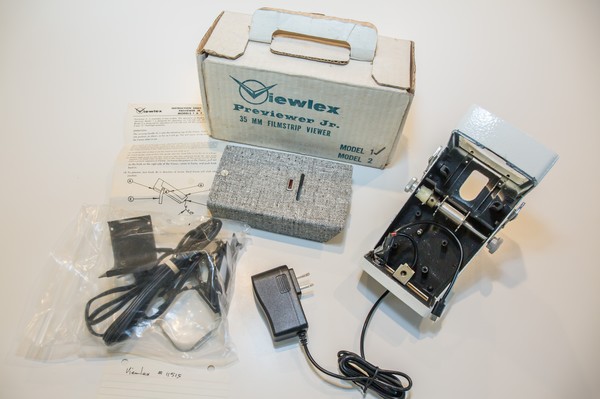
Compact devices for viewing slides through the lens were produced worldwide, including in the USSR (examples: 1 and 2 ). Today, inside such a device you can put the Raspberry Pi Zero with a small display. Almost all vintage parts, including the lens and the switch, remain in place. The author has “fastened” a theme in the style of “Star Wars” to RetroPie (developers - CoinJunkie and ArcadePunks).
From the translator: RetroPie is just one of the options, vi would look great even without a cool-retro-term for such a lens, only a keyboard is needed instead of a gamepad. The column will become unnecessary, the current consumption will decrease accordingly.
It seems that there is a lot of space in the device’s case, but a significant part of it takes up the space between the slide (now the display) and the lens. If you move closer, the increase will become small.
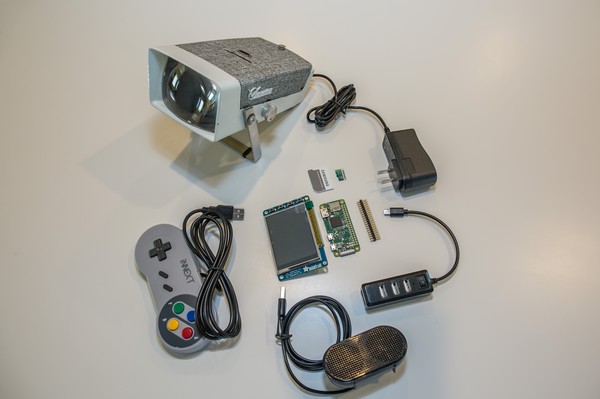
Components:
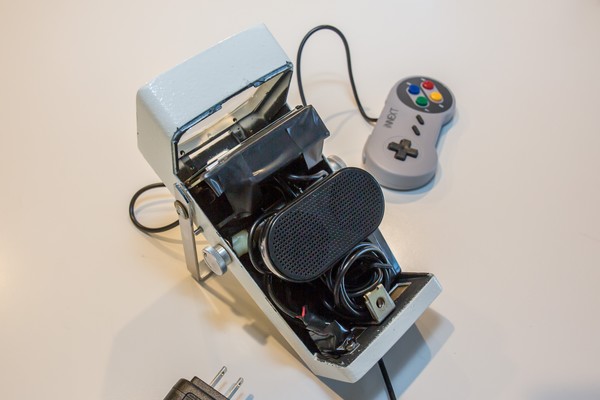
- device for viewing slides
- PiTFT display (320x200, 2.8 inches, resistive sensor - not used)
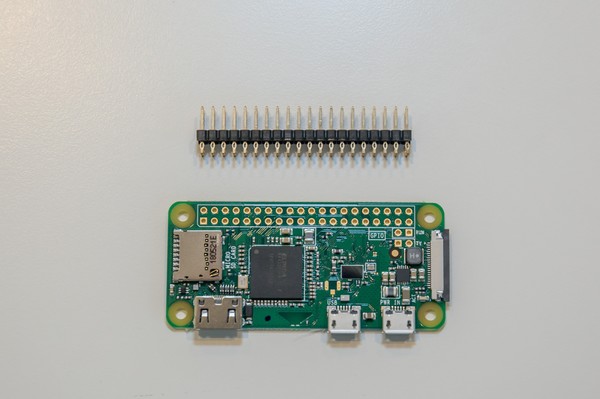
- Raspberry Pi Zero with comb
- small USB hub
- 5-volt 2.5 A pulse PSU and Micro USB cable cross-section of at least 0.518 mm 2
- USB speaker with integrated sound card
- USB gamepad
- 32 GB memory card
Assembly order. We open the device, unsolder the wires connected to it earlier from the power switch, instead we include it in the gap of the positive conductor of the cable coming from the new PSU (use the switch only if you are sure that it will “pull” 2.5 A):
If the “raspberry” is purchased without a comb, it must be soldered. But the author bought a comb with contacts that do not need to be soldered. Instead, you have to use special guides and ... a hammer:


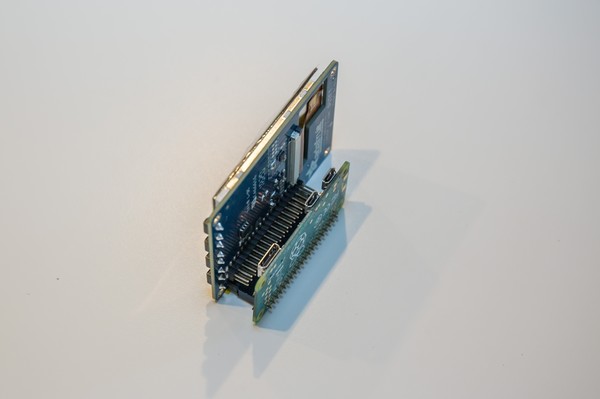
Now connect the PiTFT to the comb. The second connector on the display board is a loop through to connect anything else:
We glue the “raspberry” and the display with electrical tape in places of possible contact with metal parts. We install the resulting “sandwich” in place, in the free space we place the hub and column. We bring out the gamepad cable:
Close and use: