Creating an Android device farm using Open STF
The share of mobile traffic is increasing every year. A modern person is mobile and it is easier for him to get information from the screen of his own smartphone. Therefore, the development of mobile applications is trending. When developing and testing, it is important to have access to a variety of devices, so that the application runs correctly on all kinds of smartphone models. Consider various options for accessing devices.
One way is mobile cloud farms :
SAMSUNG Developres: Remote Test Lab
Firebase Test Lab
BrowserStack
AWS Device Farm
App Center
Sauce Labs
Some of them are free - with a limited number of devices, others - paid, with a large fleet of devices. Through them, you can gain remote access to real devices and track bugs that occur on devices but cannot be played on emulators.
Another way is to create your own farm of Android smartphones, thanks to which employees from different cities and countries can connect to office devices. Let's see how you can make your own Android device farm through the Open STF project.
Update apt-get:
Install dependencies for OpenSTF (Node.js, NPM, GraphicsMagick, ZeroMQ, Protocol Buffers, yasm, pkg-config, adb).
Download the deb package RethinkDB (the package is not available for Ubuntu 18.04 via apt):
Install OpenSTF:
If during installation errors appear that npm cannot access / usr / local / lib or / usr / local / bin, then provide access to them:
And restart
Install homebrew:
Download and install all the dependencies:
If the following error occurs when installing protobuf:
Then you need to create the / usr / local / Frameworks folder and give write permissions to it:
Install OpenSTF:
Possible through Cygwin, but not officially supported by developers.
For OpenSTF to work, you must first run RethinkDB.
Next run openstf itself
By default, OpenSTF independently detects and connects the device without rebooting when connecting mobile devices to the machine.
But in Ubuntu there may be problems:
If the mobile device is not visible in openstf and the following message is displayed to the openstf logs:
and the adb devices command produces the following output:
You will have to add the device manually:
For this, we launch
and find a device that could not determine.
For instance,
The USB device ID consists of two parts - the manufacturer ID (the first part of the ID is up to ':', 2e04, as in the example above) and the device model ID (c026).
Next, run the commands where the parameters ATTR {idVendor} and ATTR {idProduct} are filled in according to the ID of the incorrectly found device:
It is worth considering that it is recommended to connect devices through a separate USB hub with separate power supply (for example, this one ).
One of the features of the farm is that due to constant charging, the battery life of mobile devices will be limited to 2-3 years, so if the battery is removable on the device, it makes sense to purchase it in advance. On devices, you can turn off the mode in which the device’s screen is constantly on when charging (just leave the setting to turn off the screen automatically after 30 seconds of inactivity), because OpenSTF can independently turn on the screen when it is needed - this will increase the life of the device. It is important to say that OpenSTF should not be accessible from outside the corporate network, except through a VPN, since there is no normal authorization for it.
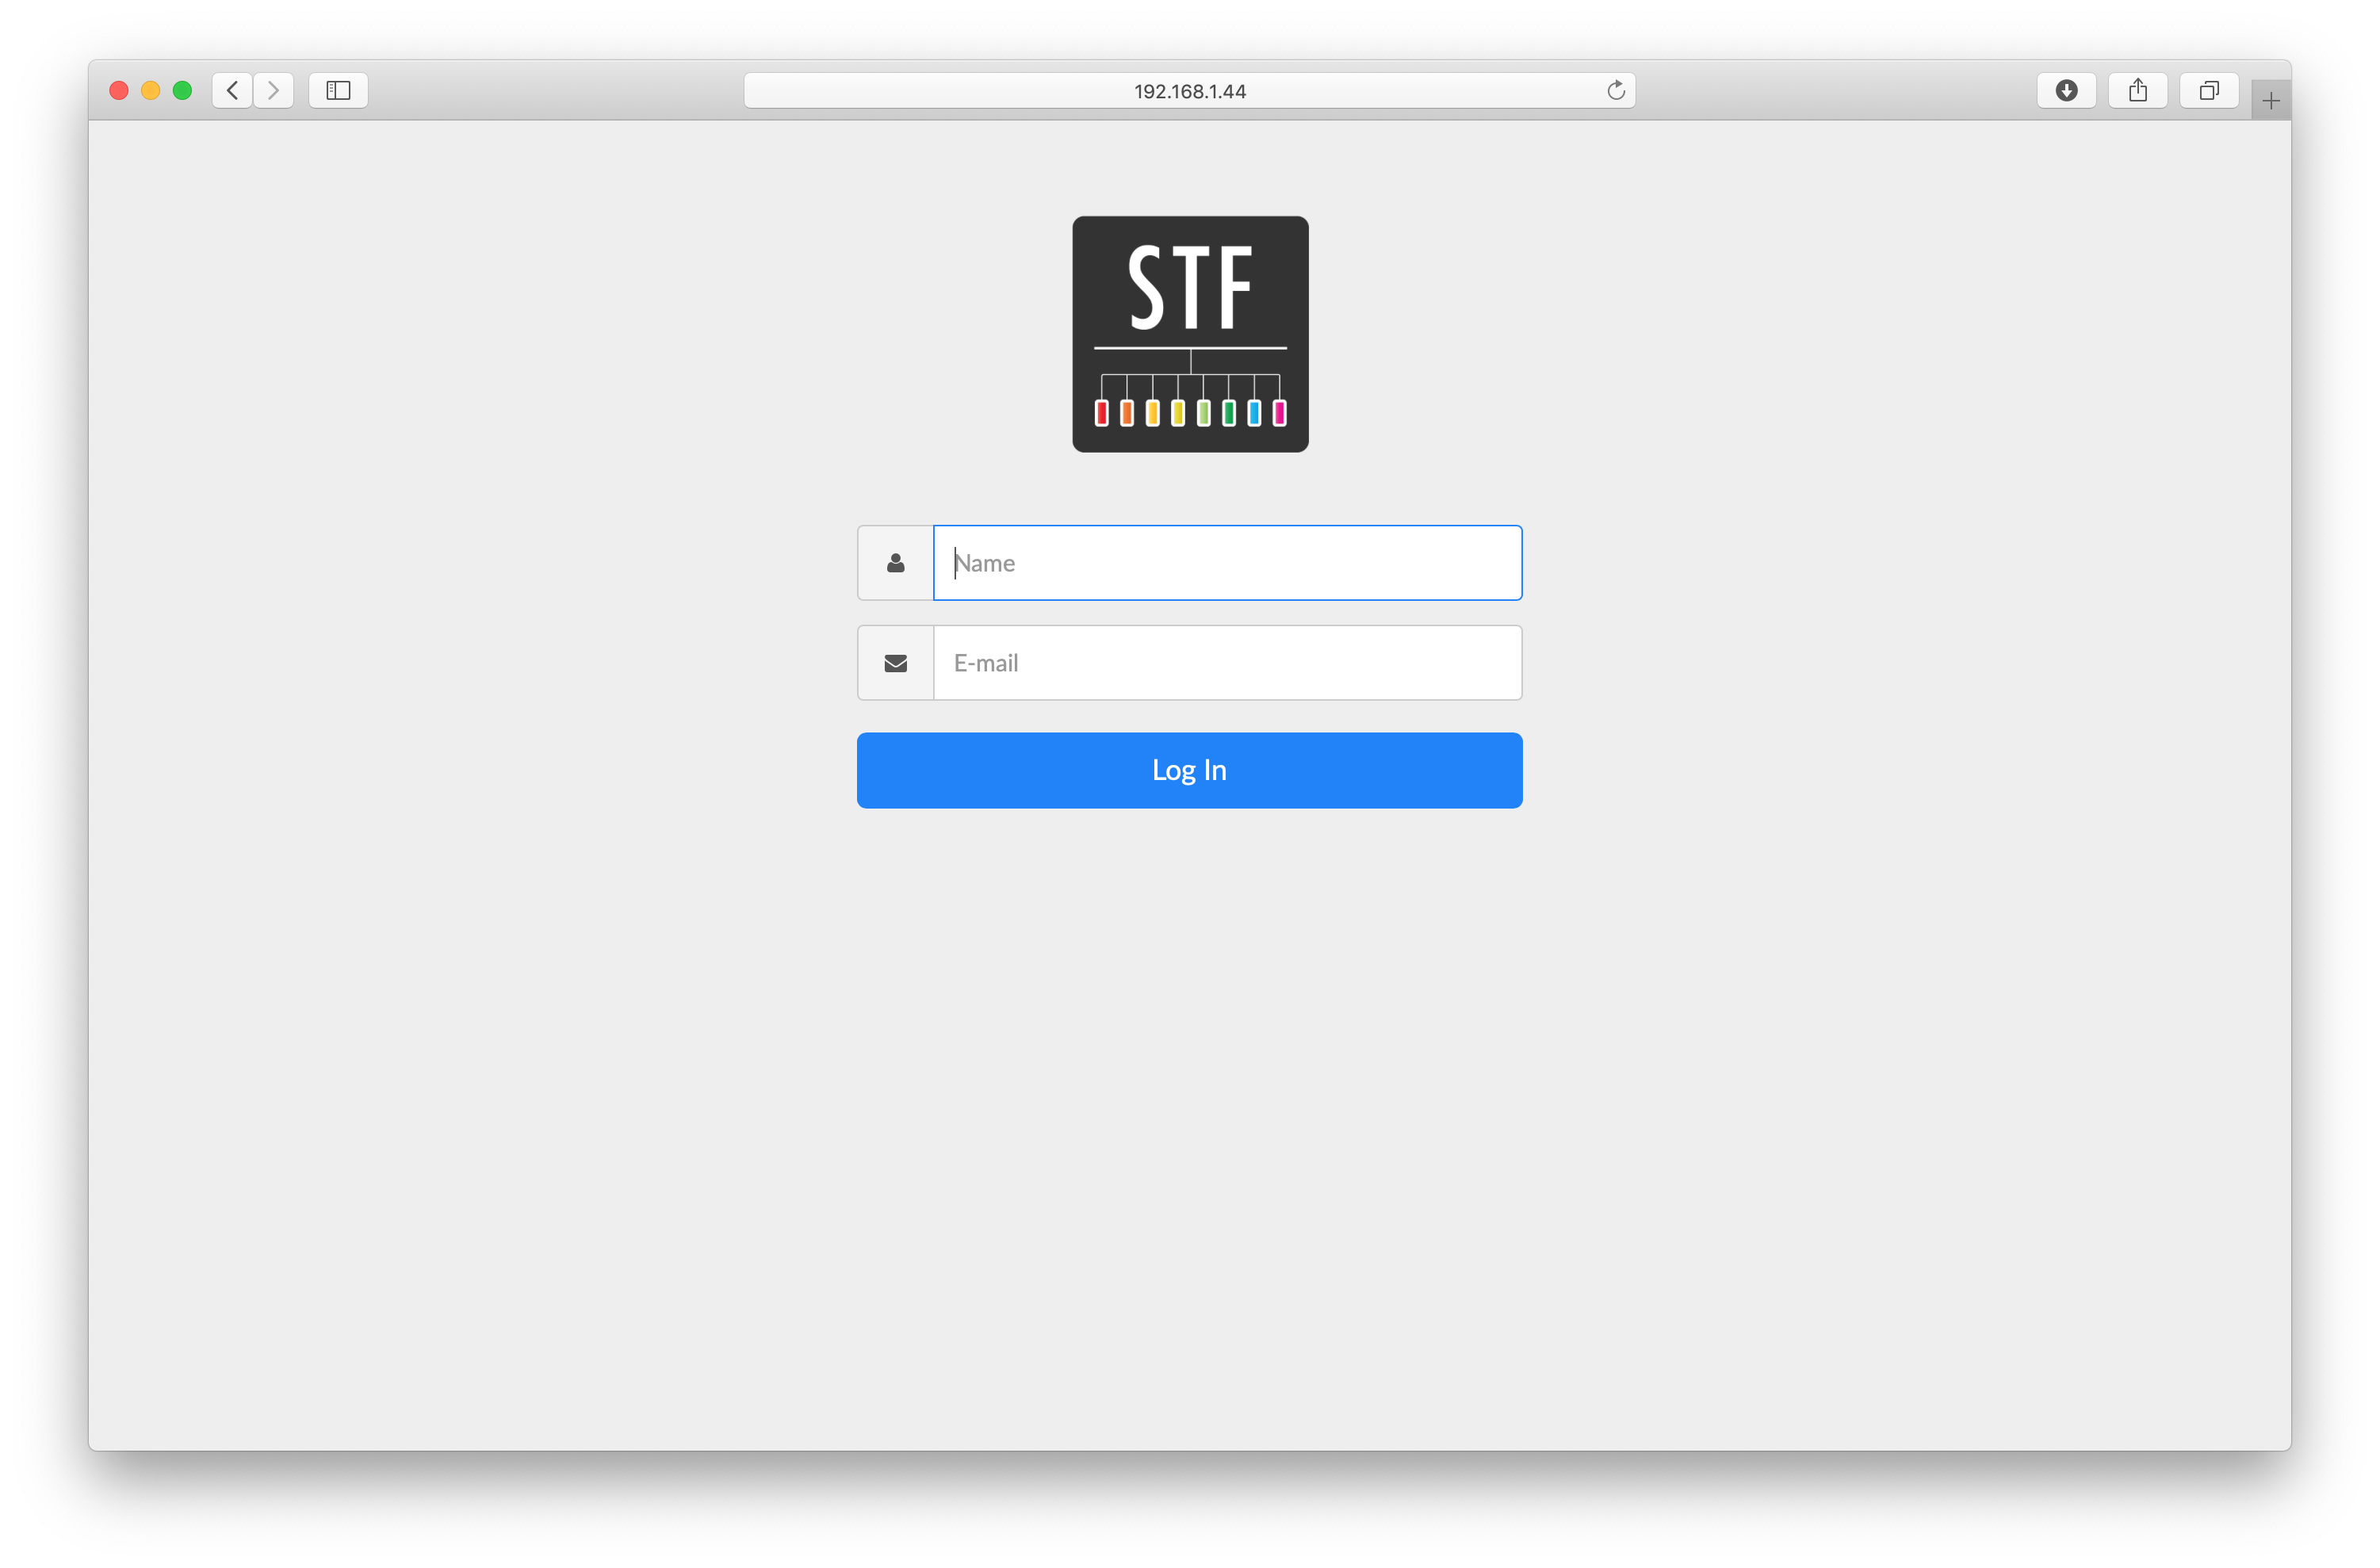
Launching OpenSTF:
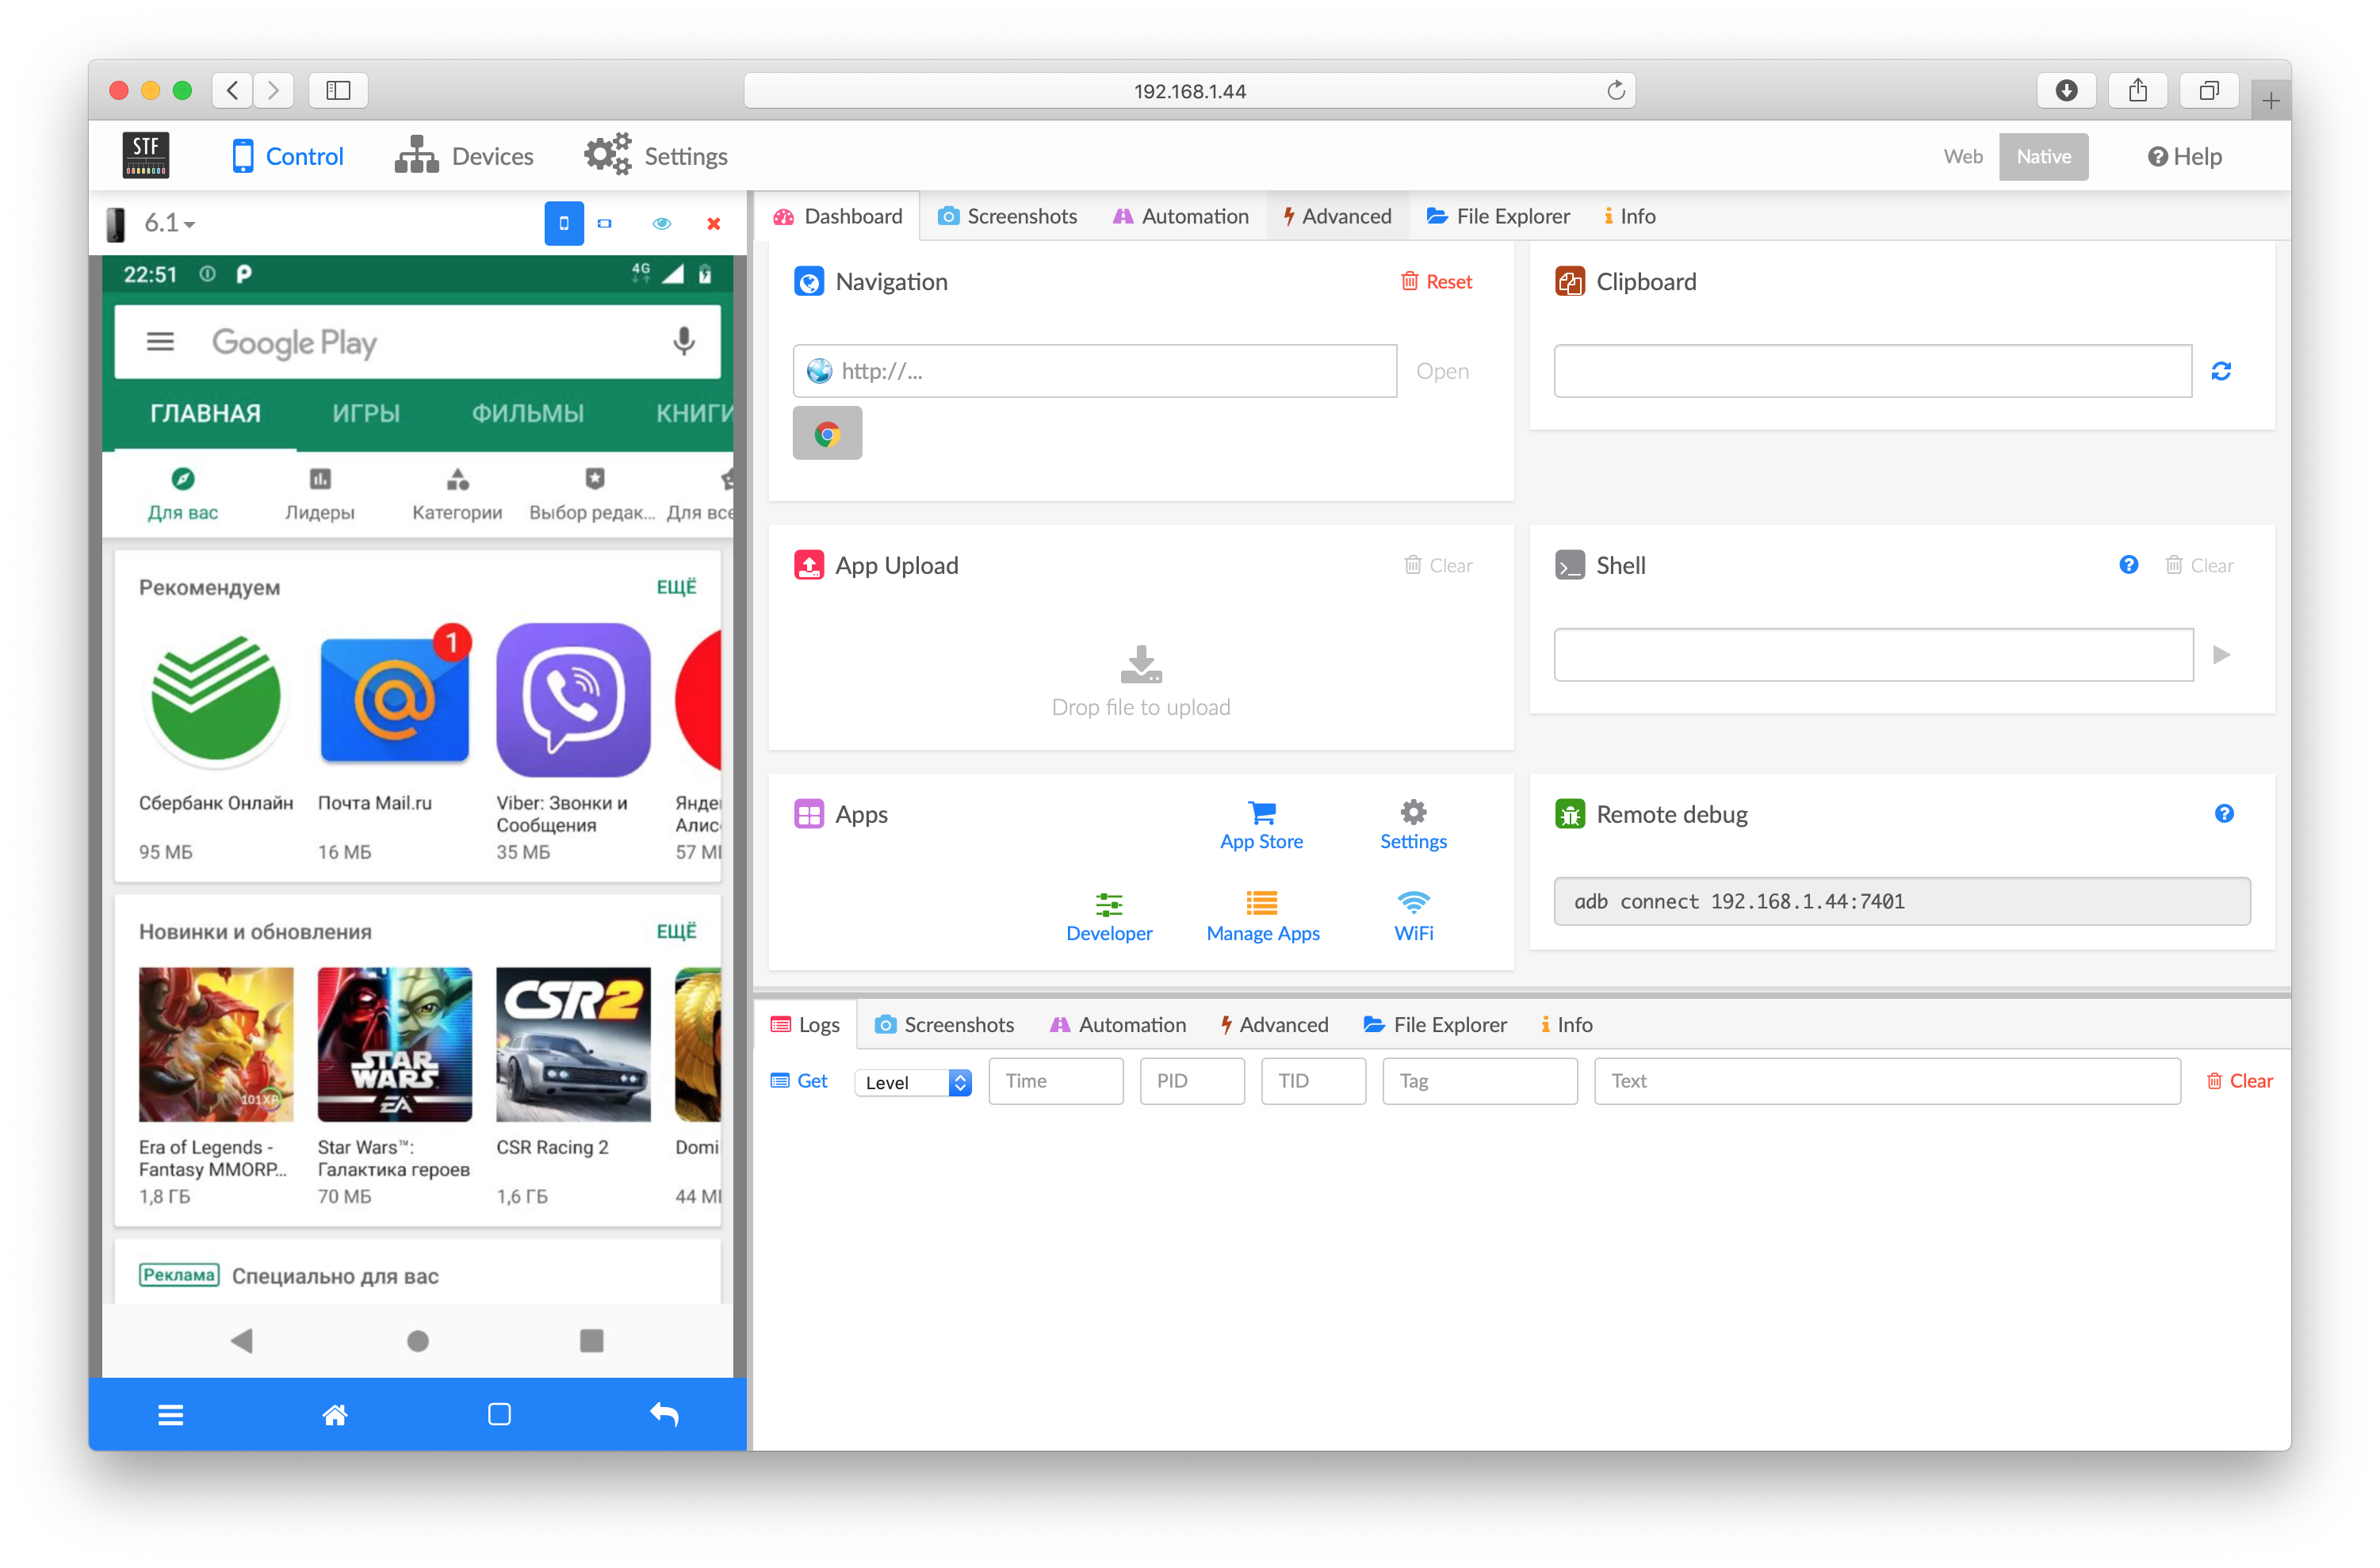
Launching the Google Play application in OpenSTF
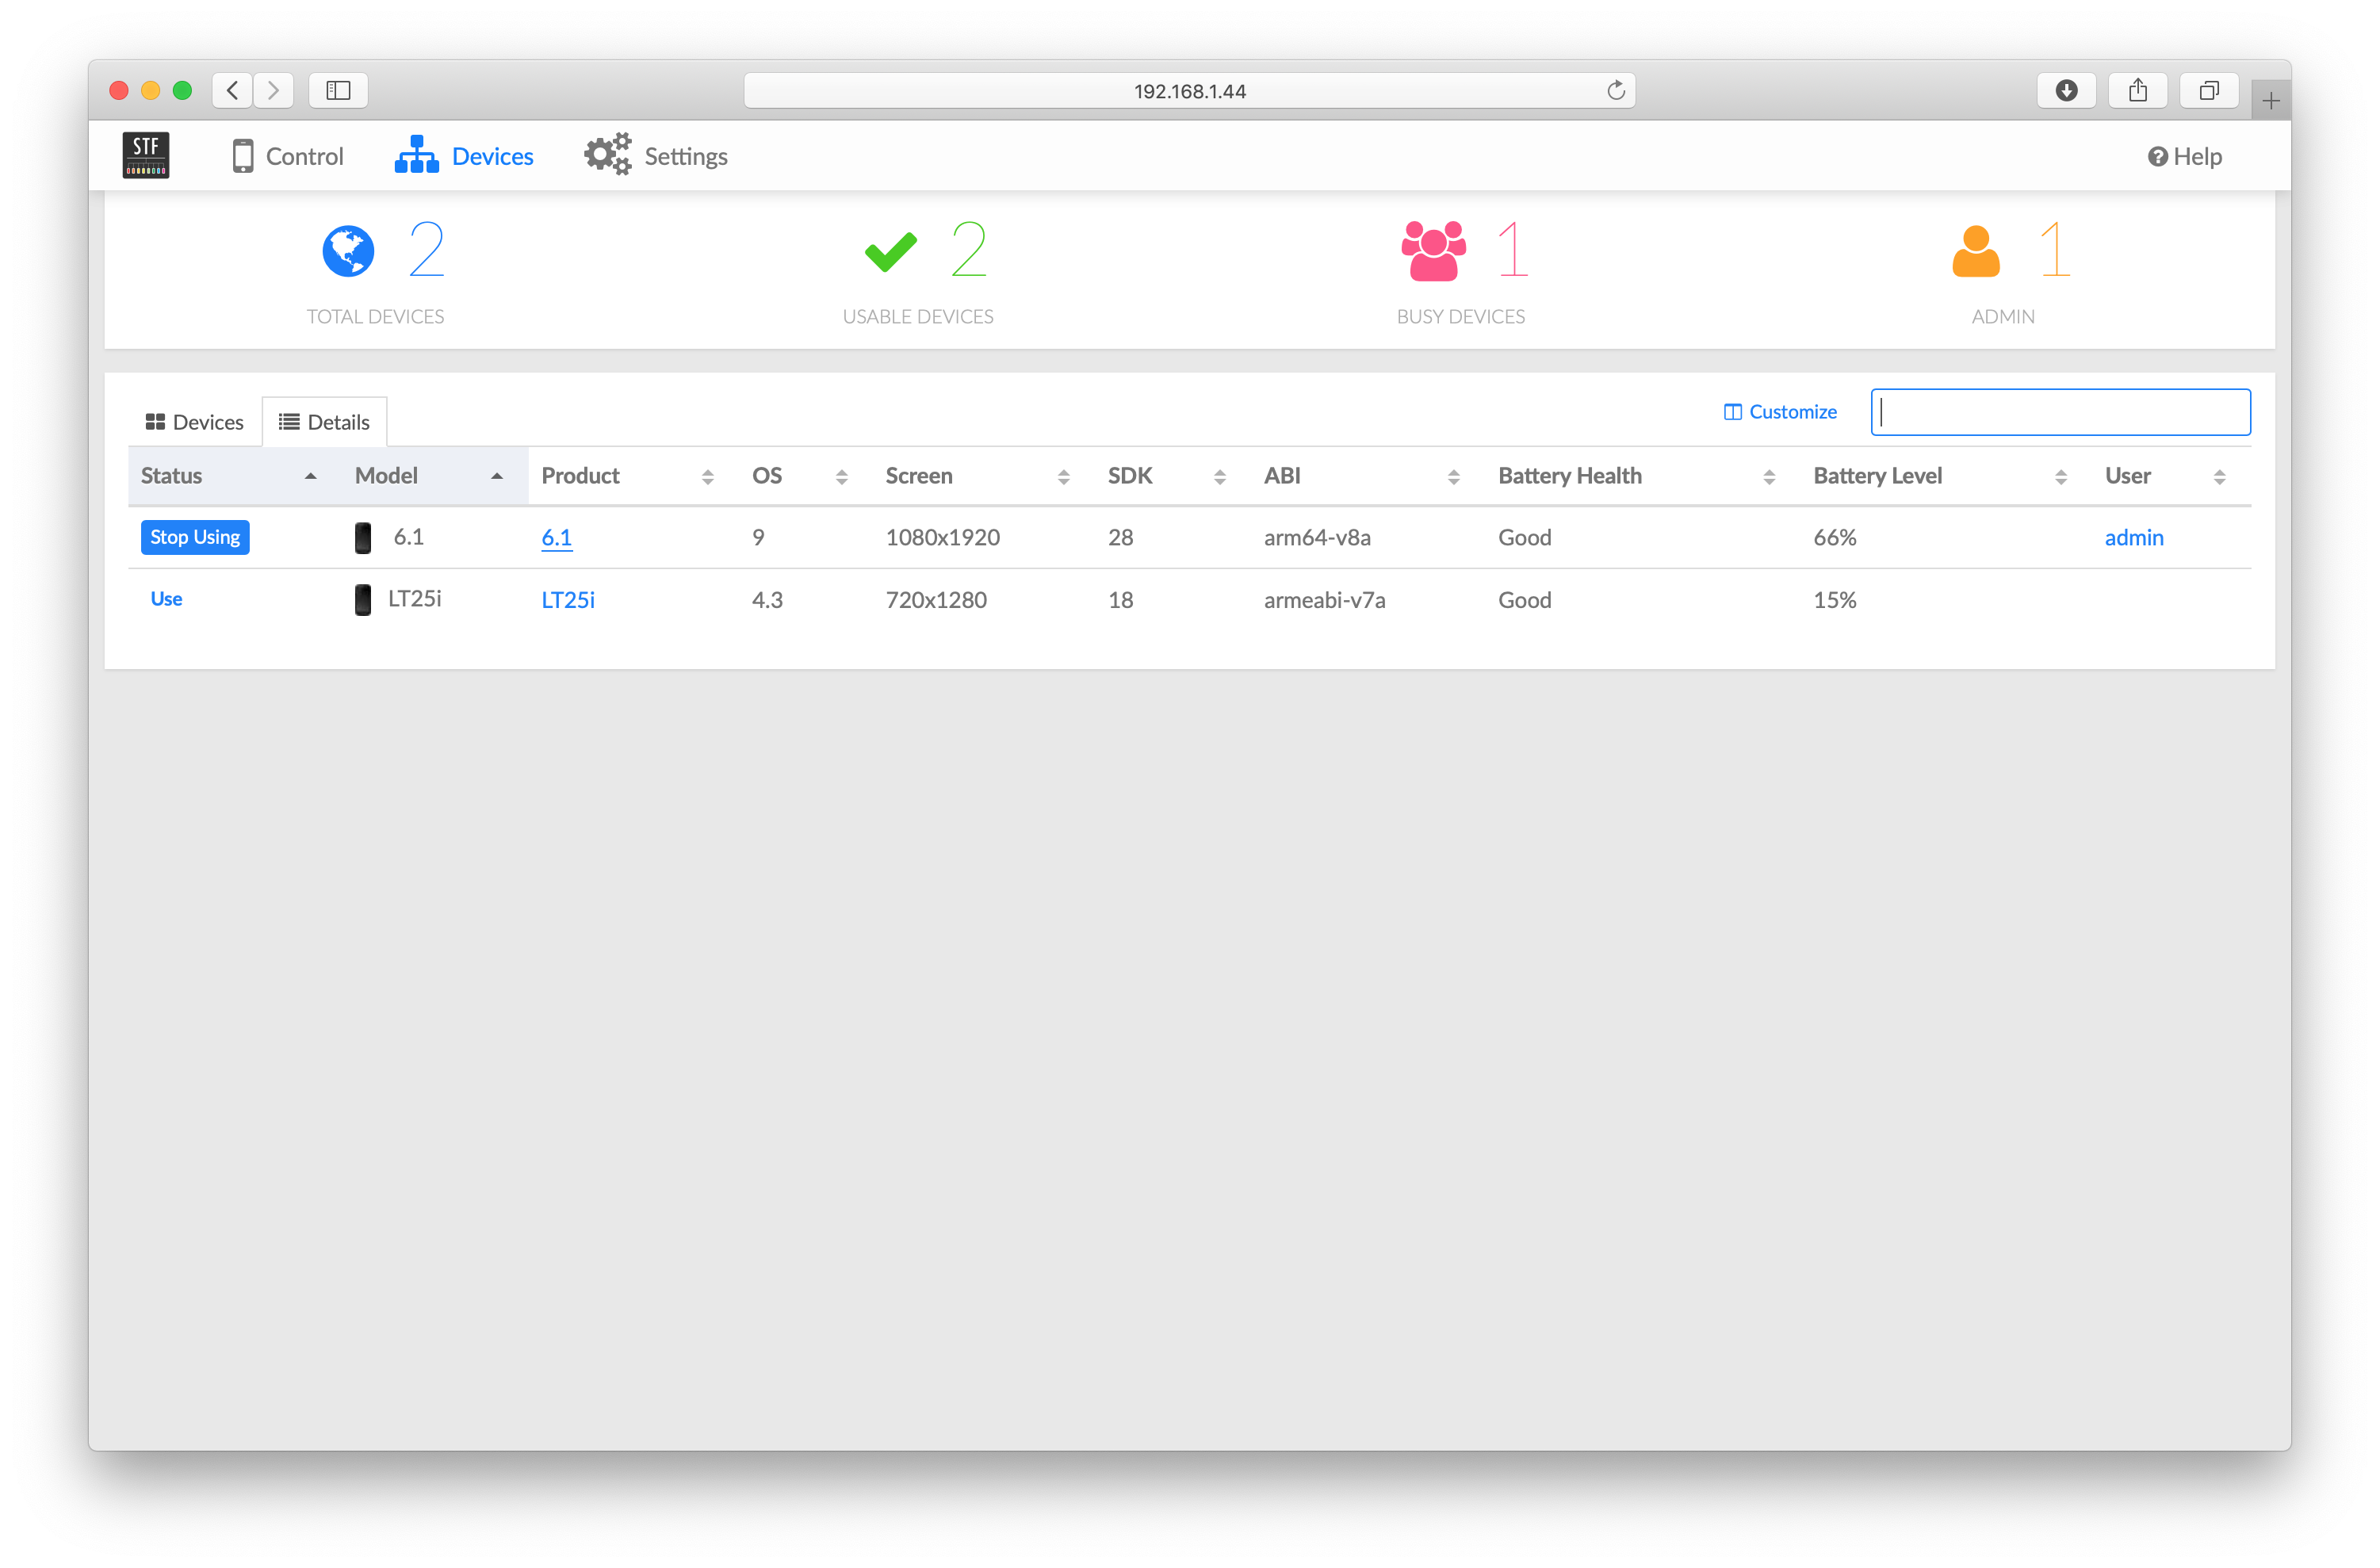
List of connected devices in OpenSTF
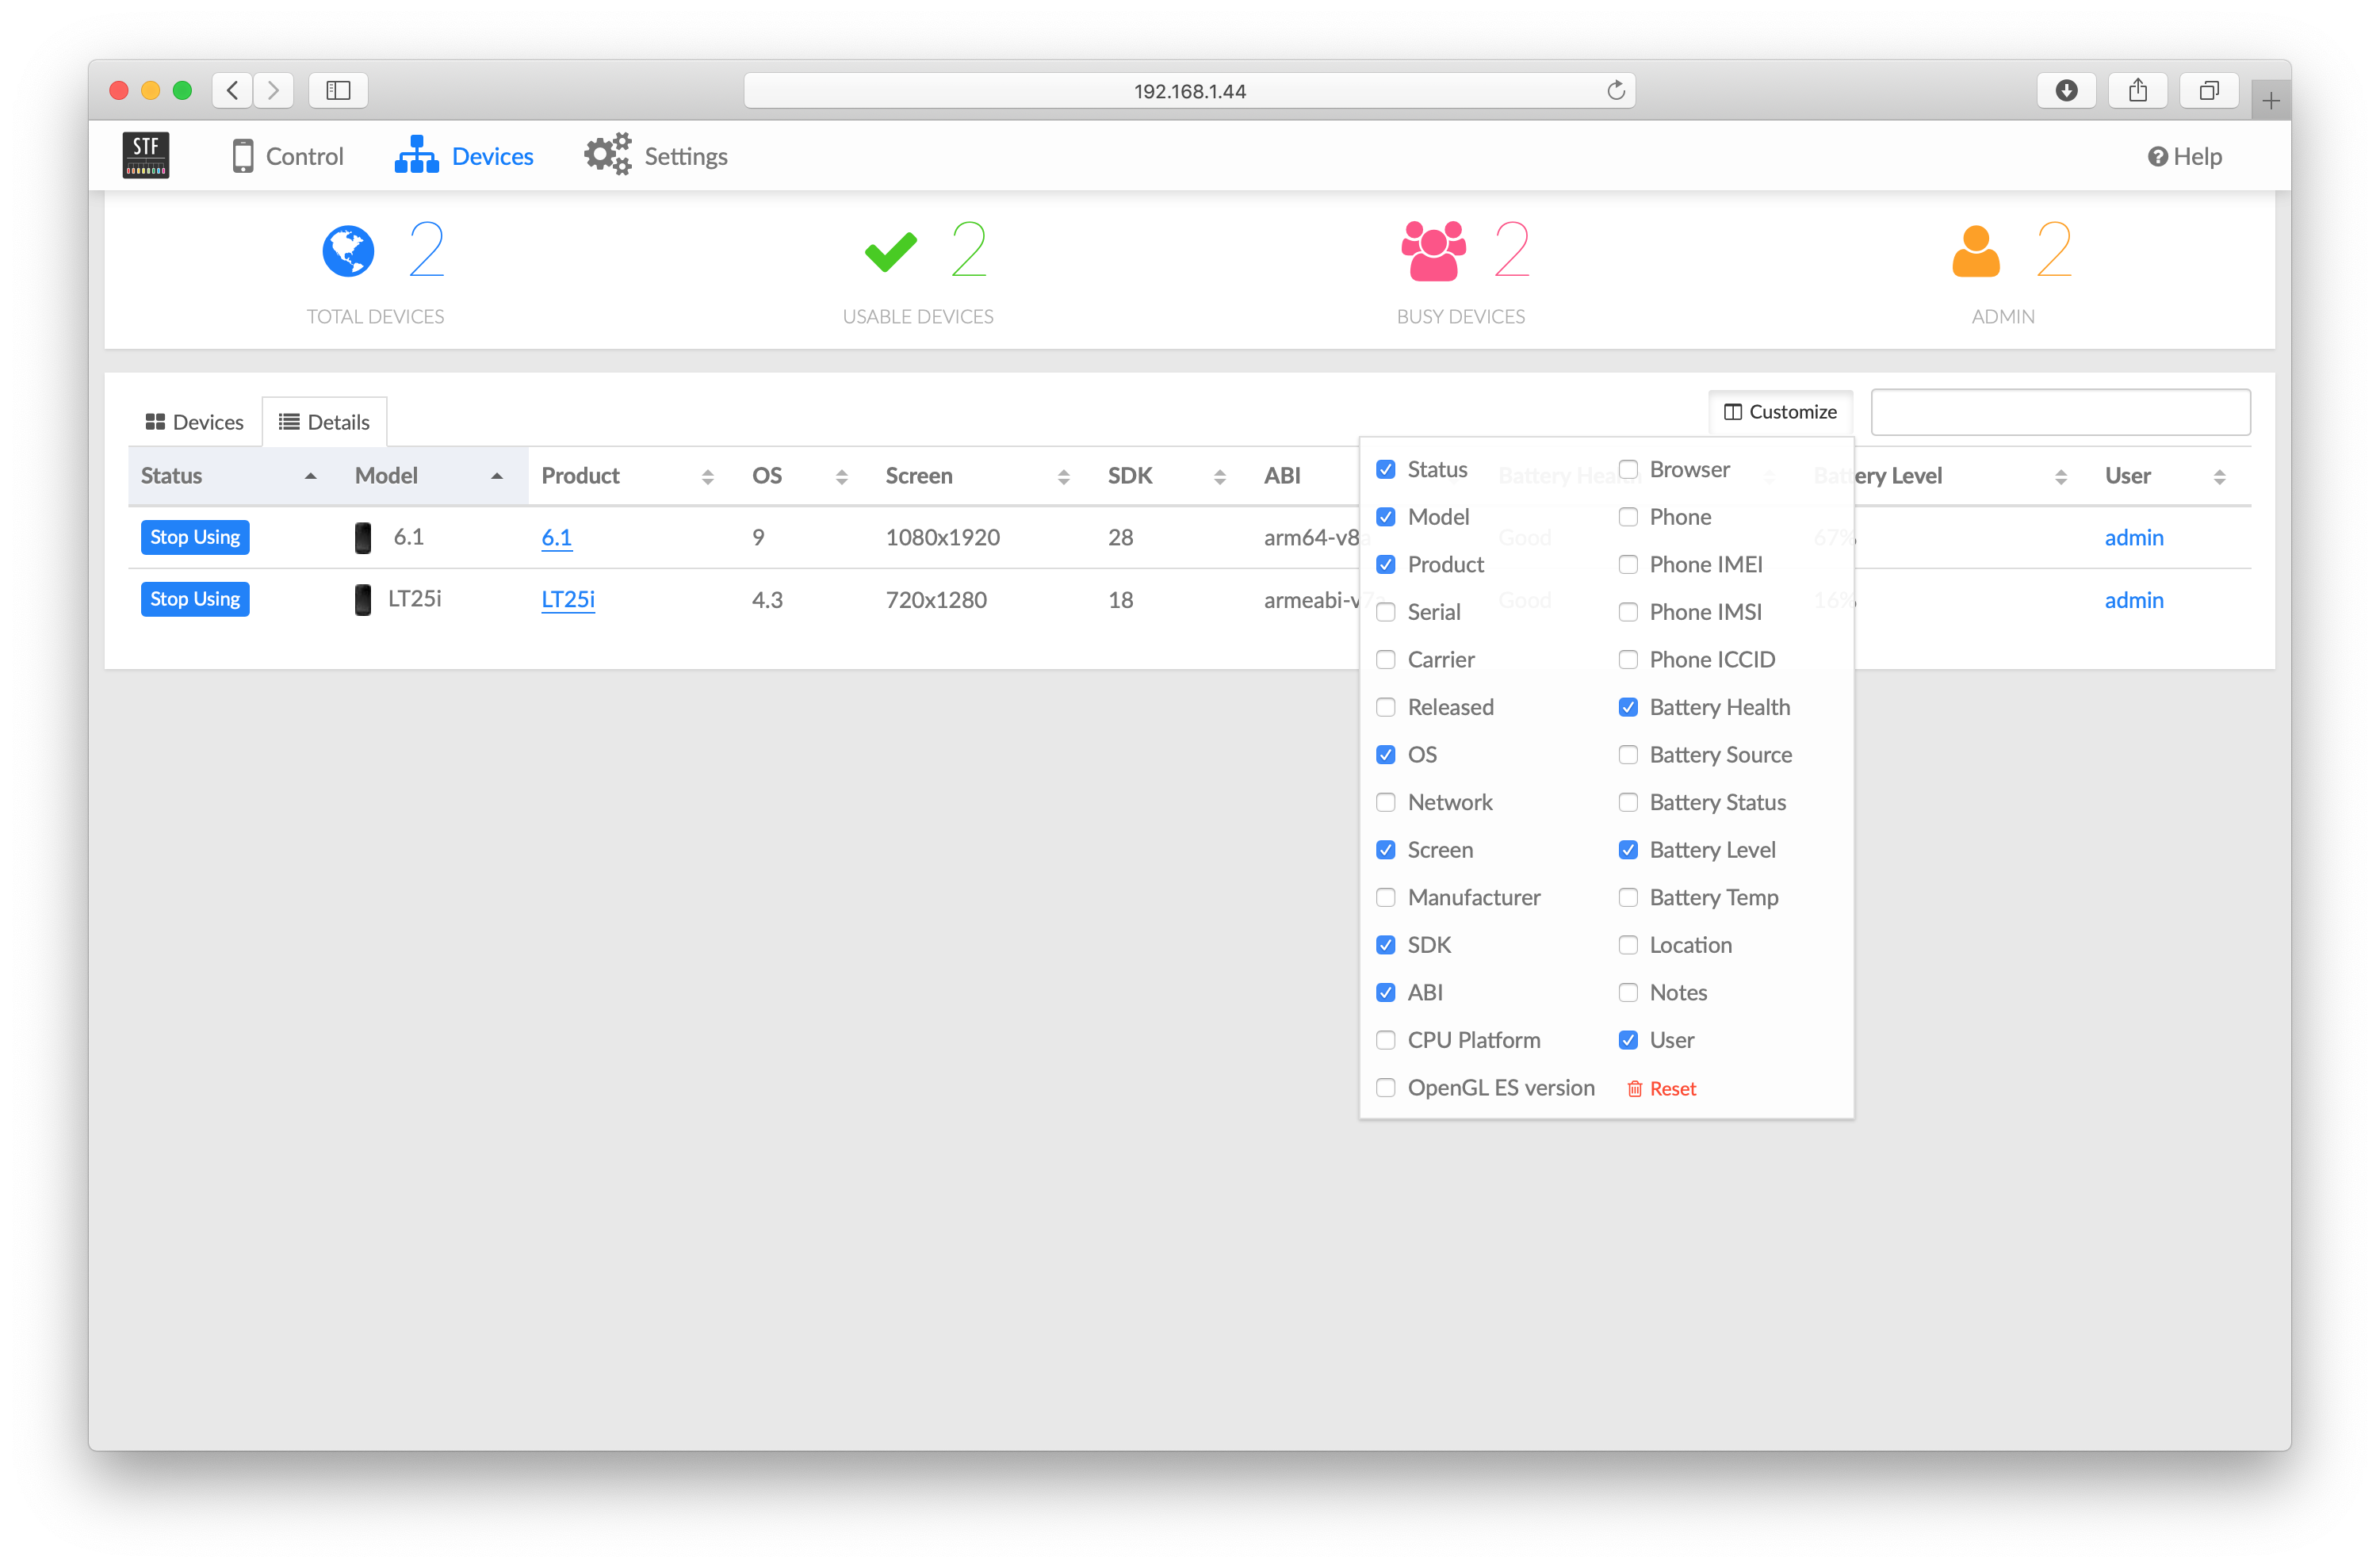
Configuring device information in OpenSTF
Thus, its own Android device farm helps to configure access to office devices for remote employees, thereby improving the quality of developed applications. It has its pros and cons, which are worth considering.
One way is mobile cloud farms :
SAMSUNG Developres: Remote Test Lab
Firebase Test Lab
BrowserStack
AWS Device Farm
App Center
Sauce Labs
Some of them are free - with a limited number of devices, others - paid, with a large fleet of devices. Through them, you can gain remote access to real devices and track bugs that occur on devices but cannot be played on emulators.
Another way is to create your own farm of Android smartphones, thanks to which employees from different cities and countries can connect to office devices. Let's see how you can make your own Android device farm through the Open STF project.
Installation on Ubuntu 18.04:
Update apt-get:
sudo apt-get updateInstall dependencies for OpenSTF (Node.js, NPM, GraphicsMagick, ZeroMQ, Protocol Buffers, yasm, pkg-config, adb).
sudo apt-get install nodejs npm graphicsmagick libzmq3-dev protobuf-compiler libprotobuf-dev yasm pkg-config android-tools-adbDownload the deb package RethinkDB (the package is not available for Ubuntu 18.04 via apt):
wget https://github.com/srh/rethinkdb/releases/download/v2.3.6.srh.1/rethinkdb_2.3.6.srh.1.0bionic_amd64.deb
sudo dpkg -i rethinkdb_2.3.6.srh.1.0bionic_amd64.deb
Install OpenSTF:
npm install -g stfIf during installation errors appear that npm cannot access / usr / local / lib or / usr / local / bin, then provide access to them:
sudo chown -R $USER /usr/local/lib
sudo chown -R $USER /usr/local/bin
And restart
npm install -g stfInstallation on MacOS X:
Install homebrew:
/usr/bin/ruby -e "$(curl -fsSL https://raw.githubusercontent.com/Homebrew/install/master/install)"Download and install all the dependencies:
brew install node rethinkdb graphicsmagick zeromq protobuf yasm pkg-config homebrew/cask/android-platform-toolsIf the following error occurs when installing protobuf:
Error: An unexpected error occurred during the `brew link` step
The formula built, but is not symlinked into /usr/local
Permission denied @ dir_s_mkdir - /usr/local/Frameworks
Error: Permission denied @ dir_s_mkdir - /usr/local/Frameworks
Then you need to create the / usr / local / Frameworks folder and give write permissions to it:
sudo mkdir /usr/local/Frameworks
sudo chown $USER /usr/local/Frameworks
Install OpenSTF:
npm install -g stfWindows Installation:
Possible through Cygwin, but not officially supported by developers.
Launch
For OpenSTF to work, you must first run RethinkDB.
rethinkdbNext run openstf itself
stf local --public-ip Connecting devices:
By default, OpenSTF independently detects and connects the device without rebooting when connecting mobile devices to the machine.
But in Ubuntu there may be problems:
If the mobile device is not visible in openstf and the following message is displayed to the openstf logs:
Unhandled rejection Error: Illegal value for Message.Field .DeviceIntroductionMessage.status of type enum: undefined (not a valid enum value)and the adb devices command produces the following output:
List of devices attached
??????? no permissions (verify udev rules); see [http://developer.android.com/tools/device.html]
You will have to add the device manually:
For this, we launch
lsusband find a device that could not determine.
For instance,
Bus 001 Device 010: ID 2e04:c026
Bus 001 Device 001: ID 1d6b:0002 Linux Foundation 2.0 root hub
Bus 002 Device 001: ID 1d6b:0001 Linux Foundation 1.1 root hub
The USB device ID consists of two parts - the manufacturer ID (the first part of the ID is up to ':', 2e04, as in the example above) and the device model ID (c026).
Next, run the commands where the parameters ATTR {idVendor} and ATTR {idProduct} are filled in according to the ID of the incorrectly found device:
echo 'ACTION=="add", SUBSYSTEM=="usb", ENV{DEVTYPE}=="usb_device", ATTR{idVendor}=="2e04", ATTR{idProduct}=="c026", MODE="0666"' | sudo tee /etc/udev/rules.d/99-android.rules
sudo udevadm control --reload-rules
sudo udevadm trigger --verbose --action=add --subsystem-match=usb
It is worth considering that it is recommended to connect devices through a separate USB hub with separate power supply (for example, this one ).
One of the features of the farm is that due to constant charging, the battery life of mobile devices will be limited to 2-3 years, so if the battery is removable on the device, it makes sense to purchase it in advance. On devices, you can turn off the mode in which the device’s screen is constantly on when charging (just leave the setting to turn off the screen automatically after 30 seconds of inactivity), because OpenSTF can independently turn on the screen when it is needed - this will increase the life of the device. It is important to say that OpenSTF should not be accessible from outside the corporate network, except through a VPN, since there is no normal authorization for it.
Screenshots of the running program
Launching OpenSTF:
Launching the Google Play application in OpenSTF
List of connected devices in OpenSTF
Configuring device information in OpenSTF
Thus, its own Android device farm helps to configure access to office devices for remote employees, thereby improving the quality of developed applications. It has its pros and cons, which are worth considering.