DIY carpentry: expectations and reality
Why do a carpentry workshop at all? I have no definite answer. If you just want to do something with your hands from a tree, that is, workshops where you can come, pay money for the rental of machines and a workplace, and do everything there. It is not necessary to have your own premises and your own equipment. If you want to engage in woodworking as a business, then the competition is high, it is difficult to find your niche. Therefore, I will begin by explaining my own motives.
It all started in 2015, when I realized that my old barn in the country would soon fall apart and I needed to build a new one. I calculated the required area, amount of materials, estimated costs and time to build. He poured the foundation, bought wood the next year, and began building with his friend. Initially, I did not intend to make a workshop. I just built a new barn instead of the old one to store tools and equipment.

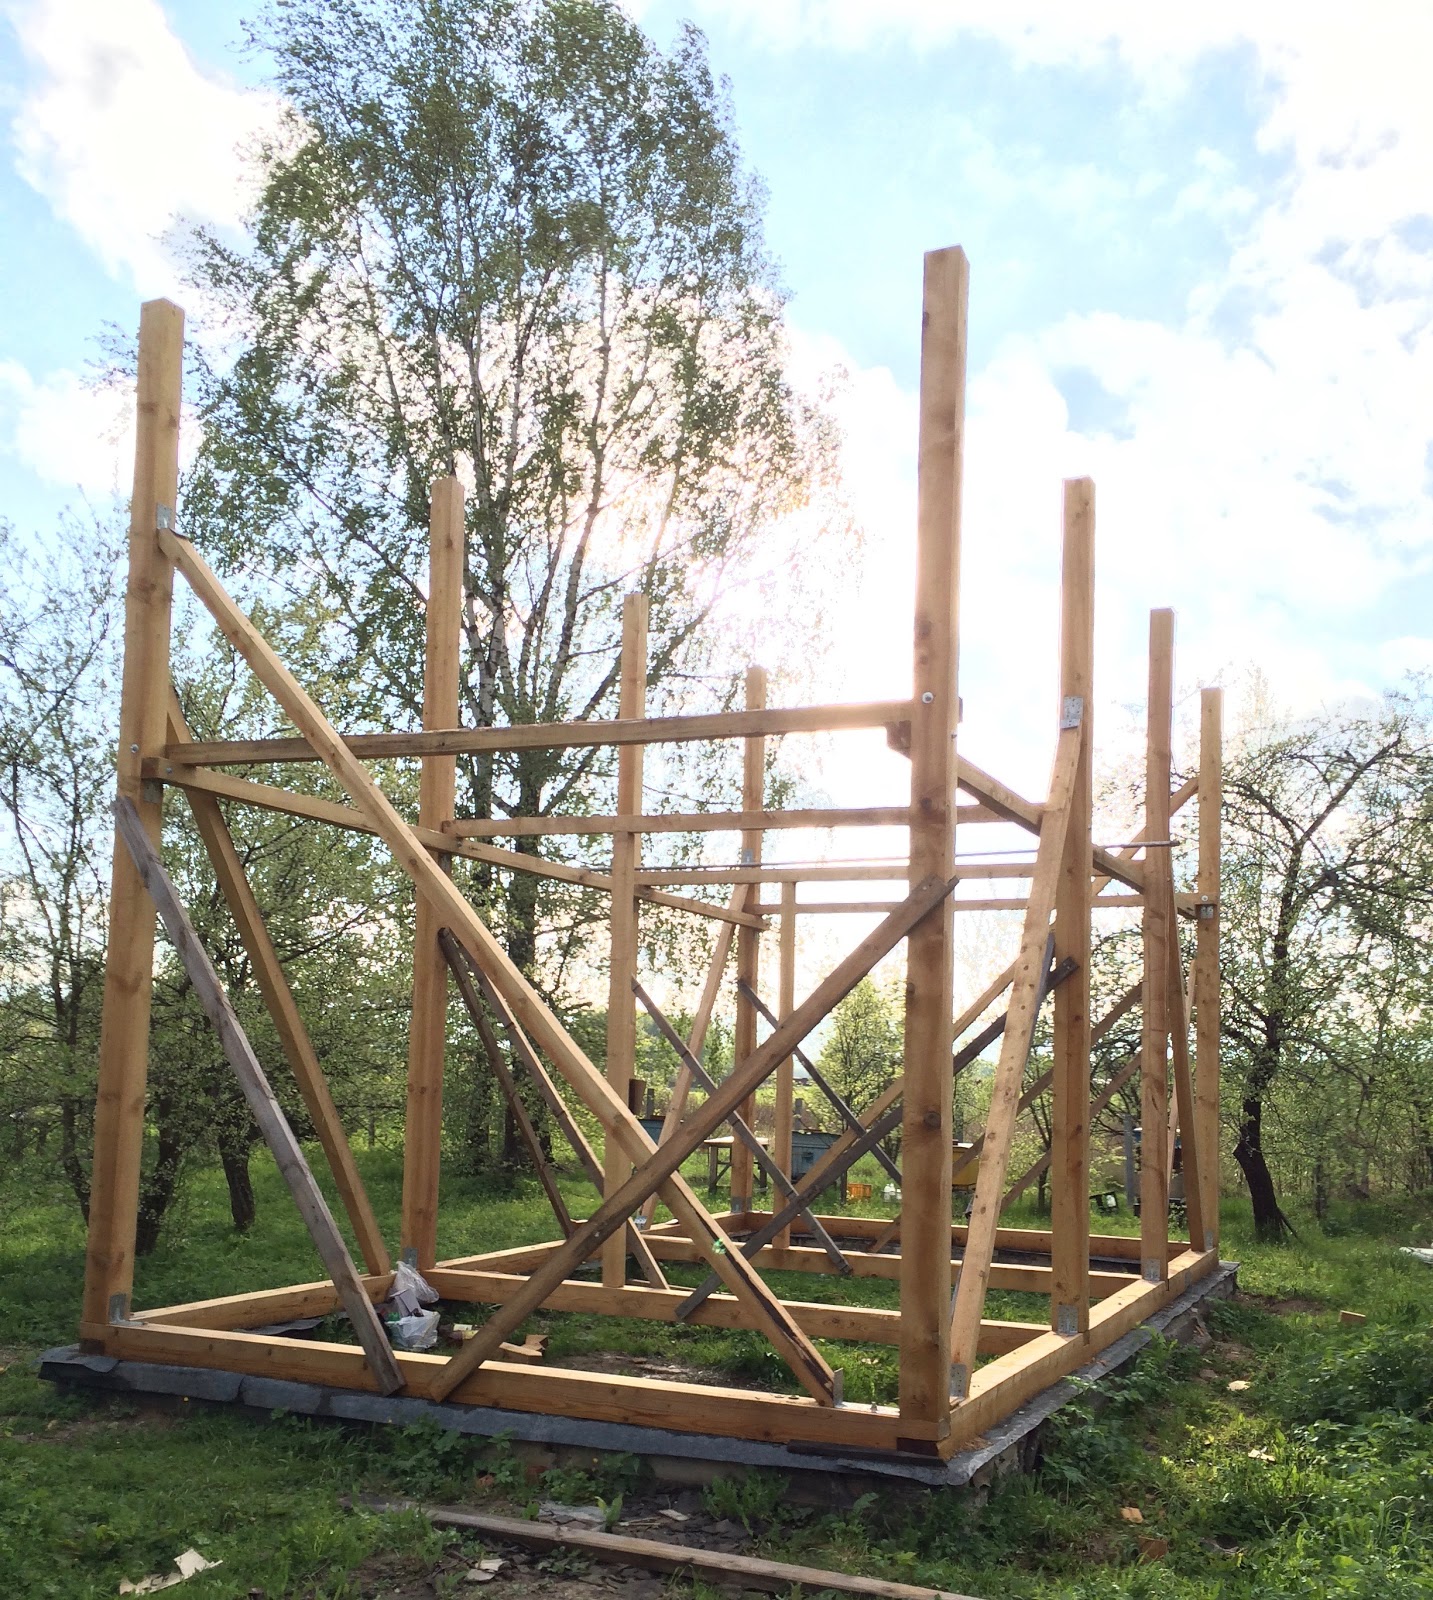
Naturally, during the construction process, everything went wrong. A friend said: “we have such cool six-meter bars, why are we going to cut them?” And he proposed to build a two-story shed.
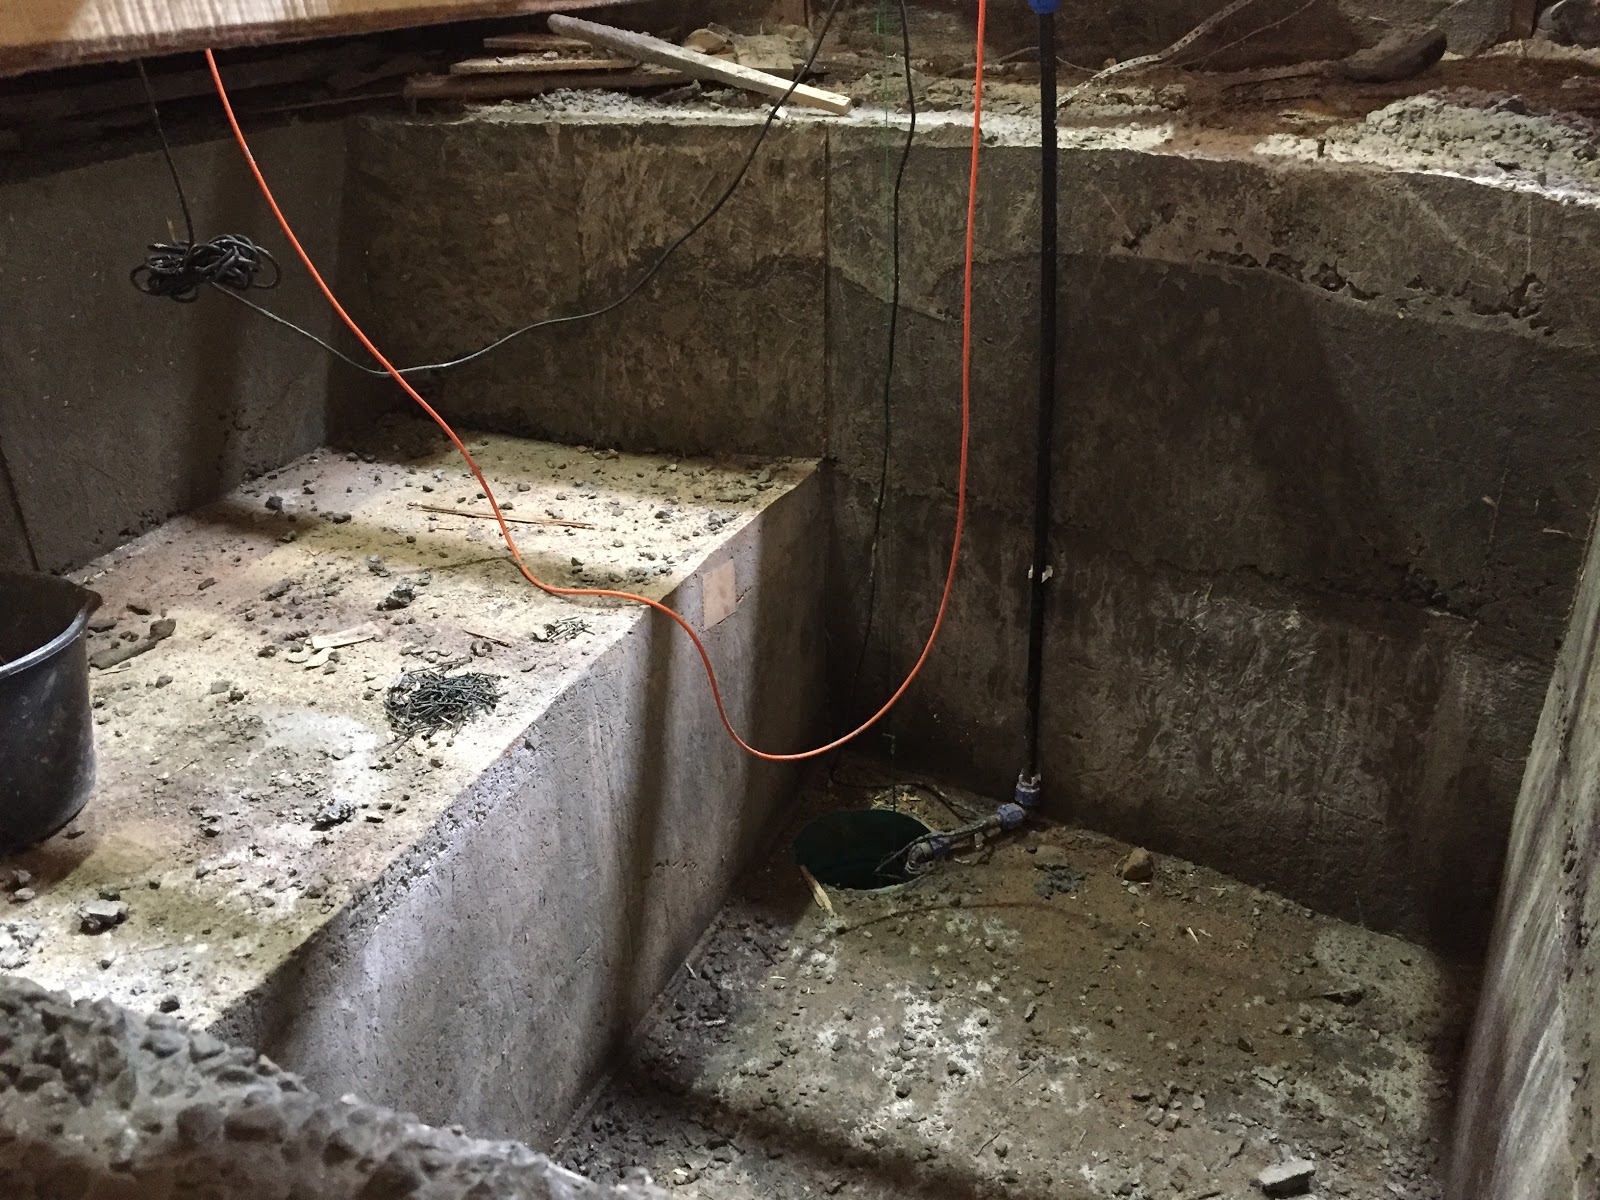
If you have ever built a frame structure, you see that we made a bunch of mistakes. Now I am gradually strengthening and remodeling the barn. The next catch was the desire to make a basement: "until they are sewn up, let's dig and pour concrete?" In general, I spent a total of two calendar years on the basement. Because of him, I could not close the floor on the first floor, although I already had a sheathed, fully finished barn. Only on the second floor was the floor, and on the first floor was a pit. She was flooded a couple of times, in general, it was a lot of fun. Therefore, my advice: do not make basements if you do not need them. In my basement now there are two boxes with apples, I, in fact, do not use it.
The barn area was about 80 m 2. I began to wonder why I need such a large room? I would like to organize some kind of workshop, but which one? I started to think. Then I remembered that from my grandfather I got an excellent universal woodworking machine. We got it, assembled it and thought that now we would start making furniture, watch out, Ikea! Now we will buy more machines, we will come and do something for our pleasure.
We wanted to make furniture, and this was the first obstacle that was not obvious to me. Woodworking is a rather difficult task. Here you need a lot of specific knowledge, which, on a hunch, can be acquired for a very long time. Therefore, I advise you to read specialized literature or learn somewhere. And then I did not understand this at all: "I have a machine tool, I have some money, I will buy other machines and do everything." Naturally, that did not work out.
I began to figure out what manipulations with the tree I need to produce and what I need to buy for this.
Sawing
First of all, the workpieces need to be trimmed - to make even cuts perpendicular to the workpiece. It doesn't matter what furniture you make, stools or cabinet sets. It is important to be able to saw precisely, ideally also at certain angles.
If you are a serious enthusiast, then you can do it manually with the help of a miter box. But still a miter saw is a must have in a carpentry workshop. It’s going to be tight without it.
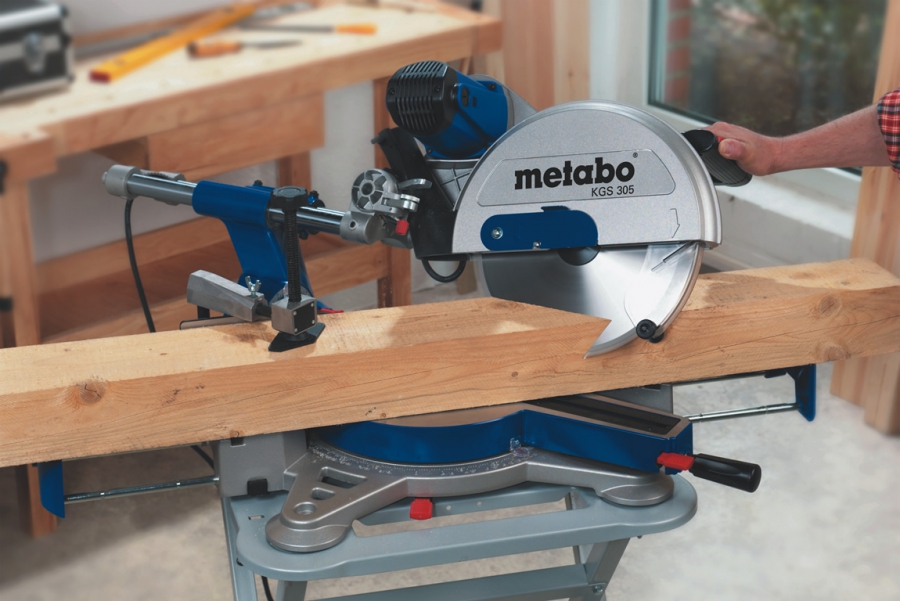
It is desirable that the saw was with a broach, that is, it would allow sawing wide enough workpieces. The tool is good and not particularly expensive. The main thing, as in any other instrument, is that there are no backlashes and you can set the angles you need.
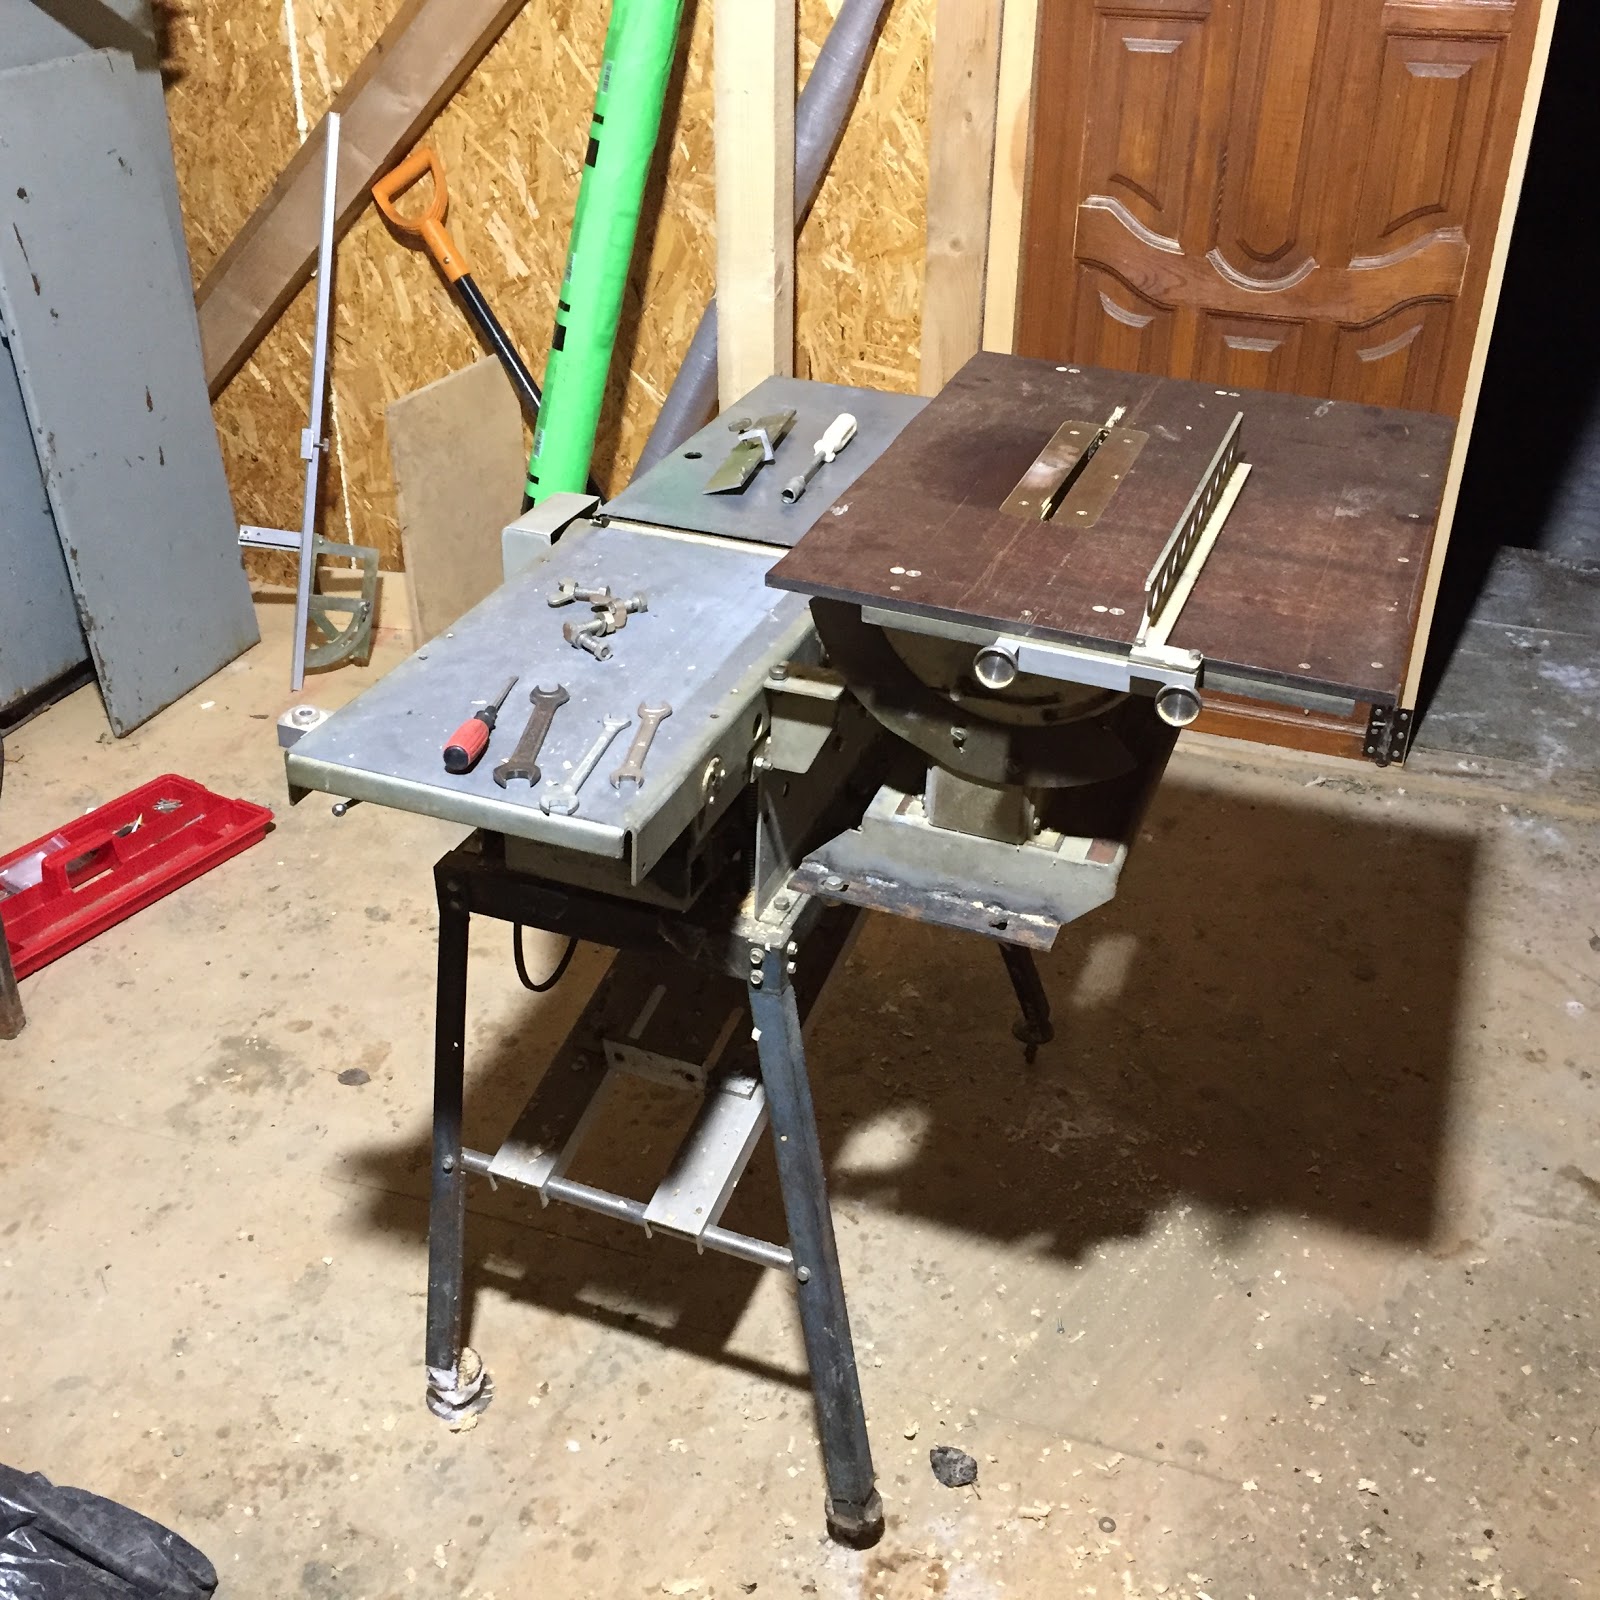
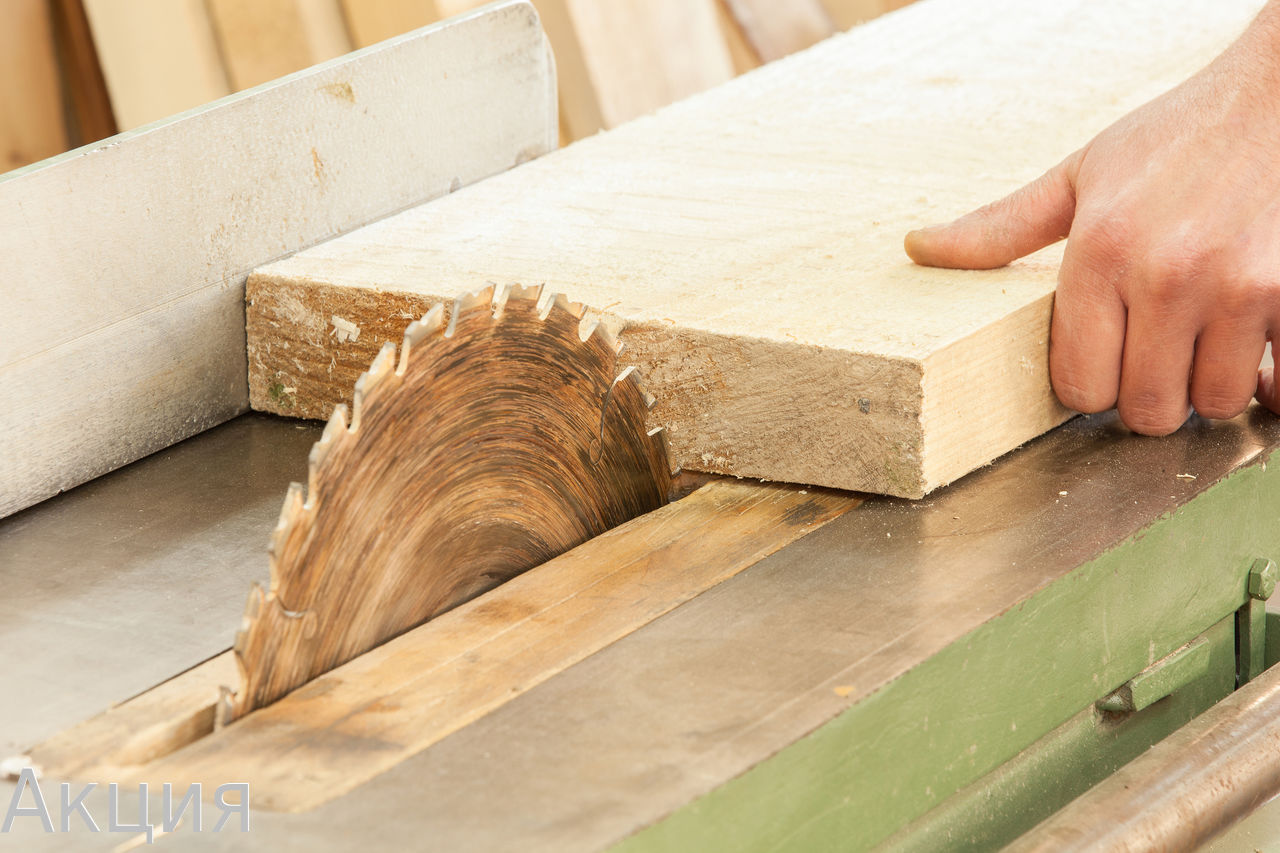
Another tree needs to be unfurled or cut , that is, sawedalong . To do this, you need a circular saw, preferably installed in a cutting table. You can dissolve it with a manual circular with a parallel stop or along the guide rail, but it is much more convenient and productive to do it on the table.
With wood planing , everything is more complicated, because it is not easy to cut a fairly wide workpiece with a manual plane. To do this, you need to develop a skill for a long time, remove the wood in different directions, taking into account the location of the fibers, constantly monitoring the uniformity of removal along the entire width and length of the workpiece. To simplify your life - but not to improve the quality of processing! - it is possible with the help of planing and planers.
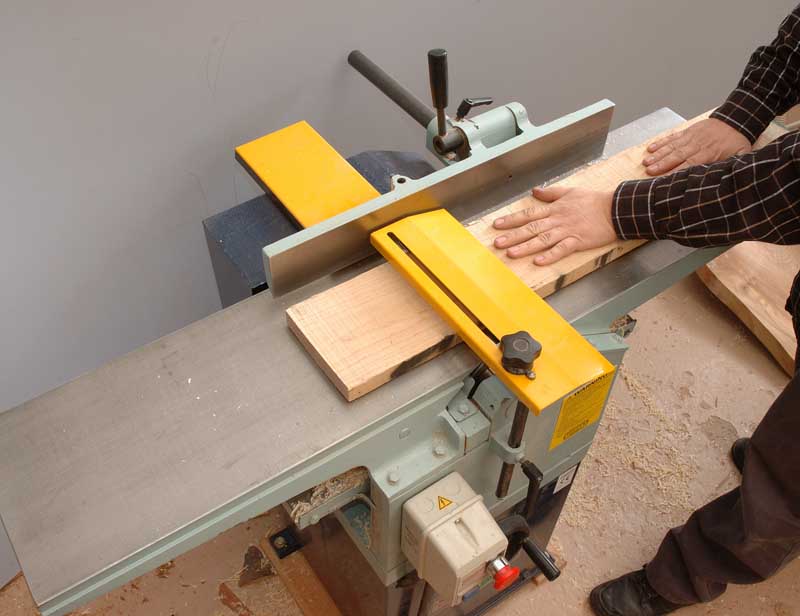
Important: the planer does not replace the planer, but complements! Jointer allows you to first getone flat plane at the workpiece, and a surface gage based on this plane aligns the opposite side. For beginners, this bundle of two machines makes it easy to get even workpieces of relatively large length and width, uniform in thickness. This is very important in the manufacture of furniture. But to buy two machines is very expensive and often for the amateur too much. Therefore, the network has a bunch of guides on how to make a surface gage or jointer from an ordinary manual planer and two bars.

Turning
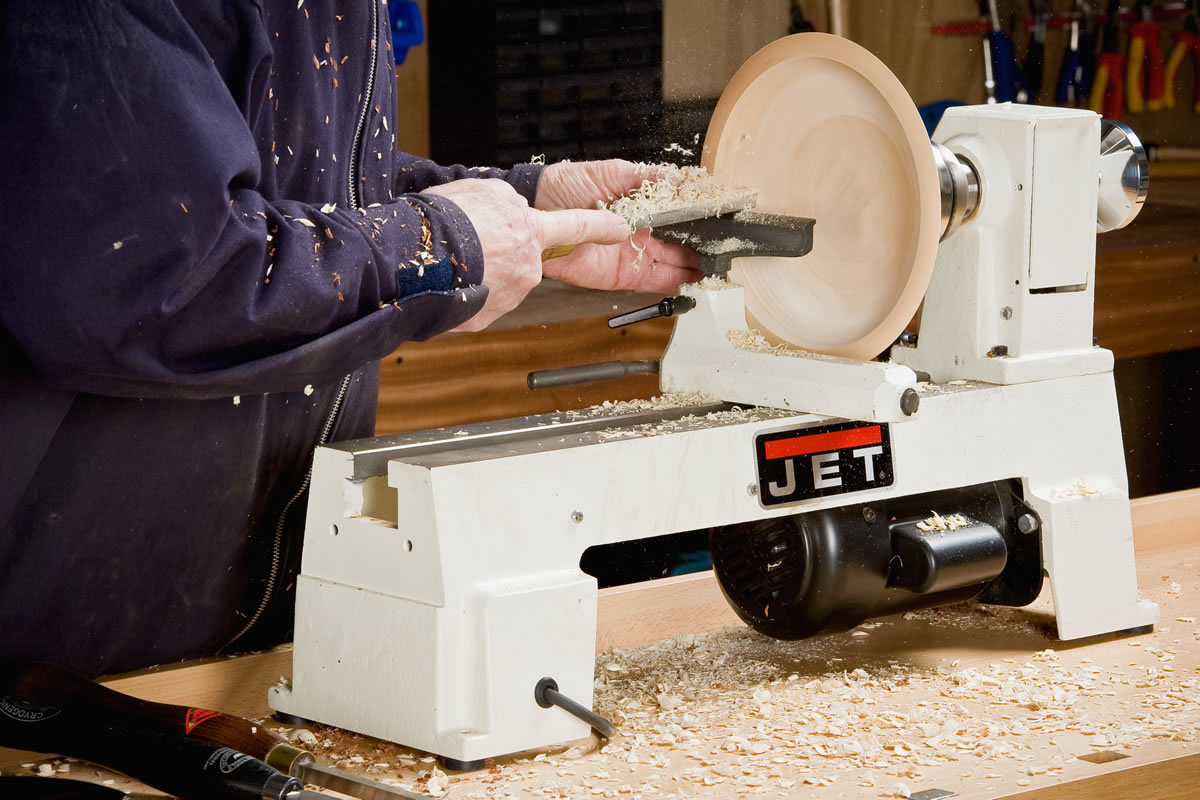
The three operations described above - trimming, planing and thicknessing - will allow you to make only some very simple products. In a good way, you still need to master turning business, that is, grind workpieces, which are rotation figures. For example, round legs for a stool or table, vases, bowls, some other products. And without a lathe in this case can not do. Of course, you can turn to the experience of generations and make an adapter
If you want to do something more complicated than a cylinder, you have to buy a lathe. Fortunately, this is one of the simplest machines, it is a cast-iron frame, an engine, a collet and an emphasis for a chisel (hand). In the secondary market, you can find many interesting models, there are quite new modern models.
In order for you to get high-quality furniture, if you want to make it for yourself or sell it, you will have to equip the workshop with many other equipment.
Drying
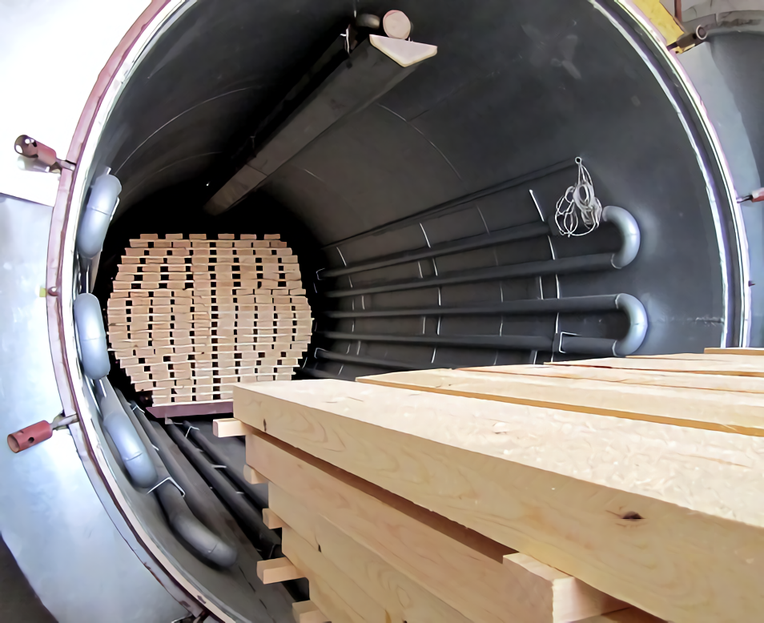
The tree needs to be dried , and dried according to a certain method . Usually a tree is sold with “natural moisture”, that is, it contains about 25-40% moisture. If you make something out of such wood, then as the product dries, the product will warp and crack. Regardless of how many layers of varnish you apply to it. Generally speaking, wood is a living material and subject to seasonal changes in air humidity, due to which its linear dimensions fluctuate throughout the year: the lengths (along the fibers) are extremely small, and the width of the wood can swell and dry by tens of millimeters, depending on the total size of the product.
Therefore, the main rule - the wood must first be dried to 8 - 12% humidity, only after that it can be used.
How to dry a tree in an apartment? Gently fold the boards as far as possible from the batteries, transfer the layers with bars of the same width and press something on top. It is advisable to smear the ends with paint, since moisture evaporates most intensively and cracks can go along the boards. It’s great if you can buy chamber-dried wood that has already been dried, this will help to avoid numerous defects if you start to dry yourself.
Bend
Probably almost all of you have seen such beautiful tables and chairs with bent legs.
It looks very impressive. If such legs are cut-sawed, they will turn out to be much less durable, because the longitudinal integrity of the fibers will be violated. It is best to achieve this shape by bending wood. And so that the workpieces do not break, you must first increase their ductility. The plants use chemical plasticization of wood, and lovers usually have only one way: first moisten the wood and then heat it, after which the workpiece can be gradually bent.
Milling
A very useful and often necessary operation in woodworking. If we are talking about furniture, then at least you have to mill the edges of the products, rounding them (I do not consider the option of manually machining with moldings). To do this, you will need a manual milling cutter, which would be nice to supplement with a milling table with a more powerful device installed in it. However, at first, more than one milling cutter of medium power is enough, putting it on the table if necessary or using it manually.
Drilling
To connect the parts, you will need to make holes in them for fasteners - screws or dowels. You are unlikely to do this with a regular hand drill evenly and accurately, moreover, you often need to drill holes in the ends. Ideally, you should have a drilling machine. Option “for the poor”: a stand in which a hand drill is clamped, which is lowered manually. Both options will help you make holes much more accurately and accurately, or even just make.
Plywood
Previously, this term was called the procedure for gluing carpentry with plywood - thin sheets of wood of other, more valuable varieties. Now we mean “plywood” multilayer glued panels, and thin wood sheets we call “veneer”. Accordingly, instead of “plywood”, today many say “veneering”. Using veneers, you can give a beautiful, even sophisticated look to products made from “simple” types of wood growing in our latitudes. For example, oak veneer can be glued furniture from birch. By the way, today a lot of furniture samples, including “elite” foreign ones, are actually glued with veneer of more valuable species and sold as made of solid wood at much higher prices.
For beginners, I do not recommend immediately tackling the veneer sticker, since this task is non-trivial, requiring skill, patience, and in the case of large parts, also serious equipment in the form of powerful presses or vacuum bags for uniform veneer gluing.
Gluing and protective decorative coating
These are the main operations after the manufacture and assembly of the parts themselves. And to fulfill them, certain conditions are needed. The barn is not a house; it is not heated. When I started doing carpentry, I realized that I couldn’t glue or paint, because it was already winter outside and it was too cold in the workshop, even materials could not be stored at this temperature. At the same time, working in a cold workshop is uncomfortable.
This, of course, upset me very much, because it would be quite expensive to insulate the barn. And I recommend that you either immediately attend to the insulation, or in the cold season do gluing and painting in other warm rooms.
Connections
In carpentry, there are many types of connection of parts with each other, differing in practicality, strength, aesthetics and durability. I will not talk in detail about all types, this is a topic for the whole book. Most often, parts are mechanically connected to each other using tongue-and-groove or dowel joints, which are coated with glue.
Everyone knows about purely mechanical joints: the parts are attached to each other with screws, self-tapping screws, eccentric joints, and other metal devices.
Workshop arrangement
Having spent a couple of years on a shed with an unnecessary basement, I set up all the machines in the workshop and made a dust removal installation: I took a construction vacuum cleaner and installed a cyclone filter on a two-liter metal barrel. Class! Now there will be no dust. And then I realized: the vacuum cleaner consumes 1.5 kW, the miter saw another 2 kW, apart from other devices, looked sadly at the wire through which electricity was connected to the shed, and realized that I could not do anything. He turned to electricians and asked them to draw me a three-phase line. These wonderful guys have been dynamizing me for a long time, and I think I won’t be able to defeat them, I’ll have to turn to another place.
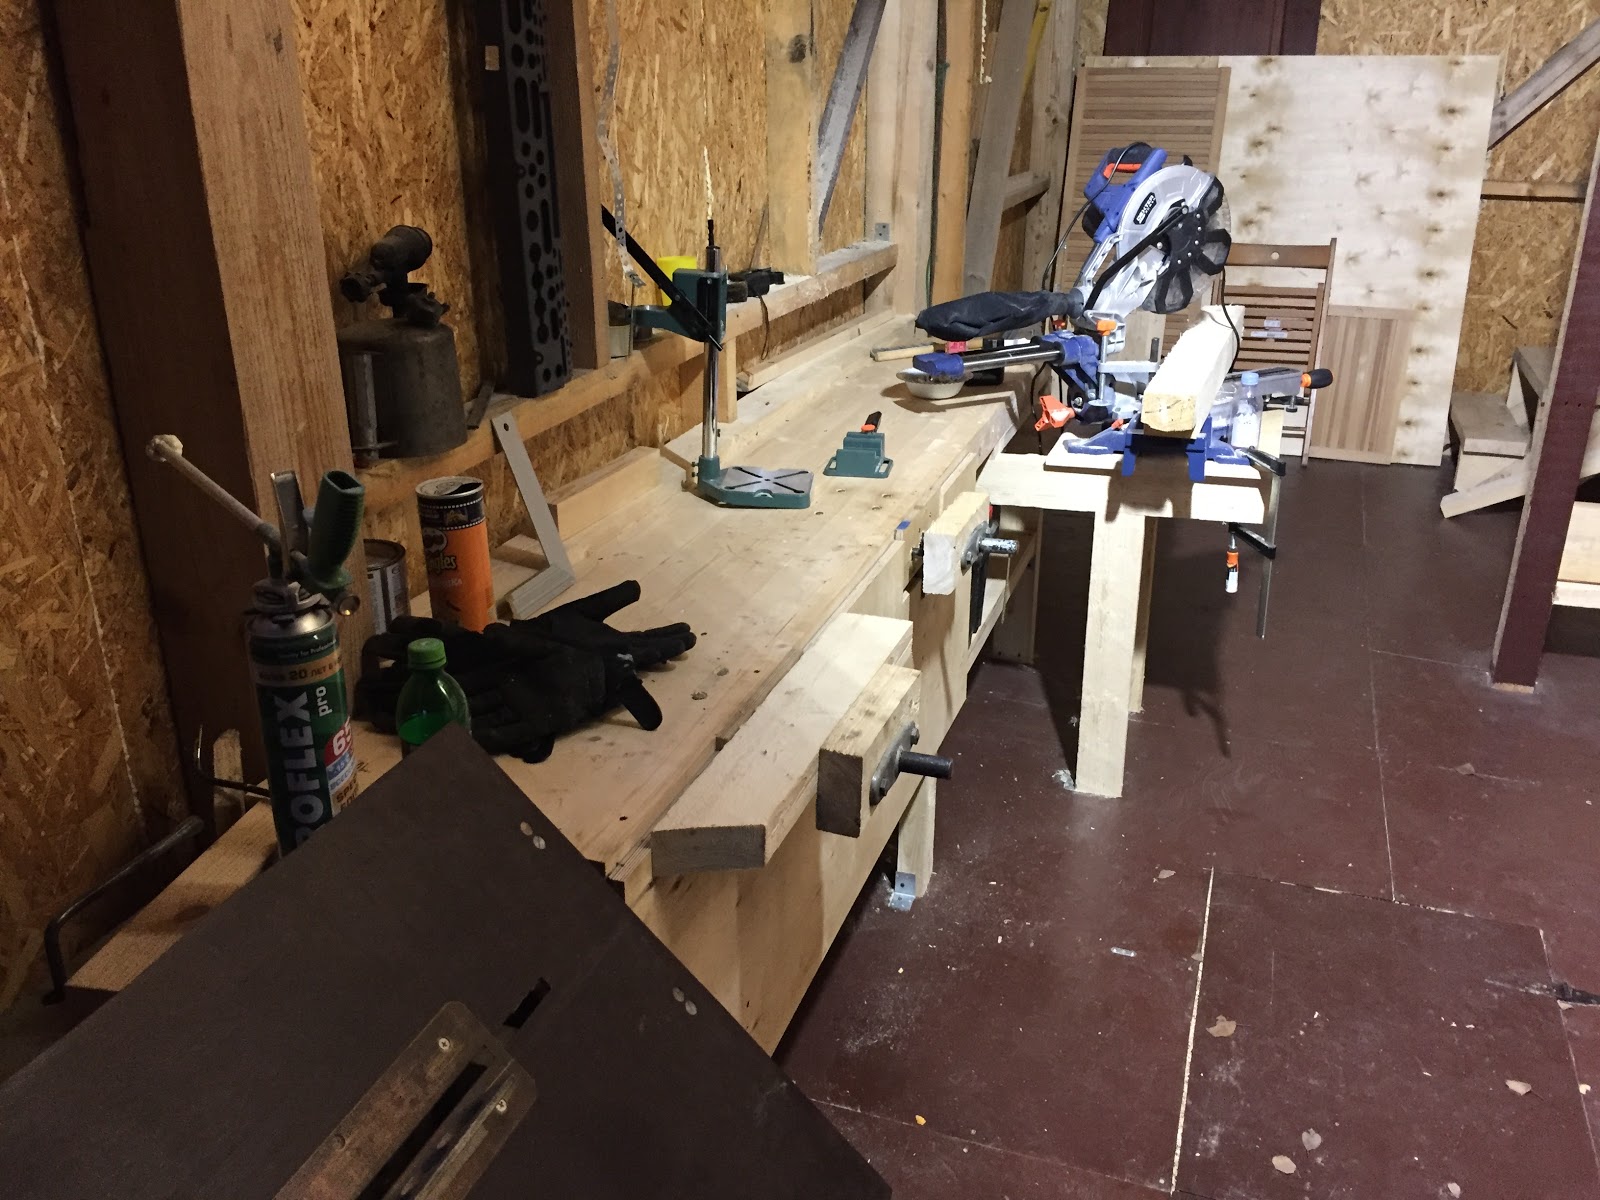
I started arranging the workshop with a workbench. And in the end, he did it not where the dust removal failed, and the vacuum cleaner had to be moved.
The miter saw is recessed so that its own table is flush with the workbench. Thanks to the folding tabletop, a whole sheet of plywood is placed here, which can be conveniently cut.

Then I installed the vise, spent a lot of time on it. The drill stand is not yet fixed, but also built into the countertop, it is convenient to use it for drilling end holes.
Due to insufficient power supply, I did not even start the machine, I will continue to fight with the power engineers.
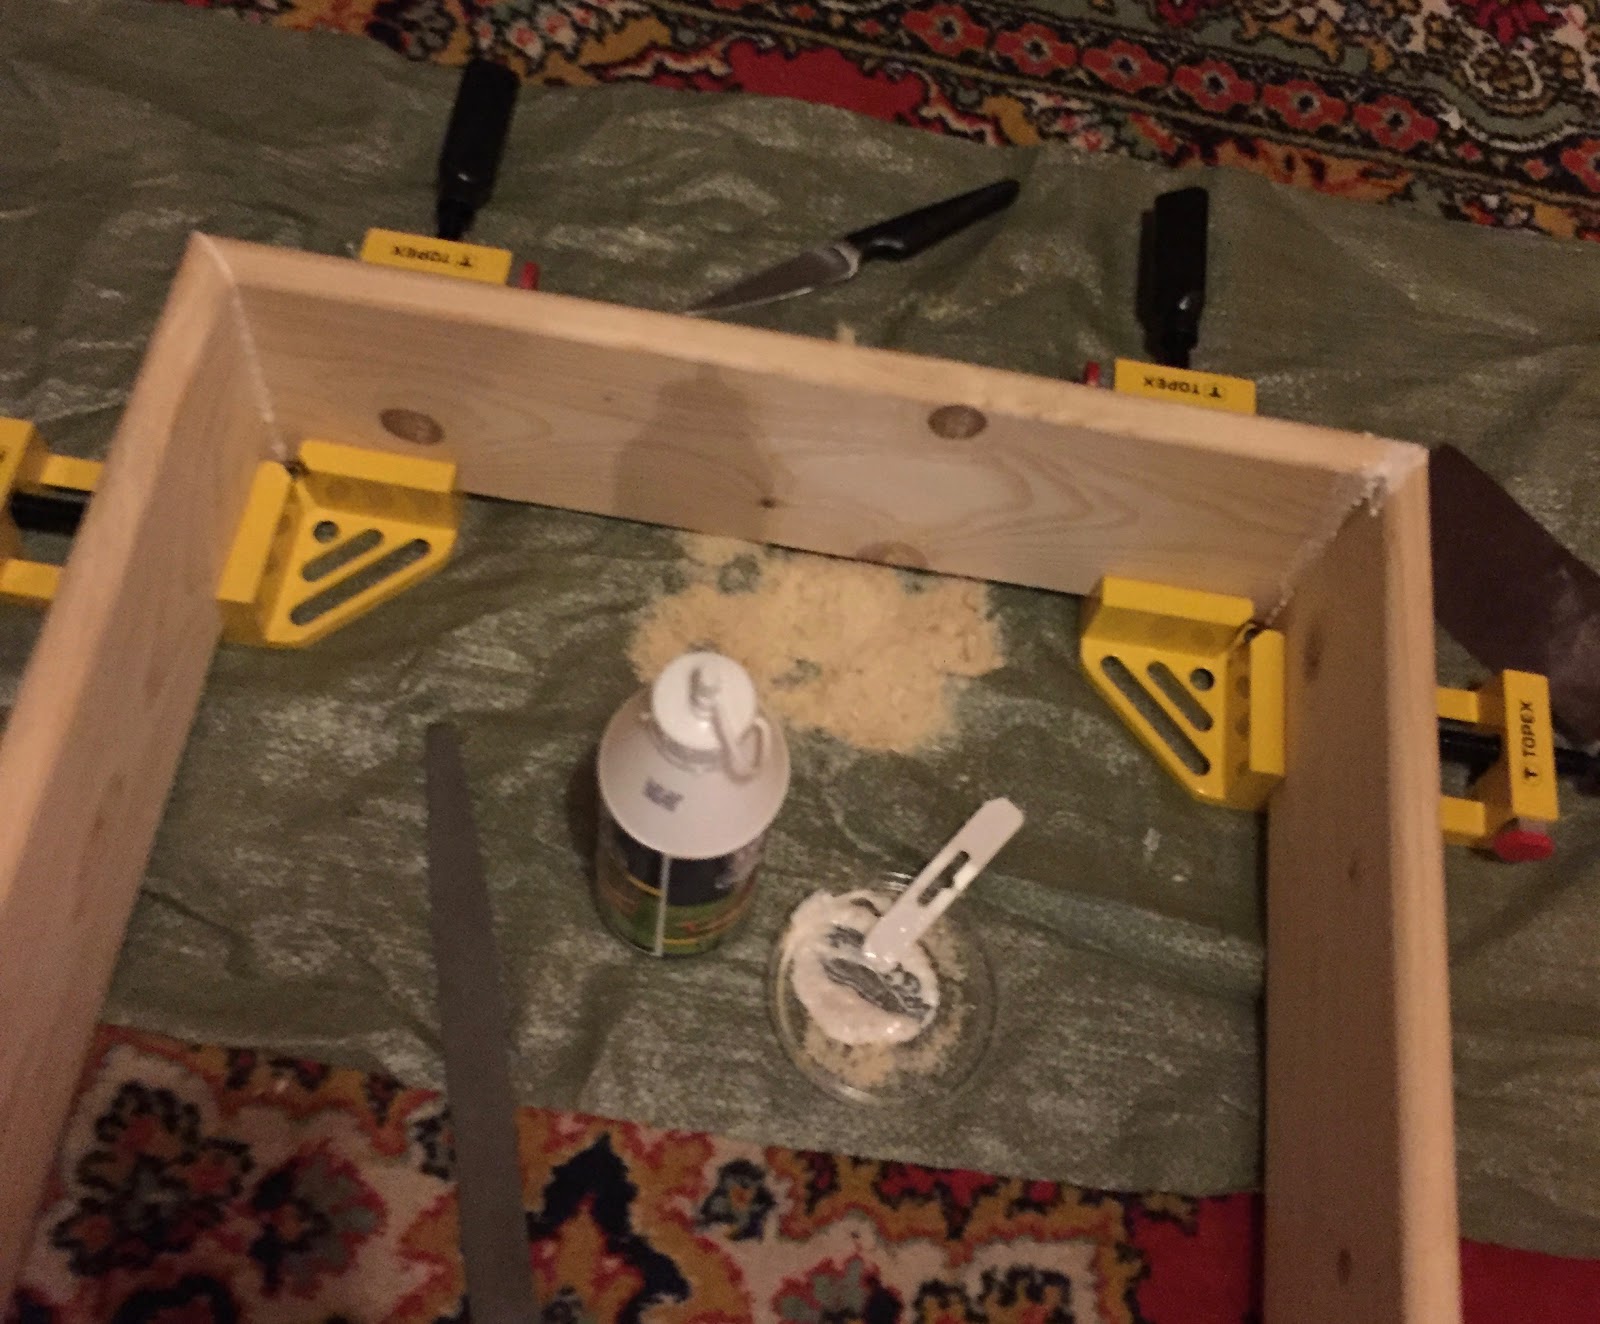
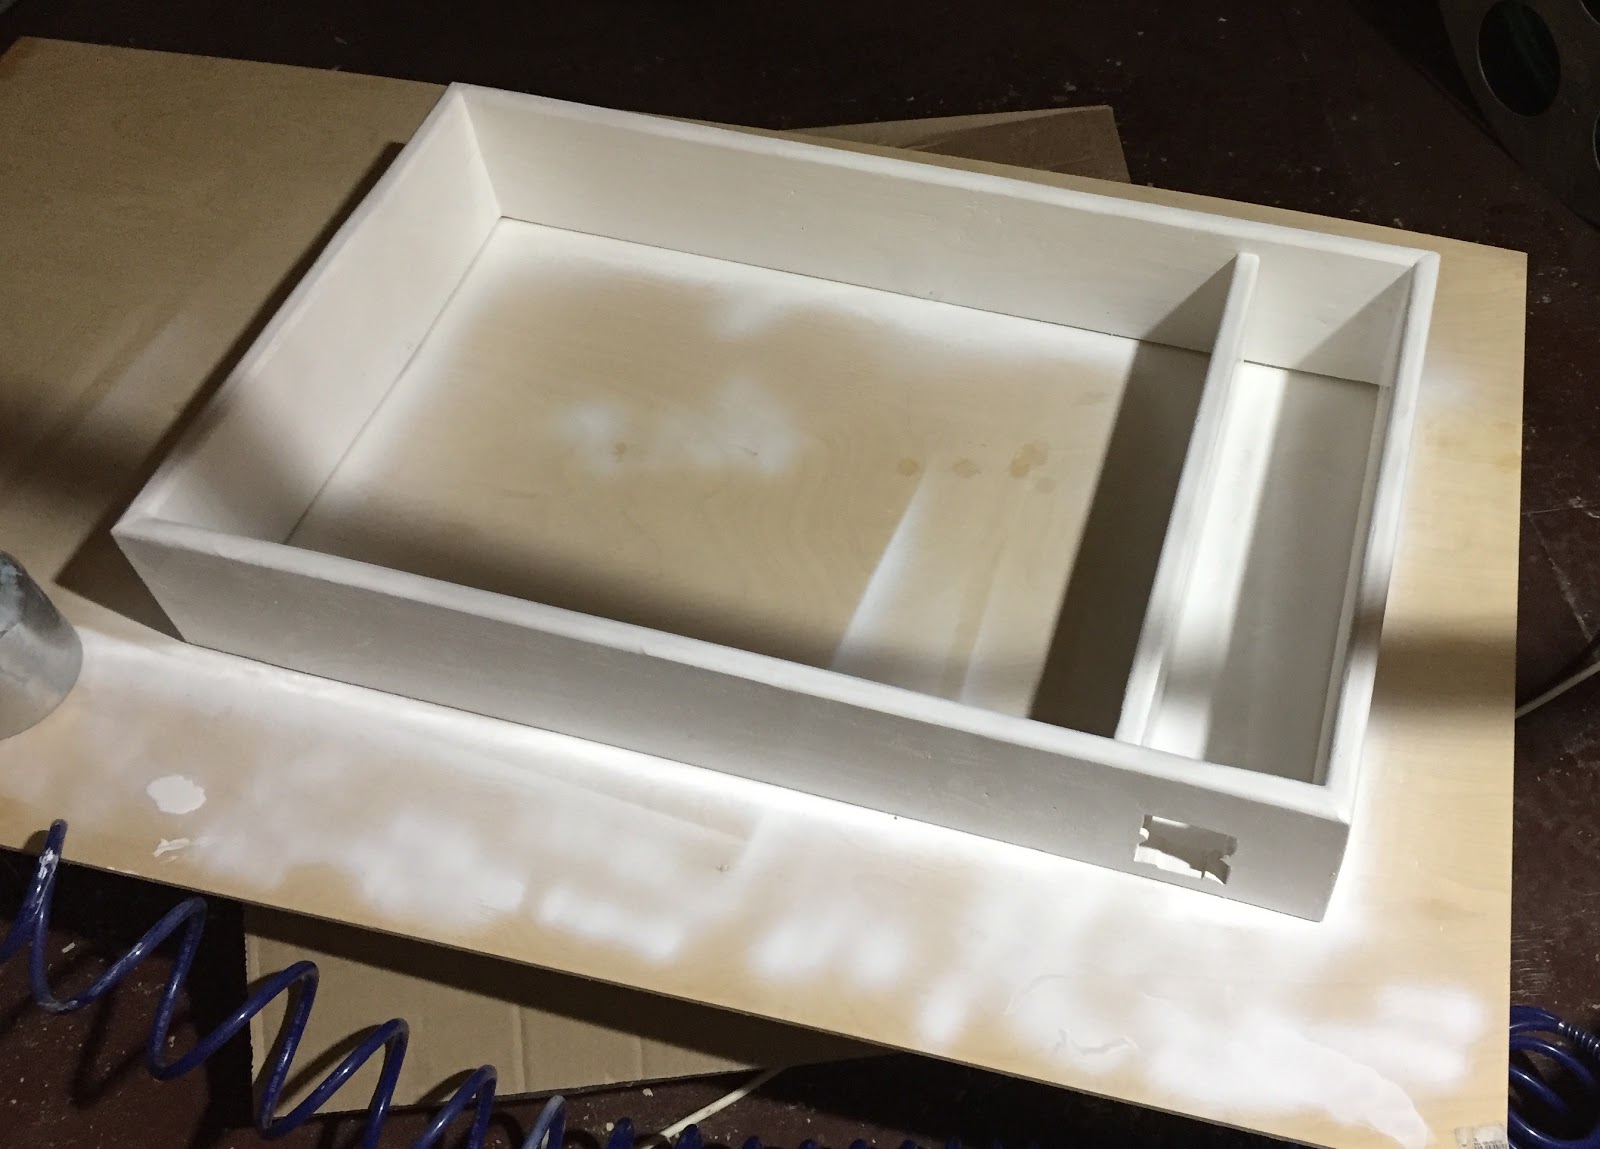
And here is all that I managed to do with my own hands - a table for painting with sand for my daughter:

I did it quickly enough, somewhere in 20 hours, because by that time there were already all the necessary tools and equipment. Moreover, it took about 6 hours to process the blanks to give them a parallelepiped shape.
The table is simple: a box, it has 8 meters of LED strip, a controller and a power supply. First, I processed the boards, milled the edge and glued the entire structure. It turned out very crookedly. If you look closely, the photo shows that I filled the seams at the joints with a mixture of sawdust and PVA glue. But holds tight.
The tool compartment and the sand are bolted with four barrel nuts. It was here that I realized the full benefit of the drill stand, because it is very difficult to drill into the butt.
Here you can see the screen itself, which is installed under the plexiglass.
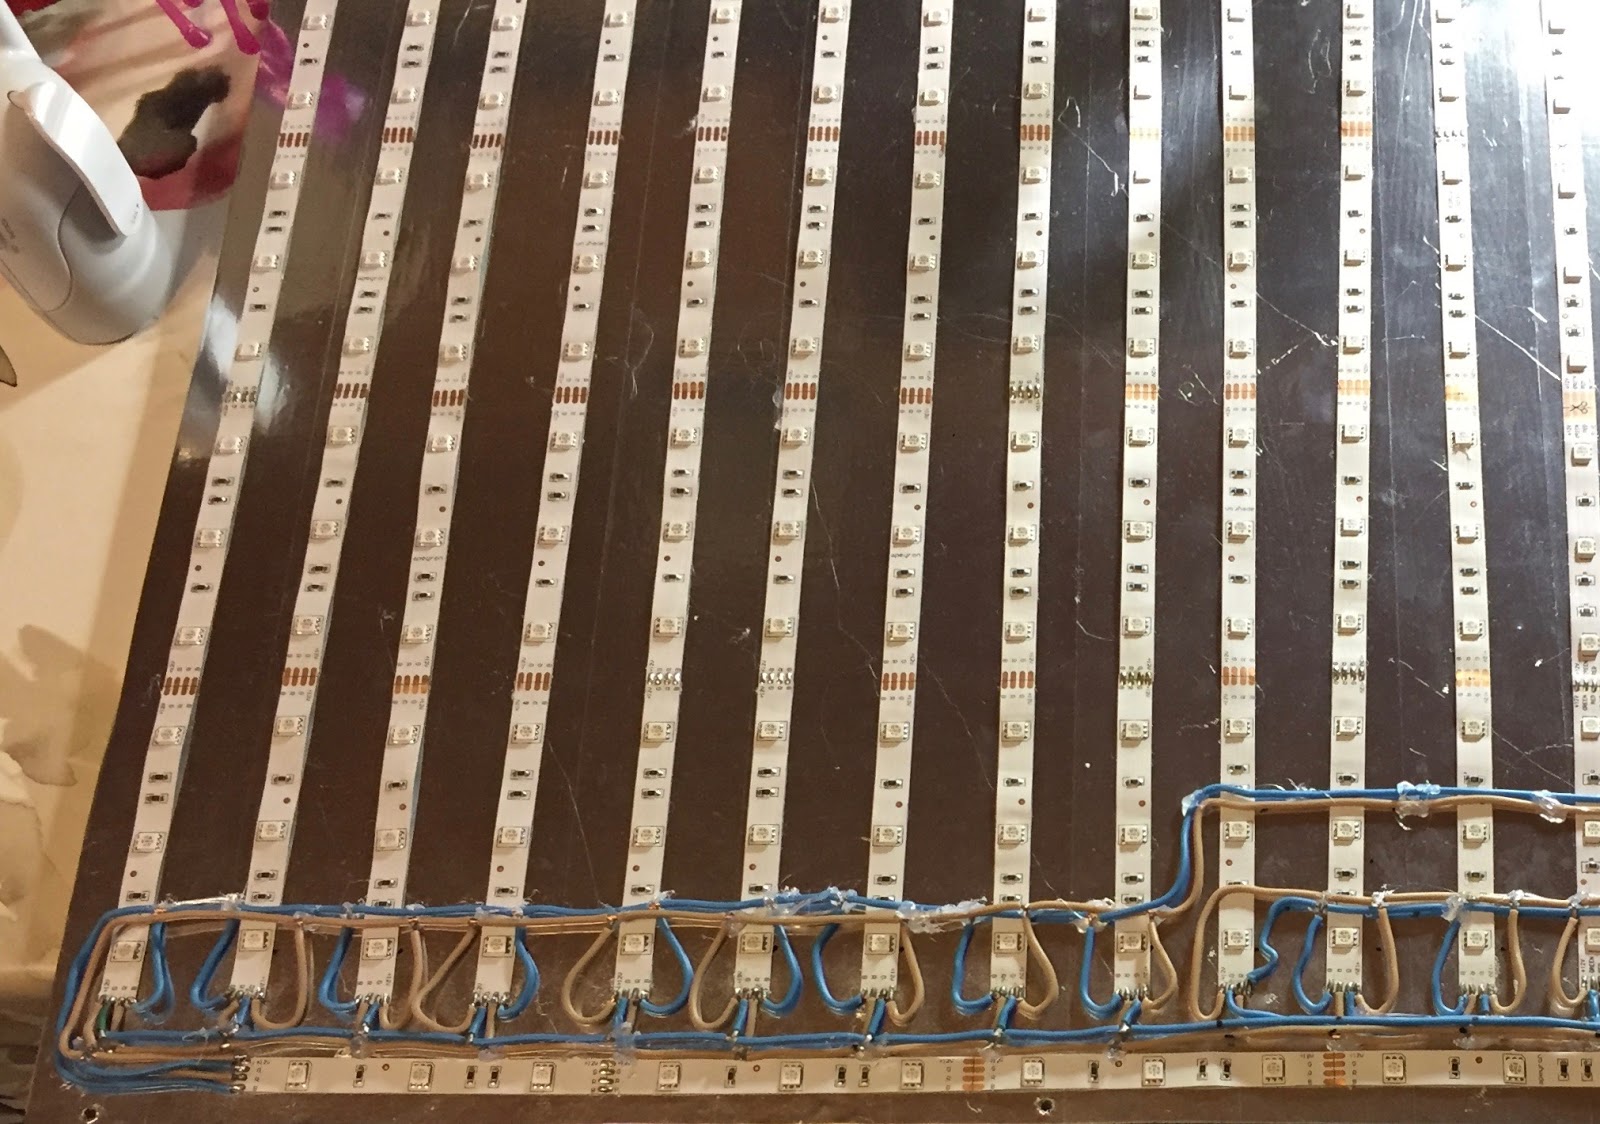
On it, on top of aluminum adhesive tape, an LED tape is glued to the hot glue. I thought that the adhesive tape would work as a reflector, but it turned out that it “dilutes” the spectrum of light.
Plexiglass is easy to mount. After the primary primer and painting, I inserted metal shkantki, laid the glass and filled it with epoxy. It sits there like a native and will not go anywhere.
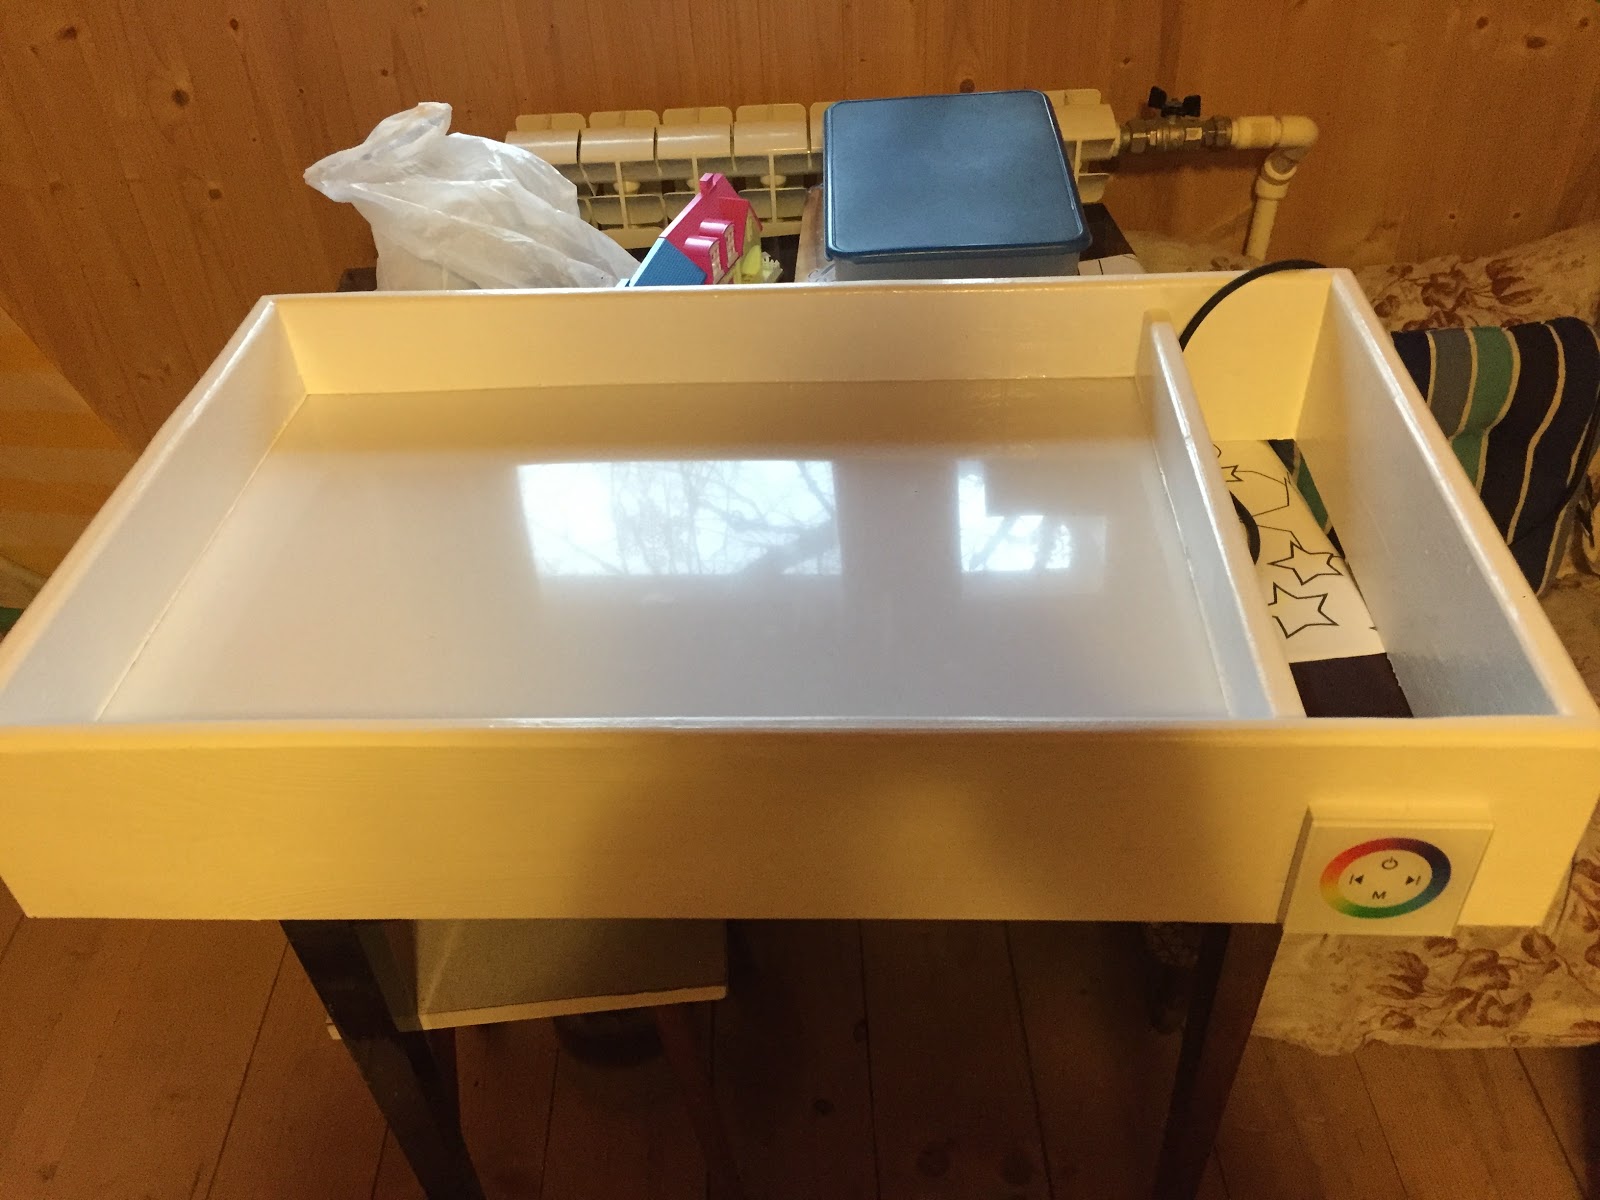
I want to make two more tables, there are already blanks for them, and try to sell, because the cost is very low. The most expensive ones are the controller and LEDs. At the same time, I will develop skills in processing such small-scale parts.