Joystick for AppleII DIY
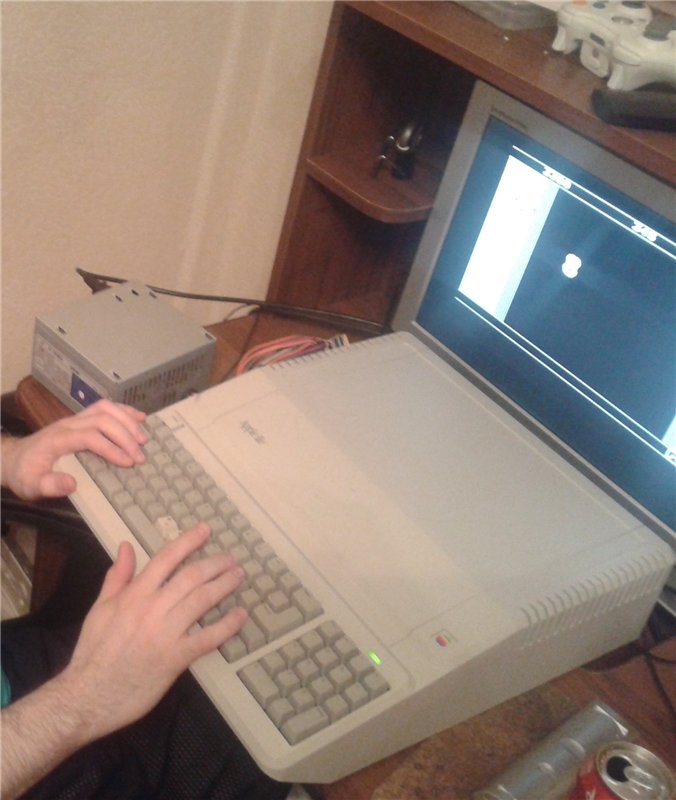
I got a computer like Apple IIe platinum, which was probably decommissioned 20 years ago, after a work day at the enterprise’s warehouse. He was lying in a heap of other iron, which has outlived his age, and if I had not picked it up on time, he would simply have gone to a landfill. I got it without a power supply, but this is nonsense, an adapter from a standard ATX is not a problem to solder. It connects to the TV with an ordinary RCA in composite and has a somewhat non-standard NTSC, so all the TVs that connected to it showed a black and white picture.
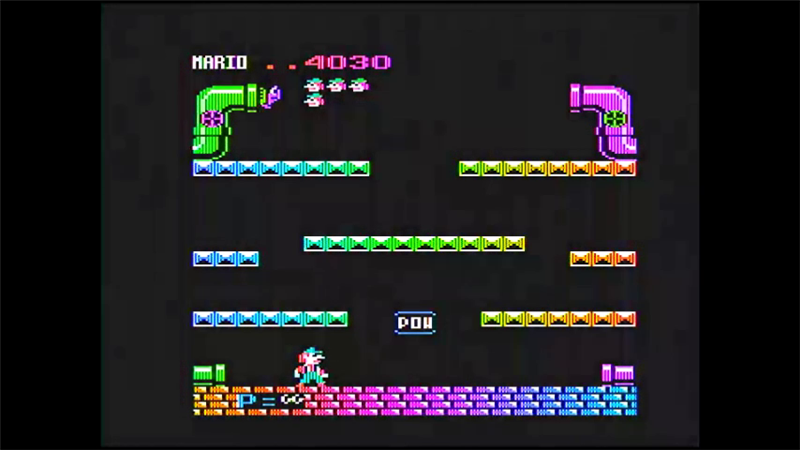
The situation was changed only by the whistle easycap USB 2.0, which, although with jambs, but displays color. There should not be any “rainbow” as in the screenshot below, but in any case it is more interesting to play with color.
Games on it are loaded like on a Spectrum through an audio input from a tape recorder. There is one very useful site asciiexpress.net which allows you to launch the game just as you would launch it from a tape recorder. The list of games is quite impressive, but you can’t play many with the keyboard, they require a joystick (I can imagine how bombing it would be for modern gamers). So how to connect the joystick to apple IIe? It is soldered on two connectors, a 16-pin old model inside the motherboard and DB-9F. You can now completely order the joystick for the epl on ibey, but there is a better way. I will do it myself. It turned out a little google that this task is not so difficult. The principle of operation is very similar to the principle of the joystick for PC gameplay. Here is a diagram in which I really added a second button, as some games use two and used the db-9f connector,

Here is the pin mapping for 9 pin and 16 pin connectors.
db-9f value 16-pin
2 - + 5v - 1
7 - button0 - 2
5 - X-axis - 6
8 - Y-axis - 10
1 - button1 - 3
3 - ground - 8
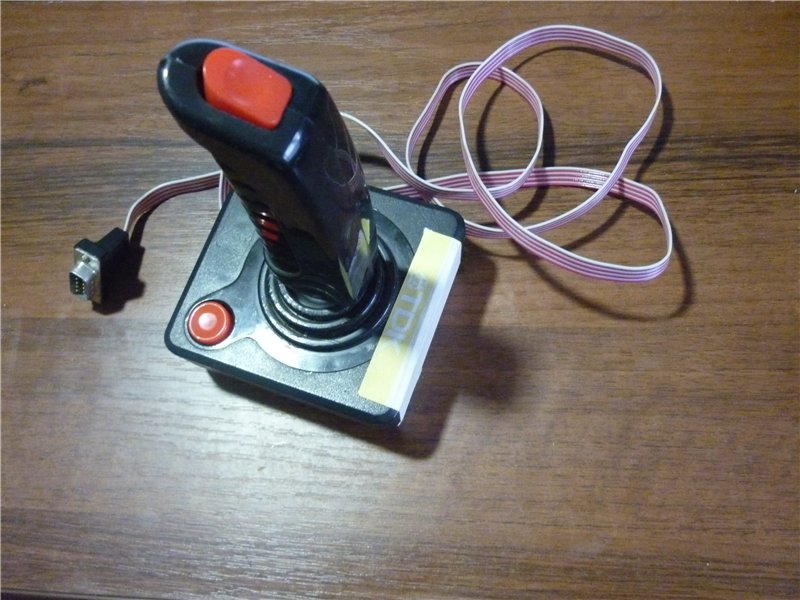
We take the usual joystick from the Rambo prefix, it’s the Atari 2600. It’s not a pity to tamper with it at all, as standard Sego joysticks are suitable for the atari. We disassemble it and solder another cable to it, the DB-9M plug to it, change the mechanics of the joystick, since it differs from the Atariyevsky one. The cross in the middle had to be cut into 4 parts. Slightly screwed up to make pressing right and down, not on pressing as it was originally, but pressing the button. There are 2 axes, on the vertical axis, the up button is triggered to close the contacts, the neutral position is 68 KOhm resistance, the down button to open, we get a resistance of 168 KOhm. Same thing on the horizontal axis. On the Rambo joystick, the upper button duplicated the lower one, but I made the upper one as button No. 1 and the lower one as button No. 2. Inside, it doesn't look very cool, but it works.
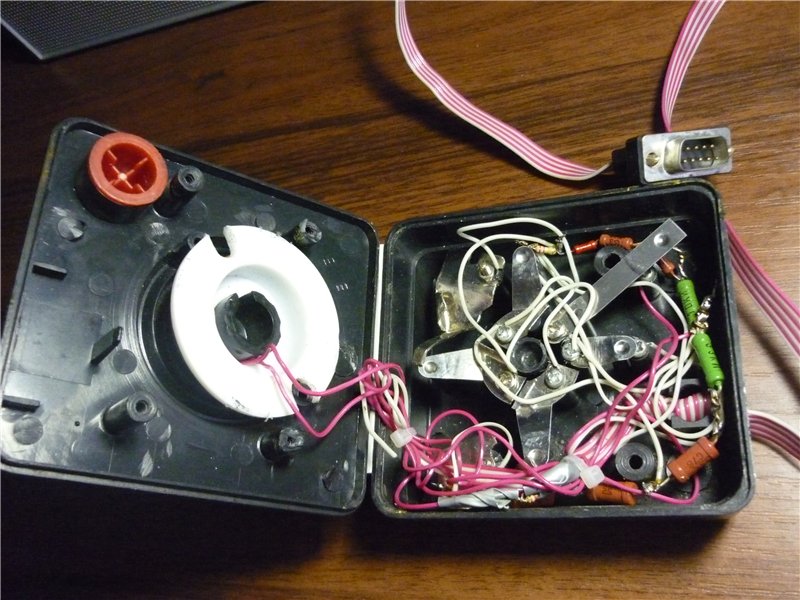
Gather it back.
All the games that I tested worked with it without problems, except perhaps a sublogic flight simulator, which apparently needs some other analog joystick.
But not all games can be run through the audio input, for more serious ones, such as prince of persia, you need a drive, I have it, but unfortunately there is no drive controller.
PS Play good games;)
The situation was changed only by the whistle easycap USB 2.0, which, although with jambs, but displays color. There should not be any “rainbow” as in the screenshot below, but in any case it is more interesting to play with color.
Games on it are loaded like on a Spectrum through an audio input from a tape recorder. There is one very useful site asciiexpress.net which allows you to launch the game just as you would launch it from a tape recorder. The list of games is quite impressive, but you can’t play many with the keyboard, they require a joystick (I can imagine how bombing it would be for modern gamers). So how to connect the joystick to apple IIe? It is soldered on two connectors, a 16-pin old model inside the motherboard and DB-9F. You can now completely order the joystick for the epl on ibey, but there is a better way. I will do it myself. It turned out a little google that this task is not so difficult. The principle of operation is very similar to the principle of the joystick for PC gameplay. Here is a diagram in which I really added a second button, as some games use two and used the db-9f connector,
Here is the pin mapping for 9 pin and 16 pin connectors.
db-9f value 16-pin
2 - + 5v - 1
7 - button0 - 2
5 - X-axis - 6
8 - Y-axis - 10
1 - button1 - 3
3 - ground - 8
We take the usual joystick from the Rambo prefix, it’s the Atari 2600. It’s not a pity to tamper with it at all, as standard Sego joysticks are suitable for the atari. We disassemble it and solder another cable to it, the DB-9M plug to it, change the mechanics of the joystick, since it differs from the Atariyevsky one. The cross in the middle had to be cut into 4 parts. Slightly screwed up to make pressing right and down, not on pressing as it was originally, but pressing the button. There are 2 axes, on the vertical axis, the up button is triggered to close the contacts, the neutral position is 68 KOhm resistance, the down button to open, we get a resistance of 168 KOhm. Same thing on the horizontal axis. On the Rambo joystick, the upper button duplicated the lower one, but I made the upper one as button No. 1 and the lower one as button No. 2. Inside, it doesn't look very cool, but it works.
Gather it back.
All the games that I tested worked with it without problems, except perhaps a sublogic flight simulator, which apparently needs some other analog joystick.
But not all games can be run through the audio input, for more serious ones, such as prince of persia, you need a drive, I have it, but unfortunately there is no drive controller.
PS Play good games;)