Creating an independent and self-sufficient weather probe
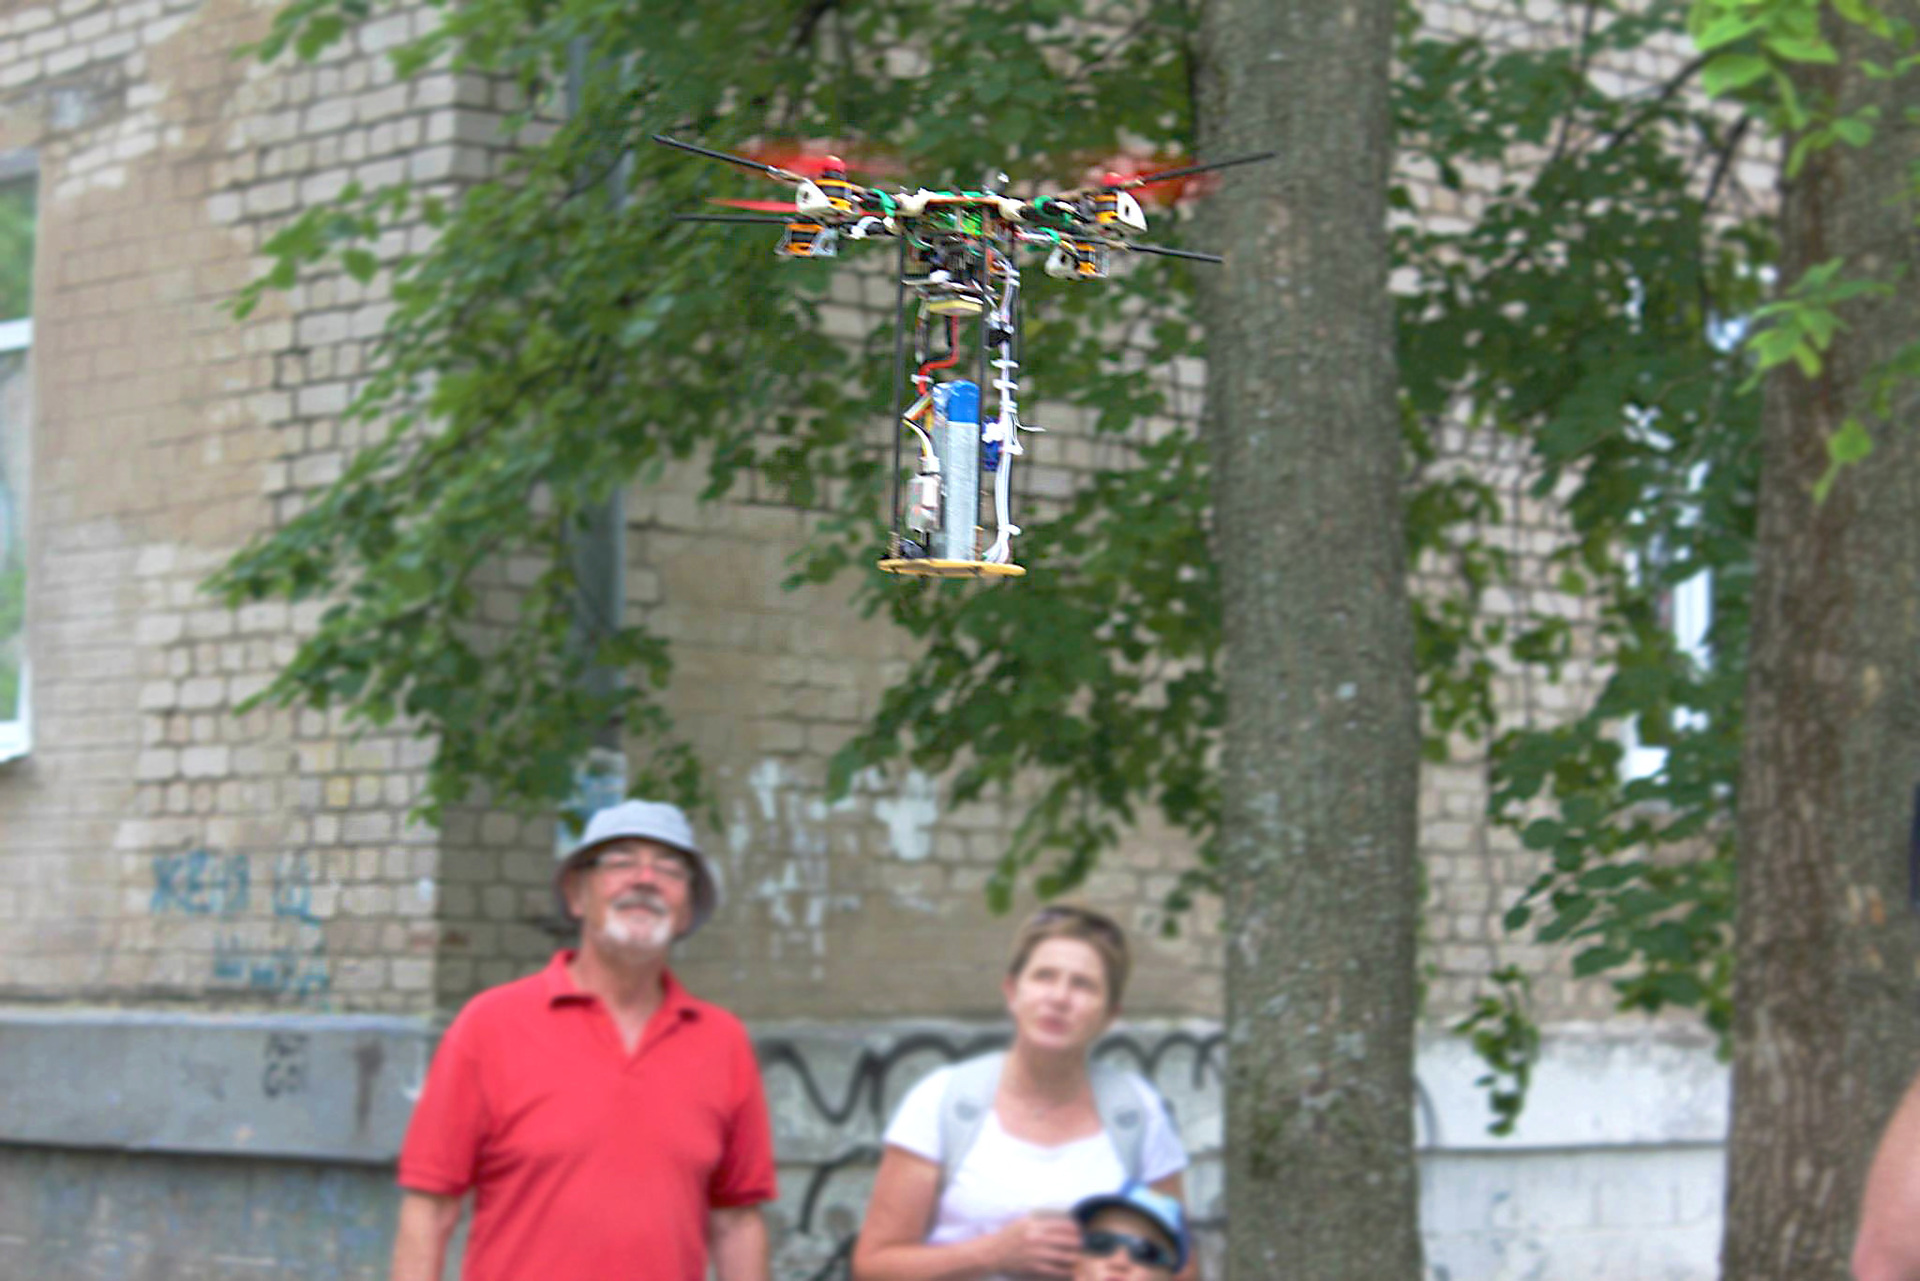
This year, we participated in the CanSat weather probe launch championship and set an ambitious goal: to turn the probe into a full UAV, keeping within the rules of the competition
This post includes:
1) description of the device
2) purpose of its creation
3) assembly process
4) flight tests
5) final launch
Description
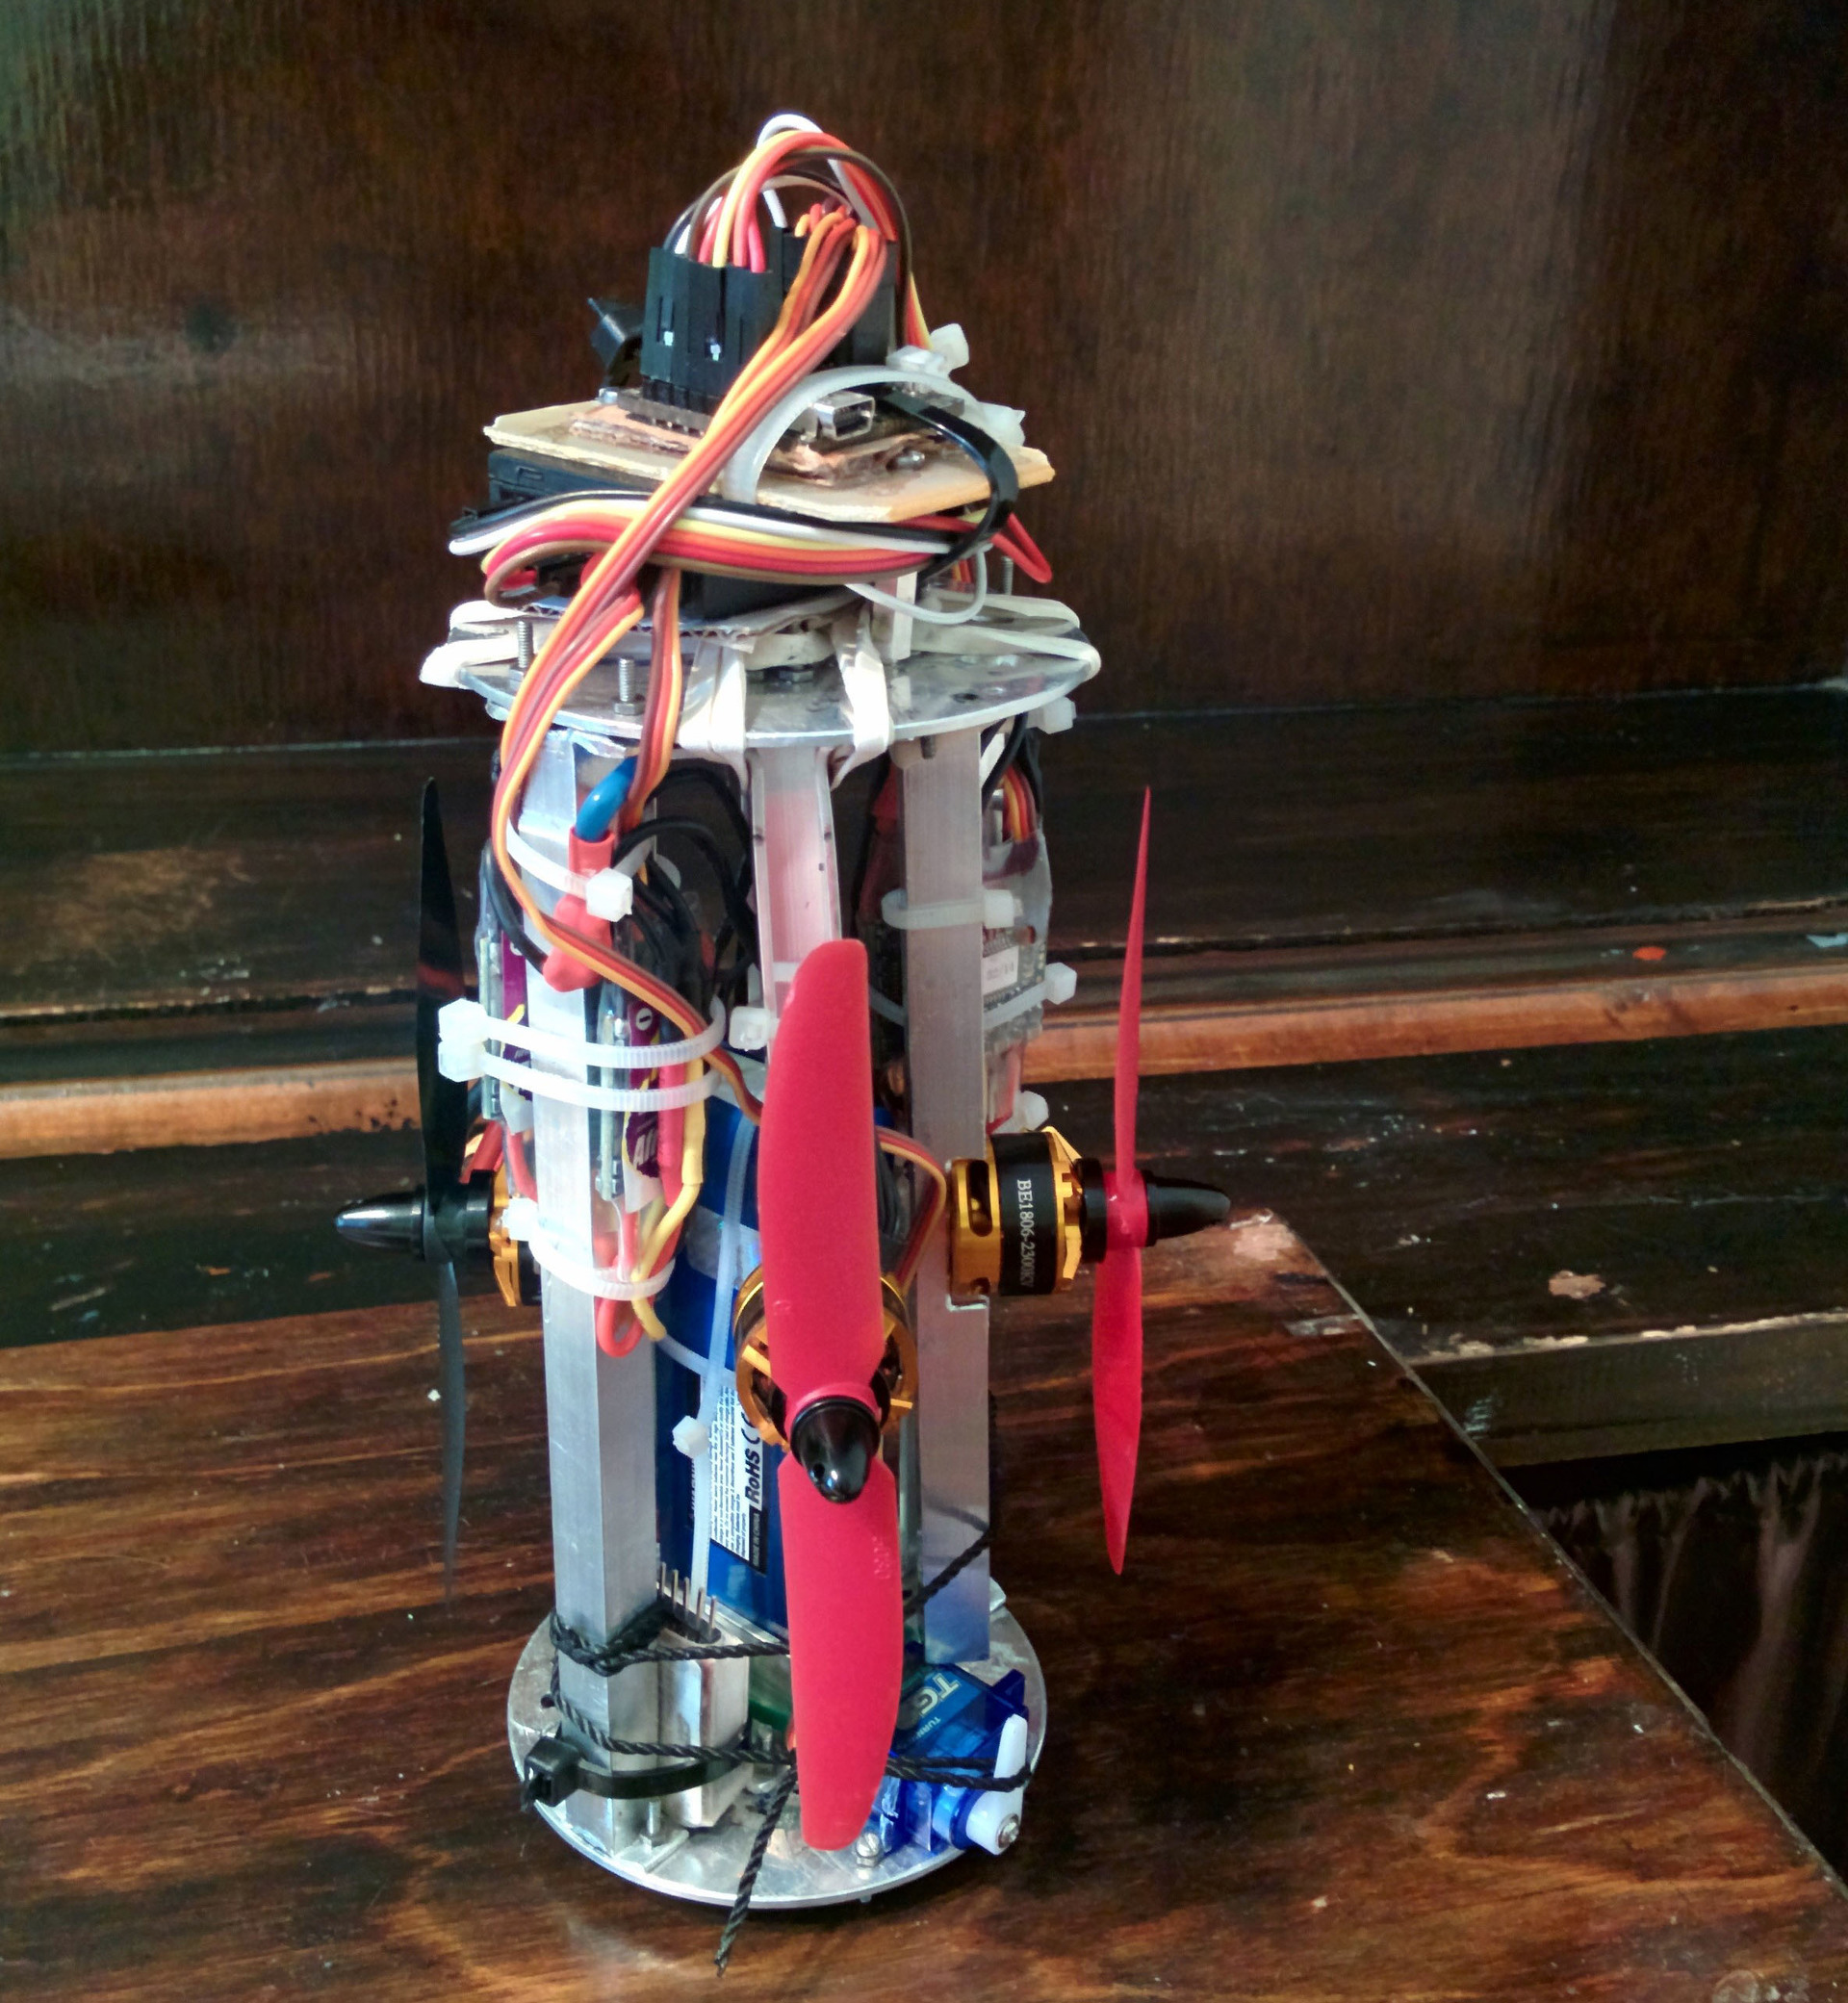
The device is a quadrocopter with two modes: in passive, it takes the form of a cylinder that is placed in the rocket’s body, in the active rays are opened, engines are started, the main mission begins, which consists in collecting data on the state of the earth’s surface and atmosphere, autonomous flight according to set points (with the ability to intercept pilot control) and return to base.
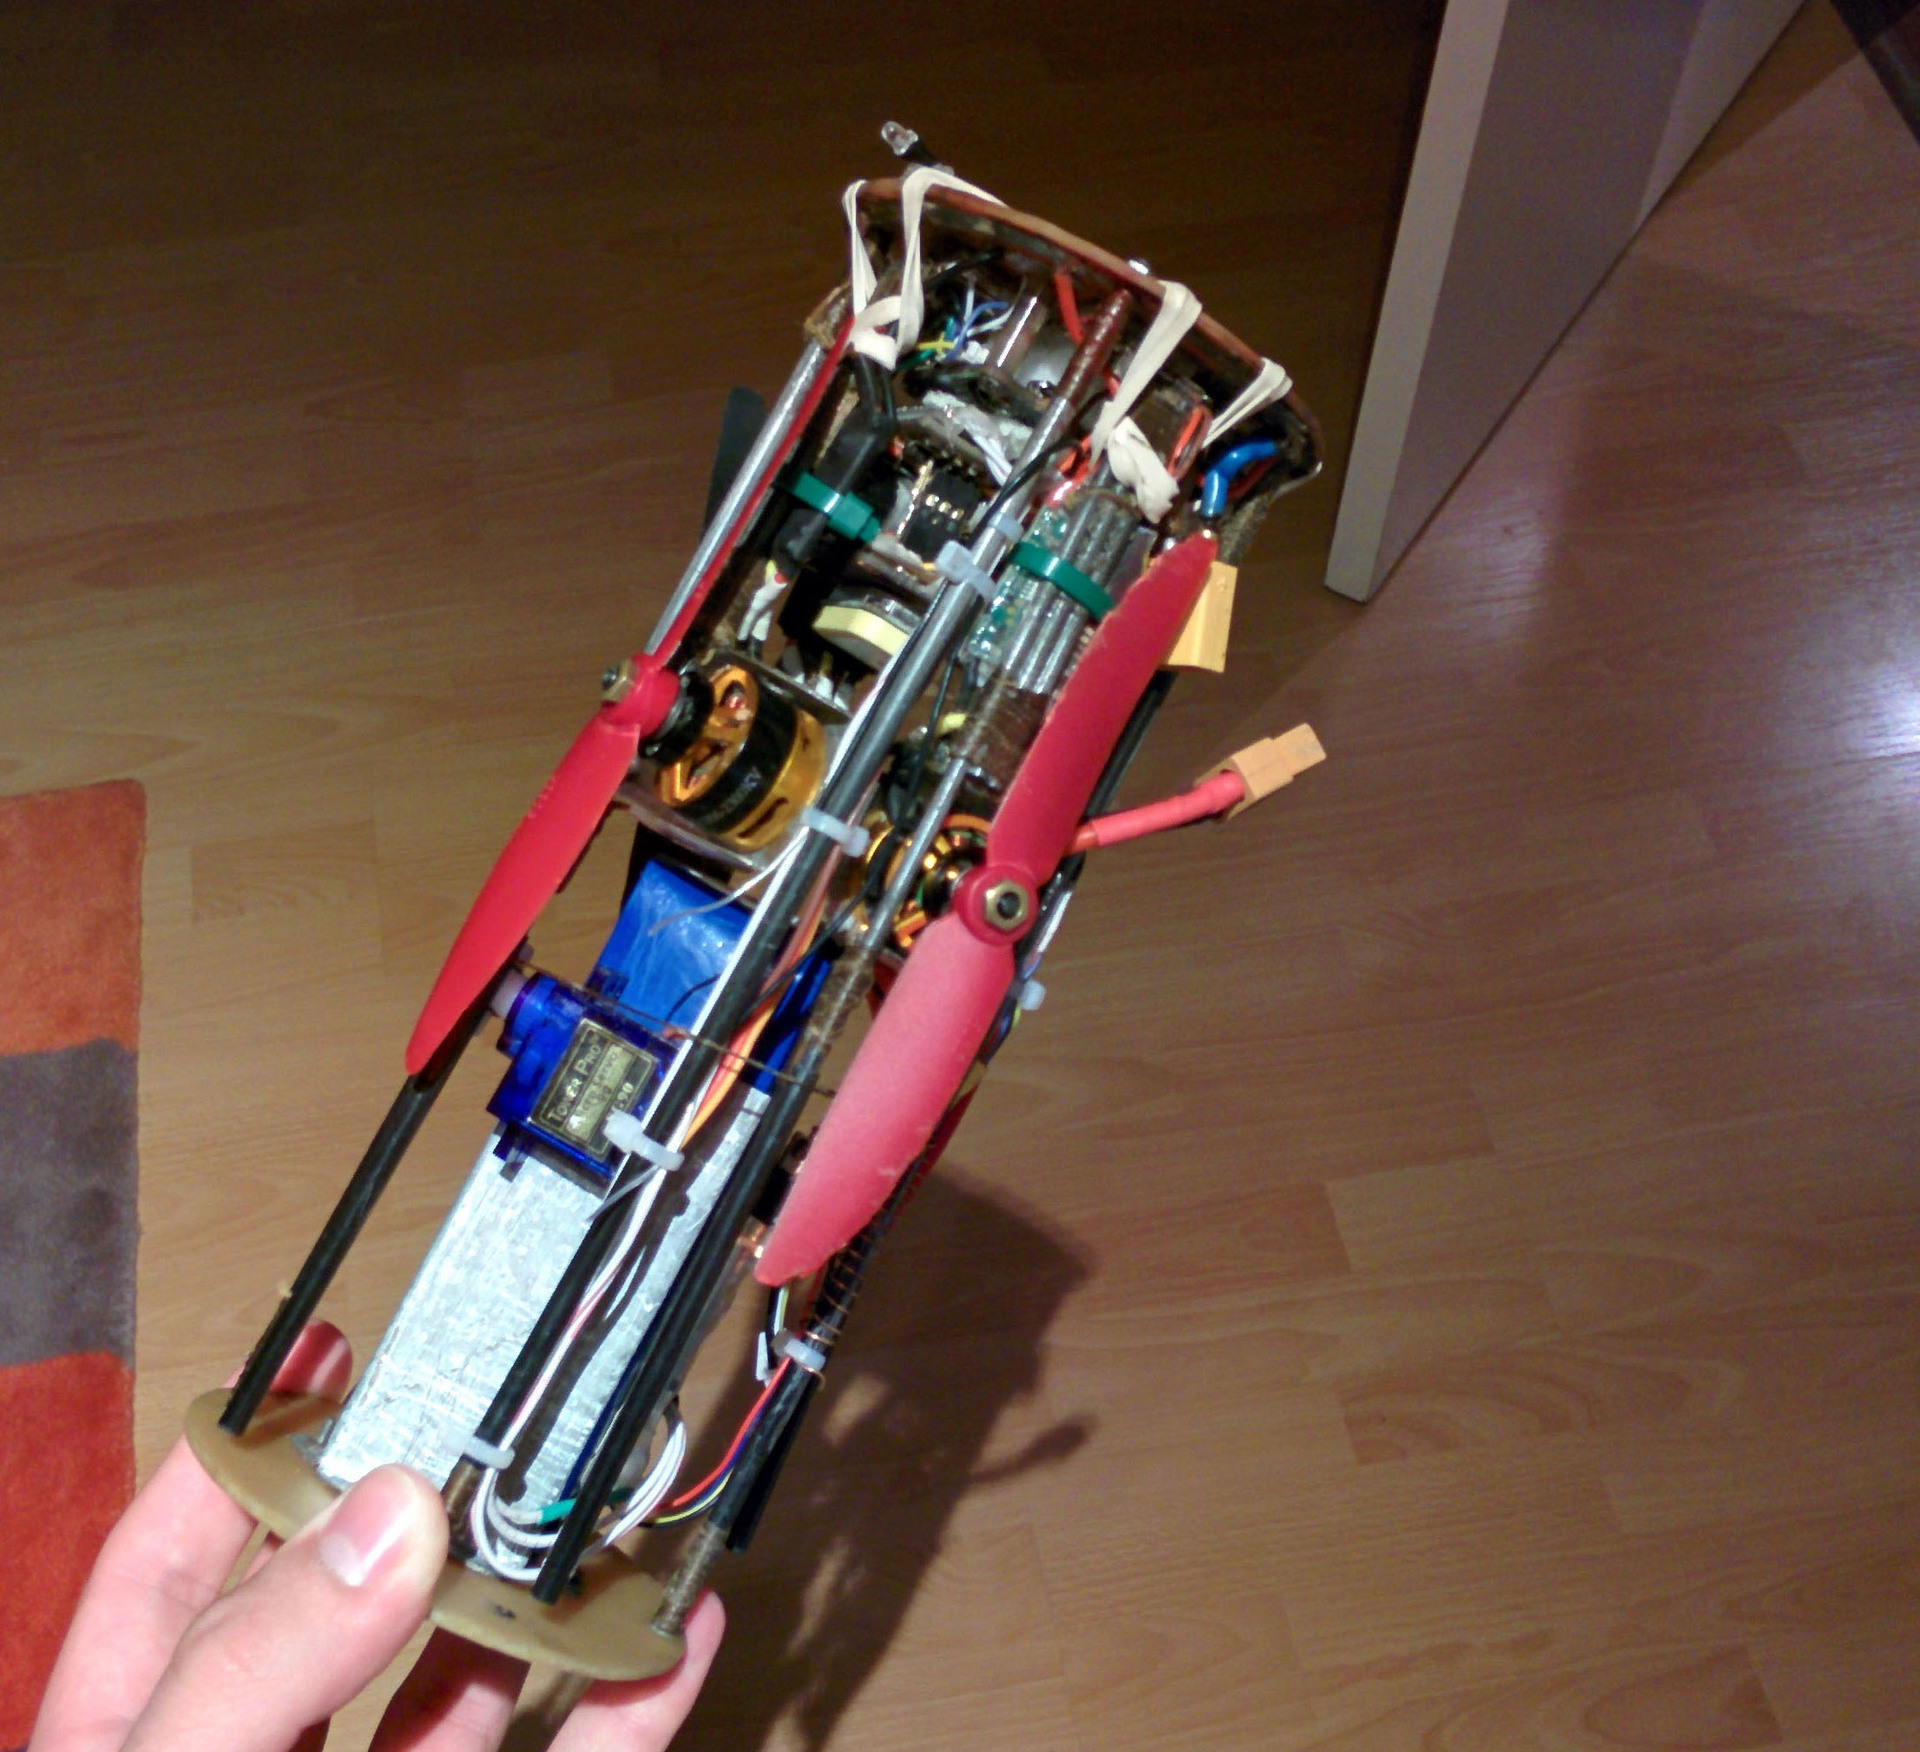
Folded state
Specifications:
Flight time: 6-12 minutes
Horizontal flight range: 4 km
Vertical flight range: 2 km
Active mode transition time: 3 seconds
Weight: 600 g
Installed sensors: barometer, accelerometer, gyroscope, magnetometer, GPS, infrared camera
The project was created to participate in the major league of the CanSat championship, which is held by the SINP MSU.
What is Kansat
This is an international championship in which schoolchildren and students participate. The teams create their weather probe ("satellite"), which is launched on a rocket, during descent by parachute, it transmits various data to the ground.
The first stage is a winter session, at which a team of 1-4 people presents a presentation that describes the future draft of the weather probe, an additional mission, etc.
Then, if the jury approved the project, you can proceed with the assembly. In the summer, launches take place in the field near Dubna, after which the flying-off probes are taken away by the jury, later they are issued simultaneously to all teams. There is a night left for data processing and the creation of the final presentation.
There are 3 leagues in total:
regular league- volume 0.5 l, maximum weight 350 g, it is mandatory to use a ready-made designer, which consists of an analog pressure sensor, a digital temperature sensor, an ATmega 128 microcontroller, an RXQ2 transceiver (433 MHz). The regular league launches on a rocket to a height of 500m.
Major League - the maximum allowable volume and weight has been increased, it is possible to use your own components. Main tasks: delayed disclosure at an altitude of 200m, construction of a flight path. Launches on a rocket to a height of 1 km.
Student League - the probe launches into the stratosphere (30 km) on a helium ball.
My team had experience participating in the championship: last year we were in the regular league. Instead of a ready-made designer, it was decided to make your own, while preserving the main components from the basic set, so that the rules were not actually violated, but we notified the organizers. We managed to reduce the board size by 3 times due to the use of double-sided printing, so theoretically we would be able to take part in the American championship, but due to home production the board worked with some interruptions, which did not allow us to launch on a rocket.
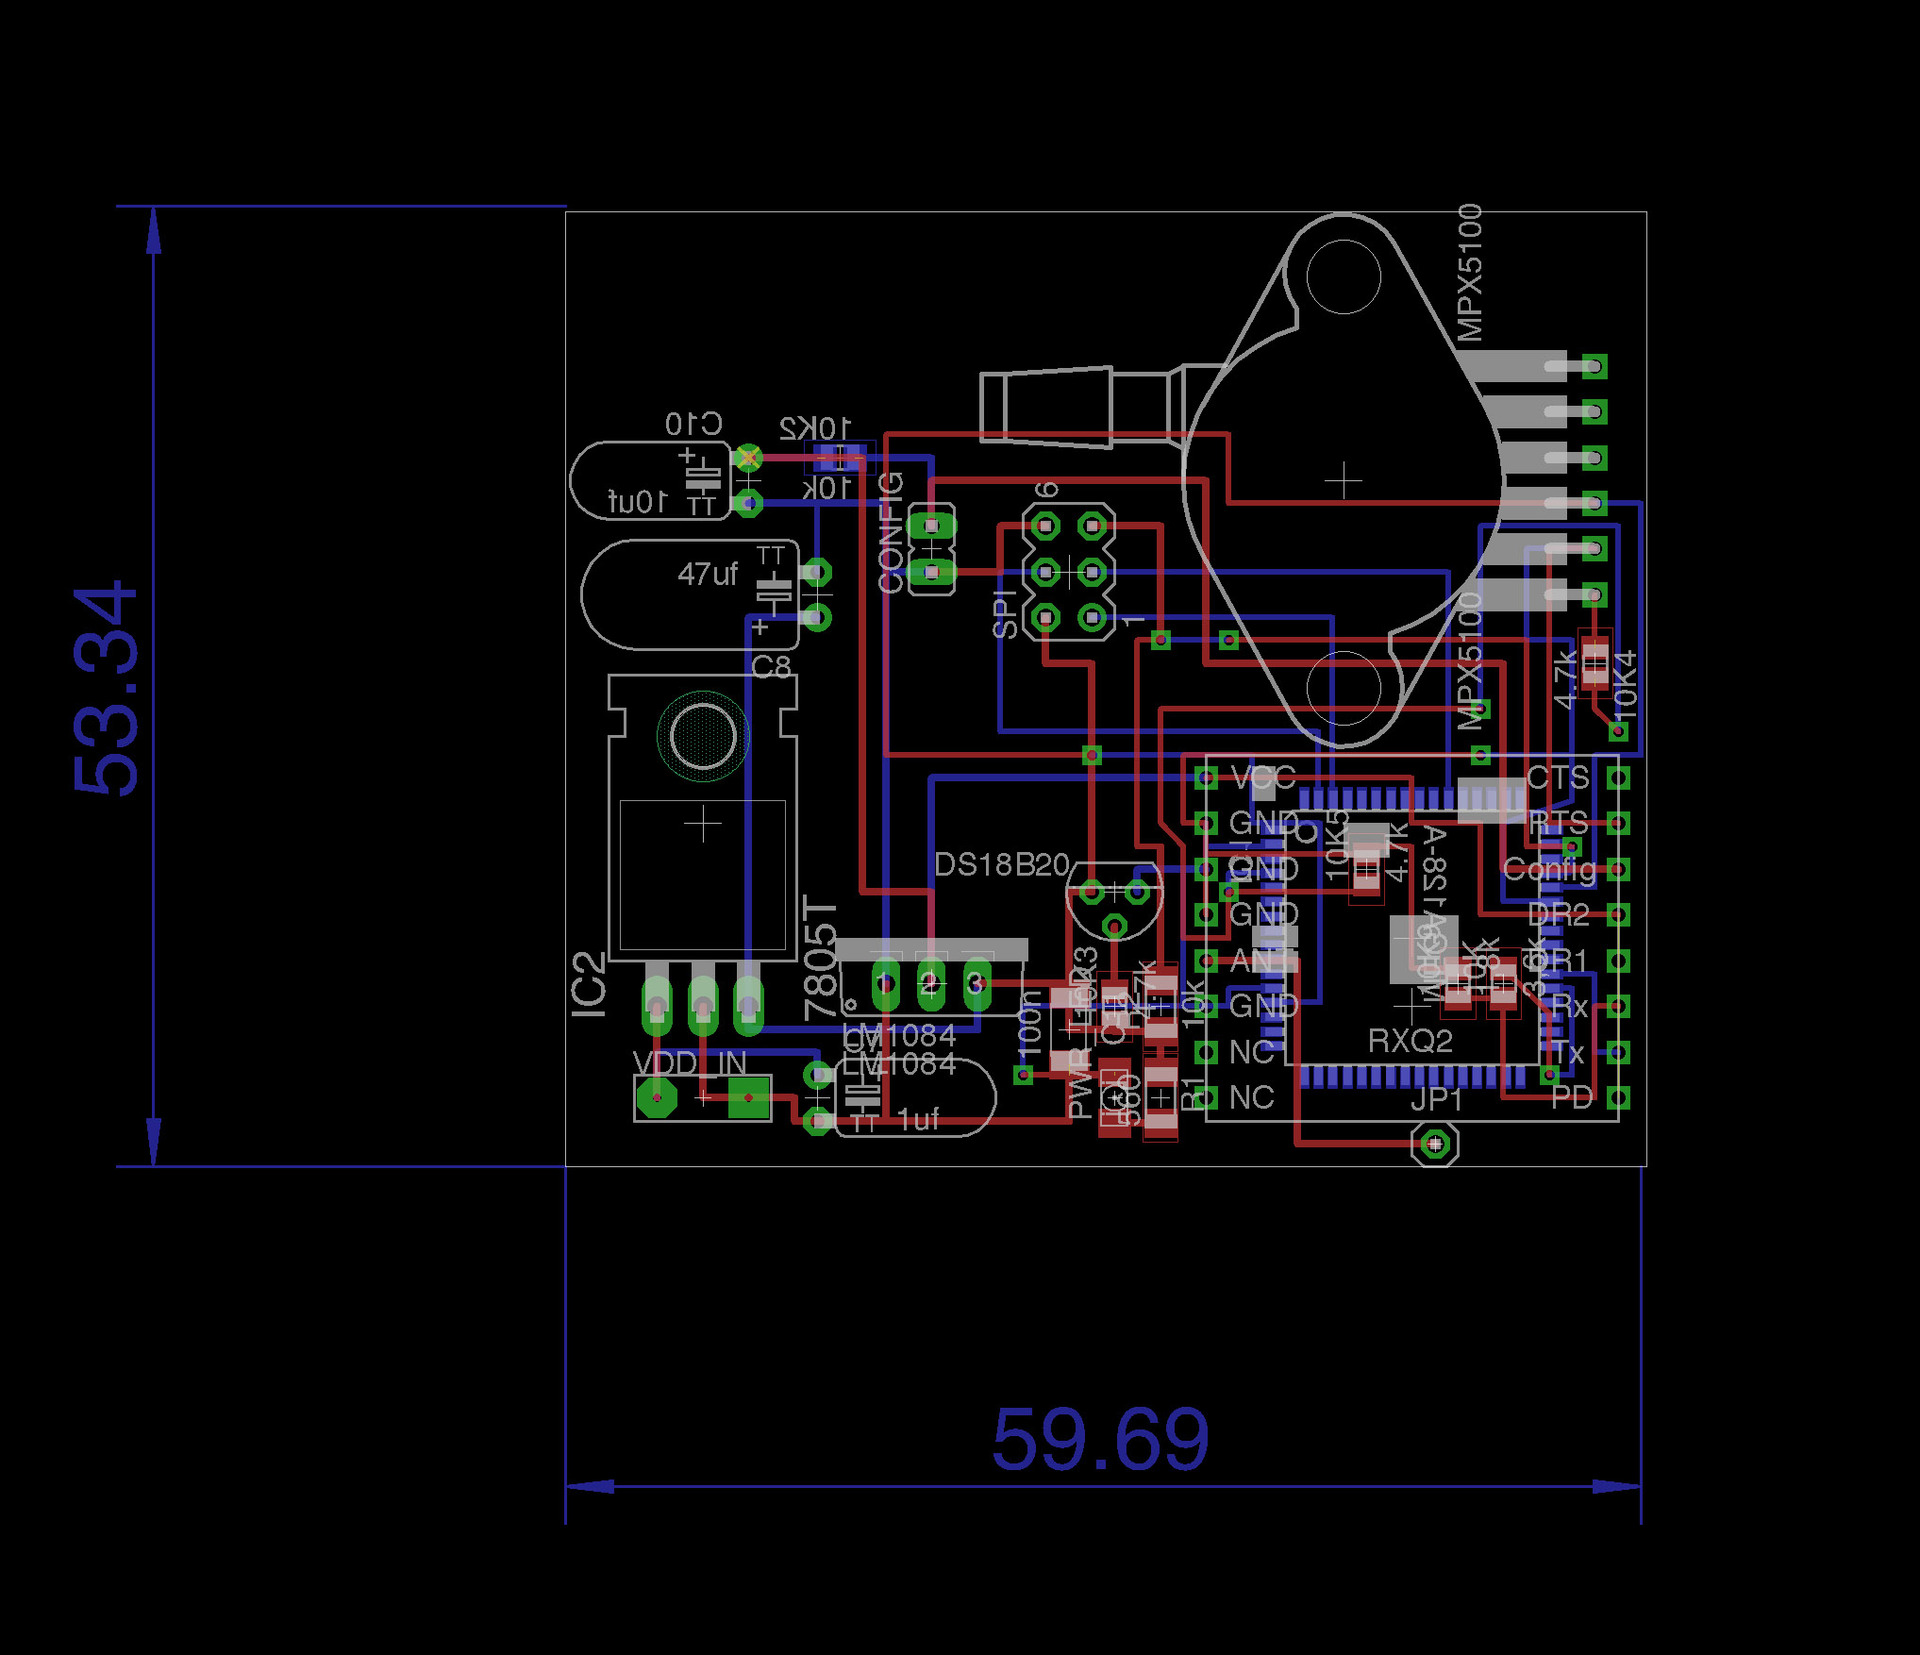
Main circuit board
Our additional mission was to shoot the earth in the infrared range with a 16x4 pixel camera and the visible range with further overlay. As practice has shown, the project was useless in one way or another, since the probe was constantly swaying due to the parachute dropping, there was a lack of aperture speed and shooting speed, so all the videos were blurry.
example of such a video
Test launch of the probe from a quadrocopter (parachute flight from 0:35)
Quadrocopter shooting. The same overlay of 2 ranges
Test launch of the probe from a quadrocopter (parachute flight from 0:35)
Quadrocopter shooting. The same overlay of 2 ranges
More details on how we all broke
1) In the process of constant assembly-disassembly, the camera cable fell off, which removes in the visible range.
2) In the morning, I woke up in the hostel of Moscow State University from the fact that someone burned my main circuit, reversing the polarity of the battery. This was my fault, it was necessary to put a protective diode.
3) An infrared camera was shot at a frequency of 18 fps and this only worsened the results.
4) We went to the championship with a completely unprepared code for the main board, we thought that we had time to write everything before the start.
This was enough so that we did not go to the launches and slept enough for all 4 sleepless nights, during which we finished our probe.
It is also worth mentioning the older team, which took part in an even earlier championship. Last year they participated in the major league. The main feature is the use of an impeller instead of a parachute, but due to the unavailability of the program code and a makeshift board, they also could not perform.
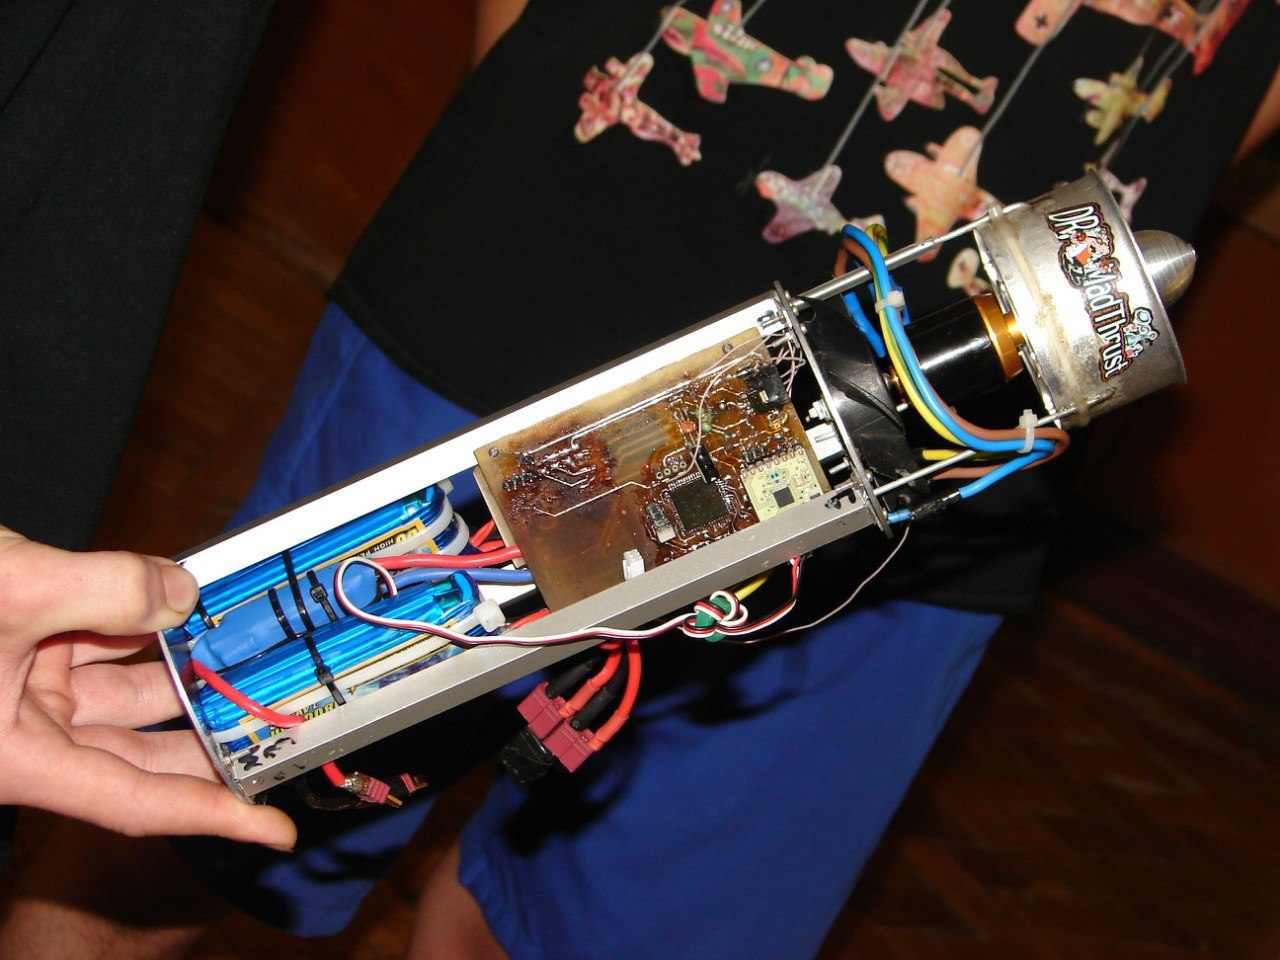
impeller probe
Their story
Their first probe, by the way, worked. The main features were its own receiving station and two rescue systems, which included GPS and GSM modules.
Before launches, the receiver at the base station stopped working for them. Miraculously they were able to unsolder the burnt part from the old cracked receiver, everything worked.
It is worth noting that we were allies, since we worked in the same room.

Their first probe, by the way, worked. The main features were its own receiving station and two rescue systems, which included GPS and GSM modules.
Before launches, the receiver at the base station stopped working for them. Miraculously they were able to unsolder the burnt part from the old cracked receiver, everything worked.

It is worth noting that we were allies, since we worked in the same room.
This year, it was decided to merge the team. As a result, my team decided to develop the idea of a controlled descent, namely to create a quadrocopter that would fit in a rocket.
Process of creation
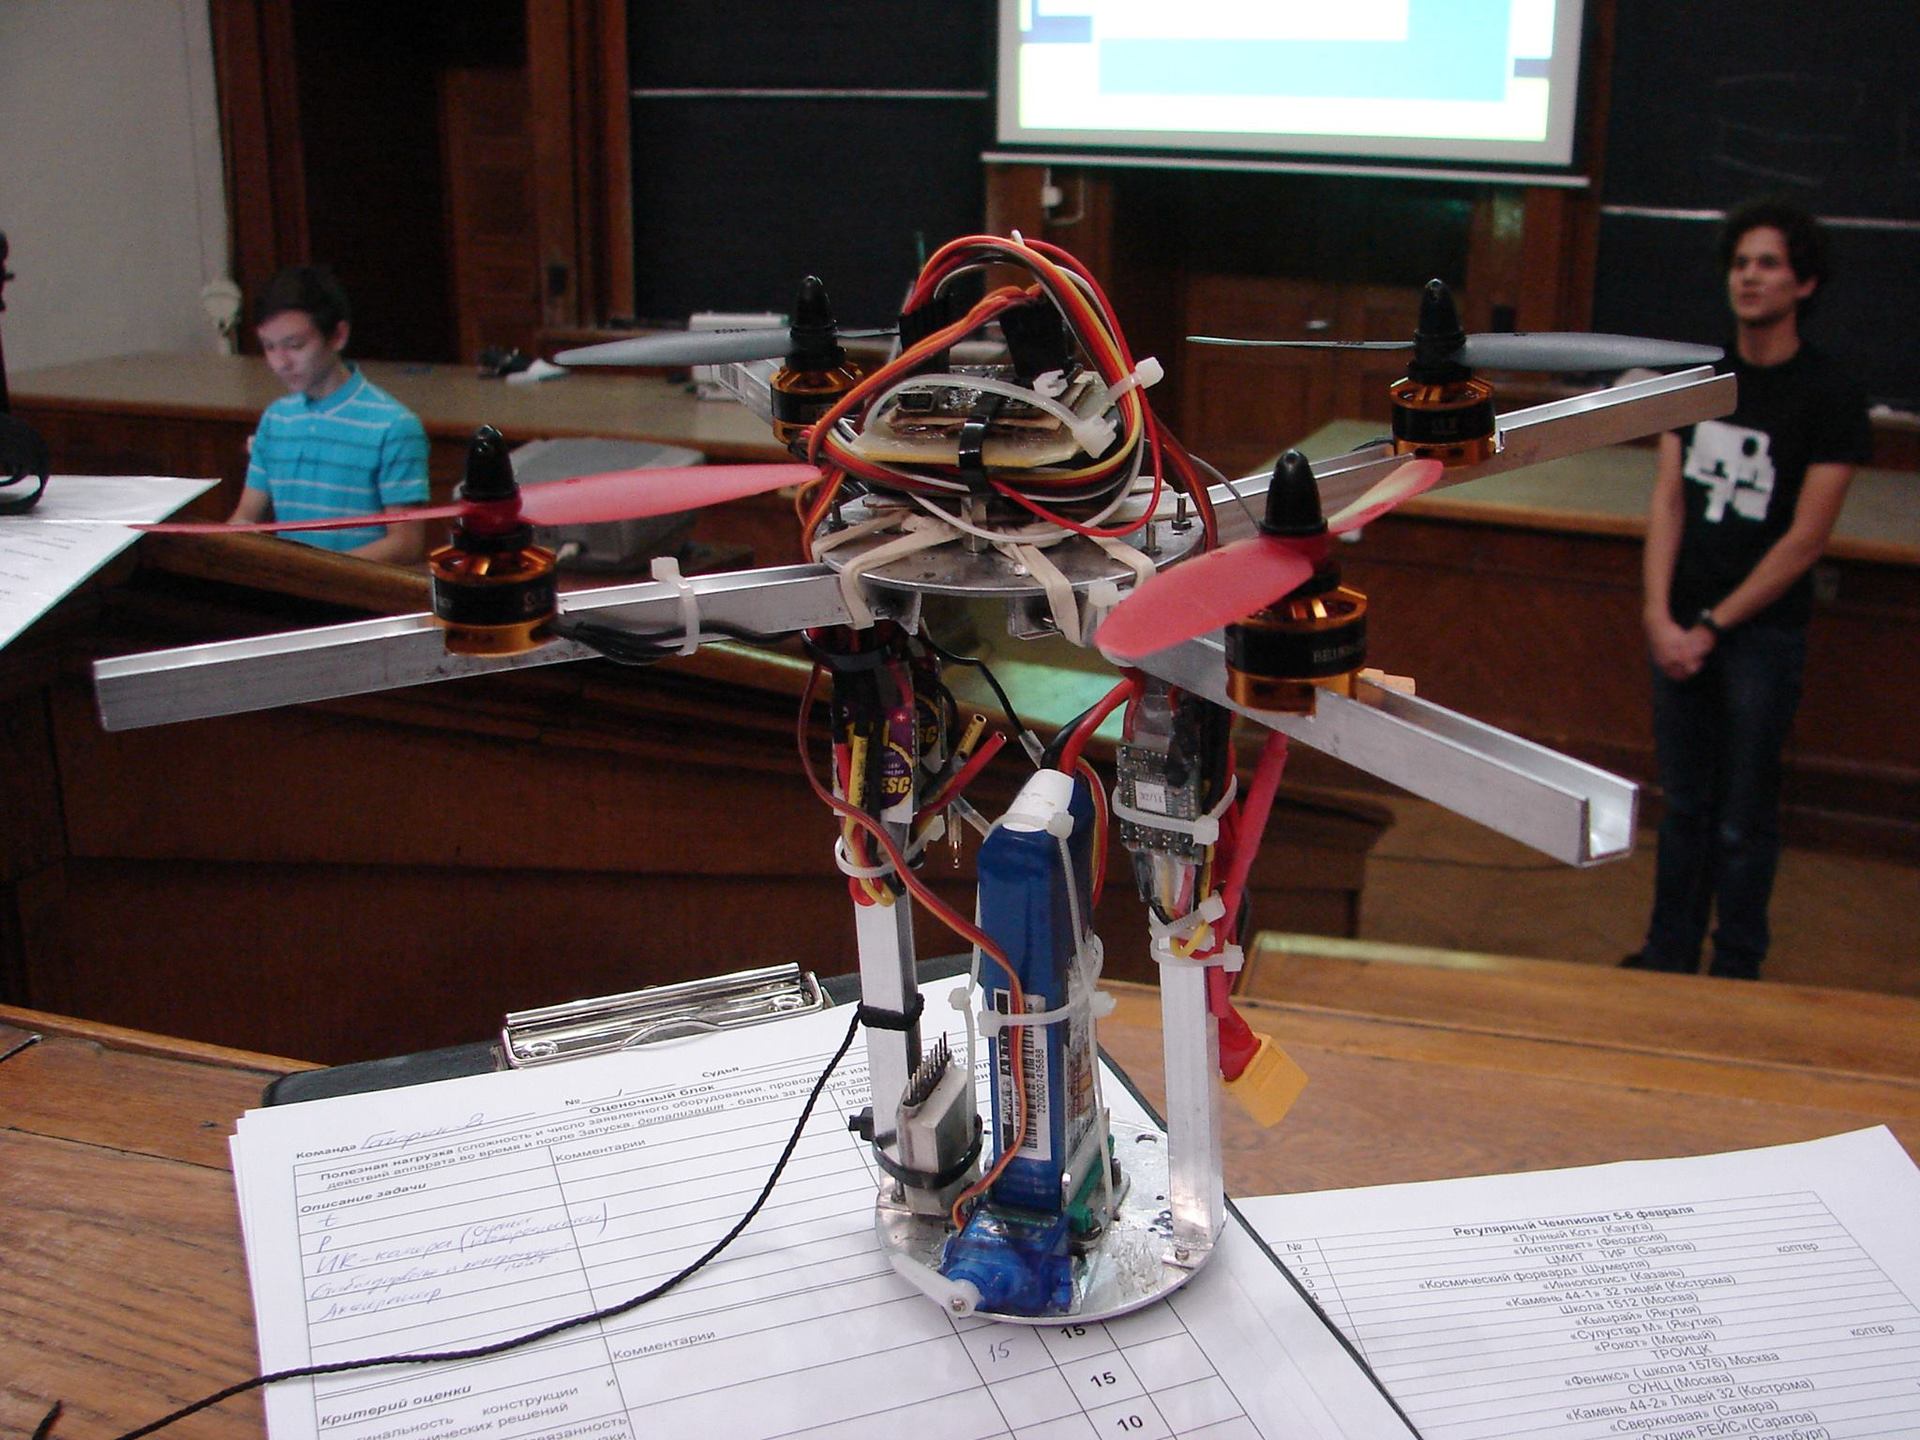
prototype
The first prototype we made a week before the winter session to convince the jury of the reality of this project. The frame was made of aluminum, beams too. As a flight controller, I used MultiWii, so this prototype could only open the rays at the command of the operator, and fly in manual mode.
flight video
The jury appreciated the project, we took first place, and now we could start assembling. By the way, right before the presentation during the test flight, our engine burned out, we changed it to a spare one. During the presentation, the engine burned out again. Both were connected to the same speed controller, we did not use it anymore.
Unfortunately, the source of funding disappeared, it appeared closer to passing the exam, here I could not take part. As a result, after passing the exams, we urgently ordered the necessary parts by express delivery and, armed with carbon pipes, Kevlar threads and epoxy, we began assembling the frame and beams. Over the course of all two weeks, the idea that we didn’t have time did not leave me, but the train tickets were bought, there was no turning back.
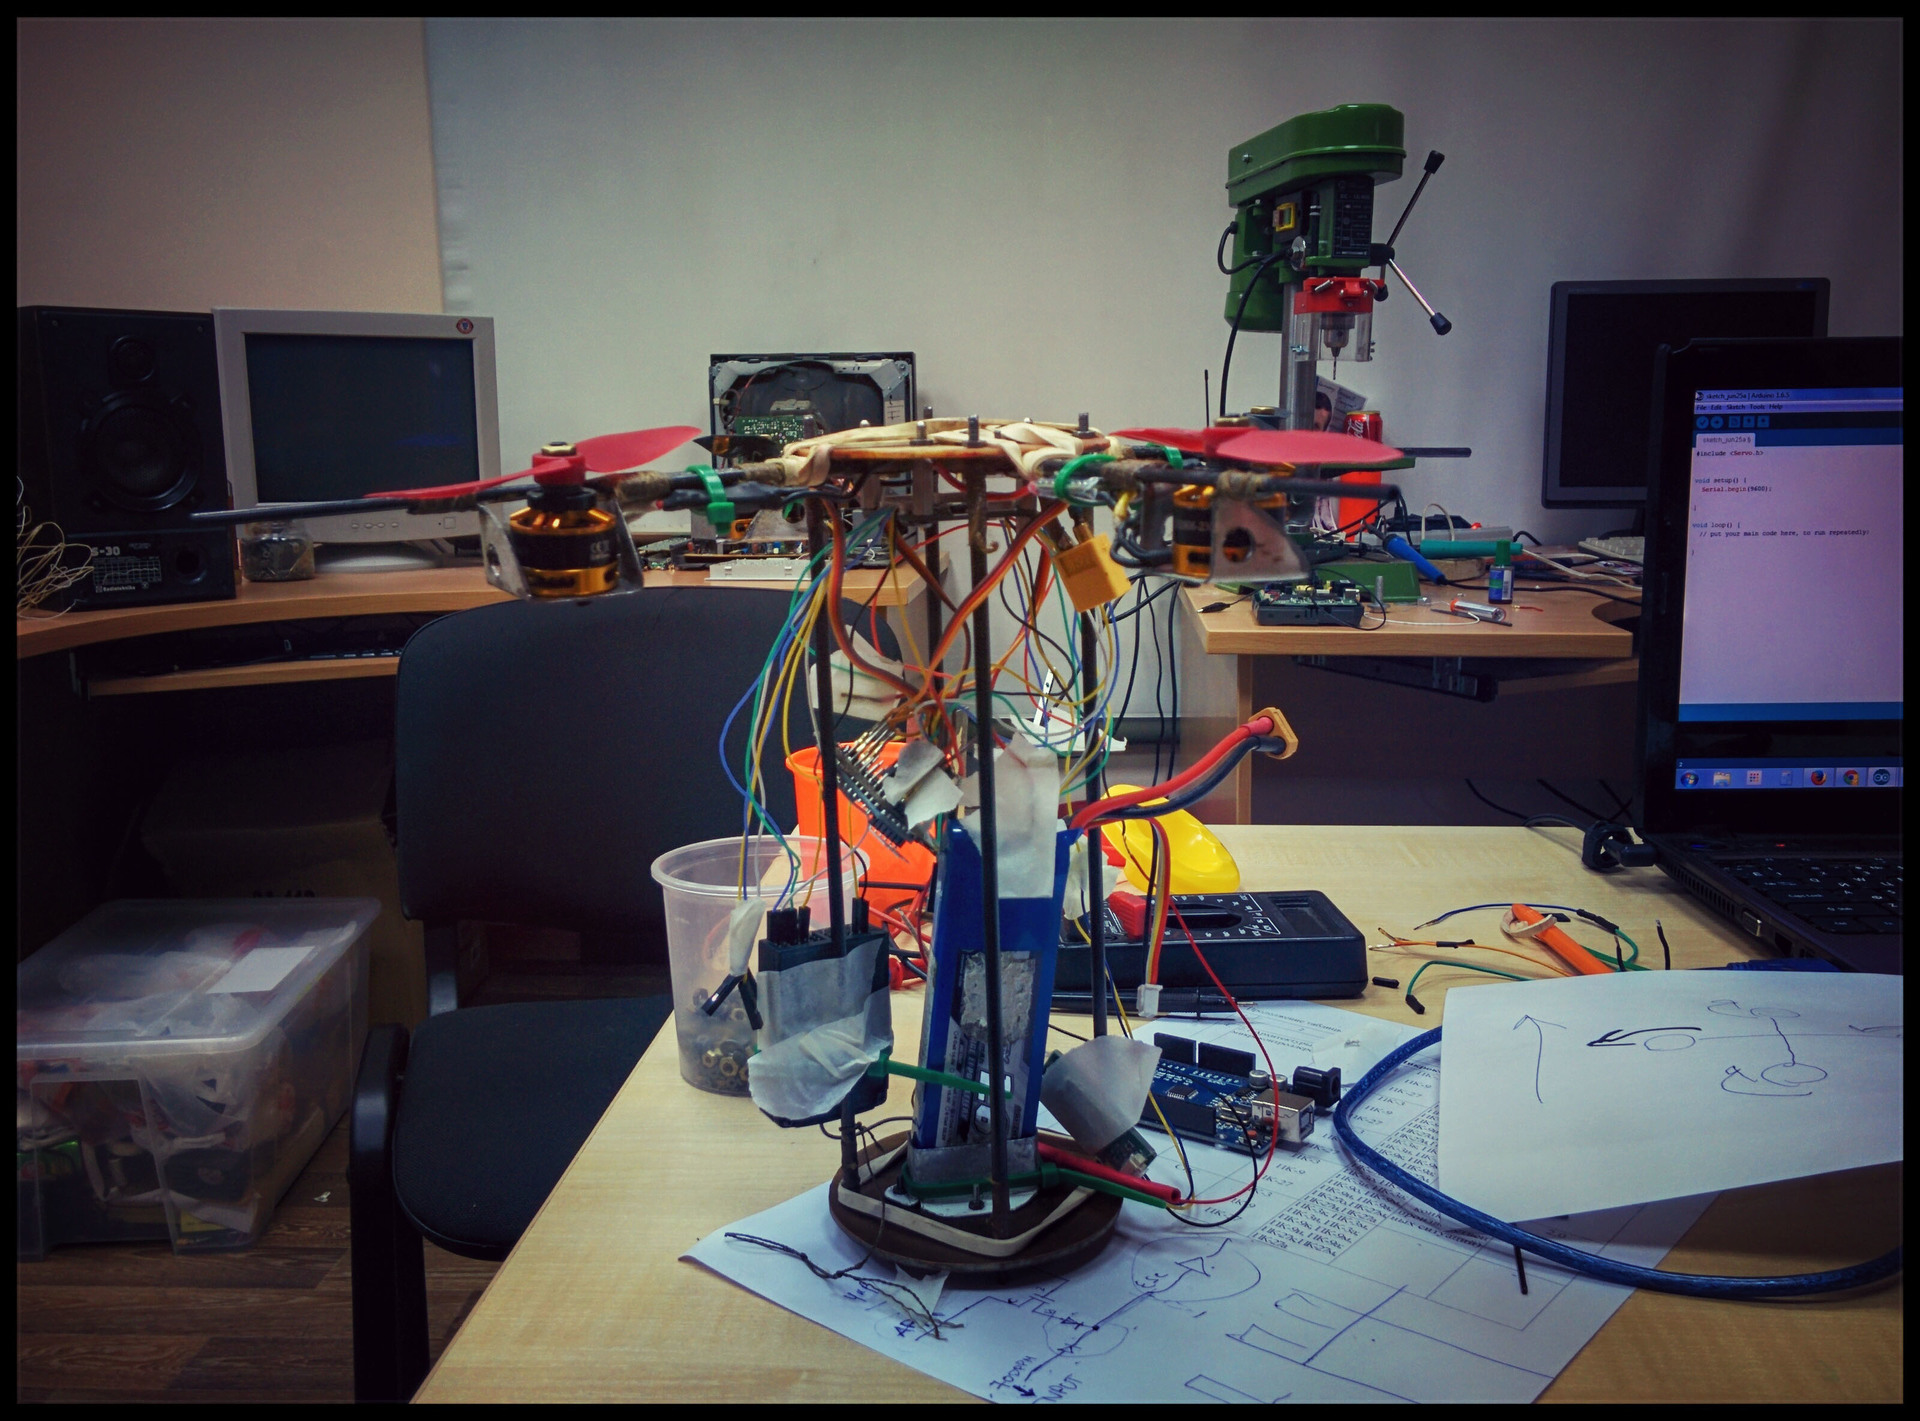
debug final version
There was no need to talk about serious flight tests, we had only one working model, its loss meant failure.
The first launch was inside the building, it was successful, the second launch on the street in manual mode was successful, the third launch in gps hold mode was almost fatal. Due to an incorrectly tuned magnetometer, the probe stopped obeying the commands and flew towards the nearest lake, since the dormitory wall stopped it. We lost 2 beams and 2 propellers, the frame survived. We had spare beams, so performance was restored in a couple of hours. After a long setup of the magnetometer, there was another attempt - the launch was successful.
It remained to check the return to the base. This day was just at my graduation, but there was nothing to do, we went to the field, tried to return home - successfully. There was no limit to joy, the next day we went to Moscow for launches, but the code for automatic disclosure was still not written and, it seems, we repeated the error of the last year.
test return to the base
I will tell you more about the automatic disclosure system.
It consists of a servo drive, a rope, rubber bands, a control board and a photodetector.
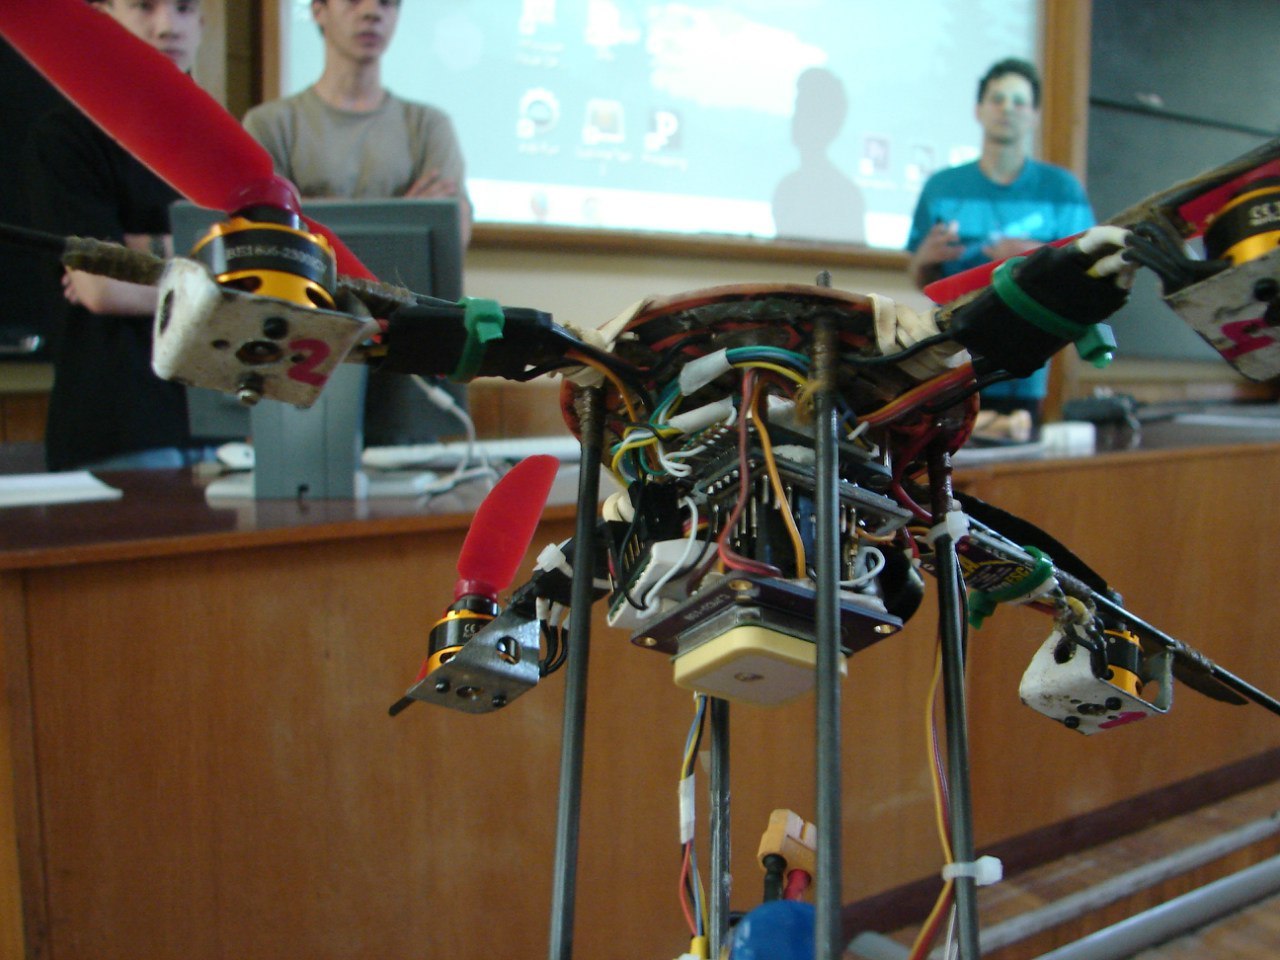
The probe is immersed in a rocket, it is dark there, with the help of the MK photodetector it fixes, the system goes into standby mode. The rocket starts, separation, the light flux increases, the servo releases the rope that holds the rays (their normal state is due to the rubber bands open), the rays open, after 3 seconds the board provides access to the onboard flight microcontroller to the speed controllers, the flight to the first point begins, Further flight home.
The disclosure management board also controls the IR camera. After we transferred the processing of raw data from the sensor to the computer, the frequency increased from 18 fps to 30 fps (data are recorded on microSD)
. We had to work hard to control the engines: you can’t just disconnect the connection between the MK and speed controllers first, and then restore - they will not start. First you need to give a signal to initialize and only then give access to the flight MK. Therefore, I had to create a scheme with the ability to access the regulators from both the flight micron and the manager.
We smoothly proceed to the final stage -
launches
And it seems that everything is ready the night before the launches, we even tested the flight by points, it really flies, but nobody thought of making a complete simulation. As a result, the bus that drove us to the launch field revealed that the code was not working correctly; I invited a friend to comment on the main cycle in which the work of all additional systems begins to determine the root of the problem. We tried to fix the error throughout the remaining time before the launches, asked the organizers to let us last. Ultimately, the problem was resolved, but as it turned out, my friend instead of commenting out the cycle set a "debug" return, which no one bothered to remove.
The rocket, as it happened, could not raise the probe by the declared kilometer, only 500 meters the next day, so we decided to launch on the hexacopter. To simulate the location of the probe in a rocket, we put a cap on the photodetector, and its other end was tied to a hexacopter.
And so the hexacopter rises with our swaying probe, slowly turning into an indistinguishable spot; on FPV, the probe was released per kilometer, but because of the low resolution it was not clear whether the disclosure occurred, someone even said that it didn’t open and fell down with a stone (initially it had to fly at given points, and then return to start place, but even after 5 minutes of waiting no one saw him). Of course, we were upset and went to look for his remains in the field, but, looking at the latest telemetry data, we noticed that, although the connection with the probe was gone, the last coordinates indicate a neighboring field from the cow parsnip. Let's go along the coordinates; along the way, another team said that she had seen him sit in the bushes; searches began. As it turned out, it is extremely difficult to find a small probe in the grass even knowing its coordinates.
In the end, I decided to turn on the engines to plant a supposedly discharged battery, then I had to clean the built-in voltmeter. The plan worked, we found it safe and sound, even the propellers did not suffer, thanks to the elongated rays.
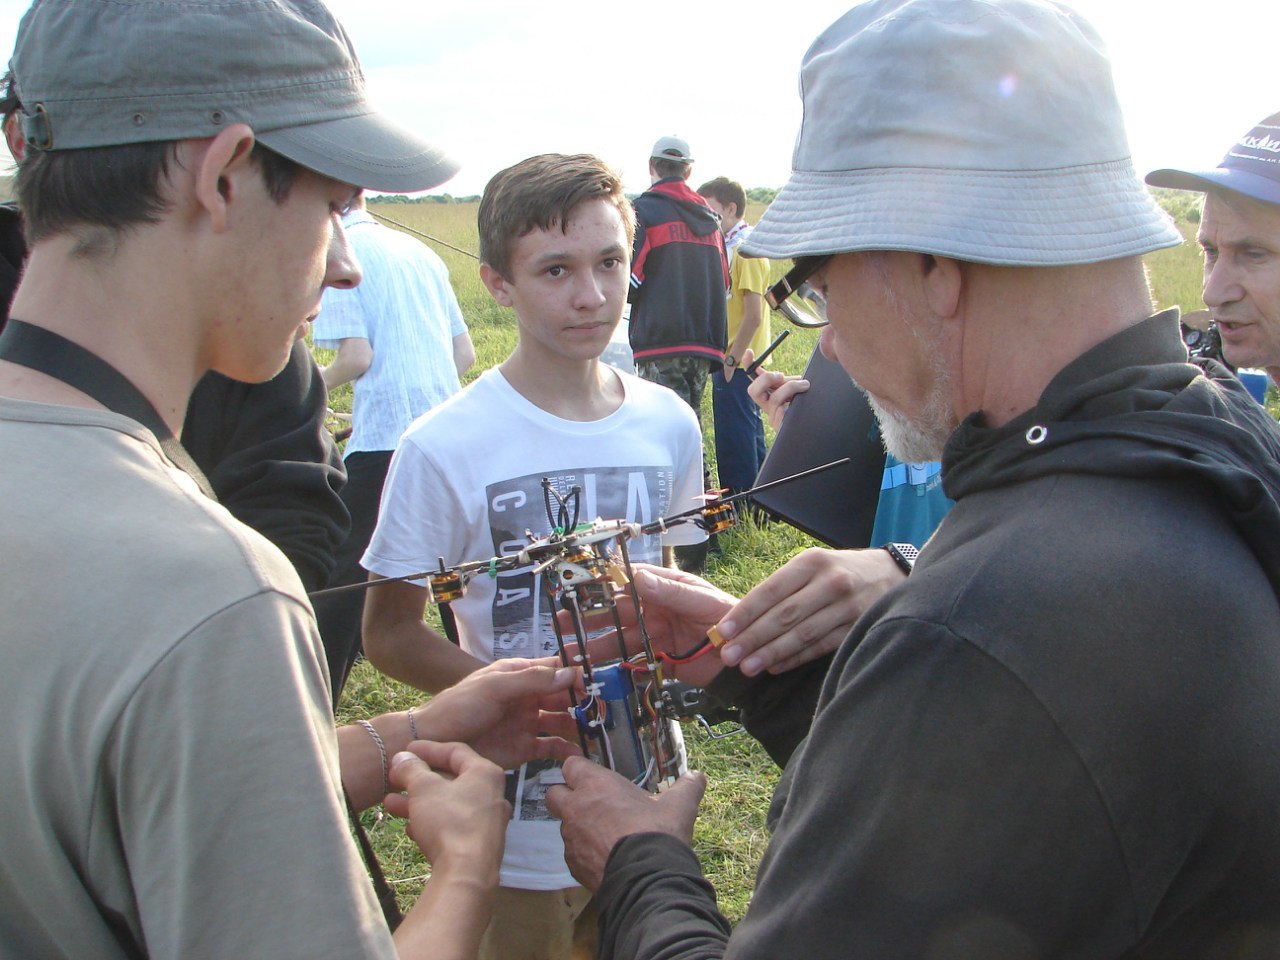
The joyful went home to process the data, or rather, their absence, thanks to the "debug" return.
True, we had data from the flight controller, and they were analyzed. Got a trajectory, a graph of heights and system errors.
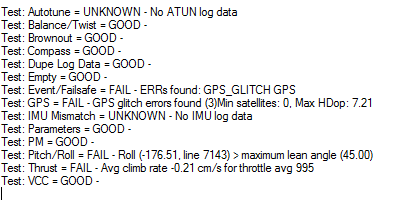
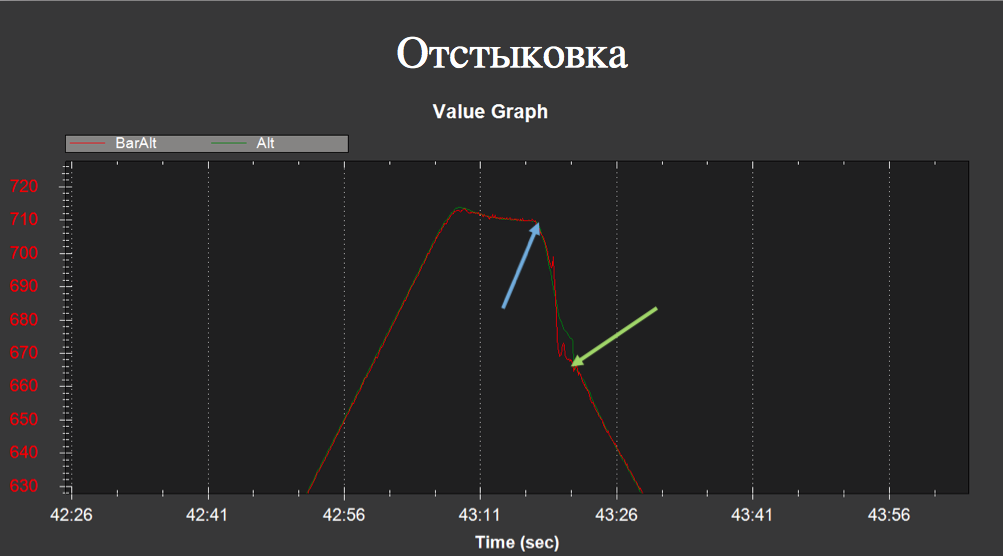
blue arrow - the moment of turning on the engines; green arrow - the moment of inclusion of the mode of returning home.
We also received a record from the hexacopter.
The result is that he successfully separated, released the rays, turned on the engines, was able to level out from an inverted position and flew to the nearest point.
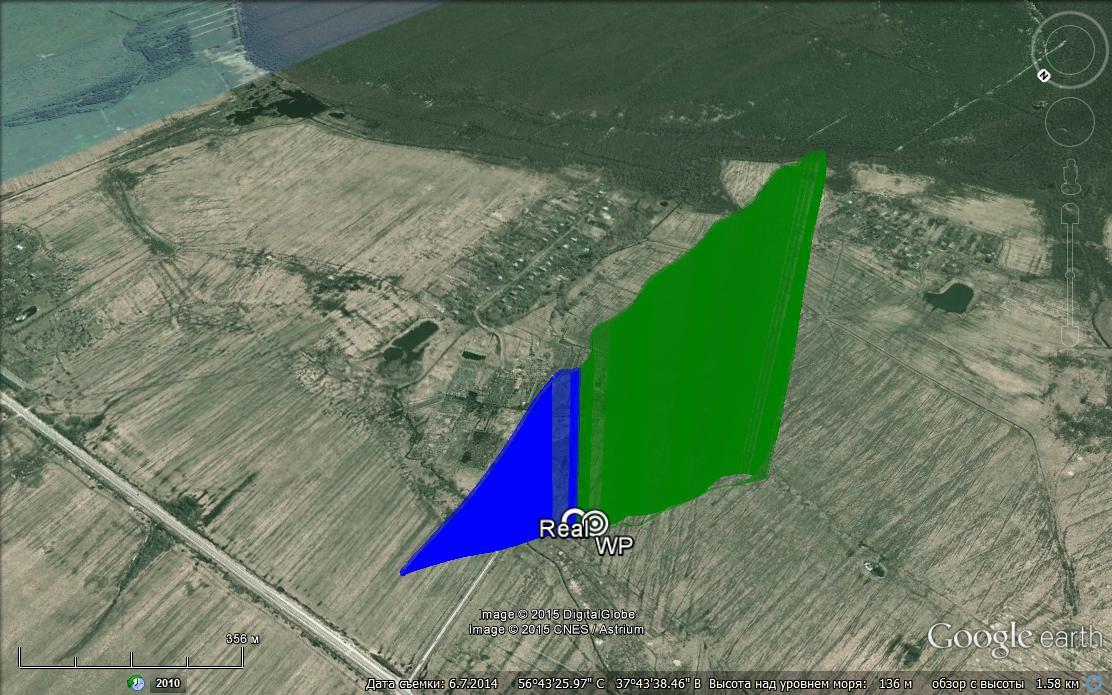
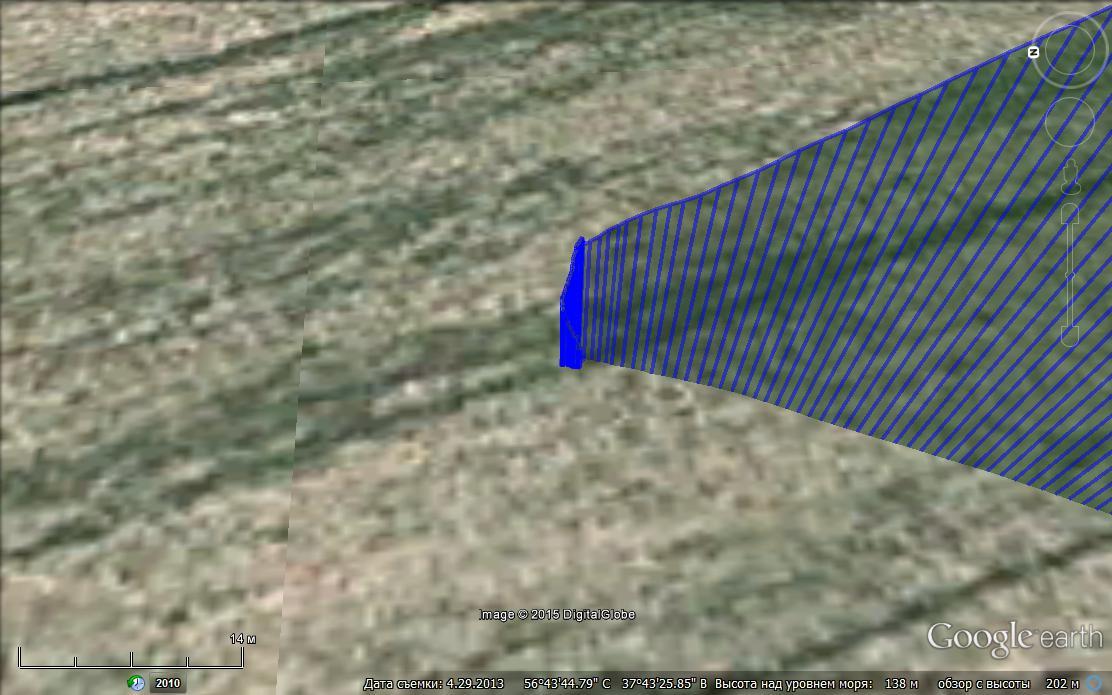
Then there was a loss of communication with the base station, this is exactly the moment that I did not take into account. In the default settings, he was instructed to interrupt the flight by points and fly home, so he stopped descending and got ready to base, but there it was, we turned on the engines too quickly, before we had time to “warm up” the GPS, so he remembered not quite those coordinates , I didn’t correctly record the point of the house (although why it lies on a straight line along its path is a question). Then he made a smooth landing in automatic mode and turned off the engines.
After so many blunders, we did not hope to take first place, but the jury seemed to appreciate the idea. So we won the fourth CanSat championship in Russia.
PS
I never found a single working project on the controlled descent of the CanSat probe, maybe we are the first, this is even strange, since everything was relatively simple.
References:
Here you can read about last year's kansat.
The official website, if you want to participate,
The firmware site that we used for offline flight
Afterword
Is there a probe application in real life?
Because of its compactness, you can drop a pack of similar pieces to explore a certain territory, the same search for peat bogs, for example. It can be launched on a rocket, then there will be no climb costs.
Did we have a supervisor?
Yes, Igor Ivanovich, thank you very much for his support, I would also like to thank the Kazan Aviation Institute and the House of Entertaining Science and Technology for the provided laboratories.
What is the cost of the probe?
From $ 300 to $ 500, depending on the task. It is clear that you can increase flight time, maximum distance, reliability by increasing the budget. We had to give up many ideas, unfortunately.
Why was the GPS antenna under the belly of the probe?
Because the layout did not allow it to be put in another place (but in the air the reception was excellent).
