Circuit Scribe review: drawing electronic circuits without wires and breadboards

Did you have a constructor in your childhood? I am sure that yes. Perhaps it was a brutal iron, with screwdrivers and keys, or refined wooden - for the assembly of houses. Perhaps you were lucky and got a set of LEGO, and if not really - then LEGO Duplo. Parents gave the author of this text an electronic constructor, “Expert”, a set with a lot of details for creating electrical circuits and with the advice of Andrei Bakhmetyev (“Crazy hands”).
You won’t surprise anyone with smartphones and tablets, and just ten years ago, the electronic designer seemed like a technological miracle. The set made it possible to assemble your own radio receiver, burglar alarm, fan and, in general, everything that lacked children's imagination and resources. With the latter, it was just tight: a limited number of “wires” - plastic parts with a metal “stuffing” connected with rivets — came with the kit.
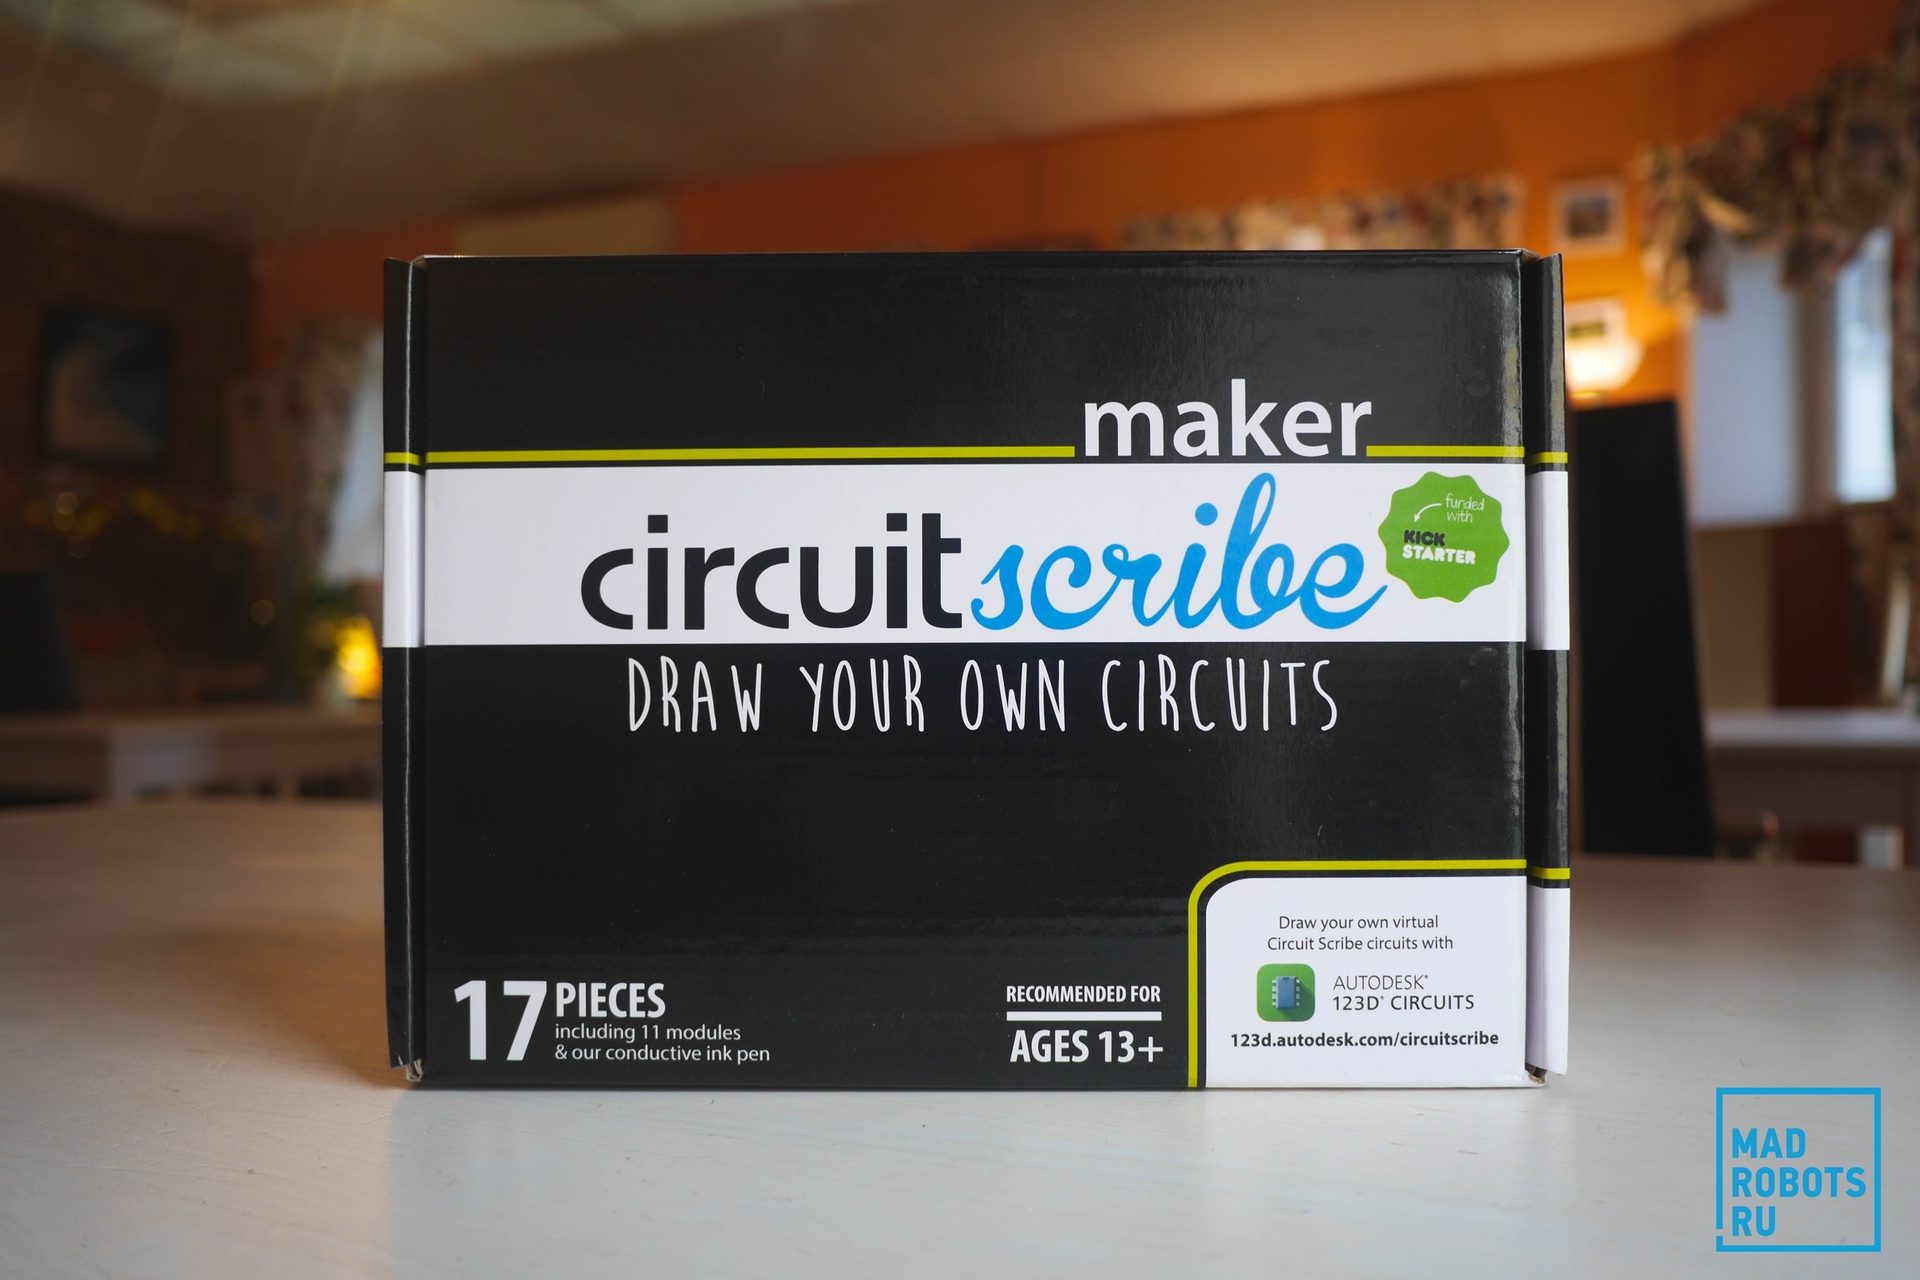
Circuit Scribe is an Electroninks project designed to solve this problem with conductive inks. The start-up has already collected the necessary amount and began selling sets at a price of $ 45 to $ 195, depending on the configuration.
Appointment
The authors of Circuit Scribe offer their product as an educational tool for children, teachers of specialized institutions, artists and all those who are interested in electrical engineering. Features:
- Ink with particles of silver: do not flow, are not lubricated, odorless and instantly dry;
- Teaching children basic STEM skills (science, technology, engineering, mathematics);
- Cheap and affordable materials: an electrical circuit can be built using a sheet of paper, a battery and a diode;
- Flexible chains: draw a contour on the sheet, cut and embed in any development;
- A breadboard is not needed: all the elements of the circuit can be placed on a regular sheet of paper;
- Open hardware: Circuit Scribe can be used with Arduino, MaKey MaKey and other platforms.
Using the kit, you can create electrical circuits of any complexity, without limiting yourself to the dimensions of the breadboard and without getting entangled in the wires. It all depends on the amount of ink in the pen and your imagination.
What's in the box?

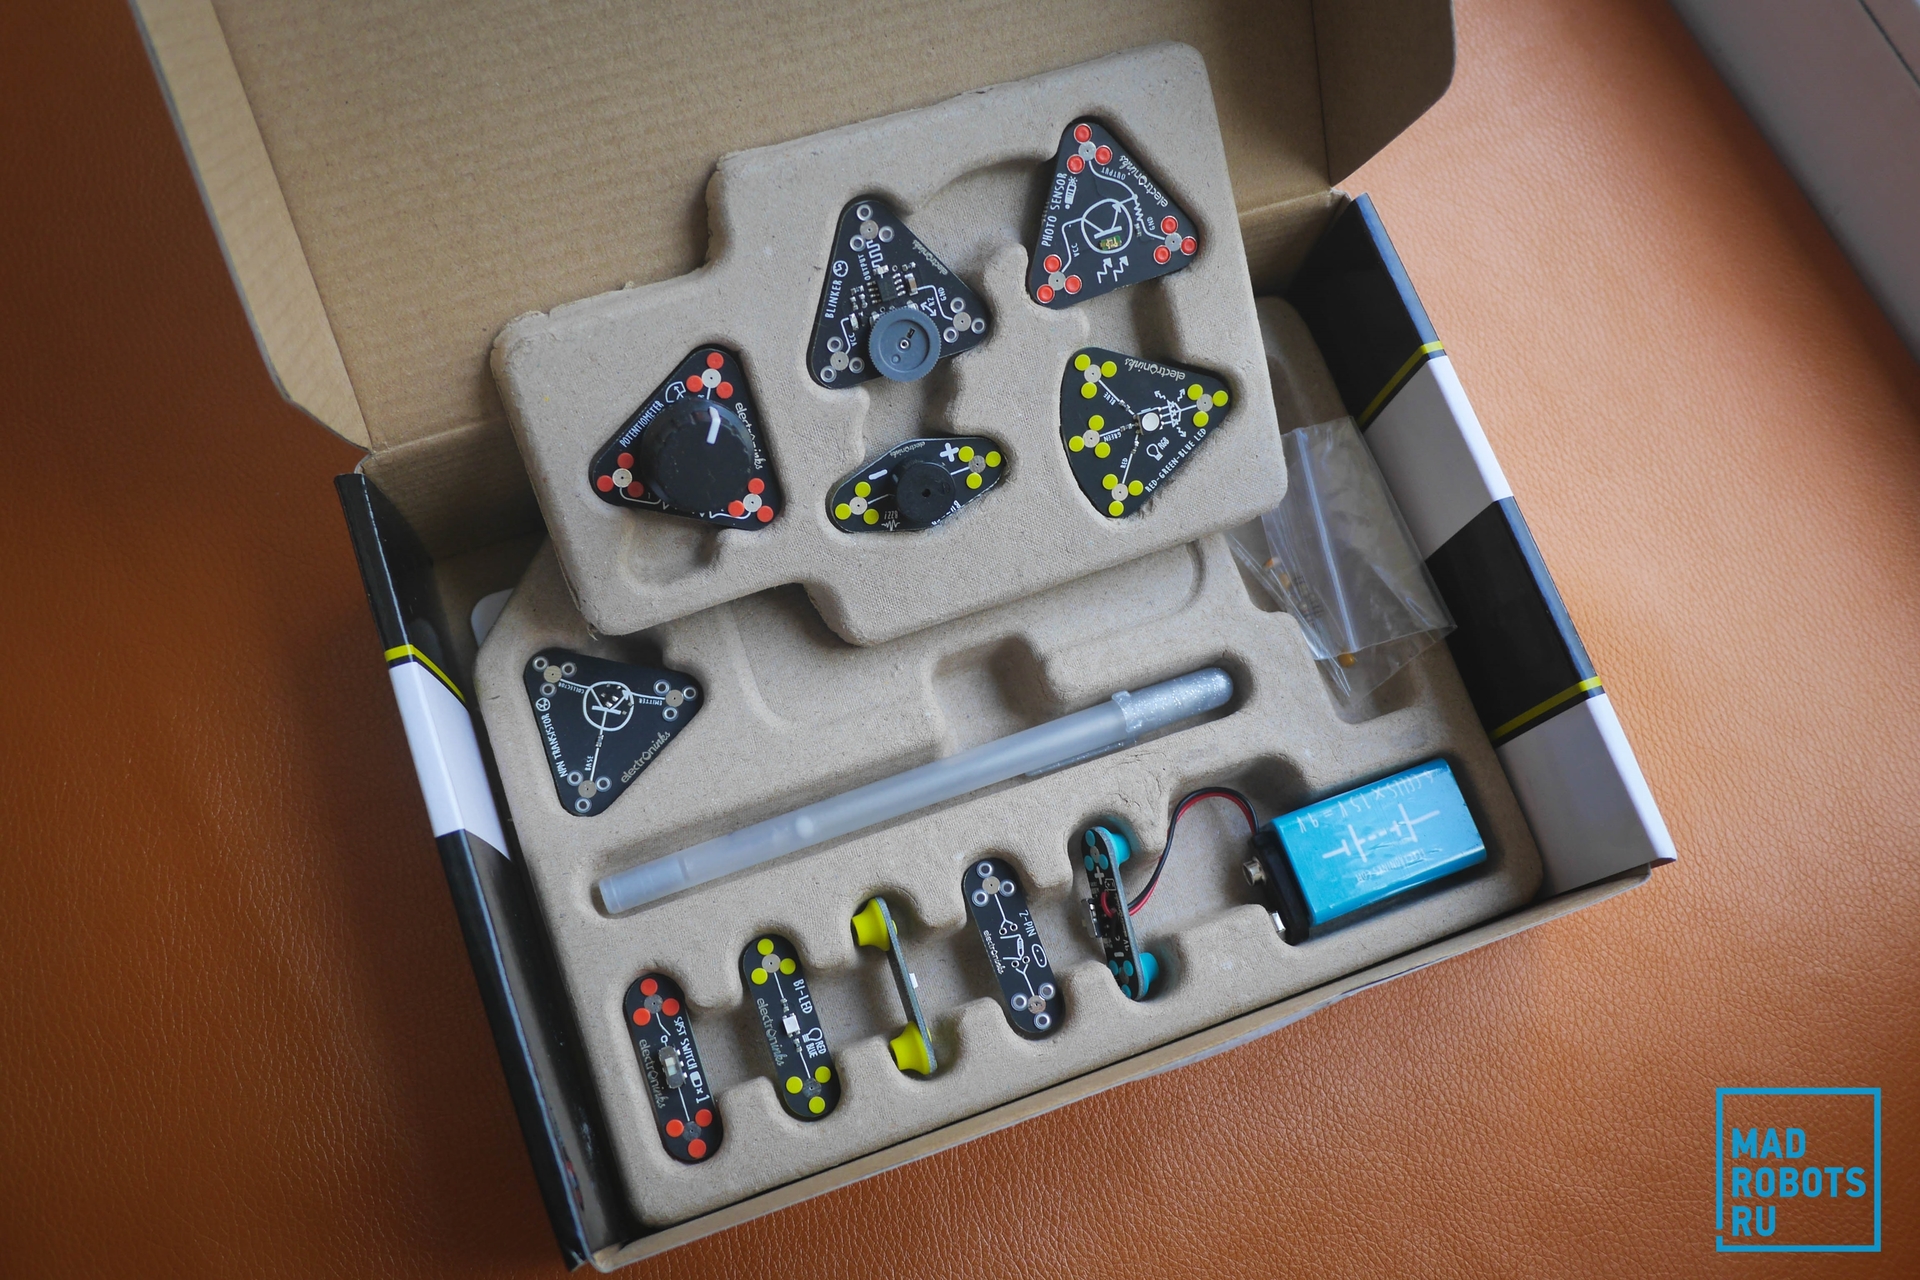
The rich scope of delivery includes: a pen with silver ink, basic modules, a 9V battery, a plastic stencil, a training notebook, resistors, a steel sheet and a sheet with adhesive jumpers. Let's analyze each element in more detail.
Conductive ink pen . Externally - an ordinary ballpoint pen with a cap, inside of which conductive ink with silver particles is filled. If you do not use it for a couple of weeks, ink may “roll”. To avoid this, just shake the handle before use.

Base modules. The review came up with a Maker Kit with 11 modules, which include two conventional LEDs, one RGB diode, a buzzer, a switch, a photosensor, a potentiometer (rheostat), a blinker, a 2-pin transistor, an NPN transistor and a 9V adapter. There are currently 4 versions of Circuit Scribe: Lite, Basic, Maker, and Developer. In the smaller ones, some of these modules are missing, and in the largest one there is even a small engine and MicroUSB controller.

Using a plastic stencil, you can mark the future location of the modules on paper.

Training notebook, it's a sketchbook. A useful mini-tutorial where acquaintance with Circuit Scribe goes from simple to complex, and the lessons themselves are written easily and easily learned. In each section, markup is pre-marked, the user can only read the text and immediately draw the training chain. Half of the pages of the notebook are empty: they are needed for further drawing schemes, but no one forbids using another notebook, A4 sheets or the whole paper.

Resistors are needed to control the current and voltage in the electrical network. As elsewhere, they are marked with colored stripes. The training notebook contains a table that allows you to decipher the order and colors of the bands: the first is tens of Ohms, the second is units, the third is a multiplier.

Steel sheetIt is laid out under paper, and a diagram is drawn on top and the modules are located. At their ends there are small magnets with which the parts are held in place.

Jumpers are small pieces of paper with an adhesive surface. The kit comes with 135 jumpers, but they can be made independently from ordinary adhesive tape (the main thing is that ink is held on it). These pieces of paper are necessary if the circuitry becomes larger and there is a risk of crossing wires. They stuck a jumper - they got a bridge over which you can run the "wire" without crossing the others.

What is most surprising is the design of the Circuit Scribe. Immediately striking attention to detail, attention to the user. The training material, although in English, however, basic knowledge will be enough to not only translate the text, but also quickly learn it. The inscriptions and notes on the modules seemed to be drawn by a child (I won’t be surprised if this is so). In general, the set does not look like a serial product, but as a single manual work, in which they put their soul and a lot of time.
Learn effortlessly
The process of working with Circuit Scribe is simple: put a steel sheet, paper on top, mark the position of the modules, draw “wires” and put the modules (the last three steps can be done in random order).

A reasonable question: as soon as I did all the exercises on the sketchbook, what next? And here comes the powerful tool created by Circuit Scribe with the support of Autodesk.
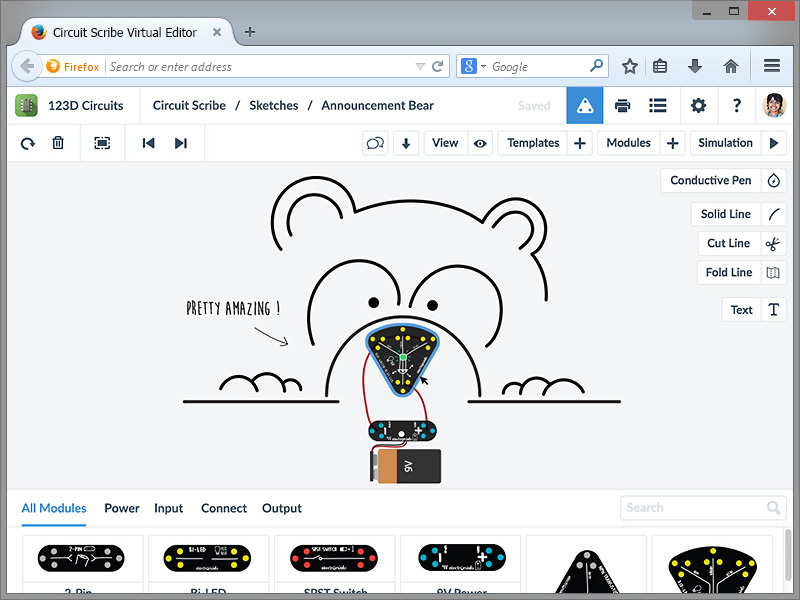
After registering on the website https://123d.circuits.io/the user will have access to the designer of their own electrical circuits. It is a work area that is equal in size to a notepad or A4 sheet. On it, you can draw "electronic" lines and mark the place for the modules. Then you can transfer the modules to a sheet and run a demonstration of the circuit. Here you can turn on and off the diodes, adjust the frequency of their flashing, move the slider of the rheostat and immediately observe the change in the system.
If you don’t know what to draw, hundreds of circuits created by other users are available in the Circuit database. Most of them, unfortunately, do not work yet, so I advise you to use examples from the official Electroninks account. Foreign schemes can be duplicated in your account, and then print. The resulting image will be a circuit outline, which only remains to be painted over with electronic ink.

For example, I took the simplest circuit from Electroninks. It includes a 9V battery, an adapter and an RGB diode:

Saved in PDF format:

Printed on a home printer:

Put a steel sheet and paint the outline with silver ink: I

placed the modules and closed the circuit:

And now the magic: I rotate the RGB diode and it shimmers with different colors :
Or here is a circuit with a blinker and two diodes:
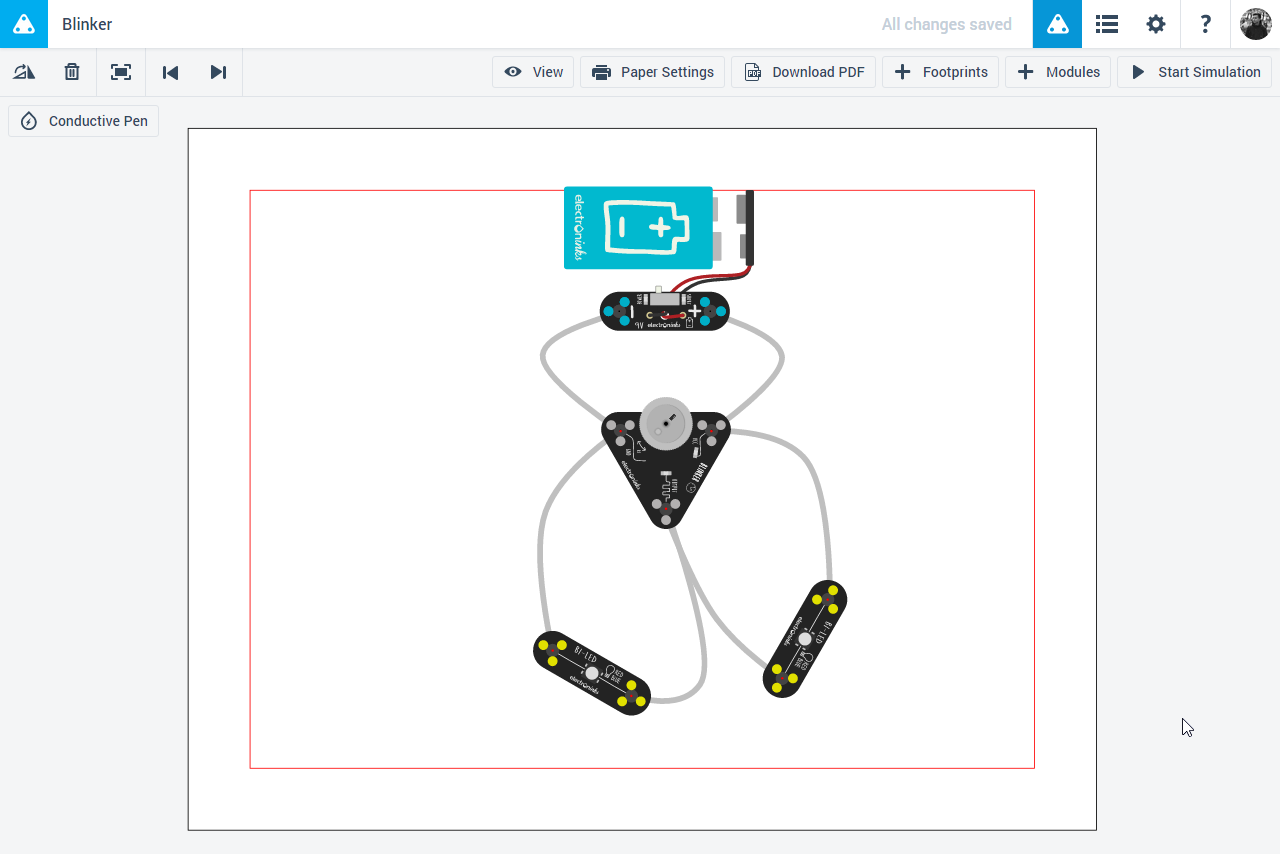
Check, print, paint, arrange the modules and turn on:

Create effortlessly
The examples above are a drop in the bucket compared to the potential of Circuit Scribe. See how one developer made a controller:
And this is not the limit. However, the main purpose of Circuit Scribe is to educate children and master the basic skills of building electrical circuits. Especially for educational institutions, Electroninks prepared a set of 10 Circuit Scribe, and for those who want to buy additional modules, there is a "spare parts" store .
Read the Madrobots blog:
- Ozon: one ring to rule all ... gadgets
- Drones help plant a billion trees a year
- Details about the Star Wars BB-8 Robot
For all readers of Geektimes, a permanent 5% discount on the MADGEEKS promotional code is valid. Just enter the promotional code at checkout.
If you want to become an author in our blog, send an application to ib@madrobots.ru .