Stewart, Mignon Stewart
We are the uMove team, students of the Technopark in Bauman and residents of the CMIT Academy, we are engaged in various web projects for our pleasure and a bit of iron. Today we want to introduce our robot minion to your court. The system consists of a TCP client (robot) and a server (operator control panel).

The robot, as an electromechanical, hardware, part of the project existed a couple of months before the Technopark. It was developed to participate in the competition of autonomous robots Eurobot 2015, but by coincidence, not a single match was hit. Therefore, it was decided to give the project a second life as part of homework. Develop software functionality and improve the quality of training.
Having some experience in the development of electronics, we decided to stop using the components already familiar to us. In addition to experience, we relied on the price factor and the availability of components at home or in the store. Total we got:

The software is entirely written in C ++, both the client and the server. The server acts as a GUI for controlling the robot. SDL libraries were used for graphics. The client uses openCV for working with cameras, as well as a self-written class for communicating a computer with microcontrollers via UART. The dashboard performs the following functions:

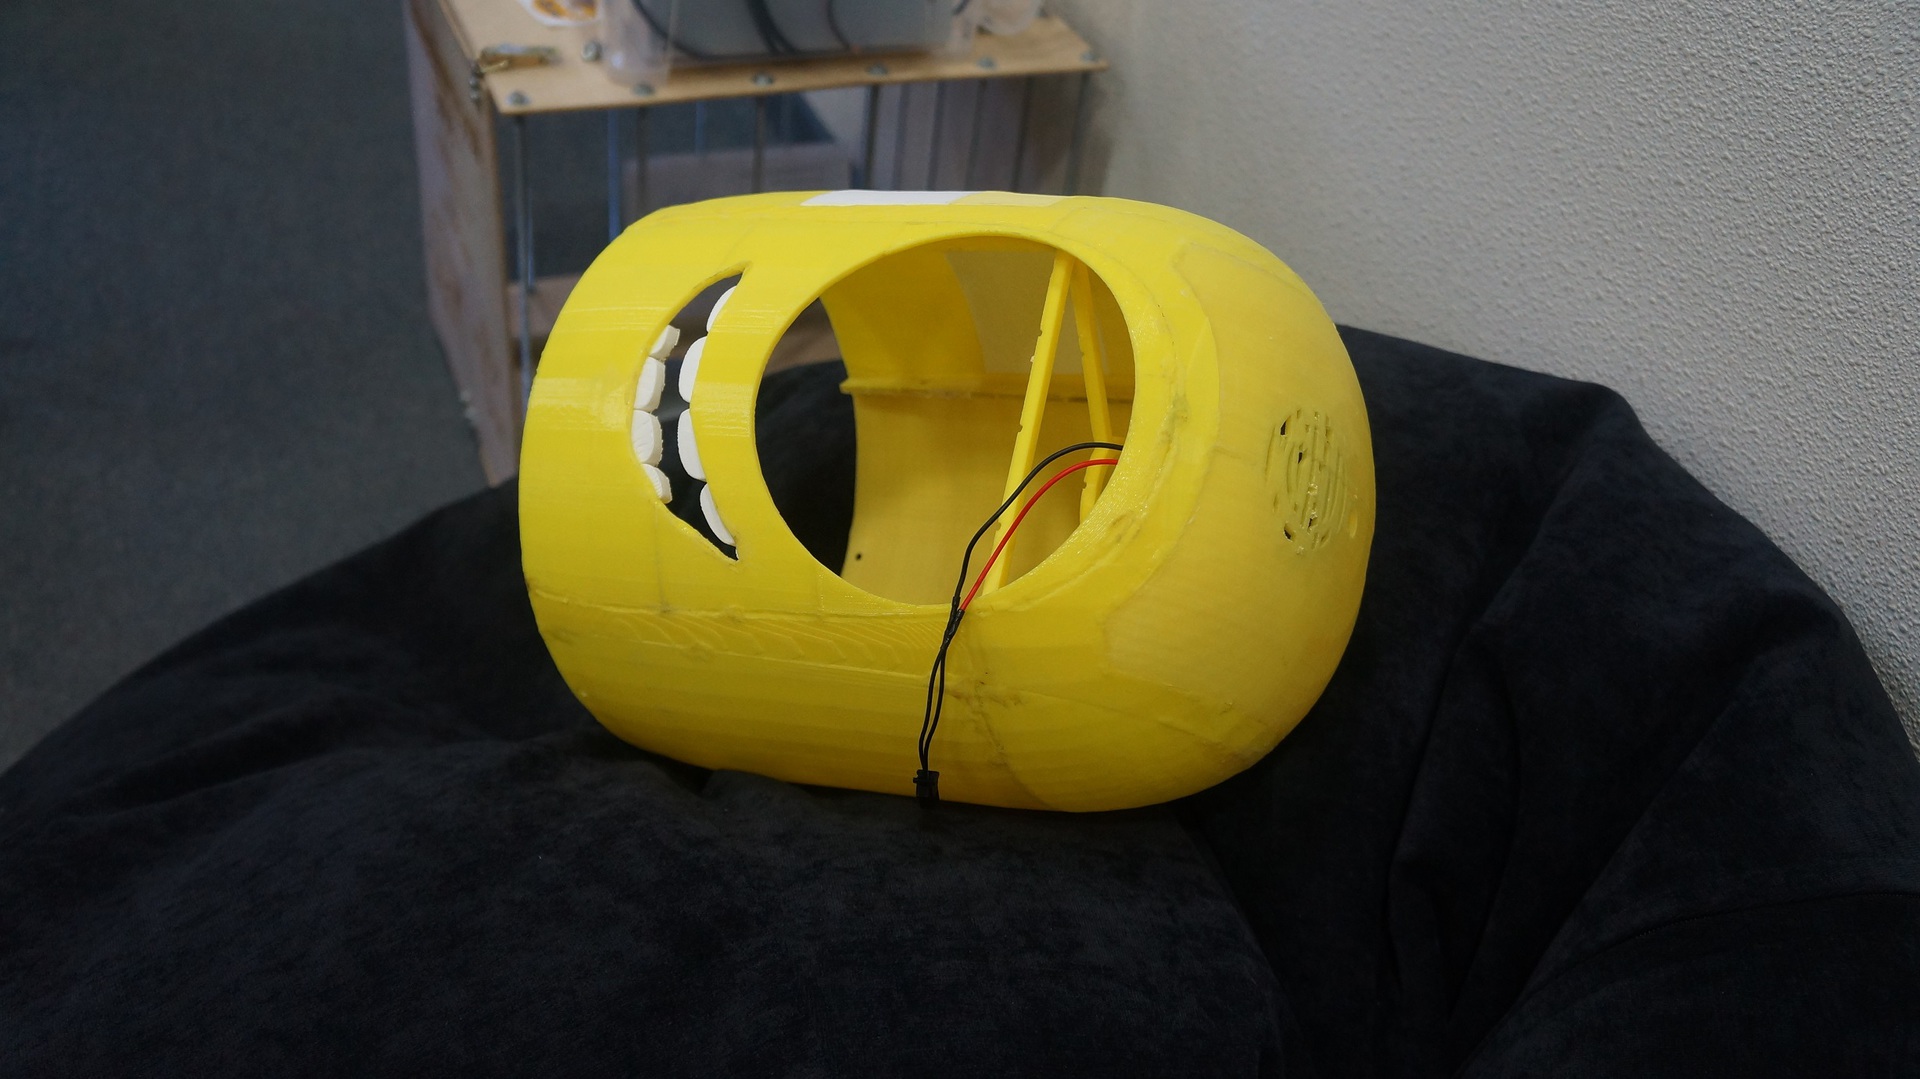
The case is fully printed on a 3D printer. Unfortunately, the workshop did not have a printer with the required size of the print area, so I had to print in parts, and then weld the parts. We left the top of the minion believable. When designing the bottom, we decided not to copy the character, but to make it as convenient as possible for a wheeled robot: we made wings for wheels, a bumper and a cutout for lidar, connectors for power buttons and a battery cover.

The idea to teach the robot how to take a selfie arose a week before the project was completed. The robot was sent to Startup Village, where they wanted to check it in real conditions. As it turned out, the robot did not cause special emotions among visitors. There was a lack of interactivity, interaction with guests. In fact, the robot looked like a radio-controlled machine in a pretty appearance. What to do? The answer came naturally when Medvedev arrived in Skolkovo. All the crowd did in his presence was take a selfie! Ok, the robot will also take a selfie!) All that was left was to find a suitable camera and servo. Now we use an additional server on which you can see all the captured photos and post them to the social. network. This is done so as not to send extra garbage from failed photos to the social network. In addition, a separate server will allow you to send posts to different social networks in the future.
Like everything else, the robot requires continuous improvement. Having abandoned the idea of an autonomous robot, the lion's share of iron became unnecessary: instead of ODROID, you can safely put a less powerful Raspberry Pi, lidar does not carry any functionality, NUCLEO and SPARK can be safely replaced with a cheap Arduino Uno. Total, it turns out savings of about 9 thousand rubles. In addition, it took a lot of time to design the prefabricated structure, next time we will more carefully look for a 3D printer with a larger print area.
I'd like to receive feedback from amateurs and professionals, impressions and tips. BANANA to everyone!

Idea
The robot, as an electromechanical, hardware, part of the project existed a couple of months before the Technopark. It was developed to participate in the competition of autonomous robots Eurobot 2015, but by coincidence, not a single match was hit. Therefore, it was decided to give the project a second life as part of homework. Develop software functionality and improve the quality of training.
Electronics and Electromechanics
Having some experience in the development of electronics, we decided to stop using the components already familiar to us. In addition to experience, we relied on the price factor and the availability of components at home or in the store. Total we got:
- ODROID-X2 - a single-board computer with an arm version of Ubuntu on board is used as the main computing unit;
- NUCLEO-F411RE - board based on the STM32F4 microcontroller for working with motor drivers and encoders;
- SPARK - Wi-Fi module with a STM32 microcontroller for monitoring the charge of LiPo battery cans, as well as for controlling a selfie stick and diode tape;
- Power stabilizers for voltages 3.3, 5 and 12 volts with a maximum output current of 3 to 10 amperes;
- Collector motors with a torque of 28 kg * cm each;
- Collector motor driver;
- Lidar is an optical radar that makes 1800 measurements per second. The optocoupler rotates at a frequency of 5 rpm and measures the range of obstacles at each angle from 0 to 359 degrees. Pulled out of a robot cleaner;
- 2 web cameras, a wide-angle lens is mounted on a selfie stick;
Software
The software is entirely written in C ++, both the client and the server. The server acts as a GUI for controlling the robot. SDL libraries were used for graphics. The client uses openCV for working with cameras, as well as a self-written class for communicating a computer with microcontrollers via UART. The dashboard performs the following functions:
- Display a video stream from cameras;
- Control the movement of the robot with the buttons W, A, S, D;
- Battery Tracking
- Turn on the sound of the robot;
- Taking a selfie and sending pictures to instagram and vkontakte;
Housing
The case is fully printed on a 3D printer. Unfortunately, the workshop did not have a printer with the required size of the print area, so I had to print in parts, and then weld the parts. We left the top of the minion believable. When designing the bottom, we decided not to copy the character, but to make it as convenient as possible for a wheeled robot: we made wings for wheels, a bumper and a cutout for lidar, connectors for power buttons and a battery cover.
Selfie stick
The idea to teach the robot how to take a selfie arose a week before the project was completed. The robot was sent to Startup Village, where they wanted to check it in real conditions. As it turned out, the robot did not cause special emotions among visitors. There was a lack of interactivity, interaction with guests. In fact, the robot looked like a radio-controlled machine in a pretty appearance. What to do? The answer came naturally when Medvedev arrived in Skolkovo. All the crowd did in his presence was take a selfie! Ok, the robot will also take a selfie!) All that was left was to find a suitable camera and servo. Now we use an additional server on which you can see all the captured photos and post them to the social. network. This is done so as not to send extra garbage from failed photos to the social network. In addition, a separate server will allow you to send posts to different social networks in the future.
Development
Like everything else, the robot requires continuous improvement. Having abandoned the idea of an autonomous robot, the lion's share of iron became unnecessary: instead of ODROID, you can safely put a less powerful Raspberry Pi, lidar does not carry any functionality, NUCLEO and SPARK can be safely replaced with a cheap Arduino Uno. Total, it turns out savings of about 9 thousand rubles. In addition, it took a lot of time to design the prefabricated structure, next time we will more carefully look for a 3D printer with a larger print area.
I'd like to receive feedback from amateurs and professionals, impressions and tips. BANANA to everyone!