Programming the LEGO NXT Mindstorms 2.0 microcomputer. Introduction
- Tutorial
Hello. In my articles I want to introduce you to the basics of programming the LEGO NXT Mindstorms 2.0 microcomputer. For application development, I will use the Microsoft Robotics Developer Studio 4 (MRDS 4) and National Instruments LabVIEW (NI LabVIEW) platforms. The tasks of automatic and automated control of mobile robots will be considered and implemented. We will move from simple to complex.
Why exactly NXT Mindstorms 2.0? Because for my projects this set seemed to me the most suitable, because The NXT microcomputer is fully compatible with the MRDS 4 and NI LabVIEW platforms, and this kit is also very flexible in terms of assembling various robot configurations - it takes a minimum of time to assemble the robot.
Why are MRDS 4 and NI LabVIEW platforms? It happened historically. Studying in the senior courses of the university, the task was to develop training courses using these platforms. In addition, the platforms have sufficient ease of development and functionality, using them you can write a program directly to control the robot, develop a user interface and conduct testing in a virtual environment (in the case of MRDS 4).
But who needs these your lessons at all, on the net and so many projects on robotics! Using this bundle (NXT + MRDS 4 / NI LabVIEW), there are practically no training articles, mainly the native programming environment is used, and everything is trivial in it. Everyone who is interested in robotics, programming and who has a set of NXT (and there are many of them), any age audience.
Graphic programming languages are evil, and those who program heretics on them!The graphical programming languages MRDS 4 and NI LabVIEW undoubtedly have their drawbacks, for example, focus on narrow tasks, but nevertheless they are inferior to text languages in functionality, moreover, NI LabVIEW was originally developed as an easy-to-learn language for solving scientific and engineering problems , for this there are many necessary libraries and tools in it. Therefore, these graphic languages are the most suitable for solving our problems. And do not despise us forburning it at the stake .
All this looks childish and not serious at all!When the task is to implement algorithms, to teach the basics and principles of programming, robotics, real-time systems without going deep into circuitry and protocols, then this is a very suitable tool, although not cheap (with regards to the NXT suite). Although Arduino-based kits are suitable for the same purpose, this controller has almost no compatibility with MRDS 4 and NI LabVIEW, and these platforms have their own charms.
The technologies that are used are the product of rotting capitalist countries, and the author is an enemy of the people and an accomplice of Western conspirators!Unfortunately, most of the technologies in the field of electronics and computer technology come from the West, I will be very glad if they point me to similar technologies of natively domestic production. In the meantime, we will use what we have. And do nottell me for this the secret services to keep evil.
I will bring some clarity to the terminology. By the platform, in this case, we mean a set of different tools, for example, the VPL language in MRDS, as well as the application runtime, i.e. There is no direct compilation of applications into executable (* .exe) files.
In 2006, Microsoft announced the creation of the Microsoft Robotics Developer Studio platform (for more details, see the Wikipedia article) MRDS is Windows - an application-oriented development environment for robotics and simulation. Currently, the version of Microsoft Robotics Developer Studio 4 is relevant. Among the features are: VPL graphical programming language, Web and Windows oriented interfaces, VSE simulation environment, simplified access to sensors, microcontrollers and robot actuators, support for the C # programming language, libraries for multi-threaded programming and distributed execution of CCR and DSS applications, support for many robotic platforms (Eddie, Boe - Bot, CoroBot, iRobot, LEGO NXT, etc.).
LabVIEW (Laboratory Virtual Instrumentation Engineering Workbench)Is a development environment and platform for executing programs created in the National Instruments graphical programming language “G” (for more details, see the Wikipedia article) LabVIEW is used in data collection and processing systems, as well as for the management of technical objects and technological processes. Ideologically, LabVIEW is very close to SCADA-systems, but in contrast to them it is more focused on solving problems not so much in the field of industrial control systems (automated process control systems), but in the field of ASNI (automated scientific research systems). The graphical programming language “G” used in LabVIEW is based on a data stream architecture. The sequence of execution of operators in such languages is determined not by the order of their sequence (as in imperative programming languages), but by the availability of data at the inputs of these operators. Operators not related by data are executed in parallel in random order.
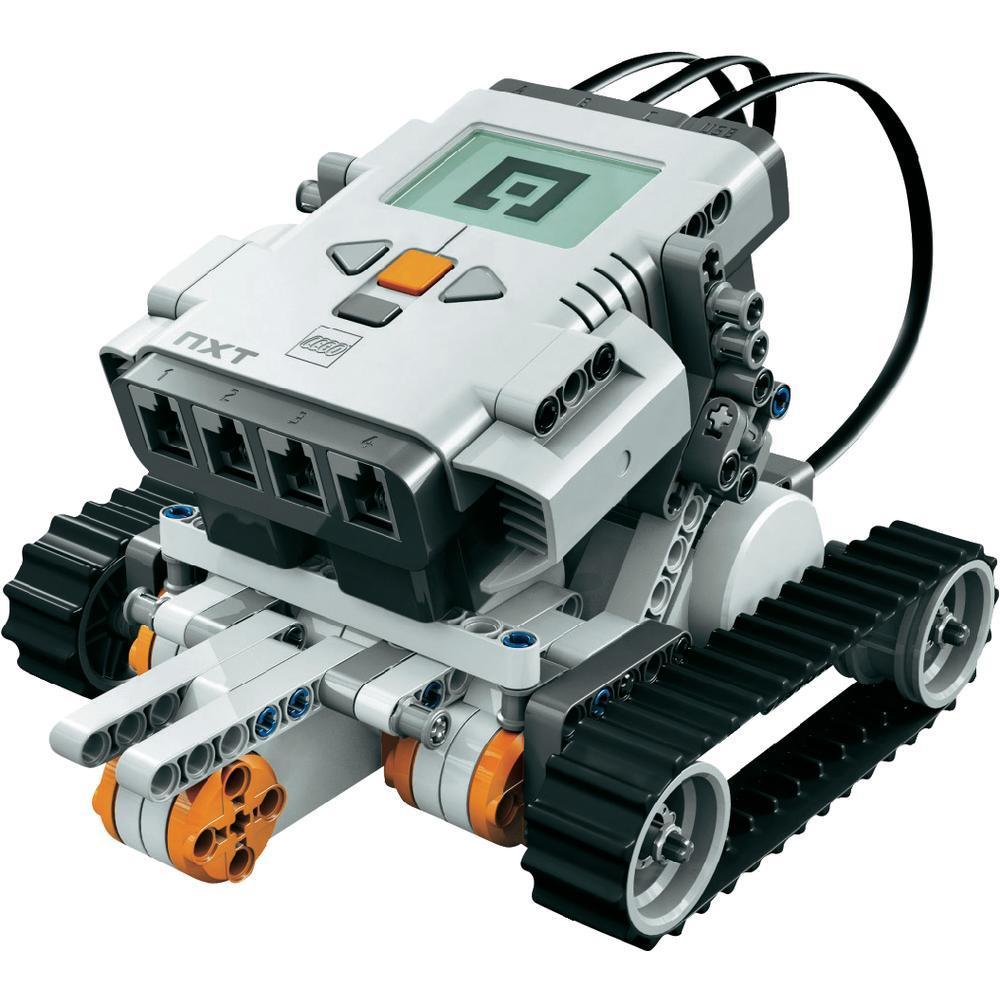
The NXT kit consists of a control unit, four sensors and three servos. The control unit contains:
Sensors (in different trim levels different sets of sensors):
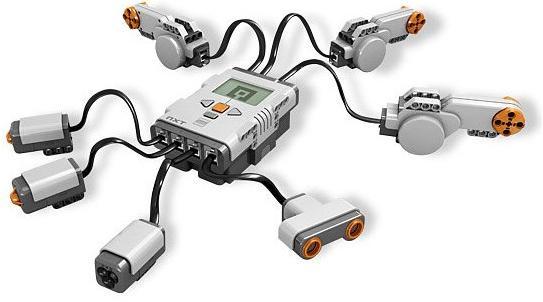
Figure 1 - NXT microcomputer with connected sensors and actuators.
And of course, the set contains a variety of LEGO parts in the LEGO Technic form factor from which actuators and a supporting structure will be assembled.
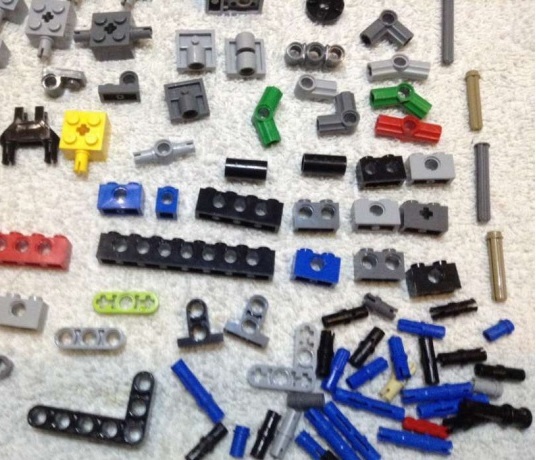
Figure 2 - Details in the LEGO Technic form factor
We will write the first application. Suppose, classically, this application displays the text “Hello, World!”. Implementation will take place alternately in MRDS 4 and NI LabVIEW, in the process we will consider the specifics of each platform.
We pre-install the MRDS 4 and NI LabVIEW platforms, in the case of MRDS 4, the installation must be carried out in a folder whose path does not consist of Cyrillic (Russian letters), the user account must also consist only of Latin letters .
We start the VPL environment (Start Menu - All Programs - Microsoft Robotics Developer Studio 4 - Visual Programming Language). This environment allows you to develop applications in the VPL language, conduct testing in the virtual VSE environment. A program in VPL is a diagram consisting of interconnected blocks. In the window that opens, in addition to the standard command bar and menu, there are 5 main windows:

Figure 3 - The VPL programming environment
Let's perform the following sequence of actions:
On this platform, everything is implemented almost identically. Launch the LabVIEW environment. Two windows will appear in front of us, the first - Front Panel, designed to implement the user interface (the appearance of the virtual device), the second - Block Diagram, to implement the program logic.
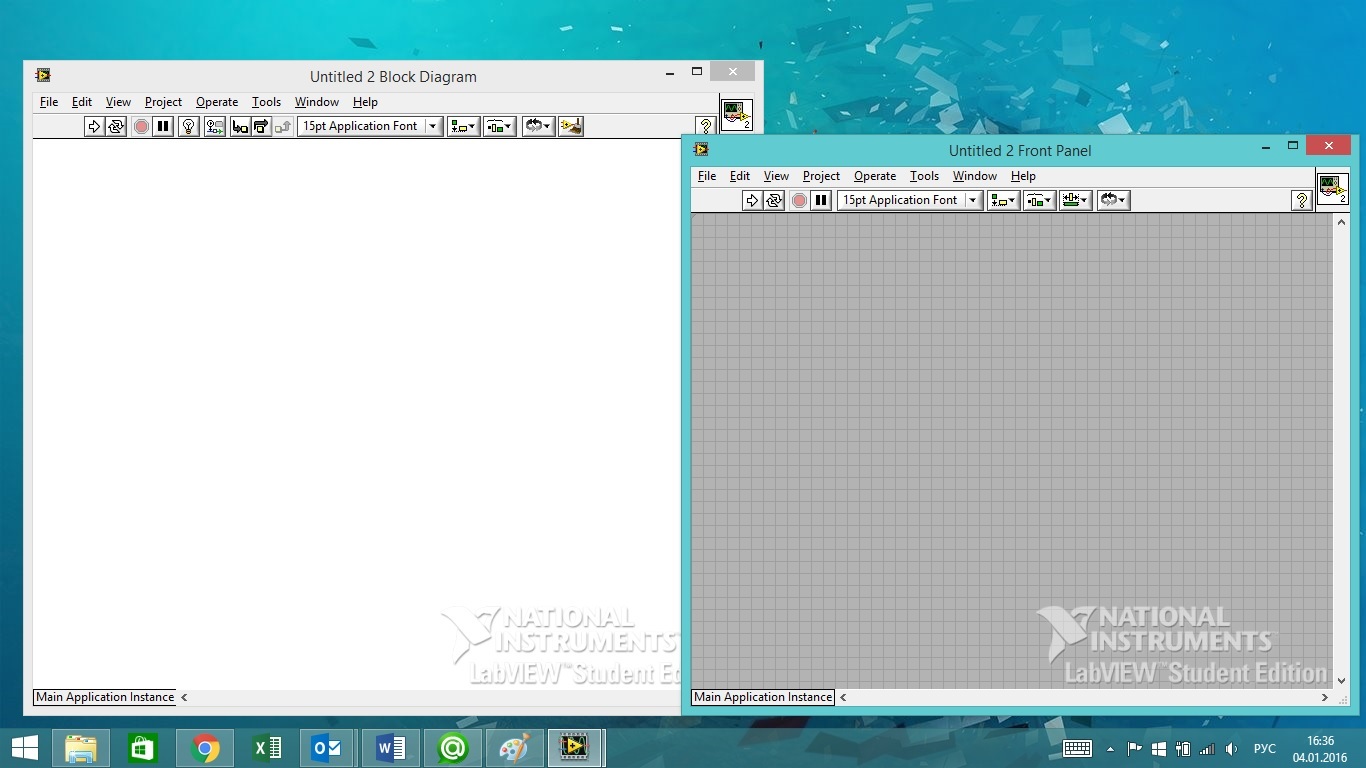
Figure 8 - LabVIEW environment windows
We will use the Block Diagram window. Follow the steps below:
In the following articles, we will deal directly with NXT programming. There are a lot of training materials on the LabVIEW network environment, much less on VPL. I highly recommend that you study the reference guide for both platforms (knowledge of English is necessary), in these manuals there are a lot of examples that can be implemented without NXT, as well as the following books:
In my articles I will describe only my projects, because I see no reason to rewrite information from one source to another. I will accept any constructive criticism, I will answer any questions regarding the platforms discussed. Thanks in advance!
Anticipating some questions and reader comments.
Why exactly NXT Mindstorms 2.0? Because for my projects this set seemed to me the most suitable, because The NXT microcomputer is fully compatible with the MRDS 4 and NI LabVIEW platforms, and this kit is also very flexible in terms of assembling various robot configurations - it takes a minimum of time to assemble the robot.
Why are MRDS 4 and NI LabVIEW platforms? It happened historically. Studying in the senior courses of the university, the task was to develop training courses using these platforms. In addition, the platforms have sufficient ease of development and functionality, using them you can write a program directly to control the robot, develop a user interface and conduct testing in a virtual environment (in the case of MRDS 4).
But who needs these your lessons at all, on the net and so many projects on robotics! Using this bundle (NXT + MRDS 4 / NI LabVIEW), there are practically no training articles, mainly the native programming environment is used, and everything is trivial in it. Everyone who is interested in robotics, programming and who has a set of NXT (and there are many of them), any age audience.
Graphic programming languages are evil, and those who program heretics on them!The graphical programming languages MRDS 4 and NI LabVIEW undoubtedly have their drawbacks, for example, focus on narrow tasks, but nevertheless they are inferior to text languages in functionality, moreover, NI LabVIEW was originally developed as an easy-to-learn language for solving scientific and engineering problems , for this there are many necessary libraries and tools in it. Therefore, these graphic languages are the most suitable for solving our problems. And do not despise us for
All this looks childish and not serious at all!When the task is to implement algorithms, to teach the basics and principles of programming, robotics, real-time systems without going deep into circuitry and protocols, then this is a very suitable tool, although not cheap (with regards to the NXT suite). Although Arduino-based kits are suitable for the same purpose, this controller has almost no compatibility with MRDS 4 and NI LabVIEW, and these platforms have their own charms.
The technologies that are used are the product of rotting capitalist countries, and the author is an enemy of the people and an accomplice of Western conspirators!Unfortunately, most of the technologies in the field of electronics and computer technology come from the West, I will be very glad if they point me to similar technologies of natively domestic production. In the meantime, we will use what we have. And do not
A brief overview of the MRDS 4 and NI LabVIEW platforms.
I will bring some clarity to the terminology. By the platform, in this case, we mean a set of different tools, for example, the VPL language in MRDS, as well as the application runtime, i.e. There is no direct compilation of applications into executable (* .exe) files.
In 2006, Microsoft announced the creation of the Microsoft Robotics Developer Studio platform (for more details, see the Wikipedia article) MRDS is Windows - an application-oriented development environment for robotics and simulation. Currently, the version of Microsoft Robotics Developer Studio 4 is relevant. Among the features are: VPL graphical programming language, Web and Windows oriented interfaces, VSE simulation environment, simplified access to sensors, microcontrollers and robot actuators, support for the C # programming language, libraries for multi-threaded programming and distributed execution of CCR and DSS applications, support for many robotic platforms (Eddie, Boe - Bot, CoroBot, iRobot, LEGO NXT, etc.).
LabVIEW (Laboratory Virtual Instrumentation Engineering Workbench)Is a development environment and platform for executing programs created in the National Instruments graphical programming language “G” (for more details, see the Wikipedia article) LabVIEW is used in data collection and processing systems, as well as for the management of technical objects and technological processes. Ideologically, LabVIEW is very close to SCADA-systems, but in contrast to them it is more focused on solving problems not so much in the field of industrial control systems (automated process control systems), but in the field of ASNI (automated scientific research systems). The graphical programming language “G” used in LabVIEW is based on a data stream architecture. The sequence of execution of operators in such languages is determined not by the order of their sequence (as in imperative programming languages), but by the availability of data at the inputs of these operators. Operators not related by data are executed in parallel in random order.
- block diagram describing the logic of the virtual device;
- front panel that describes the user interface of the virtual appliance.
A quick tour of the LEGO NXT Mindstorms 2.0 suite.
The NXT kit consists of a control unit, four sensors and three servos. The control unit contains:
- 32-bit AVR7 microcontroller with 256 KB of FLASH memory and 64 KB of RAM memory;
- 8-bit AVR microcontroller with 4 Kbytes of FLASH memory and 512 Bytes of RAM memory;
- Bluetooth radio module V 2.0;
- USB port
- 3 connectors for connecting servos;
- 4 connectors for connecting sensors;
- LCD display with a resolution of 99x63 pixels;
- speaker
- connector for 6 AA batteries.
Sensors (in different trim levels different sets of sensors):
- ultrasonic sensor;
- two tactile sensors (touch sensors);
- color detection sensor.
Figure 1 - NXT microcomputer with connected sensors and actuators.
And of course, the set contains a variety of LEGO parts in the LEGO Technic form factor from which actuators and a supporting structure will be assembled.
Figure 2 - Details in the LEGO Technic form factor
We are writing the first application.
We will write the first application. Suppose, classically, this application displays the text “Hello, World!”. Implementation will take place alternately in MRDS 4 and NI LabVIEW, in the process we will consider the specifics of each platform.
We pre-install the MRDS 4 and NI LabVIEW platforms, in the case of MRDS 4, the installation must be carried out in a folder whose path does not consist of Cyrillic (Russian letters), the user account must also consist only of Latin letters .
1. MRDS platform 4.
We start the VPL environment (Start Menu - All Programs - Microsoft Robotics Developer Studio 4 - Visual Programming Language). This environment allows you to develop applications in the VPL language, conduct testing in the virtual VSE environment. A program in VPL is a diagram consisting of interconnected blocks. In the window that opens, in addition to the standard command bar and menu, there are 5 main windows:
- Basic Activities - contains base blocks that implement such operators as constant, variable, condition, etc .;
- Services - contains blocks that provide access to the functionality of the MRDS platform, for example, blocks for interacting with any hardware component of the robot, or blocks for invoking a dialog box;
- Project - combines the diagrams included in the project, as well as various configuration files;
- Properties - contains the properties of the selected block;
- Diagrams window - contains, directly, the diagram (source code) of the application.
Figure 3 - The VPL programming environment
Let's perform the following sequence of actions:
- add the Data blocks (from the Basic Activities window) and the Simple Dialog service block (from the Services window),
- in the Data block, enter “Hello, World!” (without quotes) and select the String data type,
- connect the Data block to the Simple Dialog block, a dialog box appears,
- Further, we perform everything as in the figures
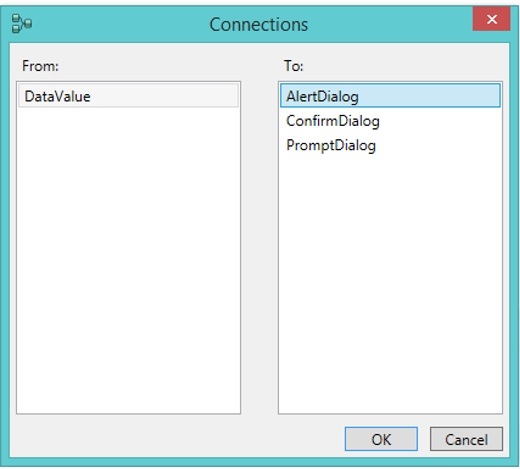
Figure 4 - The Connections Window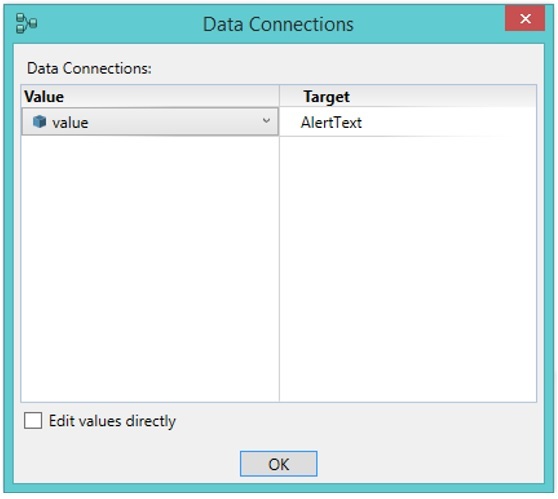
Figure 5 - Data Connections Window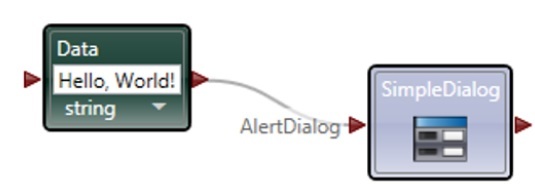
Figure 6 - The finished view of the diagram- Run the program to run.
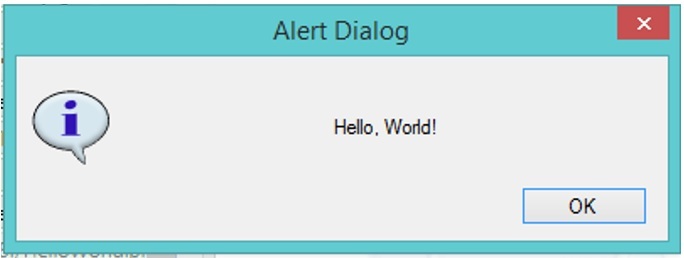
Figure 7 - The result of the program
2. NI LabVIEW platform.
On this platform, everything is implemented almost identically. Launch the LabVIEW environment. Two windows will appear in front of us, the first - Front Panel, designed to implement the user interface (the appearance of the virtual device), the second - Block Diagram, to implement the program logic.
Figure 8 - LabVIEW environment windows
We will use the Block Diagram window. Follow the steps below:
- in the Block Diagram window, call the context menu by right-clicking,
- in the window that appears, go to the tabs, as in the figure, and select String Constant,
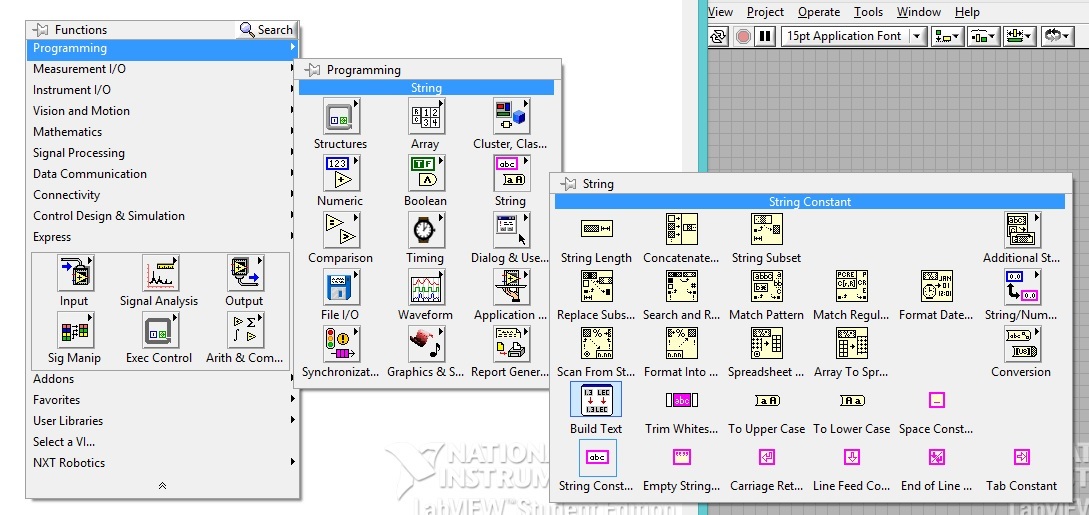
Figure 9 - The context menu - place this block and enter “Hello, World!”,
- in the same way, select the One Button Dialog block,
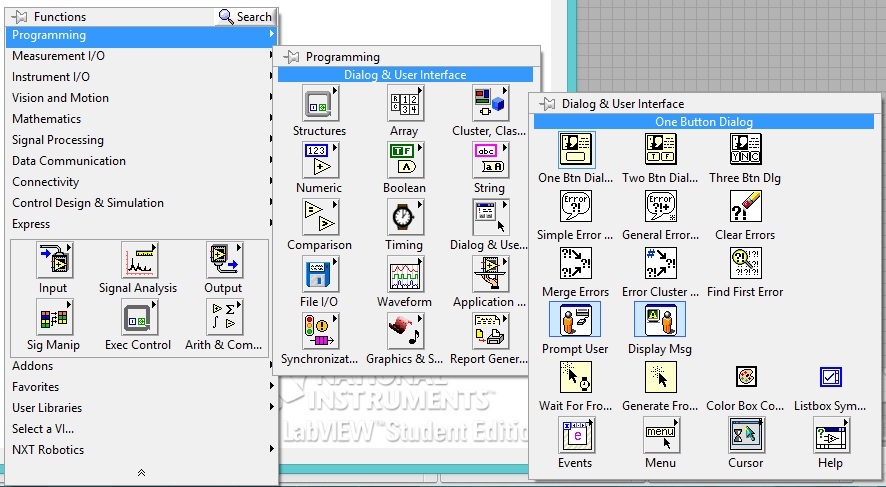
Figure 10 - One Button Dialog Block - connect the blocks as shown in the figure,
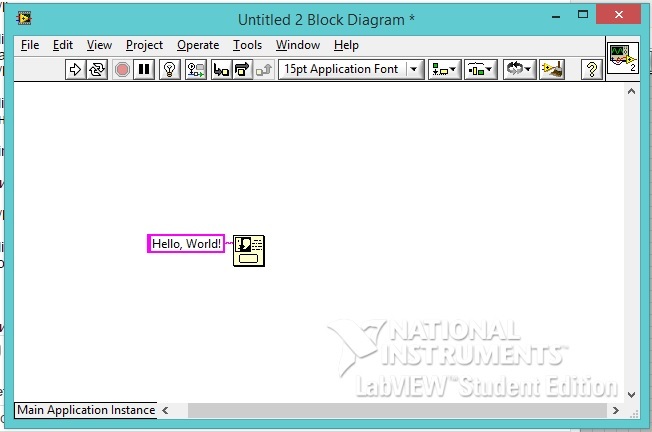
Figure 11 - The finished diagram - run the program by clicking the button in the form of a horizontal arrow on the taskbar,

Figure 12 - The result of the program
Summary
- We did an overview of software platforms for developing NXT microcomputer applications.
- We examined the basic principles of application development in the MRDS 4 and NI LabVIEW platforms.
- We got acquainted with the interface of environments.
In the following articles, we will deal directly with NXT programming. There are a lot of training materials on the LabVIEW network environment, much less on VPL. I highly recommend that you study the reference guide for both platforms (knowledge of English is necessary), in these manuals there are a lot of examples that can be implemented without NXT, as well as the following books:
- We program the NXT microcomputer in LabVIEW - Lidia Beliovskaya, Alexander Beliovsky,
- Microsoft Robotics Developer Studio. Programming Robot Control Algorithms - Vasily Gai.
In my articles I will describe only my projects, because I see no reason to rewrite information from one source to another. I will accept any constructive criticism, I will answer any questions regarding the platforms discussed. Thanks in advance!