Using a POS keyboard to solve routine tasks
Around us there are many useful computer devices that, with the correct application of forces, can significantly help us in solving typical routine tasks. And, unfortunately, few know about this and know how to put such things into practice. Today I want to tell you about the curious use of the POS keyboard for significant assistance in the work of the QA engineer. This is just one of the many applications of this class of devices for tasks where it is necessary to produce predetermined sequences of identical actions.
What is a POS keyboard?
From Wikipedia :
There are two main differences between a POS keyboard and a standard keyboard. Firstly, a programmable keyboard is used not so much for entering symbolic information as for managing cash transactions. Secondly, the keys of the programmable keyboard were initially not tied to code sequences (or macros). They are prescribed by a technical specialist when installing peripheral equipment. The functionality of the selected keyboard depends on the number of potential macro combinations.
How did i come to this
I work as a QA engineer in an outsourcing company. And so historically, almost all projects are distributed client-server applications with mobile clients. The first project was no exception. I immediately got into the active phase of development. There were 7 programmers on the project (Android, iOS, Back-End, Front-End) and me. In the hottest months, I started 150 bug reports, plus tasks / bugs on the part of the customer, tasks from the PM, and, of course, work with already open / rediscovered tasks. Every day, several client updates, work with test documentation and much more. It was interesting and fun! But, for the most part, many actions are associated with the routine, and it significantly reduced productivity, leaving less time for much more necessary activities on the project.
What did I try to use before this?
Programs for creating click macros, clipboard managers, all kinds of toolbars, etc. Something was caused by hot keys, somewhere there were pop-up toolbars. The main problem was that there were too many keyboard shortcuts. The most frequent and popular were remembered, the less popular in a week or two managed to “fly out” of the head. Plus, the combinations were not complicated, and often there was a conflict of local and global keyboard shortcuts. As a result, this option didn’t take root in me, and I began to look from the side of hardware solutions.
Search for hardware solutions
So, I started looking for hardware solutions. The first options were crazy:
- use buttons of various game joysticks and reassign buttons;
- search for functional multimedia keyboards, followed by extracting the insides and connecting to a mechanical keyboard;
- and many others;
In the process of searching, I came across a POS keyboard. I read the description, and realized that this is just what we need. I went to the online store of trading equipment, looked at the price tags ... 100-300ue. For a Junior QA salary, that was a bit much. I decided to search on free bulletin boards. And lo and behold, a 96-button POS keyboard for $ 13. A couple of days of waiting, and I have it in my hands.
Install the keyboard and drivers on the PC
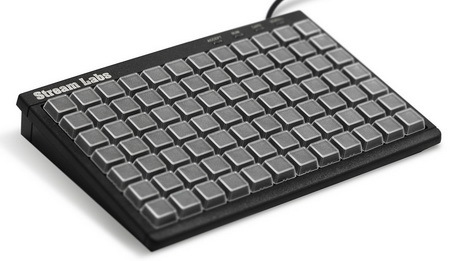
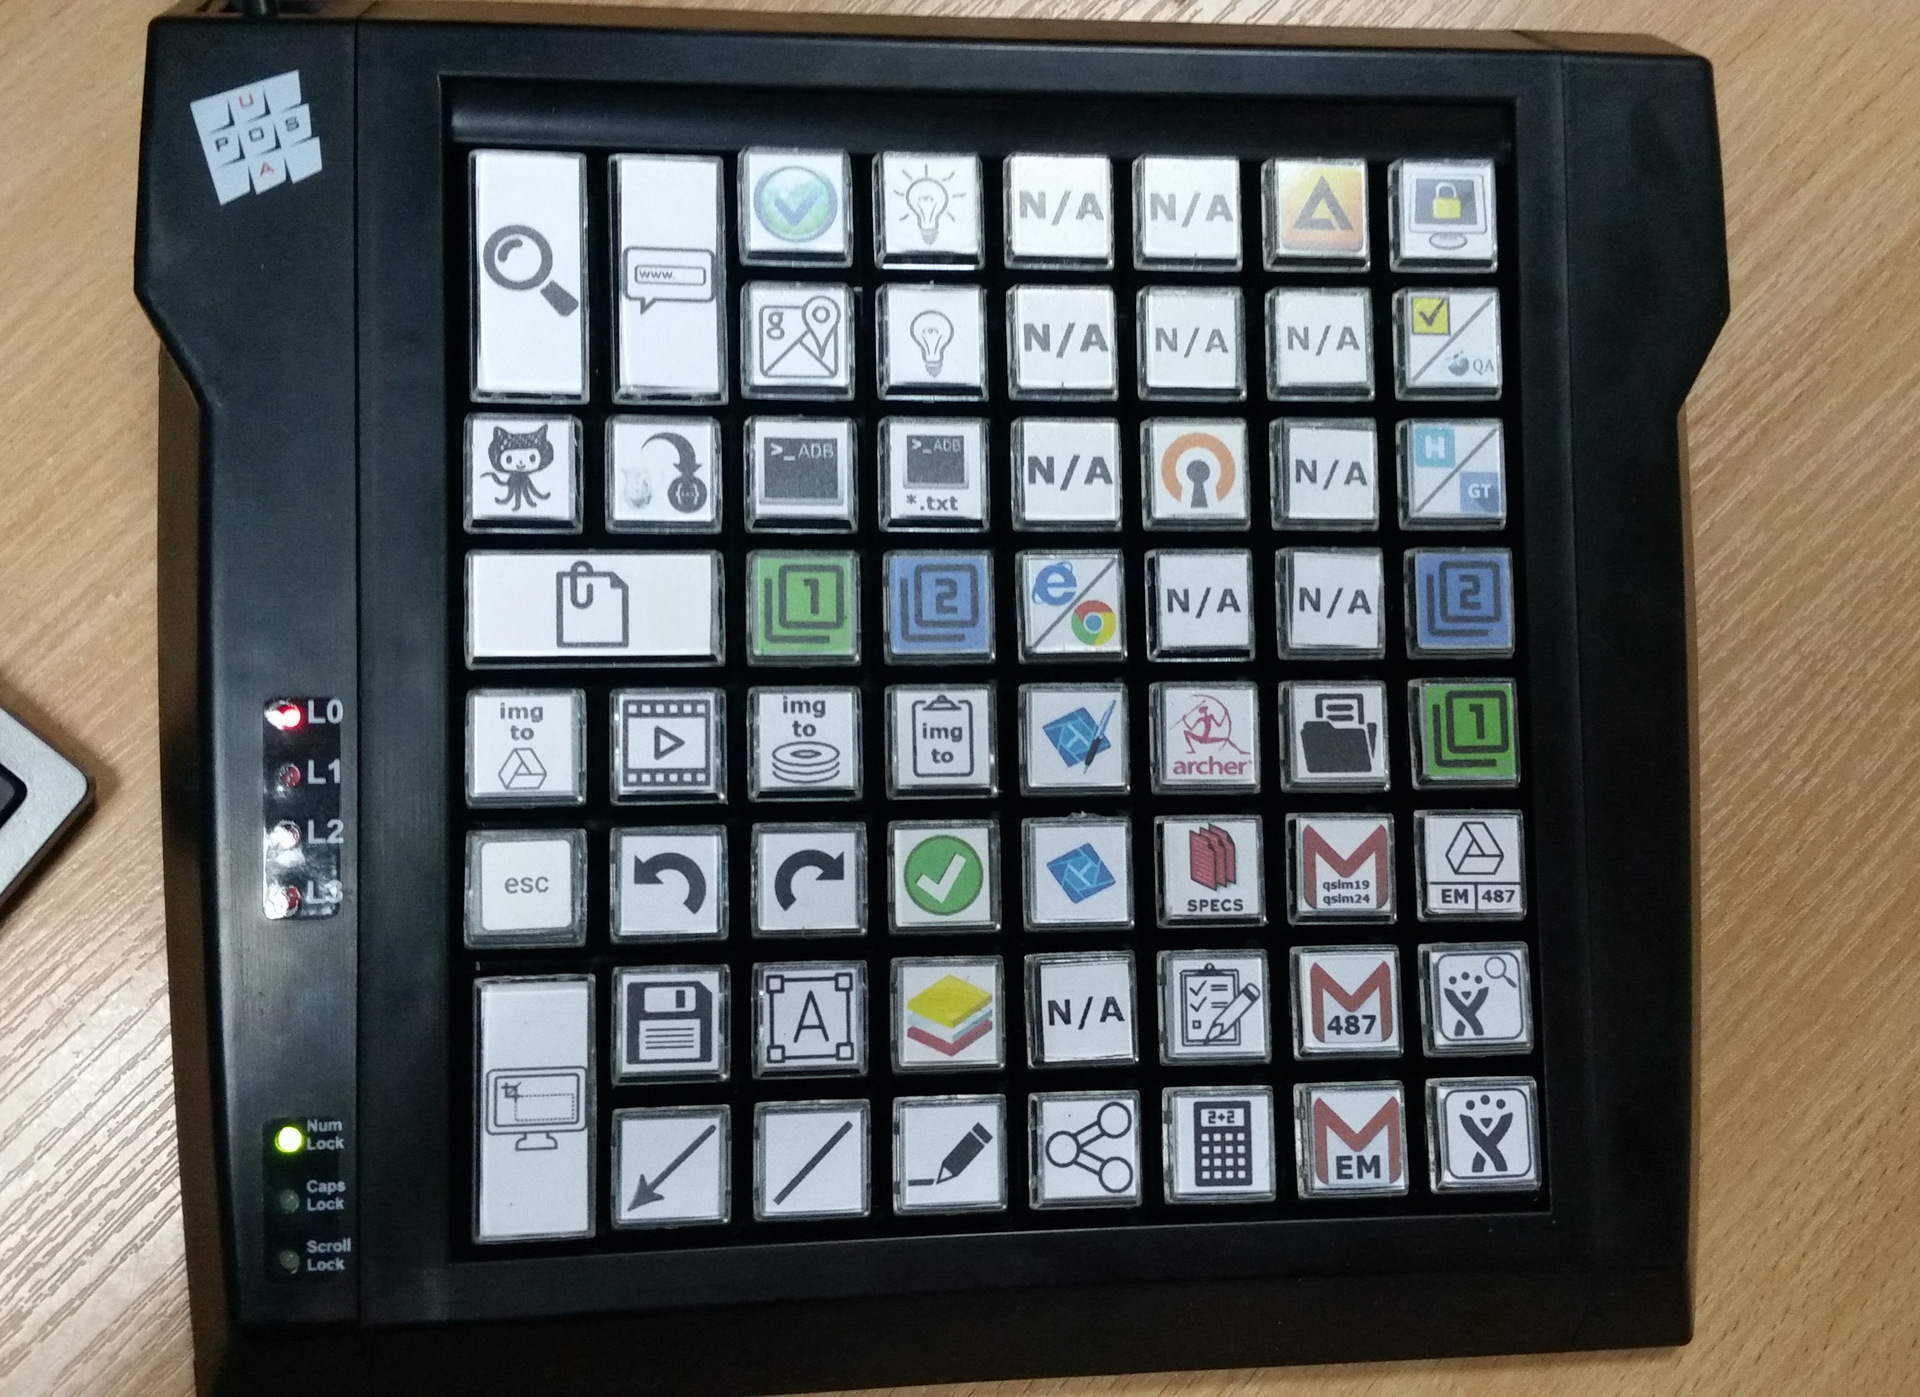
So, the POSUA LPOS-II-096 keyboard with the PS / 2 interface fell into my hands. Her image and performance characteristics:

- Programmable Keys: 96
- Layout Levels: 4
- Key Type: Cherry MX1A cross gold contacts (Germany)
- Hit Resource:> 50'000'000
- Operating Temperature Range: 0 ° C ... + 70 ° C
- Supply voltage: 4.5-5.6 V
Installation is not complicated, I will describe it in steps:
- we go to the manufacturer’s website, download the PS / 2 keyboard driver “Win7_64drv” (it is needed to program the keys) and the “MPOS-Master” configuration program;
- on the advice of the manufacturer, to install an unsigned driver (I have Win7, x64) we enable test mode in Windows;
- Install the driver and configuration program;
The keyboard is ready to use. For a keyboard version with a USB interface, just install the configuration program.
Key Programming
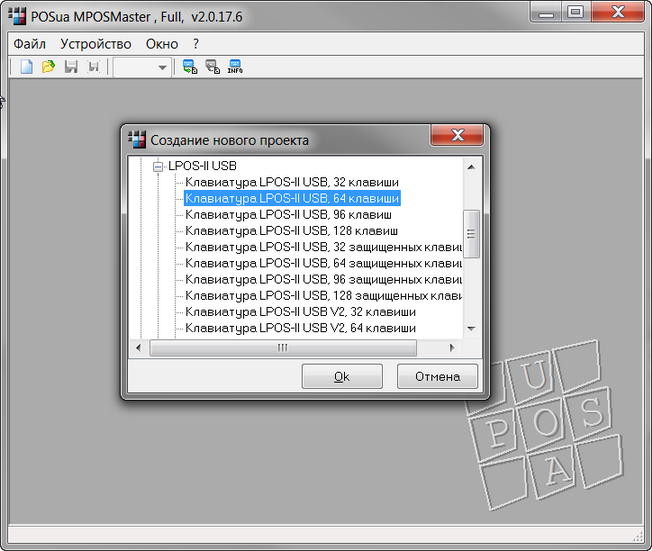
- run the previously installed MPOSMaster program;
- we create a new project, and indicate our type of equipment (at the moment I am using the USB version for 64 kopecks, which I bought all the same on the bulletin board);
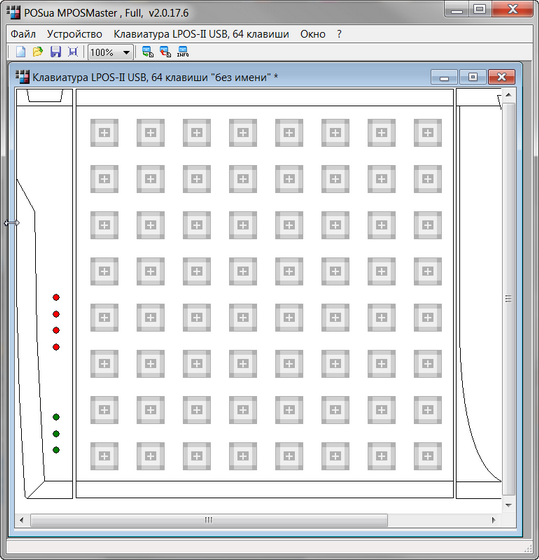
- in the new project we see keys not yet assigned;
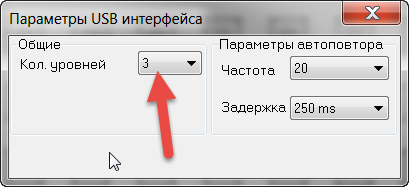
- Do not forget to set the number of keyboard layers in the “Keyboard” -> “USB Interface Settings” section if they plan to use more than one level, otherwise the program will give an error when programming: “This level does not exist”;
Next, we will examine in more detail the functions of the keys. To do this, double-click on an unassigned key and see its configuration parameters:
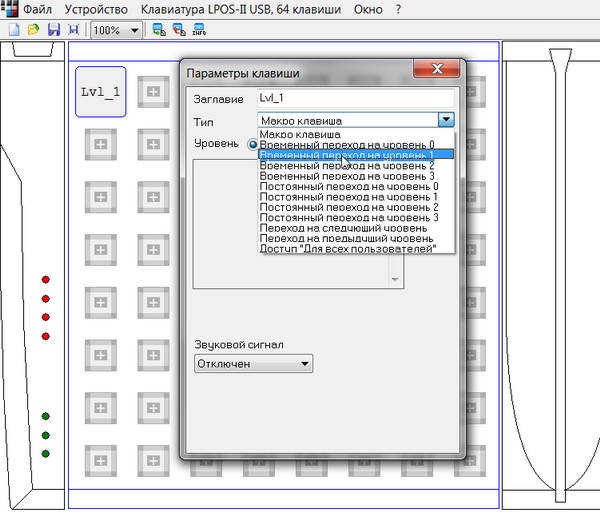
In this menu we can select the “Macro key” mode, or select a temporary or permanent transition to a level from 0 to 3. For each level, you can assign your own unique macro, those. we get 64 * 4 = 256 unique macros. Key macro features:

- we can specify any sequence or combination of characters for 4 layers, but no more than 42 characters in one layer (controller memory limit);
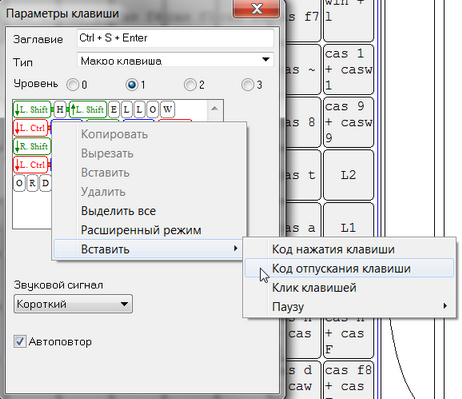
- You can specify a macro either by entering it from the keyboard using the “capture” window, or by manually inserting codes for pressing, releasing, or clicking a key. Using manual input, it is possible to specify key combinations of this type: Ctrl + Alt + Shift + Win + ”x”;
- It is also possible to insert a pause from 0.1s to 1.6s anywhere in the macro. If you need a long pause or not a standard one, you can insert several pauses in a row;
- we can set a sound signal for pressing: short, medium or long;
- we can enable “Auto Repeat” for the key. If it is disabled, the macro runs only once, regardless of how long we hold the key;
Some examples from my practice
This is what my second version of a 64-button keyboard with a USB interface looks like: I made all the icons in a graphics editor measuring 103 * 103 pixels and printed them on a color printer. Pictures, of course, chose to your taste and color. Almost all buttons are assigned a unique key combination. I used combinations of the form: Ctrl + Alt + Shift + 'keys 0-9, AZ, incl. symbolic '. If there are not enough combinations, I add the “Win” button to them. Combinations of 4-5 buttons usually do not lead to conflicts with Windows and software, as used extremely rarely. Now more about some keys. - these are layer control buttons, they make a temporary transition to level L1 and level L2. Level L0 is set by default. I do not use L3 at the moment, since 192 combinations are enough for me.

Further, about the physically allocated control unit of the screenshot editor (in my case, this is Snagit Editor).
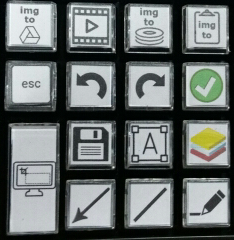
The first row at the top is additional screenshots.
- Share the screenshot without processing through Google Drive (I use it when I need to create a link very quickly and drop it in the chat, or when I do not need to process the image);
- create a video and send it to the editor;
- create a screenshot, and save it to the hard drive without processing or questions;
- create a screenshot and copy it to the clipboard;
- arrow;
- line;
- highlighted area;
- text insertion;
- smoothing layers;
- insert markers;
- redo and undo, when they click on the button of the L1 level, they decrease \ increase the font in the text box;
- main button for taking screenshots (sends the image to the editor);
- ESC button, in case you need to change the capture area;
Separately, I note the save button.
 Is a keypress macro of this kind:
Ctrl + S ⇒ pause 1.2s (so that the save window appears in time) ⇒ Enter
Allows one-click save the edited screen to your hard drive.
This block of buttons in my work is the most used, therefore it is in the most convenient place.
All other keys work through a program for creating keystroke macros, which performs all the actions. This makes it easy to reconfigure and reassign buttons without the limitations of physical macro keys of 42 characters. It also allows you to perform other actions that are not possible in only the "iron" version. As an example: launching programs, recording macro clicks without restriction, opening a URL, inserting pre-prepared text, managing windows, various actions with the system, and many others. another.
 - opens the clipboard manager magazine. When switching to L1 layer, the same button opens the “favorites” section;
 - Search for text from the clipboard in Google. Here the click macro is used:
Win + R ⇒ (pause 0.3s) ⇒ “www.google.com/search?as_q=(Ctrl+V)” ⇒ Enter
 - opens the url that is on the clipboard. Macro:
Win + R ⇒ (pause 0.3s) ⇒ “(Ctrl + V) ⇒ Enter”
The link opens in the default browser.
 - various options for running ADB using BAT files:
- normal console launch:
ADB “adb logcat -s mLog:D” - L1 + ADB button - start with deleting data from the clipboard (so as not to pull up the old logs);
We write in bat:adb logcat -c adb logcat -s mLog:D - All logs with ADB are saved in a text file with the following name format: ADB_logs _ "% hour%". "% Minute%". "% Sec% _% day%.% Month%.% Year% .txt We
write in bat:rem @echo off set dd=%DATE% set tt=%TIME% set /a ddd=%dd:~0,2% IF %ddd% LSS 10 ( SET day=0%ddd%) else ( SET day=%ddd%) set month=%dd:~3,2% set year=%dd:~6,4% set /a ttt=%tt:~0,2% IF %ttt% LSS 10 ( SET hour=0%ttt%) else ( SET hour=%ttt%) SET minute=%tt:~3,2% SET sec=%tt:~6,2% adb logcat -s mLog:D > C:\ADB\"ADB_logs_"%hour%"."%minute%"."%sec%_%day%.%month%.%year%.txt
 - work with mail;
 Personal, work and two test. They use two layers:
- The first opens a url of the form: mail.google.com/mail/u/0/#inbox
- L1 + button opens a new letter form: mail.google.com/mail/u/0/#inbox?compose=new
 - the button using the bat file opens the working folder:
explorer.exe F:\Dropbox\work_doc
 - open Google docks with checklists and specifications for the current project in Chrome (by default, the system costs FF, but Chrome with Google docks works better);
 Team text:
start Chrome.exe https://docs.google.com/document/d/1OYBf….
 - turns on / off the table lamp using the USB HID relay, which is controlled through the console;
 I will also give an example of one of the one-time tasks that I performed just a couple of days ago.
Task:
- check the counter, which sorts people according to the list of their party affiliation, a total of 7 parties.
- in order to get to the choice of a party, it is necessary to answer 50 questions; all questions are randomly mixed each time.
- in the test there are traps that reject honest honest respondents, such as: protection against linear answers, comparing answers to similar questions, trap questions, etc.
Given:
List of correct answers that pass all server validations in a txt file.
Decision:
The project is small and short. The time to check is an hour or two, and the task itself is a one-time task. You can of course just go through the list and find the correct answers in a text file, but it is harmful to the nerves. In a minute, I made a macro on a free key that performs this sequence of keystrokes:
Ctrl + F ⇒ Ctrl + V ⇒ Enter ⇒ Esc
After that, the verification process looked like this:
- open a web form with a list of questions;
- copy the question to the clipboard (I use additional keys on the mouse for this);
- We translate focus in Notepad ++;
- click on the macro key that finds the text of the question and hides the search box, leaving highlighted the text of the question with the correct answer in the range from -3 to 3;
- click on the correct answer in a web form, etc .;
Result : about 600 questions were passed with an acceptable level of comfort, nerves were saved, the customer is happy.
After that, the idea came that we need to designate several unused buttons with colored figures, so that we could use them for one-time / temporary tasks.
The rest of the buttons are nothing special. And in most cases, you can guess about their purpose from the pictures.
A few words about the manufacturers of POS keyboards
In practice, I used keyboards of only one brand. But, the general principle and possibilities are approximately the same for everyone. They differ mainly only in the external design and the number of buttons, which happens from 4 to 128 pieces.
They can be found both in online stores and in offices for the installation of commercial equipment. There are also such keyboards on aliexpress and ebay. They are not very much in demand right now, and problems with acquiring at a low cost should not arise.
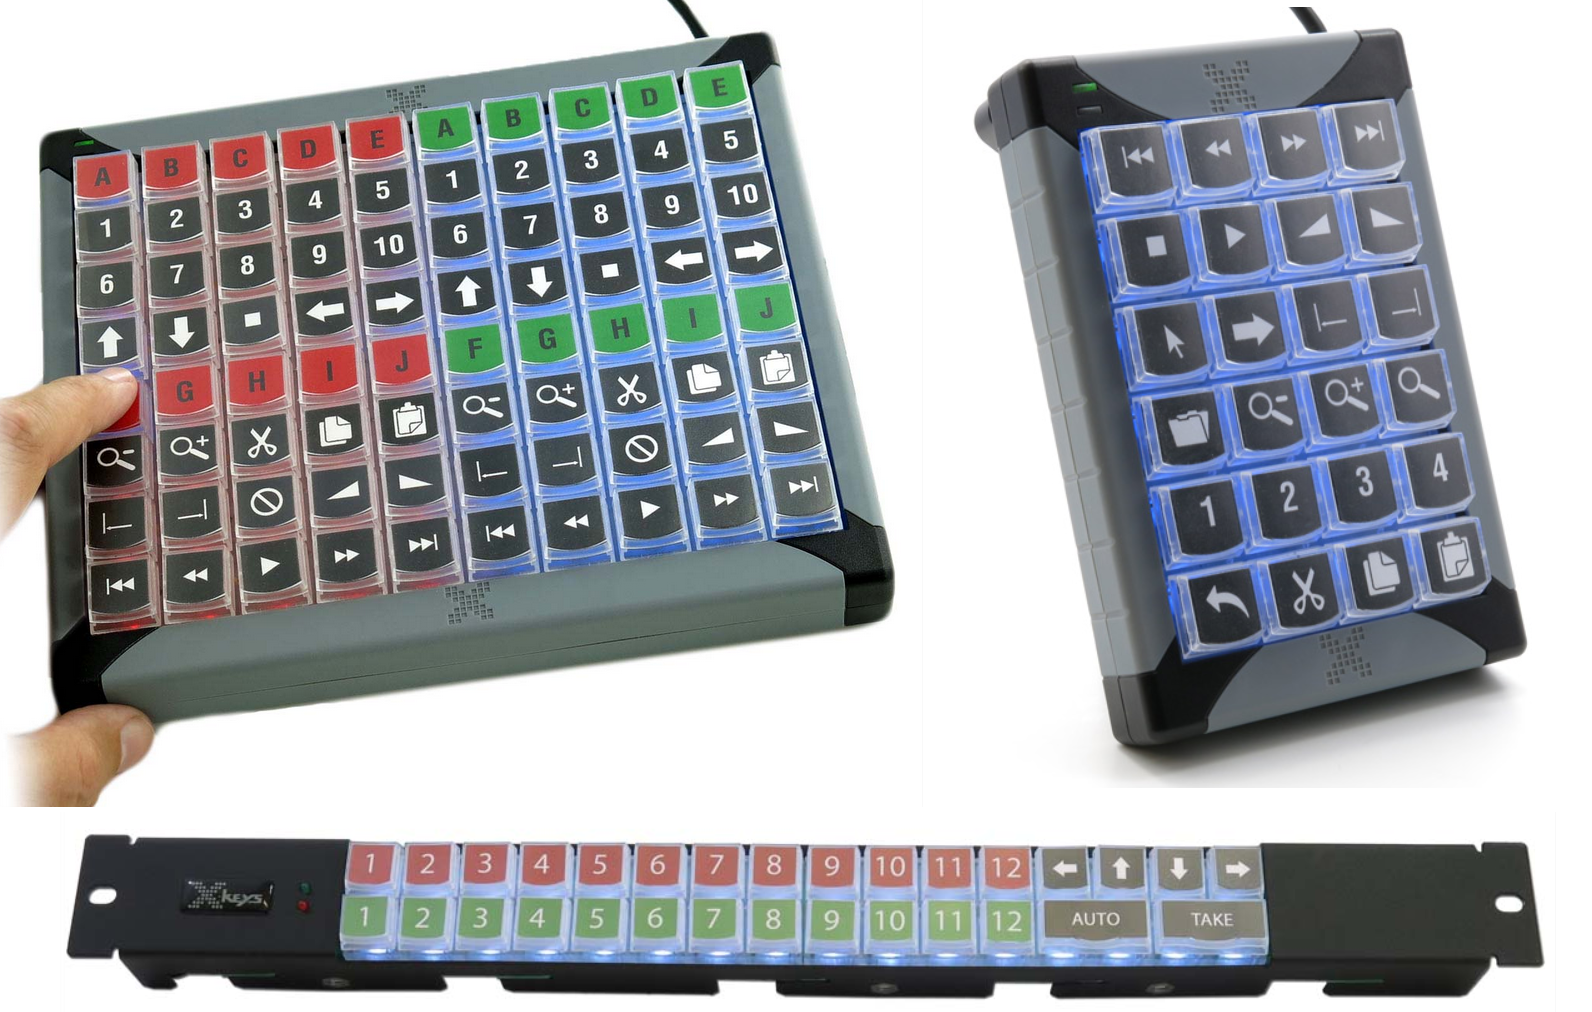
Separately, I want to mention this manufacturer - X-keys . As I understand it, their emphasis is on the audience of gamers, that's why outwardly their keyboards look much better than models for trading equipment. Plus they have keyboards with very interesting configurations. Here are some examples:
What's inside?
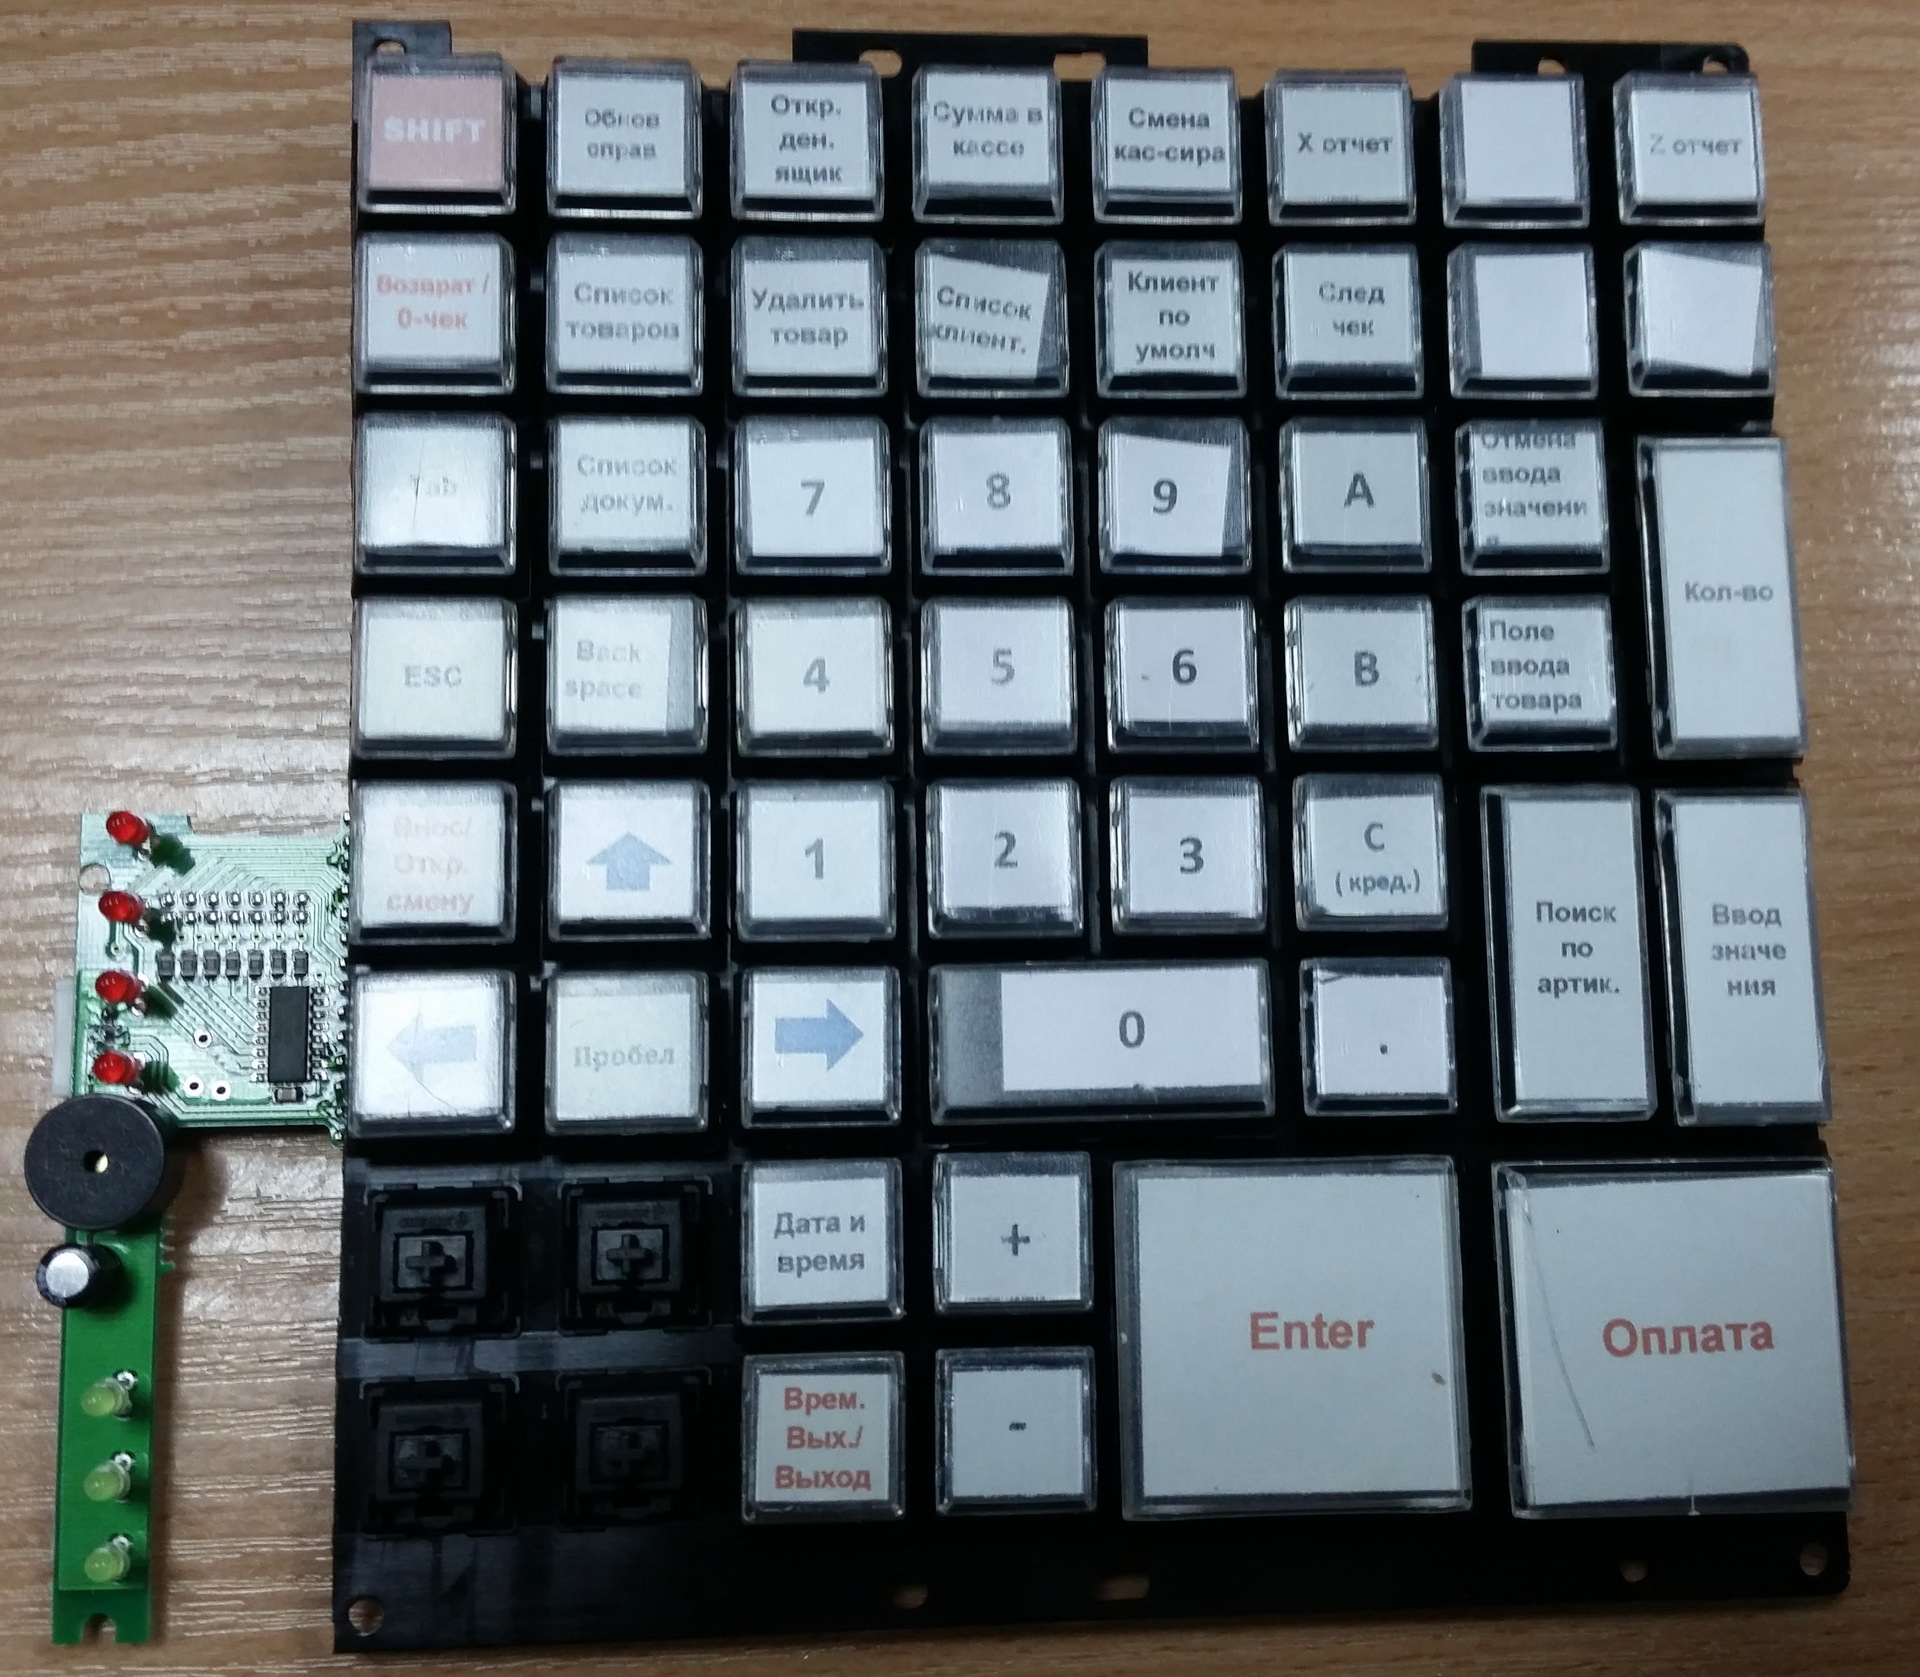
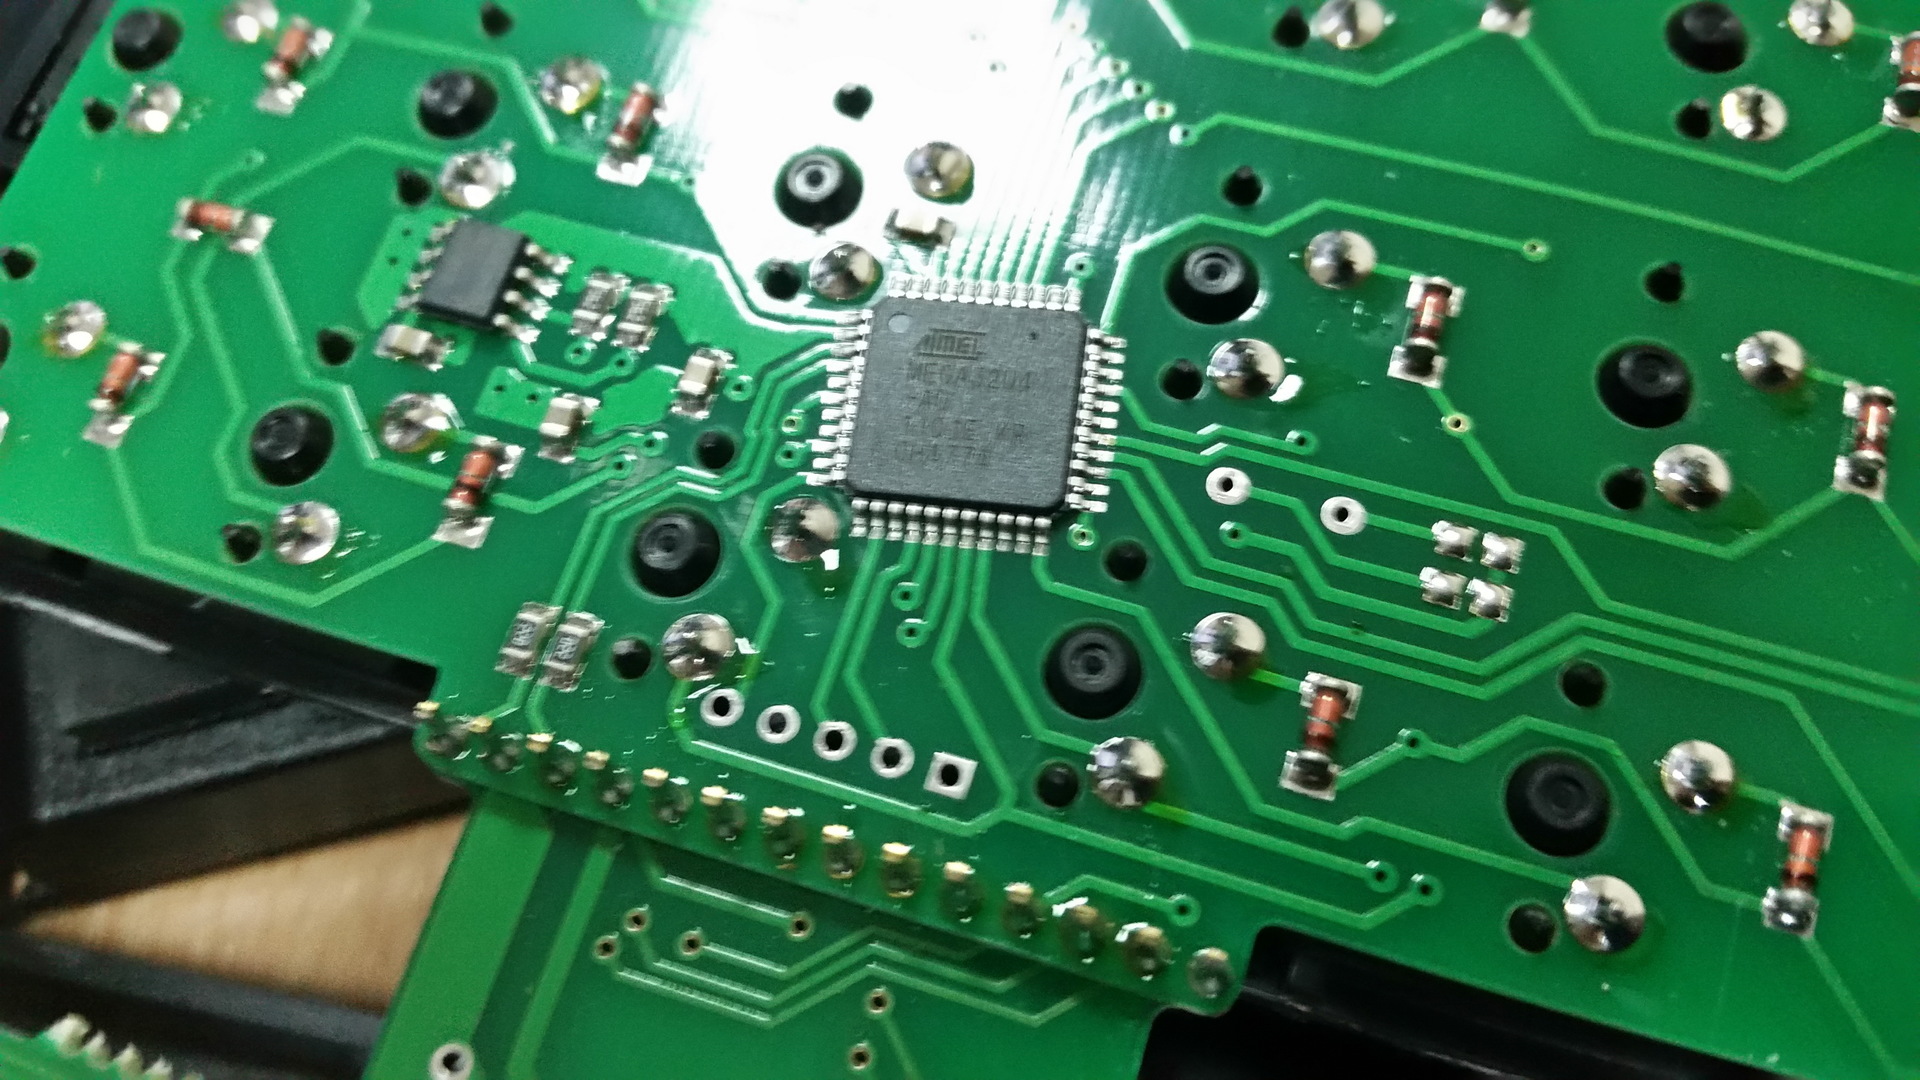
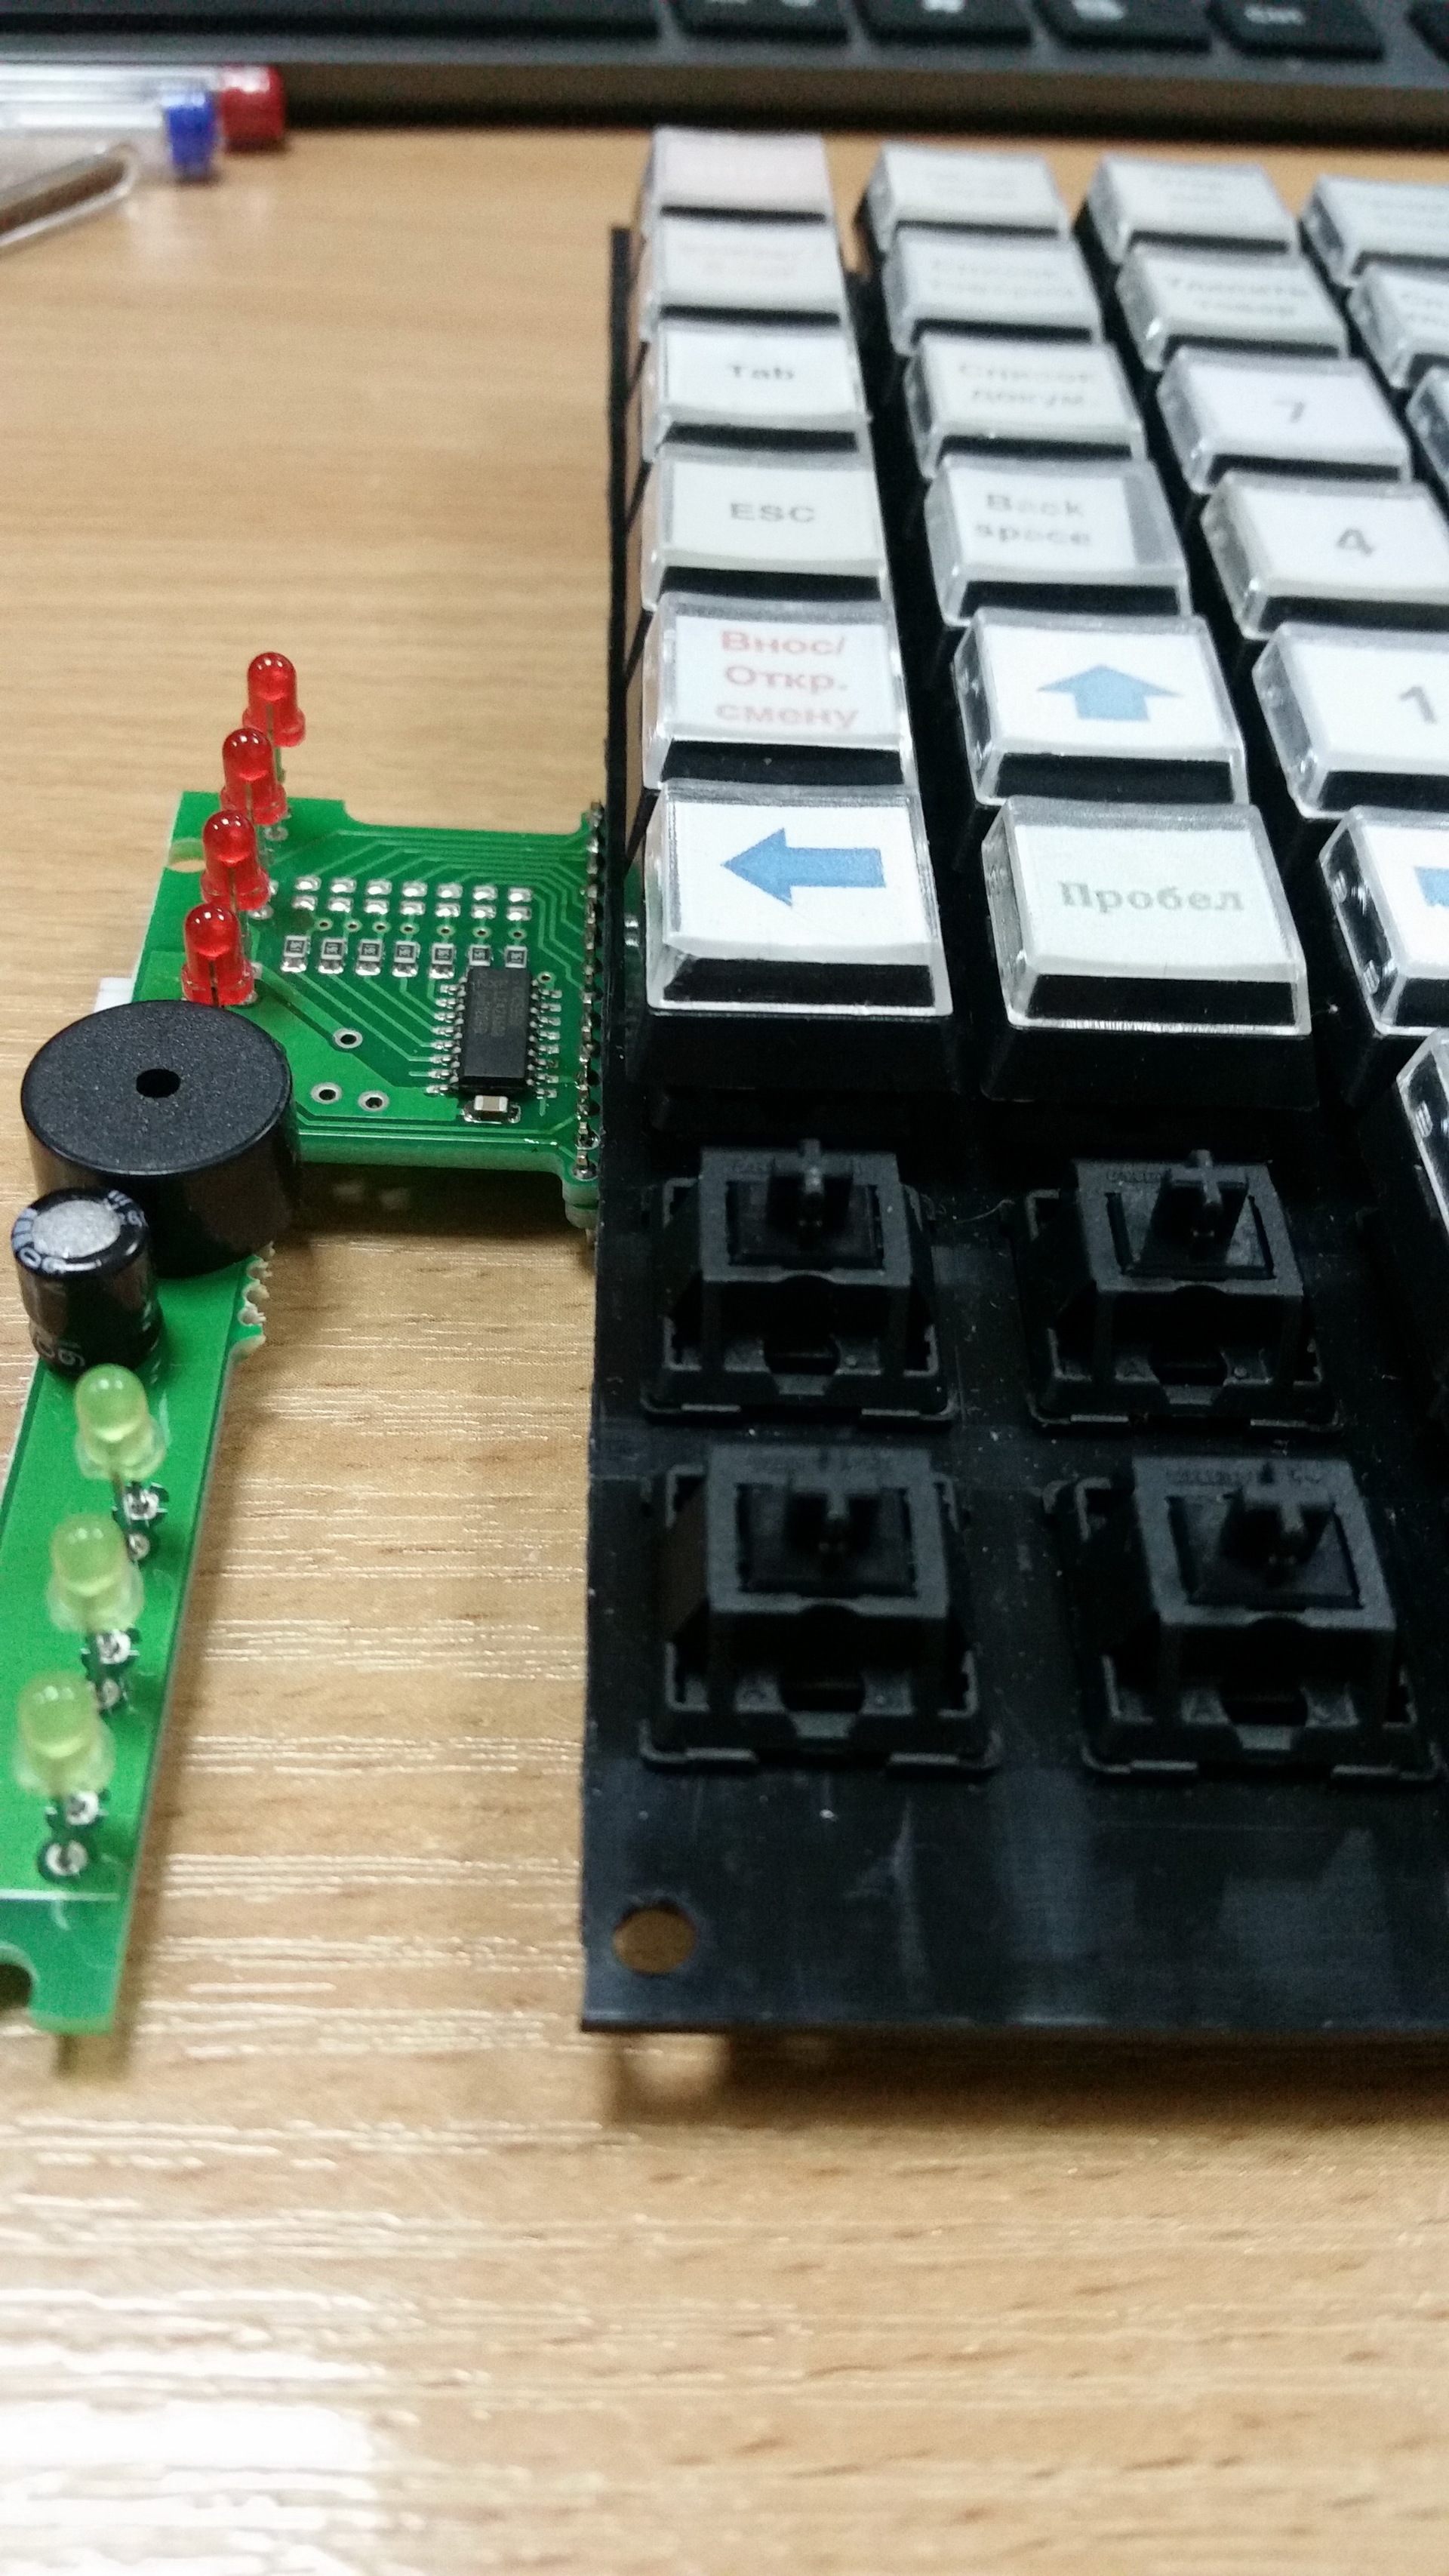
Here are a few unassembled photos (clickable pictures): By the way, like many other POS keyboards, it is protected from liquid and dirt getting on the keyboard.

Conclusion
The article turned out to be a great one, but I hope it will help someone in the implementation of their ideas. I will be glad to questions and suggestions in the comments.
And lastly, a photo of my first keyboard. Do not be alarmed. She survived many changes, and for the time being temporarily sent for a well-deserved rest.
