Introducing Qt with the Raspberry Pi 3
Once there was a need to write programs for raspberries, it was using the wonderful QT framework, with all the conveniences of its creator. This article is an attempt to structure knowledge on building libraries and setting up the environment for convenient compilation and debugging directly on the hardware.
First of all, download the image of the system for raspberries. In my case, raspbian jessie was on hand. Other distributions easily download from the website . To make it easier to work at the assembly stage, create a directory in the home directory:
We drop the image of the system there and, in principle, you can immediately mount it to yourself, it will come in handy later:
To calculate this offset, we do:
The next step is to copy the Qt sources:
And, going to the freshly downloaded directory:
execute:
to resume the required submodules. This is where we need coffee. My jump took at least half an hour. Then we need a cross-platform toolchain. It can be pulled out of here:
Unpack it into our daddy. Still need a library:
But only if you have a 64 bit version of the OS. Now that everything has been downloaded and a new portion of coffee is on the way, you can run a useful script from the toolchain:
Which will configure symlink. That's it, now you can start building Qt. We go to the configurator:
And do:
To which the terminal will friendly answer something like this:
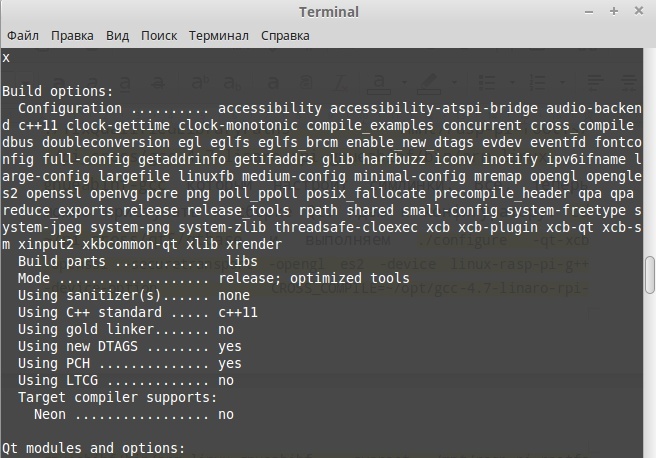
Enumerating the supported options. We collect:
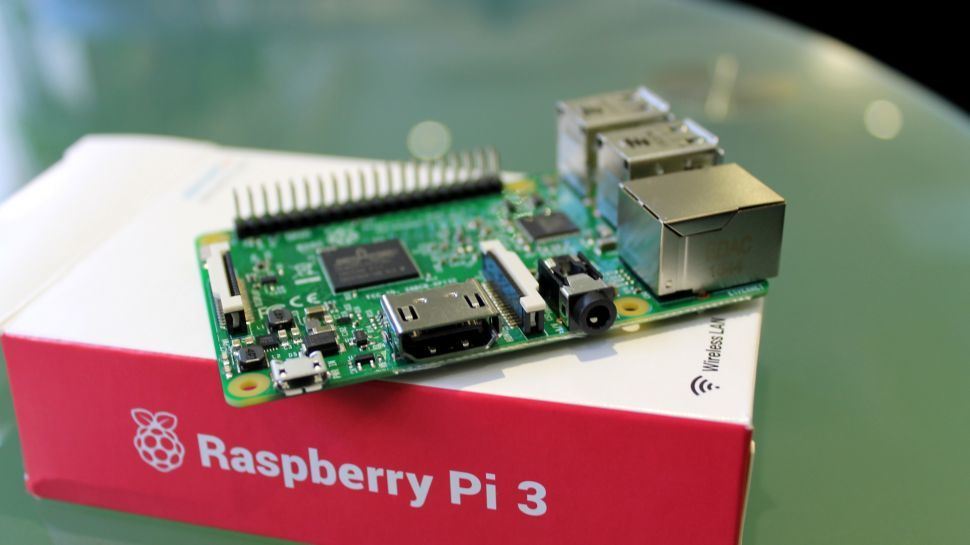
This is the longest stage. My machine rustled in bytes for about an hour. Everything is almost ready. The exhaust assembly-installation is a disk image that we mounted ahead of time. It needs to be unmounted and filled onto the SD card, which must be inserted into the Malinka and can be turned on. (photo of the work table of raspberry).
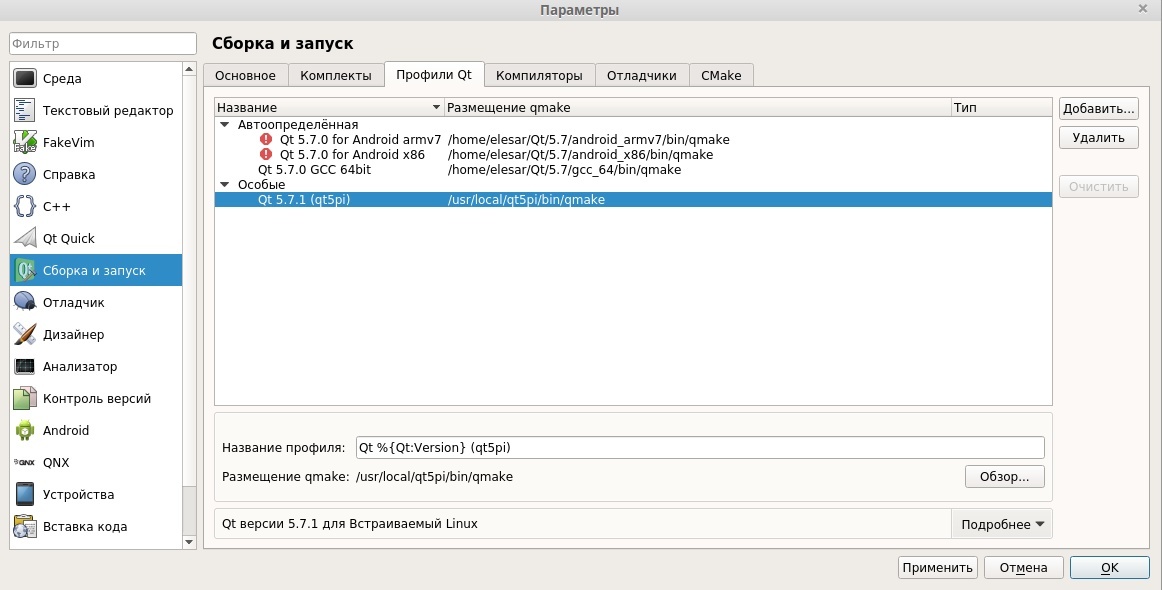
After loading the system and a small configuration, we begin to configure Creator. First, tell him qmake what was built, like Frankenstein, in the folder / usr / local / qt5pi / bin / qmake:
As the compiler, specify gcc-4.7-linaro-rpi-gnueabihf / bin / arm-linux-gnueabihf-gcc:

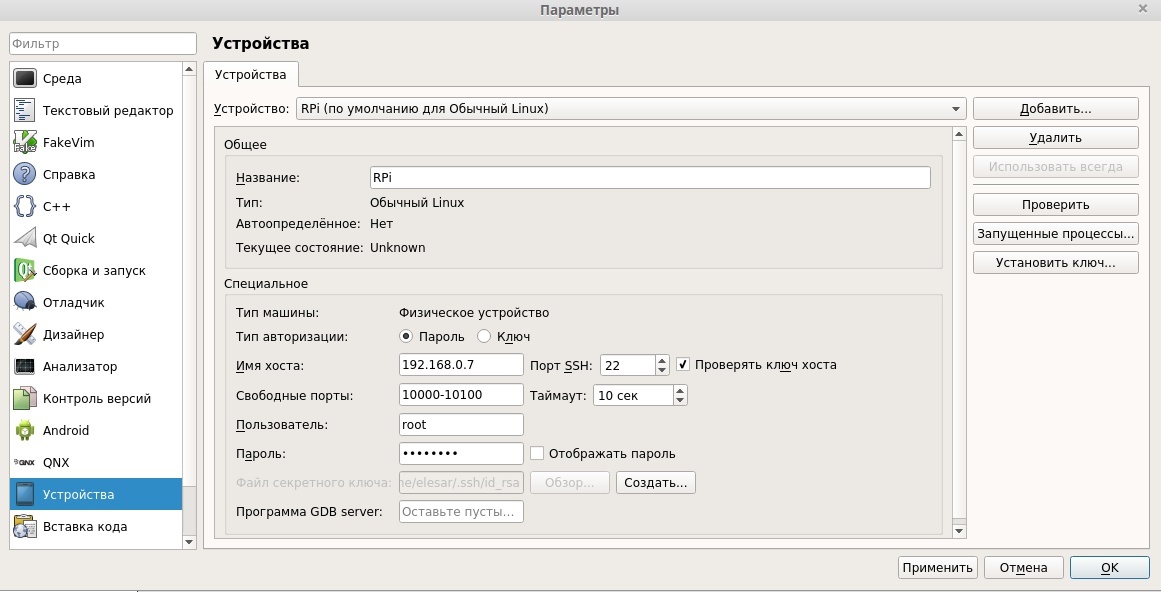
We create the device, set the password and address for it:
Create a new kit with the appropriate name:
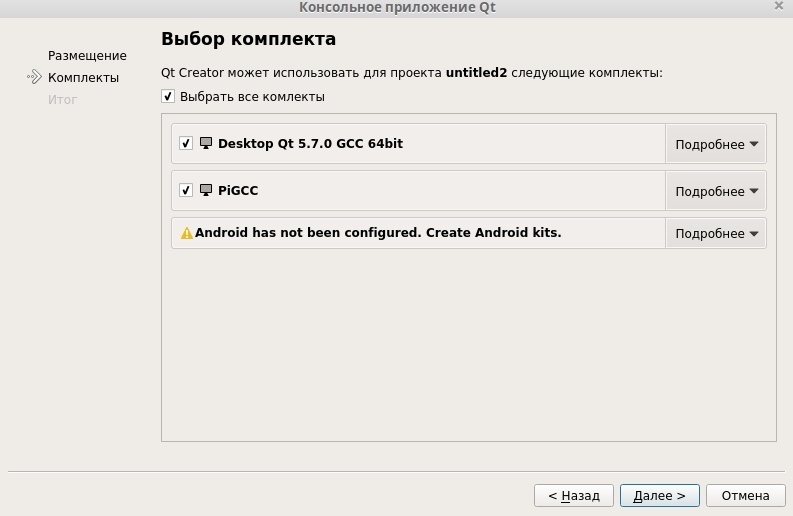
In sysroot we indicate our newly mounted image. The only catch is the debugger. I flatly refused to work as such from the Linaro, so I slipped GDB-Multi, which works flawlessly. All! Now, when creating a new project, a new kit has become available:
To start and debug directly on the device, you need to add a couple of lines to the .pro file:
They will indicate the path where the application will be installed, and its name.
As a conclusion, I would like to note a minus of this method - for any changes on the target, for example, installing new libraries, you have to remove the image from the SD card in order to mount it as sysroot, otherwise the compiler will not know about them. Thank you for your attention, take my leave. And yes, they will bypass you.
- For starters, what we have:
- Host with installed Mint 17.3
- Qt 5.7.0, QtCreator 4.1.0
- Raspberry pi 3
- MicroSD card from 8 gigabytes
- A couple of hours of free time
- Coffee
First of all, download the image of the system for raspberries. In my case, raspbian jessie was on hand. Other distributions easily download from the website . To make it easier to work at the assembly stage, create a directory in the home directory:
mkdir ~/pi_cross/ We drop the image of the system there and, in principle, you can immediately mount it to yourself, it will come in handy later:
sudo mount -o loop,offset=70254592 ~/pi_cross/raspberry-embed.iso /mnt/rasp-pi-rootfs.To calculate this offset, we do:
So:
We look at the end of the second part, and multiply by the size of the sector: 137216 * 512 = 70254592.
elesar@elesar ~ $ fdisk -l ~/pi_cross/raspberry-embed.iso
Disk /home/elesar/pi_cross/raspberry-embed.iso: 16.0 GB, 16021192704 bytes
255 heads, 63 sectors/track, 1947 cylinders, total 31291392 sectors
Units = sectors of 1 * 512 = 512 bytes
Sector size (logical/physical): 512 bytes / 512 bytes
I/O size (minimum/optimal): 512 bytes / 512 bytes
Disk identifier: 0xb0358c95
                               Device Boot      Start         End      Blocks   Id  System
/home/elesar/pi_cross/raspberry-embed.iso1            8192      137215       64512    c  W95 FAT32 (LBA)
/home/elesar/pi_cross/raspberry-embed.iso2          137216    31291391    15577088   83  Linux
We look at the end of the second part, and multiply by the size of the sector: 137216 * 512 = 70254592.
The next step is to copy the Qt sources:
git clone git://code.qt.io/qt/qt5.gitAnd, going to the freshly downloaded directory:
cd qt5execute:
./init-repositoryto resume the required submodules. This is where we need coffee. My jump took at least half an hour. Then we need a cross-platform toolchain. It can be pulled out of here:
wget https://www.dropbox.com/s/sl919ly0q79m1e6/gcc-4.7-linaro-rpi-gnueabihf.tbzUnpack it into our daddy. Still need a library:
sudo apt-get install ia32-libsBut only if you have a 64 bit version of the OS. Now that everything has been downloaded and a new portion of coffee is on the way, you can run a useful script from the toolchain:
sudo ./fixQualifiedLibraryPaths /mnt/rasp-pi-rootfs/ ~/pi_cross/gcc-4.7-linaro-rpi-gnueabihf/bin/arm-linux-gnueabihf-gccWhich will configure symlink. That's it, now you can start building Qt. We go to the configurator:
cd ~/pi_cross/qt5/qtbaseAnd do:
./configure -qt-xcb -openssl -securetransport -opengl es2 -device linux-rasp-pi-g++ -device-option CROSS_COMPILE=~/pi_cross/gcc-4.7-linaro-rpi-gnueabihf/bin/arm-linux-gnueabihf- -sysroot /mnt/rasp-pi-rootfs -opensource -confirm-license -optimized-qmake -reduce-exports -release -qreal float -make libs -prefix /usr/local/qt5pi -hostprefix /usr/local/qt5piTo which the terminal will friendly answer something like this:
Enumerating the supported options. We collect:
make -j 4
sudo make install
This is the longest stage. My machine rustled in bytes for about an hour. Everything is almost ready. The exhaust assembly-installation is a disk image that we mounted ahead of time. It needs to be unmounted and filled onto the SD card, which must be inserted into the Malinka and can be turned on. (photo of the work table of raspberry).
After loading the system and a small configuration, we begin to configure Creator. First, tell him qmake what was built, like Frankenstein, in the folder / usr / local / qt5pi / bin / qmake:
As the compiler, specify gcc-4.7-linaro-rpi-gnueabihf / bin / arm-linux-gnueabihf-gcc:
We create the device, set the password and address for it:
Create a new kit with the appropriate name:
In sysroot we indicate our newly mounted image. The only catch is the debugger. I flatly refused to work as such from the Linaro, so I slipped GDB-Multi, which works flawlessly. All! Now, when creating a new project, a new kit has become available:
To start and debug directly on the device, you need to add a couple of lines to the .pro file:
target.path = /usr/bin
INSTALLS += target
TARGET = Name_On_Target
They will indicate the path where the application will be installed, and its name.
As a conclusion, I would like to note a minus of this method - for any changes on the target, for example, installing new libraries, you have to remove the image from the SD card in order to mount it as sysroot, otherwise the compiler will not know about them. Thank you for your attention, take my leave. And yes, they will bypass you.