Modular Android Application Development

When developing Android applications, there come moments when certain parts of the code can be rendered in the form of libraries so that you can reuse them in different projects:
- Modules in the project that are often found. For example, custom View
- When the existing API is inconvenient or doesn’t allow you to do what you intended to do, we create an extension for this API
Most often, all problems were resolved long before us, but in our case it was necessary to lay out a part of the business logic layer and virtually the entire layer responsible for the data in our 3 main products of the united company Wheels Roof Market . All our products are classifieds about cars, real estate and other goods. Therefore, we, the developers, decided to write one solution for all the company's products. In addition, it facilitated our work.
Tried git submodule
The easiest solution is to use git submodule. If you briefly explain its operation, then you attach a link to another git repository, which should be automatically cloned along with the parent. It would seem simple: we have several git repository where all our module libraries are stored and you just need to specify it in the git submodule.
But what about the versions? When updating through the git submodule update command, changes to the submodule are erased, merge does not occur. You will have to constantly update when another developer makes a change to this submodule. Instead, it is worth developing modules in the form of libraries with a jar file or Android Archive (aar). In fact, these archives contain the same files that could be in the git submodule, but now there is a more understandable versioning instead of the commit or tag history.
Caution, not everything can be published.
When publishing libraries, it should be noted that they should not contain confidential company data. Moreover, it will not be convenient for other developers if the library contains code related to a specific company. Therefore, we need a private artifactory to keep libraries private. There are many open source solutions, but we use JFrog Artifactory .
And if you can publish? In this case, you will find a bright road to the world of open source projects. Simply find open web servers that support gradle so that hosted jar and aar files are pulled through dependency in your projects.
So, we begin to create a module
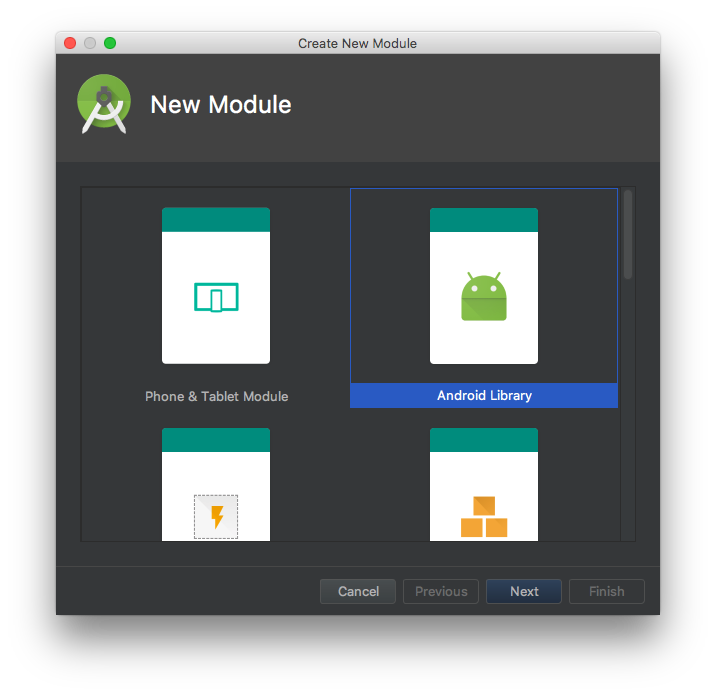
It all starts simply - go to the File > New > New Module…
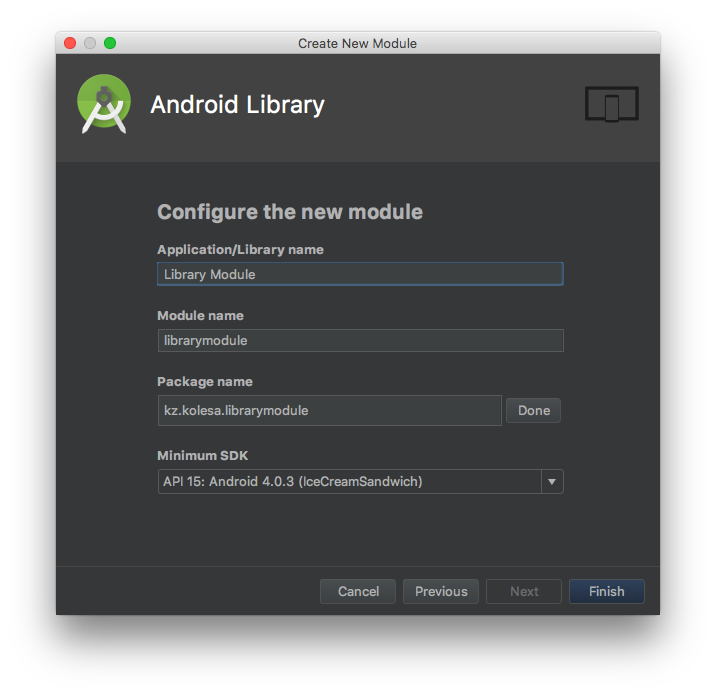
Library Name, which you specify in this window, will become the name of the library of your library.
Having created the module, you can start writing code. If you write tests to the attached code, the rest of the team will understand how to use your module. Even better, create a new sample app module that works exclusively with your module for demonstration on real devices. It’s more convenient when you need to pre-test the code before publishing to artifactory. To do this, just specify the dependency in build.gradle . In the examples, I will indicate librarymodule as the name of the module.
# {module project}/sample-app
dependencies {
   implementation project(":librarymodule")
}
Customize gradle to publish to artifactory
Take the build script from Chris Banes: Gradle script to upload artifacts to Maven repositories
Specifically, in his case, the process is described in the maven repository for public publication. The main settings are absolutely identical: in each module that you want to publish, call the gradle script file from the build.gradle file of the modules and create gradle.properties, where the configuration information for the publication will lie. We are interested in the opportunity to publish in a private artifactory
# {project}/build.gradle
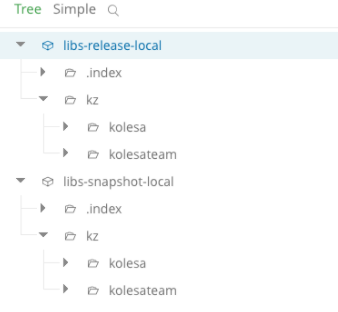
RELEASE_REPOSITORY_URL={artifactory_url}/release-modules
SNAPSHOT_REPOSITORY_URL={artifactory_url}/snapshot-modulesWe need to add 2 folders for publication in artifactory: one for the official release and snapshot for test builds of modules.
When we finally configured the gradle.properties configuration file, we are ready to make the first publication of the libraries in artifactory. In the test build, set SNAPSHOT to VERSION_NAME. Then execute the command:
./gradlew clean build sdk:uploadArchives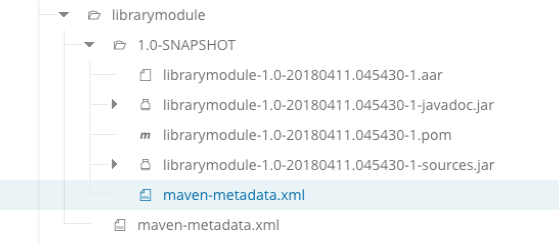
Setting CI environment
We managed to manually publish the modules in our private artifactory. In conclusion, it remains to configure the CI environment so that we can embed the publication in our development process.
We want only CI to publish in release artifactory, and for the rest we add free read and write access to snapshot. Therefore, we will make changes to the root gradle.properties file, which usually lies in ~/.gradle/gradle.properties. We will register {% username%} and {% password%} for access when publishing to artifactory. Thus, we will have the access level configured, without making changes to .gitignore.
// ~/.gradle/gradle.properties
artifactory_username=login
artifactory_password=password
Add trigger to the master branch so that when merge we have a build for publication in release artifactory. We add the launch of tests to the list of assembly tasks, if we have them in the module. It will be good to configure the auto increment version.
# Checkout git repository with modules
# Запускаем тест
./gradlew test
# Собираем архив для публикации
./gradlew librarymodule:build
# Публикация в artifactory
./gradlew libarrymodule:uploadArchives
We use the module in the product
As soon as CI collects the assembly and fills it in artifactory, you can add the dependency of this module in the project. But hey, we also need to add a url to our artifactory, because they are not available in a typical repository like maven
# {project}/build.gradle
allprojects {
    repositories {
        maven { url artifactory_url/release-modules }
        maven { url {artifactory_url}/snapshot-modules }
   }
}
Now we can use it in the project.
# {project}/app/build.gradle
dependencies {
   implementation ‘kz.kolesa-team: librarymodule:1.0.0’
}
What are we faced
When connecting Kotlin to our modules, the documentation for Kotlin files is not pulled. It turned out that for this you need to add a gradle task with Dokka .
If several developers indicated identical versions for libraries when publishing, then, of course, the latest publication was the latest version of the model. In the process of developing the module, they required to specify a postfix with the ticket ID from Jira. It turns out something like 1.0.1-AAS-1-SNAPSHOT.
What ultimately happened
Over time, we have increased the number of modules. We kept each module in a separate git repository. A lot of git repository creates a lot of inconvenience in the development process, if the module is dependent on other modules. In the end, it turned out that in order to complete one task, it was necessary to create a PR in each git repository. It is not clear in what order they should be tested, not taking into account the constant change in PR, if changes were made to one of the PRs. Therefore, using one git repository for all modules in practice turned out to be the most convenient.
You can have many such modules. If a particular module is not required in a particular project, then we can easily remove the dependency, which in the end will allow us not to write duplicate codes in each of three of our projects.
Such a modular development of internal components of the business will help us increase the speed of delivery of features to users. In conclusion, it is worth noting the important advantage of modular development - building apk files will take much less time, since gradle will reassemble only the part of the module in which the change occurred.