Unreal Engine Procedural Level Generation System
- Tutorial
Hello, my name is Dmitry. I make computer games on the Unreal Engine as a hobby. Today I will tell you how I created the procedural generation of levels for my game “The Future City Project”. All sources will be presented at the end of the article. And there will be a surprise.
Algorithm
First you need to clarify that my game is a first-person action game with parkour. Therefore, the level should not be flat, that is, there must be some height differences to which you can climb or jump on the contrary. In addition, as the setting for the game, I chose the city of the future with giant skyscrapers and flying hovercars, which also imposed requirements on the level generation algorithm.
- Since the level is a city, it is necessary to generate a grid of roads. My road network consists of two types of roads: these are the main roads and ordinary roads. The main roads differ from the usual ones in that they are wider in the first and secondly they cross the city through, while ordinary roads have a length of no more than a quarter. As a result, we get just such a picture (I apologize for being crooked):

- Now we have roads and islands between them. These islands need to be filled with something. To do this, I generate a graph which is a rectangular grid. Each node of this graph will be a room randomly located inside the space of a particular island (naturally, within certain limits, that is, the next node cannot be before the previous one). The rooms I determine in advance. In this case, there may be several layers of graphs in order to obtain a multi-level structure. And so that these layers somehow overlap nearby graphs have common nodes (rooms), which are determined randomly.
- Now it remains only to connect these nodes (rooms) with corridors in accordance with their position in the graph. To do this, I used the "greedy" path finding algorithm. That is, I take one of the sections of the corridor (the sections of the corridor as well as the rooms are determined in advance) and put it to the exit of the room, then I do this with all the other sections and select the section whose exit is closest to the desired point (which is the entrance to another room) , after that I’m doing the same thing, but I’m applying sections to the section already, the corridor found during the previous iteration and so on until the victorious end.
- After creating the graph structure inside the islands. It is necessary to connect the islands to each other. To do this, in the neighboring islands is located around the room that are closest to each other. Then these rooms are connected in the same way as the rest.
- So we already have a network consisting of rooms connected by corridors. But she hangs in the air to do something. Well, firstly, you can make each of the “islands” a skyscraper, and the rooms and corridors will respectively be the rooms and corridors of this skyscraper. In principle, I did so with 1/5 of all the islands. But doing so with everyone will be very boring.
- With the remaining 4/5 islands, I did so. The upper rooms and corridors form a kind of roof. The rooms that appeared under them appear in the inner space of the “island” but I do not fill the space between them, as in the case of skyscrapers, but leave it empty, so we have “platforms” between which you can easily jump over. Let me

give you a couple of examples: Here you can see how the upper rooms and corridors merge into a single roof.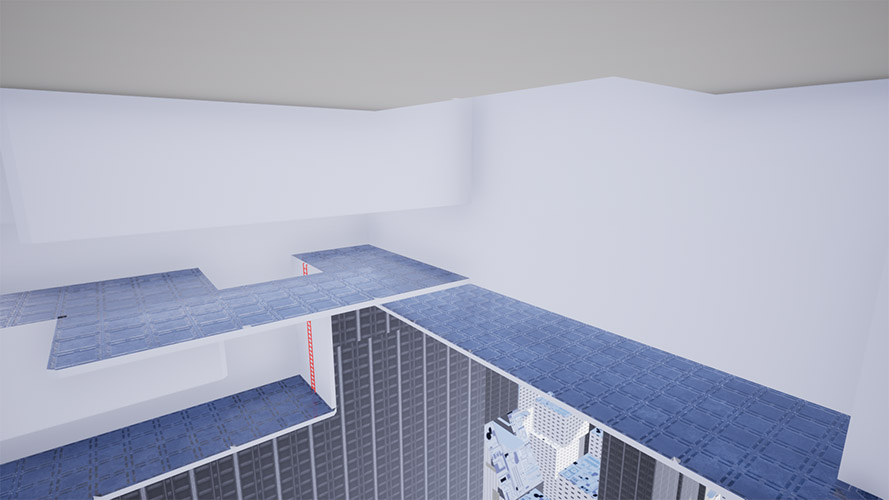
And here you can see the inner space of such an island. - But it turns out that such an island just soars in the air. To get rid of this, I added towers to the islands. Which will support them.
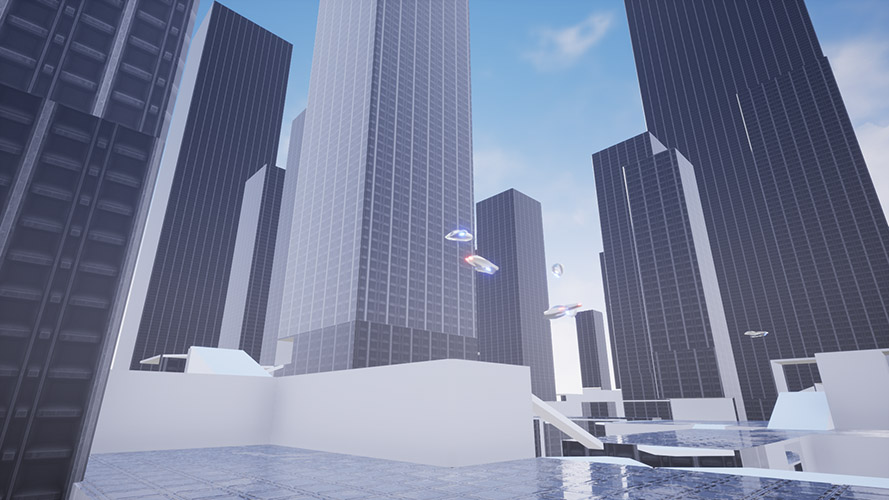
- Actually the level is already ready but it would not hurt to add a few elements to make it more beautiful. Firstly, below I added a model of the building so that it does not seem that the city is above the desert, here they are:

- In addition, I added hovercars plying over the roads.
All the procedurally generated city is ready.
How to use
Well, now I'll tell you how to use the plugin that you download from GitHub. After you open the project, you will see only a map on which there will be only one LevelGenerator object (If you want to pull this object onto the map but do not see it in the content browser, check the ShowPluginContent checkbox).
So here are its settings:
- Generate, Rebild level, Delete level - Buttons are used for debugging, with the help of them you can generate, rebuild or delete a level.
- Set Generate Seed - Use a random number to generate or a given
- MainMenuLevel - Used for the back of the main menu from the main mode, it differs in that there is no rendering cycle that draws the city when the character moves
- Generate Order - Allows you to set the drawing range for different modules (the modules themselves can be set in the LevelGenerator.cpp file). Modules are divided into “Data Fillers” and “Level Bilders”, the first data is generated, and the second data will hide the level from this data. Range numbers represent the radius in the center of which the character is located.
- Next are the material settings for specific environmental elements.
- RoadFrequency - The average number of cells between roads. The larger the number, the less often the road.
- MainRoadFrequency - The average number of regular roads dividing the main roads.
- RoadSize - width of a normal road in cells
- MainRoadSize - width of the main road in cells
- TowerFrequency - how many island cells fall on one supporting tower.
- FullBildingTowersFrequency - The number of islands representing a skyscraper relative to the rest. The larger the number, the fewer they are.
- FloorNum - The number of floors of the level. It is better to take this number as a multiple of the number of layers of the graph + 1
- CellSize - The size of the cell.
- CellHeight - Cell Height
- FirstCityFloor and SecondCityFloor - These values determine how high the level is from the ground.
- ActorTag - Generated ectors will be placed in a folder with this name.
- GraphNodsFrequency - Determine the average distance between graph nodes. The larger the number, the less often the graph.
- GraphLayerNum - The number of graph layers.
- HoverCarTrackLayers - Contains layers with hovercars. Each layer has such parameters as: Hovercraft height, hovercraft flight direction and average distance between them.
- WallThickness - Wall thickness of generated meshes. I want to add that the thickness of the ceiling is also equal to this number.
- ComplicitySpawnForTick - The total complexity of the generated ectors in one tick. The higher the number, the greater the delay in spawn and jerking may occur during the game. You ask, why not just set the number of ectors that can be generated per tick. And because different ectors require different time spent on their spawn. You can see the complexity for each specific ector in the VirtualSpawner.h file.
- DeltaCellForGeneration - The number of cells the character must shift to begin level reconstruction.
- MinBildingZoneSize - The minimum size of the island in cells. If an island suddenly appears
wide or less than this value, it will be connected to the neighboring one.
And then there are three repositories (the repository data is created by right-clicking the LevelGen subsection):
Towerstorage
In TowerStorage - There are two types of objects:
- Twers are objects that are derived from the LevelTowerActorTower class. They will determine what the towers going through the islands will look like.
- Bildings are objects that are derived from the LevelTowerActorBilding class. Determine the appearance of buildings spawning at the bottom of the level.
So, creating one of the blueprints, we will see this:

The BordersShower object is present in the construction tree - it is needed so that you can understand if your model falls into the area that is selected under it or crawls out of the bounds.
- Size - size noticed in cells.
- BildingHeight - Determines the height of the building if the value is 1 then it should not exceed SecondCytiFlore (red color) if 2 then it should not exceed FistCytiFlore + SecondCytiFlore.
This is necessary because only buildings with BildingHeight = 1 will spawn under the roads to give space to the hovercars. - CellSize - the cell size is needed only for the BorderComponent to display correctly, because when generating a level, CellSize will be taken from the LevelGenrator settings.
- FistCytiFlore, SecondCytiFlore - exactly the same are needed only for the BorderComponent to display correctly.
Roomstorage
In RoomStorage there are objects that determine the parameters of rooms placed at the level.
- NodeRooms - Rooms located in the nodes of the graph. Derived from LevelRoomActorNode
- GroundLinkRooms - These are sections of the corridors connecting NodeRoom. Derived from LevelRoomActorLink
- RoadLinkRooms - This section is inserted if the corridor goes across the road. Derived from LevelRoomActorRoadLink
- TerraceLinkRoom - These are sections of corridors located above the road along the walls. Derived from LevelRoomActorTerraceLink
Having created one of the rooms, we will see this:

As in the previous case, we see BordersShower - but it already has other parameters:
- JointSlots - Determine where other rooms will join. To set them, you need to determine the relative coordinate and direction from 4. If not defined correctly, the slot will be painted in WrongSlotsMaterial.
- RoomSize - The size of the room in cells. All rooms are rectangular parallelepipeds.
- RoomWals - You can add a room-bounding wall, set like JointSlot. What are they needed for? Depending on the location, the room may not have walls, and if walls are added here they will always be.
- CanPlayerSpanw - Can a character appear in this room.
- CellSize, CellHeight, WallTicness - Likewise, they are only needed for BordersShower rendering; they do not affect level generation.
Hovercarstorage
HoverCarStorage contains objects defining parameters of hovercars. These objects are derived from HoverCarActor.
Here's what we will see by creating such an object:
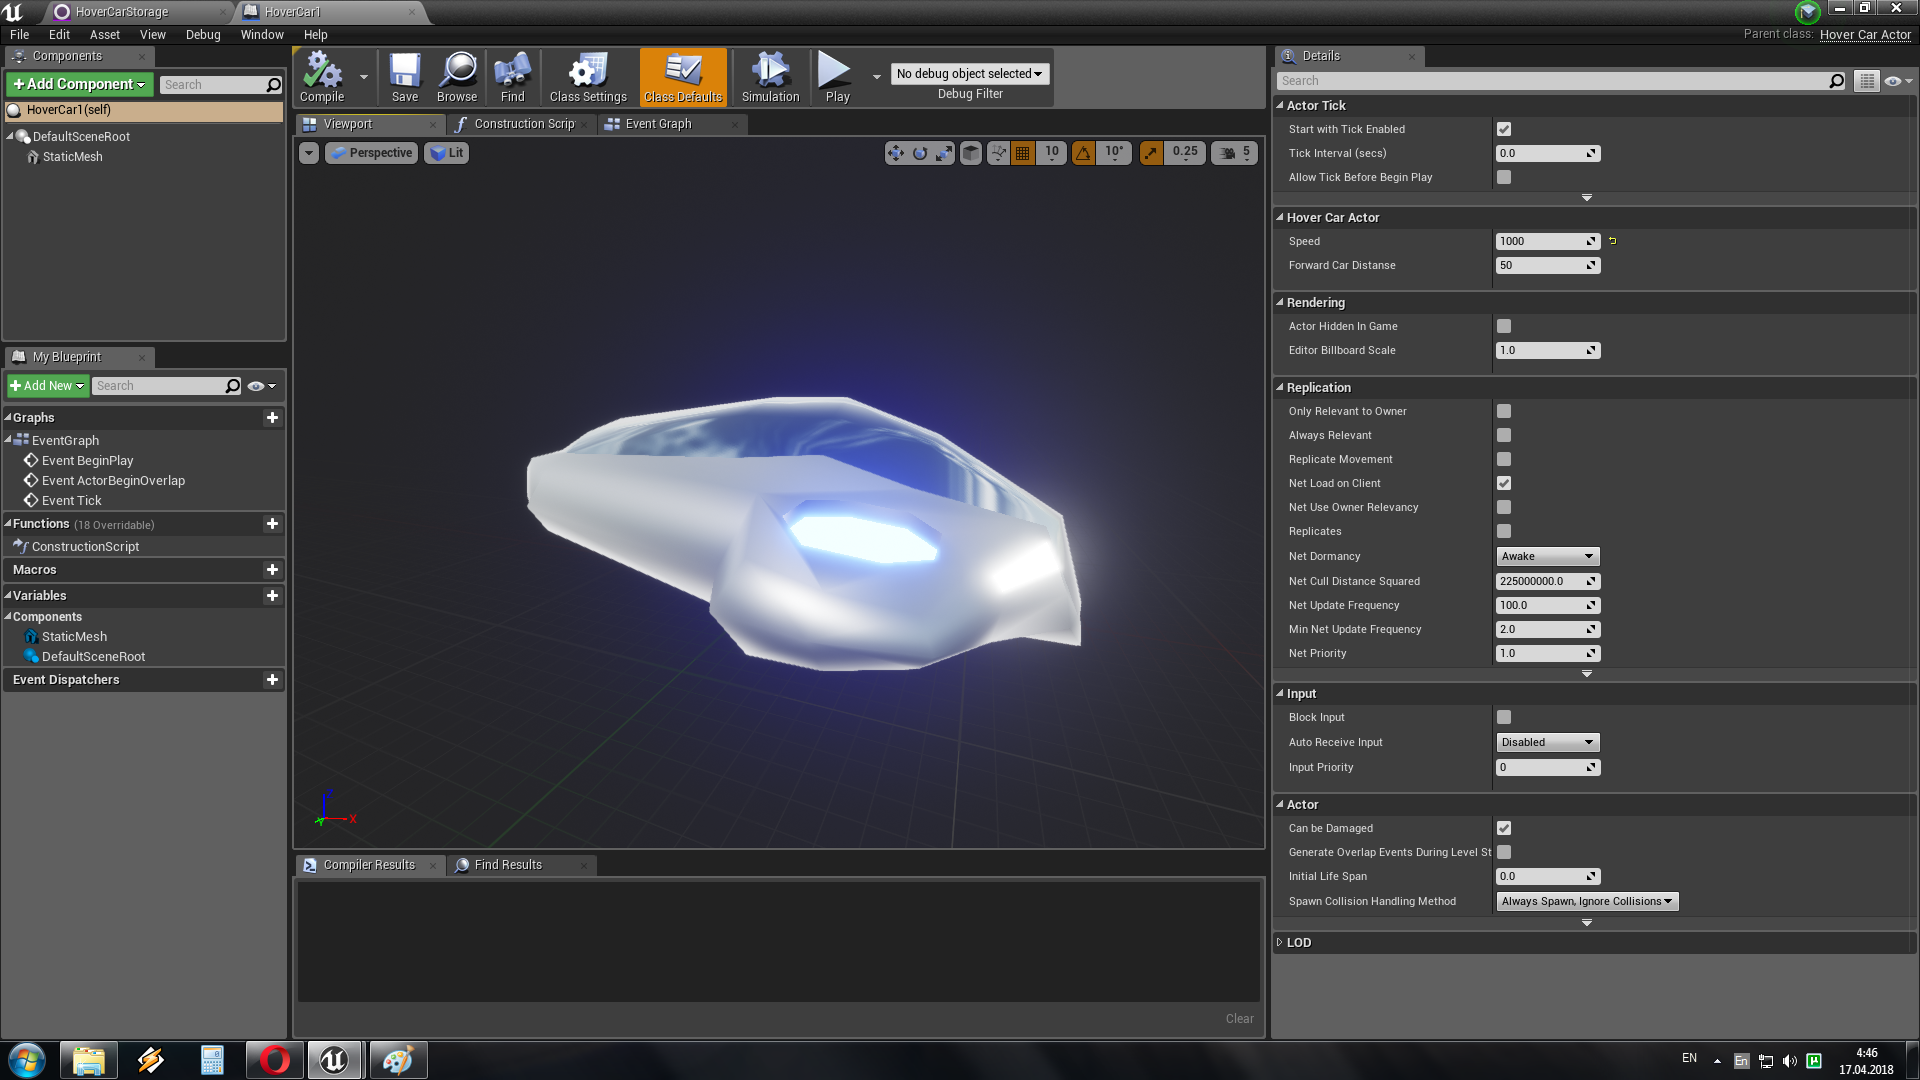
This object already does not have BordersShower, and the only one parameter is Speed, which determines the speed of the browser, the ForwardCarDistance parameter is not used in any way.
That's all.
Download plugin link.
Surprise
Those who still read to the end are waiting for the promised surprise, and they will, my game “The Future City Project”. The game is a first-person action game with parkour in a procedurally generated world.
Download link "The Future City Project"