Unreal Engine 4 - burning shader
- Transfer
- Tutorial
This is a small shader that appeared when I thought about the various methods of applying a flowmap. There are many transition / dissolution effects, but most of them look pretty static, as they use static textures. This shader is far from perfect, but the smooth movement makes it visually appealing as a smooth burning effect.
The shader itself is extremely simple, below I will describe the process of its creation. As with most of my shaders, I wrapped it in a material function so that it can be used with any existing materials.
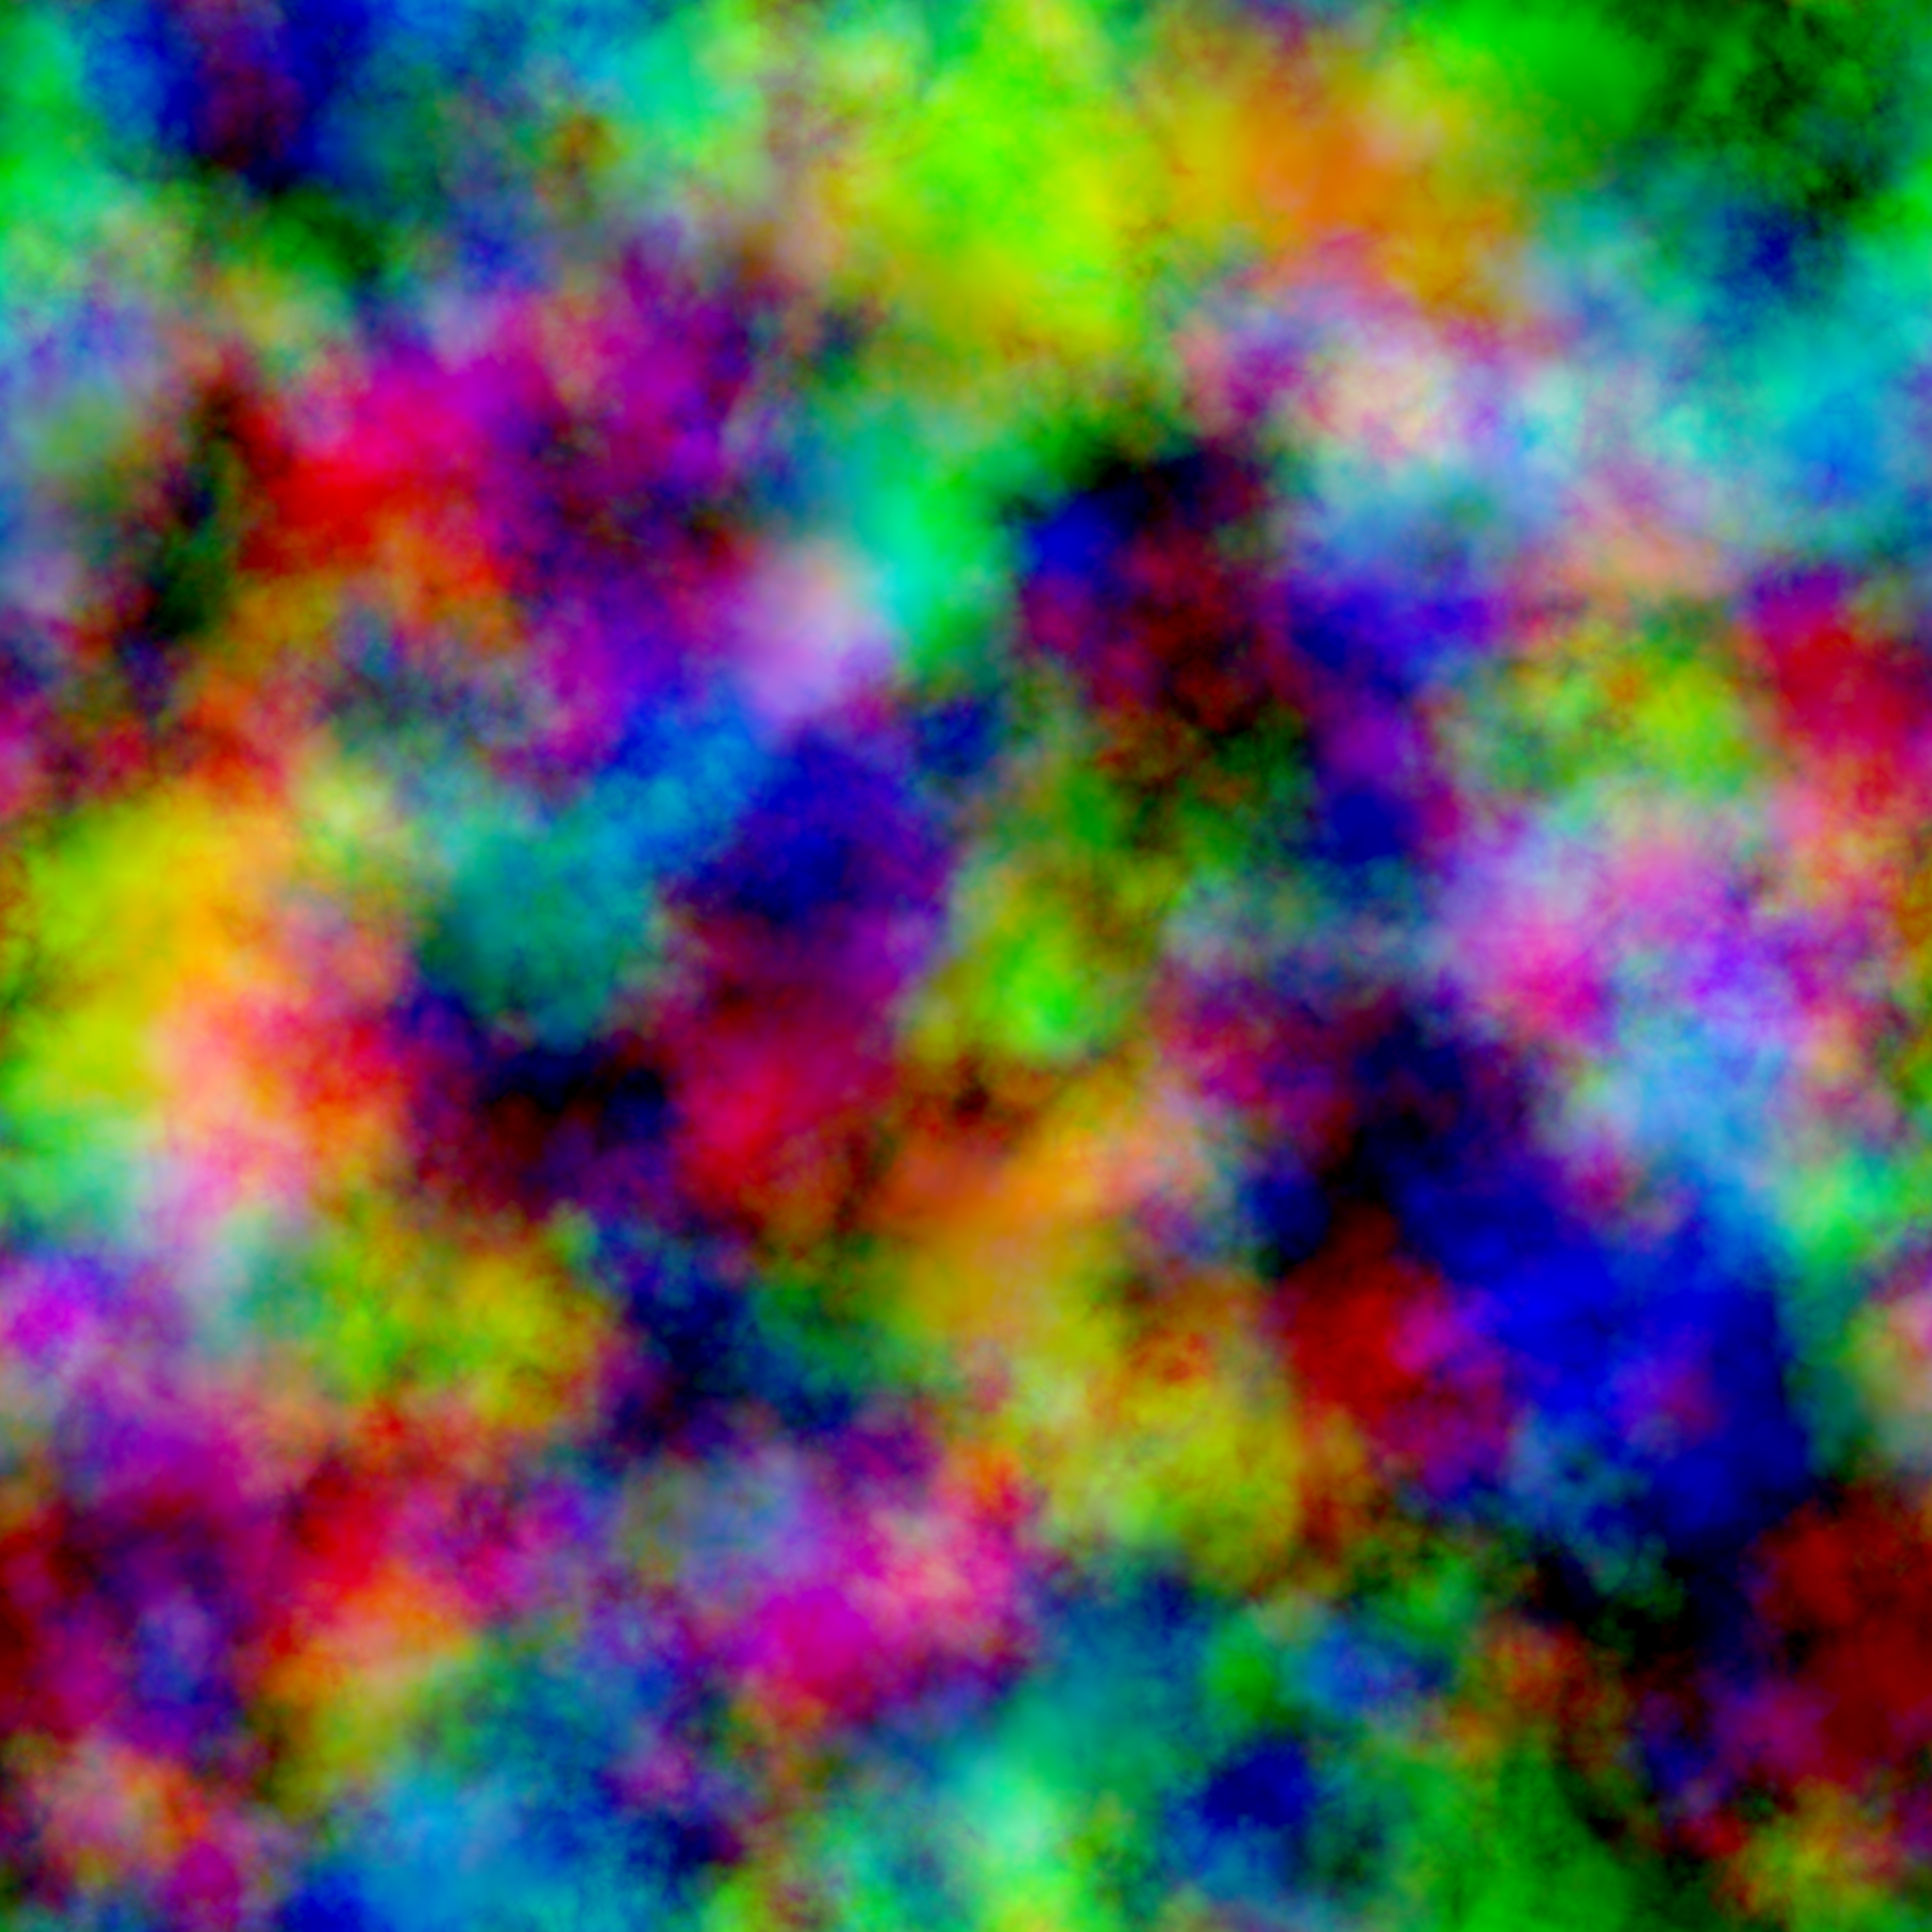
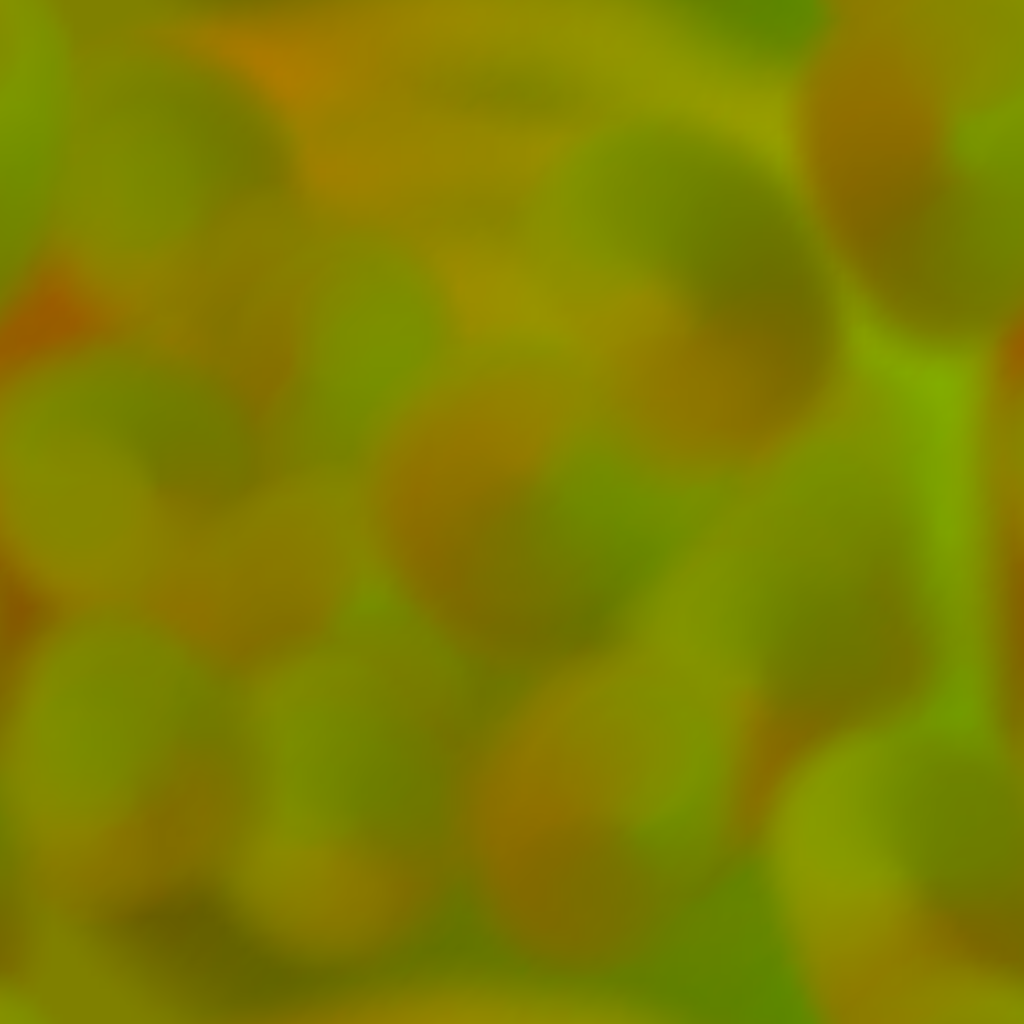
I used the following textures in the shader, the first is the simple noise generated in the Substance Designer, the second, the flowmap, which I drew using FlowMap Painter .
Flowmapping is the method by which we use 2D vectors stored as a texture to distort the UV texture for a specific time. This animation then loops around to create the illusion of flow. Usually this is used in streams of water to create the impression that water flows around stones, etc. But, of course, it can be used for many other things. In my shader, I use it to create the effect of burning material. If you want to understand more about flowmap, I recommend reading the article on Polycount and see a lesson from Simonschreibt in which he perfectly explains the work with flowmap.
My options settings below
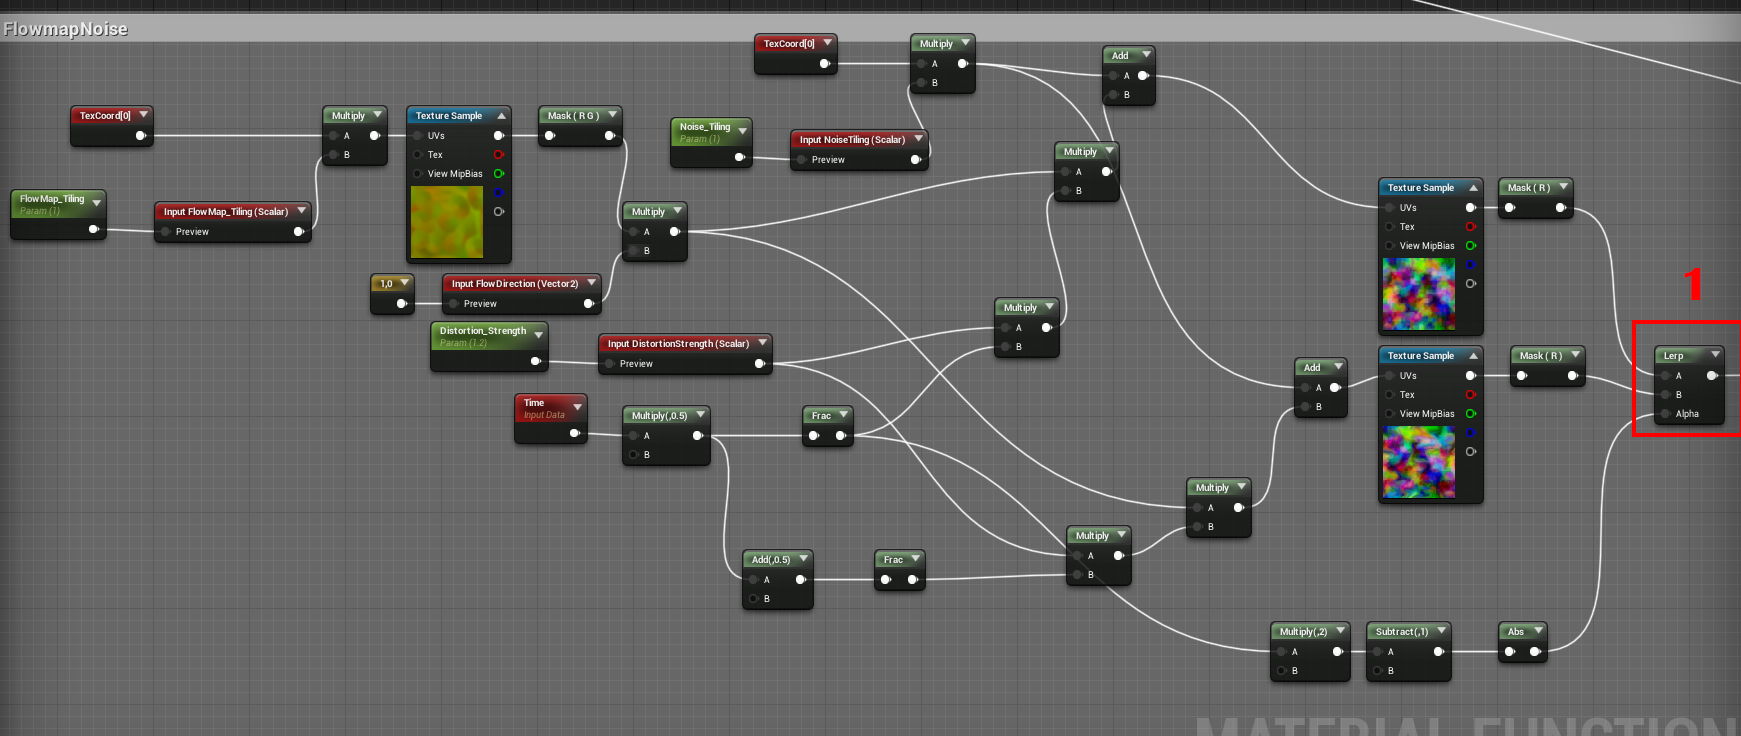
As you can see, we have options for controlling distortion strength, texture tiling, and flow direction.
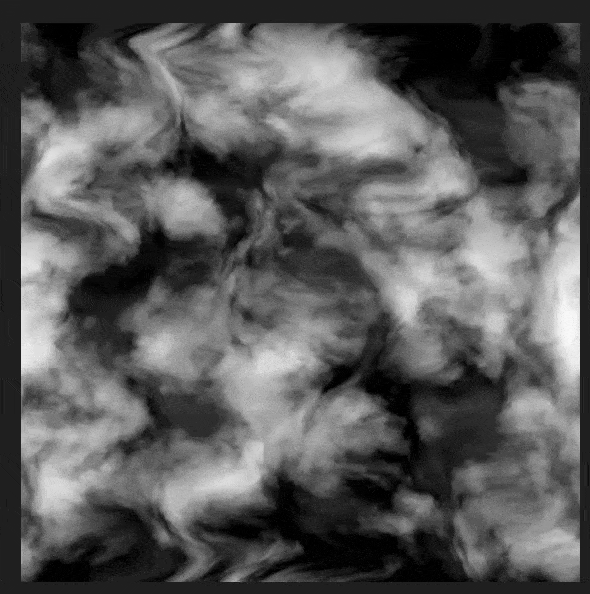
To control the effect, I use the output from the red channel from the noise map, if you look at the Lerp node, you will see the following result:
This step can be implemented in several ways, after all, all he needs is a gradient scale value to control our effect. In this case, I use SphereMask, controlled by the position of the blueprint, to move our mask. By moving the blueprint around, I can influence which areas are burned, and also animate the radius of the sphere to create a burning effect. If you want to know how to configure a set of material parameters to transfer the position of the BP to the shader, I recommend reading about the Wormhole shader , where I describe it in detail.
Creating SphereMask is easy, as UE4 already has a built-in function.
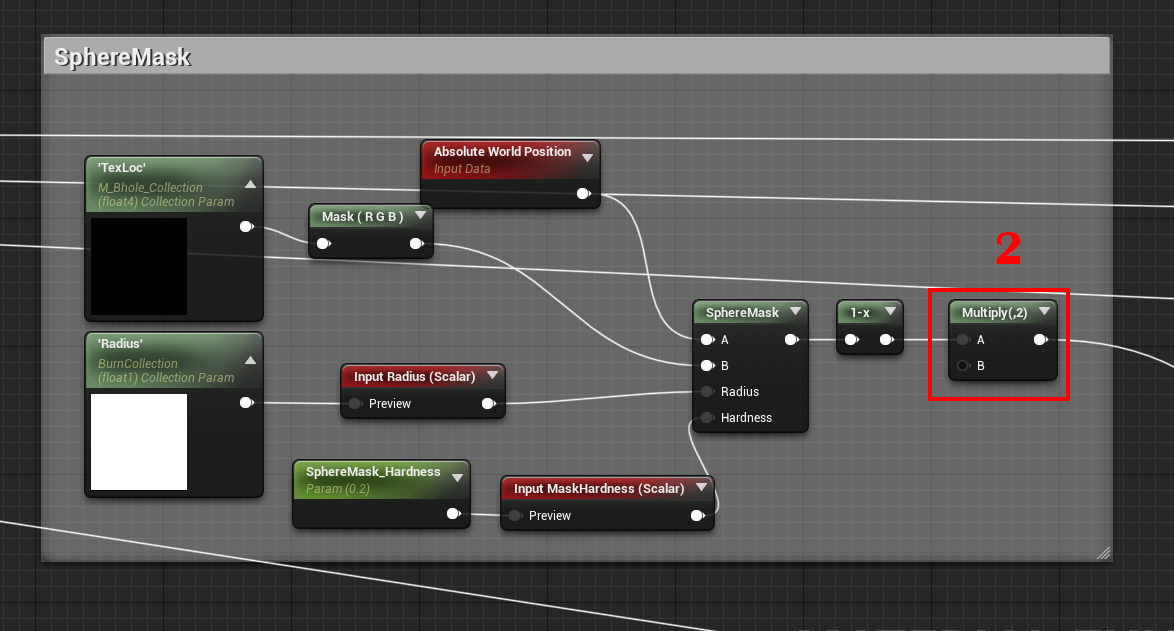
In this case, the radius is specified in world coordinates (World Space), to see this, try changing the radius value. The default location for SphereMask is {0, 0, 0}, so you will notice that the sphere appears in the center of the mesh.
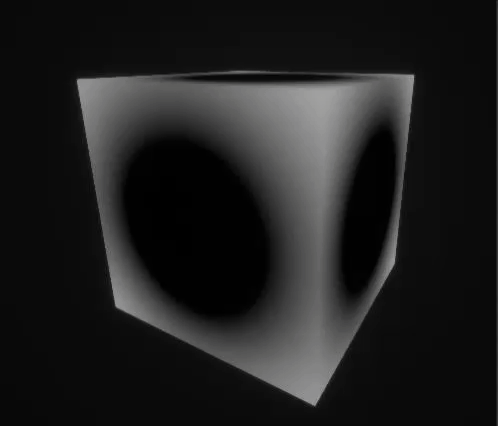
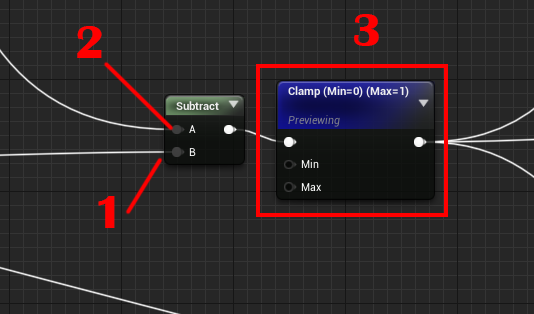
The next step is to subtract the result of the noise flowmap from SphereMask, so that we get a pattern similar to burning as the mask scales.
Note that you can adjust the Hardness parameter of SphereMask to control the amount of scatter during the transition.
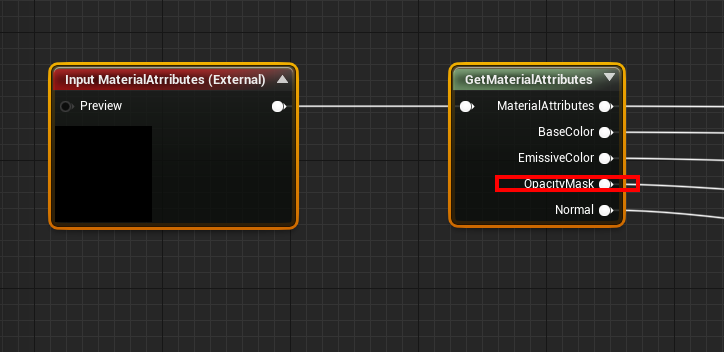
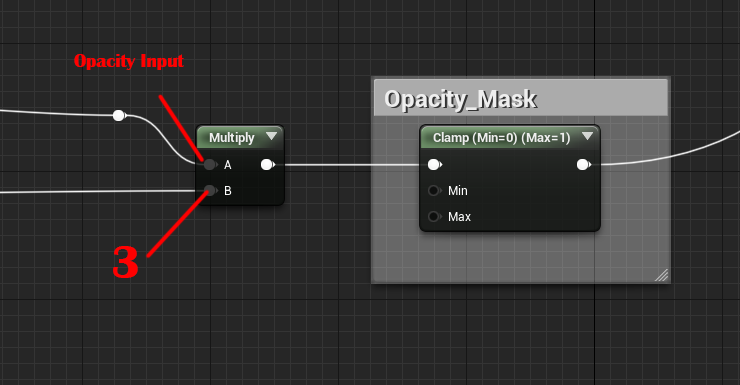
Now we can take the result and multiply it by Opacity_Mask and return the Opacity of the material to our channel to get the final mask.
You can also make such an effect without adjusting the flowmap using only a static texture. The only difference is that using flowmap you will achieve smoother animation. Below you can see the difference.
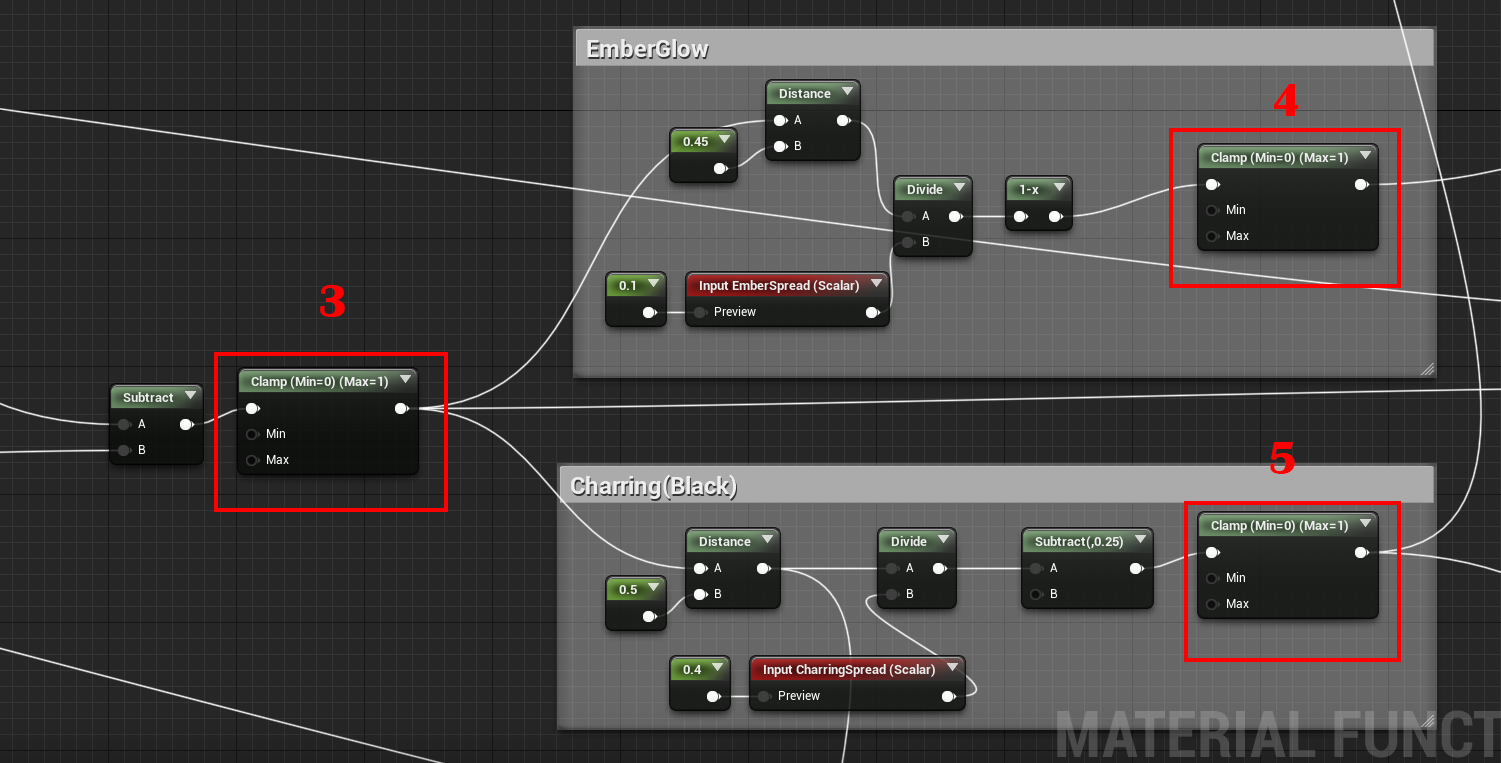
To make burning edges and get a charred blackish outline, we use the technique I used in many of my shaders, where we set the mask gradient to 0 and create an edge mask using the distance function.
Below you can see these settings. The only thing that should be noted here is that we choose 0.45 for the glow contour and 0.5 for the charring contour so that they are shifted relative to each other, and charring appears around the glow. Then we create a parameter from the width to control the spread as needed.
If you put a preview on each of these nodes, you will see the following
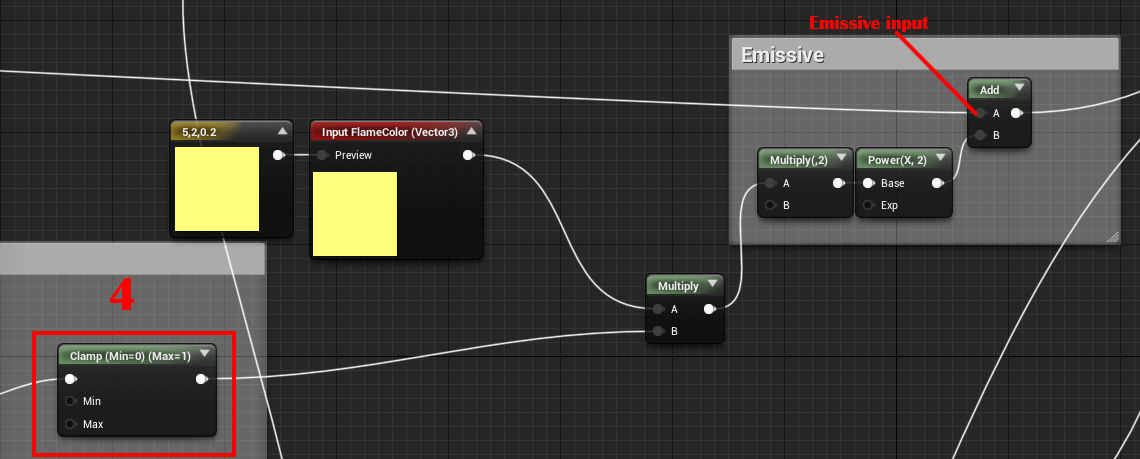
Now we take the result from EmberGlow and multiply it by the color of the flame, then add it to the color of Emissive and return it to the input of our material.
Alternatively, you can use the result from the EmberGlow section as Diffuse data to display colors based on the gradient. This technique is called gradient mapping, and UE4 now has a CurveAtlass function that allows you to define color curves and access them inside the shader. Note that this is an experimental function, and I ran into several missions trying to use it in my shaders, so I advise you to refrain from using it for now.
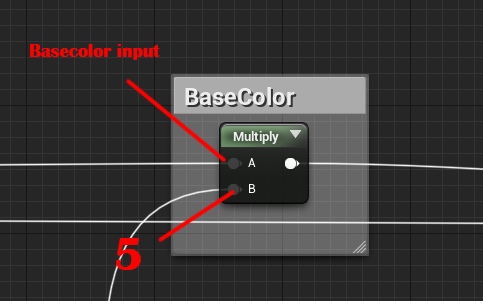
Then we take the result from the Charring section and multiply it by Basecolor from the input data of the function to get the Final Basecolor value.
Now you can see how the edges turn black before starting to burn
. We have finished with this.
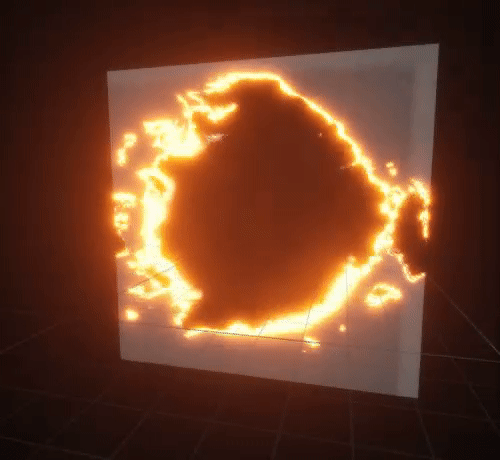
Now the coolest part is that we can move our blueprint around to change the burning area. For example, in the game, we can use the location of the player’s torch to control this effect. As a result, it will look like it is burning something. And we can control the Hardness parameter of SphereMask and the radius to get the look we need. This is how it will look with different settings.

In addition, you can animate the radius so that it looks as if it burns with time.
An example of a project with this shader can be taken from the github repository
The shader itself is extremely simple, below I will describe the process of its creation. As with most of my shaders, I wrapped it in a material function so that it can be used with any existing materials.
Note. You can open the images in a new tab to view them in higher resolution.
Textures
I used the following textures in the shader, the first is the simple noise generated in the Substance Designer, the second, the flowmap, which I drew using FlowMap Painter .
Setting FlowMap
Flowmapping is the method by which we use 2D vectors stored as a texture to distort the UV texture for a specific time. This animation then loops around to create the illusion of flow. Usually this is used in streams of water to create the impression that water flows around stones, etc. But, of course, it can be used for many other things. In my shader, I use it to create the effect of burning material. If you want to understand more about flowmap, I recommend reading the article on Polycount and see a lesson from Simonschreibt in which he perfectly explains the work with flowmap.
My options settings below
As you can see, we have options for controlling distortion strength, texture tiling, and flow direction.
To control the effect, I use the output from the red channel from the noise map, if you look at the Lerp node, you will see the following result:
SphereMask
This step can be implemented in several ways, after all, all he needs is a gradient scale value to control our effect. In this case, I use SphereMask, controlled by the position of the blueprint, to move our mask. By moving the blueprint around, I can influence which areas are burned, and also animate the radius of the sphere to create a burning effect. If you want to know how to configure a set of material parameters to transfer the position of the BP to the shader, I recommend reading about the Wormhole shader , where I describe it in detail.
Creating SphereMask is easy, as UE4 already has a built-in function.
In this case, the radius is specified in world coordinates (World Space), to see this, try changing the radius value. The default location for SphereMask is {0, 0, 0}, so you will notice that the sphere appears in the center of the mesh.
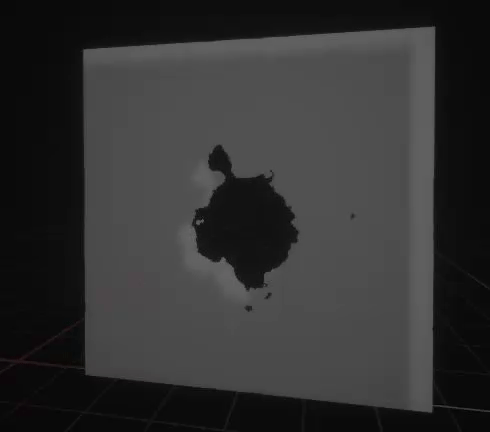
The next step is to subtract the result of the noise flowmap from SphereMask, so that we get a pattern similar to burning as the mask scales.
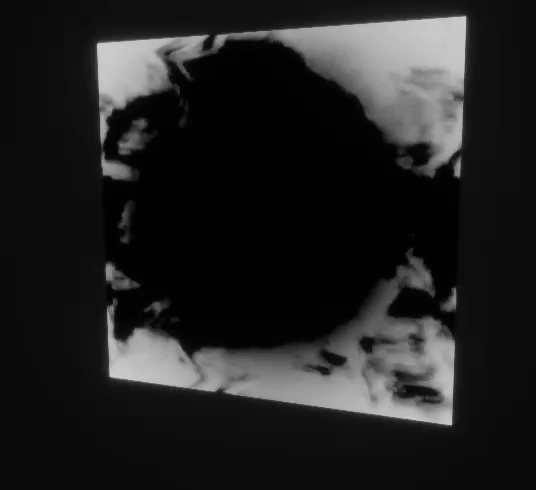
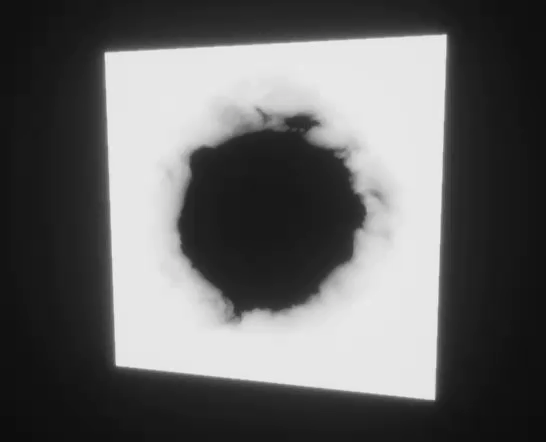
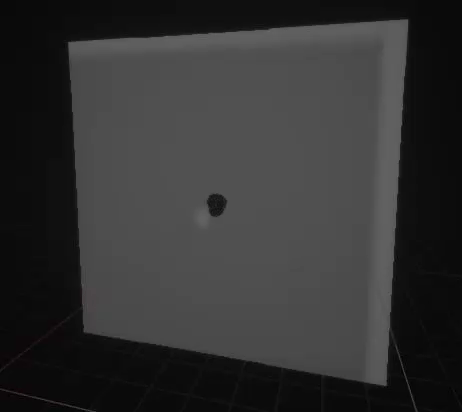
Note that you can adjust the Hardness parameter of SphereMask to control the amount of scatter during the transition.
| Hardness: 0.2 | Hardness: 0.5 |
|---|---|
 |  |
Now we can take the result and multiply it by Opacity_Mask and return the Opacity of the material to our channel to get the final mask.
 |  |
You can also make such an effect without adjusting the flowmap using only a static texture. The only difference is that using flowmap you will achieve smoother animation. Below you can see the difference.
| with flowmap | no flowmap |
|---|---|
 |  |
Edge glow and charring
To make burning edges and get a charred blackish outline, we use the technique I used in many of my shaders, where we set the mask gradient to 0 and create an edge mask using the distance function.
Below you can see these settings. The only thing that should be noted here is that we choose 0.45 for the glow contour and 0.5 for the charring contour so that they are shifted relative to each other, and charring appears around the glow. Then we create a parameter from the width to control the spread as needed.
If you put a preview on each of these nodes, you will see the following
| Emberglow | Charring |
|---|---|
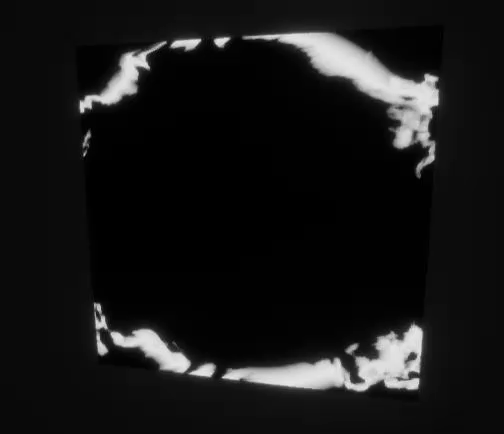 |  |
Now we take the result from EmberGlow and multiply it by the color of the flame, then add it to the color of Emissive and return it to the input of our material.
Alternatively, you can use the result from the EmberGlow section as Diffuse data to display colors based on the gradient. This technique is called gradient mapping, and UE4 now has a CurveAtlass function that allows you to define color curves and access them inside the shader. Note that this is an experimental function, and I ran into several missions trying to use it in my shaders, so I advise you to refrain from using it for now.
Then we take the result from the Charring section and multiply it by Basecolor from the input data of the function to get the Final Basecolor value.
Now you can see how the edges turn black before starting to burn
. We have finished with this.
Now the coolest part is that we can move our blueprint around to change the burning area. For example, in the game, we can use the location of the player’s torch to control this effect. As a result, it will look like it is burning something. And we can control the Hardness parameter of SphereMask and the radius to get the look we need. This is how it will look with different settings.
In addition, you can animate the radius so that it looks as if it burns with time.
An example of a project with this shader can be taken from the github repository