Unreal Engine Tutorial. Part 6: Animation
- Transfer
- Tutorial
Today it is rarely possible to meet a game without animation, because it is an important aspect of the transmission of motion. Without animation, it will seem that the character is not running, but sliding.
Fortunately, Unreal allows you to quickly and conveniently animate characters!
In this part of the tutorial you will learn the following:
- Import Skeleton Mesh
- Import animations
- Create Animation Blueprint for transitions between different animations
- Perform smooth transitions of animations
Please note that in this part we will use Blueprints. If you need to refresh your knowledge, then read the article on Blueprints .
Note: this post is one of eight parts of the Unreal Engine tutorial:
- Part 1: Introducing the Engine
- Part 2: Blueprints
- Part 3: Materials
- Part 4: UI
- Part 5: How to create a simple game
- Part 6: Animation
- Part 7: Sound
- Part 8: Particle Systems
- Part 9: Artificial Intelligence
- Part 10: How to create a simple FPS
Getting to work
Download the project blank and unzip it. There is an Animation Assets folder in the root directory . In this folder are the character and animations that we will import.

Open the project by going to the project folder and running SkywardMuffin.uproject .
Note: if a window opens informing that the project was created in an earlier version of the Unreal editor, then everything is in order (the engine is often updated). You can either select the option to create a copy, or the option to convert the project itself.
Click on Play to start the game. The goal of the game is to touch as many clouds as possible without falling. To jump to the first cloud, click the left mouse button .
Spoiler heading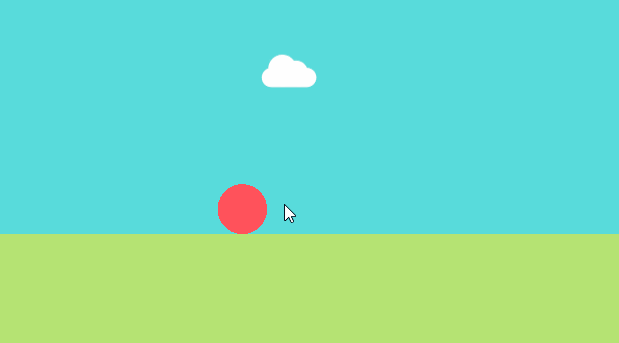
Instead of a simple red circle, let's control this cute muffin:

This muffin has a skeleton that allows us to animate it.

What is a skeleton?
In 3D editors, a skeleton refers to many interconnected points called hinges . In the figure below, each sphere is a hinge.

Note: Unreal uses the interchangeable terms joint and bone .
By controlling these hinges, you can create various character poses.

When moving from one pose to another, an animation is created .

If you create even more poses between the previous ones, you can get something like this:
Spoiler heading
In Unreal, any skeletal mesh is called Skeletal Mesh . Let's start by importing a Skeletal Mesh for a muffin.
Import Skeletal Mesh
Go to Content Browser and go to Characters \ Muffin . Click on Import and go to SkywardMuffinStarter \ Animation Assets . Select SK_Muffin.fbx and click Open .

In the import window, go to the Mesh section and uncheck the Create Physics Asset option . Physics Asset helps create a ragdoll effect. We will not use it in this tutorial, so we won’t need it.

The project already contains the material and texture of the muffin, so you do not need to import them. Uncheck the Import Materials and Import Textures options .

Leave all other settings as default and change to Import . This will create the following assets:
- SK_Muffin: Skeletal Mesh Asset. This is just a mesh with reference to the Skeleton asset.
- SK_Muffin_Skeleton: Skeleton asset. It contains a list of hinges and other information, for example, about their hierarchy.

Having imported the muffin, we are ready to use it.
Using Skeletal Mesh
Before using the new Skeletal Mesh, you need to give him the material so that it is not just a gray spot. Double-click on SK_Muffin to open it.
Go to the Asset Details panel and find the Material Slots section . Assign the material to M_Muffin and close SK_Muffin .

Now let's use SK_Muffin as a player character. Return to the Content Browser and double-click on BP_Muffin to open it.
Go to the Components panel and select the Mesh (Inherited) component . Switch to the Details panel and find the Mesh section . For the Skeletal Mesh property, select SK_Muffin .

Click on Compile and return to the main editor. Click on Play and you can control the muffin in the game!
Spoiler heading
The game already looks much better! The next step is to import animations that breathe life into the muffin.
Import animations
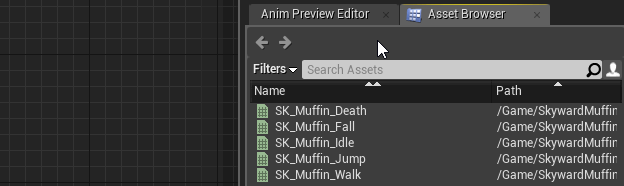
Go to Content Browser and click on Import . Go to SkywardMuffinStarter \ Animation Assets . Select the following files:
- SK_Muffin_Death.fbx
- SK_Muffin_Fall.fbx
- SK_Muffin_Idle.fbx
- SK_Muffin_Jump.fbx
- SK_Muffin_Walk.fbx
After selecting them, click on Open .

In the import window, go to the Mesh section and uncheck the Import Mesh option . Thanks to this, the Skeletal Mesh will not be imported again.

Now verify that the Skeleton property is set to SK_Muffin_Skeleton . This defines the skeleton to be used in the animation.

Then click on Import All . So you import all animations with the settings just specified.

Now that we have all the animations, we need a way to play them. You can use for this Animation Blueprint .
Creating Animation Blueprint
Animation Blueprint is similar to regular Blueprint. However, it also has a graph intended only for animation tasks.
To create it, go to Content Browser and click on the Add New button . Select Animation \ Animation Blueprint .
In the pop-up window, find the Target Skeleton property and select SK_Muffin_Skeleton . Then click on the OK button to create the Animation Blueprint.

Rename the asset to ABP_Muffin . After that, double-click on it to open it in the Animation Blueprint editor.
Animation Blueprint Editor
The Animation Blueprint editor is similar to the Blueprint editor, but it has four additional panels:

- Anim Graph: This is a special graph for animations. All animations are played here.
- Preview Scene Settings: this panel allows you to customize the preview scene in Viewport
- Anim Preview Editor: created variables will also be displayed here. Use this panel to preview how your variables affect the final animation.
- Asset Browser: this panel contains a list of animations that the current skeleton can use.
To specify the situations in which should be played, each animation can use a state machine ( State Machine ).
What is a state machine?
A state machine is a collection of states and rules . In our tutorial, you can consider the state as animation.
Finite state machines can only be in one state at a time. To transition to the next state, certain conditions specified by the rules must be met.
Below is a simple example of a state machine. It shows the state of the jump and the rules for transition to each state.

States can also have a two-way relationship. In the example below, the states of Jump and Fall can transition into each other.

Without this two-way communication, the character would not be able to perform a double jump, because he could only switch to the Jump state from the Idle state.
Well, enough about finite state machines, let's get down to their creation.
Creating a state machine
Go to Anim Graph and right-click on an empty area. From the menu, select Add New State Machine .

This will add the State Machine node to the graph. Rename the State Machine to Locomotion . Then connect the Locomotion state machine to the Final Animation Pose node .

Locomotion State Machine will now determine the final animation of the muffin.
Double-click on the Locomotion state machine to open it. Inside you will see the Entry node .

The state connected to this node is the default state . In our tutorial, the default state will be wait animation. Create this state by right-clicking on an empty area of the graph. From the menu, select Add State and rename it Idle .

Now you need to connect the Entry node to the Idle state . Drag the Entry contact to the gray area of the Idle state . Release the left mouse button to connect them.

When creating a state through the context menu, no animation will be associated with it. Let's fix it.
Bind animation to state
Double-click on the Idle state to open it.
To snap the animation, go to the Asset Browser and drag the SK_Muffin_Idle animation . Release the left mouse button on an empty area of the graph to add it.

Then attach the Play SK_Muffin_Idle node to the Final Animation Pose node .

To use Animation Blueprint, we need to update BP_Muffin .
Using Animation Blueprint
Click Compile and switch to BP_Muffin .
Go to the Components panel and select the Mesh component (Inherited) . Go to the panel and find the Animation section .
Set Animation Mode to Use Animation Blueprint . For Anim Class, select ABP_Muffin .

Now Skeletal Mesh will use ABP_Muffin as its Animation Blueprint .
Click Compile and close BP_Muffin . Go to the main editor and click on Play to check out Animation Blueprint. Since Idle is the default state, the muffin immediately uses the wait animation.
In the next section, we will create states for jumping and falling.
Creating jump and fall states
Return to ABP_Muffin and switch to the Locomotion state machine graph . This can be done by clicking on the word Locomotion , located at the top of the graph.

Instead of creating a state and binding an animation to it, you can create a state with an animation already bound. Let's do it for the jump state.
Go to Asset Browser and drag the SK_Muffin_Jump animation . Release the left mouse button on an empty area of the graph. This will create a state with animations already attached to it.
Rename the state to Jump .
Repeat the process with the SK_Muffin_Fall animation and rename the state to Fall .
Now we have three states: Idle , Jump and Fall .

Now we will associate the states with each other. This can be done by dragging the gray area of the state from which you want to make the transition. Release the left mouse button on the gray area of the target state to create a transition.
Create the following transitions:
- From Idle to Jump
- From Jump to Fall
- From Fall to Jump
- From Fall to Idle

Now that we have the transitions, we need to set the conditions under which they occur. This can be done using the Transition Rules .
Transition Rules
This icon indicates a Transition Rule:

Each transition rule contains a Result node with a single Boolean input.

If this input is true , a transition occurs.
Next, we need to create variables that tell us if the player is jumping or falling. We will apply these variables in the transition rules.
Determine if a character is jumping or falling
Create two boolean variables named IsJumping and IsFalling .
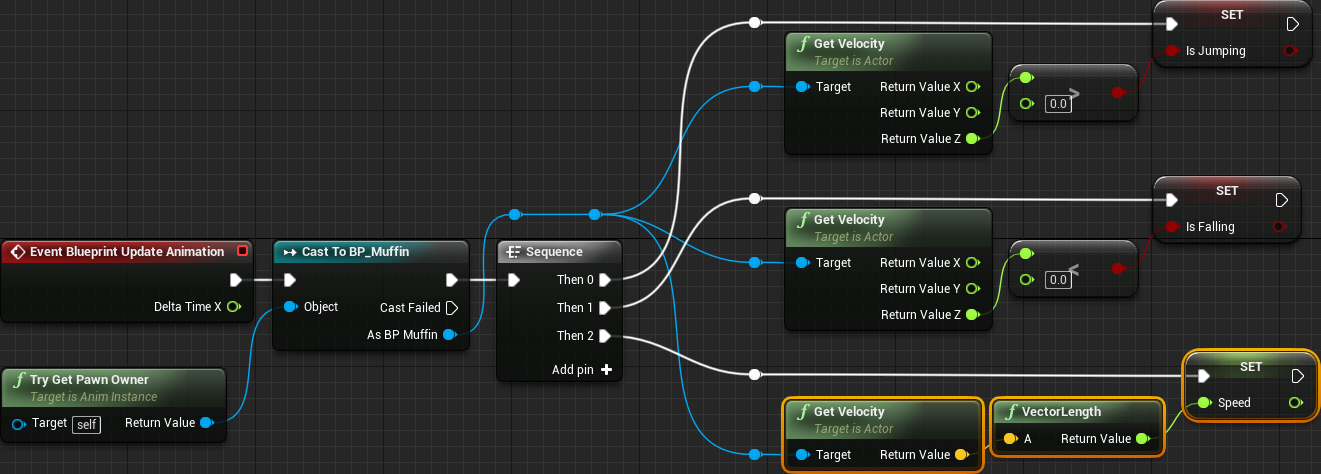
First, we set the value to IsJumping . Switch to the Event Graph and find the Event Blueprint Update Animation node . This node works like an Event Tick node .

To check if the character is jumping, create the following diagram:

So we check whether the character’s speed on the Z axis is greater than zero . If so, then the character jumps, and IsJumping should be set to true .
Note: Bring it to a class that will use Animation Blueprint. This is very important so that you can preview the variables using the Anim Preview Editor.
To check if the character falls, we just need to do the opposite check. Add selected nodes:
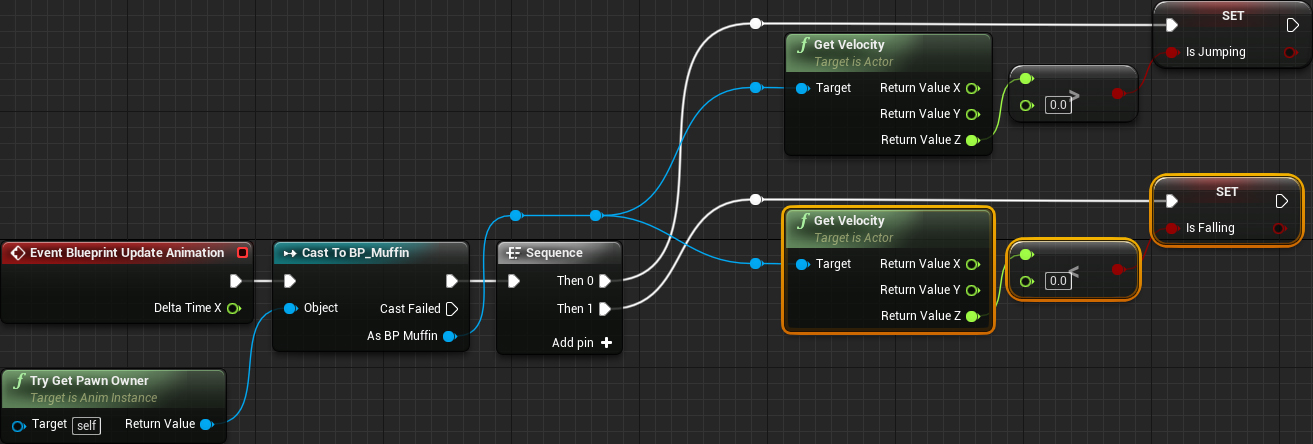
Now IsFalling will be true when the character’s Z speed is less than zero.
It’s time to use these variables to define transition rules.
Defining Referral Rules
First, we need to set the transition rule Idle to Jump . Switch back to the Locomotion state machine . Double-click on the Idle to Jump transition rule to open it.

Create an IsJumping node and connect it to the Result node .

Now the Idle state can transition to the Jump state when IsJumping is true .
Repeat the process for Jump to Fall and Fall to Jump transition rules . Use the following variables:
- From Jump to Fall: IsFalling
- From Fall to Jump: IsJumping

Jump and Fall states can now transition into each other.
It remains to assign another transition rule. Open the Fall to Idle transition rule .

To enter the Idle state, the player must not jump or fall. To perform this check, you can use the NOR node . This node returns true only when both inputs are false .
Create a NOR node and connect the IsJumping and IsFalling node to it . Then connect the NOR node to the Result node .

Now the Fall state can transition to the Idle state when IsJumping and IsFalling are false .
Click on Compile and return to the main editor. Click on Play to verify conversions.
Spoiler heading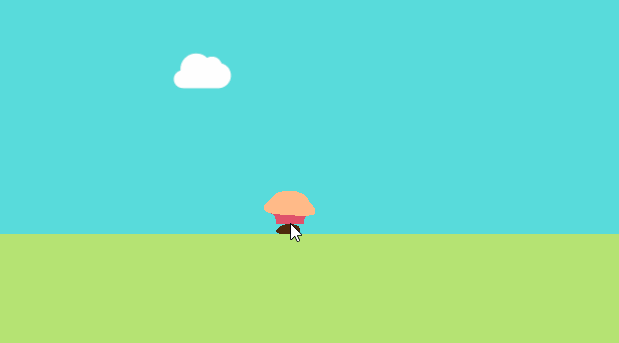
Note: you can also check transitions by changing variables in the Anim Preview Editor.
So far, the muffin only slides when moving on the ground, because we have not yet applied the walking animation!
Instead of creating a new walking state, you can mix it with a wait animation using Blend Space .
What is Blend Space?
Blend Space is a type of animation resource. It interpolates between different animations based on input values. In this tutorial we will use the player’s speed as input .
Spoiler heading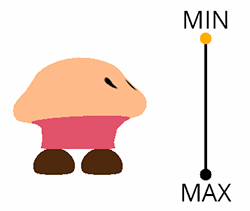
Blend Space also helps simplify state machines. Here's what the Locomotion state machine will look like if you don't use Blend Space for walking:

Thanks to Blend Space, it's easy enough to replace the wait animation.

Now that you’ve become familiar with the magic of Blend Space, it’s time to create it.
Creating Blend Space
Go to Content Browser and click on Add New . Select Animation \ Blend Space 1D .
Note: the difference between Blend Space and Blend Space 1D is that the first has two inputs. The latter has only one input.
In the pop-up window, select SK_Muffin_Skeleton .

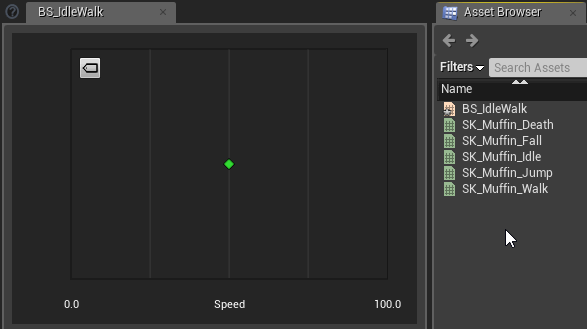
Rename the asset to BS_IdleWalk and double-click on it to open it in the Animation editor.
When Blend Space opens, you will see a panel at the bottom of the screen. This is the Blend Space editor in which we will add animations.

Let's add animations to Blend Space.
Adding Animations to Blend Space
First, you need to change the name of the axis value (input). Go to the Asset Details panel and find the Axis Settings section . Change the Horizontal Axis \ Name property to Speed .
Now we will add animations. Go to Asset Browser and drag the SK_Muffin_Idle animation . Move it to the left on the Blend Space grid so that it snaps to a value of 0.0 . Release the left mouse button to add animation.
Note: to display the names of the animations, click on the label icon in the upper left corner of the Blend Space grid.
After that, add the SK_Muffin_Walk animation to the value 100.0 .

Blend Space will now mix wait and walk animations based on the input value. If the input value is 0 , only the wait animation will be played. If the input value is 100 , only the walking animation will play. All intermediate values will be mixed.
Note: these values are chosen arbitrarily. For example, you can change the maximum value by making it equal to 500. In this case, the walking animation will only play at higher speeds.
You can change the values of the Axis Settings section in the Asset Details panel.
It's time to use Blend Space.
Apply Blend Space
Close BS_IdleWalk and open ABP_Muffin . Switch to the Locomotion state machine and open the Idle state .
First, delete the Play node SK_Muffin_Idle .
Then add Blend Space BS_IdleWalk using drag and drop. Connect the BS_IdleWalk node to the Final Animation Pose node .

Now BS_IdleWalk will play automatically because it is the default state. However, it will only display wait animations. This is because the Speed input remains at 0 .
To fix this, you need to pass him the player’s speed.
Getting player speed
Create a new variable of type float named Speed . Then switch to the Event Graph.
Add a new contact to the Sequence node , and then add the highlighted nodes to it:
This pattern will constantly equate the Speed variable to the player’s speed value.
Switch back to the Idle status graph . Connect the variable Speed to the input Speed node BS_IdleWalk .

Now BS_IdleWalk will be able to mix between wait and walk animations.
Click on Compile and return to the main editor. Click on Play to test Blend Space.
Spoiler heading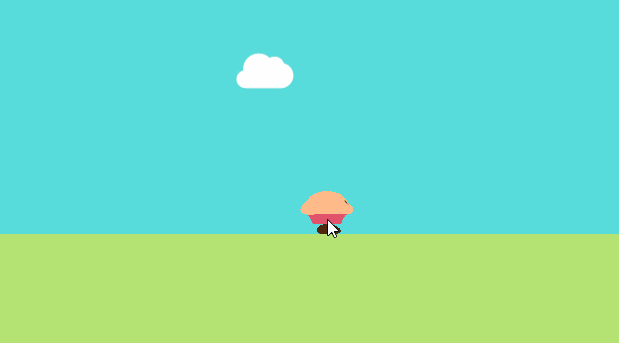
There is another animation we need to use: the death animation!
Using Death Animation
In this game, you can only die in the Idle state (on earth). However, let's imagine that a player can die in any condition. The first thought will be to create the Death state and connect all the states with it. This can be done, but it will quickly lead to a confusing graph.

The solution might be to use the Blend Poses by bool node . This node can switch between two animations depending on the value of the input Boolean value.
Before creating this node, we need a variable containing the death status of the player.
Check if the player is dead
Go back to ABP_Muffin and create a boolean variable called IsDead . Then switch to the Event Graph.
Add a new contact to the Sequence node , and then add the highlighted nodes to it:
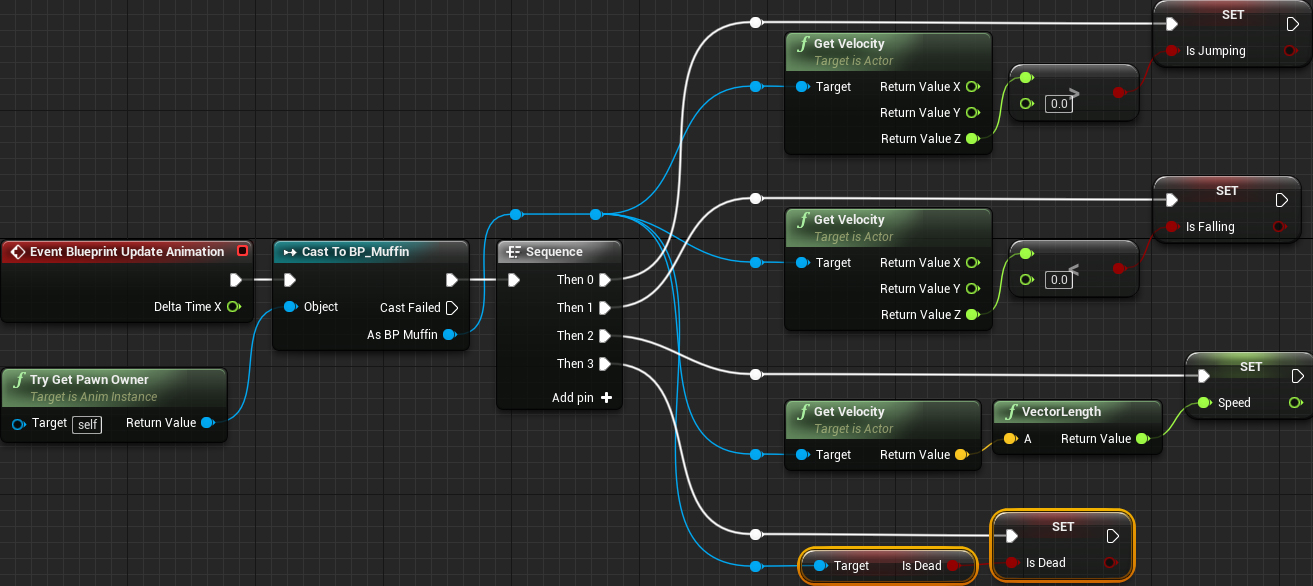
So we set the IsDead variable , depending on the state of death of the player.
Then we will use the Blend Poses by bool node .
Using the Blend Poses by Bool node
Switch to Anim Graph and add SK_Muffin_Death animation . Having selected it, go to the Details panel and uncheck the Loop Animation property .

Thanks to this, the death animation will play only once.
Then create a Blend Poses by bool node .

Select the Blend Poses by bool node and go to the Details panel. In the Option section, select the Reset Child on Activation property .

Since the death animation plays only once, this option ensures that the animation is reset before playback.
Finally, add the IsDead variable and connect everything as follows:

Now if the IsDead variable is true , then the death animation will start playing. If IsDead is false , the current animation of the Locomotion state machine will be played .
Click on Compile and close ABP_Muffin . Click on Play and test the new death animation!
Spoiler heading
Where to go next?
You can download the finished project here .
Now the game looks much better, right? Based on the knowledge already gained, much can be done, but this is not the end! Check out the Skeletal Mesh Animation System page of the Unreal Engine documentation. Here you can learn about other types of animation assets and how to use them.
If you want to continue learning, then read the next part of the tutorial , in which I will show you how to add music and sound effects to the game.