Biome Draftsman: Filling the World with Content
- Transfer
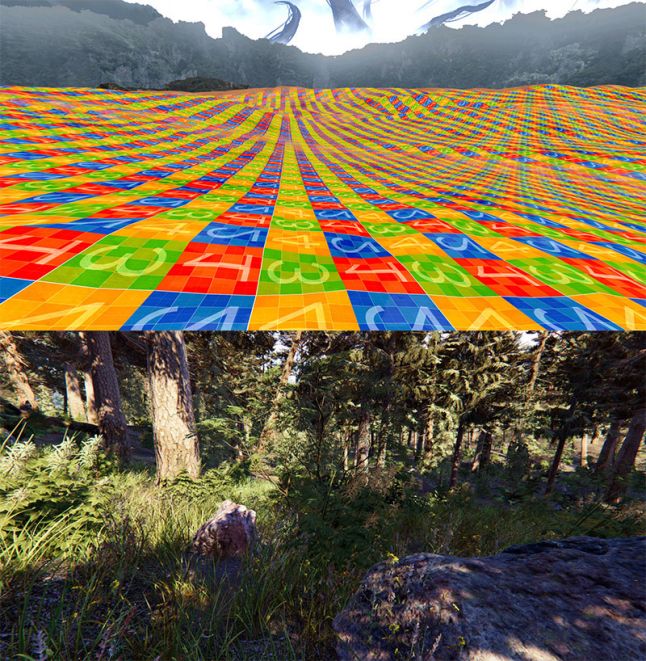
How to convert a height map from the top image to the forest from the bottom?
Open world games are steadily gaining popularity and are in first place on the bestseller list. Each new game raises the bar for the size and complexity of the world. Just by looking at the trailers of the latest open-world games, you can understand that their goal is to create a sensation of enormous proportions.
The construction of such worlds poses a big question for developers - how to effectively fill such spacious worlds? No one wants to arrange each tree manually, especially if the development team is small. After all, game development is always about smart compromises.
If you look at a typical open world game, you can see the Pareto principle in action - 20% of the content is the main path of the player, and 80% is the background. The main path of the player must be of high quality and artistic content, because the players will spend most of the time on it. Backgrounds, including vast forests or deserts around major cities, do not require such attention to detail. These 80% are a great target for smart content hosting tools that sacrifice a bit of quality and decoration in favor of speed and ease of content creation.
After the release of our latest game, “Shadow Warrior 2,” we had the opportunity to experiment a bit with new ideas while our design team was busy pre-production of the new game. We decided to spend this time creating a prototype of an improved placement tool, actively working with level artists. We are very grateful to our employer Flying Wild Hog, who allowed me to write about this so early, and to all those who participated in the creation of this prototype.
We knew how to generate a simple elevation map in World Machine. The question was how to quickly transform this map into a beautiful scene, so that the team of level artists would not die from overwork.
Decision analysis
There are several approaches to solving this problem, including a procedural location, a location based on physics, and a location based on color maps.
A procedural arrangement generates content based on a set of defined rules and a random seed. Such methods can be divided into those that simulate the physical process (teleological) and those that simply try to simulate the final result (ontogenetic). An example of teleological methods can be forest generation based on the accumulation of water and the distribution of sunlight in The Witcher 3 . Another example is a tool for creating procedural vegetation in UE4, which simulates the growth of successive generations of vegetation. Examples of ontogenetic methods include Houdini-based procedural generation, in which technical artists write the rules themselves, for example, as in " Ghost Recon Wildlands ".
Physical solutions are an interesting way to arrange objects. They are based on a simulation of physics, in which you can drop several objects from a height and wait until they disperse in level. This is implemented, for example, in the Object Placement Tool for Unity.
The location based on the color map is based on manually painted color maps, which are subsequently converted into resources in accordance with a given set of rules. A fresh example of this approach is the tools fromHorizon Zero Dawn ", which has become a powerful source of inspiration for us.
starting point
We are a fairly small studio with limited resources, so we are always looking for ways to speed up our work - including using improved entity location tools.
Our first placement tool was based on physics and was created for our first game Hard Reset (2011). The game was attended by dark cyberpunk cities, so we created a tool for quickly locating various types of “garbage”. We could just hang objects in the air and turn on a physical simulation. After everything fell to the ground and stopped moving, then if we liked the final results, it was enough to just save them. Using this tool was a real pleasure, but as a result, its use was quite limited. The results were difficult to manage, and the repetition of the simulation often turned out to be slower than the manual arrangement, so in the end we decided to drop this idea.
We looked closely at the procedural solutions, but we were not able to apply them, mainly because of the team of level artists who did not master Houdini and similar packages too well.
In the second game, Shadow Warrior (2013), we had outdoor areas with different types of vegetation, so we created a drawing-based layout tool . The process of working on levels was based on the creation of basic grids (meshes) in 3ds Max. Level artists painted the vertices of these level grids, and during the import of the level, this vertex coloring was transformed into many points for creating objects.
Painted level grid from Shadow Warrior - the color of the vertices stores the density of grass and thickets.
Inside our game editor, level artists could choose any area and configure the type of entities created there with the specified density and properties (for example, snap to a grid or color variations). Then, during the execution of the game, we created these entities in accordance with the rules and parameters of the execution of the game (for example, LOD settings) set by the artists. This tool was well received by the team of level artists and they often asked us to further expand its capabilities.
Requirements
We started by writing down the characteristics expected from the new system:
- Rapid prototyping. We wanted to quickly prototype worlds based on the high-level input provided by level artists so that they could quickly set the world’s appearance in general terms. The level artist should at least be able to indicate where the forest, desert, etc. are located. For example, draw a 2D world map, and then transform it into an in-game world. The ability to quickly launch a prototype of the world inside the game is very important so that the entire development team can start working.
- Simple and safe iterations. We need a way to make safe changes at the last minute, in which you do not need to rebuild the whole world and do not need to block the area (convert the location tool data to manually placed entities). Locking a region allows you to make arbitrary changes to the arrangement of entities, but destroys the whole point of the layout tool, because after locking it will not be possible to configure layout rules in the process without destroying manually made changes. That is, a decrease in the parameter, for example, the density of trees, should destroy only a few instances of trees, and not rebuild the entire forest from scratch.
- Extensibility. For small development teams, the ability to gradually add new features is important. We cannot first plan in the first year of development, then in the second year to create resources, place them in the third year, and then release the game. We need the ability to work with resources throughout production and the hassle-free way to add them to an existing world. For example, we need a simple way to replace one type of tree with two types of trees without changing their location.
- Perfect integration with hand-held content. Obviously, we need some way to place a military base inside the generated forest or manually lay the road going through this forest without worrying that the generated trees stick out of the spaced buildings or the paved road.
We were ready to sacrifice the level of quality and manual control for the sake of the possibility of a more efficient content arrangement.
Biome drawer
Observing how our level artists used the previous drawing tool, we noticed that they were doing a double job. For example, they first place grass specimens, and later draw soil with the corresponding grass texture under this grass. We decided to generate both texturing of the earth, and arrangement of entities using one system. This not only accelerated the work, but also allowed us to create a holistic world in which all resources are located on the corresponding earth textures.
We wanted to be able to reuse biome color maps to speed up prototyping. To solve this problem, we based our system on two color maps: a biome type (for example, forest, desert, water, etc.) and weights (vegetation splendor), and also added some rules that control the coloring of the weight map: low values should mean almost empty relief, and high - lush vegetation or many obstacles.
In the previous coloring tool, after completing a new set of prefabs, we often had to go back to the old areas and repaint them. To simplify iterations, we decided to build a system with more complex rules, namely with a list of rules for creating objects, which will be evaluated in order of importance - from the most important to the most unimportant. This allowed us to add new prefabs to existing areas without a headache.
In addition, in order to be able to iterate, we needed to minimize the impact of rule changes. To solve this problem, we base everything on pre-calculated points of creation and pre-calculated random numbers. For example, if you need to correct the points of tree creation, then when you adjust the density of their location, new instances appear, but most of the forest remains unchanged.
Finally, after the first tests, we decided that we still need some kind of procedural generation in order to destroy some repeating patterns. We solved the problem by arranging special objects (for example, a fallen tree in the forest) with a very low density (with a low probability of creation).
Biome Rules
Now that we have a biome-type map and a weight map, we need some rules that describe how these maps are transformed into entities and terrain textures.
The rules for texture mapping are quite simple:
- Interval of biome weights with preset recession
- Relief weights interval with preset recession
- Interval of hilly terrain with preset recession
- Density
Each rule is assigned a specific relief texture, and these rules are applied from bottom to top. First, we fill the entire biome with a basic texture. Then we evaluate the following rules and place the assigned texture when conditions are met, that is, replace the previous texture at the current point.
Entity rules are slightly more complex:
- All of the above texture rules
- Location relative to the earth or to the world axis “up” - for example, trees are tied to the world axis “up” because they usually grow up, but the stones are located relative to the relief
- Random angular displacement from the axis of binding - allows you to destroy the uniformity, for example, growing bamboo
- Random rotation around the snap axis
- Random Scale Interval
- Offset along the snap axis
- Influence (radius of collisions of an entity)
As with texture rules, each entity rule is assigned a specific prefab. Entity rules apply from top to bottom. First, we create large entities, such as stones or trees, then, if possible, create bushes, grass, etc. Additionally, each entity also checks for collisions between itself and already located elements.
Using these rules, you can build an example of a biome, for example, here is a forest:

An example of assigning weights for a forest biome.
Among other possible interesting rules is checking the distance to another entity. For example, the creation of small trees around large ones. We decided not to implement them yet in order to minimize procedural generation.
LOD Biome
And here the system manifests itself completely. Due to the fact that all entities are formed from color maps, it significantly improves LOD and streaming loading. We create entities during the execution of the game, therefore, from the point of view of the streaming system, it’s enough for us to get only two bytes per square meter instead of loading all the entity location data.
For various graphics settings on the PC, we simply control the density of small objects like garbage or grass. The creation of the LOD world is governed by complex entity creation rules. We create everything that is next to the player. After a certain distance, we create only larger objects. Further we create only the largest objects. Finally, beyond a certain distance from the camera, we do not create objects at all. This not only helps in rendering, but also helps in all third-party calculations of the central processor, because we do not have to simulate or track changes in entities at a distance.
Biome integration
We wanted to integrate our solution with hand-held entities and other tools. In the case of spline tools, such as river or road tools, we can analytically calculate the distance from this spline. Based on this distance, you can automatically delete all entities of the biome painter from paved roads and rivers. Moreover, we reduce the weight of biomes around this spline. Thus, if we arrange the road inside the forest, then the splendor of vegetation next to the road will be reduced.

An example of how a river creation tool automatically works with biomes.
Similarly, we work with manually arranged entities. In our prefabs, you can insert special biome blockers. Biome blockers are simple forms (i.e. spheres or convex figures) that remove the essence of the biomes and reduce the weight of the biomes around them with a certain set recession value. This not only helps to avoid the appearance of trees inside manually located houses, but also allows you to freely move buildings without the need for manual repainting of color maps, because everything around will adapt to the new position of the building without destroying the drawn biome data.
The working process
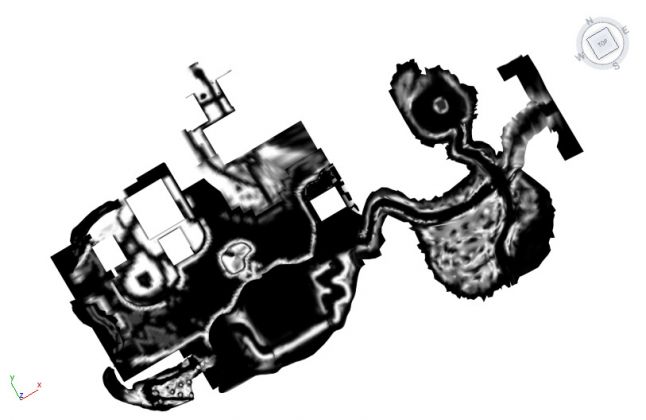
Our workflow begins with World Machine, in which we generate an initial elevation map. In the next step, we iterate on approximate color biome maps in the Substance Designer. We created support for automatic re-import of biome maps, so when the graphic artist saves them in the Substance Designer, a new biome map is imported, and the changes immediately become visible inside the game editor.
This allows you to quickly create a world filled with resources, terrain textures, etc. Obviously, it will not correspond to the quality of the finished game, but in general, at this stage the game can already work, and the team of gameplay developers is already starting to work on player speed, transport and battles.
Finally, when we are satisfied with the rough model of the world, we begin to manually allocate resources and make minor changes to the color maps of biomes using brushes from the game editor.
Implementation
The entity location algorithm reduces to cyclic traversal of pre-calculated points of creation, obtaining world data at each point (for example, elevation, slope, etc.), calculating the density from the creation rules and comparing the density with the previously calculated minimum density at the creation point, to determine whether to create an entity at the current point. Entities are prefab instances, that is, we can create, for example, trees with triggers, sounds, special effects (for example, fireflies) and relief decals.
Preliminary calculation of a good set of creation points turned out to be surprisingly difficult. We wanted to pre-calculate a pattern with the following properties:
- As dense arrangement as possible
- There is a specified minimum distance between points
- Nearby entities are not aligned with one straight line, because this would destroy the illusion of a natural arrangement (more about this can be found in the excellent series of posts about the location of grass in the game Witness )
- The above properties should be preserved with a decrease in density (due to a decrease in the number of specified creation points depending on the calculated density)
- The pattern should have a seamless overlay. to cover a big world
We tried to generate many points similar to a Poisson spot with the additional requirement that nearby points should not be aligned with one line. As a result, we arrived at a regular grid distorted by several sin and cos functions. We also assigned a weight to each point with a simple dithering algorithm to preserve the above properties when deleting some points due to a decrease in the density of entity creation.
When creating entities on a relief, it is important not to use the original map of the elevation of the relief, but instead to use the one in which there are manually inserted relief grids. Fortunately, we had this data because we used ray tracing to create this combined elevation map to draw the shadows of large relief heights.
To handle collisions between entities, we have a two-dimensional collision bitmap; before arranging entities, we will rasterize the entity shape onto it.
It seems that the arrangement of entities is conveniently performed in the shader of the GPU, but in fact, when we started to implement more complex rules, such as collisions between entities with different sizes, the code became very confusing. As a result, we decided to simply create entities using the CPU function. This function receives a new tile 64 mx 64 m, creates entities and exits, and then we run another function with a different tile.
On the other hand, creating texture textures works great on a video processor, because each texel can be calculated in parallel without any dependencies. We just run one shader per clipmap level of the relief to create a texture map for it. The only drawback is that in order to process collision reactions (bullets, footprints, etc.), we need these data to be in the main memory from the side of the CPU. To do this, we needed to copy the aforementioned texture maps from the video processor memory into the main memory.
To summarize
Who knows what the future will bring us, but in interviews with visionaries of the gaming industry, the mention of Metaverse often pops up (for example, in this interview with Tim Sweeney). I have no idea what this Metaverse will look like, but it will definitely require more intelligent tools that can build and dispose of huge amounts of content. I believe that one day such tools will become a familiar standard for level artists.