React, Part 5 Tutorial: Getting Started on a TODO Application, Basics of Styling
- Transfer
- Tutorial
Today, in the next part of the translation of the training course on React, we will begin work on the first training project and talk about the basics of styling.
→ Part 1: course overview, reasons for the popularity of React, ReactDOM and JSX
→ Part 2: functional components
→ Part 3: component files, project structure
→ Part 4: parent and child components
→ Part 5: starting work on a TODO application, basics of styling
→ Part 6: about some features of the course, JSX and JavaScript
→ Part 7: inline styles
→ Part 8: continued work on the TODO application, familiarity with the properties of components
→ Part 9: properties of components

→ Part 10: a workshop on working with properties of components and styling
→ Part 11: dynamically forming markup and the array method map
→ Part 12: a workshop, the third stage of working on a TODO application
→ Part 13: components based on classes
→ Part 14: a workshop on class-based components, component status
→ Part 15: workshops on working with component status
→ Part 16: fourth stage of working on a TODO application, event handling
→ Part 17: fifth stage of working on a TODO application, modifying component state
→ Part 18: estoy phase of work on TODO-application
→Part 19: component life cycle methods
→ Part 20: first lesson on conditional rendering
→ Part 21: second lesson and practice on conditional rendering
→ Part 22: seventh stage of working on a TODO application, loading data from external sources
→ Part 23: first lesson on working with forms
→ Part 24: second lesson on working with forms
→ Part 25: a workshop on working with forms
→ Part 26: application architecture, Container / Component pattern
→ Part 27: course project
→ Original
In this lesson, we will begin work on our first educational project - the TODO application. These classes will be designed as regular workshops. First, you will be given a task, for which you will need to navigate in the previously studied material, after which the solution will be presented.
We will work on this application for quite a long time, so if you use it
File ID
File ID
Here's how at this stage of work looks like a standard project
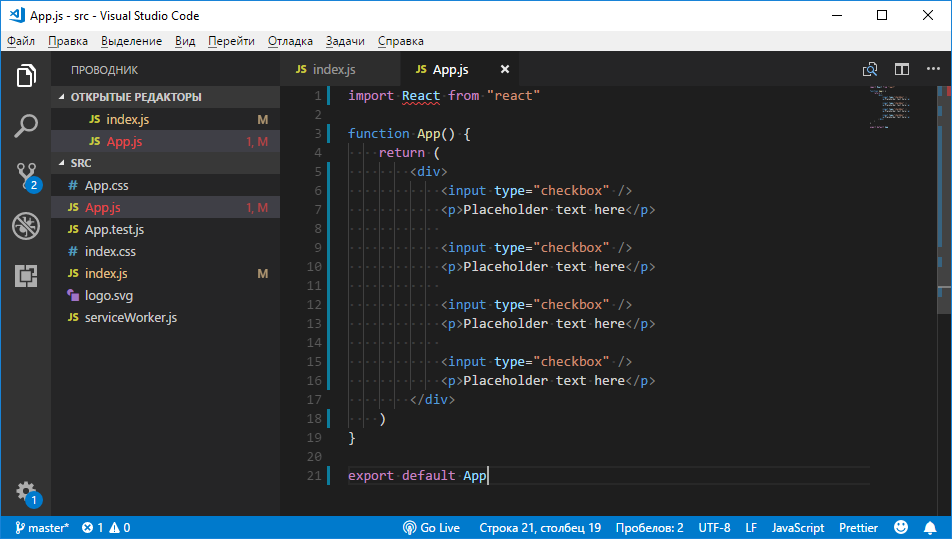
Project in VSCode
This is what our application now displays on the page.
Appearance of the application in the browser
Today we have taken the first step towards the TODO application. But what this application displays on the screen does not look so pleasant, as well as what appeared on the pages during our past experiments. Therefore, in the next lesson we will deal with the stylization of elements.
→ Original
Now we will work on the application that was created as a result of the workshop in lesson 10. This is what the application displayed on the screen looked like.
Application page in the browser
We would like to stylize the page elements. In React there are many approaches to styling. We now use the approach with the principles of which you are probably already familiar with. It consists of applying CSS classes and CSS rules assigned to these classes. Take a look at the structure of this project and think about which elements you need to assign the classes that will be used to style them.

Project in VSCode
File is
Usually, when working with HTML code and want to assign a class to an element, this is done using an attribute
To add a new class to an element, do this:
In a similar situation, it is more convenient to use the property of elements
As a matter of fact, for us, to assign classes to JSX elements, it is enough to know that where the keyword is used in HTML
Assign a
Now, in the folder
Now we will include this file in the
Here is what it will look like in VSCode.
The style file and its connection in VSCode
All this will lead to the fact that the appearance of the topmost line displayed by the application on the page will change.
Changing the style of the top line
Here we used an extremely simple style. Replace the contents of the file
In addition, open the file already existing in the project
We include this file in the
Changing the page style
Please note that the styles specified in
As a matter of fact, assuming that you are already familiar with CSS, you can say that it uses exactly the same CSS code that is used to stylize ordinary HTML elements. The main feature that must be remembered when styling elements using classes in React is that it is used instead of the element attribute
In addition, it should be noted that classes can only be assigned to elements of React - such as
Here's another thing that at the beginning of working with React may seem difficult to you. We are talking about the stylization of elements that have different levels of hierarchy on the page. Let's say it happens when styling uses Flexbox or CSS Grid technology. In such cases, for example, when using Flex-layout, you need to know which entity is a flex-container, and which entities are flex-elements. Namely, it may be difficult to understand how to stylize elements, to which particular elements to apply certain styles. Suppose, for example, that an element
At the same time, flex-elements are displayed by means of components
The element
In order to understand the styling of such constructions, you need to consider what the HTML code generated by the application will be. Open the
Page Code
An element
That is, analyzing the code of the React-application given above, we can assume that the structure
This concludes our first introduction to styling React applications. It is recommended to experiment with what you just learned. For example - try to independently stylize the elements displayed by the components
Today we started to develop our first training project - TODO-applications, and also got acquainted with the styling of React-applications using CSS classes. Next time we will talk about the features of the code style that the author of this course adheres to, as well as some things related to JSX and JavaScript.
Dear readers! Do you already have an idea for an application that you would like to create with React?


→ Part 10: a workshop on working with properties of components and styling
→ Part 11: dynamically forming markup and the array method map
→ Part 12: a workshop, the third stage of working on a TODO application
→ Part 13: components based on classes
→ Part 14: a workshop on class-based components, component status
→ Part 15: workshops on working with component status
→ Part 16: fourth stage of working on a TODO application, event handling
→ Part 17: fifth stage of working on a TODO application, modifying component state
→ Part 18: estoy phase of work on TODO-application
→Part 19: component life cycle methods
→ Part 20: first lesson on conditional rendering
→ Part 21: second lesson and practice on conditional rendering
→ Part 22: seventh stage of working on a TODO application, loading data from external sources
→ Part 23: first lesson on working with forms
→ Part 24: second lesson on working with forms
→ Part 25: a workshop on working with forms
→ Part 26: application architecture, Container / Component pattern
→ Part 27: course project
Session 11. Workshop. TODO application. Stage # 1
→ Original
In this lesson, we will begin work on our first educational project - the TODO application. These classes will be designed as regular workshops. First, you will be given a task, for which you will need to navigate in the previously studied material, after which the solution will be presented.
We will work on this application for quite a long time, so if you use it
create-react-app, it is recommended to create a separate project for it.▍Job
- Create a new React application.
- Display the component by
<App />means of the fileindex.js. - The component
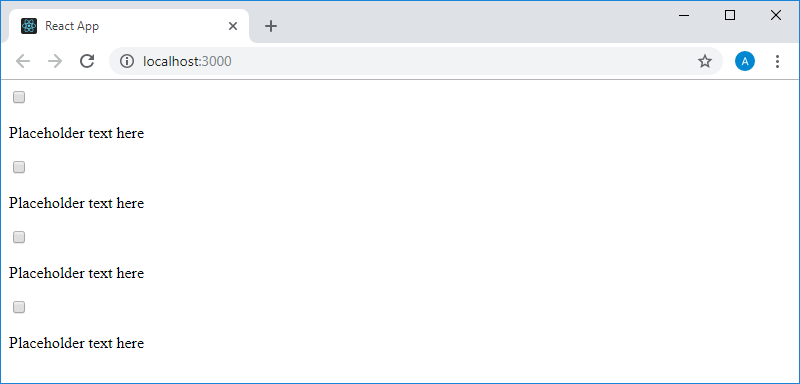
<App />should generate a code for displaying 3-4 checkboxes with some text following after them. Text can be decorated with tags<p>or<span>. What you can do should be like a to-do list with some entries already made.
▍Decision
File ID
index.js:import React from'react'import ReactDOM from'react-dom'import App from'./App'
ReactDOM.render(
<App />,
document.getElementById('root')
)File ID
App.js:import React from"react"functionApp() {
return (
<div>
<input type="checkbox" />
<p>Placeholder text here</p>
<input type="checkbox" />
<p>Placeholder text here</p>
<input type="checkbox" />
<p>Placeholder text here</p>
<input type="checkbox" />
<p>Placeholder text here</p>
</div>
)
}
export default AppHere's how at this stage of work looks like a standard project
create-react-appin VSCode.Project in VSCode
This is what our application now displays on the page.
Appearance of the application in the browser
Today we have taken the first step towards the TODO application. But what this application displays on the screen does not look so pleasant, as well as what appeared on the pages during our past experiments. Therefore, in the next lesson we will deal with the stylization of elements.
Lesson 12: Styling in React using CSS classes.
→ Original
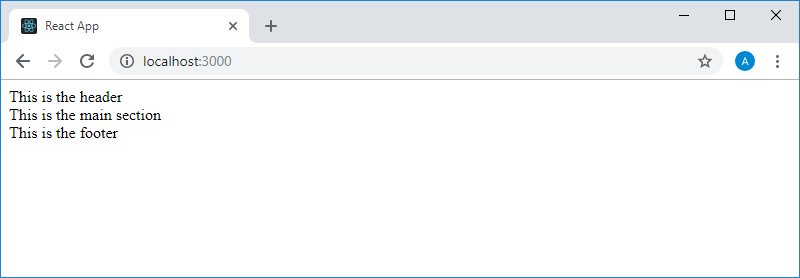
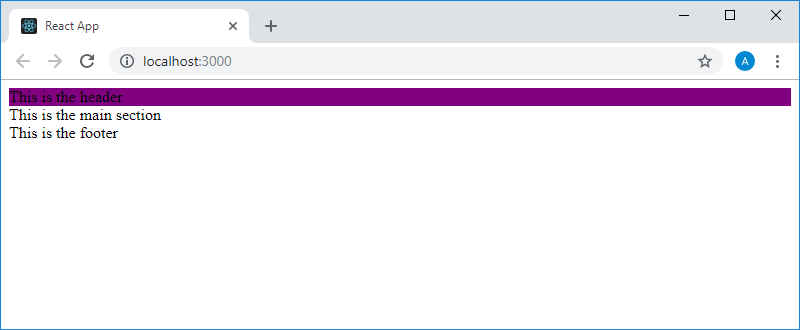
Now we will work on the application that was created as a result of the workshop in lesson 10. This is what the application displayed on the screen looked like.
Application page in the browser
We would like to stylize the page elements. In React there are many approaches to styling. We now use the approach with the principles of which you are probably already familiar with. It consists of applying CSS classes and CSS rules assigned to these classes. Take a look at the structure of this project and think about which elements you need to assign the classes that will be used to style them.
Project in VSCode
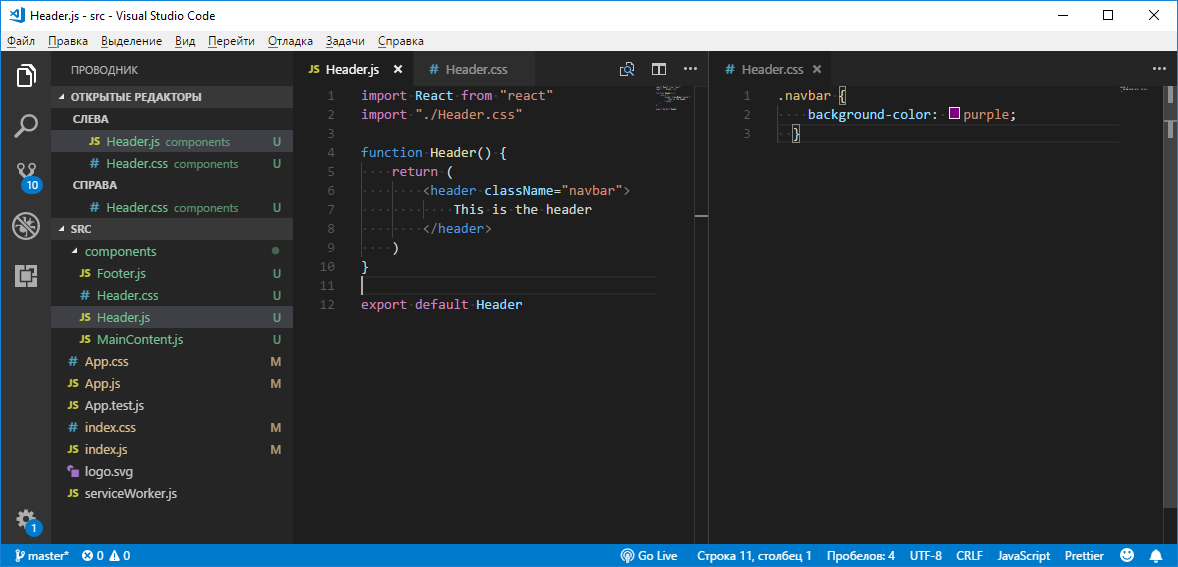
File is
index.jsresponsible for rendering the componentApp. The componentAppdisplays an element<div>that contains three other components -Header,MainComponentandFooter. And each of these components simply displays one JSX element with text. It is in these components that we will be engaged in stylization. Work on the componentHeader. Recall that at this stage of work, its code looks like this:import React from"react"functionHeader() {
return (
<header>This is the header</header>
)
}
exportdefault HeaderUsually, when working with HTML code and want to assign a class to an element, this is done using an attribute
class. Suppose we are going to assign such an attribute to an element <header>. But here we must not forget that we are working not with HTML-code, but with JSX. And here classwe cannot use the attribute (in fact, it is possible to use an attribute with this name, but it is not recommended to do so). Instead, an attribute named is used className. Many publications state that the reason for this is that class- this is a reserved keyword JavaScript. But, in fact, JSX uses the usual JavaScript API to work with the DOM. To access the elements using this API, an already familiar construction of the following form is used:document.getElementById("something")To add a new class to an element, do this:
document.getElementById("something").className += " new-class-name"In a similar situation, it is more convenient to use the property of elements
classList, in particular, because it has convenient methods for adding and deleting classes, but in this case it does not matter. And the important thing is that the property is applied here className. As a matter of fact, for us, to assign classes to JSX elements, it is enough to know that where the keyword is used in HTML
class, in JSX you need to use a keyword className. Assign a
<header>class to an element navbar:import React from"react"functionHeader() {
return (
<headerclassName="navbar">This is the header</header>
)
}
exportdefault HeaderNow, in the folder
components, create a file Header.css. Put the following code in it:.navbar {
background-color: purple;
}Now we will include this file in the
Header.jscommand import "./Header.css"(this command, which extends the capabilities of the standard command import, we inform the Webpack bundler, which is used in the projects created by the tools create-react-app, what we want to use Header.cssin Header.js). Here is what it will look like in VSCode.
The style file and its connection in VSCode
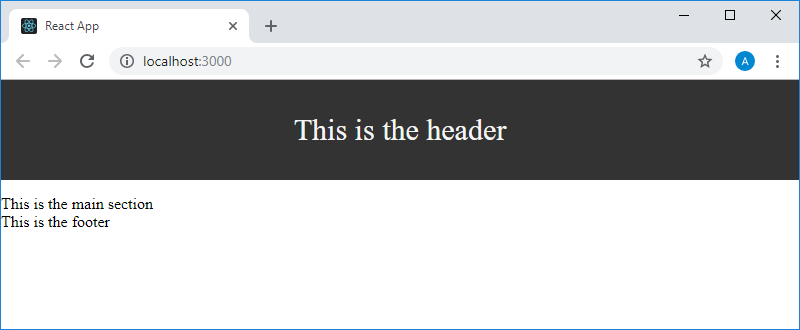
All this will lead to the fact that the appearance of the topmost line displayed by the application on the page will change.
Changing the style of the top line
Here we used an extremely simple style. Replace the contents of the file
Header.csswith the following:.navbar {
height: 100px;
background-color: #333;
color: whitesmoke;
margin-bottom: 15px;
text-align: center;
font-size: 30px;
display: flex;
justify-content: center;
align-items: center;
}In addition, open the file already existing in the project
index.cssand place the following style in it:body {
margin: 0;
}We include this file in the
index.jscommand import "./index.css". As a result, the application page will appear as shown in the following figure.Changing the page style
Please note that the styles specified in
index.cssinfluenced all page elements. If you are experimenting, use, for example, a certain online editor, where working with style files can be organized in a special way. For example, in such an editor there may be a single standard style file that is automatically connected to the page, the CSS rules described in which will apply to all elements of the page. In our simple example, it would be quite possible to put all the styles inindex.css.As a matter of fact, assuming that you are already familiar with CSS, you can say that it uses exactly the same CSS code that is used to stylize ordinary HTML elements. The main feature that must be remembered when styling elements using classes in React is that it is used instead of the element attribute
classused in HTML className. In addition, it should be noted that classes can only be assigned to elements of React - such as
<header>, <p>or <h1>. If you try to assign a class name to an instance of a component, like <Header />or <MainContent />, the system will behave quite differently than you would expect. We will talk about this later. For now, just remember that classes in React applications are assigned to elements, not components.Here's another thing that at the beginning of working with React may seem difficult to you. We are talking about the stylization of elements that have different levels of hierarchy on the page. Let's say it happens when styling uses Flexbox or CSS Grid technology. In such cases, for example, when using Flex-layout, you need to know which entity is a flex-container, and which entities are flex-elements. Namely, it may be difficult to understand how to stylize elements, to which particular elements to apply certain styles. Suppose, for example, that an element
<div>from our component Appmust be a flex-container:import React from"react"import Header from"./components/Header"import MainContent from"./components/MainContent"import Footer from"./components/Footer"functionApp() {
return (
<div>
<Header />
<MainContent />
<Footer />
</div>
)
}
exportdefault AppAt the same time, flex-elements are displayed by means of components
Header, MainContentand Footer. Take, for example, the component code Header:import React from"react"import"./Header.css"functionHeader() {
return (
<headerclassName="navbar">
This is the header
</header>
)
}
exportdefault HeaderThe element
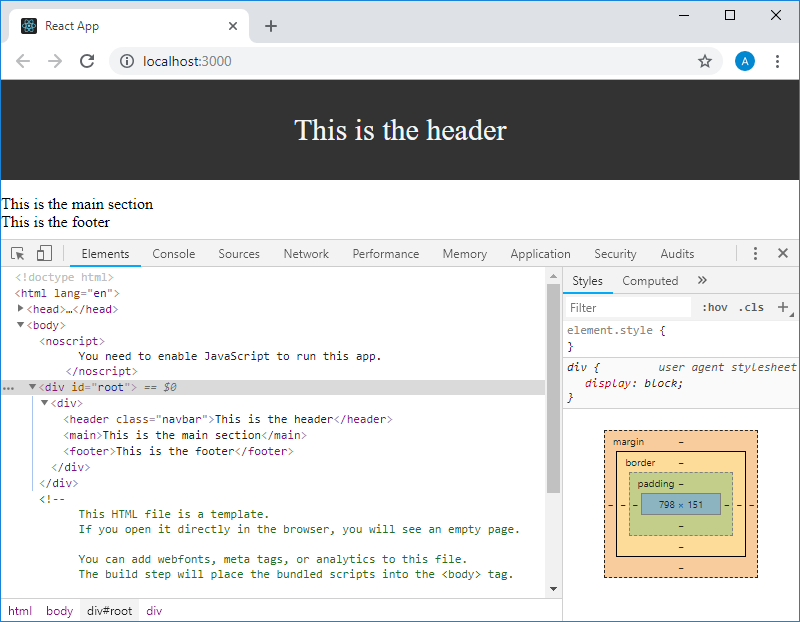
<header>must be a direct descendant of the element <div>from the component App. It also should be styled as a flex-element. In order to understand the styling of such constructions, you need to consider what the HTML code generated by the application will be. Open the
ElementsChrome developer tools tab for the page that is displayed in the browser when working with the project created by the tools create-react-app.Page Code
An element
<div>with an identifierrootis the element of the pageindex.htmlto which we refer in the methodReactDOM.render()called in the fileindex.js. It displays the markup formed by the componentApp, namely, the next element<div>that contains the elements<header>,<main>and<footer>formed by the corresponding components. That is, analyzing the code of the React-application given above, we can assume that the structure
<Header />in the componentAppis replaced by the structure<header className="navbar">This is the header</header>. Understanding this fact makes it possible to use complex schemes for styling page elements.This concludes our first introduction to styling React applications. It is recommended to experiment with what you just learned. For example - try to independently stylize the elements displayed by the components
<MainContent />and <Footer />.Results
Today we started to develop our first training project - TODO-applications, and also got acquainted with the styling of React-applications using CSS classes. Next time we will talk about the features of the code style that the author of this course adheres to, as well as some things related to JSX and JavaScript.
Dear readers! Do you already have an idea for an application that you would like to create with React?