Introducing kube-spawn, a utility for creating local Kubernetes clusters
- Transfer
Note perev. : kube-spawn is a fairly new (announced in August) Open Source project created at the German company Kinvolk to launch Kubernetes clusters locally. It is written in Go, works with Kubernetes versions 1.7.0+, uses the capabilities of kubeadm and systemd-nspawn, is focused only on the GNU / Linux operating system. Unlike Minikube, it does not start a virtual machine for Kubernetes, which means that overhead will be minimal and all processes running inside the containers are visible on the host machine (including through top / htop). The following article is an announcement of this utility, published by one of the company's employees (Chris Kühl) on a corporate blog.
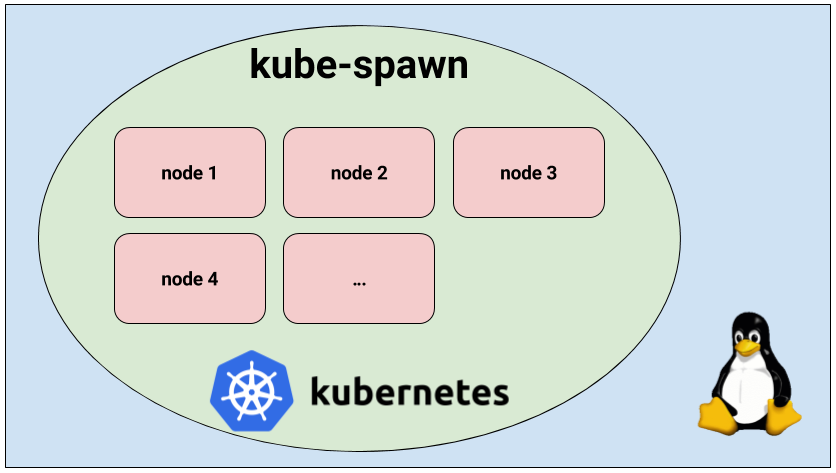
kube-spawnIs a tool to easily start a local Kubernetes cluster from multiple nodes on a Linux machine. Initially, it was created primarily for developers of Kubernetes itself, but over time it turned into a utility that is great for trying and learning Kubernetes. This article provides a general introduction to kube-spawn and shows how to use this tool.
kube-spawn aims to be the easiest way to run tests and other experiments with Kubernetes on Linux. This project came about because of the difficulties encountered when starting a Kubernetes cluster with many nodes on development machines. Utilities that offer the necessary functionality usually do not provide an environment in which Kubernetes will subsequently be launched, that is, a full GNU / Linux operating system.
So let's start the cluster. In kube-spawn, one command is enough to get the Container Linux image , prepare nodes, and deploy the cluster. These steps can be performed separately with the
When the command finishes executing, you will get a Kubernetes cluster with 3 nodes. We'll have to wait until the nodes are ready for use.
Now you can see that all nodes are ready. We move on.
We’ll test the cluster ’s health by deploying the Sock Shop demo microservice application created in Weaveworks . Sock Shop is a complex application consisting of microservices and using many components that can usually be found in real installations. Thus, it allows you to verify that everything really works, and provides a more substantial basis for research than the simple "hello world".
To continue, you will need to clone the repository
Now everything is ready for deployment. But the first thing you need to do is create a namespace
Now everything is really ready for the deployment of the application:
After performing these operations, you must wait until all the pods appear:
When they are all ready, it remains to find out which port and IP address to go to to access the store. To find out the port, let's see where the front-end services are forwarded:
It can be seen that the frontend (
Remember that the first node is the master, and all the rest are workers. In our case, it is enough to open a browser and go to the address
When the sock purchases are finished, you can stop the cluster:
For those who prefer "guided tours", watch the video on YouTube (about 7 minutes in English - approx. Transl.) .
As mentioned in the video, kube-spawn creates a directory in the current directory
We hope you find the kube-spawn utility useful too. For us, this is the easiest way to check for changes in Kubernetes or deploy a cluster to learn Kubernetes.
Numerous improvements can still be made in kube-spawn (and some of them are quite obvious). Very welcome pull requests!
PS from the translator . About installation and other features of kube-spawn is written in the project's GitHub repository . Read also in our blog:
kube-spawnIs a tool to easily start a local Kubernetes cluster from multiple nodes on a Linux machine. Initially, it was created primarily for developers of Kubernetes itself, but over time it turned into a utility that is great for trying and learning Kubernetes. This article provides a general introduction to kube-spawn and shows how to use this tool.
Overview
kube-spawn aims to be the easiest way to run tests and other experiments with Kubernetes on Linux. This project came about because of the difficulties encountered when starting a Kubernetes cluster with many nodes on development machines. Utilities that offer the necessary functionality usually do not provide an environment in which Kubernetes will subsequently be launched, that is, a full GNU / Linux operating system.
Starting Kubernetes cluster with kube-spawn
So let's start the cluster. In kube-spawn, one command is enough to get the Container Linux image , prepare nodes, and deploy the cluster. These steps can be performed separately with the
machinectl pull-rawand kube-spawn setupand subcommands init. However, the subcommand upwill do everything for us:$ sudo GOPATH=$GOPATH CNI_PATH=$GOPATH/bin ./kube-spawn up --nodes=3When the command finishes executing, you will get a Kubernetes cluster with 3 nodes. We'll have to wait until the nodes are ready for use.
$ export KUBECONFIG=$GOPATH/src/github.com/kinvolk/kube-spawn/.kube-spawn/default/kubeconfig
$ kubectl get nodes
NAME           STATUS    AGE       VERSION
kube-spawn-0   Ready     1m        v1.7.0
kube-spawn-1   Ready     1m        v1.7.0
kube-spawn-2   Ready     1m        v1.7.0
Now you can see that all nodes are ready. We move on.
Demo application
We’ll test the cluster ’s health by deploying the Sock Shop demo microservice application created in Weaveworks . Sock Shop is a complex application consisting of microservices and using many components that can usually be found in real installations. Thus, it allows you to verify that everything really works, and provides a more substantial basis for research than the simple "hello world".
Application cloning
To continue, you will need to clone the repository
microservices-demoand go to the directory deploy/kubernetes:$ cd ~/repos
$ git clone https://github.com/microservices-demo/microservices-demo.git sock-shop
$ cd sock-shop/deploy/kubernetes/Application Deployment
Now everything is ready for deployment. But the first thing you need to do is create a namespace
sock-shop- it is assumed in the deployment:$ kubectl create namespace sock-shop
namespace "sock-shop" createdNow everything is really ready for the deployment of the application:
$ kubectl create -f complete-demo.yaml
deployment "carts-db" created
service "carts-db" created
deployment "carts" created
service "carts" created
deployment "catalogue-db" created
service "catalogue-db" created
deployment "catalogue" created
service "catalogue" created
deployment "front-end" created
service "front-end" created
deployment "orders-db" created
service "orders-db" created
deployment "orders" created
service "orders" created
deployment "payment" created
service "payment" created
deployment "queue-master" created
service "queue-master" created
deployment "rabbitmq" created
service "rabbitmq" created
deployment "shipping" created
service "shipping" created
deployment "user-db" created
service "user-db" created
deployment "user" created
service "user" created
After performing these operations, you must wait until all the pods appear:
$ watch kubectl -n sock-shop get pods
NAME                            READY     STATUS    RESTARTS   AGE
carts-2469883122-nd0g1          1/1       Running   0          1m
carts-db-1721187500-392vt       1/1       Running   0          1m
catalogue-4293036822-d79cm      1/1       Running   0          1m
catalogue-db-1846494424-njq7h   1/1       Running   0          1m
front-end-2337481689-v8m2h      1/1       Running   0          1m
orders-733484335-mg0lh          1/1       Running   0          1m
orders-db-3728196820-9v07l      1/1       Running   0          1m
payment-3050936124-rgvjj        1/1       Running   0          1m
queue-master-2067646375-7xx9x   1/1       Running   0          1m
rabbitmq-241640118-8htht        1/1       Running   0          1m
shipping-2463450563-n47k7       1/1       Running   0          1m
user-1574605338-p1djk           1/1       Running   0          1m
user-db-3152184577-c8r1f        1/1       Running   0          1m
Access to sock shop
When they are all ready, it remains to find out which port and IP address to go to to access the store. To find out the port, let's see where the front-end services are forwarded:
$ kubectl -n sock-shop get svc
NAME           CLUSTER-IP       EXTERNAL-IP   PORT(S)        AGE
carts          10.110.14.144            80/TCP         3m
carts-db       10.104.115.89            27017/TCP      3m
catalogue      10.110.157.8             80/TCP         3m
catalogue-db   10.99.103.79             3306/TCP       3m
front-end      10.105.224.192          80:30001/TCP   3m
orders         10.101.177.247           80/TCP         3m
orders-db      10.109.209.178           27017/TCP      3m
payment        10.107.53.203            80/TCP         3m
queue-master   10.111.63.76             80/TCP         3m
rabbitmq       10.110.136.97            5672/TCP       3m
shipping       10.96.117.56             80/TCP         3m
user           10.101.85.39             80/TCP         3m
user-db        10.107.82.6              27017/TCP      3m
It can be seen that the frontend (
front-end) uses port 30001 and an external IP address. This means that we can reach its services through the IP address of any worker node and port 30001. You can find out the IP addresses of all cluster nodes through machinectl:$ machinectl
MACHINE CLASS SERVICE OS VERSION ADDRESSES
kube-spawn-0 container systemd-nspawn coreos 1492.1.0 10.22.0.137...
kube-spawn-1 container systemd-nspawn coreos 1492.1.0 10.22.0.138...
kube-spawn-2 container systemd-nspawn coreos 1492.1.0 10.22.0.139...Remember that the first node is the master, and all the rest are workers. In our case, it is enough to open a browser and go to the address
10.22.0.138:30001or 10.22.0.139:30001, where we will be greeted by a store selling socks.Cluster stop
When the sock purchases are finished, you can stop the cluster:
$ sudo ./kube-spawn stop
2017/08/10 01:58:00 turning off machines [kube-spawn-0 kube-spawn-1 kube-spawn-2]...
2017/08/10 01:58:00 All nodes are stopped.
Demonstration with instructions
For those who prefer "guided tours", watch the video on YouTube (about 7 minutes in English - approx. Transl.) .
As mentioned in the video, kube-spawn creates a directory in the current directory
.kube-spawnin which you will find several files and directories in default. In order not to be limited by the size of each OS Container, we mount /var/lib/dockerevery node here . Thanks to this, we can use the disk space of the host machine. Finally, at the moment, we do not have a cleanup ( clean) command . Those who want to completely cover up the traces of kube-spawn's activities can execute the command rm -rf .kube-spawn/.Conclusion
We hope you find the kube-spawn utility useful too. For us, this is the easiest way to check for changes in Kubernetes or deploy a cluster to learn Kubernetes.
Numerous improvements can still be made in kube-spawn (and some of them are quite obvious). Very welcome pull requests!
PS from the translator . About installation and other features of kube-spawn is written in the project's GitHub repository . Read also in our blog:
- “ Getting Started at Kubernetes with Minikube ” (translation) ;
- “ Our experience with Kubernetes in small projects ” (video report, which includes an introduction to the technical device of Kubernetes);
- “ We are writing an operator for Kubernetes in Golang ” (translation) ;
- “ How does the Kubernetes scheduler actually work?” " (Translation) .