September 8, 2017 at 17:52
As I wrote browser-based 3D football. Part 1
Hello, Habr! I want to share a story about how I wrote 3D browser-based football. It all started with the fact that my husband loves football. He watches broadcasts, goes to games, plays on the phone. And so, in order to surprise him, and also, to at least tear him away from the device with the game, I decided to write my own game.
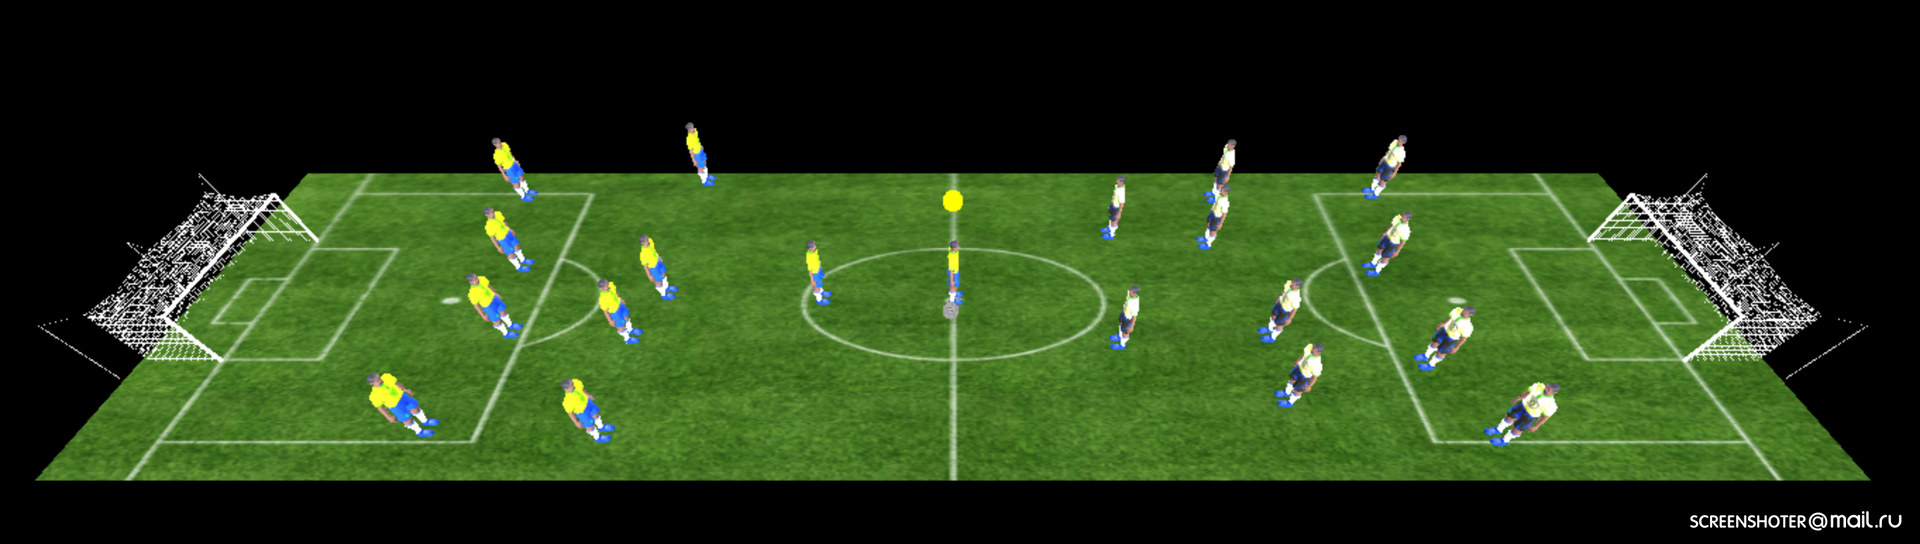
Under the cut, I’ll tell you how TypeScript and Three.js were friends and what came of it.
I already had some experience with the Three.js library, so this time I decided to use it to work with 3D graphics.
TypeScript decided to use because it is just good.
A few words about setting up the environment. This has nothing to do with the development of the game itself, but just in case, I’ll briefly describe the configuration of the project’s assembly, maybe it will be useful to someone.
First thing:
initializes the npm package and creates the package.json file.
In package.json, a scripts block is configured - a set of scripts that can subsequently be launched in this way:
Here is my set of scripts:
Respectively:
Several executable files:
bin / compile-css - creates the dist / css directory if necessary and starts compiling stylus styles:
bin / copy - creates necessary directories if necessary and copies dependencies from node_modules, html files and resources.
bin / requirejs - collects js files into one bundle.
The first problems lay in wait at the stage of installing dependencies and starting typescript compilation.
By setting Three.js and TypeSript as dependencies:
It seemed like a logical step to check if there are any ready-made taips for Three.js. It turned out that there is - @ types / three . And I rushed to install them:
However, as it turned out, these taipings turned out to be not quite high-quality, and when the compilation was started, they immediately sprinkled a lot of similar errors of the following kind:
Looking at node_modules/@types/three/index.d.ts I saw something like this:
Those. it turns out that all the internal descriptions are first connected, and then all this is declared by the THREE namespace and exported outside. But, at the same time, in the very first inclusion - in three-core.d.ts the THREE space is already used , which will be announced later.
How it worked for someone is unknown (someone has committed all this).
I had an assumption that the namespace had a “retroactive effect” in some previous versions of typescript, and decided to abandon such extravagancies to the current version, but a consistent rollback to previous versions did not bring results.
Then I decided to see exactly where THREE is used in three-core.d.ts and as it turned out, all uses were concentrated in two adjacent methods:
At the same time, all types that were specified in the THREE namespace were described right there in three-core.d.ts . This means that in order to use them, you do not need either a namespace or additional imports. Just removed THREE , started the compilation again and - voila, the compilation was successful.
Light, camera,
A light source and a camera are integral parts of any 3D scene. Which, of course, also needs to be created:
It is also necessary to create a canvas for drawing, add it to the document and stretch it to full screen:
And call createRenderer in the constructor:
Well, the last touch of the starting scene setup is redrawing:
Having prepared the scene, you can start adding objects directly related to football. And it seemed logical to me to start with the field.
The texture for the field was found on the Internet without any problems (which cannot be said about 3d models, but more on that below):

field.ts :
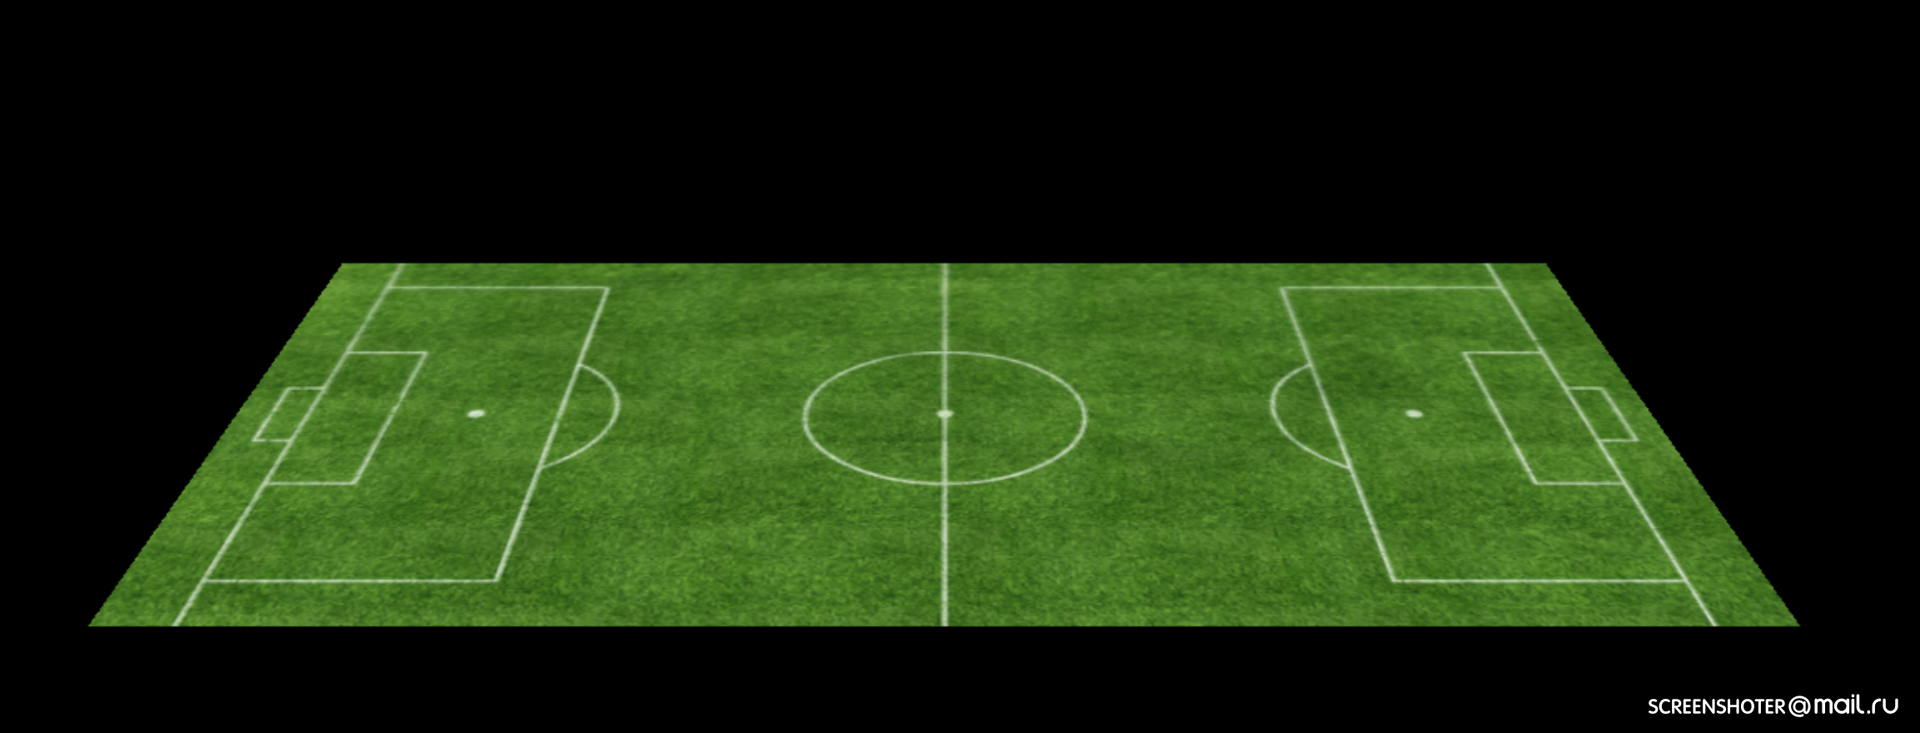
As you can see, the texture is loaded first, then an object of the PlaneGeometry class is created , this texture is superimposed on it. After which the object rotates around the X and Z axes a little.
As a result, we get the following picture:
No football will work if there is no goal on the field. Therefore, I decided the next step to find on the Internet a free 3D model of football goals, create goal objects in the amount of two pieces and add them to the scene. But then an unpleasant surprise awaited me, about which a small lyrical digression would tell.
Suddenly for myself, I found out that finding a suitable 3D model is not at all trivial. Most suitable models turned out to be paid, and they cost quite a lot of money (in my opinion). And quite a lot of time was spent searching for the unfortunate football goal. Of course, I do not call for the free distribution of anything and everything, but in the field of software development there is a huge layer of free open source software, one github is worth it. Free audio, photos and many other types of files, too, as a rule, is not difficult to find. It is possible that in all these areas free analogues will lose in some respects to commercial offers (and in some ways, by the way, they will win), but at least they exist, and finding them is not difficult. What can not be said about the field of 3D modeling.
Perhaps I am missing some detail, or I don’t know anything about 3D modeling, which would immediately dot all the i and explain why there are so few free models, and those that are difficult to find and / or they are noticeably inferior in quality . I would be glad to hear an alternative point of view in the comments.
For the whole game, I just needed to find models of the goal, players and the ball. And according to a rough estimate, 20-30% of all the time spent on development was spent on searching for suitable models.
But back to our sheep, or rather to the gate. The necessary model was still found, which allowed to implement the gate class:
Gate.ts
So that the gates fit us in size, we had to squeeze them a little, which happens in the line:
A particularly attentive reader may notice that the Gate class inherits from the FootballObject class , an implementation of which was not given. Immediately eliminate this flagrant injustice.
Object.ts
Subsequently, the classes Player (players) and Ball (ball) will also be inherited from FootballObject , which contains the implementation of methods for setting a position on the stage and rotating it at a certain angle specified in degrees.
After that, it remains for us to create the gate objects and place them in the desired coordinates:
app.ts
DELTA_X - a certain offset, by which it was necessary to adjust the coordinates of the goal, so that they stood clearly on the marking of the field.
As you can see, the left gate is shifted halfway to the negative side (i.e., to the left), the right gate - to the same half of the field towards the positive side (i.e. right).
Both models rotate to get their natural position on the field.
The result is this picture:

Initially, I didn’t plan to stretch this into several articles, but somehow it turns out to be voluminous, so, perhaps, on this wonderful note I will complete the first part of the article on “home-made” football.
In the second part I will talk about creating teams and players, their placement on the field and strategies.
In order not to spoil and keep the intrigue to the end, I will lay out the source and demo in the last part of the article.
Thank you all for your attention!
Under the cut, I’ll tell you how TypeScript and Three.js were friends and what came of it.
A bit about choosing technology
I already had some experience with the Three.js library, so this time I decided to use it to work with 3D graphics.
TypeScript decided to use because it is just good.
Environment setup
A few words about setting up the environment. This has nothing to do with the development of the game itself, but just in case, I’ll briefly describe the configuration of the project’s assembly, maybe it will be useful to someone.
First thing:
$ npm init
initializes the npm package and creates the package.json file.
In package.json, a scripts block is configured - a set of scripts that can subsequently be launched in this way:
$ npm run Here is my set of scripts:
"scripts": {
	"clean": "rm -rf ./tmp ./dist",
	"copy": "./bin/copy",
	"ts": "./node_modules/.bin/tsc",
	"requirejs": "./bin/requirejs",
	"js": "npm run ts && npm run requirejs",
	"css": "./bin/compile-css",
	"build": "npm run clean && npm run js && npm run css && npm run copy",
	"server": "./node_modules/.bin/http-server ./dist",
	"dev": "./bin/watcher & npm run server"
}
Respectively:
- clean - cleans rebuilt files
- copy - copy the necessary files
- ts - typescript compilation
- requirejs - build by requirejs
- js - start two previous commands sequentially
- css - css compilation
- build- complete assembly
- server - launch http server to render statics
- dev - start in dev mode (change tracking + http server)
Several executable files:
bin / compile-css - creates the dist / css directory if necessary and starts compiling stylus styles:
bin / compile-css
#!/usr/bin/env bash
if [ ! -d ./dist/css ]; then
	mkdir -p ./dist/css
fi
./node_modules/.bin/stylus ./src/styles/index.styl -o ./dist/css/styles.css
bin / copy - creates necessary directories if necessary and copies dependencies from node_modules, html files and resources.
bin / copy
#!/usr/bin/env bash
cp ./src/*.html ./dist
if [ ! -d ./dist/js/libs ]; then
	mkdir -p ./dist/js/libs
fi
if [ ! -d ./dist/js/libs/three/loaders ]; then
	mkdir -p ./dist/js/libs/three/loaders
fi
cp ./node_modules/three/build/three.js ./dist/js/libs/three.js
cp -r ./node_modules/three/examples/js/loaders/sea3d ./dist/js/libs/three/loaders/sea3d
cp -r ./node_modules/three/examples/js/loaders/TDSLoader.js ./dist/js/libs/three/loaders/TDSLoader.js
cp -r ./src/resources ./dist/resources
bin / requirejs - collects js files into one bundle.
bin / requirejs
#!/usr/bin/env node
const requirejs = require('requirejs');
const config = {
    baseUrl: "tmp/js",
    dir: "./dist/js",
    optimize: 'none',
    preserveLicenseComments: false,
    generateSourceMaps: false,
    wrap: {
        startFile: './node_modules/requirejs/require.js'
    },
    modules: [
        {
            name: 'football'
        }
    ]
};
requirejs.optimize(config, function (results) {
    console.log(results);
});
First problems
The first problems lay in wait at the stage of installing dependencies and starting typescript compilation.
By setting Three.js and TypeSript as dependencies:
$ npm install three  --save
$ npm install typescript --save-dev
It seemed like a logical step to check if there are any ready-made taips for Three.js. It turned out that there is - @ types / three . And I rushed to install them:
$ npm install @types/three --save-dev
However, as it turned out, these taipings turned out to be not quite high-quality, and when the compilation was started, they immediately sprinkled a lot of similar errors of the following kind:
$ npm run ts
...
node_modules/@types/three/three-core.d.ts(1611,32): error TS2503: Cannot find namespace 'THREE'.
Looking at node_modules/@types/three/index.d.ts I saw something like this:
export * from "./three-core";
export * from "./three-canvasrenderer";
...
export * from "./three-vreffect";
export as namespace THREE;
Those. it turns out that all the internal descriptions are first connected, and then all this is declared by the THREE namespace and exported outside. But, at the same time, in the very first inclusion - in three-core.d.ts the THREE space is already used , which will be announced later.
How it worked for someone is unknown (someone has committed all this).
I had an assumption that the namespace had a “retroactive effect” in some previous versions of typescript, and decided to abandon such extravagancies to the current version, but a consistent rollback to previous versions did not bring results.
Then I decided to see exactly where THREE is used in three-core.d.ts and as it turned out, all uses were concentrated in two adjacent methods:
/**
* Calls before rendering object
*/
onBeforeRender: (renderer: THREE.WebGLRenderer, scene: THREE.Scene, camera: THREE.Camera, geometry: THREE.Geometry | THREE.BufferGeometry,
                     material: THREE.Material, group: THREE.Group) => void;
/**
* Calls after rendering object
*/
onAfterRender: (renderer: THREE.WebGLRenderer, scene: THREE.Scene, camera: THREE.Camera, geometry: THREE.Geometry | THREE.BufferGeometry,
                    material: THREE.Material, group: THREE.Group) => void;
At the same time, all types that were specified in the THREE namespace were described right there in three-core.d.ts . This means that in order to use them, you do not need either a namespace or additional imports. Just removed THREE , started the compilation again and - voila, the compilation was successful.
Light, camera, motor
A light source and a camera are integral parts of any 3D scene. Which, of course, also needs to be created:
import { Camera, Scene } from 'three';
export class App {
    protected scene: Scene;
    protected camera: Camera;
    constructor() {
        this.createScene();
        this.createCamera();
        this.createLight();
    }
    protected createScene() {
        this.scene = new THREE.Scene();
    }
    protected createCamera() {
        this.camera = new THREE.PerspectiveCamera(75, window.innerWidth / window.innerHeight, 0.1, 1000);
    }
    protected createLight() {
        const ambient = new THREE.AmbientLight(0xffffff);
        this.scene.add(ambient);
    }
}
It is also necessary to create a canvas for drawing, add it to the document and stretch it to full screen:
...
protected renderer: WebGLRenderer;
...
protected createRenderer() {
    this.renderer = new THREE.WebGLRenderer();
    this.updateRendererSize();
    document.body.appendChild(this.renderer.domElement);
}
protected updateRendererSize() {
    this.renderer.setSize(window.innerWidth, window.innerHeight);
}
And call createRenderer in the constructor:
...
constructor() {
        this.createRenderer();
}
Well, the last touch of the starting scene setup is redrawing:
constructor() {
    this.animate();
}
protected animate() {
    window.requestAnimationFrame(() => this.animate());
    this.renderer.render(this.scene, this.camera);
}
Playing field
Having prepared the scene, you can start adding objects directly related to football. And it seemed logical to me to start with the field.
The texture for the field was found on the Internet without any problems (which cannot be said about 3d models, but more on that below):
field.ts :
import { BASE_URL } from './const';
import { Scene, Texture } from 'three';
export const FIELD_WIDTH = 70;
export const FIELD_HEIGHT = 15;
export class Field {
    protected scene: Scene;
    constructor(scene: Scene) {
        this.scene = scene;
        const loader = new THREE.TextureLoader();
        loader.load(`${ BASE_URL }/resources/textures/field.jpg`, (texture: Texture) => {
            const material = new THREE.MeshBasicMaterial({
                map: texture
            });
            const geometry = new THREE.PlaneGeometry(FIELD_HEIGHT, FIELD_WIDTH);
            const plane = new THREE.Mesh(geometry, material);
            plane.rotateX(-90 * Math.PI / 180);
            plane.rotateZ(90 * Math.PI / 180);
            this.scene.add(plane);
        });
    }
}
As you can see, the texture is loaded first, then an object of the PlaneGeometry class is created , this texture is superimposed on it. After which the object rotates around the X and Z axes a little.
As a result, we get the following picture:
No football will work if there is no goal on the field. Therefore, I decided the next step to find on the Internet a free 3D model of football goals, create goal objects in the amount of two pieces and add them to the scene. But then an unpleasant surprise awaited me, about which a small lyrical digression would tell.
Lyrical digression
Suddenly for myself, I found out that finding a suitable 3D model is not at all trivial. Most suitable models turned out to be paid, and they cost quite a lot of money (in my opinion). And quite a lot of time was spent searching for the unfortunate football goal. Of course, I do not call for the free distribution of anything and everything, but in the field of software development there is a huge layer of free open source software, one github is worth it. Free audio, photos and many other types of files, too, as a rule, is not difficult to find. It is possible that in all these areas free analogues will lose in some respects to commercial offers (and in some ways, by the way, they will win), but at least they exist, and finding them is not difficult. What can not be said about the field of 3D modeling.
Perhaps I am missing some detail, or I don’t know anything about 3D modeling, which would immediately dot all the i and explain why there are so few free models, and those that are difficult to find and / or they are noticeably inferior in quality . I would be glad to hear an alternative point of view in the comments.
For the whole game, I just needed to find models of the goal, players and the ball. And according to a rough estimate, 20-30% of all the time spent on development was spent on searching for suitable models.
Like a ram to a new gate
But back to our sheep, or rather to the gate. The necessary model was still found, which allowed to implement the gate class:
Gate.ts
import { BASE_URL } from './const';
import { Mesh, Object3D } from 'three';
export class Gate extends FootballObject {
    protected mesh: Mesh;
    load() {
        return new Promise((resolve, reject) => {
            const loader = new THREE.TDSLoader();
            loader.load(`${ BASE_URL }/resources/models/gate.3ds`, (object: Object3D) => {
                this.mesh = new THREE.Mesh(( object.children[0]).geometry, new THREE.MeshBasicMaterial({color: 0xFFFFFF}));
                this.mesh.scale.set(.15, .15, .15);
                this.scene.add(this.mesh);
                resolve();
            });
        });
    }
}
So that the gates fit us in size, we had to squeeze them a little, which happens in the line:
this.mesh.scale.set(.15, .15, .15);
A particularly attentive reader may notice that the Gate class inherits from the FootballObject class , an implementation of which was not given. Immediately eliminate this flagrant injustice.
Object.ts
import { Mesh, Scene } from 'three';
export abstract class FootballObject {
    protected abstract mesh: Mesh;
    protected scene: Scene;
    constructor(scene: Scene) {
        this.scene = scene;
    }
    setPositionX(x: number) {
        this.mesh.position.x = x;
    }
    setPositionY(y: number) {
        this.mesh.position.y = y;
    }
    setPositionZ(z: number) {
        this.mesh.position.z = z;
    }
    getPositionX(): number {
        return this.mesh.position.x;
    }
    getPositionY(): number {
        return this.mesh.position.y;
    }
    getPositionZ(): number {
        return this.mesh.position.z;
    }
    setRotateX(angle: number) {
        this.mesh.rotateX(angle * Math.PI / 180);
    }
    setRotateY(angle: number) {
        this.mesh.rotateY(angle * Math.PI / 180);
    }
    setRotateZ(angle: number) {
        this.mesh.rotateZ(angle * Math.PI / 180);
    }
}
Subsequently, the classes Player (players) and Ball (ball) will also be inherited from FootballObject , which contains the implementation of methods for setting a position on the stage and rotating it at a certain angle specified in degrees.
After that, it remains for us to create the gate objects and place them in the desired coordinates:
app.ts
...
import { Field, FIELD_HEIGHT, FIELD_WIDTH } from './field';
import { Gate } from './gate';
class App {
    ...
    protected leftGate: Gate;
    protected rightGate: Gate;
    ...
    constructor() {
        ...
        this.createGates();
    }
    ...
    protected createGates() {
        const DELTA_X = 2;
        this.leftGate = new Gate(this.scene);
        this.rightGate = new Gate(this.scene);
        this.leftGate.load()
            .then(() => {
                this.leftGate.setPositionX(- FIELD_WIDTH / 2 + DELTA_X);
                this.leftGate.setPositionY(2);
                this.leftGate.setRotateX(-90);
                this.leftGate.setRotateZ(180);
            });
        this.rightGate.load()
            .then(() => {
                this.rightGate.setPositionX(FIELD_WIDTH / 2 - DELTA_X);
                this.rightGate.setPositionY(2);
                this.rightGate.setRotateX(-90);
            });
    }
}
DELTA_X - a certain offset, by which it was necessary to adjust the coordinates of the goal, so that they stood clearly on the marking of the field.
As you can see, the left gate is shifted halfway to the negative side (i.e., to the left), the right gate - to the same half of the field towards the positive side (i.e. right).
Both models rotate to get their natural position on the field.
The result is this picture:
Initially, I didn’t plan to stretch this into several articles, but somehow it turns out to be voluminous, so, perhaps, on this wonderful note I will complete the first part of the article on “home-made” football.
In the second part I will talk about creating teams and players, their placement on the field and strategies.
In order not to spoil and keep the intrigue to the end, I will lay out the source and demo in the last part of the article.
Thank you all for your attention!