BIOS boot from GPT disk
The article describes how to make a computer boot with BIOS from a GPT-labeled hard drive. This article is not a translation of the original article, but rather a free retelling of the article written by Rod Smith , for which I personally am very grateful to him. Link to the source at the end of this article.
The hard drive marked up in the MBR on which the Windows 7 OS was installed failed on the working video server .
The situation was complicated by the fact that there was no replacement disk at hand, it took a long time to buy, from the word VERY (features of the organization of processes in the enterprise), and the server must be put into operation.
Of the materials at hand, there was only a disk that was used in this server to store the archive. The server is old, and the drive is new ( WD Purple line ), respectively, the question arose of how to force the old computer to boot (read the computer with BIOS ) from this hard drive, which is marked up in GPT , so as not to lose useful space.
The study of this issue led to the site rodsbooks.com, which found a solution.
Actually the free retelling itself, behind the theoretical part of why this turned out to be not a trivial task, welcome to the great and mighty Google.
So, to solve this problem, we need a Live CD / DVD / USB with GNU / Linux.
Personally, for this purpose I tried to use Ubuntu 16.04 and Debian 8. The author himself suggests using Gparted written on the "blank" , but everyone is free to use what is closer to him.
To get started, you need to get DUET : gitlab.com/tianocore_uefi_duet_builds/tianocore_uefi_duet_installer/repository/master/archive.tar.gz (actually all the “magic” is contained in it), as well as SYSLINUX :www.kernel.org/pub/linux/utils/boot/syslinux/5.xx/syslinux-5.10.tar.gz (it is necessary to download this version, in the following the file gptmbr.bin necessary for further manipulations is not compiled. In order not to compile it yourself, just download the archive from the link).
The resulting files must be written to a convenient network storage (or flash drive) and then, for convenience, transferred to temporary storage on a running Linux system.
Now boot into your favorite GNU / Linux distribution.
The first thing you need after loading into a Live CD is to mark our disk in the GPT partition table.
(I give examples for Ubuntu 16.04)
Open the console (the console must be English, the localized console causes errors when processing the script) and mark up the disk with fdisk:
Now create a new GPT partition table on the disk, as well as the necessary partitions. It is assumed that there is only one disk in the system and is defined as / dev / sda, otherwise, you must change the name of the disk to one that suits you.
I will not comment on the steps that are described above, because these are standard procedures that are performed in fdisk. The only thing worth paying attention to is that when creating the first partition on which DUET will be stored, you need to change its type to 'EFI System' (
), and the type of the second section, select as 'Microsoft basic data' (
) Actually, it will be installed on Windows in the future.
With the markup done, now create the file systems:
With the standard procedures completed, now move on to magic.
I copied SYSLINUX and TianoCore to / tmp / 1 and moved to the folder with TianoCore:
We make executable copy_duet_files.sh and duet-install:
Install DUET:
Now you need to copy the EFI TianoCore emulator:
Mount the first partition in / mnt and install EFI. I chose EDK_UEFI64, because later on when setting up the boot, UDK_X64 for some reason did not save the settings. It was too lazy to figure it out.
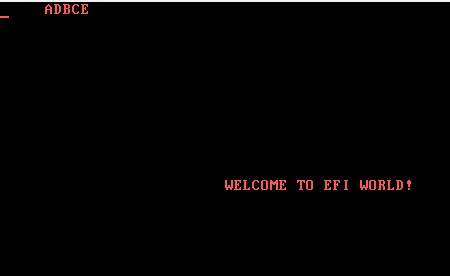
That’s all magic. It is enough to restart the computer and set the boot from the hard drive in the BIOS. The result should be a welcome inscription as shown below:
After it, if everything went smoothly and the copy_duet_files.sh script worked correctly, an EFI emulator prompt will appear.
Unfortunately, this cannot be reproduced in a virtual machine, so I brought a picture from EFI VirtualBox, it is almost the same as the one you should see.

Further configuration of the download is done through this menu. I leave the subsequent setup of the download through the EFI menu for personal study, especially since there is nothing complicated there. For example, for starters, you can practice in the same VirtualBox in EFI boot mode.
We insert the disk with the Windows distribution into the drive or use the pre-formed installation flash drive. In the EFI emulator menu, choose where to boot from (this is selected through the menu 'Boot Maintenance Manager' → 'Boot From File', the choice of the device from which the USB flash drive or CD / DVD is loaded. To start the installation this is enough. You will need to select the bootx64 file in the list. efi it is it that is bootable). Further download and installation takes place using the standard Windows installer, but with the ability to install on a disk that is marked up in GPT.
That's all. Thanks for attention.
Original article: by Rod Smith
Motivation
The hard drive marked up in the MBR on which the Windows 7 OS was installed failed on the working video server .
The situation was complicated by the fact that there was no replacement disk at hand, it took a long time to buy, from the word VERY (features of the organization of processes in the enterprise), and the server must be put into operation.
Of the materials at hand, there was only a disk that was used in this server to store the archive. The server is old, and the drive is new ( WD Purple line ), respectively, the question arose of how to force the old computer to boot (read the computer with BIOS ) from this hard drive, which is marked up in GPT , so as not to lose useful space.
The study of this issue led to the site rodsbooks.com, which found a solution.
The solution of the problem
Actually the free retelling itself, behind the theoretical part of why this turned out to be not a trivial task, welcome to the great and mighty Google.
So, to solve this problem, we need a Live CD / DVD / USB with GNU / Linux.
Personally, for this purpose I tried to use Ubuntu 16.04 and Debian 8. The author himself suggests using Gparted written on the "blank" , but everyone is free to use what is closer to him.
To get started, you need to get DUET : gitlab.com/tianocore_uefi_duet_builds/tianocore_uefi_duet_installer/repository/master/archive.tar.gz (actually all the “magic” is contained in it), as well as SYSLINUX :www.kernel.org/pub/linux/utils/boot/syslinux/5.xx/syslinux-5.10.tar.gz (it is necessary to download this version, in the following the file gptmbr.bin necessary for further manipulations is not compiled. In order not to compile it yourself, just download the archive from the link).
The resulting files must be written to a convenient network storage (or flash drive) and then, for convenience, transferred to temporary storage on a running Linux system.
Now boot into your favorite GNU / Linux distribution.
The first thing you need after loading into a Live CD is to mark our disk in the GPT partition table.
(I give examples for Ubuntu 16.04)
Open the console (the console must be English, the localized console causes errors when processing the script) and mark up the disk with fdisk:
ubuntu@ubuntu:~$ sudo fdisk /dev/sda
Now create a new GPT partition table on the disk, as well as the necessary partitions. It is assumed that there is only one disk in the system and is defined as / dev / sda, otherwise, you must change the name of the disk to one that suits you.
Command (m for help): g
Created a new GPT disklabel (GUID: 416CDA03-62CB-4E45-8260-DD7723111AF7).
Command (m for help): n
Partition number (1-128, default 1): 1
First sector (2048-62914526, default 2048):
Last sector, +sectors or +size{K,M,G,T,P} (2048-62914526, default 62914526): +100M
Created a new partition 1 of type 'Linux filesystem' and of size 100 MiB.
Command (m for help): t
Selected partition 1
Hex code (type L to list all codes): 1
Changed type of partition 'Linux filesystem' to 'EFI System'.
Command (m for help): n
Partition number (2-128, default 2):
First sector (206848-62914526, default 206848):
Last sector, +sectors or +size{K,M,G,T,P} (206848-62914526, default 62914526):
Created a new partition 2 of type 'Linux filesystem' and of size 29.9 GiB.
Command (m for help): t
Partition number (1,2, default 2): 2
Hex code (type L to list all codes): 11
Changed type of partition 'Linux filesystem' to 'Microsoft basic data'.
Command (m for help): w
The partition table has been altered.
Calling ioctl() to re-read partition table.
Syncing disks.
I will not comment on the steps that are described above, because these are standard procedures that are performed in fdisk. The only thing worth paying attention to is that when creating the first partition on which DUET will be stored, you need to change its type to 'EFI System' (
Command (m for help): t
Selected partition 1
Hex code (type L to list all codes): 1
Changed type of partition 'Linux filesystem' to 'EFI System'.
), and the type of the second section, select as 'Microsoft basic data' (
Command (m for help): t
Partition number (1,2, default 2): 2
Hex code (type L to list all codes): 11
Changed type of partition 'Linux filesystem' to 'Microsoft basic data'.
) Actually, it will be installed on Windows in the future.
With the markup done, now create the file systems:
ubuntu@ubuntu:~$ sudo mkfs.fat -F32 /dev/sda1
mkfs.fat 3.0.28 (2015-05-16)
ubuntu@ubuntu:~$ sudo mkfs.ntfs -f /dev/sda2
Cluster size has been automatically set to 4096 bytes.
Creating NTFS volume structures.
mkntfs completed successfully. Have a nice day.
With the standard procedures completed, now move on to magic.
Install DUET
I copied SYSLINUX and TianoCore to / tmp / 1 and moved to the folder with TianoCore:
ubuntu@ubuntu:~$ cd /tmp/1/tianocore_uefi_duet_installer/
ubuntu@ubuntu:/tmp/1/tianocore_uefi_duet_installer$ ll
total 96
drwxrwxr-x 10 ubuntu ubuntu   400 Nov  7  2013 ./
drwxrwxr-x  4 ubuntu ubuntu    80 Sep  1 06:37 ../
drwxrwxr-x  2 ubuntu ubuntu   260 Nov  7  2013 BootSector/
-rw-rw-r--  1 ubuntu ubuntu  2155 Nov  7  2013 copy_duet_files.sh
-rw-rw-r--  1 ubuntu ubuntu  2921 Nov  7  2013 CreateUSB.cmd
-rw-rw-r--  1 ubuntu ubuntu 16019 Nov  7  2013 duet-install
-rw-rw-r--  1 ubuntu ubuntu  9116 Nov  7  2013 duet-install.8
drwxrwxr-x  4 ubuntu ubuntu    80 Nov  7  2013 Efildr/
-rw-rw-r--  1 ubuntu ubuntu 20480 Nov  7  2013 Elevate.exe
drwxrwxr-x  3 ubuntu ubuntu    60 Nov  7  2013 Extras/
drwxrwxr-x  2 ubuntu ubuntu    80 Nov  7  2013 Licenses/
drwxrwxr-x  3 ubuntu ubuntu    60 Nov  7  2013 Linux_Source/
-rw-rw-r--  1 ubuntu ubuntu  9282 Nov  7  2013 Migle_BootDuet_INSTALL.txt
drwxrwxr-x  3 ubuntu ubuntu   160 Nov  7  2013 Modified_files_for_compiling_EDK1_DUET_in_Windows_X64/
-rw-rw-r--  1 ubuntu ubuntu  3536 Nov  7  2013 README.txt
drwxrwxr-x  2 ubuntu ubuntu    80 Nov  7  2013 Shell/
-rw-rw-r--  1 ubuntu ubuntu 13673 Nov  7  2013 UDK_EDK2_DuetPkg_Changes_to_Makefiles.patch
-rw-rw-r--  1 ubuntu ubuntu  1821 Nov  7  2013 Usage_Linux.txt
-rw-rw-r--  1 ubuntu ubuntu  2165 Nov  7  2013 Usage_Windows.txt
drwxrwxr-x  2 ubuntu ubuntu    80 Nov  7  2013 Windows_Binaries/
ubuntu@ubuntu:/tmp/1/tianocore_uefi_duet_installer$
We make executable copy_duet_files.sh and duet-install:
ubuntu@ubuntu:/tmp/1/tianocore_uefi_duet_installer$ chmod +x copy_duet_files.sh duet-install
Install DUET:
ubuntu@ubuntu:/tmp/1/tianocore_uefi_duet_installer$ sudo ./duet-install -m -s ../syslinux-5.10/mbr /dev/sda1
Will install SYSLINUX to the MBR
Will install SYSLINUX to the MBR
Path to SYSLINUX is ../syslinux-5.10/mbr
Path to bootduet is /tmp/1/tianocore_uefi_duet_installer/BootSector
Path to UEFI DUET is /tmp/1/tianocore_uefi_duet_installer
Will install UEFI version UDK
Target partition is /dev/sda1
Target disk (for storing MBR boot code) is /dev/sda
Partition number is 1
Partition starts at sector 2048
FAT32 filesystem found on /dev/sda1
Partition table type is gpt
Proceeding with installation will overwrite at least some data on /dev/sda1.
This is your LAST CHANCE to abort! Do you want to continue (Y/N)? y
Preparing disk...
Writing 00 08 00 00  to boot partition's hidden sectors field
Installing SYSLINUX...
Installing BootDuet...
Installing UEFI DUET....
Installation completed without errors; the disk should now be bootable!
You may need to copy an EFI boot loader, such as ELILO or GRUB 2, to the
disk.
Now you need to copy the EFI TianoCore emulator:
ubuntu@ubuntu:/tmp/1/tianocore_uefi_duet_installer$ sudo mount /dev/sda1 /mnt
ubuntu@ubuntu:/tmp/1/tianocore_uefi_duet_installer$ sudo ./copy_duet_files.sh /mnt EDK_UEFI64
--------
PARTITION MOUNTPOINT = /mnt
PARTITION FILESYSTEM = FAT32
UEFI-DUET FIRMWARE BUILD = EDK_UEFI64
--------
+ cp --verbose /tmp/1/tianocore_uefi_duet_installer///Efildr/EDK_UEFI64//Efildr20 /mnt/EFILDR20
'/tmp/1/tianocore_uefi_duet_installer///Efildr/EDK_UEFI64//Efildr20' -> '/mnt/EFILDR20'
+ mkdir -p /mnt/EFI/tools/
+ cp --verbose /tmp/1/tianocore_uefi_duet_installer///Shell//shellx64_v1.efi /tmp/1/tianocore_uefi_duet_installer///Shell//shellx64_v2.efi /mnt/EFI/tools/
'/tmp/1/tianocore_uefi_duet_installer///Shell//shellx64_v1.efi' -> '/mnt/EFI/tools/shellx64_v1.efi'
'/tmp/1/tianocore_uefi_duet_installer///Shell//shellx64_v2.efi' -> '/mnt/EFI/tools/shellx64_v2.efi'
+ mkdir -p /mnt/EFI/tools/extras
+ cp --verbose /tmp/1/tianocore_uefi_duet_installer///Extras/X64//diskpart.efi /tmp/1/tianocore_uefi_duet_installer///Extras/X64//efichk.efi /tmp/1/tianocore_uefi_duet_installer///Extras/X64//efifmt.efi /mnt/EFI/tools/extras/
'/tmp/1/tianocore_uefi_duet_installer///Extras/X64//diskpart.efi' -> '/mnt/EFI/tools/extras/diskpart.efi'
'/tmp/1/tianocore_uefi_duet_installer///Extras/X64//efichk.efi' -> '/mnt/EFI/tools/extras/efichk.efi'
'/tmp/1/tianocore_uefi_duet_installer///Extras/X64//efifmt.efi' -> '/mnt/EFI/tools/extras/efifmt.efi'
+ set +x +e
--------
DUET EDK_UEFI64 files have been copied to the FAT32 PARTITION successfully
--------
Mount the first partition in / mnt and install EFI. I chose EDK_UEFI64, because later on when setting up the boot, UDK_X64 for some reason did not save the settings. It was too lazy to figure it out.
That’s all magic. It is enough to restart the computer and set the boot from the hard drive in the BIOS. The result should be a welcome inscription as shown below:
After it, if everything went smoothly and the copy_duet_files.sh script worked correctly, an EFI emulator prompt will appear.
Unfortunately, this cannot be reproduced in a virtual machine, so I brought a picture from EFI VirtualBox, it is almost the same as the one you should see.
Further configuration of the download is done through this menu. I leave the subsequent setup of the download through the EFI menu for personal study, especially since there is nothing complicated there. For example, for starters, you can practice in the same VirtualBox in EFI boot mode.
We insert the disk with the Windows distribution into the drive or use the pre-formed installation flash drive. In the EFI emulator menu, choose where to boot from (this is selected through the menu 'Boot Maintenance Manager' → 'Boot From File', the choice of the device from which the USB flash drive or CD / DVD is loaded. To start the installation this is enough. You will need to select the bootx64 file in the list. efi it is it that is bootable). Further download and installation takes place using the standard Windows installer, but with the ability to install on a disk that is marked up in GPT.
That's all. Thanks for attention.
Original article: by Rod Smith