Developing Action-able Applications for Slack
From the translator: we publish for you Tomomi Imura's article on how to develop an application that is integrated with Slack
Actions - something that allows Slack users to interact with your application using messages: report a problem with a bug, send a request to helpdesk or do something still. This feature is similar to built-in features like commenting or sharing.
This tutorial will guide you through the entire process of creating a live application.
Skillbox recommends: A two-year hands-on course "I am a PRO Web Developer . "
We remind: for all readers of "Habr" - a discount of 10,000 rubles when writing to any Skillbox course on the promotional code "Habr".
Tutorial will be useful for anyone who would like to learn the Slack API. When developing an application, Node.js is used, so if you want to repeat what the conversation is about, set it up.
With the finished project can be found on GitHub , with a simplified version of it - on the Glitch .
ClipIt! for Slack
We will develop the Slack-app for the imaginary application ClipIt! Let's imagine that we manage a web service that allows you to “lay” a part of a web page, saving it to a database. Users can access the stored content from a mobile device or PC, the service is multiplatform. And ClipIt! allows you to attach text in a Slack message environment using Action.
Here is a gif showing the principle of the application.
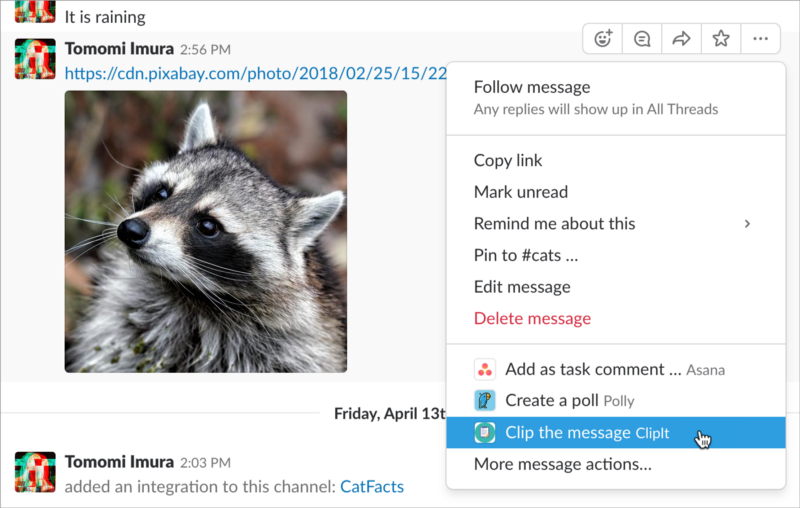
But the user interaction algorithm with ClipIt! from Slack:
- The user hovers over the message and selects Clip the message in the drop-down menu.
- A dialogue opens that gives you more options.
- The user confirms the action.
- ClipIt! for Slack, it exports the message to the ClipIt! database.
- ClipIt! for Slack sends the DM user with confirmation.
Configure the application
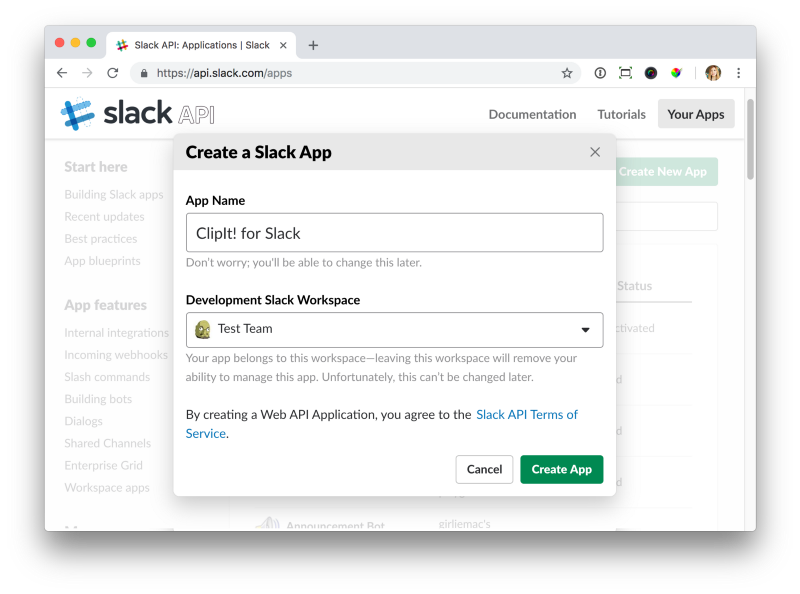
Log in to your Slack account and create an application using this link . Enter its name and scope.
Click Create App, then Basic Information, scroll to App Credentials.
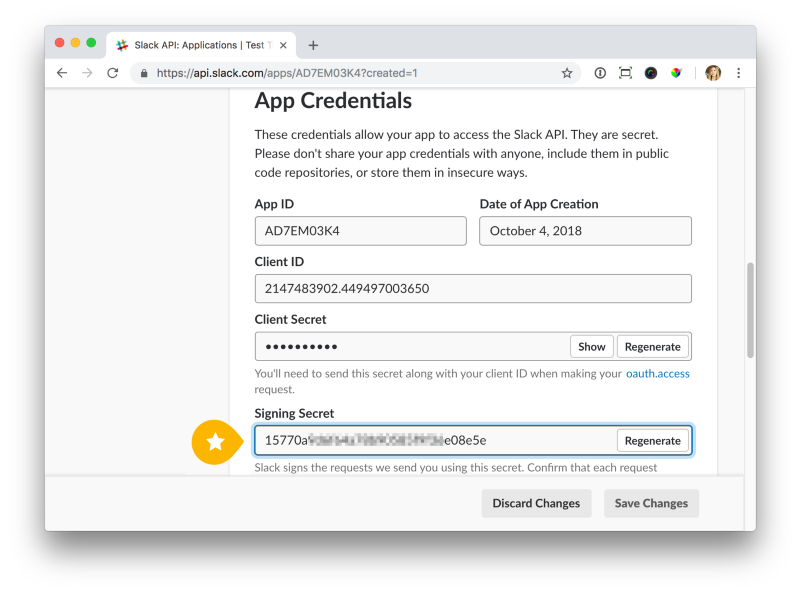
After that, open Signing Secret and copy the code to use as the environment variable SLACK_SIGNING_SECRET in your .env file in the root Node. I will explain what this is and how to use it all, in the “Verification of Requests” section below.
SLACK_SIGNING_SECRET = 15770a ...
Scroll a little more below to fill in the Display Information with your application icon and description.
Now enable Interactivity in Interactive Components. By doing this, you will see more fields on the page.
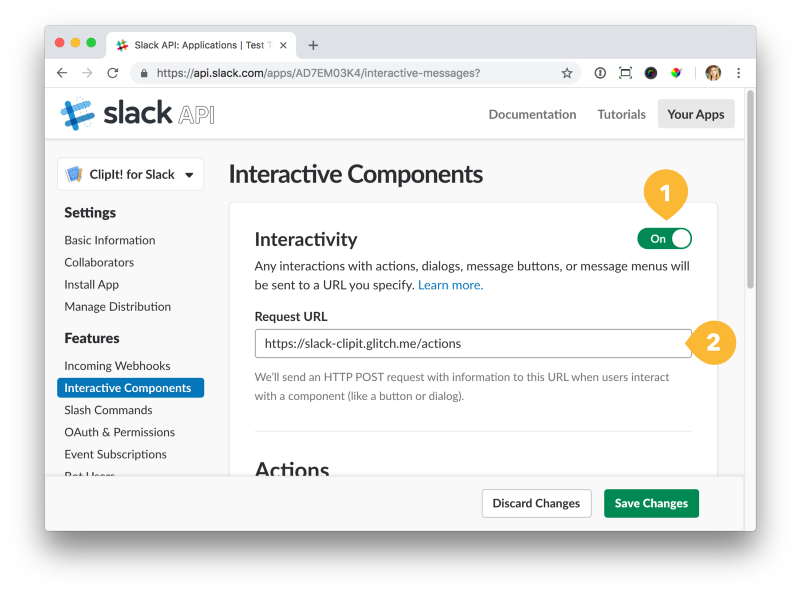
It's time to enter the Request URL - this is the address to which Slack sends the relevant data when the user launches an action.
This should be the URL of your server running the application code. For example, if you put all this in Glitch, your URL would look something like example.glitch.me/actions . If you are using tunneling, working with services like ngrok, then use the URL of the service (for example, example.ngrok.io , and then add / actions).
Once you have entered the Request URL, scroll down to Actions and click Create New Action. Fill out the form:
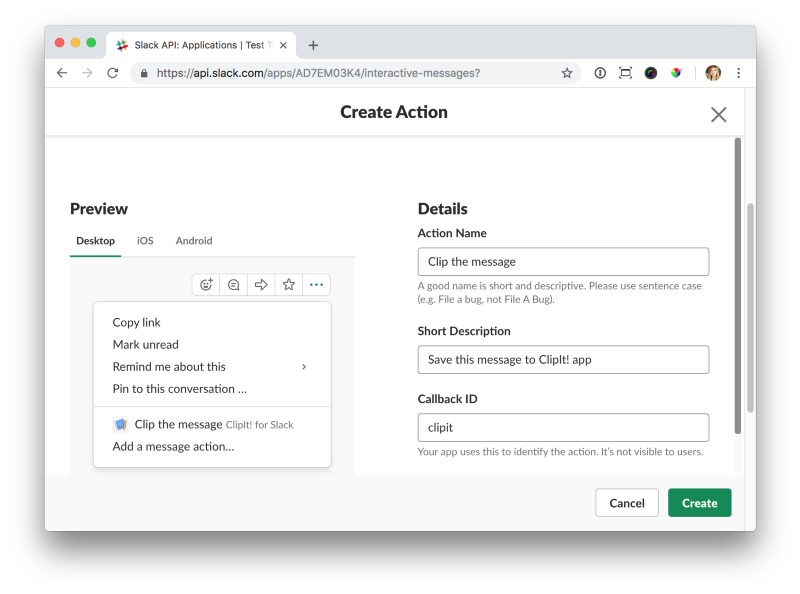
Click Create, then Save Changes.
Next, go to the Bot Users. Click Add a Bot User and name the application bot.
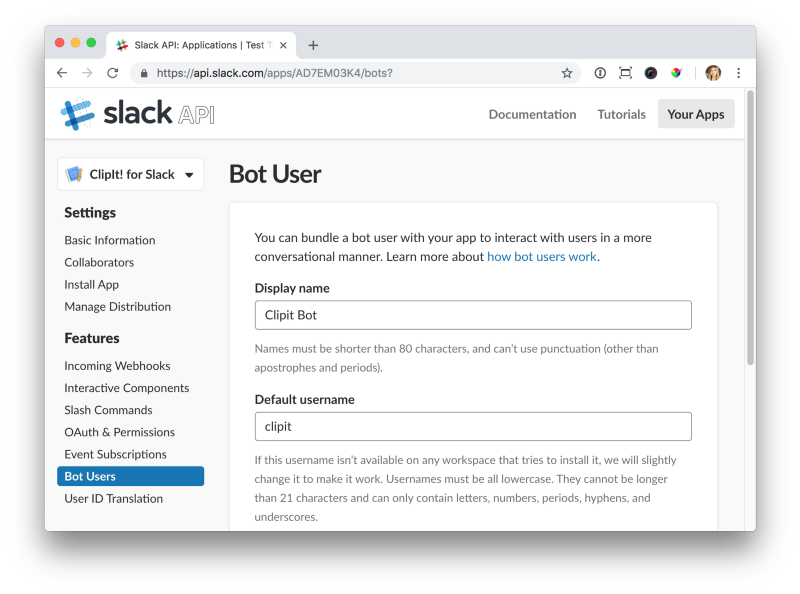
Now click on Add Bot User and save.
The next step is to go to OAuth & Permissions and click Install App to Workspace. After the installation is complete, the page will return you to OAuth & Permission with access tokens. Copy the bot token and save it all in an .env file.
SLACK_ACCESS_TOKEN = xoxb-214 ...
In addition, Scopes will need to be activated on the same page. When you do this, make sure that both bot and command are highlighted.
Now that all the settings are ready, we start creating - we write the application.
Creating an application
As mentioned above, when creating an application, Node.js and ExpressJS are used. In order to work with all this, we install ExpressJS dependencies, bodyParser, and one more thing. So, I use the axios HTTP request client along with qs.
$ npm install express body-parser axios qs dotenv --save
Let's start with the most important. We will change the code later when we add more functions. First create the index.js file. In this file, we register listening by the server of the corresponding port:
/* Snippet 1 */require('dotenv').config(); // To grab env vers from the .env fileconst express = require('express');
const bodyParser = require('body-parser');
const axios = require('axios');
const qs = require('qs');
const app = express();
// The next two lines will be modified later
app.use(bodyParser.json());
app.use(bodyParser.urlencoded({ extended: true }));
const server = app.listen(5000); // port
Before proceeding, let's take a look at the diagram describing the principles of operation of everything we are talking about.
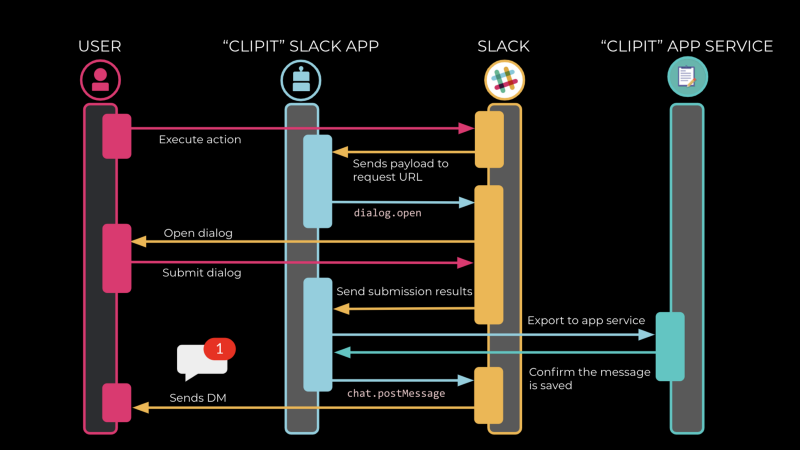
Each thread is initialized when the user performs actions located in the message menu. As soon as the message_action event is triggered, Slack sends the payload application to the request URL that was registered earlier.
Endpoint can be written as follows:
/* Snippet 2 */
app.post('/actions', (req, res) => {
  const payload = JSON.parse(req.body.payload);
  const {type, user, submission} = payload;
  // Verifying the request. I'll explain this later in this tutorial!if (!signature.isVerified(req)) {
    res.sendStatus(404);
    return;
  }
  if(type === 'message_action') {
    // open a dialog!
  } elseif (type === 'dialog_submission') {
    // dialog is submitted
  }
});
If the event type is message_action, the application opens a dialog.
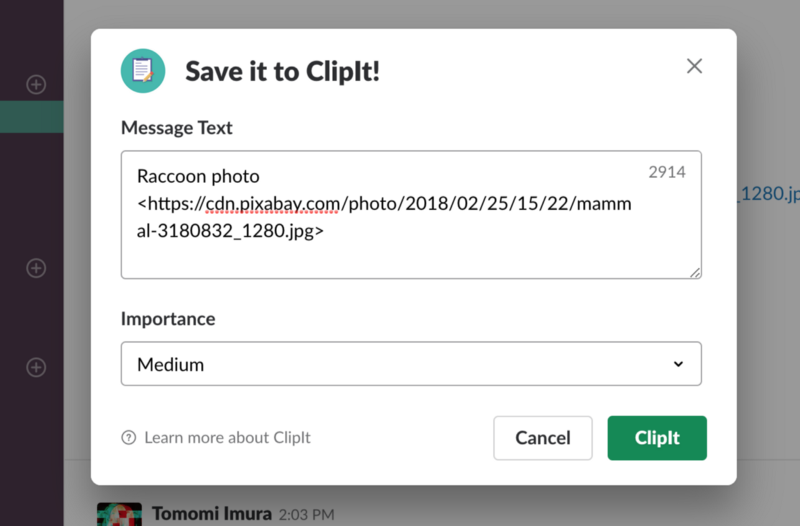
Then we add code that defines the structure of the content of the dialog, opening it in the Slack client using the dialog.open method:
/* Snippet 2.1 */const dialogData = {
  token: process.env.SLACK_ACCESS_TOKEN,
  trigger_id: payload.trigger_id,
  dialog: JSON.stringify({
    title: 'Save it to ClipIt!',
    callback_id: 'clipit',
    submit_label: 'ClipIt',
    elements: [
      {
        label: 'Message Text',
        type: 'textarea',
        name: 'message',
        value: payload.message.text
      },
      {
        label: 'Importance',
        type: 'select',
        name: 'importance',
        value: 'Medium ',
        options: [
          { label: 'High', value: 'High ' },
          { label: 'Medium', value: 'Medium ' },
          { label: 'Low', value: 'Low ️' }
        ],
      },
    ]
  })
};
// open the dialog by calling the dialogs.open method and sending the payload
axios.post('https://slack.com/api/dialog.open', qs.stringify(dialogData))
  .then((result) => {
      if(result.data.error) {
        res.sendStatus(500);
      } else {
        res.sendStatus(200);
      }
   })
  .catch((err) => {
      res.sendStatus(500);
});
Here we use the axios module to perform a POST request to Slack; then the dialog.open method opens the dialog, sending HTTP status 200.
Endpoint is also activated if the dialog is initiated by the user. In snippet 2 code, you need to respond with an empty HTTP 200 request so that Slack knows that the view has been received.
Finally, we send the user a confirmation message using the chat.postMessage method.
/* Snippet 2.2 */elseif (type === 'dialog_submission') {
  res.send('');
  // Save the data in DB
  db.set(user.id, submission); // this is a pseudo-code!// DM the user a confirmation messageconst attachments = [
    {
      title: 'Message clipped!',
      title_link: `http://example.com/${user.id}/clip`,
      fields: [
        {
          title: 'Message',
          value: submission.message
        },
        {
          title: 'Importance',
          value: submission.importance,
          short: true
        },
      ],
    },
  ];
  const message = {
    token: process.env.SLACK_ACCESS_TOKEN,
    channel: user.id,
    as_user: true, // DM will be sent by the bot
    attachments: JSON.stringify(attachments)
  };
}
Now let's run the code and see how the application works in integration with Slack. If all is well, perform the last step.
Request verification
Now let's take care of the security of the application and add verification requests. Always verify any requests from Slack before taking them to work.
To do this, go back to snippet 1, which is located at the top. Replace the place where there is a comment // The next two lines will be modified later, with this:
/* Snippet 3 */const rawBodyBuffer = (req, res, buf, encoding) => {
 if (buf && buf.length) {
   req.rawBody = buf.toString(encoding || 'utf8');
 }
};
app.use(bodyParser.urlencoded({verify: rawBodyBuffer, extended: true }));
app.use(bodyParser.json({ verify: rawBodyBuffer }));
I already connected the cryptography to verifySignature.js , so just add the function to the beginning of index.js:
const signature = require('./verifySignature');Now we perform verification:
if(!signature.isVerified(req)) { // when the request is NOT coming from Slack!
   res.sendStatus(404); // a good idea to just make it “not found” to the potential attacker!return;
}
I recommend verifying requests each time your application receives them from Slack.
We run the code again, and if everything works as it should, we can celebrate success! Congratulations!
- Online course "Profession frontend-developer"
- Practical course "Mobile Developer PRO" .
- Practical annual course "PHP developer from 0 to PRO" .