August 3, 2016 at 14:05
From registration to a storefront: how to put a mobile application on the App Store and Google Play (part 2)
- Tutorial
In the first part of our tutorial, we registered in both stores - the App Store and Google Play. But in order for your application to become available for download, you need to perform many more steps. Let's look at them.
Before proceeding to the upload procedure, be sure to make sure that your application meets the requirements ( Google , Apple ) for the quality and content of published applications. Non-compliance with these requirements often leads to the fact that novice developers are surprised to receive a refusal to publish, and even a warning for violation.
First of all, the application must have some kind of functionality, that is, have a benefit, value. Make sure that your application is at least somewhat different from its analogues. If you have not looked for analogues in the store, do not be too lazy to do this - at this stage the creation of many projects ends. This is especially true for beginners with an "innovative" idea.
There are also many options to get rejected due to incorrectly written code. This primarily relates to application crashes. Also, many developers are tempted to get into the internal API when there are not enough software interfaces provided by the vendor. But believe me, if the API is closed, it means it was done for a reason. Re-read the documentation on the technology used, for sure you missed something.
If you use the names of other companies, trademarks, copyrighted images and images (even as screenshots) in the name of the application or in its content - without the appropriate permission, then you can safely count on the application being “wrapped” with a reprimand . Therefore, carefully avoid such situations. If you need to use or mention copyrighted material, then you will need to immediately prove the right to use it using the appropriate form.
A complex or incomprehensible interface is another common cause of failure. Make sure that the application screens are not overloaded, read easily, and the colors are selected so as not to kill the user's eyes in 5 minutes of working with the application. Both companies have recommendations on interface design, check with them (Google , Apple ).
Apple is especially anxious about the performance of all the declared functions: if you have a distant menu item that you haven’t finished yet and placed a stub, then reviewers will find this out and force them to modify the application first.
If your application collects any information about the user and his device, it is necessary to explain as clearly as possible in the application how you will use this data. It is not recommended to collect all kinds of telemetry and send it to your server without explanation, this is suspicious and punishable by failure to publish the application.
When planning to take money from users using the built-in payment systems App Store and Google Play, then check whether your application falls into one of the categories supported by these systems. For example, if you plan to sell any services through your application, you will have to “fasten” other payment systems.
Background Modes. These are the modes that your application can use in minimized / closed form. But the application should contain functionality that justifies the choice of these modes. If you have Audio and no audio, or Voice over IP, and you cannot call from the application, then wait for the refusal.
Most often, applications do not pass moderation when laying out for the following reasons:
- Incomplete filling in all accompanying forms.
- Bugs and crashes.
- The application uses fake, fraudulent or misleading data.
- Icons similar to those of third-party applications are used.
- When developing the interface, recommendations from official guidelines (Apple, Google) were not taken into account.
- Mismatch of declared functions and / or screenshots to the actual application.
About all sorts of malicious things - like using an application to hack, spam, using dishonest methods of attraction, etc. - You can not mention.
If you do not take a responsible approach to the question of checking your application for compliance with the requirements, then your developer account may be blocked altogether.
In conclusion about the application verification process, a quote from the official website: “ We will reject the application with content or functionality that cross the line. Where is this trait, you ask? As one judge once said, “I will know when I see it.” And we think you too will understand when you cross it . ”
So, you have tested your application and are ready to share it with the whole world. Let's look at the appropriate procedures.
App store
Tools used:
- Apple computer (with OS X installed).
- Apple store - Apple app store.
- developer.apple.com is the Apple Developer Center.
- itunesconnect.apple.com - a site for managing your applications, uploading to the store, viewing statistics, finances, etc.
- Xcode is an integrated development environment.
- Application Loader - Apple program for downloading the collected application archive to iTunes Connect.
Each application uploaded to the App Store must be signed with a valid certificate issued by Apple.
To sign the application we need:
- Request a certificate from Apple.
- Add a new application to the Developer Center.
- Create a Provisioning profile.
- Create a new application on the itunesconnect.apple.com portal (hereinafter - iTunes Connect).
- Fill in all the necessary information about the application.
- Collect the application archive from Xcode by signing it with our Provisioning profile.
- Download the archive to iTunes Connect using the Application Loader (Apple software).
- Indicate in the new version of the application the archive that we downloaded and send the application for verification.
Consider each step in more detail:
- Certificate request from Apple.
- Go to Xcode.
- Open Xcode -> Preferences ...
- Choose Apple ID. If it is not in the list, click on the bottom "+" -> Add Apple ID.

- On the right, select the group on behalf of which you want to lay out the application, and click "View Details ..."
- After downloading the certificates, find in the box at the top “iOS Distribution”, if there is a Create button on the right, click on it. Certificate created.

- Adding a new application to Dev Center.
- We go to developer.apple.com/account/ios/identifier/bundle .
- Click on the "+". We enter the name of the application (only for Dev Center), and the Bundle ID is the unique identifier of our application, it must match the one specified in your project. Usually com.company.appname.
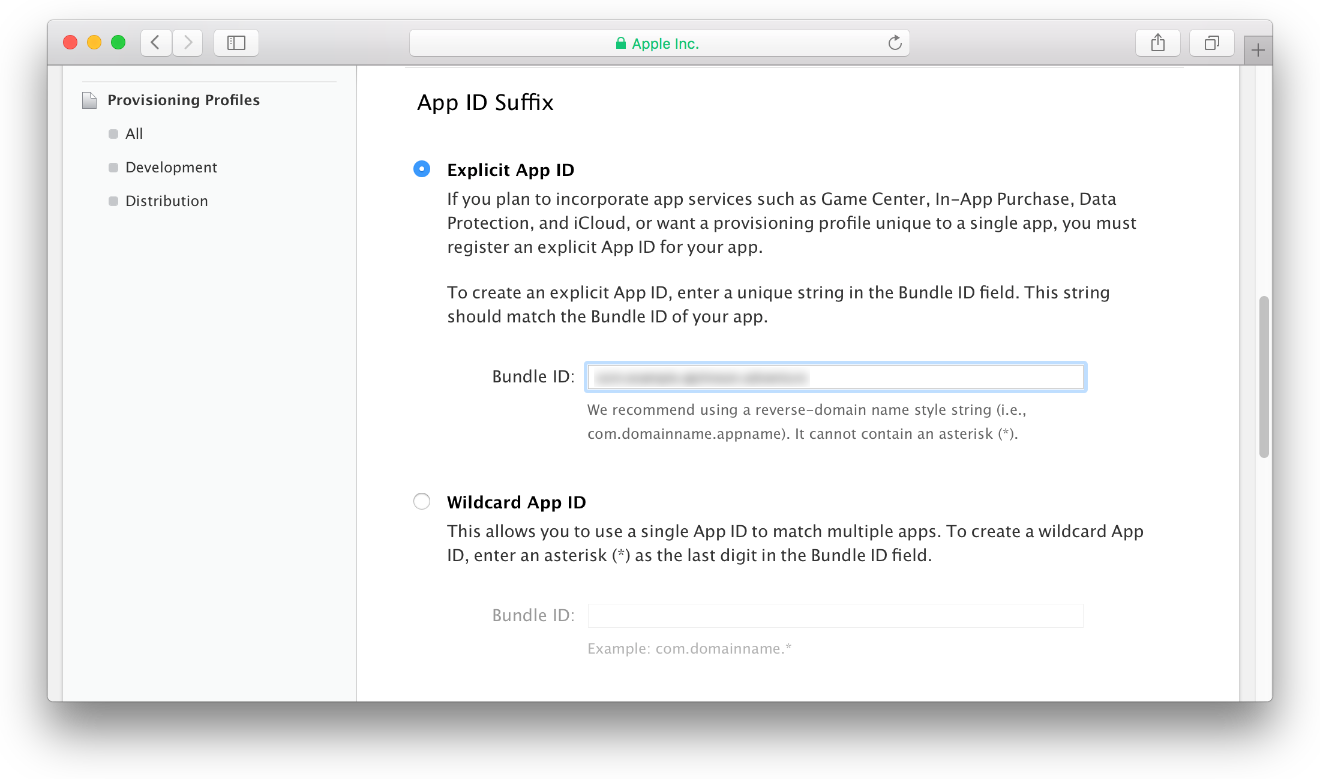
We indicate below the necessary services. They must match the ones you specified in the project (Xcode -> Target -> Capabilities).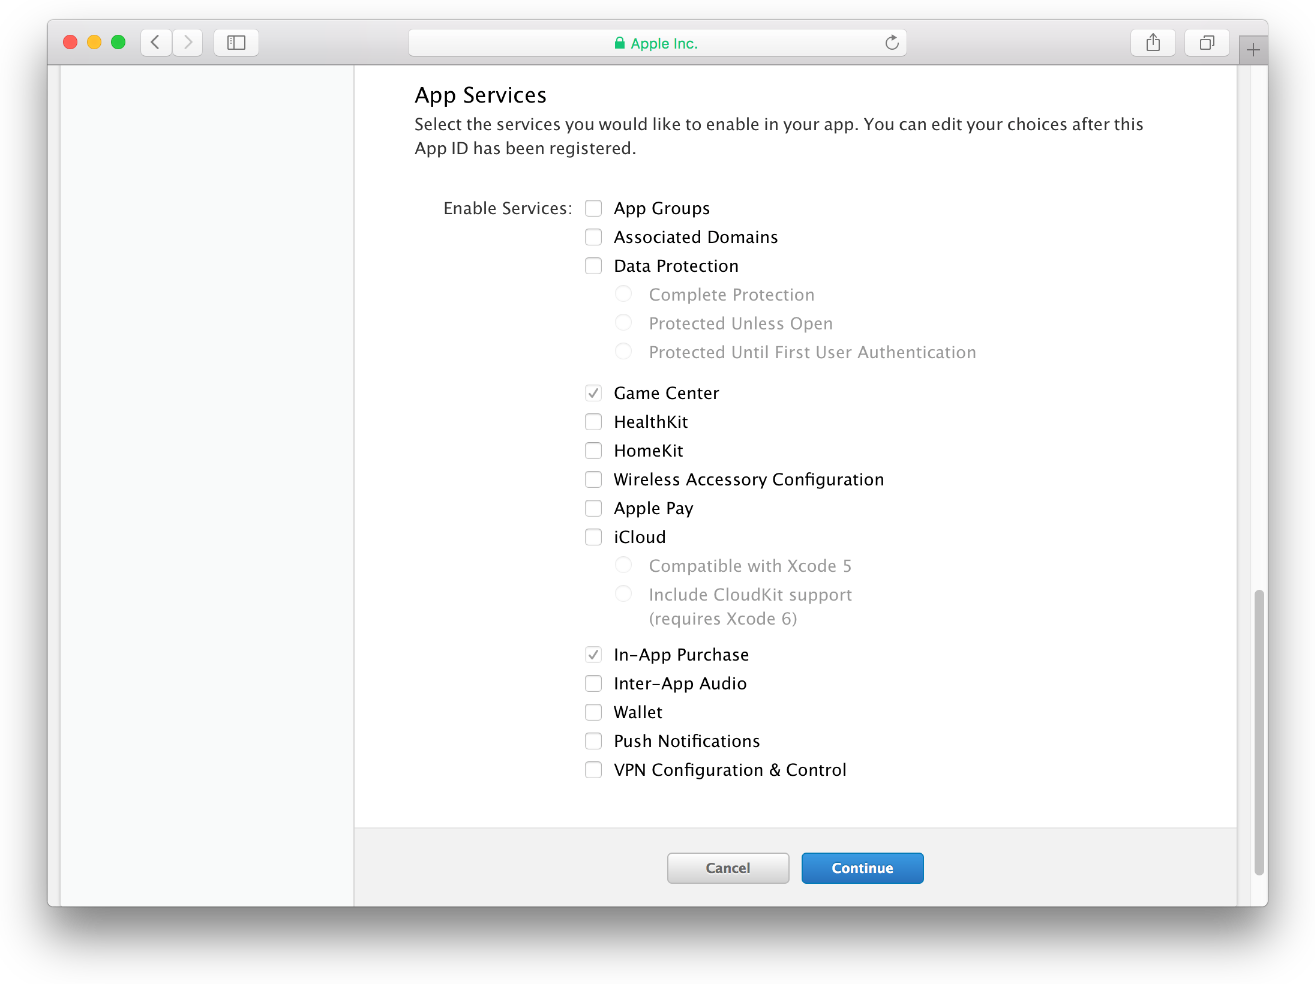
- Click Done - an application record has been created.
- Creation of a Provisioning profile.
- Go to developer.apple.com/account/ios/profile/production .
- Click on the "+". Select Distribution -> App Store. Click Continue.
- Select the certificate we created (iOS Distribution). Click Continue.
- Set the name of the certificate. Click Continue.
- Certificate created. Download it to your computer and open it - now you have it in Xcode.
- Create a new application in iTunes Connect.
- Go to itunesconnect.apple.com, in the "My Applications" section.
- Click on "+" -> New application.
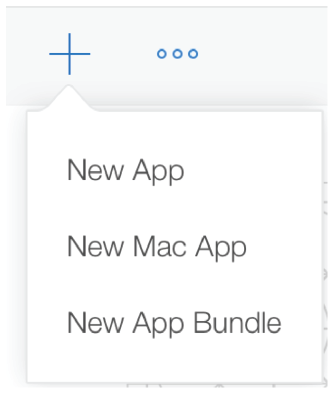
- Enter the application name, version (1.0), SKU - any identifier in your personal accounting system.
- Choose the main language. In the Bundle ID field, all applications from your developer account are loaded. Select the one you created earlier.
- Click Create. Application record created.

- Filling out all the necessary information about the application.
- Go to itunesconnect.apple.com , in the "My Applications" section, select our application from the list.
- AppStore -> Application Information. Here is the general information about the application.
- AppStore -> Pricing and Availability. Here you can specify the cost of your application and the country in which it will be available.
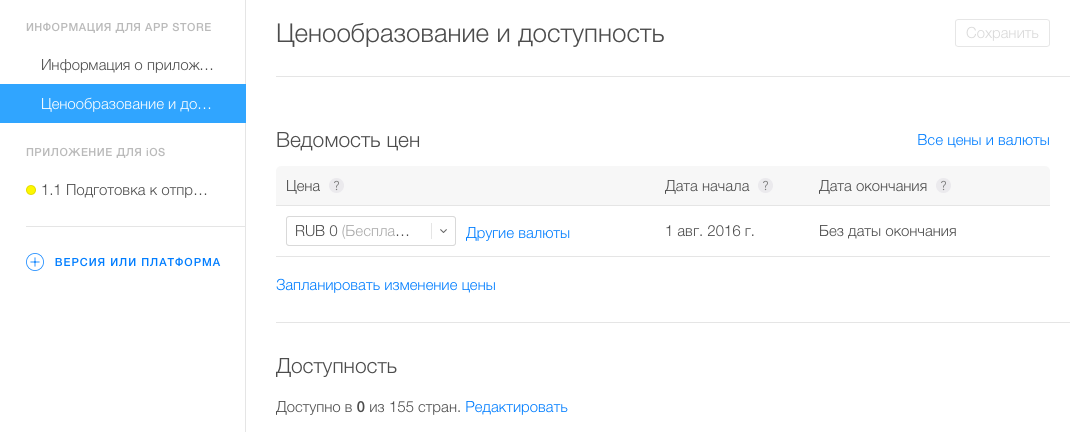
- Below we select “1.0 Preparing for sending” - this is the first version of the application that you send to the App Store. Here you need to go through the entire page and specify the most detailed information about the application: screenshots (up to 5 pieces per device, most conveniently done on a simulator), description, application icon, etc. Do not forget to enter the details for the test account below, if authorization is provided in your application. If Apple employees can’t access your application, you’ll immediately be rejected.
- Collecting an archive from Xcode, with signing it with our Provisioning profile.
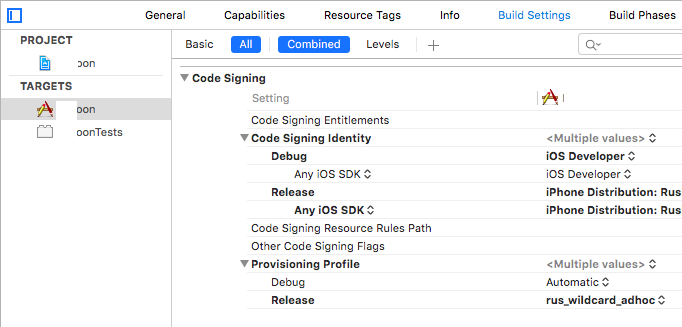
- Go to Xcode, in the file inspector on the left, select our project -> Targets, select our application. In the Build settings section we find the Code signing section. In the Provisioning profile field, select the one that we downloaded in step 3. If everything is correct, then in the Code Signing Identity field we can select our iOS Distribution Certificate created in step 1.
- In the Xcode menu at the top, select Product -> Archive. After archiving is completed, in the Archives organizer window, select the created archive and click Export ..., select “Save for iOS App Store Deployment” and select the place where we want to save the archive. Upon completion of this action, the archive with the extension .ipa will be created along the specified path - this is the archive of your application.
- Go to Xcode, in the file inspector on the left, select our project -> Targets, select our application. In the Build settings section we find the Code signing section. In the Provisioning profile field, select the one that we downloaded in step 3. If everything is correct, then in the Code Signing Identity field we can select our iOS Distribution Certificate created in step 1.
- Download an archive to iTunes Connect using Application Loader.
- Click My Apps on the iTunes Connect homepage. You will see a page listing the documentation and downloads for installation.
- Click the “Download Application Loader” link to download the self-extracting installation package.
- After installation, you must log in to the application through your Apple ID.
- After logging in, click on the “Deliver Your App” button and select the archive file created in step 6.
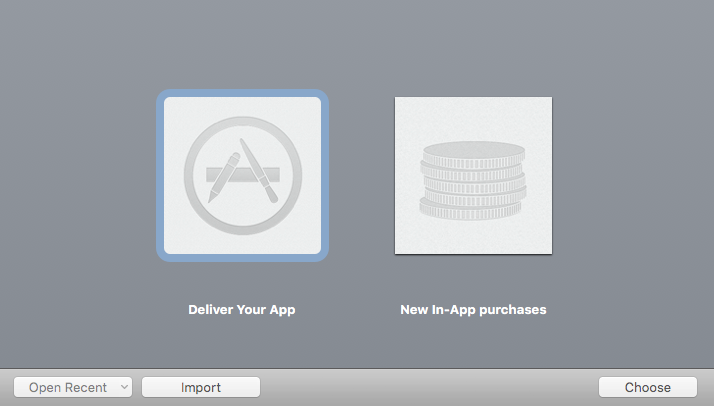
- Specifying the archive for the new version of the application that we downloaded, and sending the application for verification.
- Go to itunesconnect.apple.com , in the "My Applications" section. We find the laid out application created earlier. Select "1.0 Preparing for Shipping." In the "Assembly" section, indicate the downloaded application assembly.
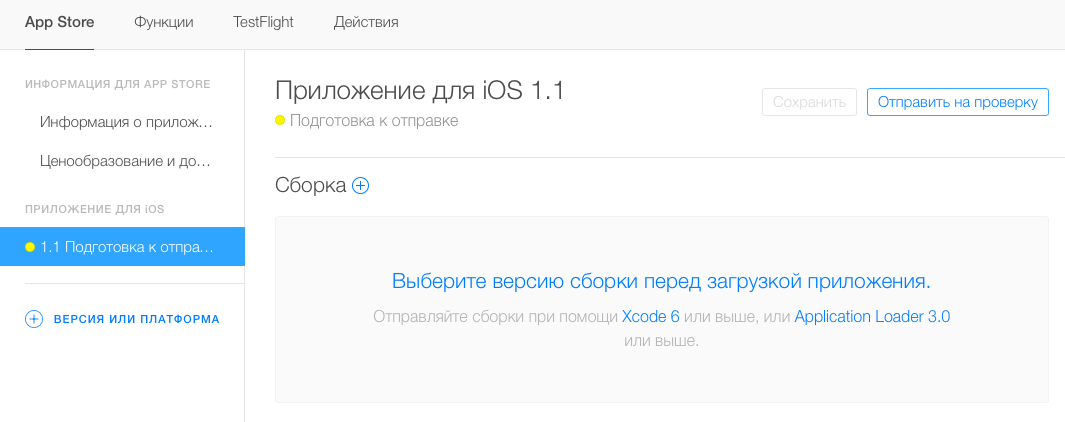
- At the very bottom, you can choose whether to publish the application after checking automatically or manually. In manual mode, you can publish the application when you see fit.
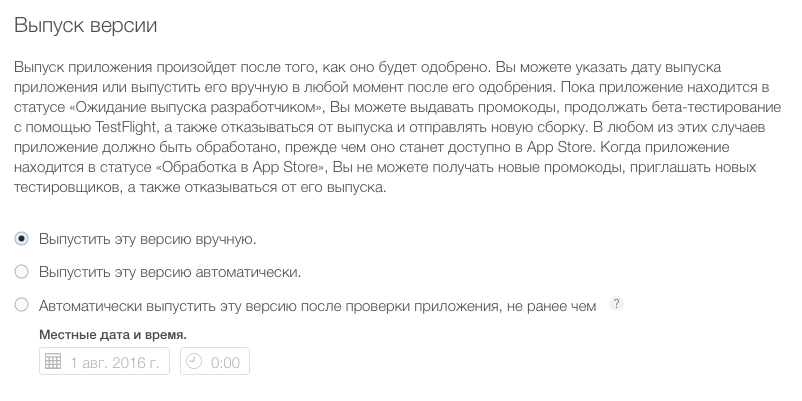
- Save changes. From above we press the button "Send for verification".

- If everything was done correctly, then you will see the file “Awaiting verification”. If there are errors, a message appears with information that needs to be fixed. All application status changes are accompanied by a letter from Apple. To set up notifications, go to Itunes Connect homepage -> Users and Roles -> select a user from the list -> select "Notifications". Here you can configure which notifications the user will receive.
- Go to itunesconnect.apple.com , in the "My Applications" section. We find the laid out application created earlier. Select "1.0 Preparing for Shipping." In the "Assembly" section, indicate the downloaded application assembly.
Google play
- We sign the APK file.
In order to put your application on Google Play, you must sign it with a special key. There are two types of keys:- develop - the key with which absolutely all applications are signed during installation from the development environment to devices;
- production - the key with which the application is signed before uploading to Google Play.
We will need the second type of key. It is unique for each application, they also need to sign all updates to your application. If you suddenly lose it, then it will be impossible to restore it and you will have to upload a completely new application.
Consider the signing process.- Click “Generate Signed APK”.
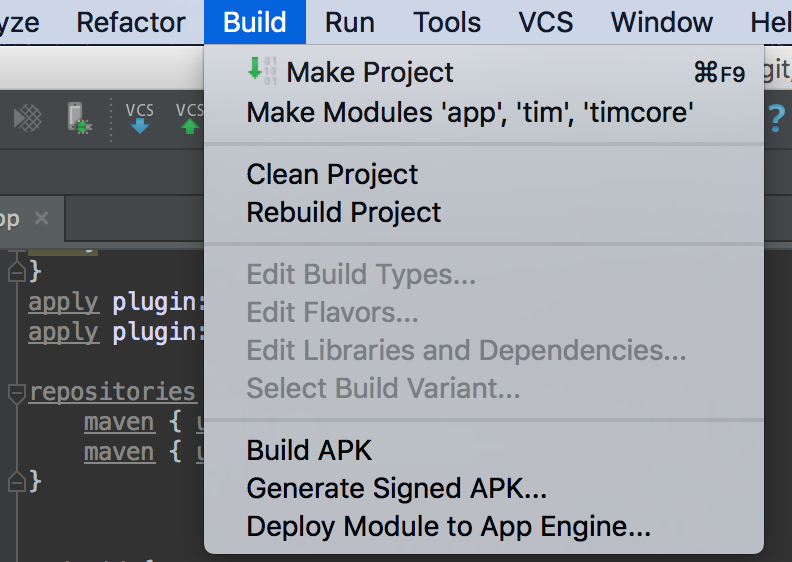
- Click “Next”.

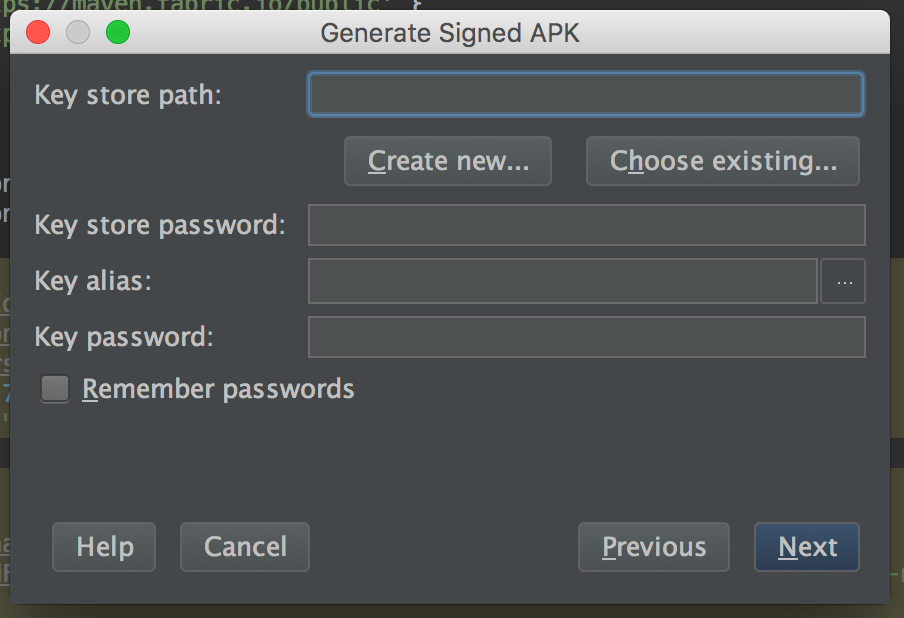
- At the next stage, you need to specify the path to the keystore (Keystore), the password for it, and also select the key itself in this repository by which the application will be signed. Since we do not yet have the keystore and the key itself, click “Create new”.
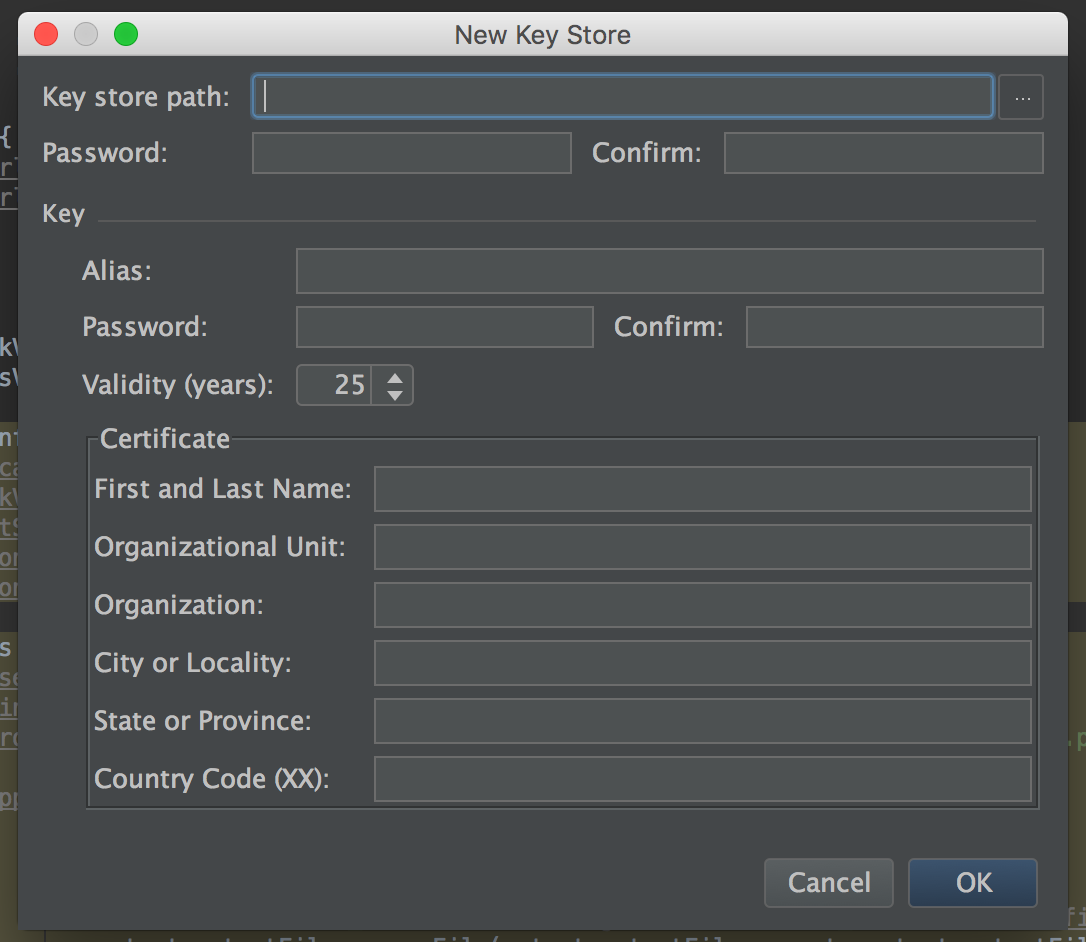
- In the window that appears, select the path where the created keystore file and password for it will be located. Next, enter the key name and password, select the key life (at least 25 years). In the “Certificate” block, it is enough to fill in the “First and last name” field, the remaining fields are optional.
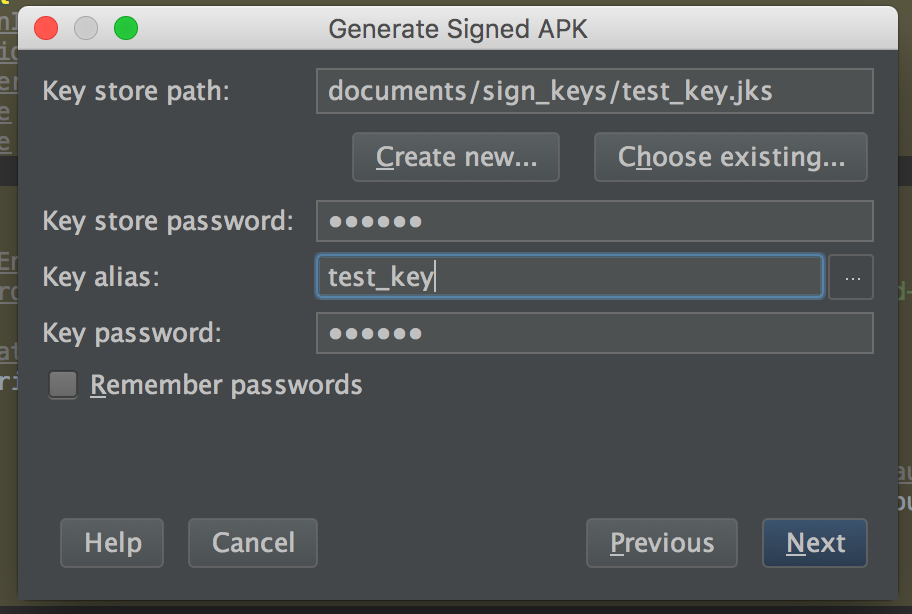
- Upon successful creation of the key, we will be returned to the previous window with the filled data. Click “Next”.
- In the window that appears, click the “Finish” button.
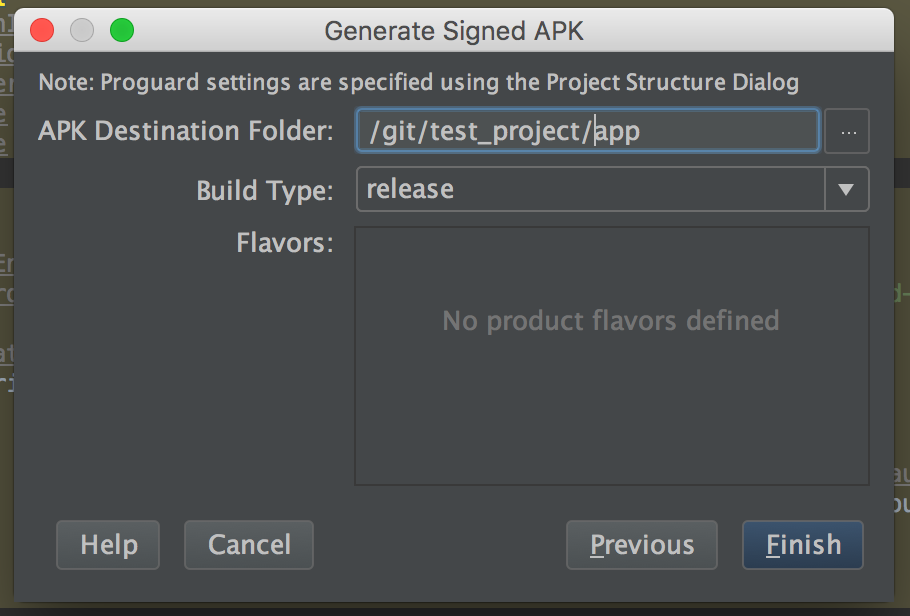
Next, the process of creating the APK-file of your application will be launched, the final stage of which will be its signature with the newly created key.
- Create a new project and upload the APK file to the developer console.
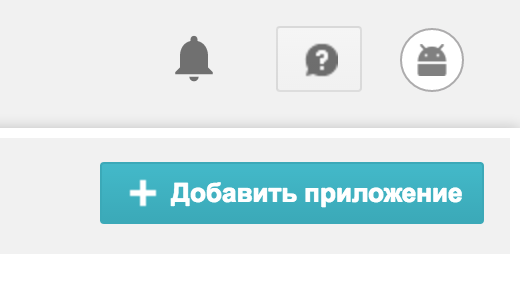
- In the developer’s console in the upper right corner, click on the "Add Application" button.
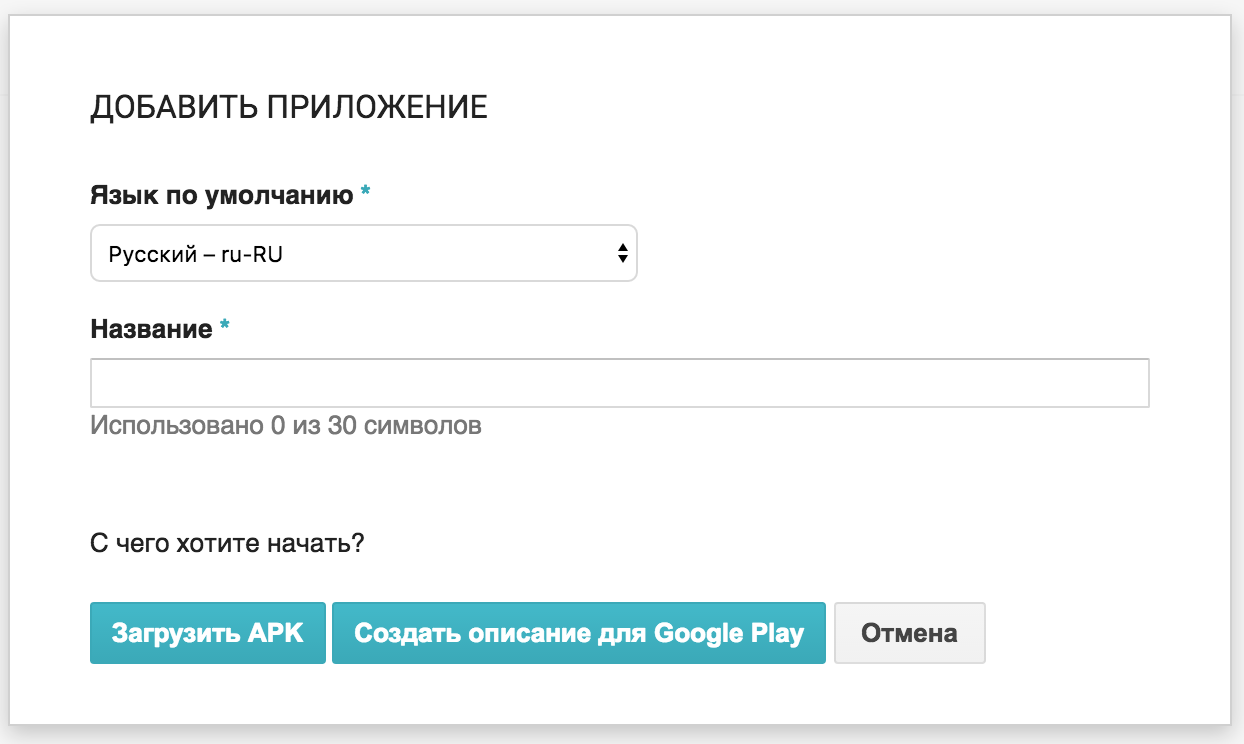
- In the window that appears, select the language that will be used by default on the page of our application in the Google Play store. We also enter the name of the application and click the "Download APK" button.
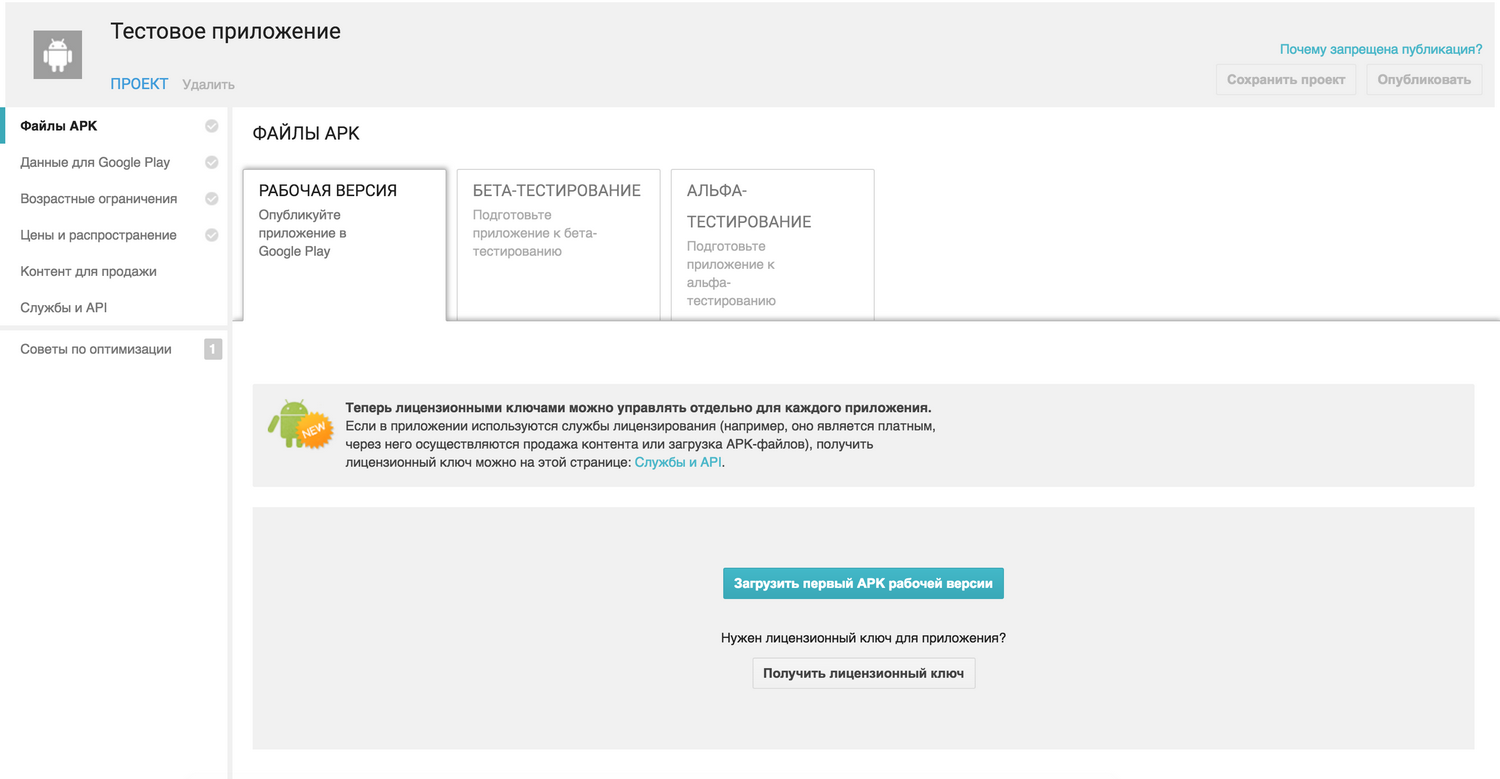
- Next, click on the button in the center of the screen "Download the first APK of the working version."
In the window, specify the path to our APK-file.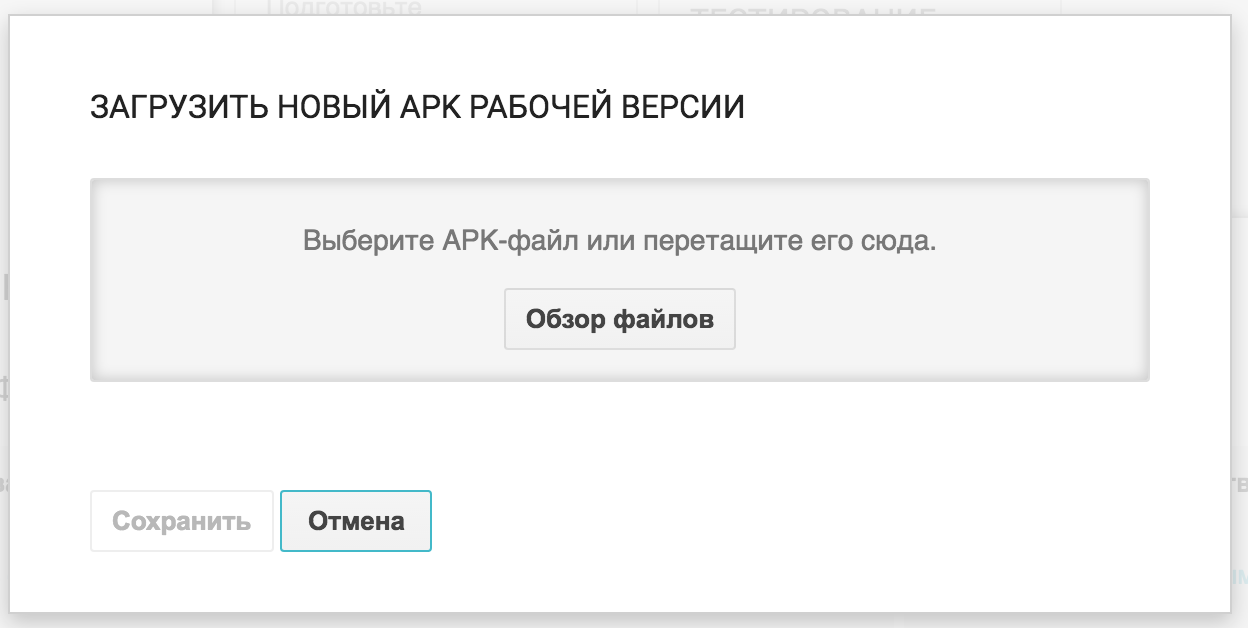
The download process will begin.
- After successfully downloading the APK file, the following screen will appear.

Please note that in the upper left corner opposite the line “APK files” the checkmark from gray turned to green. This is an indicator that we have successfully downloaded the file and fulfilled one of the requirements of Google Play for the successful publication of the application. Next, you need to make all the other checkmarks green, that is, to fulfill the remaining requirements.
- In the developer’s console in the upper right corner, click on the "Add Application" button.
- Filling in the required information about the application.
- Let's move on to the "Data for Google Play". Here you need to fill in all the fields marked with an asterisk *, as well as add all the necessary screenshots (at least 3 pieces), load the application icon, indicate the type and category of the application, age restrictions.


- If your application is designed not only for the Russian-speaking audience, then you can add a description and screenshots in other languages by clicking on the "Translations" button.
- After filling in all the fields, click on the “Save Project” button in the upper right corner.
- We pass to the tab "Age restrictions".
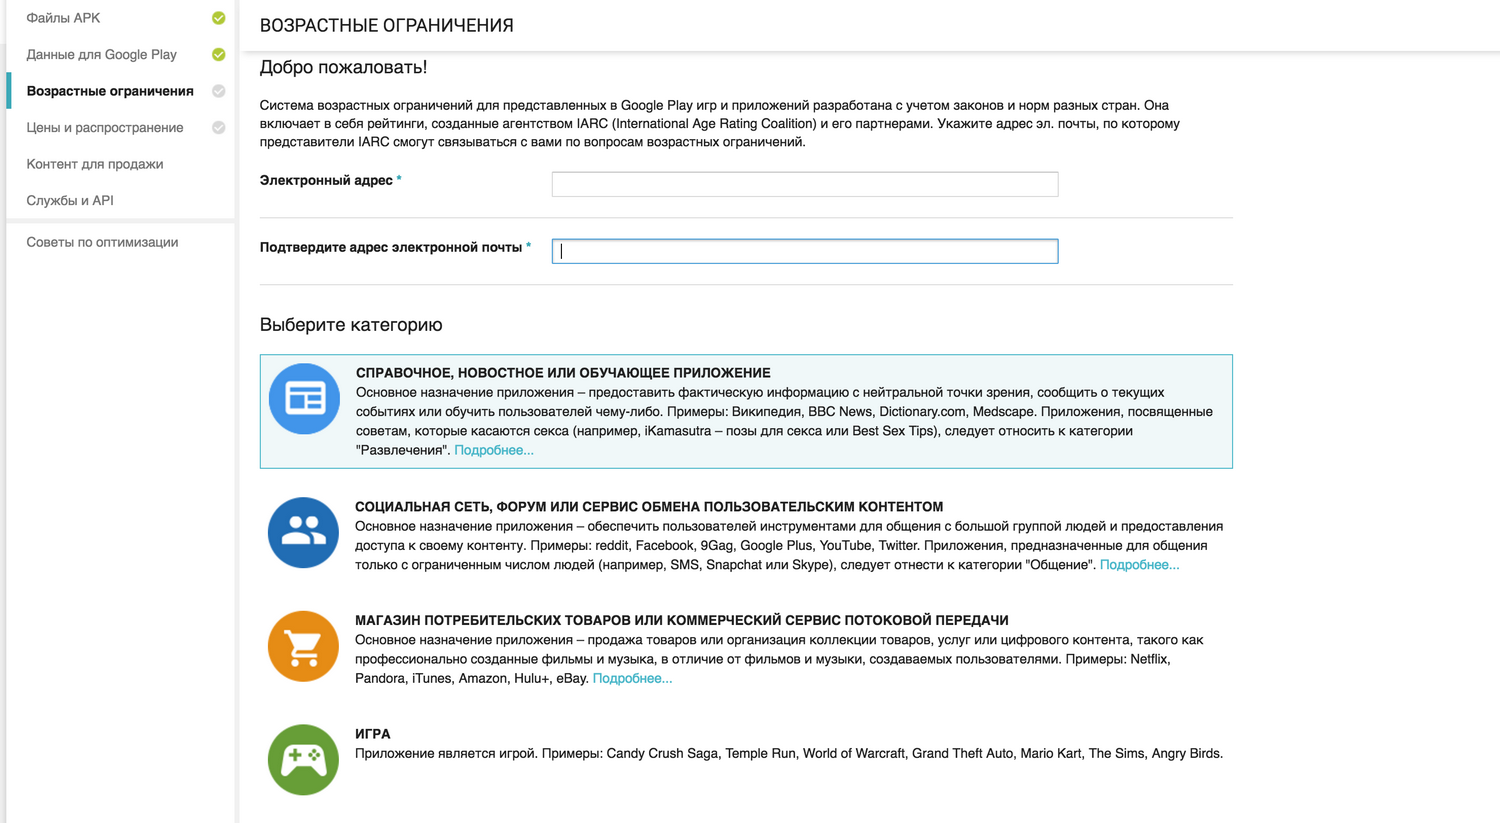
- The first step is to enter and confirm an email address, and then select a category for your application. Then you need to answer a small list of questions and at the bottom of the page click on the "Save" button.
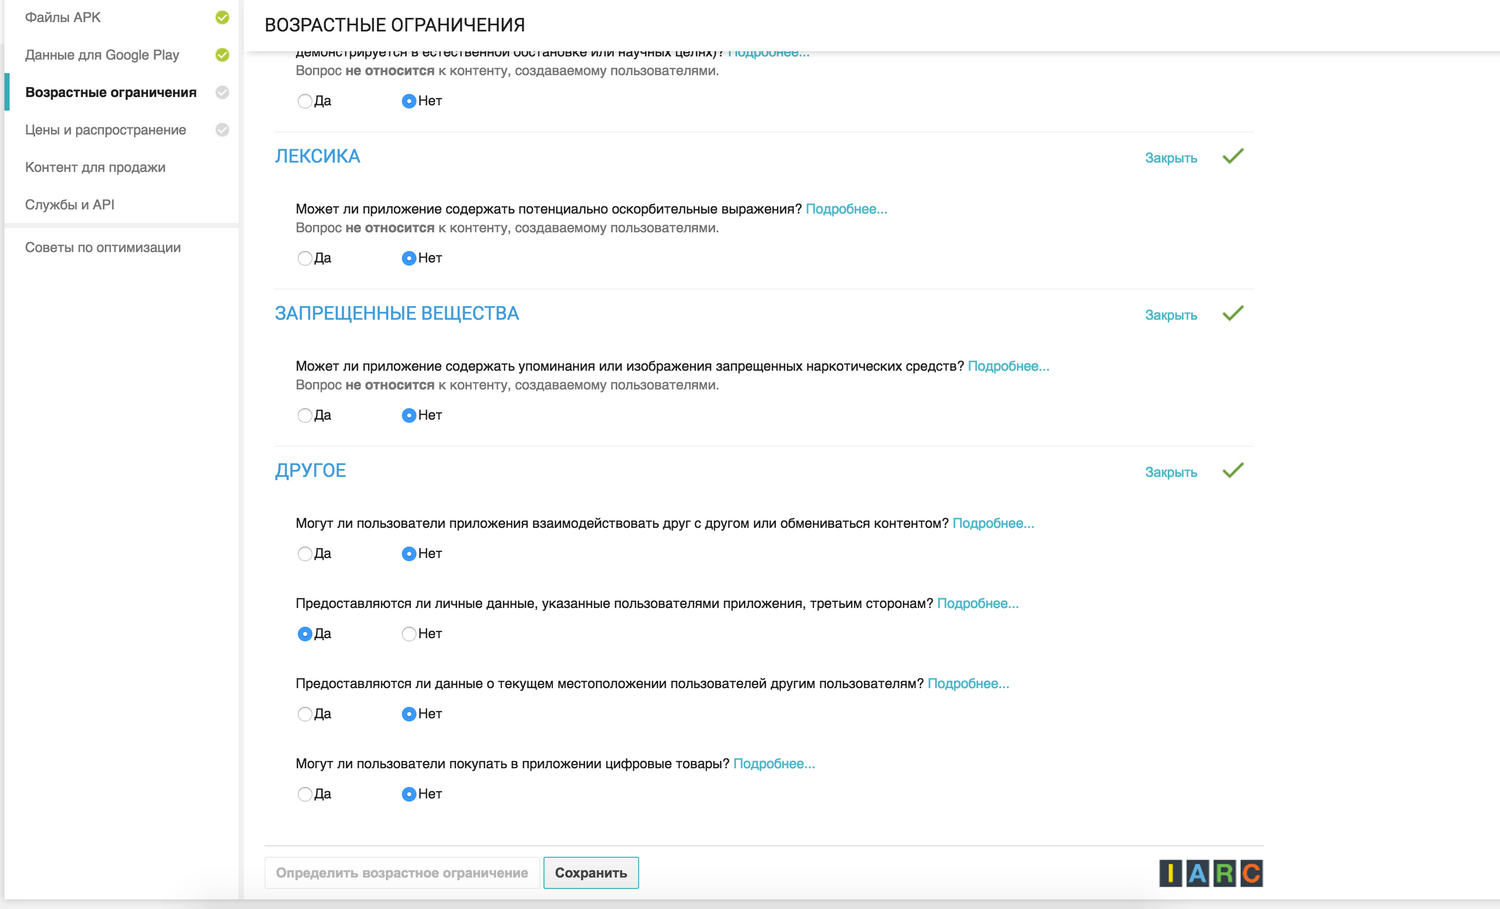
- After that, the button next to "Define age limits" will become available, click on it. A list will be displayed based on your answers to the questions. Check it, if everything is correct - click on the button “Set age limits”.

If everything went well, you will be shown the following screen.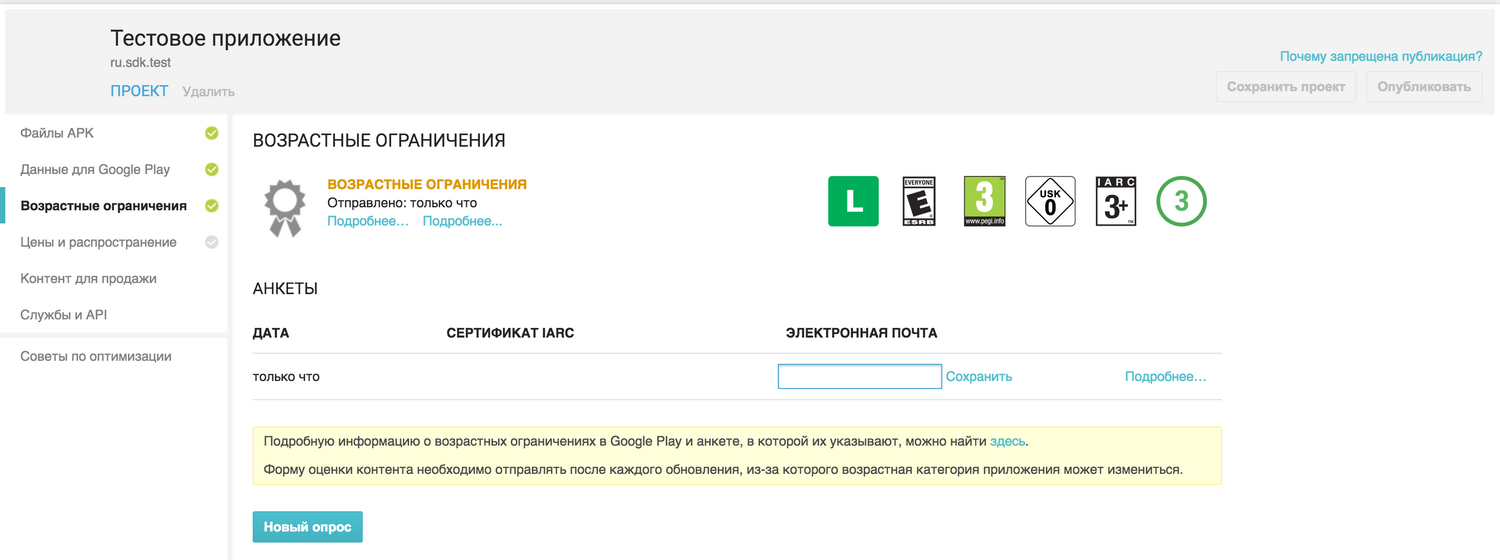
- We pass to the tab "Prices and distribution".

If your application will be distributed for free, then click on the “Free” button. Otherwise, click "Paid." For paid distribution, you will need to specify the price for the application, and choose a separate price for each country.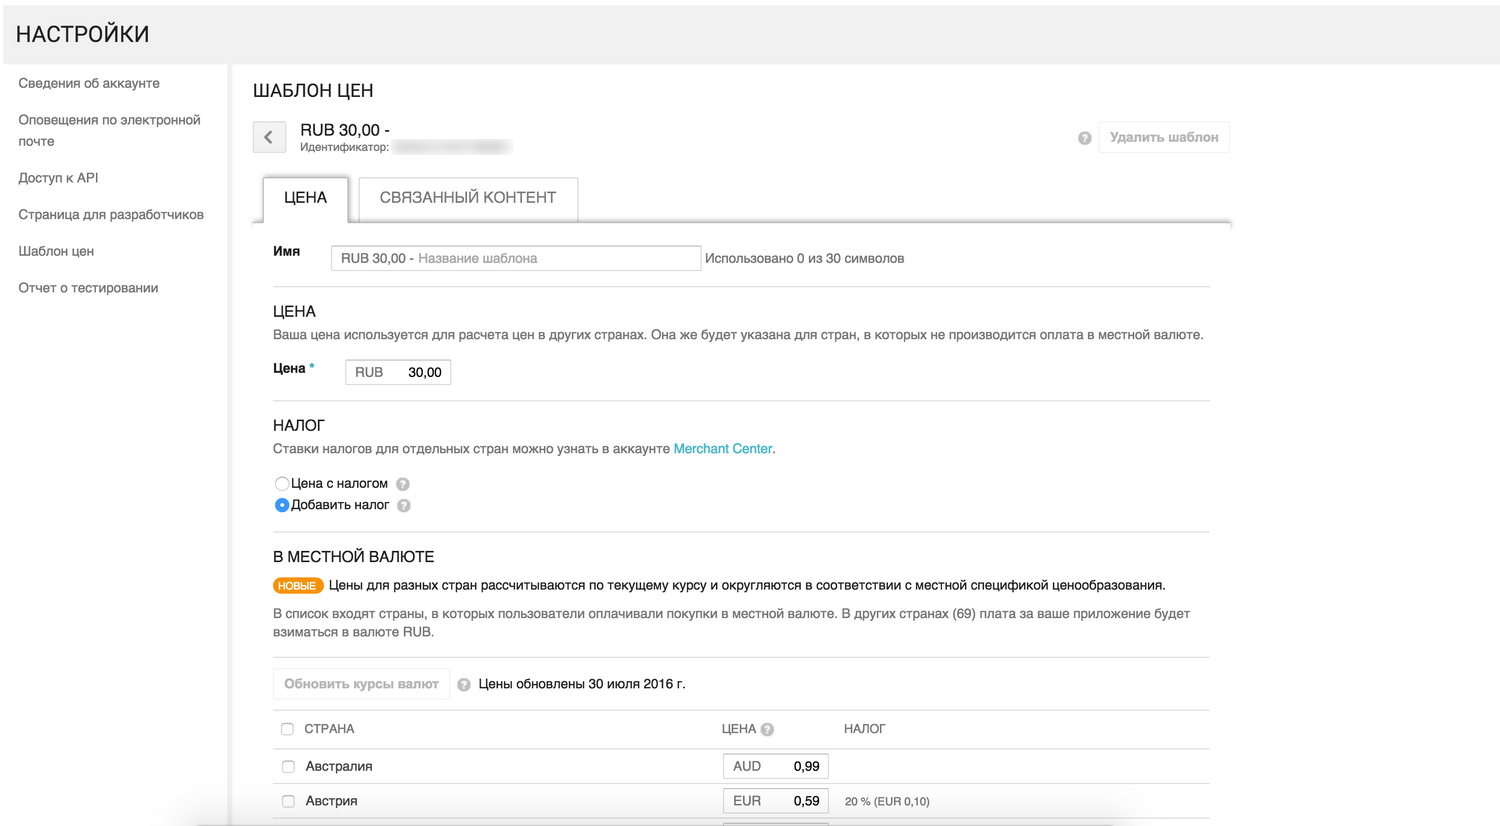
Please note that after the publication of the application, the payment of the application cannot be changed!
On the same screen, you need to specify the countries in which the application will be available for download. - Scrolling through the page to the end, put checkmarks in front of all required fields.

- Then again click on the "Save Project" button in the upper right corner.
- After correctly completed actions, the Publish button in the upper right corner will be available for you, click on it.
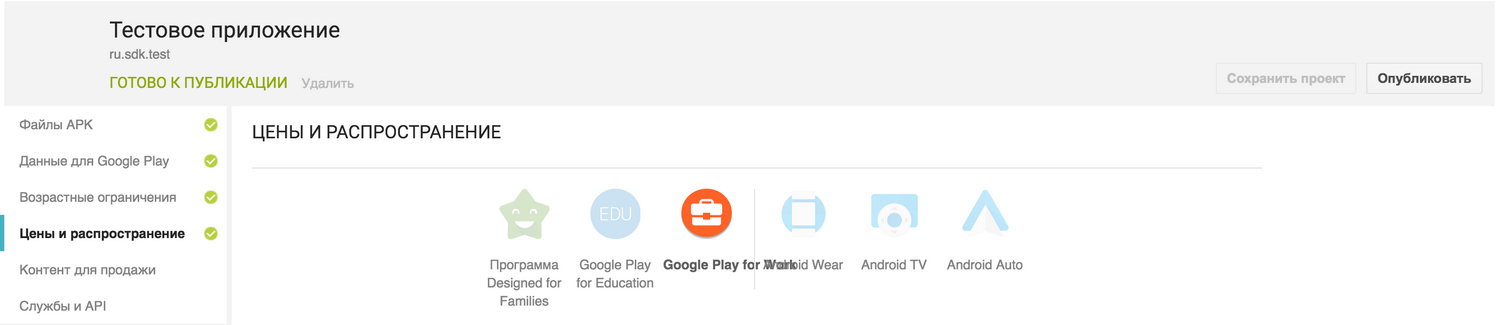
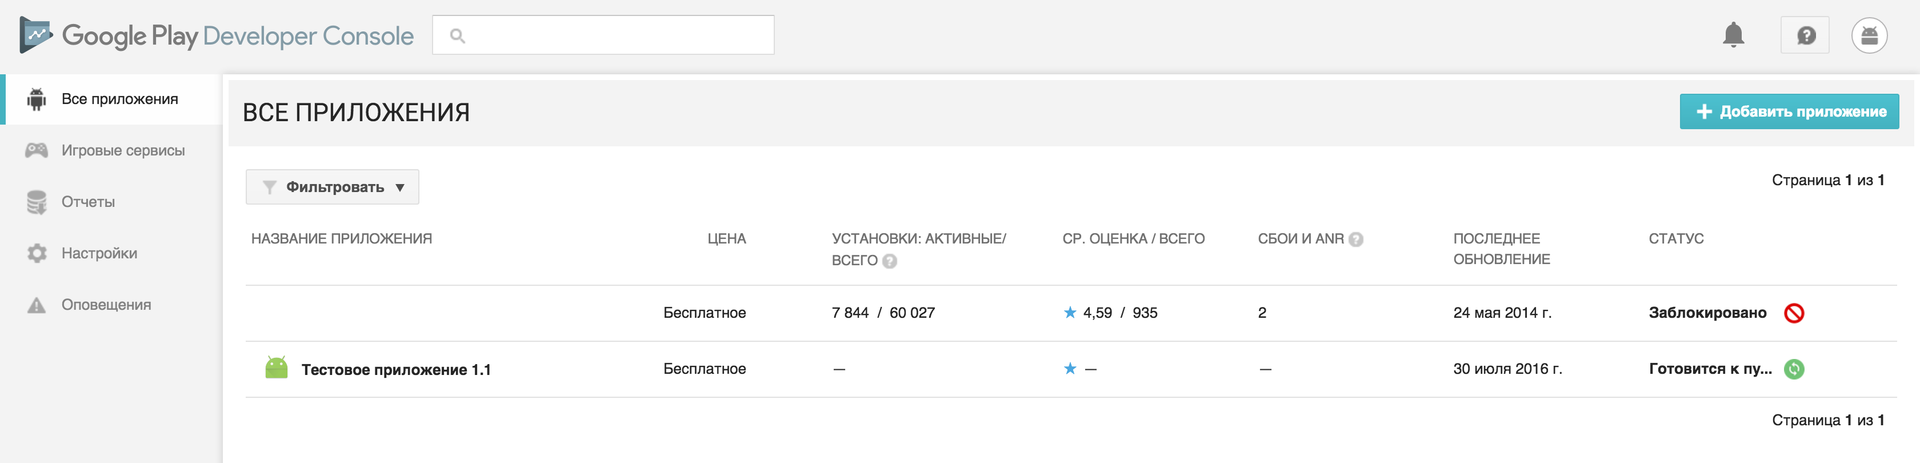
- Congratulations, within 1-2 hours (the average time it takes to publish the application) your creation will be available for installation from Google Play.
- Let's move on to the "Data for Google Play". Here you need to fill in all the fields marked with an asterisk *, as well as add all the necessary screenshots (at least 3 pieces), load the application icon, indicate the type and category of the application, age restrictions.
So, your application has passed all the checks and appeared in the store. You are excited to expect the first downloads and user reviews. But gaining the attention of users among many other applications can be very difficult. Therefore, after the publication of the application, it is necessary to pay close attention to its promotion. We will talk about ways in which this can be done in a future publication.