Unity3D Speed up rendering 2D animation at times? Easy
In this article, I would like to talk about how the rendering of monsters was accelerated when creating the Alien Massacre game. This solution is suitable for any projects that use sprite animation.
As a result of the development of a mobile game, it turned out that playing a large number of animated objects on the stage became a rather bottleneck. As a result, the following requirements were formed:
Of course, the first solution was simple: to do everything using the Animator component already built into UnityEngine. Let's see what happens.
As an atlas with the original animation, we will use an evil monster with 24 frames of sprite animation 64x64 pixels each:

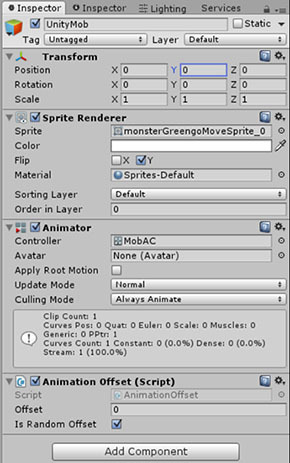
In Unity3D we set the type of texture sprite and in SpriteEditor we cut it into 24 pieces. We make an animation for it and drop it all onto an empty object. Here is the time to recall that we had a condition about different animation progress for various objects. No problem! A minute of work and the script is ready.
Now put it all together and get the solution that Unity3D provides out of the box.
Looking ahead, I’ll say that the solution “out of the box” has quite good performance and high flexibility. Animators have long been accustomed to setting up all those who work in Unity3D. But what if your application requires more performance?
Let's start with the general concept:
Let's start with the rendering shader.
Next, let's move on to a component that allows you to easily configure animation parameters from Unity Editor.
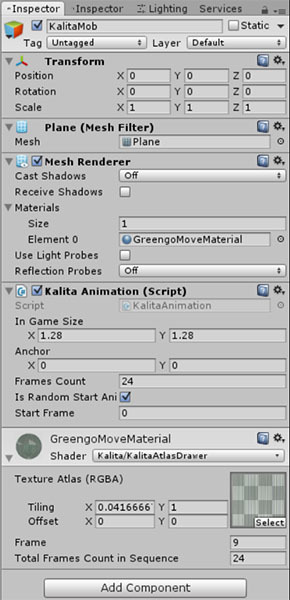
This script works in the Unity3D editor and allows you to immediately see the change in any parameters on the scene, which makes the setup simple and convenient. Do not forget to create material with the shader written above and assign it to the MeshRenderer. In the Unity3D editor, all this should look like this:
Well, now the easiest thing to do is write a global frame counter. Here he is:
For correct operation, one KalitaAtlasAC component controls many KalitaAnimation components. Since the parameters are set via sharedMaterial, any of the many controlled objects is dragged into the corresponding field (animation) of KalitaAtlasAC.
Well, it's time for testing. For the test we make a small script that allows you to create the desired number of objects on the scene.
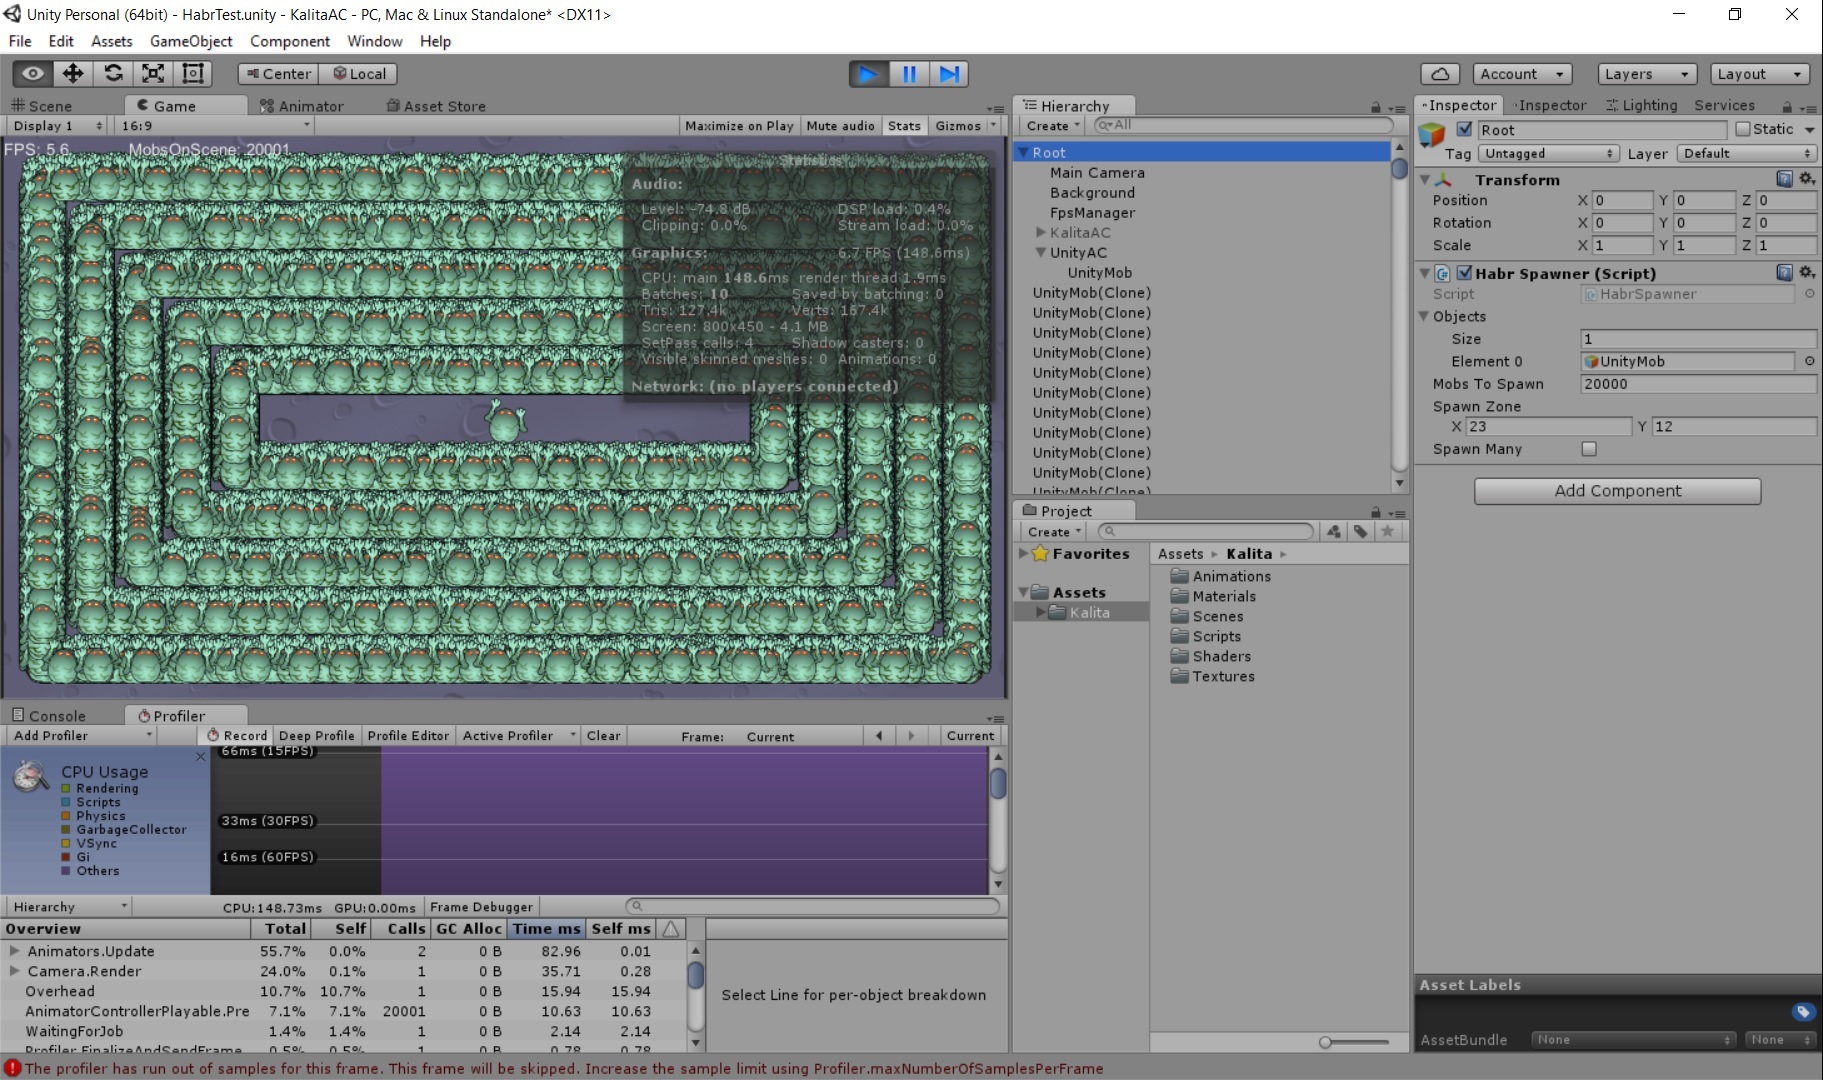
Compare the results. First, run in UnityEditor with the task of drawing 20,000 objects.
When using Unity3D Animator on my Dell M4800 laptop, we get about 5 FPS:
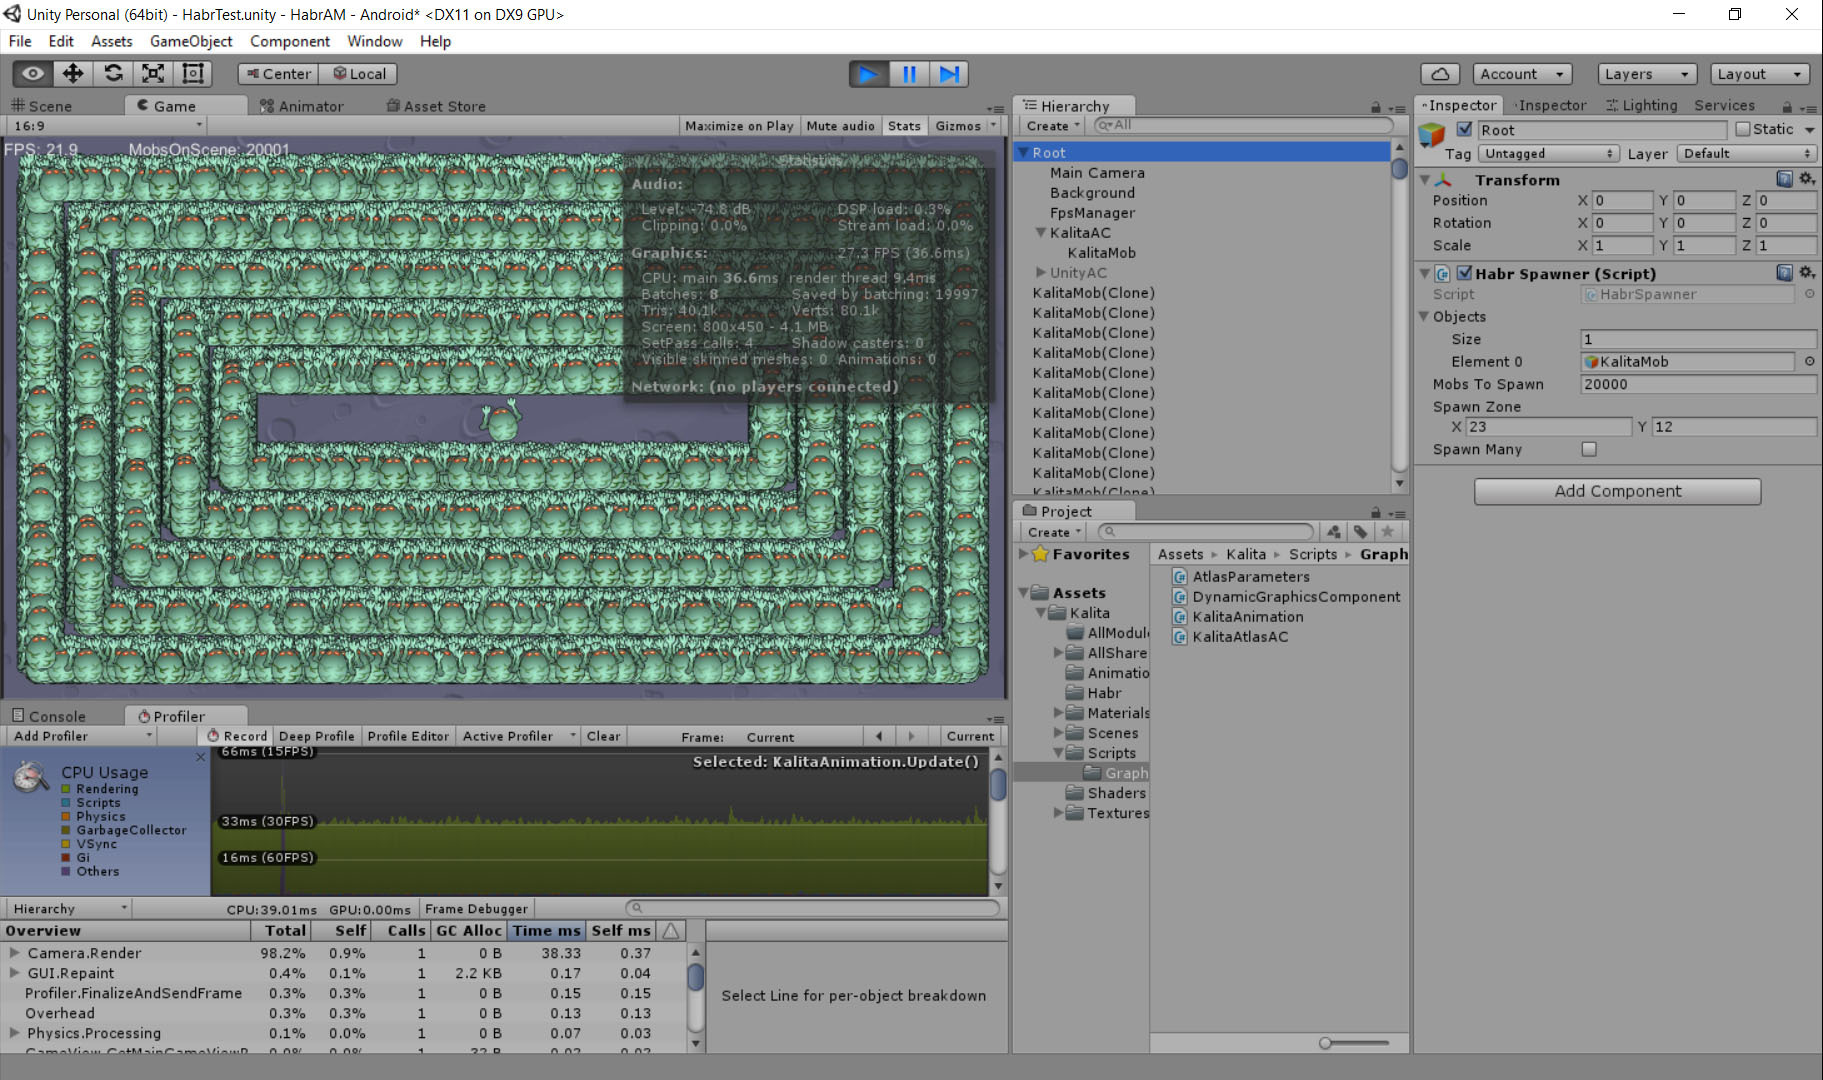
Run the same task with KalitaAtlasAC + KalitaAnimation and get 20+ FPS:
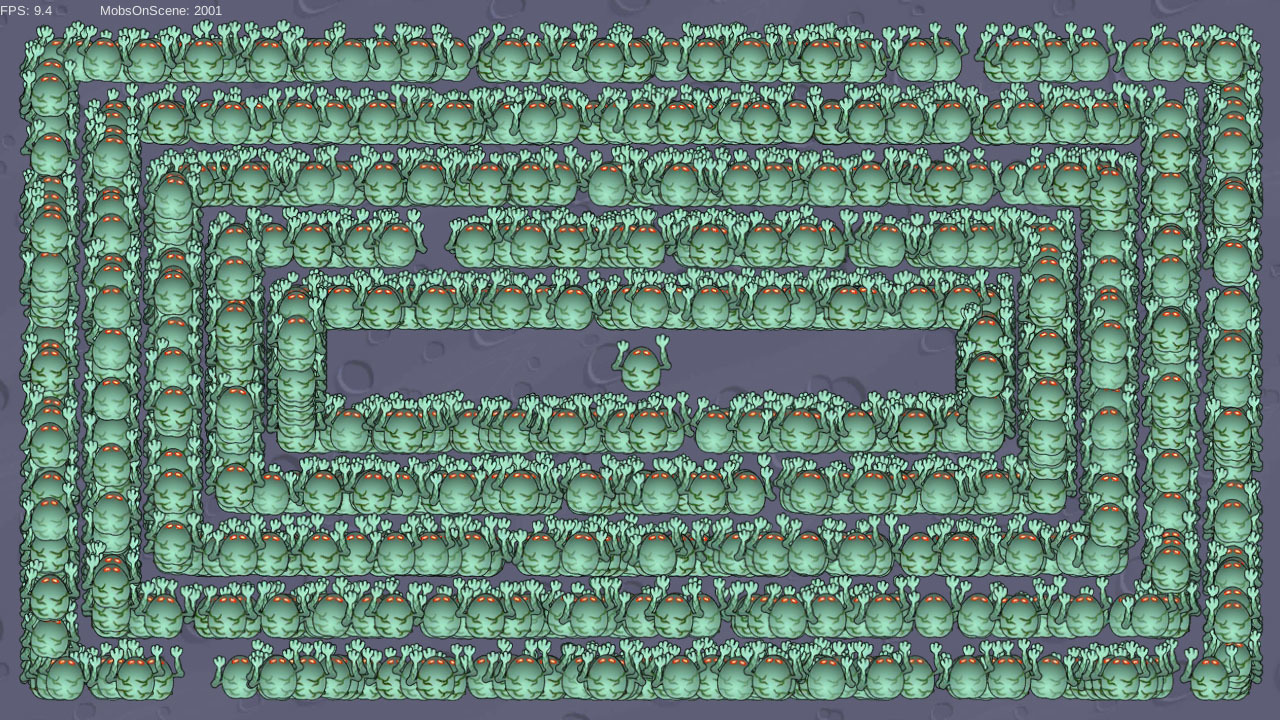
What will happen when testing on a real device? We will reduce the number of created facilities to 2000, but we will still work on a mobile device. As a test subject, the Samsung Galaxy S3 - i9300 was on hand. When using Unity3D Animator we get about 9-10 FPS:
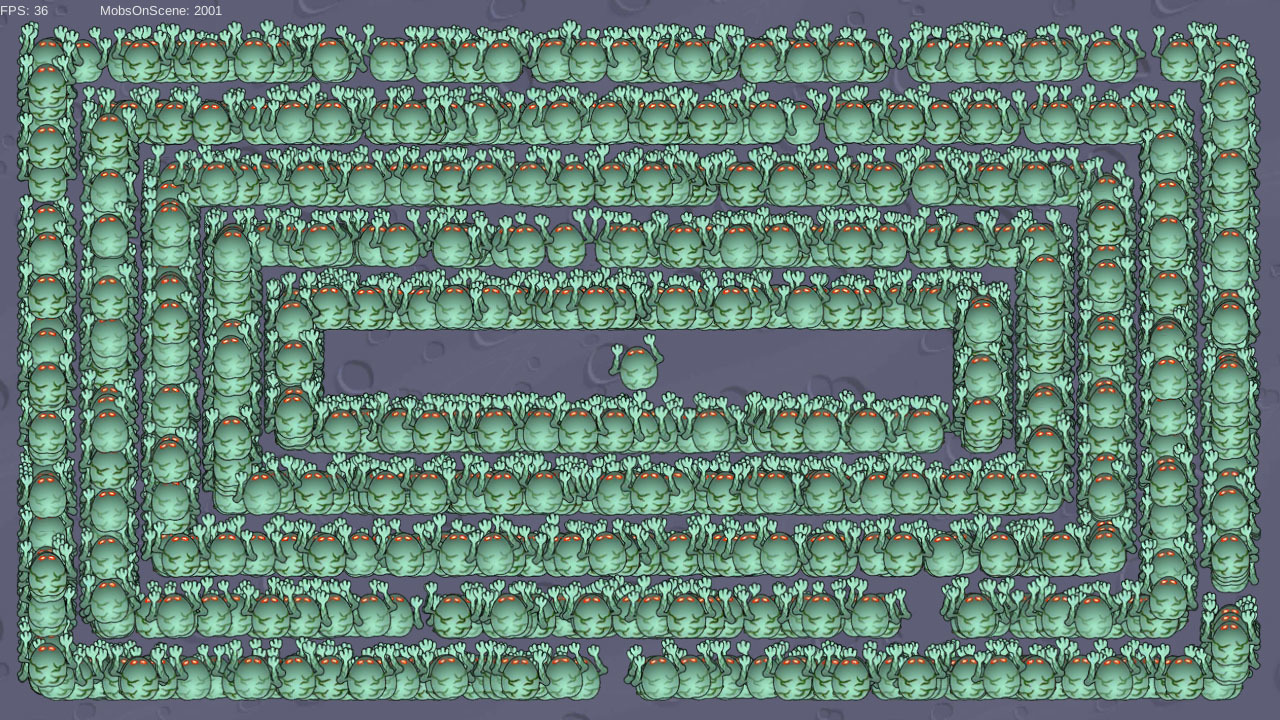
And when using KalitaAtlasAC + KalitaAnimation, as a result we have 35+ FPS:
If you use a large number of animated objects that use sprite animation, the proposed technique will reduce the cost of rendering up to four times, which can be very critical for mobile applications.
By the way, the remaining rgb vertex color components can be used as Overlay, as shown in the demo project.
Demo project can be downloaded here: bitbucket.org/Philipp0K/kalitaanimator
As a result of the development of a mobile game, it turned out that playing a large number of animated objects on the stage became a rather bottleneck. As a result, the following requirements were formed:
- 1 It is necessary to ensure the rendering of a large number of animated objects on the scene. After all, we want the player to shoot back from hordes of monsters.
- 2 The progress of the animation should be different for each of the objects. After all, we do not want mobs to go in formation.
Out of the Box Solution
Of course, the first solution was simple: to do everything using the Animator component already built into UnityEngine. Let's see what happens.
As an atlas with the original animation, we will use an evil monster with 24 frames of sprite animation 64x64 pixels each:
In Unity3D we set the type of texture sprite and in SpriteEditor we cut it into 24 pieces. We make an animation for it and drop it all onto an empty object. Here is the time to recall that we had a condition about different animation progress for various objects. No problem! A minute of work and the script is ready.
AnimationOffset.cs
using UnityEngine;
namespace Kalita
{
    [RequireComponent(typeof(Animator))]
    public class AnimationOffset : MonoBehaviour
    {
        public int Offset;
        public bool IsRandomOffset;
        private void Start()
        {
            var animator = GetComponent();
            var runtimeController = animator.runtimeAnimatorController;
            var clip = runtimeController.animationClips[0];
            if (IsRandomOffset)
                Offset = Random.Range(0, (int) (clip.length*clip.frameRate));
            var time = (Offset*clip.length/clip.frameRate);
            animator.Update(time);
        }
    }
}
Now put it all together and get the solution that Unity3D provides out of the box.
Looking ahead, I’ll say that the solution “out of the box” has quite good performance and high flexibility. Animators have long been accustomed to setting up all those who work in Unity3D. But what if your application requires more performance?
DIY solution
Let's start with the general concept:
- Let's calculate the animation progress in the vertex shader
- We encode the information on the initial frame of the animation (“local progress”) in the vertex color alpha channel (so as not to lose the batching)
- Create a component that simplifies animation settings in Unity Editor
- Create a component that will calculate the "global" animation progress
Let's start with the rendering shader.
KalitaAtlasDrawer.shader
Shader "Kalita/KalitaAtlasDrawer"
{
	Properties
	{
		_MainTex ("Texture Atlas (RGBA)", 2D) = "" {}
		_Frame("Frame", float) = 0
		_TotalFrames("Total Frames Count in Sequence", float) = 1
	}
	SubShader
	{
		Tags { "Queue"="Transparent" }
		Blend SrcAlpha OneMinusSrcAlpha
		Cull Off
		pass
		{
			CGPROGRAM
			#pragma vertex vert
			#pragma fragment frag
			sampler2D _MainTex;
			float4 _MainTex_ST;
			float _Frame;
			float _TotalFrames;
			struct appData
			{
				float4 vertex	: POSITION;
				fixed4 color	: COLOR;
				float2 uv		: TEXCOORD0;
			};
			struct v2f
			{
				float4 pos		: SV_POSITION;
				float2 uv		: TEXCOORD0;
			};
			v2f vert (appData v)
			{
				v2f o;
				o.pos = mul (UNITY_MATRIX_MVP, v.vertex);
				float frame = (_Frame  + v.color.a*255) % (_TotalFrames + 1);
				float offset = frame / _TotalFrames;
				o.uv = v.uv;
				o.uv.x += offset;
				return o;
			}
			fixed4 frag (v2f i) : COLOR
			{
				fixed4 color = tex2D (_MainTex, i.uv);
				return color;
			}
			ENDCG
		}
	}
	FallBack "Diffuse"
}
Next, let's move on to a component that allows you to easily configure animation parameters from Unity Editor.
KalitaAnimation.cs
using UnityEngine;
namespace Kalita
{
    [ExecuteInEditMode]
    [RequireComponent(typeof (MeshFilter))]
    [RequireComponent(typeof (MeshRenderer))]
    public class KalitaAnimation : MonoBehaviour
    {
        public Material RendererMaterial
        {
            get { return meshRenderer.sharedMaterial; }
        }
        public Vector2 InGameSize = Vector2.one;
        public Vector2 Anchor = new Vector2(.5f, .5f);
        public int FramesCount = 1;
        public bool IsRandomStartAnimation;
        public byte StartFrame;
        private MeshFilter filter;
        private MeshRenderer meshRenderer;
        private void Awake()
        {
            filter = GetComponent();
            meshRenderer = GetComponent();
            BuildMesh();
            SetAnimationOffset();
        }
#if UNITY_EDITOR && !TEST_RUNNING
        private void Update()
        {
            if (Application.isPlaying)
                return;
            BuildMesh();
            SetAnimationOffset();
            var mat = meshRenderer.sharedMaterial;
            mat.mainTextureScale = new Vector2(1f / FramesCount, 1);
        }
#endif
        private void BuildMesh()
        {
            var anchor = Anchor;
            anchor.Scale(InGameSize);
            anchor /= 2;
            var mesh = BuildQuad(InGameSize, anchor, new Vector2(1f / FramesCount, 1f));
            filter.mesh = mesh;
        }
        private void SetAnimationOffset()
        {
            var mesh = filter.sharedMesh;
            mesh.name = "Plane";
            var cnt = mesh.vertexCount;
            var clrs = mesh.colors32;
            if (clrs.Length != cnt)
                clrs = new Color32[cnt];
            if (IsRandomStartAnimation && Application.isPlaying)
                StartFrame = (byte)Random.Range(0, 255);
            for (int i = 0; i < cnt; i++)
                clrs[i].a = StartFrame;
            mesh.colors32 = clrs;
        }
        public static Mesh BuildQuad(Vector2 size, Vector2 anchor, Vector2 uvStep)
        {
            var dx = size.x / 2;
            var dy = size.y / 2;
            var vertices = new[]
            {
                new Vector3(-dx + anchor.x, -dy + anchor.y, 0),
                new Vector3(dx + anchor.x, -dy + anchor.y, 0),
                new Vector3(dx + anchor.x, dy + anchor.y, 0),
                new Vector3(-dx + anchor.x, dy + anchor.y, 0),
            };
            var uvs0 = new[]
            {
                uvStep,
                new Vector2(0, uvStep.y),
                new Vector2(0, 0),
                new Vector2(uvStep.x, 0),
            };
            var indices = new[]
            {
                0, 1, 2, 0, 2, 3
            };
            var mesh = new Mesh { vertices = vertices, uv = uvs0, triangles = indices };
            mesh.Optimize();
            return mesh;
        }
    }
}
This script works in the Unity3D editor and allows you to immediately see the change in any parameters on the scene, which makes the setup simple and convenient. Do not forget to create material with the shader written above and assign it to the MeshRenderer. In the Unity3D editor, all this should look like this:
Well, now the easiest thing to do is write a global frame counter. Here he is:
KalitaAtlasAC.cs
using UnityEngine;
namespace Kalita
{
    [ExecuteInEditMode]
    public class KalitaAtlasAC : MonoBehaviour
    {
        public KalitaAnimation Animation;
        public float FrameRate = 24;
        [HideInInspector]
        public int CurrentGlobalFrame;
        private float lastGlobalFrameUpdateTime;
        private void Awake()
        {
            if (Animation == null)
                Animation = GetComponentInChildren();
        }
        private void Update()
        {
            if (FrameRate <= 0)
                return;
            var t = Time.time;
            var nextUpdateTime = lastGlobalFrameUpdateTime + 1f/FrameRate;
            if (t < nextUpdateTime)
                return;
            var dt = t - lastGlobalFrameUpdateTime;
            lastGlobalFrameUpdateTime = t;
            //If we run too slow, we shoud add several frames per update
            CurrentGlobalFrame += (int) (dt*FrameRate);
            CurrentGlobalFrame %= Animation.FramesCount;
            Animation.RendererMaterial.SetFloat("_Frame", CurrentGlobalFrame);
        }
    }
}
For correct operation, one KalitaAtlasAC component controls many KalitaAnimation components. Since the parameters are set via sharedMaterial, any of the many controlled objects is dragged into the corresponding field (animation) of KalitaAtlasAC.
Testing
Well, it's time for testing. For the test we make a small script that allows you to create the desired number of objects on the scene.
HabrSpawner.cs
using System.Collections.Generic;
using UnityEngine;
namespace Kalita
{
    public class HabrSpawner : MonoBehaviour
    {
        public List Objects = new List();
        public int MobsToSpawn;
        private int mobOnScene;
        public Vector2 SpawnZone = new Vector2(10, 10);
        private void Start()
        {
            Screen.sleepTimeout = SleepTimeout.NeverSleep;
            SpawnMany();
        }
        private void Update()
        {
            if (spawnMany)
            {
                spawnMany = false;
                SpawnMany();
            }
        }
        [SerializeField]
        private bool spawnMany;
        private void SpawnMany()
        {
            const int layers = 5;
            var rectBorderSize = Vector2.one*2.4f;
            var mobsPerLayer = MobsToSpawn / layers;
            var zone = SpawnZone;
            for (int j = 0; j < layers; j++)
            {
                for (int i = 0; i < mobsPerLayer; i++)
                    Spawn(zone);
                zone -= rectBorderSize;
            }
        }
        private void Spawn(Vector2 zone)
        {
            if (Objects.Count == 0)
                return;
            var i = Random.Range(0, Objects.Count);
            var o = Instantiate(Objects[i]);
            var p = GetRandomPositionOnRect(zone);
            Spawn(o, p);
        }
        private void Spawn(GameObject o, Vector2 pos)
        {
            mobOnScene++;
            o.SetActive(true);
            o.transform.position = pos;
        }
        private void OnGUI()
        {
            var w = 150;
            var h = 20;
            var x = 100;
            var y = 0;
            var rect = new Rect(x, y, w, h);
            //+One mob is source mob
            GUI.Label(rect, "MobsOnScene: " + (mobOnScene + 1));
        }
        private Vector2 GetRandomPositionOnRect(Vector2 size)
        {
            var spawnRect = size;
            var resultPos = new Vector2();
            switch (Random.Range(0, 4))
            {
                case 0: // Top
                    resultPos.x = Random.Range(0, spawnRect.x) - (spawnRect.x) / 2f;
                    resultPos.y = spawnRect.y / 2;
                    break;
                case 1: // Right
                    resultPos.x = spawnRect.x / 2;
                    resultPos.y = Random.Range(0, spawnRect.y) - (spawnRect.y) / 2;
                    break;
                case 2: // Bottom
                    resultPos.x = Random.Range(0, spawnRect.x) - (spawnRect.x) / 2;
                    resultPos.y = -spawnRect.y / 2;
                    break;
                case 3: // Left
                    resultPos.x = -spawnRect.x / 2;
                    resultPos.y = Random.Range(0, spawnRect.y) - (spawnRect.y) / 2;
                    break;
            }
            return resultPos;
        }
    }
}
Compare the results. First, run in UnityEditor with the task of drawing 20,000 objects.
When using Unity3D Animator on my Dell M4800 laptop, we get about 5 FPS:
Run the same task with KalitaAtlasAC + KalitaAnimation and get 20+ FPS:
What will happen when testing on a real device? We will reduce the number of created facilities to 2000, but we will still work on a mobile device. As a test subject, the Samsung Galaxy S3 - i9300 was on hand. When using Unity3D Animator we get about 9-10 FPS:
And when using KalitaAtlasAC + KalitaAnimation, as a result we have 35+ FPS:
Summary
If you use a large number of animated objects that use sprite animation, the proposed technique will reduce the cost of rendering up to four times, which can be very critical for mobile applications.
By the way, the remaining rgb vertex color components can be used as Overlay, as shown in the demo project.
Demo project can be downloaded here: bitbucket.org/Philipp0K/kalitaanimator