The second life of electric oven "Kharkov"
Hello.
I will not do a long and lyrical introduction about how short and cruel the fate of household appliances. What was perceived yesterday as the last achievement of progress will now be a familiar part of the average household, and tomorrow it will simply be thrown into a landfill, despite its full working capacity or, at best, dismantled as a donor of parts. For "there are buttons, but I want a sensor," and "design is a soviet" and "there is no this chip." And it’s okay if we are talking about some kind of Chinese microwave or kettle, which you don’t have time to get used to because of their short life cycle and plastic lack of spirituality.
But what to do when it comes to the thing that remembers several generations of your family and from childhood has been for you the epitome of home comfort, grandma's delicacies and the whole "lamp". Throwing out a hand will not rise, as with this thing there are too many memories and this is blasphemy in general. But it’s also impossible to use it because of the total obsolescence and frankly unpresentable view.
What to do?
Right! Resurrect.
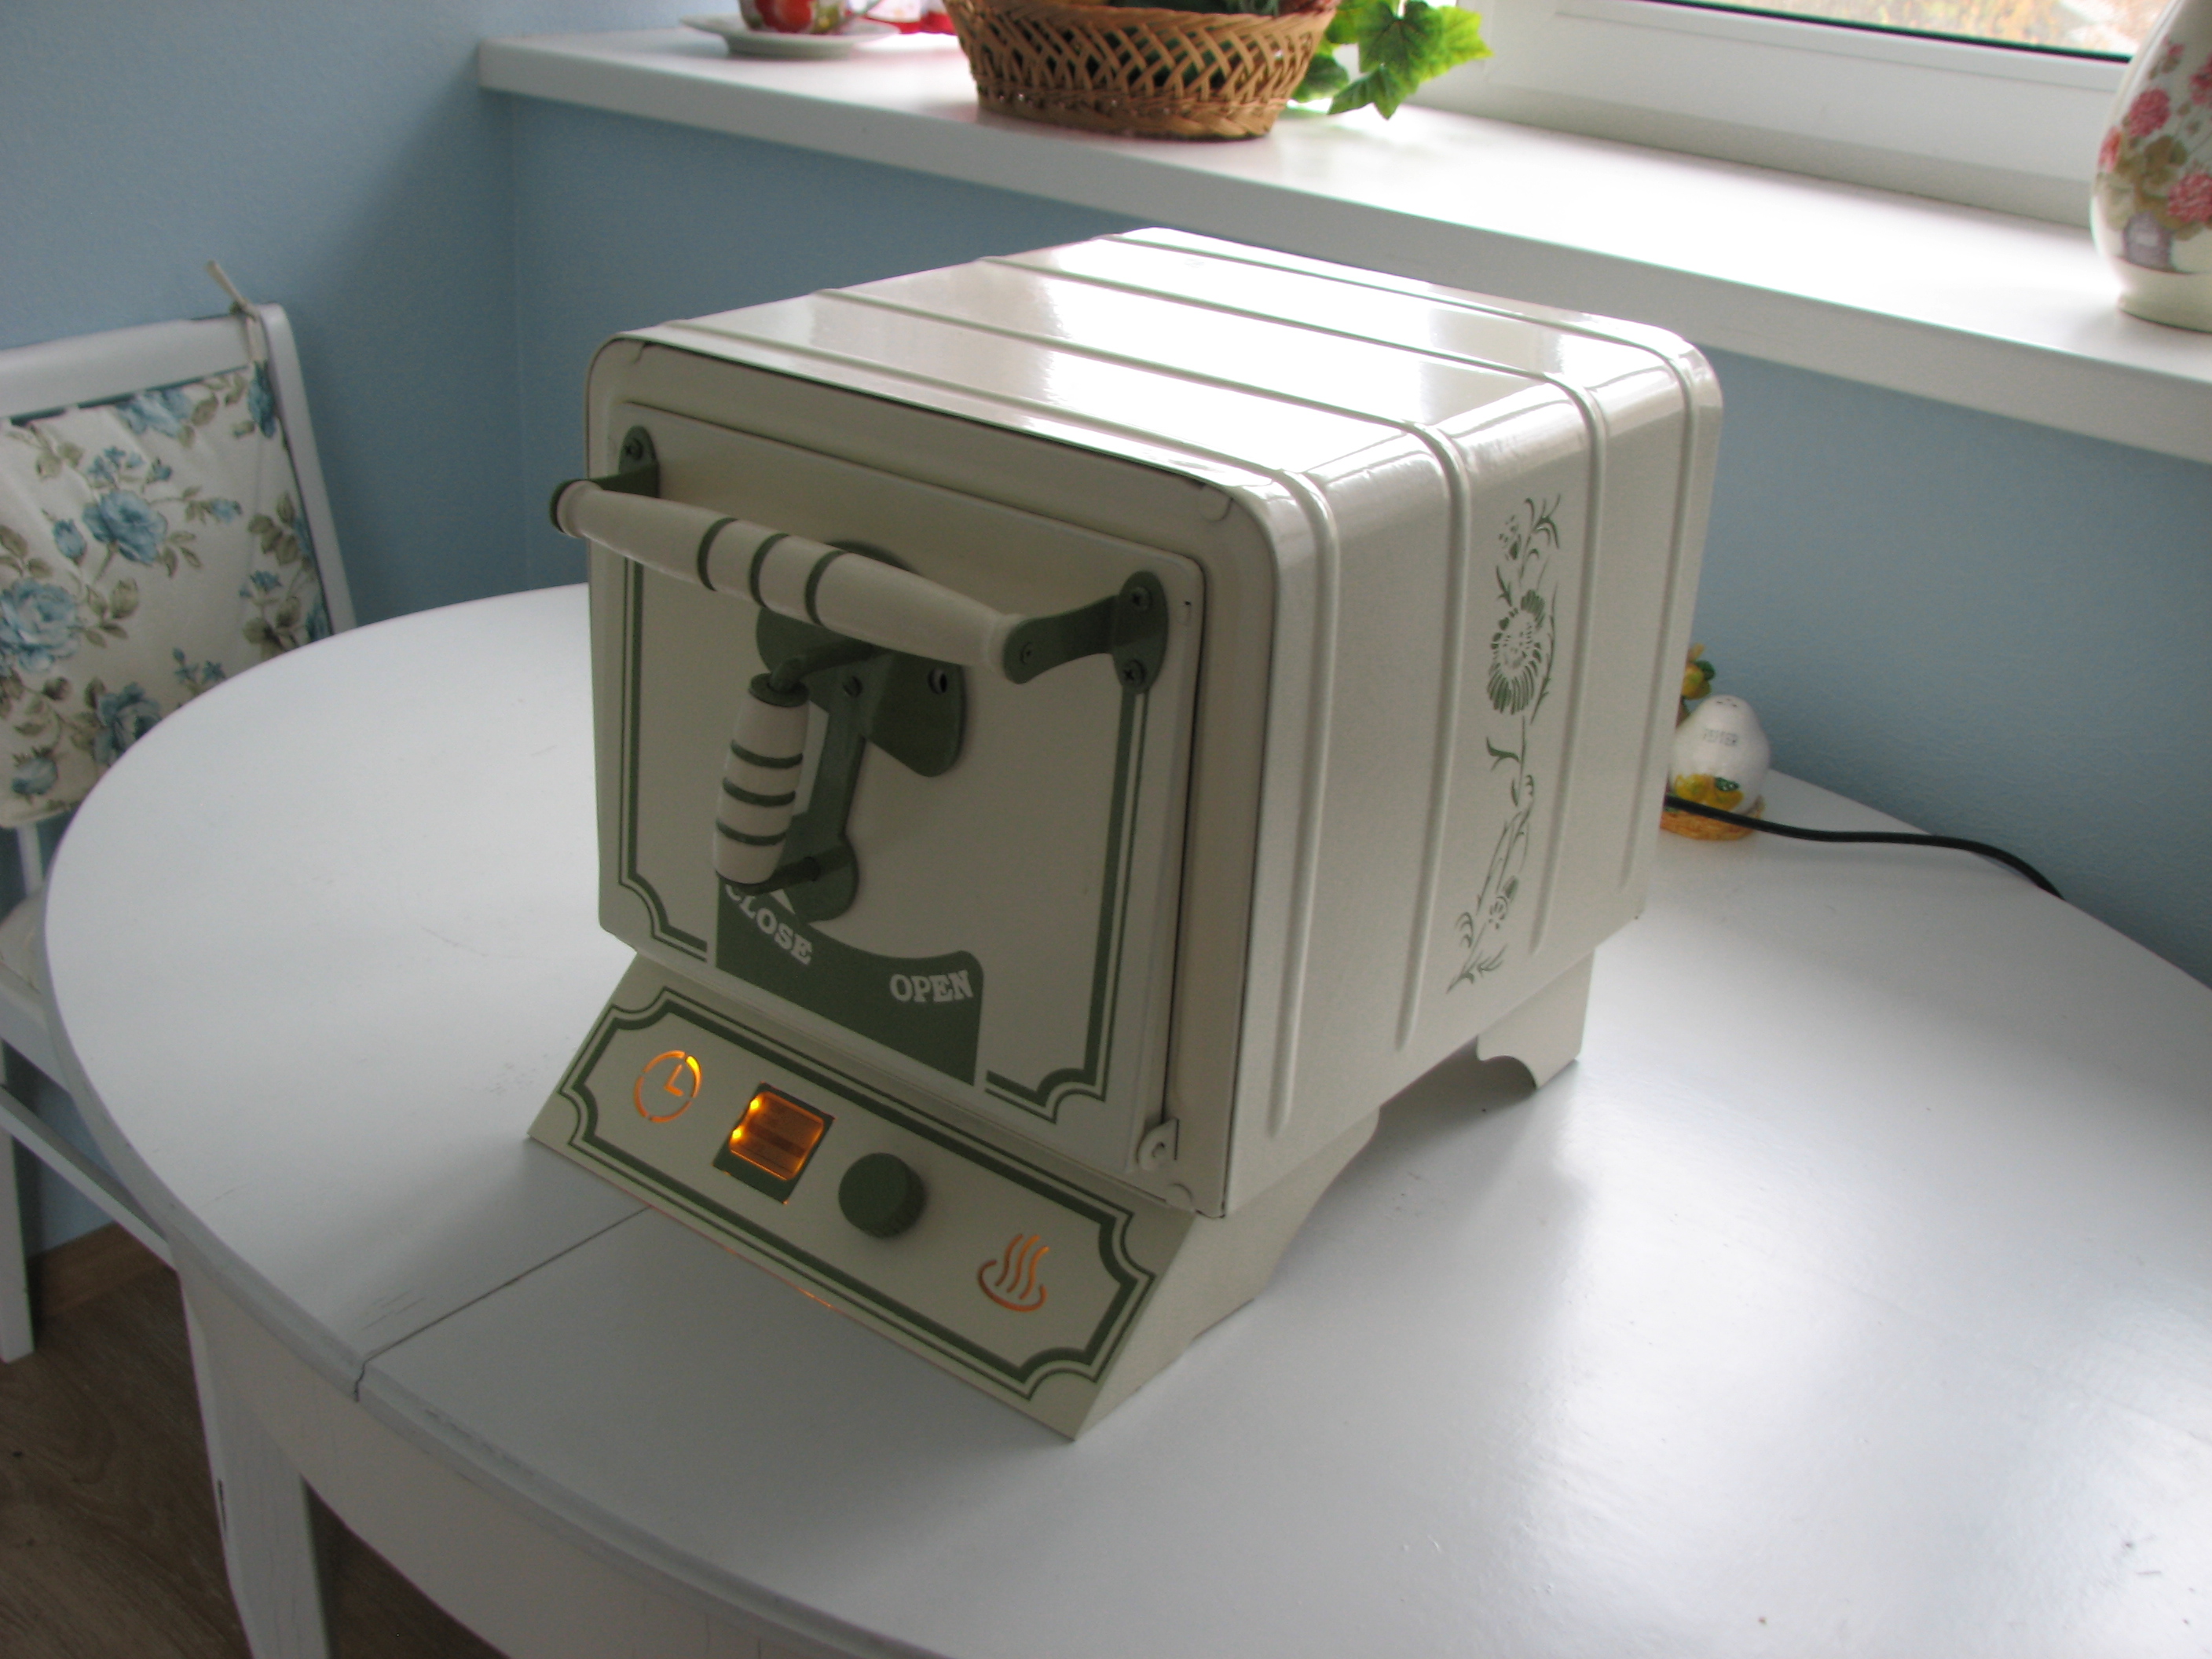
Meet our heroine. Oven electric "Kharkov".

For a start, a quick introduction to the test subject:
And that's all. There is no timer, no temperature or power regulator, no thermometer. Wai Fai is also not, everywhere I was looking for, honestly. Well, not all. There is nothing. Only the case with the heaters and the plug into the outlet, even without a switch. Bake as you like.
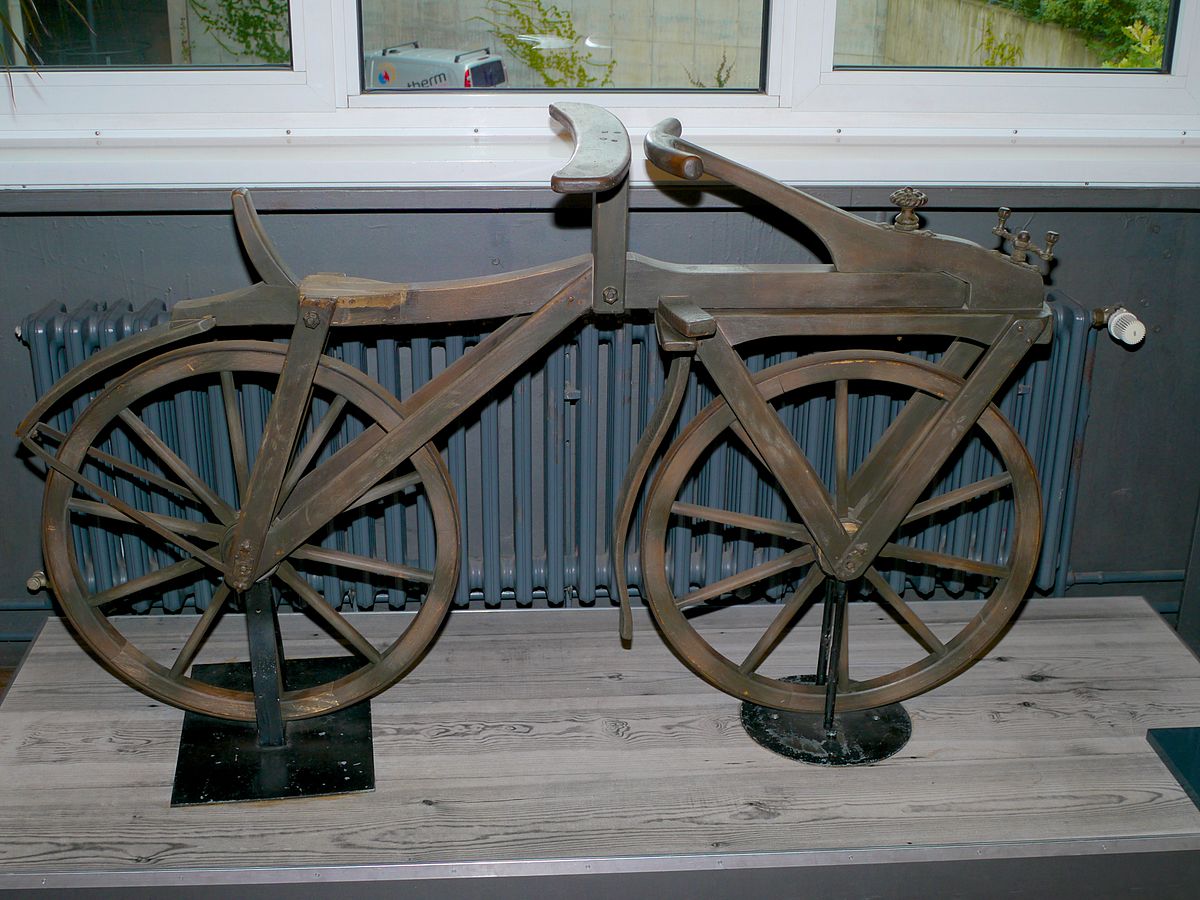
When, during the period of my former bachelor life, I discovered this rarity in the depths of garages, brushed off a nostalgic tear and tried to cook something in it, it began to come to me that, for all its sweet vintage, this “pie generator” was as friendly to the first wooden bicycle of 1817, by Karl von Dres. You can see the vintage in the museum too, but after the first conditional trip you realize that Caesar is Caesar’s, and there’s no place for a rare book in the museum, and I’ll still ride on a modern bike because I don’t want to beat the kidneys.
So here. When turned on, this stove-demon immediately roasted under 400 degrees, convincingly reminding me that any organic matter when heated turns into charcoal. And trial pizza was no exception. No wonder the family archives recipes for cooking pies on this stove more resembled the description of the technological modes of operation of the blast furnace. It was suggested to warm up for 10 minutes, then insert a pan with source, then bake for X minutes with the door ajar, then At the minutes with a fully open, periodically changing the position of the baking tray. For in 1980, Soviet engineering science could not offer a Soviet woman any other way to adjust the temperature, except by opening the oven door. Yura Gagarin has been spinning in orbit for 19 years and our vigorous bomb was the most radiant, but the Soviet mistresses all continued to heat the planet with the Kharkov ovens.
Okay. The situation is clarified, goals are set, tools are ground. Let us turn to the technical part.
“I believe in the One Father of the Almighty, the Creator of heaven and earth, visible and invisible to all. Name to my god Arduino. Amen. ”
Being a zealous parishioner of the church of Arduinova, I naturally decided to sculpt my brainchild on this godly platform. For it is simple and cheap and suitable for the legs. But on the e-stuffing a little later, but now we turn our attention to the program stuffing. Sketch, I mean.
We face the next challenge. It is necessary to implement the following functions in the oven controller:
Having worn the scrolls of the wise men at the Arduino forums, the following shit-code was created with God's help. Criticism is not accepted. Who will criticize, he will not get pies.
More and more than usual, in essence, is molded from the most basic examples of working with a Nokia 5110 screen, an encoder, a thermistor, and a reel. Your choice in favor of these components is justified in the next part of our fascinating story.
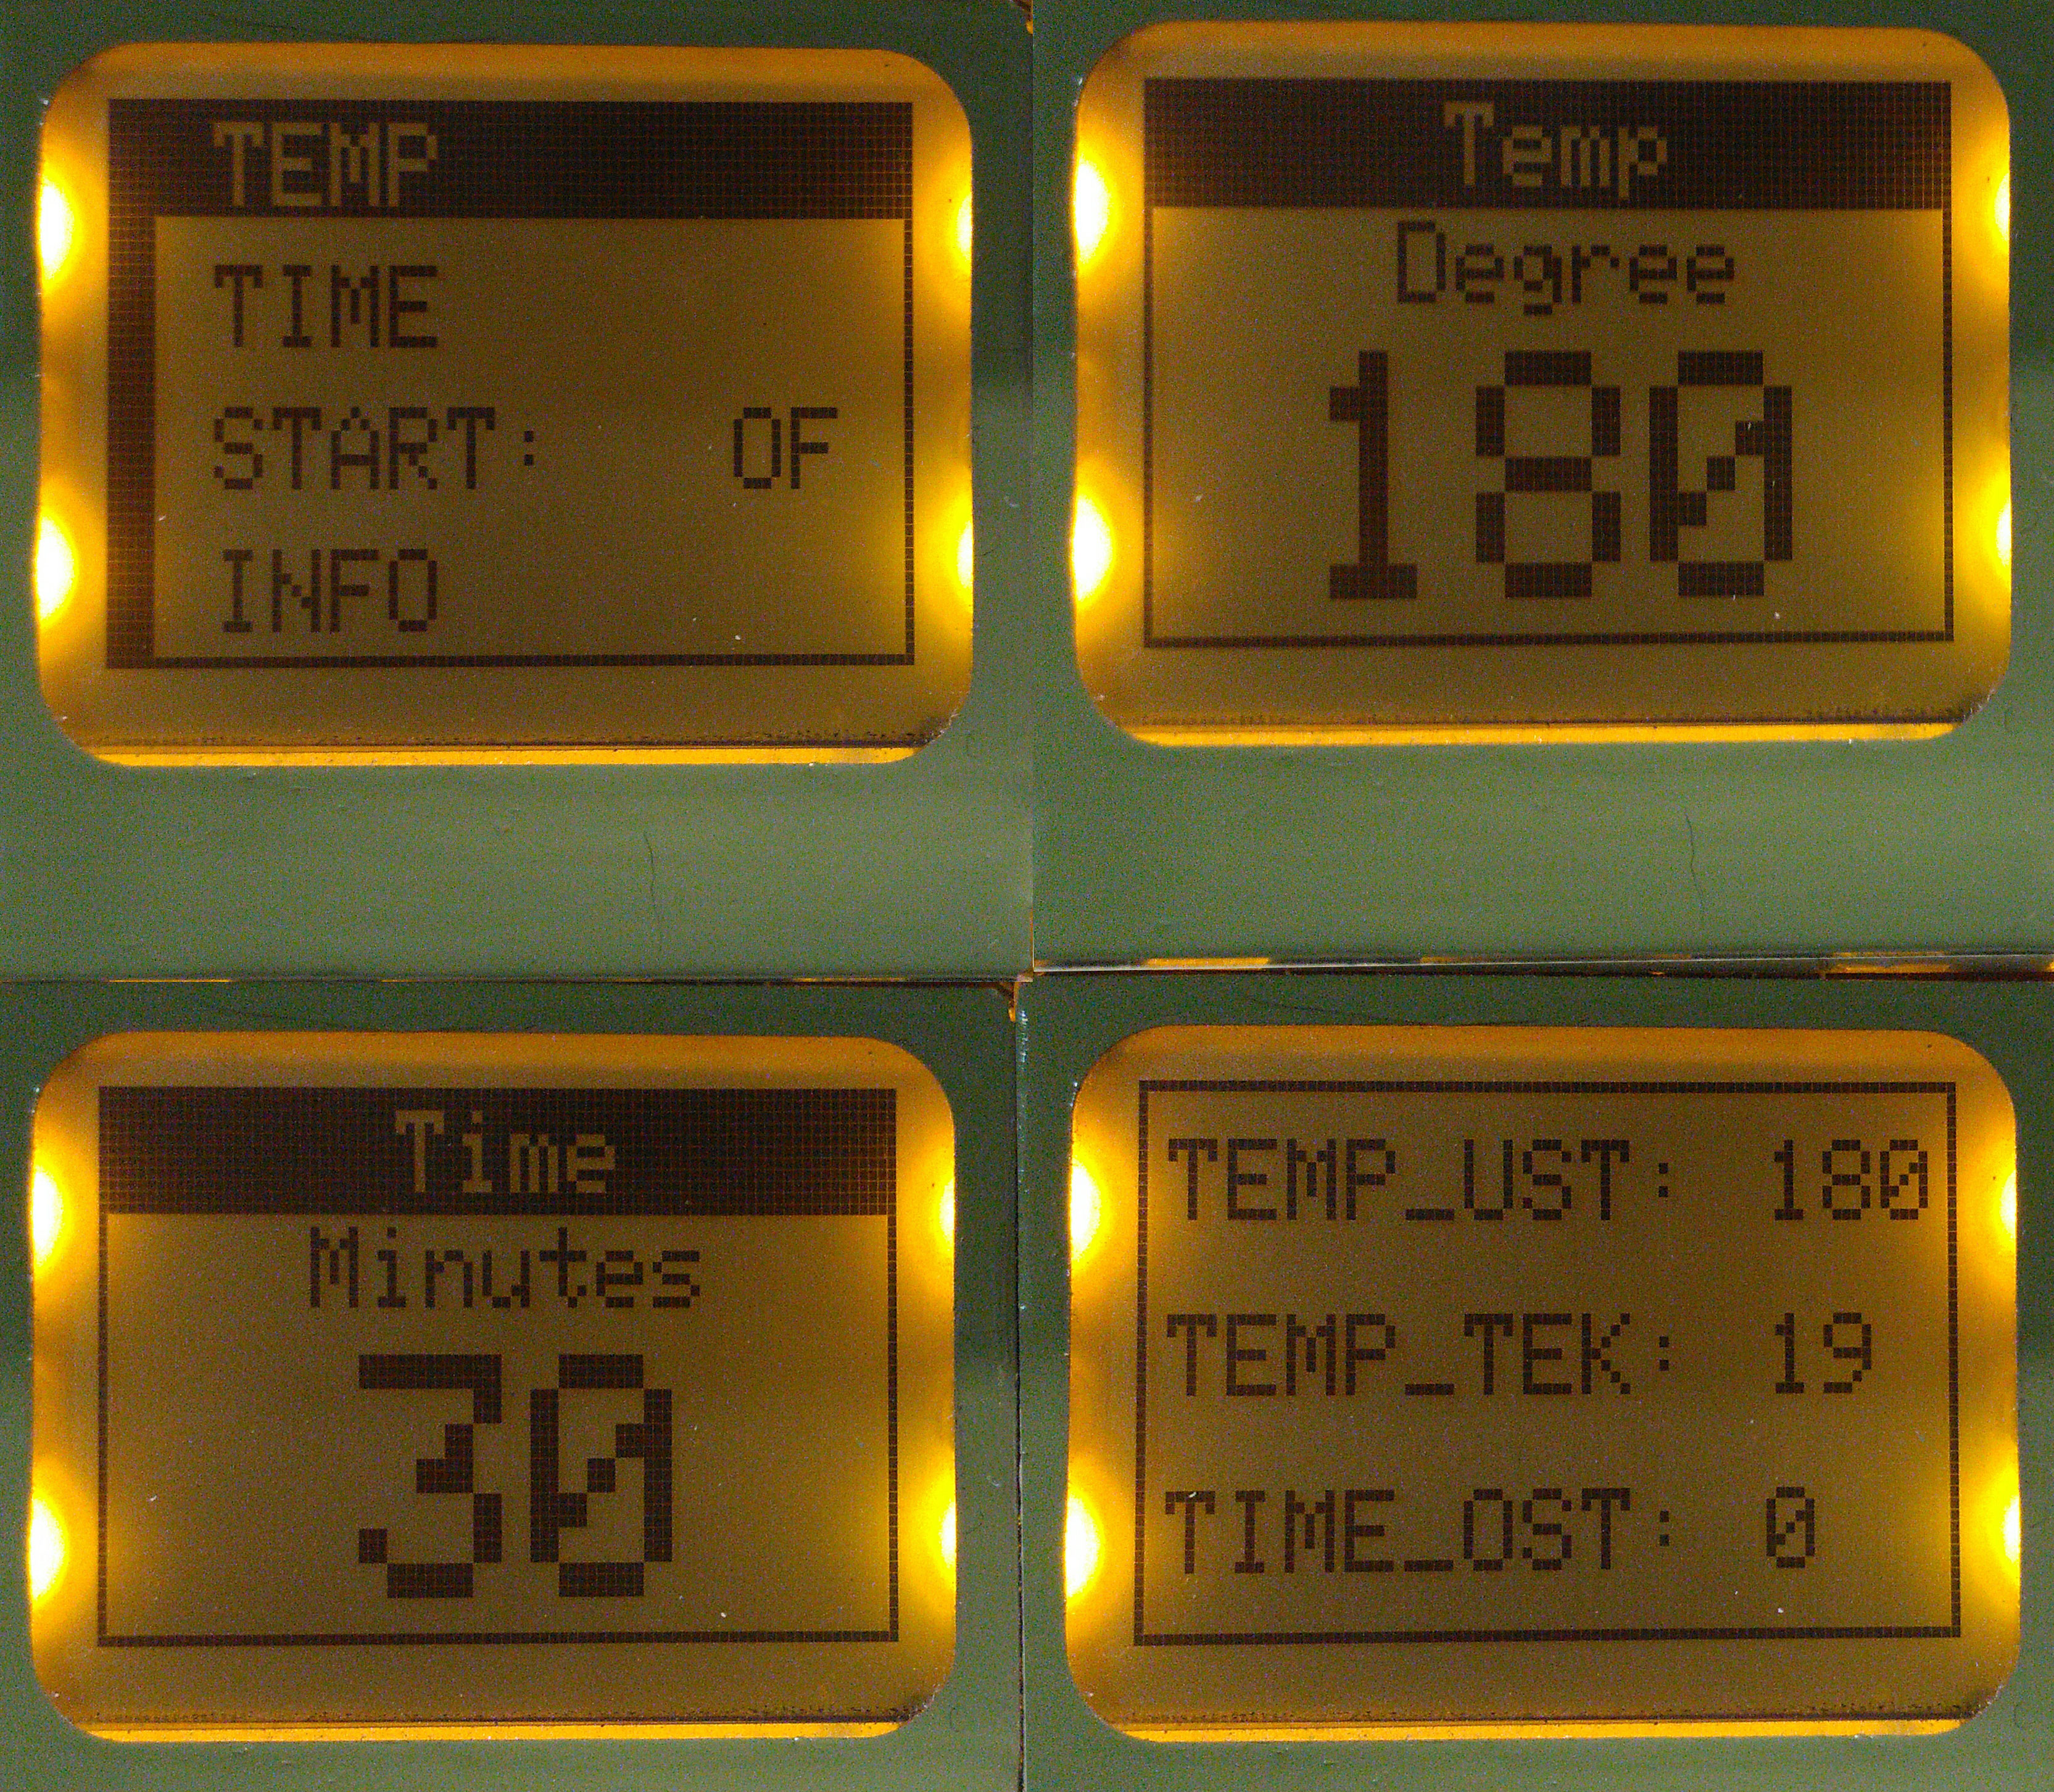
The menu consists of 4 items: “TEMP”, “TIME”, “START” and “INFO”. What is responsible for what, I think it is clear from the photo. If necessary, you can stop the program, add or decrease the time or temperature and continue again.
Naturally, our settings are stored in non-volatile memory.
Also, the control of the oven overheating and the control of the breakage or damage of the thermal sensor was added. When the temperature reaches 250 degrees (sticking of the relay or some kind of unrecorded failure) or the temperature drops below zero (sensor breaks, it shows 270 degrees in the break) there will be an alarm.
To implement the functionality described above, we need the following components:
For better atmosphere, you need to finish the screen. By default, the screens of the Nokia 5110 come with either white or bright blue LED backlights. White LEDs do not match the planned external style, and blue vyrviglaznye LEDs seem to provoke epilepsy attacks among users and generally have the creation of Satan, designed to contribute to the early coming of the Antichrist. Vypivaem and their fire. Pater noster. Amen.
Next, we take the orange smd light-emitting diodes, designed to imitate old-school incandescent bulbs and solder them instead of standard ones, after removing the metal bezel of the screen and the LCD screen itself under it. Now everything is Feng Shui.
We find a suitable plastic box with mounting ears. In it we place the power unit, arduinka, squeaker and relyushki. Display a pair of wires to the mains supply, a pair of wires to the thermistor and the wiring to the front panel to the screen, the encoder and status LEDs with diffusers. Place the control unit - on the belly of the oven.
With all my love for the old technology, I would never have undertaken to restore this oven if it were not for one thing - I have a Provence style kitchen and the rounded vintage case of this oven fits perfectly into the interior. Therefore, it was decided to fool around.
We remove the back panel by unbending 4 fastening ears to get to the back wall of the internal cavity of the stove. We take out a layer of weapons of massive destruction under the name "glass wool". In the middle of the back wall of the inner cavity, we drill a hole to fit the thermistor rod, insert a thermistor, tighten the nut, draw the wires under the case, pick out the remains of glass wool, instead of it we stuff basalt cotton wool and assemble it back.
Next, prepare the control panel, the elements of pens and stencils for decoration. No plastic, only metal. Since I do not know how to draw in AutoCAD, I draw the details I need in Photoshop and convert it into a dwg format through some kind of cloud service. Yes, I'm a pervert, I know, I like it. We give the drawings for laser cutting.

Weld the dashboard on the planned place. We finish missing the triangles on the sides, we spat and we clean the welding place, creating the appearance of a solid part as much as possible. On the dashboard, 4 slots - place under the screen, place under the encoder with holes for the LEDs under the "for beauty" twist under the twist, and shaped slots for the operation and heating indicators. The panel is made of steel with a thickness of 2 mm, so that was not enough. "Weight is reliable." Boris Razor.
The venerable age of the oven and many years of being in inhumane conditions could not help but leave traces on its body. There were scratches of paint, small dents and pockets of corrosion. We put on the grinder-brushing grinder and clean it up as much as possible. We putty dents and defects in car putty. We clean again. We degrease.
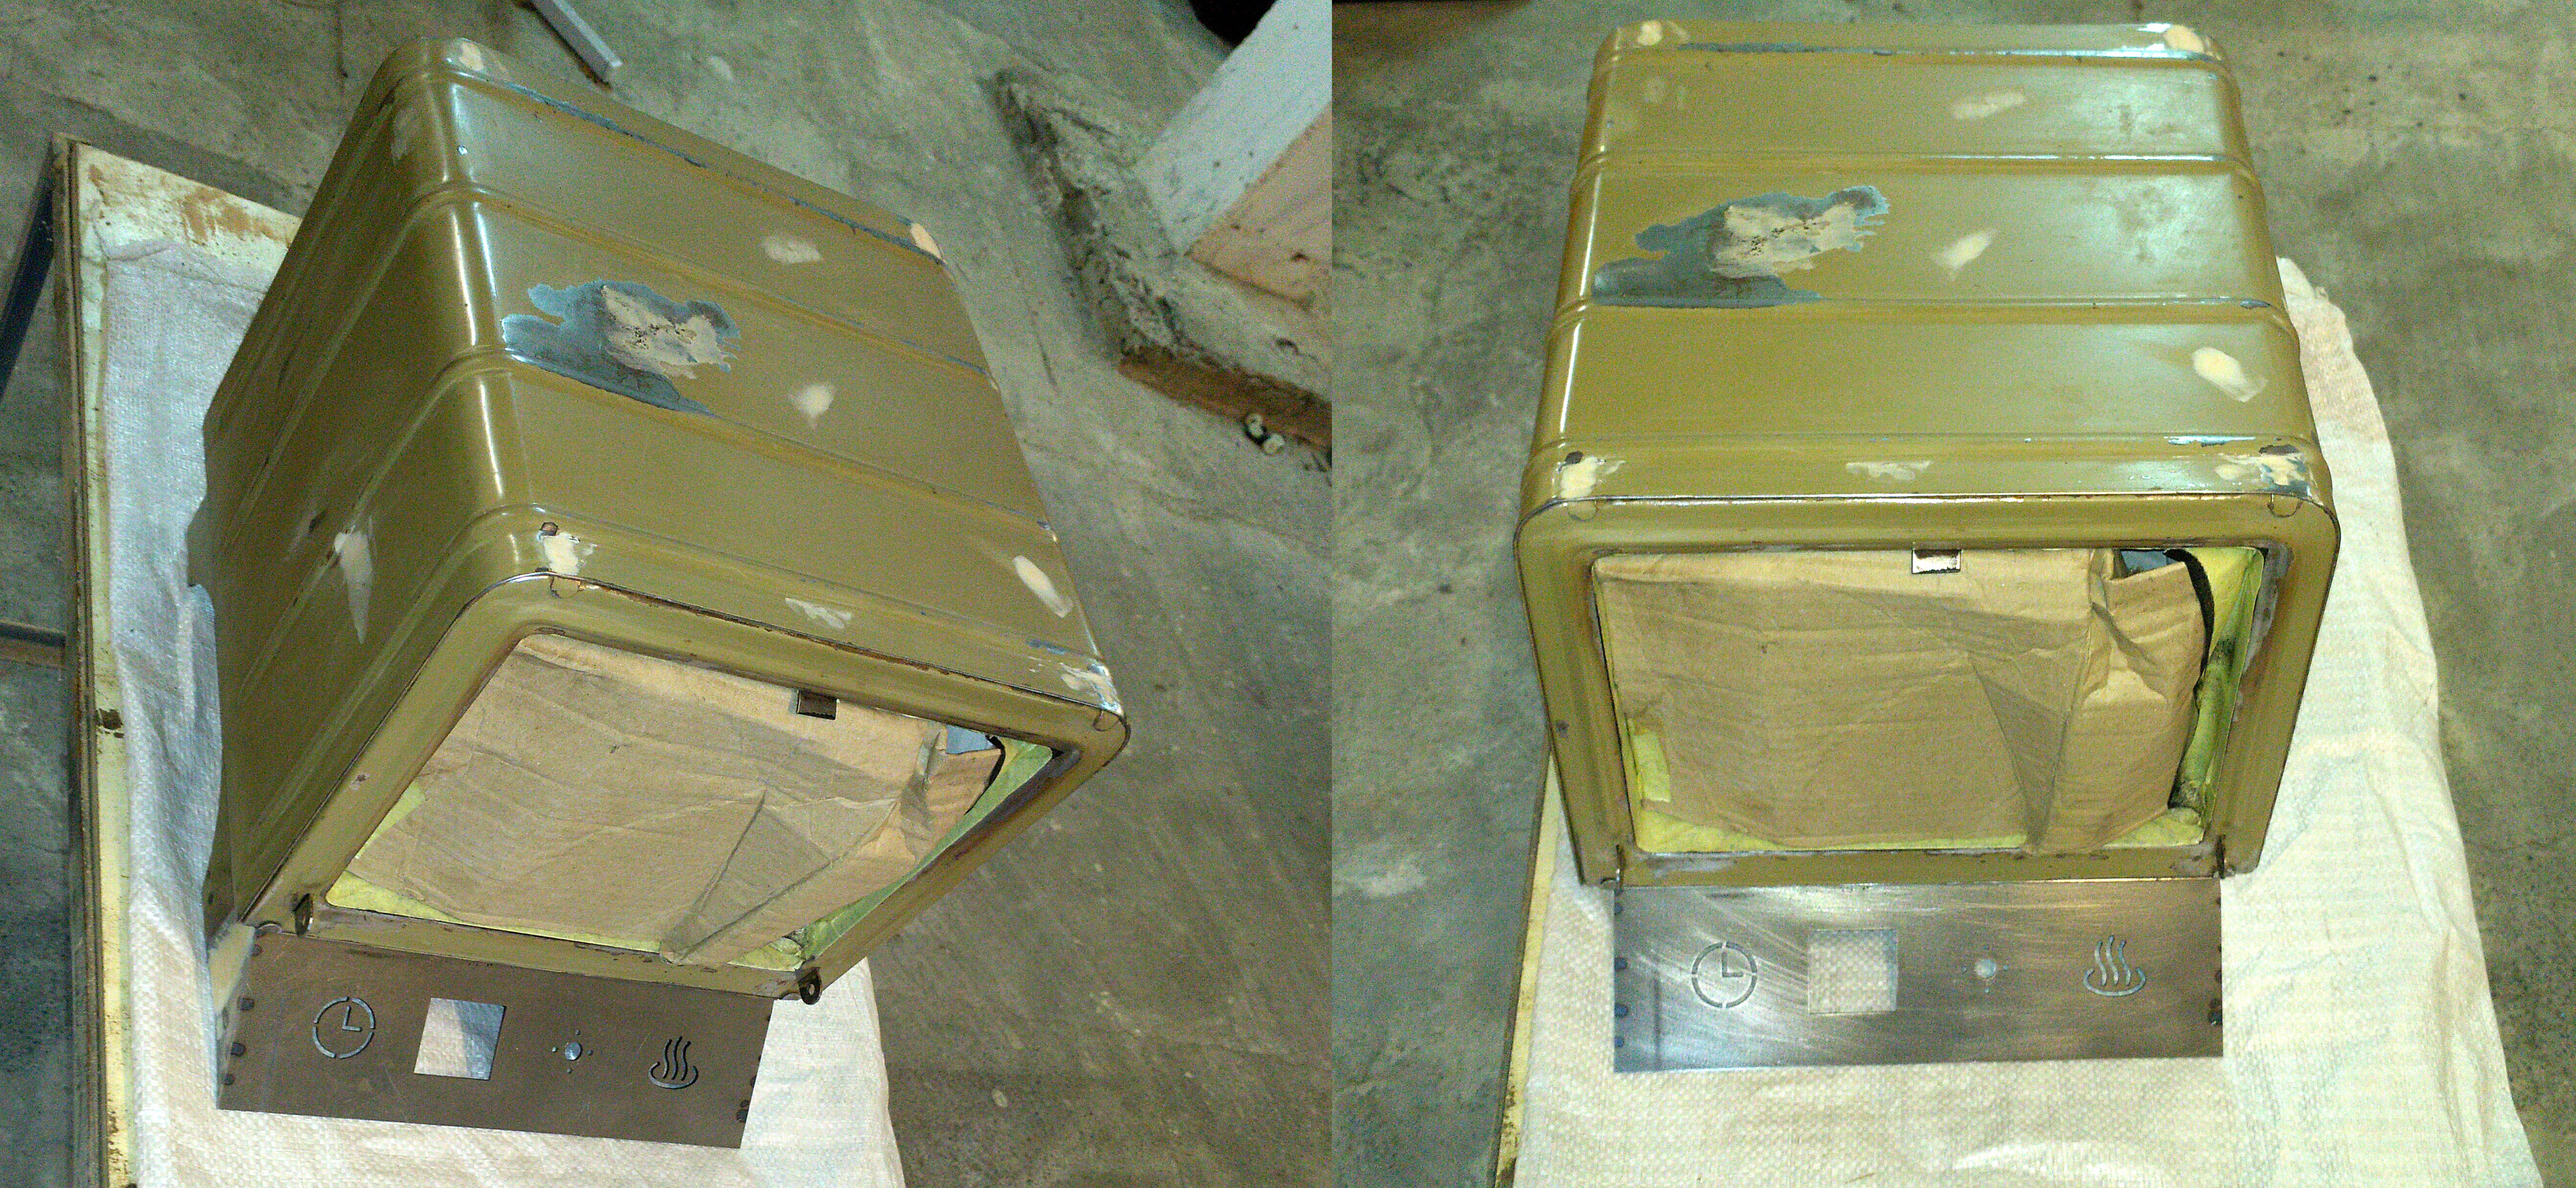
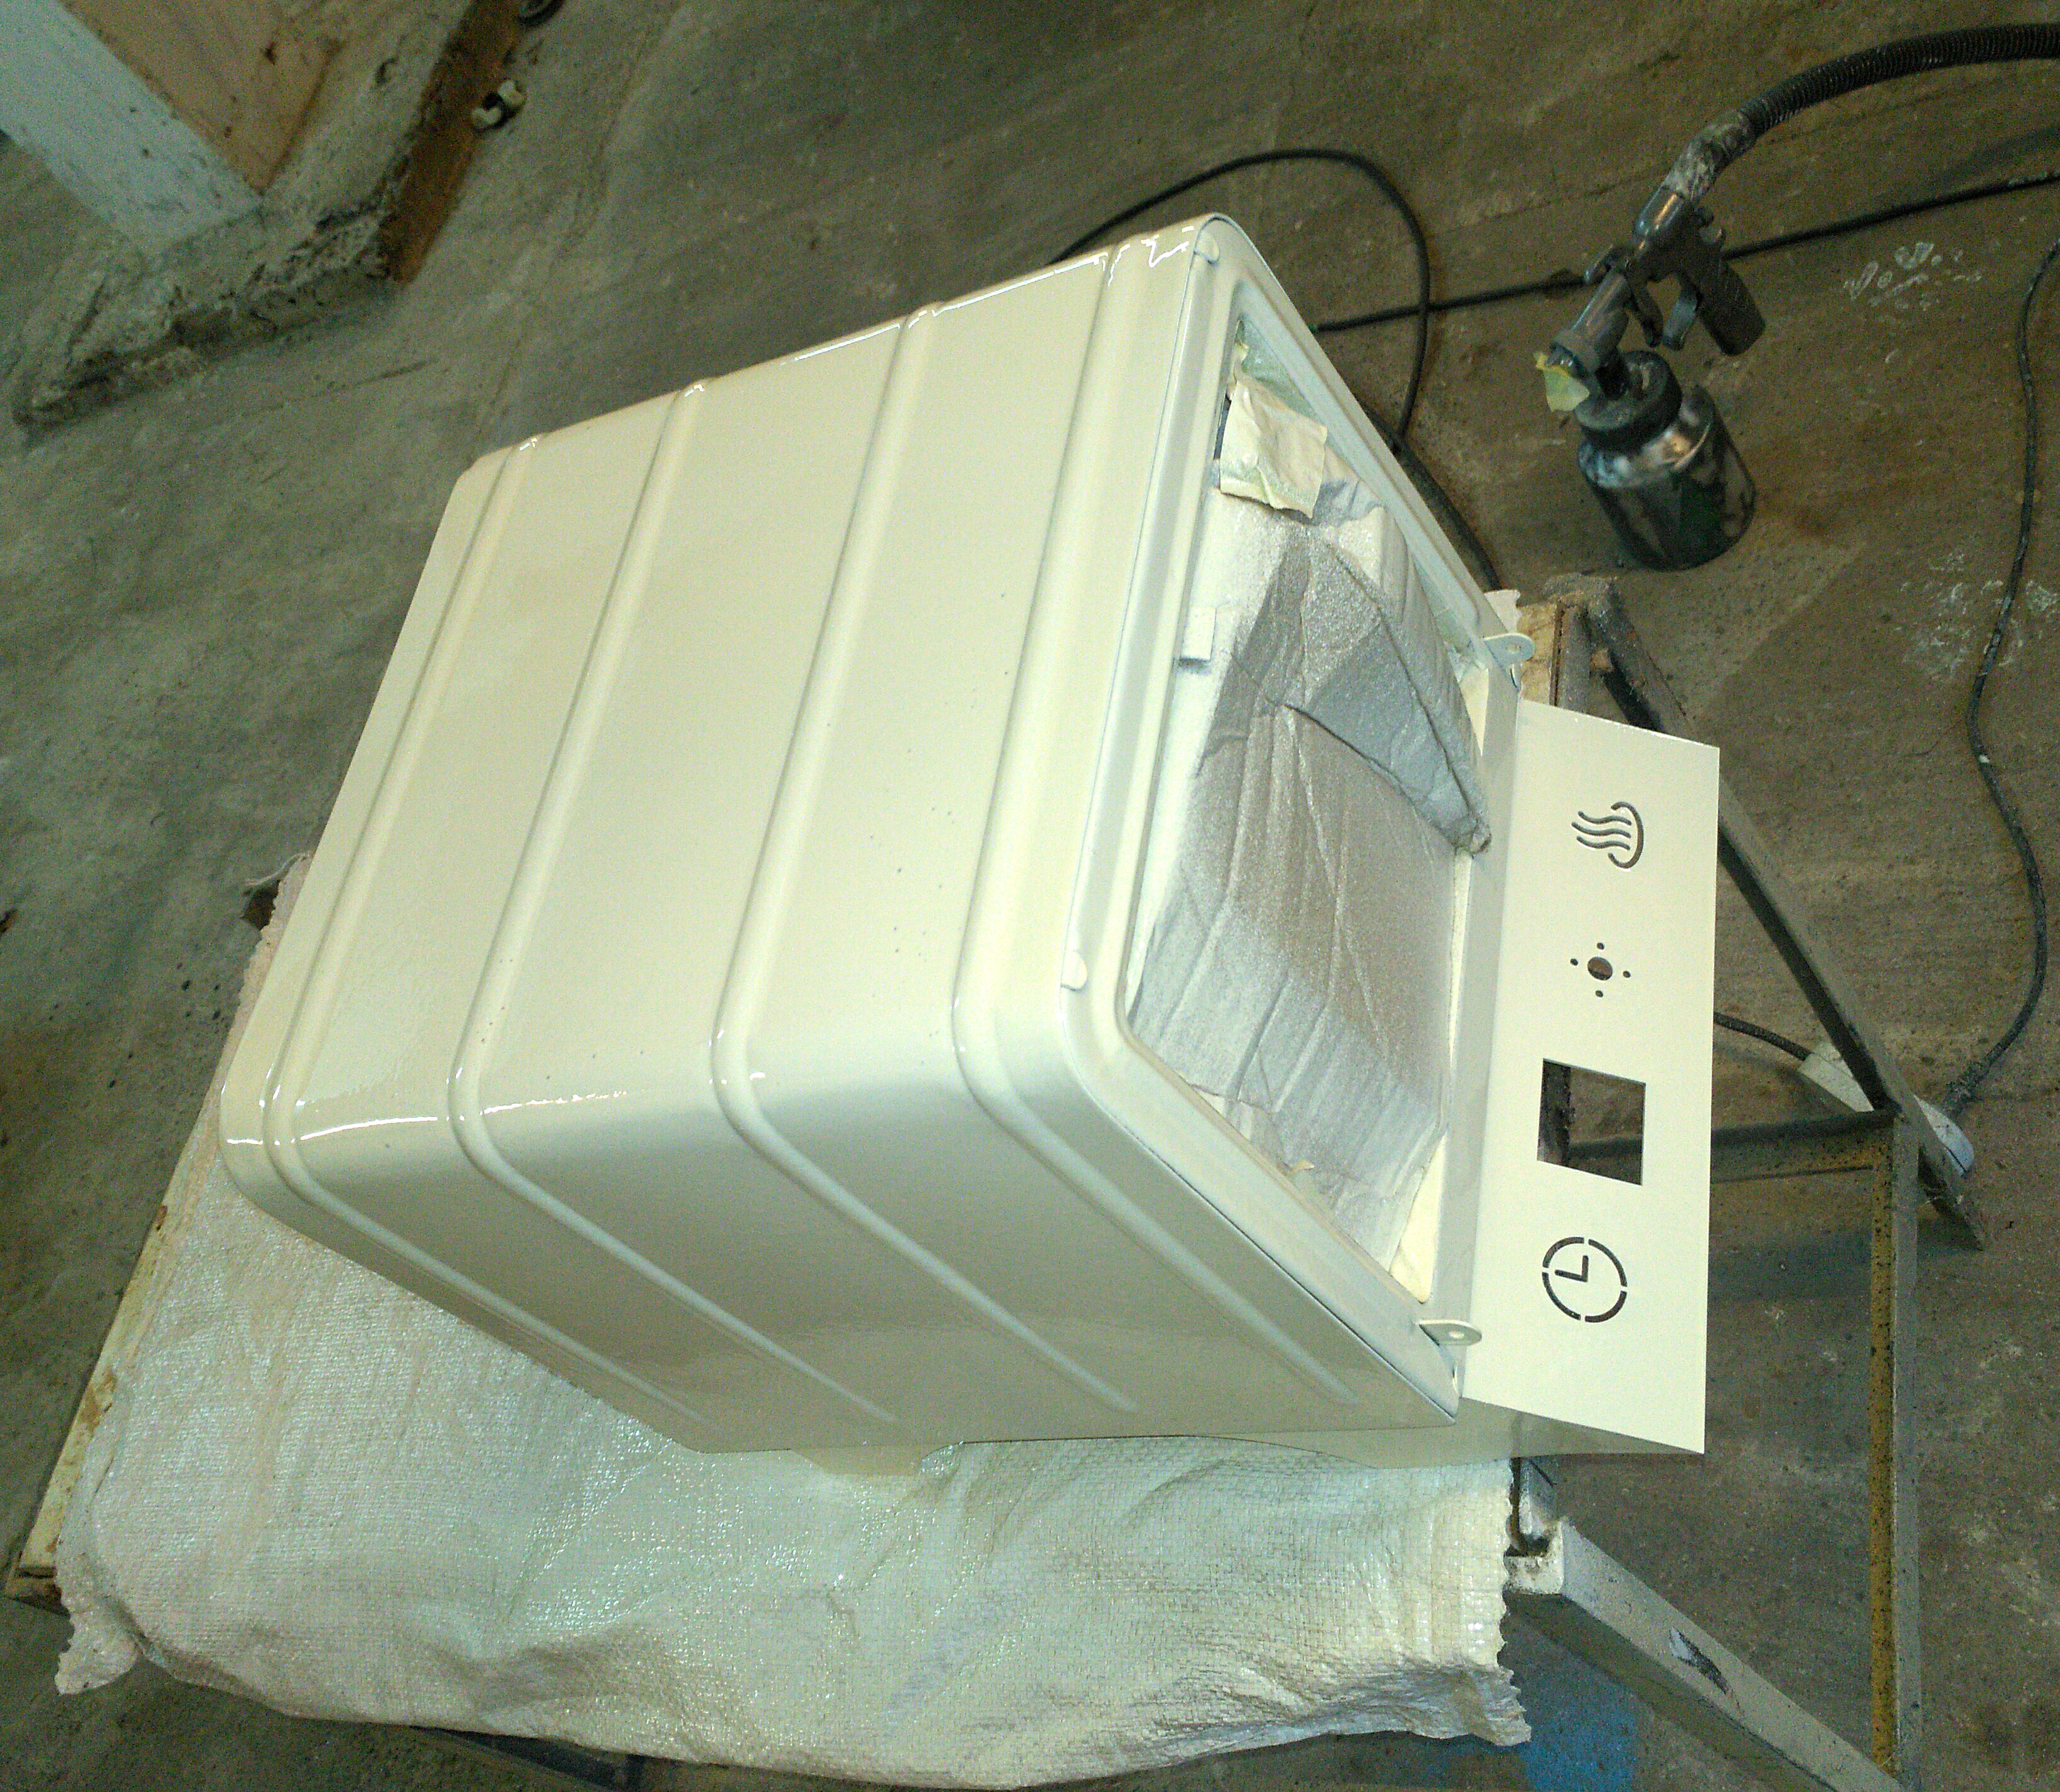
Next on painting. I did not find in my area the ability to fill pentaphthalic enamel in colors to choose from, therefore I chose from available ready-made colors. Ivory was chosen for the main body color and pistachio for the body decoration elements.
We paint, kosyachy, curse, remove the drips, repaint, again kosyachim, we vow never to fool with the like, but just peacefully plump like all normal men, calm down, paint again, remain satisfied. We are waiting for a week until the paint is dry.
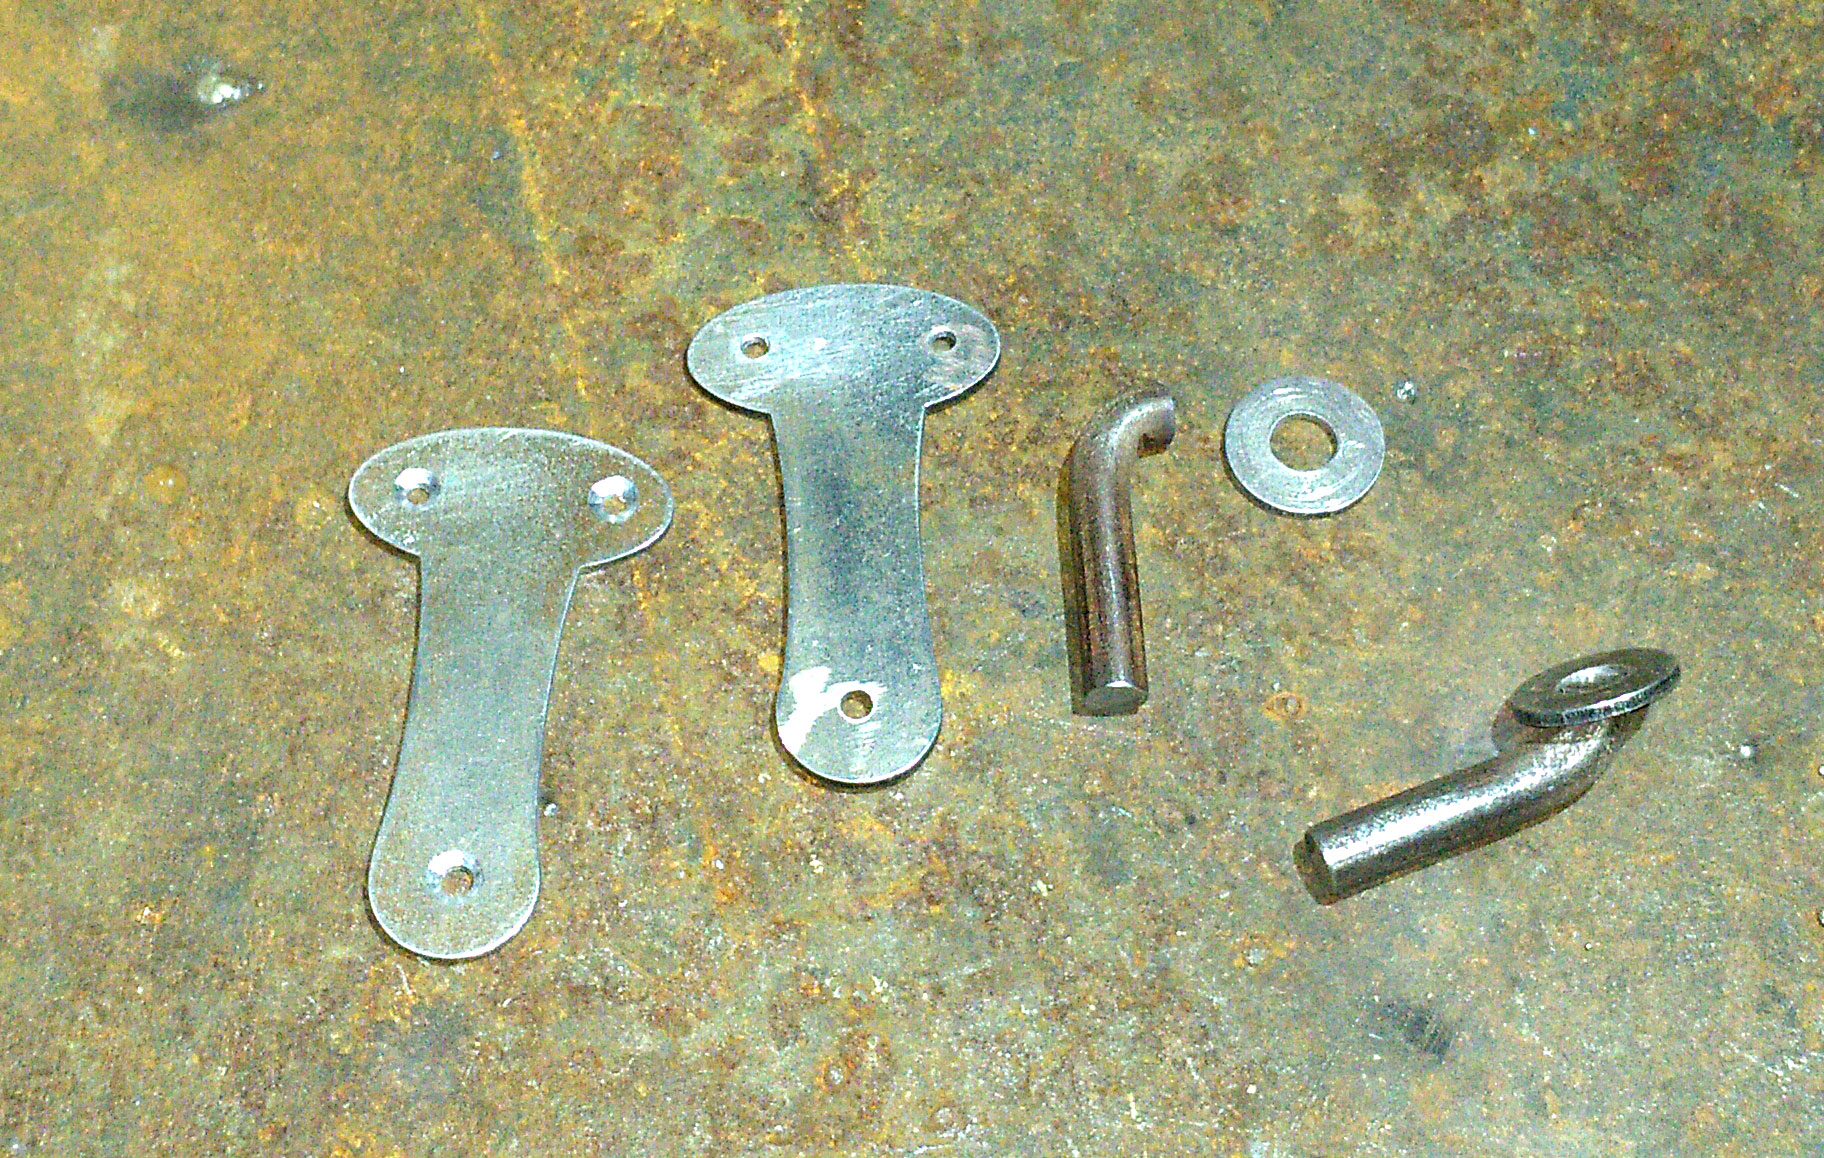
While the stove is drying, we boil fastenings for the door locking handle, draw a sketch of wooden handles and give it to the turner. We paint the pens themselves and leave them to dry. Paint the encoder handle and the metal cover on the screen body.

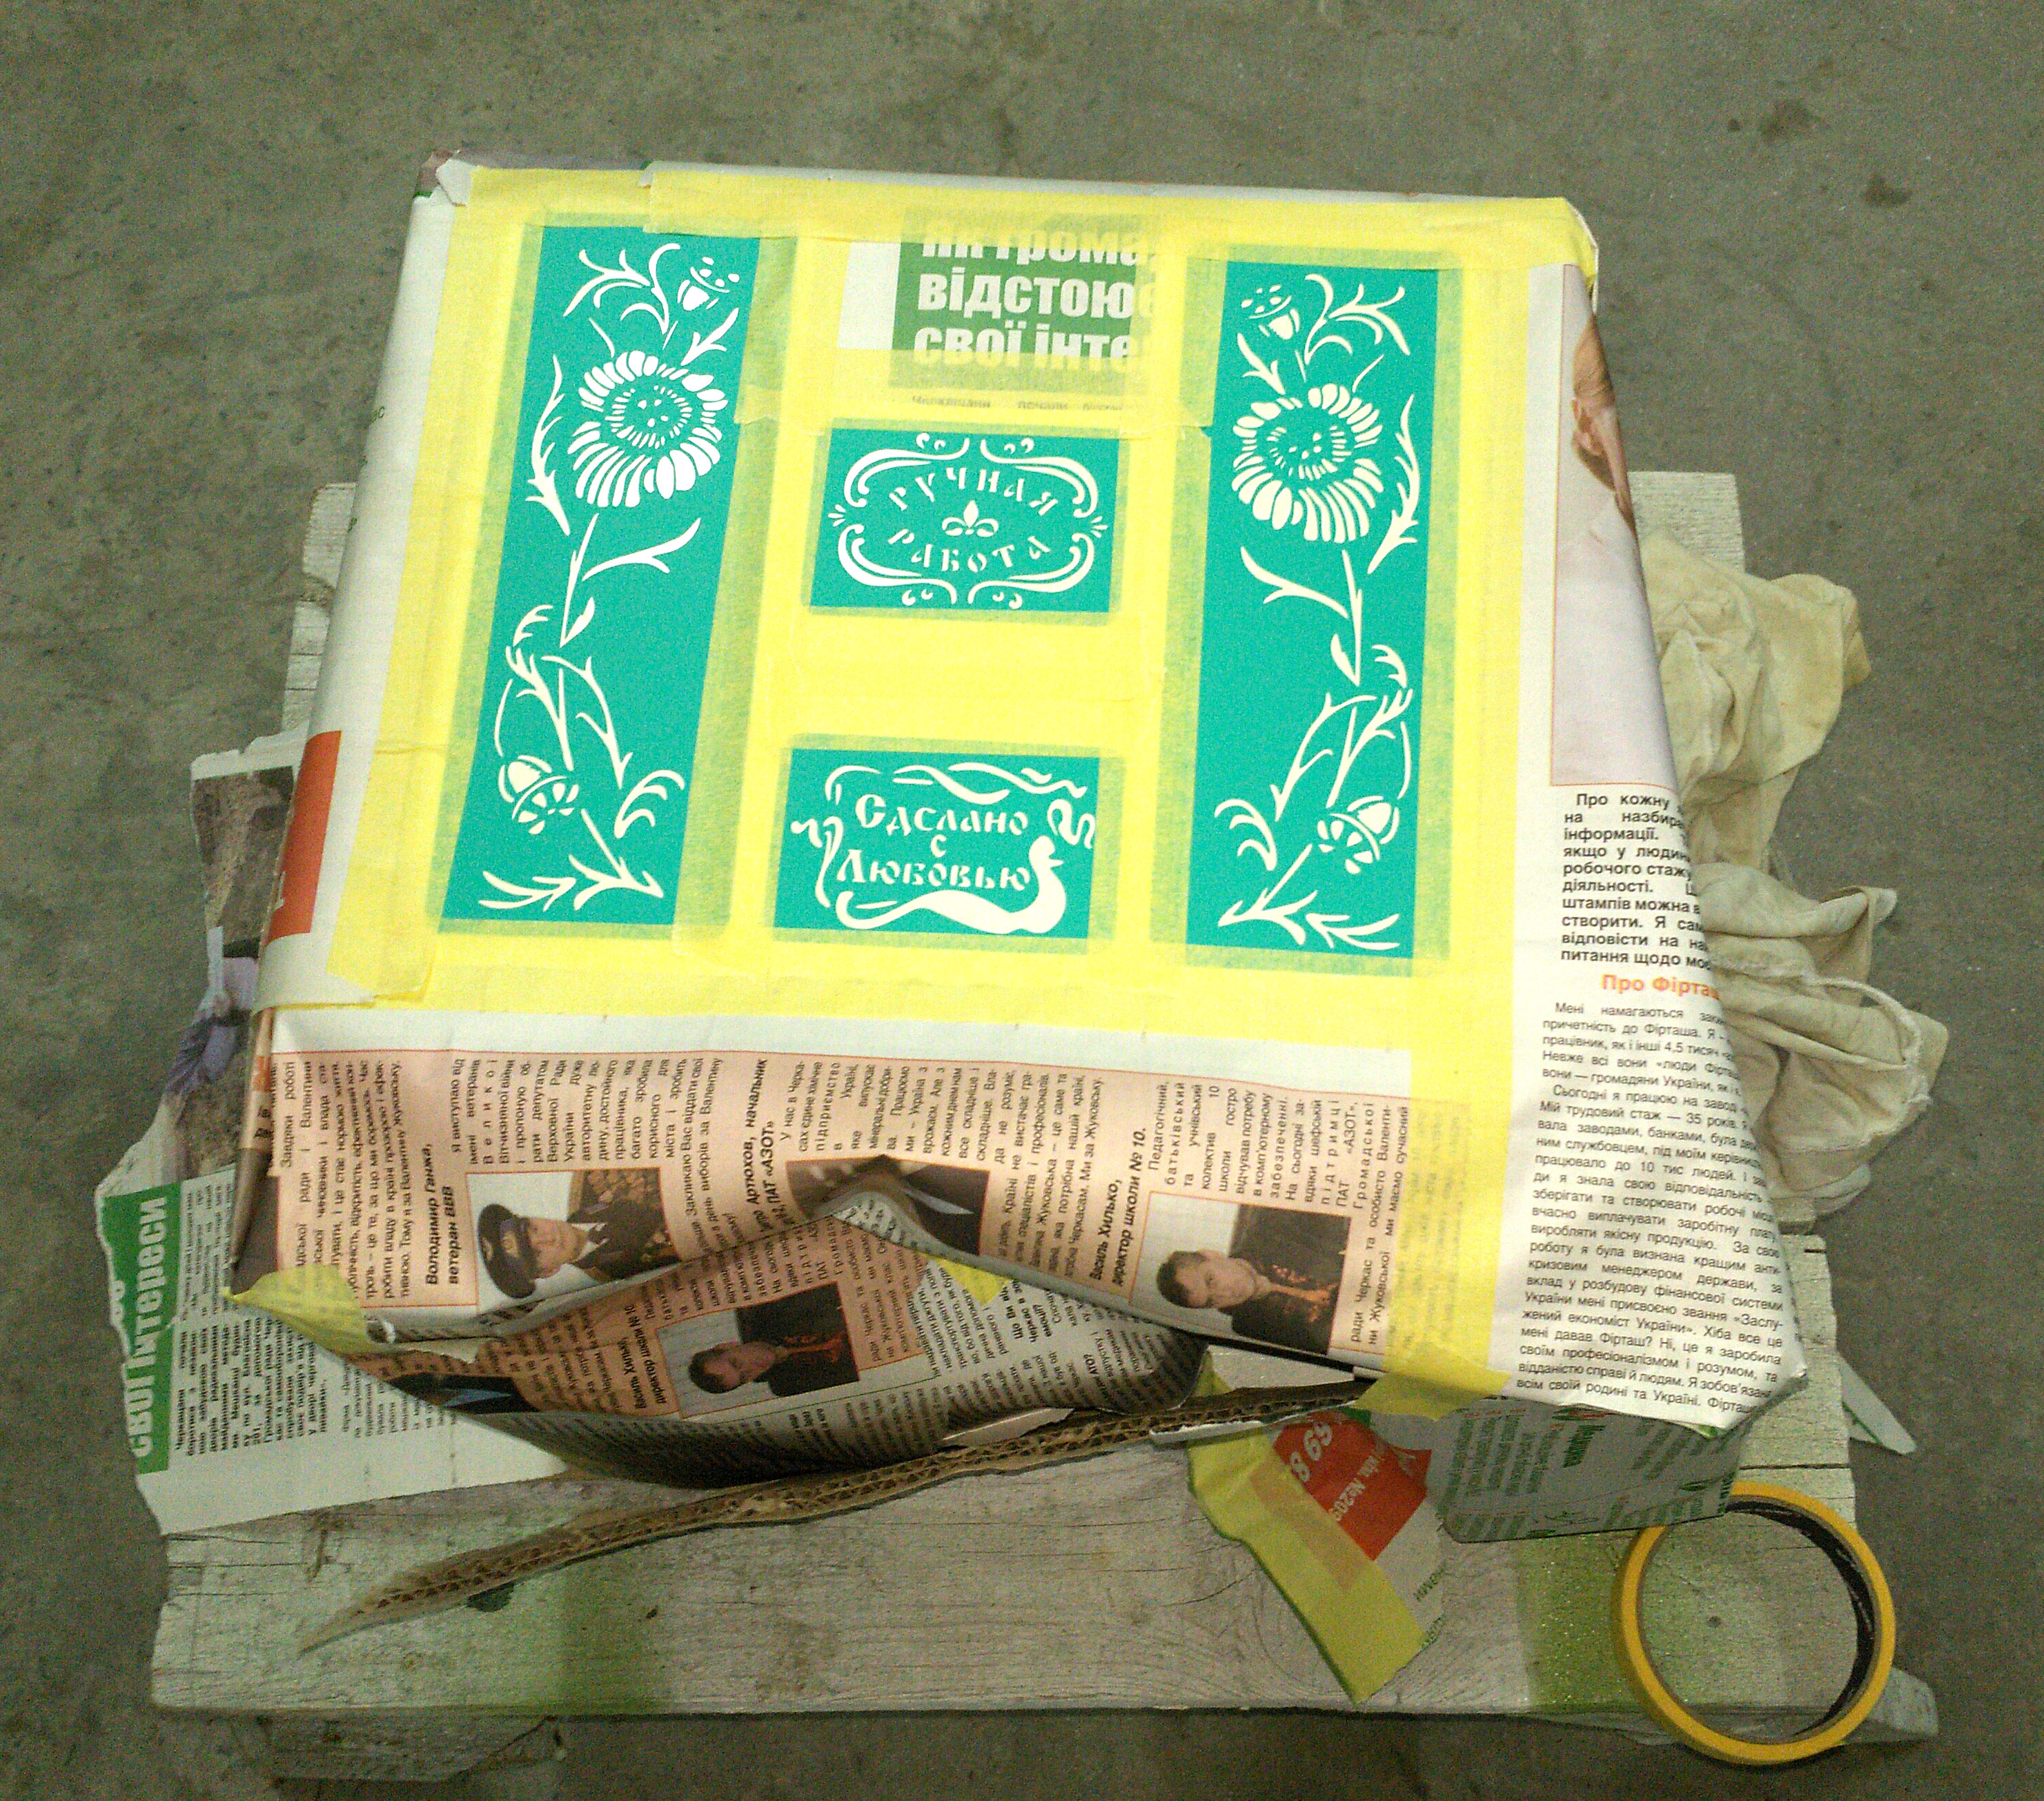
After the hull has completely dried, we apply stencils and paint it with pistachio paint.
Further, approximately we put everything in a heap and we understand that the side surfaces of the oven are provocatively empty and we cannot but hold out so as not to stick that also there. But it is extremely inconvenient to paint through metal stencils due to the paint leaking under the stencil and the need to later adjust the drawing with a brush with the solvent. And stencils to order from the oracle could not order because of the lack of understanding with the "manager" of the advertising agency. Therefore I found ready-made, suitable in size in the internet.
Pasted. We paint We admire.
Next, we collect everything in a pile - install the screen, the encoder and the encoder knob. We make diffusers from the plastered Plexiglas for the operation mode indicators and glue them to the bottom of the dashboard. We pull and solder the module wires and install the network power connector with the power key. We drill and install holders for wooden handles. On the inside of the Open-Close pointer, we glue the felt so that the handle does not scratch the surface of the door during rotation.
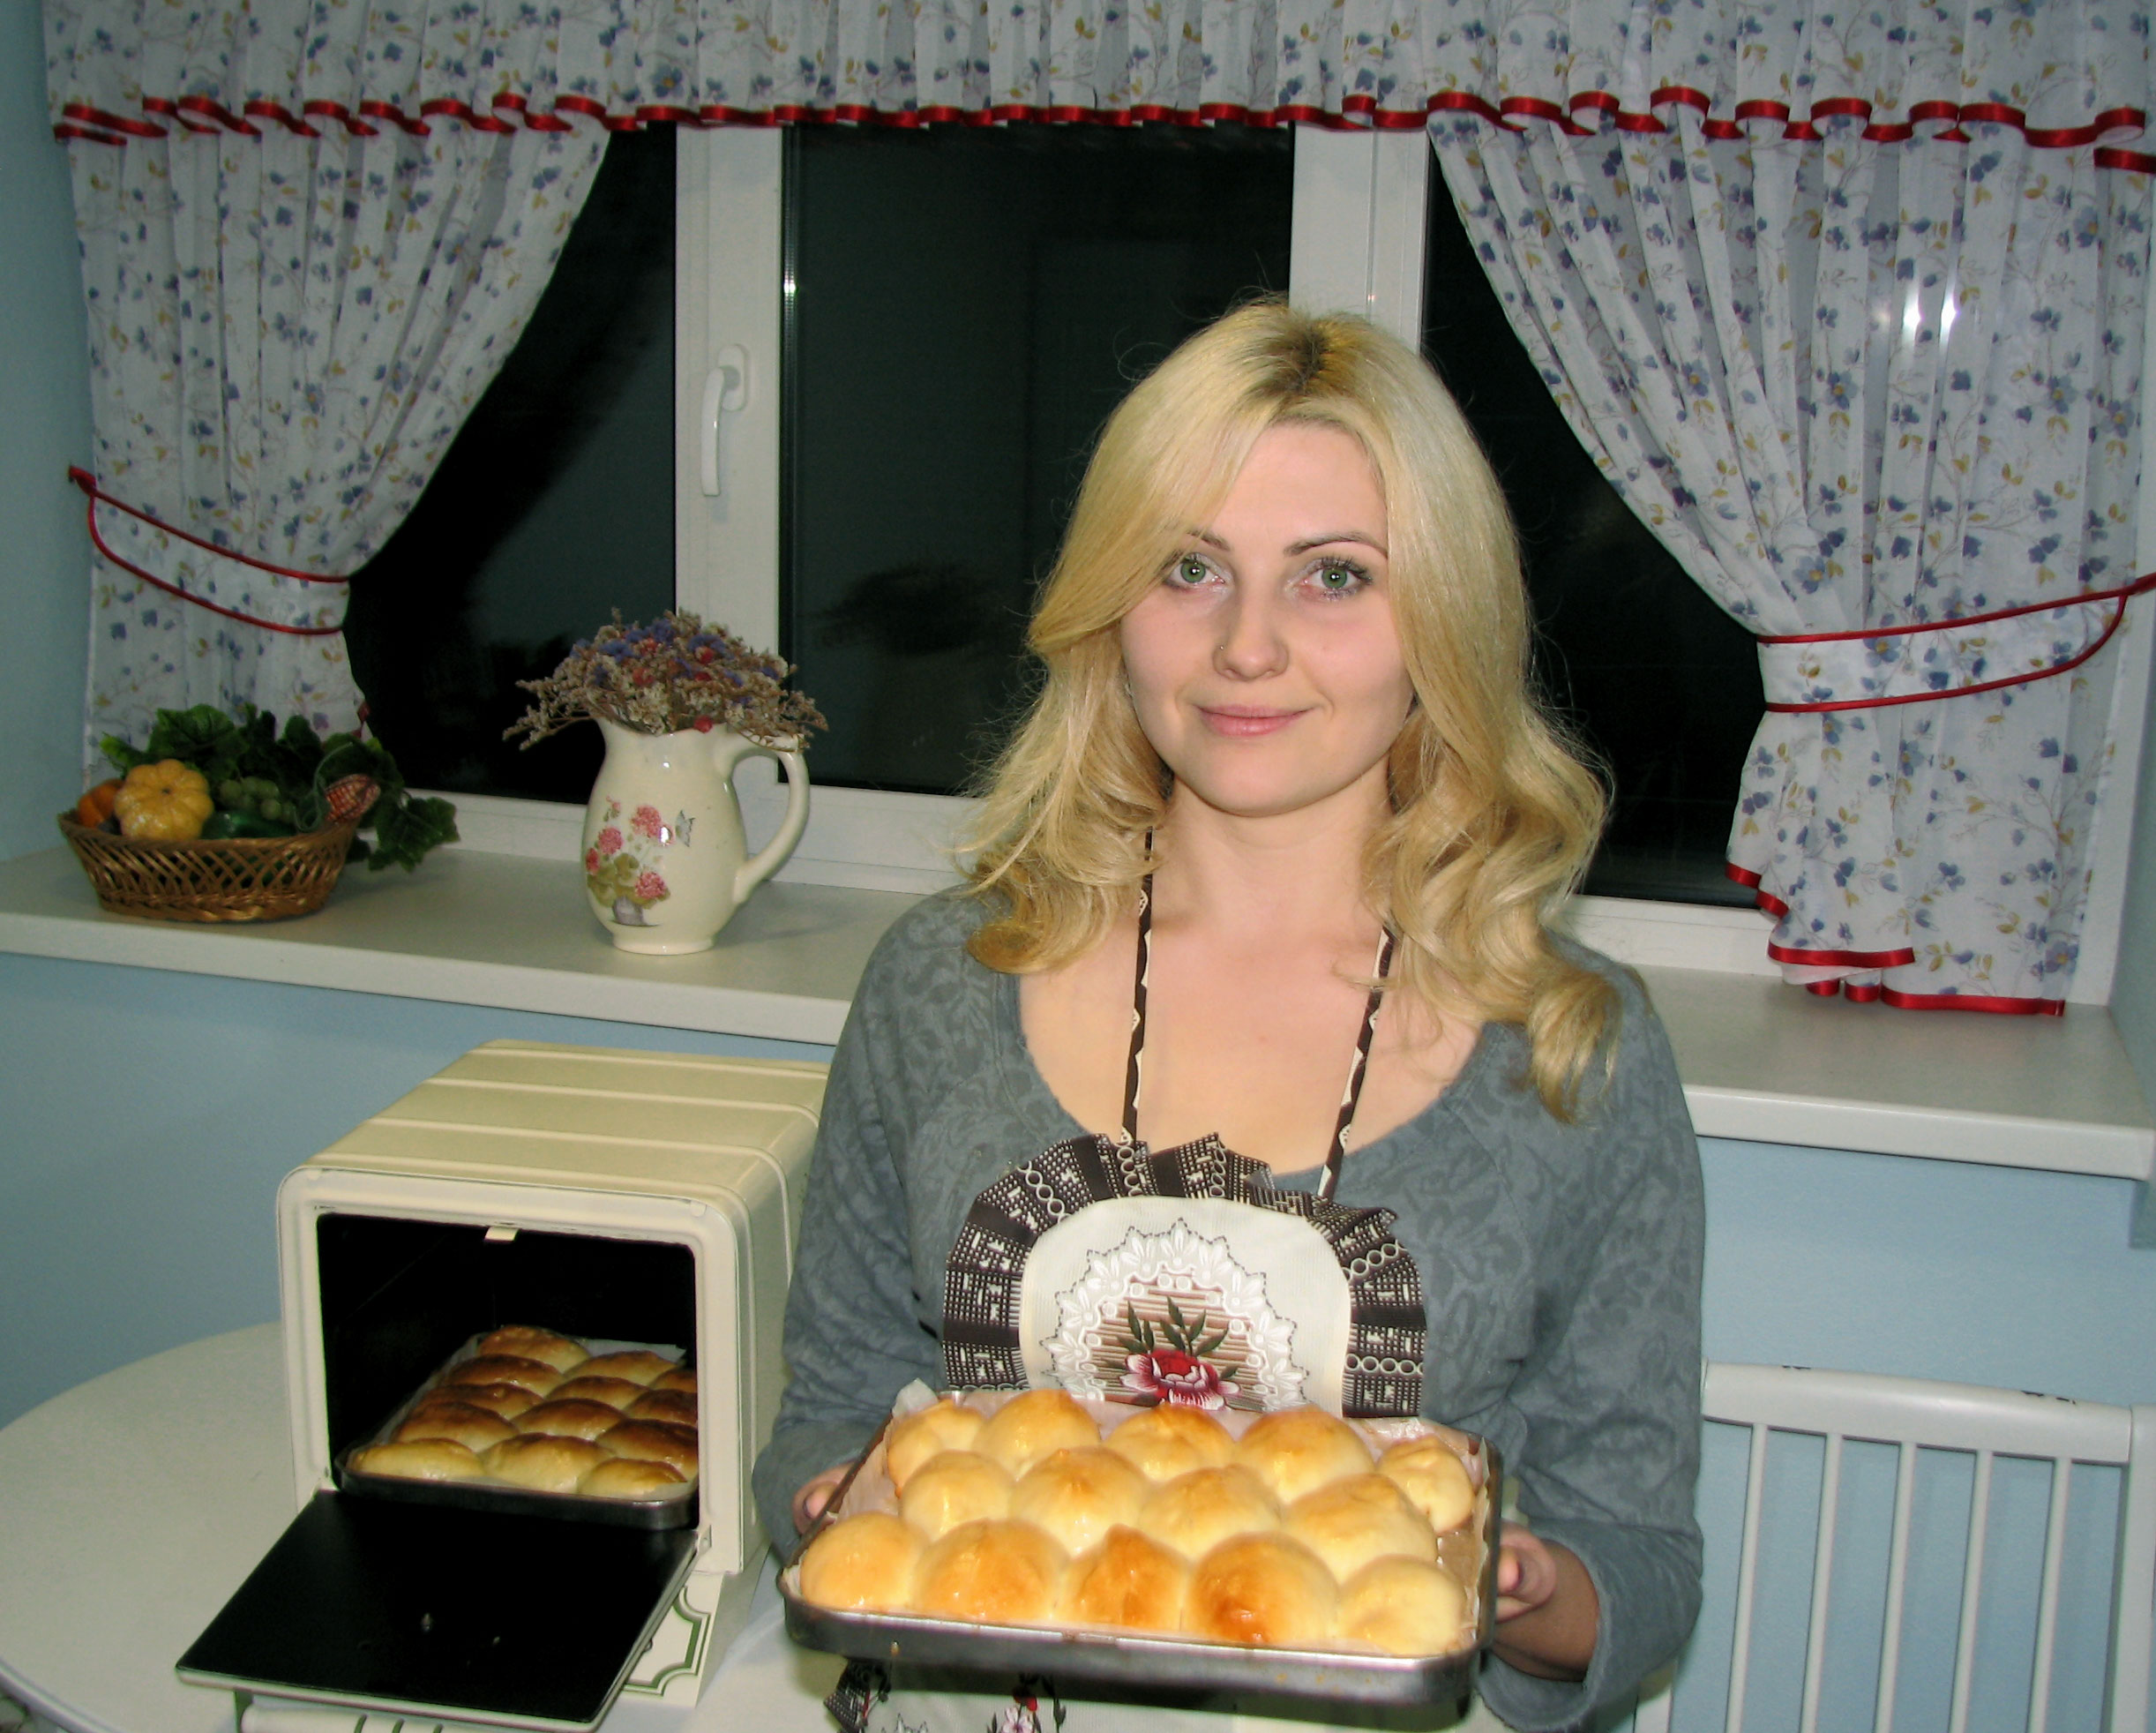
Next, we call the hostess, hand her this creative, listen to what I am smart and beautiful, and while we are waiting for the pies, we add a couple of lines explaining why I did it this way and not the other way.


1. Why is the temperature keeping algorithm so stupid and not the PID?
Because there is simply no need. For a standard program of work, 30-40 minutes, the temperature of the stove just a couple of times passes the target point. The stove is small, well insulated, it cools slowly. PID algorithm has no place to turn. A small temperature inertia occurs only once when the first temperature is set and the overlap is about 20 degrees, which is not at all essential for baking and is conveniently leveled by opening the door at this moment to set the baking tray. To do this, and the signal goes to the operating temperature. The next iteration generally occurs in the range of the order of + - 2 degrees.
2. Why a relay, not a triac and why not PWM?
All for the same reason. I love the simistor and I can cook them, but at least you don’t consider it necessary to push them into the device, in which the relay clicks four times in half an hour. And at 800 watts of power, that is, three amperes of current, even in the Chinese relay there will be an adequate margin of safety. But Shimu has nothing to do here, not the level of the device. And the relay is soulful and lamplike, and the triac is arrogance and pride. Yes, and the hostess is more than satisfied, and this was a strategic goal. In short, everything.
3. What else is planned?
Stainless steel trays. For in the original there are baking trays of chernyashki and if this is already such a heat, then the baking trays must correspond. Later draw and give to the laser.
Behind this, allow me to bow out, test the pies. Privit from Ukraine.
I will not do a long and lyrical introduction about how short and cruel the fate of household appliances. What was perceived yesterday as the last achievement of progress will now be a familiar part of the average household, and tomorrow it will simply be thrown into a landfill, despite its full working capacity or, at best, dismantled as a donor of parts. For "there are buttons, but I want a sensor," and "design is a soviet" and "there is no this chip." And it’s okay if we are talking about some kind of Chinese microwave or kettle, which you don’t have time to get used to because of their short life cycle and plastic lack of spirituality.
But what to do when it comes to the thing that remembers several generations of your family and from childhood has been for you the epitome of home comfort, grandma's delicacies and the whole "lamp". Throwing out a hand will not rise, as with this thing there are too many memories and this is blasphemy in general. But it’s also impossible to use it because of the total obsolescence and frankly unpresentable view.
What to do?
Right! Resurrect.
Meet our heroine. Oven electric "Kharkov".
For a start, a quick introduction to the test subject:
- Year of release - 1980 (my age).
- Power - 800 watts.
And that's all. There is no timer, no temperature or power regulator, no thermometer. Wai Fai is also not, everywhere I was looking for, honestly. Well, not all. There is nothing. Only the case with the heaters and the plug into the outlet, even without a switch. Bake as you like.
When, during the period of my former bachelor life, I discovered this rarity in the depths of garages, brushed off a nostalgic tear and tried to cook something in it, it began to come to me that, for all its sweet vintage, this “pie generator” was as friendly to the first wooden bicycle of 1817, by Karl von Dres. You can see the vintage in the museum too, but after the first conditional trip you realize that Caesar is Caesar’s, and there’s no place for a rare book in the museum, and I’ll still ride on a modern bike because I don’t want to beat the kidneys.
So here. When turned on, this stove-demon immediately roasted under 400 degrees, convincingly reminding me that any organic matter when heated turns into charcoal. And trial pizza was no exception. No wonder the family archives recipes for cooking pies on this stove more resembled the description of the technological modes of operation of the blast furnace. It was suggested to warm up for 10 minutes, then insert a pan with source, then bake for X minutes with the door ajar, then At the minutes with a fully open, periodically changing the position of the baking tray. For in 1980, Soviet engineering science could not offer a Soviet woman any other way to adjust the temperature, except by opening the oven door. Yura Gagarin has been spinning in orbit for 19 years and our vigorous bomb was the most radiant, but the Soviet mistresses all continued to heat the planet with the Kharkov ovens.
Okay. The situation is clarified, goals are set, tools are ground. Let us turn to the technical part.
Software component
“I believe in the One Father of the Almighty, the Creator of heaven and earth, visible and invisible to all. Name to my god Arduino. Amen. ”
Being a zealous parishioner of the church of Arduinova, I naturally decided to sculpt my brainchild on this godly platform. For it is simple and cheap and suitable for the legs. But on the e-stuffing a little later, but now we turn our attention to the program stuffing. Sketch, I mean.
We face the next challenge. It is necessary to implement the following functions in the oven controller:
- timer - the task time of our program;
- thermostat - setting and maintaining the temperature at a certain level;
- the sound alarm system of the first exit to the set temperature - the moment when it is time to put pies;
- sound signaling the end of the program - the moment when it is time to get the pies;
- visual indication of the modes of operation - to understand what is happening in this and yet it is just beautiful. There are two indicators - the program is on and the ten is on.
- display the remaining work time. To understand when it is time to secrete gastric juice.
Having worn the scrolls of the wise men at the Arduino forums, the following shit-code was created with God's help. Criticism is not accepted. Who will criticize, he will not get pies.
Sketch
/*
    d6 - светодиод режима работы (желтый)
    d7 - реле тэна (желтый) и светодиод режима нагрева (фиолетовый)
    d8 - пищалка
    d9 - ce (экран) (белый)
    d10 - rst (экран) (коричневый)
    d11 - dc (экран) (черный)
    d12 - din экран (зеленый)
    d13 - clk экран (розовый)
    gnd - bl экран (к gnd)
    a0 - кнопка валкодера (серый)
    a1 - вход валкодера (оранж)
    a2 - вход валкодера (голубой)
    a4 - вход термистора. резистор 10 к между а4 и +5. термистор между - и а4
    vcc - питание (красный)
    gnd - земля (синий)
  */#include<Adafruit_GFX.h>#include<Adafruit_PCD8544.h>#include<EEPROM2.h>#include<SPI.h> volatile byte seqA = 0;
    volatile byte seqB = 0;
    volatile byte cnt1 = 0;
    volatile byte cnt2 = 0;
    volatileint Temp = 150; // температура по дефолтуvolatileint Time = 30; // время работы по дефолту
    boolean heat = false;
    boolean work = false;
    boolean first_heat;
    volatile boolean right = false;
    volatile boolean left = false;
    volatile boolean button = false;
    long previousMillis = 0;
    int temp_count;
    long time_ost;
    long time_millis;
    byte menuitem = 1; //при включении отобразится пункт меню 1
    byte page = 1; // и страница 1unsignedlong heatMillis = 0;
    #define RT0 10000   // Ом#define B 3950      // K#define VCC 5    //Напр-е питания#define R 10000  //R=10 КОмfloat RT, VR, ln, TX, T0, VRT, temp_izmer, temp_itog;
    Adafruit_PCD8544 display = Adafruit_PCD8544(13, 12, 11, 9, 10);
    //**************************************************************************************************voidsetup(){//*************************************************************************************//***************************************************************************************************
    Serial.begin(115200);
    pinMode(A0, INPUT);
    pinMode(A1, INPUT);
    pinMode(A2, INPUT);
    pinMode(A4, INPUT);
    pinMode(6, OUTPUT);
    pinMode(7, OUTPUT);
    pinMode(8, OUTPUT);
    pinMode(LED_BUILTIN, OUTPUT);
    digitalWrite(A0, HIGH);   //валкодер
    digitalWrite(A1, HIGH);    //валкодер
    digitalWrite(A2, HIGH);    // валкодер
    digitalWrite(6, LOW); //светодиод состояния работы
    digitalWrite(7, HIGH);  //реле тена
    digitalWrite(8, LOW);  //пищалка
    T0 = 25 + 273.15;                 //Температура T0 из даташита, преобразуем из цельсиев в кельвины
    PCICR =  0b00000010; // 1. PCIE1: Pin Change Interrupt Enable 1
    PCMSK1 = 0b00000111; // Enable Pin Change Interrupt for A0, A1, A2// Initialize LCD
    display.setRotation(2); // Set LDC orientation
    display.begin(60);      // Set LCD contrast
    display.clearDisplay(); // Clear display
    display.display();      // Apply changes
    Temp = EEPROM_read_byte(0);
    Time = EEPROM_read_byte(3);
    sei();
    }
    //************************************************************************************************voidloop(){//**********************************************************************************//************************************************************************************************//начинаем отсчет времени  unsignedlong currentMillis = millis();
    // первое главное меню*****************************************************************************if (page==1) {
    display.setTextSize(1);
    display.clearDisplay();
    display.setTextColor(BLACK, WHITE);
    display.drawFastHLine(0,0,83,BLACK);
    display.drawFastHLine(0,47,83,BLACK);
    display.drawFastVLine(0,0,47,BLACK);
    display.drawFastVLine(1,0,47,BLACK);
    display.drawFastVLine(2,0,47,BLACK);
    display.drawFastVLine(3,0,47,BLACK);
    display.drawFastVLine(4,0,47,BLACK);
    display.drawFastVLine(83,0,83,BLACK);
    display.setCursor(5, 2);//первый нукт менюif (menuitem==1) {
    display.setTextColor(WHITE, BLACK); //выделяем инверсией активный пункт меню
    display.drawFastHLine(0,1,83,BLACK);  //*************************
    }
    else {display.setTextColor(BLACK, WHITE); //если не пункт не активный то без инверсии
    }
    display.print(" TEMP        ");
    display.setCursor(5, 14);
    if (menuitem==2) {
    display.setTextColor(WHITE, BLACK);
    display.drawFastHLine(0,13,83,BLACK);
    }
    else {display.setTextColor(BLACK, WHITE);}
    display.print(" TIME        ");
    if (menuitem == 3) {
    display.setTextColor(WHITE, BLACK);
    display.drawFastHLine(0,25,83,BLACK);
    }
    else {
    display.setTextColor(BLACK, WHITE);
    }
    display.setCursor(5, 26);
    display.print(" START:   ");
    if (work) {
    display.print("ON ");
    }
    else {
    display.print("OF ");
    }
    display.setCursor(5, 38);
    if (menuitem==4) {
    display.setTextColor(WHITE, BLACK);
    display.drawFastHLine(0,37,83,BLACK);
    }
    else {display.setTextColor(BLACK, WHITE);}
    display.print(" INFO        ");
    if (left) {
    left = false;
    menuitem--;
    if (menuitem==0) {
    menuitem=1;
    }
    }
    if (right) {
    right = false;
    menuitem++;
    if (menuitem==5) {
    menuitem = 4;
    }
    }
    display.display();
    if (button) {
    button = false;
    digitalWrite(8, HIGH);
    delay (50);  // одновременно и антидребезг и продолжительность звуковой индикации
    digitalWrite(8, LOW);
    if (page == 1 && menuitem==1) {
    page=3;
    }
    elseif (page == 1 && menuitem==2) {
    page=4;
    }
    elseif (page == 1 && menuitem==4) {
    page=5;
    }
    //включение режима работы********************************************************************************elseif (menuitem == 3 && page == 1) {
    if (work) {
    work = false;
    digitalWrite(6, LOW); // выключаем светодиод работы
    }
    else {
    heatMillis = currentMillis;
    work = true;
    first_heat = true;
    digitalWrite(6, HIGH);  // включаем светодиод работы
    }
    }
    }
    }
    //первый нункт меню (температура)***************************************************if (page==3) {
    display.setTextSize(1);
    display.clearDisplay();
    display.drawFastHLine(0,0,83,BLACK);
    display.drawFastHLine(0,1,83,BLACK);
    display.drawFastHLine(0,47,83,BLACK);
    display.drawFastVLine(0,0,47,BLACK);
    display.drawFastVLine(83,0,83,BLACK);
    display.drawFastVLine(82,0,10,BLACK);
    display.drawFastVLine(81,0,10,BLACK);
    display.drawFastVLine(80,0,10,BLACK);
    display.drawFastVLine(79,0,10,BLACK);
    display.setTextColor(WHITE, BLACK);
    display.setCursor(1, 2);
    display.print("     Temp    ");
    display.drawFastHLine(0,10,83,BLACK);
    display.setTextColor(BLACK, WHITE);
    display.setCursor(26, 12);
    display.print("Degree");
    display.setTextSize(3);
    if (Temp >=100) {
    display.setCursor(16, 23);
    }
    else {
    display.setCursor(27, 23);
    }
    display.print(Temp);
    if (left) {
    left = false;
    Temp--;
    }
    if (Temp==49) {
    Temp=50;
    }
    if (right) {
    right = false;
    Temp++;
    }
    if (Temp==251) {
    Temp=250;
    }
    if (button) {
    digitalWrite(8, HIGH);
    delay (50);
    digitalWrite(8, LOW);
    button = false;
    page=1;
    EEPROM_write_byte(0, Temp);
    }
    display.display();
    }
    //второй нункт меню (время)***************************************************************************elseif (page==4) {
    display.setTextSize(1);
    display.clearDisplay();
    display.drawFastHLine(0,0,83,BLACK);
    display.drawFastHLine(0,1,83,BLACK);
    display.drawFastHLine(0,47,83,BLACK);
    display.drawFastVLine(0,0,47,BLACK);
    display.drawFastVLine(83,0,83,BLACK);
    display.drawFastVLine(82,0,10,BLACK);
    display.drawFastVLine(81,0,10,BLACK);
    display.drawFastVLine(80,0,10,BLACK);
    display.drawFastVLine(79,0,10,BLACK);
    display.setTextColor(WHITE, BLACK);
    display.setCursor(1, 2);
    display.print("     Time    ");
    display.drawFastHLine(0,10,83,BLACK);
    display.setTextColor(BLACK, WHITE);
    display.setCursor(22, 12);
    display.print("Minutes");
    display.setTextSize(3);
    if (Time >=10) {
    display.setCursor(27, 23);
    }
    else {
    display.setCursor(38, 23);
    }
    display.print(Time);
    if (left) {
    left = false;
    Time--;
    }
    if (Time==0) {
    Time=1;
    }
    if (right) {
    right = false;
    Time++;
    }
    if (Time==61) {
    Time=60;
    }
    if (button) {
    digitalWrite(8, HIGH);
    delay (50);
    digitalWrite(8, LOW);
    button = false;
    page=1;
    EEPROM_write_byte(3, Time);
    }
    display.display();
    }
     //четвертый нункт меню (панель состояния)***********************************************************elseif (page==5) {
    display.clearDisplay();
    display.setTextColor(BLACK, WHITE);
    display.setTextSize(1);
    display.drawFastHLine(0,0,83,BLACK);
    display.drawFastHLine(0,47,83,BLACK);
    display.drawFastVLine(0,0,47,BLACK);
    display.drawFastVLine(83,0,83,BLACK);
    display.setCursor(3, 5);
    display.print("TEMP_UST:");
    display.setCursor(64, 5);
    display.print(Temp);
    display.setCursor(3, 20);
    display.print("TEMP_TEK:");
    display.setCursor(64, 20);
    display.print(temp_itog, 0);
    display.setCursor(3, 35);
    display.print("TIME_OST:");
    display.setCursor(64, 35);
    display.print(time_ost);
    if (button) {
    digitalWrite(8, HIGH);
    delay (50);
    digitalWrite(8, LOW);
    button = false;
    page=1;
    }
    display.setTextSize(2);
    display.display();
    }
    //вычисляем оставшееся время*********************************************if (work) {
    time_millis = Time * 1000;
    time_millis = time_millis * 60;
    time_ost = ((time_millis) - (currentMillis - heatMillis));
    time_ost = time_ost/1000;
    time_ost = time_ost/60;
    }
    else {
    time_ost = 0;
    }
    //опеределяем время окончания*******************************************if (((currentMillis - heatMillis) > time_millis) && (work)) {
    work = false;
    digitalWrite(6, LOW);  // выключаем светодиод работы
    digitalWrite(8, HIGH);// подаем сигнал
    delay (1000);
    digitalWrite(8, LOW);
    delay (500);
    digitalWrite(8, HIGH);
    delay (1000);
    digitalWrite(8, LOW);
    delay (500);
    digitalWrite(8, HIGH);
    delay (1000);
    digitalWrite(8, LOW);
    }
    //измерение температуры*************************************************if (currentMillis - previousMillis > 500) {
    previousMillis = currentMillis;
    VRT = analogRead(A4);              //Считываем аналоговое значение VRT
    VRT = (5.00 / 1023.00) * VRT;      //Преобразуем в напряжение
    VR = VCC - VRT;
    RT = VRT / (VR / R);               //Сопротивление RT
    ln = log(RT / RT0);
    TX = (1 / ((ln / B) + (1 / T0))); //Температура с термистора
    TX = TX - 273.15;                 //Преобразуем в цельсии
    temp_count++;
    temp_izmer = temp_izmer + TX;
    }
    if (temp_count == 10) {
    temp_itog = temp_izmer/10;
    temp_count = 0;
    temp_izmer = 0;
    }
     // сравнение текущей и заданной температуры**********************if (temp_itog < (Temp - 1)) {   // гистерезис
    heat = true;
    }
    if (temp_itog > (Temp + 1)) {
    heat = false;
    if (first_heat) {   // при первом достижении рабочей Т подаем сигнал
    first_heat = false;
    digitalWrite(8, HIGH);// подаем сигнал
    delay (200);
    digitalWrite(8, LOW);
    delay (300);
    digitalWrite(8, HIGH);
    delay (200);
    digitalWrite(8, LOW);
    delay (300);
    digitalWrite(8, HIGH);
    delay (200);
    digitalWrite(8, LOW);
    }
    }
    //включение тена*****************************************************if ((work) && (heat)) {
    digitalWrite(7, LOW);  // включаем тен
    digitalWrite(5, HIGH);  // включаем светодиод тена
    }
    else {
    digitalWrite(7, HIGH);  // выключаем тен
    digitalWrite(5, LOW); // выключаем светодиод тена
    }
    // контроль перегрева или обрыва датчика********************************************if ((temp_itog < 0) || (temp_itog > 250)) {
    digitalWrite(8, HIGH);// подаем сигнал
    delay (500);
    digitalWrite(8, LOW);
    delay (500);
    }
    }
    // обработка прерываний валкодера ******************************************************************
    ISR (PCINT1_vect) {
    // If interrupt is triggered by the buttonif (!digitalRead(A0)) {
    button = true;
    }
    else {    // Else if interrupt is triggered by encoder signals
    boolean A_val = digitalRead(A1);   // Read A and B signals
    boolean B_val = digitalRead(A2);
    // Record the A and B signals in seperate sequences
    seqA <<= 1;
    seqA |= A_val;
    seqB <<= 1;
    seqB |= B_val;
    // Mask the MSB four bits
    seqA &= 0b00001111;
    seqB &= 0b00001111;
    // Compare the recorded sequence with the expected sequenceif (seqA == 0b00001001 && seqB == 0b00000011) {
    cnt1++;
    left = true;
    }
    if (seqA == 0b00000011 && seqB == 0b00001001) {
    cnt2++;
    right = true;
    }
    }
    }
More and more than usual, in essence, is molded from the most basic examples of working with a Nokia 5110 screen, an encoder, a thermistor, and a reel. Your choice in favor of these components is justified in the next part of our fascinating story.
The menu consists of 4 items: “TEMP”, “TIME”, “START” and “INFO”. What is responsible for what, I think it is clear from the photo. If necessary, you can stop the program, add or decrease the time or temperature and continue again.
Naturally, our settings are stored in non-volatile memory.
Also, the control of the oven overheating and the control of the breakage or damage of the thermal sensor was added. When the temperature reaches 250 degrees (sticking of the relay or some kind of unrecorded failure) or the temperature drops below zero (sensor breaks, it shows 270 degrees in the break) there will be an alarm.
Hardware component
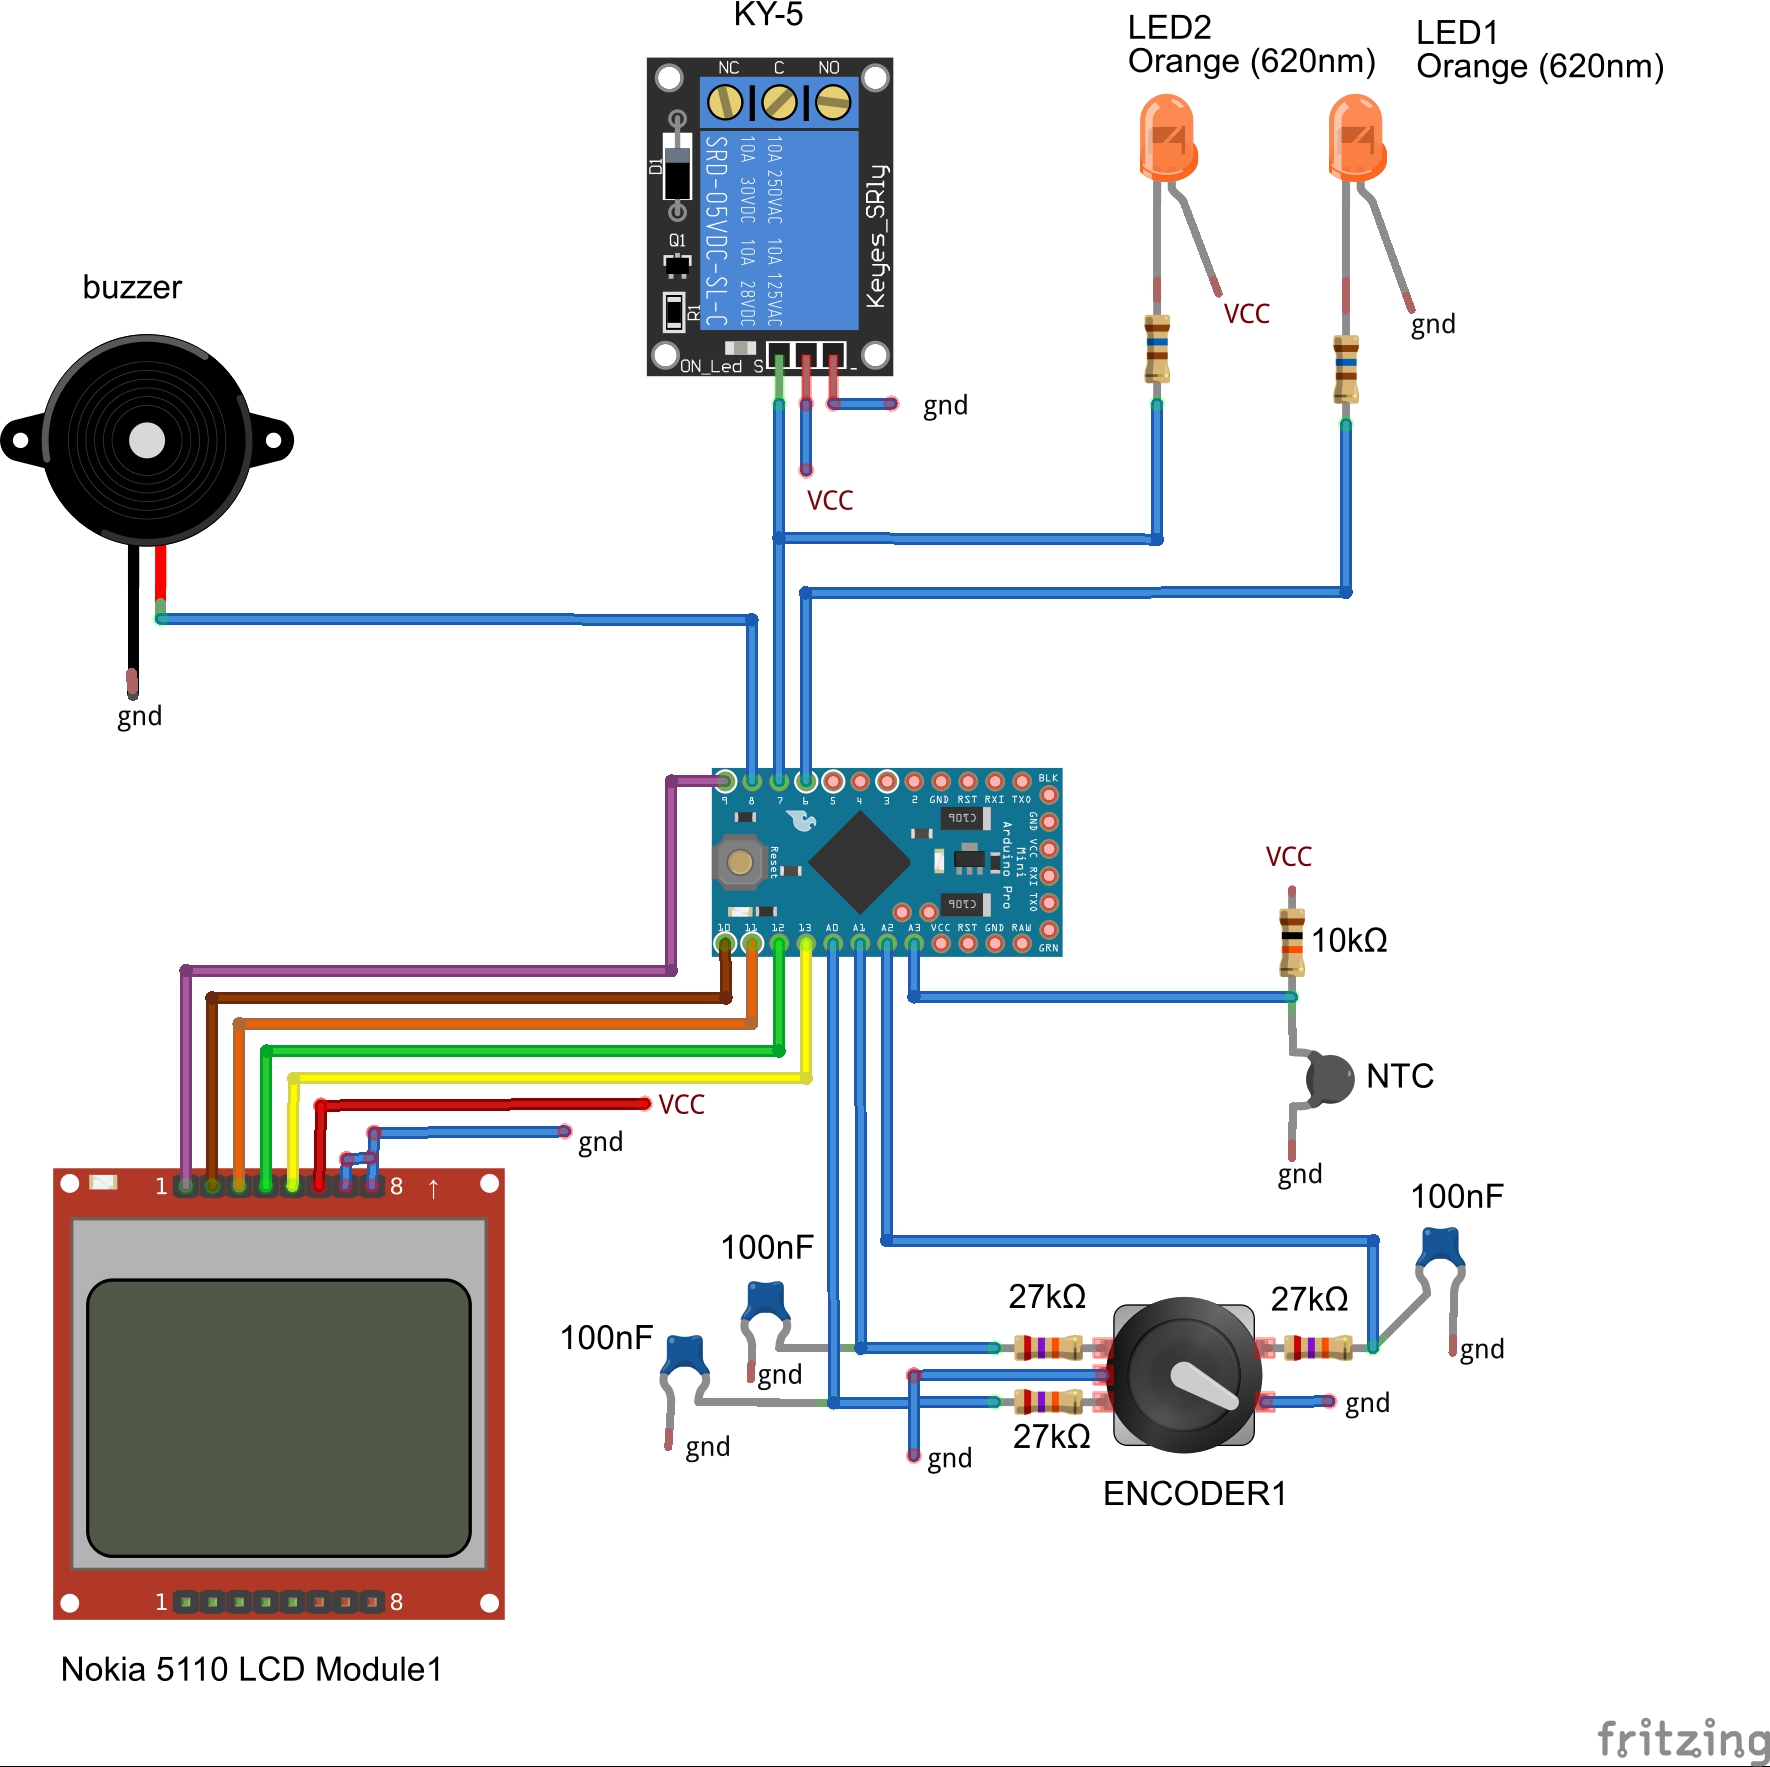
To implement the functionality described above, we need the following components:
- Power supply 220 - 5 volts, torn from some kind of charging. It feeds all electronics.
- Arduino pro mini. Silicon super brain, responsible for the management of our brainchild.
- Screen monochrome Nokia 5110, resolution 84 * 48 pixels with a slight refinement. Displays menu items, allowing you to adjust the temperature, time, turn on the program for execution and view the current parameters in the process.
- Encoder (also known as valcoder, or twisted). Allows you to intuitively manage the settings menu and requires just one hole in the control panel.
- Relay. The most common relay module for 10 Chinese amps. Even without optocouplers. Yes, the risk is my middle name.
- Thermistor as a temperature sensor. Once, an unidentified thermal sensor on a thread was broken by me from some device, lay idle, now it has become popular. Testing has shown that inside a normal NTC thermistor for 10 com. That is, everything is more than simple and the passport temperature limit of 250 - 300 degrees corresponds to my tasks. For confidence, I made a test bench of a thermistor and a digital DS18B20 sensor. Up to 100 degrees showed nostril in the nostril and the accuracy is more than excessive. Anyway
- Light indication - a pair of orange LEDs. Sound indication - active piezo squeaker.
For better atmosphere, you need to finish the screen. By default, the screens of the Nokia 5110 come with either white or bright blue LED backlights. White LEDs do not match the planned external style, and blue vyrviglaznye LEDs seem to provoke epilepsy attacks among users and generally have the creation of Satan, designed to contribute to the early coming of the Antichrist. Vypivaem and their fire. Pater noster. Amen.
Next, we take the orange smd light-emitting diodes, designed to imitate old-school incandescent bulbs and solder them instead of standard ones, after removing the metal bezel of the screen and the LCD screen itself under it. Now everything is Feng Shui.
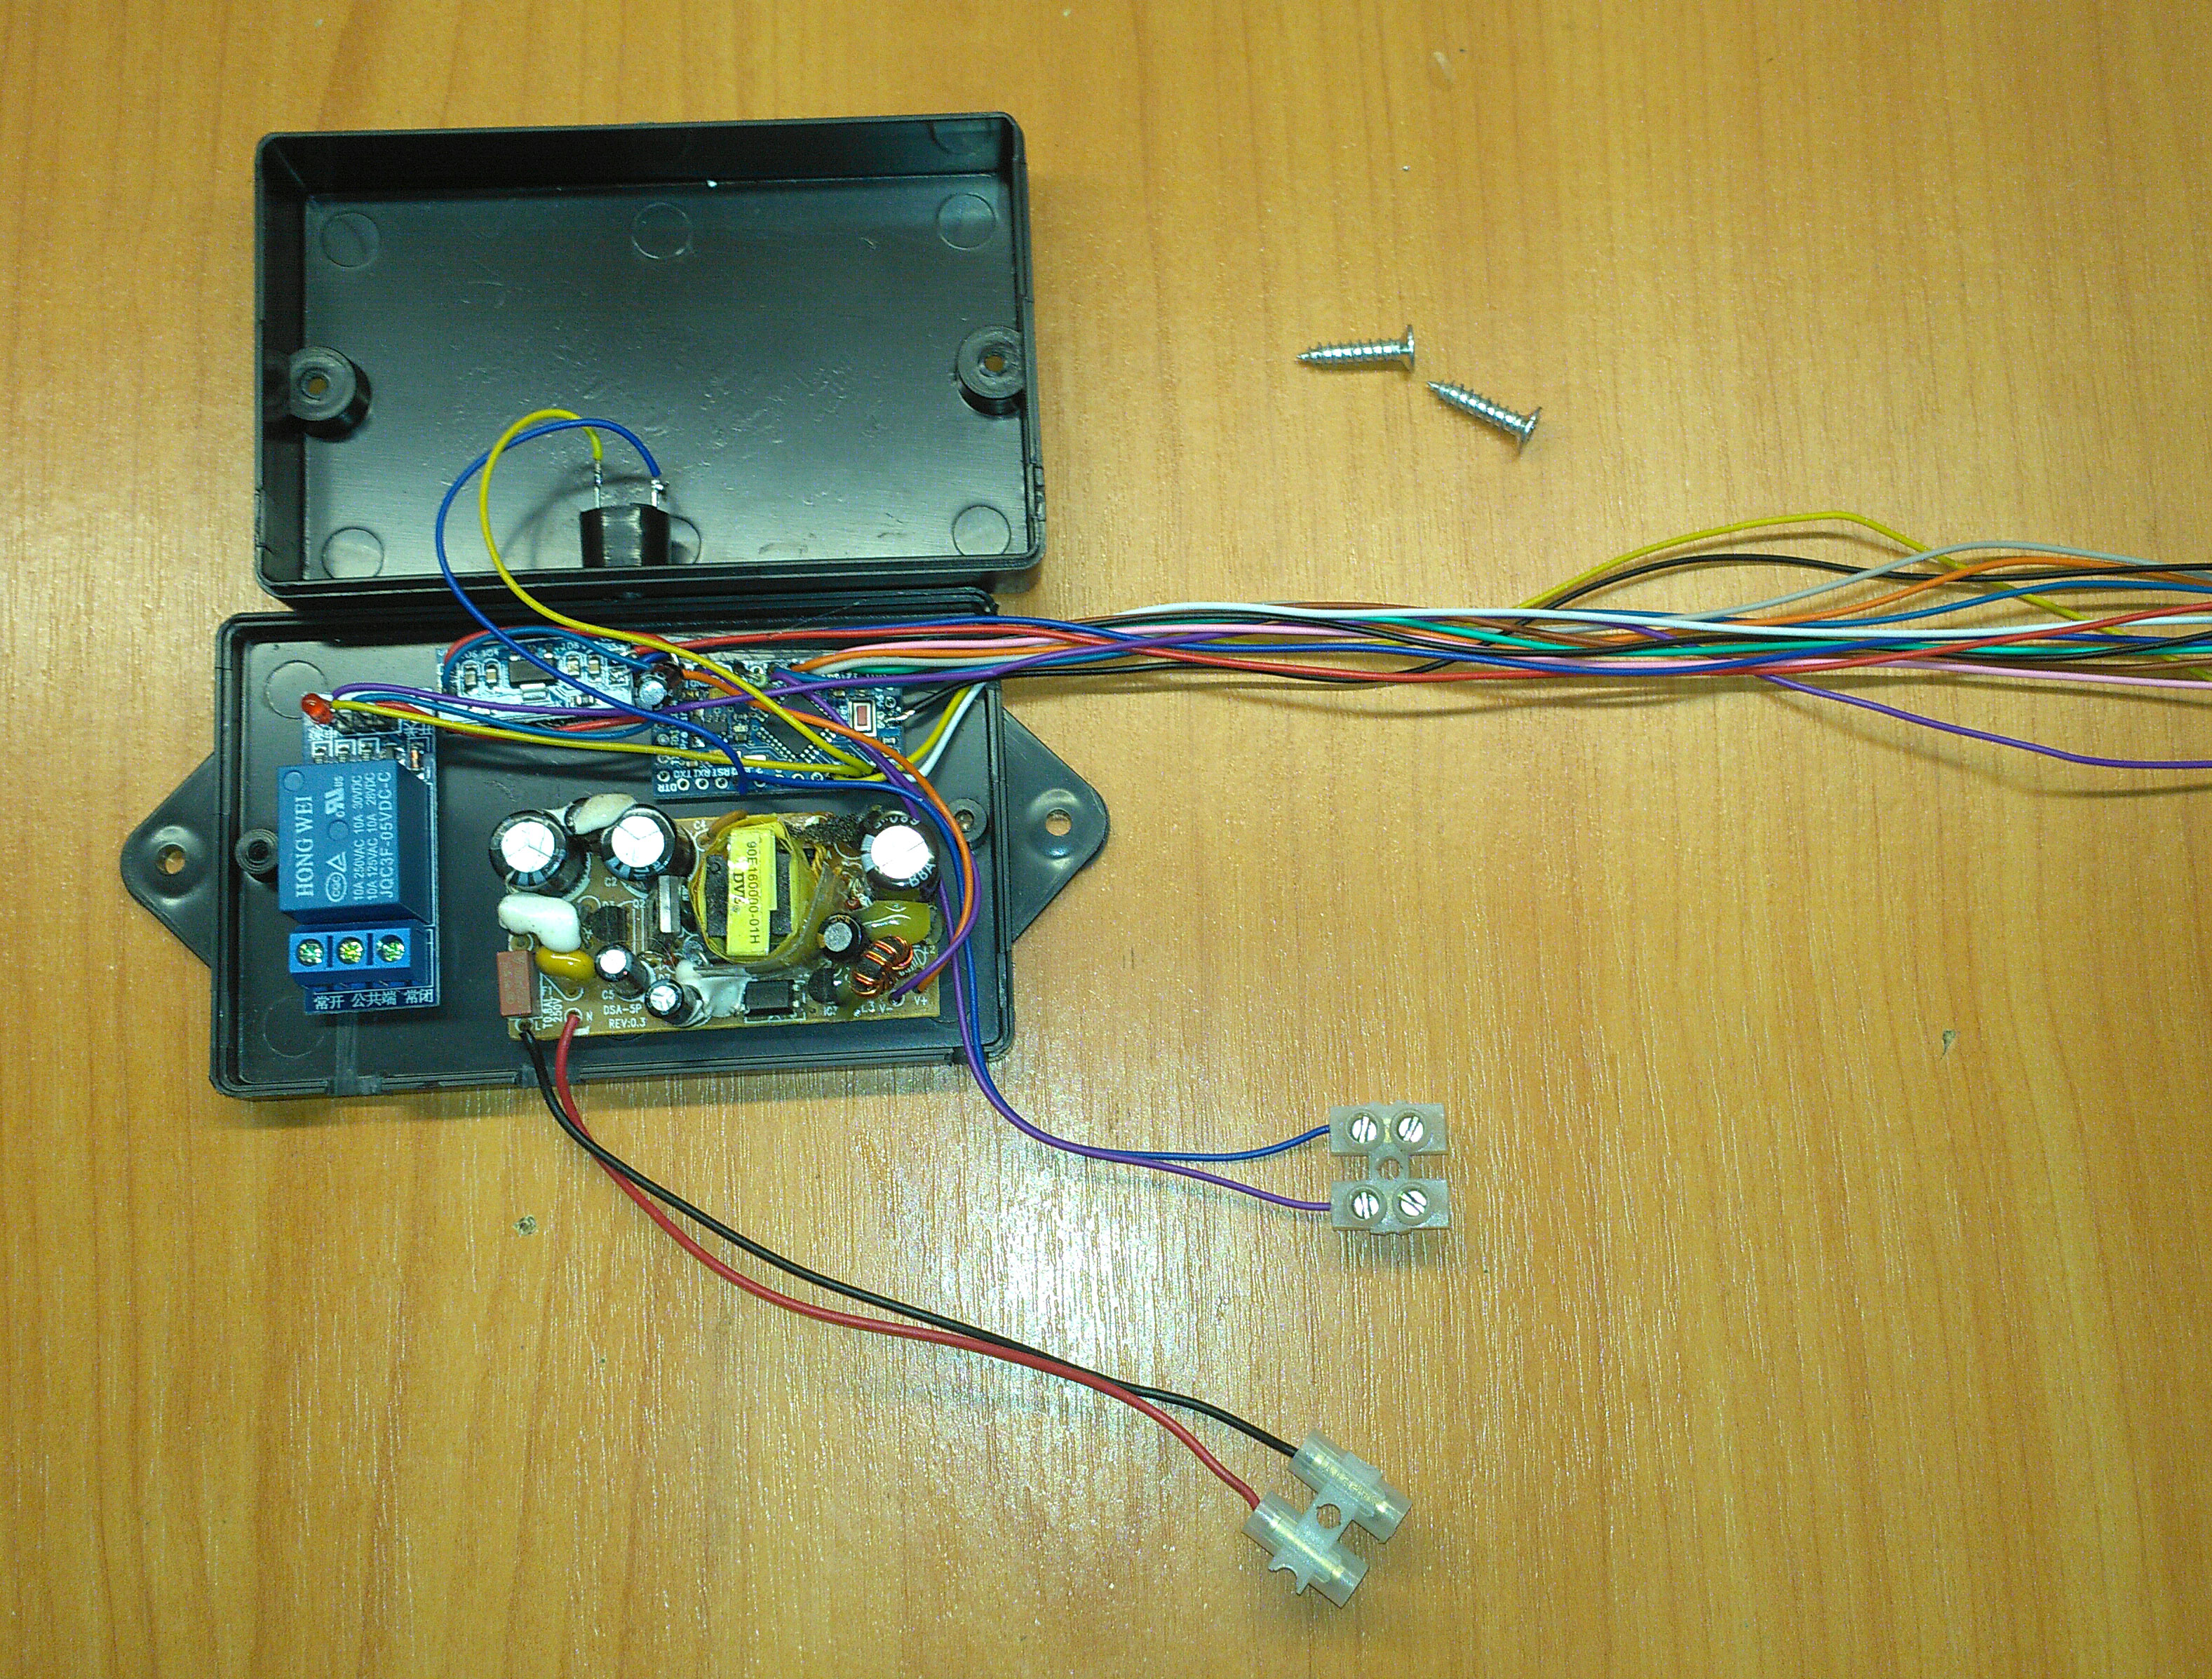
We find a suitable plastic box with mounting ears. In it we place the power unit, arduinka, squeaker and relyushki. Display a pair of wires to the mains supply, a pair of wires to the thermistor and the wiring to the front panel to the screen, the encoder and status LEDs with diffusers. Place the control unit - on the belly of the oven.
Iron component
With all my love for the old technology, I would never have undertaken to restore this oven if it were not for one thing - I have a Provence style kitchen and the rounded vintage case of this oven fits perfectly into the interior. Therefore, it was decided to fool around.
We remove the back panel by unbending 4 fastening ears to get to the back wall of the internal cavity of the stove. We take out a layer of weapons of massive destruction under the name "glass wool". In the middle of the back wall of the inner cavity, we drill a hole to fit the thermistor rod, insert a thermistor, tighten the nut, draw the wires under the case, pick out the remains of glass wool, instead of it we stuff basalt cotton wool and assemble it back.
Next, prepare the control panel, the elements of pens and stencils for decoration. No plastic, only metal. Since I do not know how to draw in AutoCAD, I draw the details I need in Photoshop and convert it into a dwg format through some kind of cloud service. Yes, I'm a pervert, I know, I like it. We give the drawings for laser cutting.
Weld the dashboard on the planned place. We finish missing the triangles on the sides, we spat and we clean the welding place, creating the appearance of a solid part as much as possible. On the dashboard, 4 slots - place under the screen, place under the encoder with holes for the LEDs under the "for beauty" twist under the twist, and shaped slots for the operation and heating indicators. The panel is made of steel with a thickness of 2 mm, so that was not enough. "Weight is reliable." Boris Razor.
The venerable age of the oven and many years of being in inhumane conditions could not help but leave traces on its body. There were scratches of paint, small dents and pockets of corrosion. We put on the grinder-brushing grinder and clean it up as much as possible. We putty dents and defects in car putty. We clean again. We degrease.
Next on painting. I did not find in my area the ability to fill pentaphthalic enamel in colors to choose from, therefore I chose from available ready-made colors. Ivory was chosen for the main body color and pistachio for the body decoration elements.
We paint, kosyachy, curse, remove the drips, repaint, again kosyachim, we vow never to fool with the like, but just peacefully plump like all normal men, calm down, paint again, remain satisfied. We are waiting for a week until the paint is dry.
While the stove is drying, we boil fastenings for the door locking handle, draw a sketch of wooden handles and give it to the turner. We paint the pens themselves and leave them to dry. Paint the encoder handle and the metal cover on the screen body.
After the hull has completely dried, we apply stencils and paint it with pistachio paint.
Further, approximately we put everything in a heap and we understand that the side surfaces of the oven are provocatively empty and we cannot but hold out so as not to stick that also there. But it is extremely inconvenient to paint through metal stencils due to the paint leaking under the stencil and the need to later adjust the drawing with a brush with the solvent. And stencils to order from the oracle could not order because of the lack of understanding with the "manager" of the advertising agency. Therefore I found ready-made, suitable in size in the internet.
Pasted. We paint We admire.
Next, we collect everything in a pile - install the screen, the encoder and the encoder knob. We make diffusers from the plastered Plexiglas for the operation mode indicators and glue them to the bottom of the dashboard. We pull and solder the module wires and install the network power connector with the power key. We drill and install holders for wooden handles. On the inside of the Open-Close pointer, we glue the felt so that the handle does not scratch the surface of the door during rotation.
Next, we call the hostess, hand her this creative, listen to what I am smart and beautiful, and while we are waiting for the pies, we add a couple of lines explaining why I did it this way and not the other way.
1. Why is the temperature keeping algorithm so stupid and not the PID?
Because there is simply no need. For a standard program of work, 30-40 minutes, the temperature of the stove just a couple of times passes the target point. The stove is small, well insulated, it cools slowly. PID algorithm has no place to turn. A small temperature inertia occurs only once when the first temperature is set and the overlap is about 20 degrees, which is not at all essential for baking and is conveniently leveled by opening the door at this moment to set the baking tray. To do this, and the signal goes to the operating temperature. The next iteration generally occurs in the range of the order of + - 2 degrees.
2. Why a relay, not a triac and why not PWM?
All for the same reason. I love the simistor and I can cook them, but at least you don’t consider it necessary to push them into the device, in which the relay clicks four times in half an hour. And at 800 watts of power, that is, three amperes of current, even in the Chinese relay there will be an adequate margin of safety. But Shimu has nothing to do here, not the level of the device. And the relay is soulful and lamplike, and the triac is arrogance and pride. Yes, and the hostess is more than satisfied, and this was a strategic goal. In short, everything.
3. What else is planned?
Stainless steel trays. For in the original there are baking trays of chernyashki and if this is already such a heat, then the baking trays must correspond. Later draw and give to the laser.
Behind this, allow me to bow out, test the pies. Privit from Ukraine.