PaintCAD Mobile - pixel art on the phone
- Tutorial
Today, on the Google Play store, the same rectangles with rounded corners are full of flowers, under each of which there is another touch application where you need to poke your finger in three buttons, playing games a la tower defense, a catapult with physics, and a more sophisticated 3D projects with a top view in isometry, where you crush ten mobs per second with a huge sword, and for similar projects with the peaceful construction of buildings every N minutes and donate into crystals, for which buildings are built faster ...
In the far corner of Google Play Utilities Either 300-500 (-700) rubles are gathering dust waiting for the buyer, or truncated demo versions / versions with ads from all sides.
But it was not always so. 10 years ago, a fun community of mobile application developers produced tons of useful software. In those days there was no Android, and Java 2 Microedition reigned everywhere - a stripped-down version of Java for weak mobile devices.
In those days, there was not 4G LTE Internet, but mainly slow GPRS (2G, 5 kilobytes per second, like a dialup modem in speed) and the emerging fashionable EDGE (2.5G, 30 kilobytes per second!).
In those days, there was no advertising in applications, so applications were not made by those who want to weld on users, inserting ads in all places where it is necessary and not necessary, but those who want to bring benefits and create funny things that will be useful to people. Of course, applications and games were sold through all kinds of services "send SMS to a number ...", but there was almost no protection and executable JAR files of mobile Java applications were scattered everywhere on the Internet.
On a small screen of the type 101x80 or 128x128, and then on 132x176 and 240x320, people used a lot of all kinds of utilities. On a phone clogged with applications (with an internal flash drive about 1-5 MB in size), it was necessary to:
- email client,
- ftp client,
- text / html editor,
- downloading web pages through html and html browser hovering them (Opera Mini has not yet been),
- MIDI ringtone editor,
- photo editor (for low-power mobile cameras such as 0.3 megapixels or 640x480 pixels, usually a phone with a camera had this native application for editing brightness / contrast / overlay frames on a photo),
- mobile basic, it was possible to write programs for the phone in it, and then pack your program with resources inside the executable JAR (ZIP) basic file so that when you launch this JAR immediately it will be autorun. Thus, you could make your own programs on your own phone, and then distribute them over the Internet.
Many users made their sites on free hosting services, wrote html code, inserted pictures, animations there, then through ftp the client laid it all out on the hosting, downloading their programs there on a mobile base, as well as a collection of wallpapers, melodies, sounds, video for the phone .
And that was only on the surface of the user level. (Below were the guys who flashed the phones with special firmware and could run programs of a special format immediately on the phone’s processor, of course, they worked faster than Java.)
In this tutorial, I will tell you how today you can draw pixel art on one of the dinosaurs from that era of j2me - PaintCAD Mobile. You will need a phone running Android 2.3 or later. With this program you can draw any pictures, for example, for a mobile / computer site or graphics for the game, make GIF animations for the site, use raster PCF fonts in your pictures (and even make these fonts yourself). In this article, we will consider the simplest functions: drawing, tools, a palette, a few effects.
The Android version of PaintCAD weighs about 600 kilobytes, which looks modest compared to the weight of today's Android applications. At the same time, it contains a lot of opportunities for drawing and image processing, for creating animations and bitmap fonts.
Launch PaintCAD
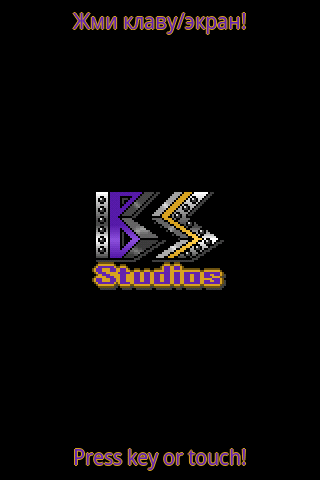
After starting, you will see a stub with the logo of the developer. Click anywhere on the screen. When you click on the screen, control from the touch screen will be selected. When you press the key, the control from the physical keyboard (for Java phones with keys) will be selected without showing the virtual one. Because we have a touch android, then click on the screen.
Next, a start window with a choice of interface language is displayed.
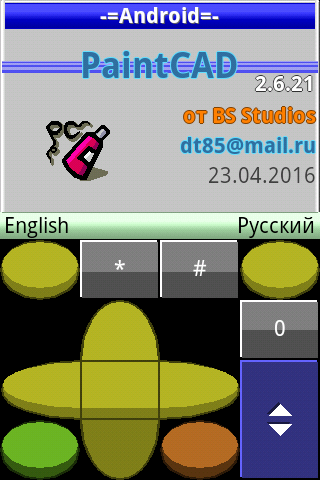
The split-screen is occupied by a virtual keyboard. In vertical mode, it is displayed below, in horizontal - on the right.
If you press the big blue button, the keyboard switches between two types - the joystick and the arrow numbers:

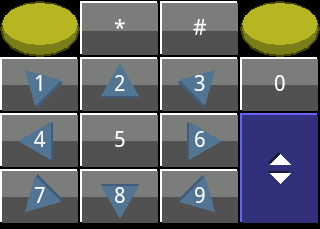
This allows you to turn on the arrow numbers when drawing and calmly chase the cursor over the drawing, and switch to the joystick when you need to call a special function (undo the last action, dropper, etc., more on this below).
Comparison of the telephone keypad and virtual keyboard in this video:
The so-called "soft keys" are two round yellow buttons on the virtual keyboard in the upper right and upper left. They are always at hand with the arrow numbers and the joystick.
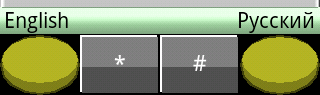
Press left - there will be an “English” interface language. Press right - there will be a “Russian” interface language. Click the right one. The download bar runs and the “Tip of the Day” window appears.
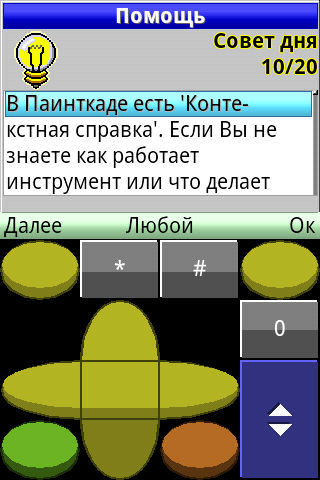
In the window, you can press the left software ("Next") and read the tips in order, or the center of the joystick ("Any") and you will be shown random advice. Use the Up - Down keys to scroll through the text of the board. Having read the tips, click the right software "OK".
A window for selecting the program operation mode appears.
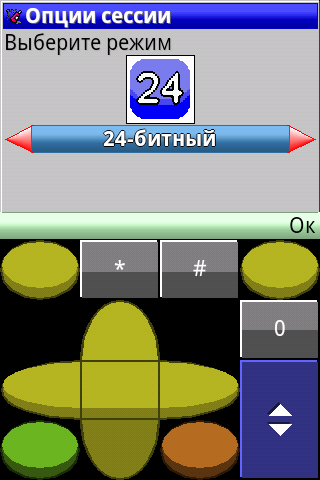
There are three modes:
8 bits per point- this is the so-called "256-color mode with an indexed palette", if in a simple way: you have 256 cans of paint in the palette. You can fill in any jar with any RGB color (i.e. choose one of 16 million colors). And, accordingly, in the picture there will be only these 256 colors from cans. In this mode, you can draw GIF files. You can also save to other formats (256-color BMP, for example).
24 bits per dot is a full-color mode, where each dot in the picture has one of 16 million colors. Used to paint 24-bit BMPs, usually with the final save in PNG (even with translucency!).
Handler- a mode with the maximum amount of free RAM, for example, allows you to convert a giant picture of any format into a smaller width-height picture (if this picture does not load at all in 8bit / 24bit modes due to lack of RAM, and I want to use it in the drawings).
Use the "Right" - "Left" keys to switch the mode. We select "24-bit" and press the right software "OK".
The “Size Limit” window appears.
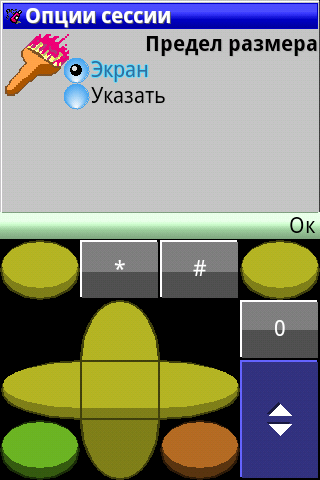
In it, we select the maximum size of the picture horizontally and vertically, which we are going to draw. After that, the memory will be allocated for the necessary buffers, so that it is enough in any case.
Using the Up - Down keys, you can select "Screen" (then there will be the maximum size of the picture from the screen) or "Specify" (then you can specify, for example, 1500 x 50 pixels if you suddenly need to draw a picture so very wide, but not high). Leave the “Screen” selected and click the right “Ok” software.
The start wizard window appears.
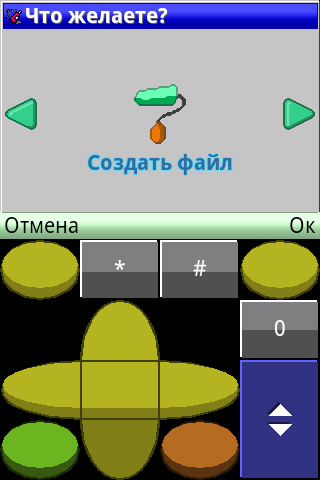
In it, you can select with the "Right" - "Left" keys, as in many PC programs, what we are going to do:
Create a file - create a new picture of the size you specified (but not more than the maximum size selected in the previous window).
Open ??? - open graphics of any format using the phone
Open ??? + alpha- open graphics of any format using the phone with the alpha transparency channel. Used to open PNG files with translucency. Then the picture will be uploaded to the picture, and the alpha channel to the buffer. You can switch between them and draw both a picture and an alpha channel.
Detailed Information for Experienced Alpha Pattern Processors
Open ??? rice + puff - open two pictures at once: put one on the picture (for example, mypic.bmp), and put the other with the CB note in the buffer (for example, mypicCB.bmp). This is convenient when you draw a picture in the picture and an alpha channel in the buffer. And now you save your work in two files at once, then you went to have lunch, and then you returned, started the paint path again and uploaded your two files - a picture and a buffer - back to the editor.
Select "Create File" and click the right software "OK".
The “New File” window appears, asking you for the size of your new picture in pixels.
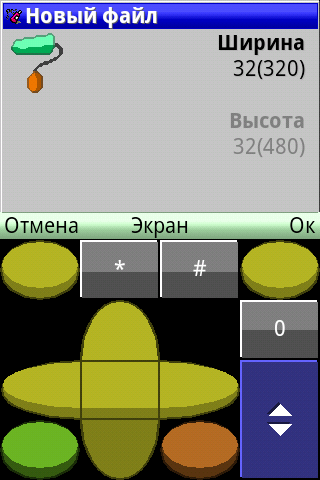
At first, 32x32 pixels are offered. In parentheses are the maximum size of the picture you have chosen (more than which you cannot enter numbers).
To switch between width and height, use the joystick keys "Up" - "Down". To enter numbers, use the arrow keys. To do this, click the big blue button and enter the numbers. The numbers are entered cyclically, added to the end of the already entered number, and with a very long / large number (larger than the maximum size), they are reset to one digit.
Example for a 320x480 screen:
entered “32”,
enter “0” - became “320”,
enter another “2” - become “2” (reset since 3202 is more than the maximum size),
enter another “0” - it became “20”,
we enter another “5” - it became “205”,
we enter another “3” - it became “3” (reset since 2053 is more than the maximum size),
etc.
If you want to enter a size equal to the screen, then just press the center of the joystick - and you will immediately enter the width / height equal to the screen, and “Ok” will be pressed.
For this training material, I’ll leave 32x32 pixels. Click the right software "OK".
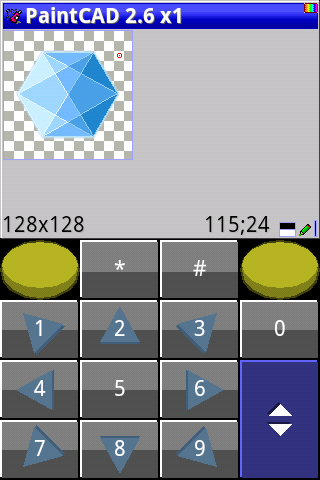
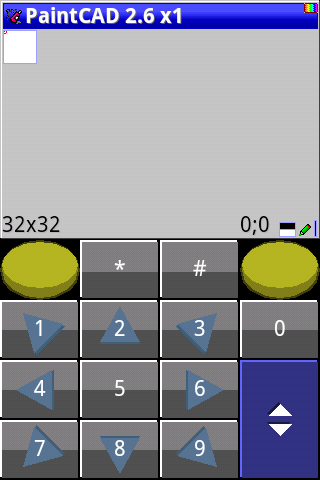
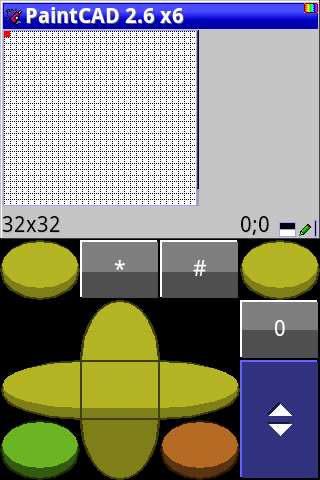
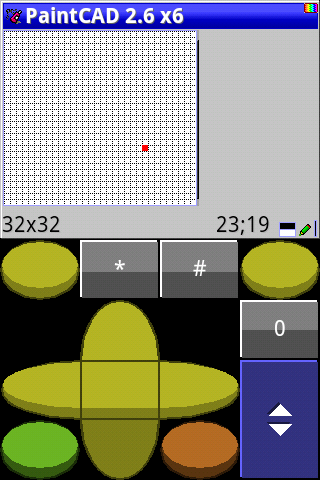
The main editor window appears - the drawing window.
Such a small picture, especially on modern giant screens, is almost not visible at all. Therefore, immediately switch to the Joystick keyboard and press "Joy Right." The "Command Menu" opens.
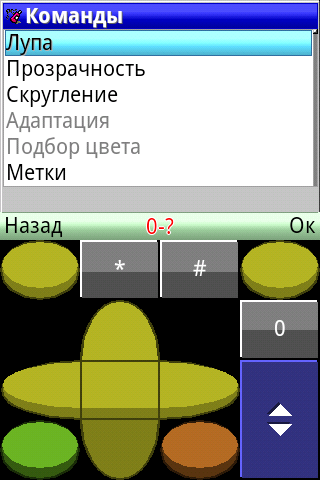
You can do a lot in the command menu, but we will change the scale with the “Loupe” command. We make sure who the menu cursor is on the item "Magnifier" and click the right software "OK". We get into the scale selection window.
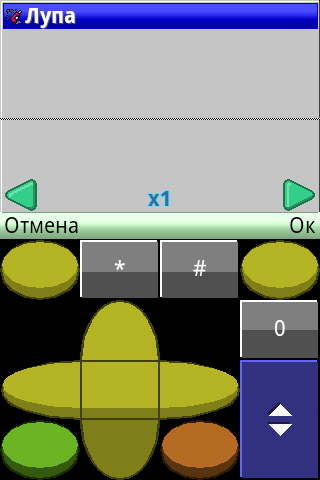
In the window, you can use the “Joy Right” - “Joy Left” buttons to change the scale within the pixel size from 1x1 to 50x50. You can also immediately click on the numbers from 1 to 9 on the arrow numbers, choosing a scale from x1 to x9, respectively.
Choose x6, for example. At the same time, a chess cell on the screen, when choosing different scales, will immediately display pixel sizes. You can immediately figure out whether it’s nice for the eye to look at them or whether you need to choose even larger.

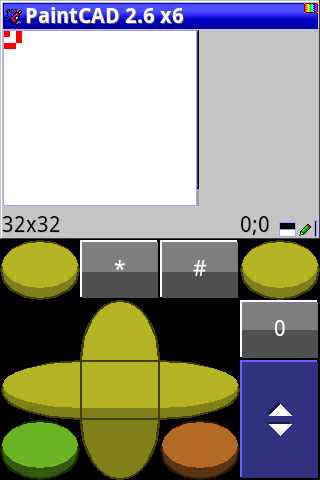
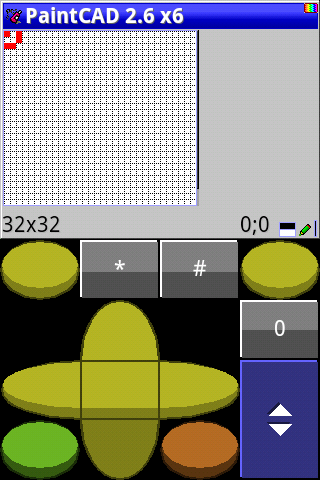
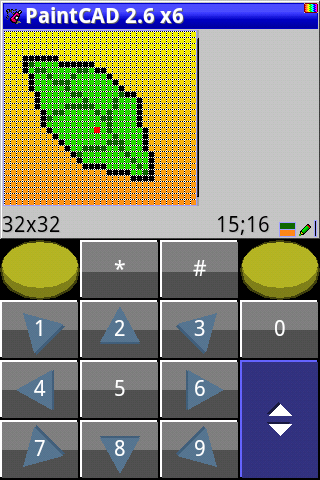
Click the right software "OK", returning to the main window. The picture has enlarged on the screen. A mini scroll bar appeared on the right, showing where we are in the picture.
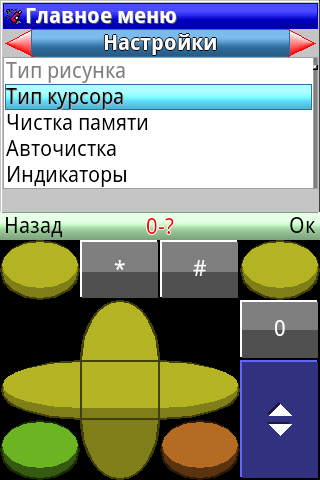
Many still love the grid so that the borders of the pixels are visible. Turn it on then in the main menu. Press "0" (zero), the main menu window appears.
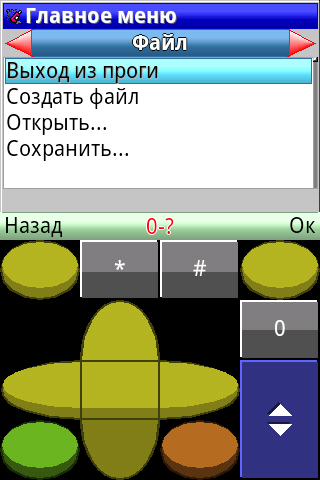
Using the "Right" - "Left" keys, you can switch the submenu, and with the "Up" - "Down" keys, crawl already inside the submenu according to the list of items. Double-click “Left” to enter the “Settings” submenu.
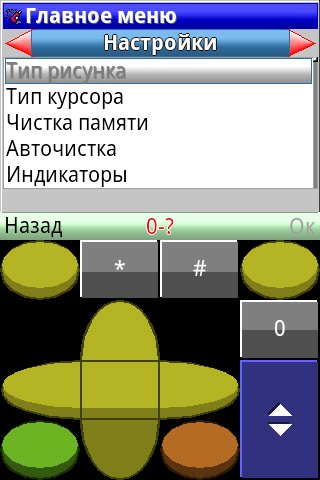
The Grid setting is almost at the very bottom of the list. So click "Up" to go through the top down and place the cursor on the "Grid".
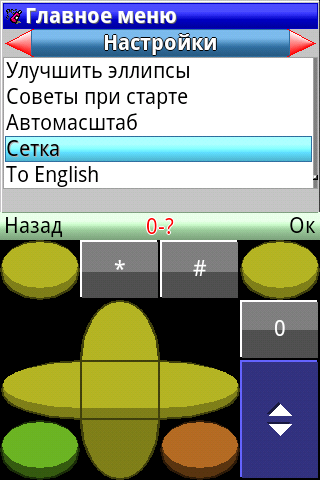
Click the right software “OK”, a window for changing the grid settings will appear.
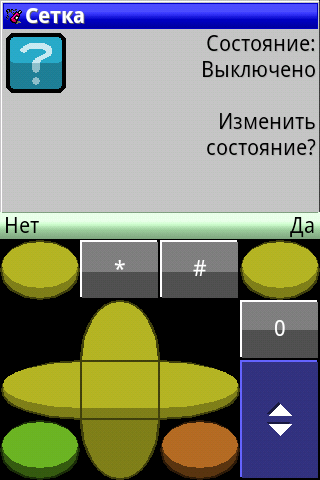
It says that now the grid is turned off and you can either change the state (turn it on) or not touch anything (leave it turned off). Click the right software “Yes” and we are returned to the main drawing window with the grid turned on.
You can also change the appearance of the cursor to a single-pixel one so that the ring around the cursor does not block our view when drawing a small picture. To do this, press “0” and find at the very top of the “Settings” submenu (where the “Grid” was) the item “Cursor Type”.
We call it and we get to the cursor settings window.
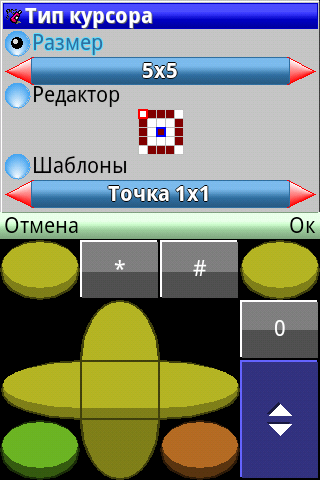
Using the “Joy Down” key, we go down to the “Templates”, there we have already selected the “1x1 Point” we need, but so that it loads - click “Joy Right and back” Joy Left. The cursor in the middle of the screen shows us how the selected cursor will look.

In this window, if desired, you can even draw your cursor within a 5x5 square. But for now, let's take a template one. Click OK and return to the drawing window with a small cursor.
Start drawing
A status bar is displayed below the figure.
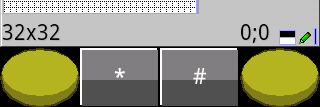
It indicates:
- the current picture size: 32x32,
- the current cursor position: 0; 0, in the settings you can enable the countdown from 1; 1, for those who do not like 0; 0),
- two colors under each other: upper black " Front color ”(PC, foreground color, FC), lower white“ Rear color ”(ZC, background color, BC). Colors are commonly used as input to effects. For example, you can outline all objects in the color of the PC with the color line of the PC. Or draw fire from the bottom up from the WOC to the PC, and then to transparency. Etc.
- tool: at the moment, “pencil”, puts the color pixels of the PC using the “5” button at the current cursor position.
- type of lines:for tools such as line, ellipse, frame, triangle, it is solid or dotted, it is switched by the green button on the joystick keyboard.
Use the arrow keys on the numeric keypad to move the cursor, and use the 5 key to set pixels. If set by, then press "Joy Left", this will exchange the colors of the PC and the ZC in places, and instead of black you will paint with white (erase the painted black). Then again press “JoyVlevo” and the PC will again turn black (and in the PC white).
So, this is how the Pencil works.

Now, before the next drawing, erase the drawn. In the paintcade, there is always a selected fragment of the picture. Now it is equal to the whole picture (i.e. the whole picture is 32x32 pixels highlighted). Fill the whole picture with the color of the LC (white), erasing everything that was painted. To do this, press "#" - the "Highlight and clipboard" menu appears.
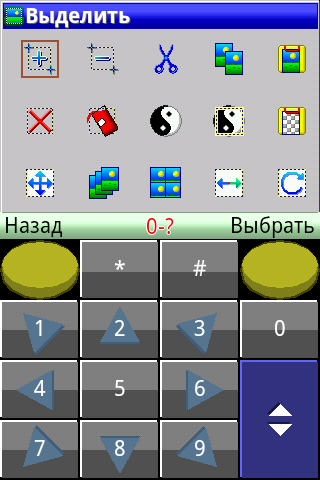
Use the Up-Down-Left-Right keys on the numeric or joystick keyboard to place the cursor on “Clear”.
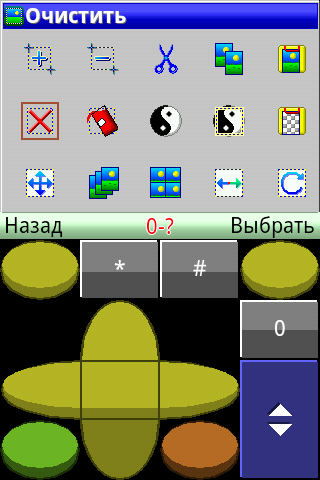
Click “OK” and the picture is clean again (filled with the color of the SC).
Instruments
Click the right software in the drawing window. The tool selection menu appears.

The boring assignment of all 15 instruments
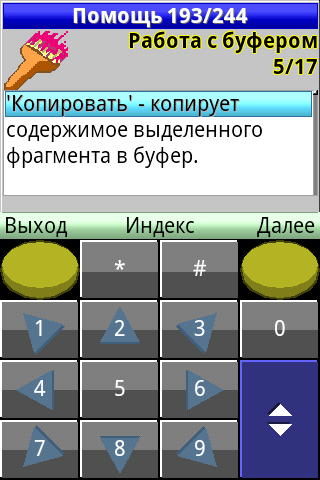
Карандаш: рисует по кнопке «5» пиксель цвета ПЦ под курсором,
Кисть: включается/выключается по кнопке «5», если включена, то при перемещении курсора оставляет за ним след цвета ПЦ.
Инвертор: аналогичен кисти, но оставляет за курсором цвета, обратные тем, которые были в пикселях до этого.
Заливка: обычная заливка по кнопке «5» цветом ПЦ в пределах того цвета, на котором она начала заливаться,
Заливка 2: необычная заливка по кнопке «5» цветом ПЦ, упирается только в точки цвета ЗЦ, остальные заливает цветом ПЦ без разбора,
Линия: прямая линия цвета ПЦ от первой точки по кнопке «5» до второй точки по кнопке «5»
Эллипс: незакрашенный эллипс в пределах прямоугольника, два противоположных угла которого выбираются кнопкой «5» по очереди,
Круг: закрашенный эллипс, аналогично инструменту «Эллипс»
Эллипс 2: незакрашенный эллипс в пределах прямоугольника, центром которого является первая точка по кнопке «5», а углом — вторая точка по кнопке «5».
Круг 2: закрашенный эллипс, аналогично инструменту «Эллипс 2».
Рамка: незакрашенный прямоугольник, двумя противоположными углами которого являются две точки по кнопке «5».
Кывадрат: закрашенный прямоугольник, аналогичен инструменту «Рамка».
Полилиния: рисует прямые линии между точками, указываемыми по кнопке «5».
Треугольник: рисует три прямых линии, образующих треугольник, между тремя точками, указываемыми по кнопке «5».
Текст: запрашивает текст, затем позволяет разместить введенный текст на рисунке с использованием системных шрифтов либо загруженного внешнего файла растрового PCF шрифта (если он был загружен в меню 0-Шрифты до этого).
Select the "Polyline" tool and click "Select" (right software).
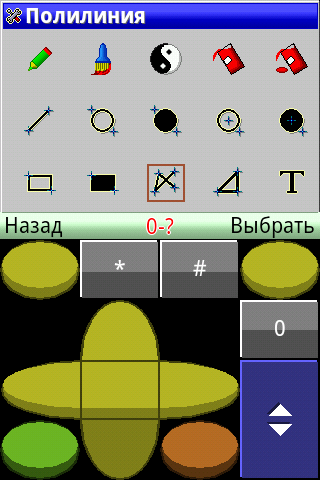
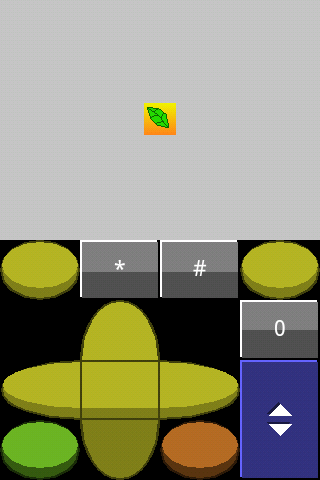
We move the cursor to different points in the picture and press the button "5" - the points will be connected by lines. To start a new polyline, you need to double-click the right software (the first press - calls up the "Tools" menu, the second press - selects the "Polyline" tool with a break of the previous polyline).
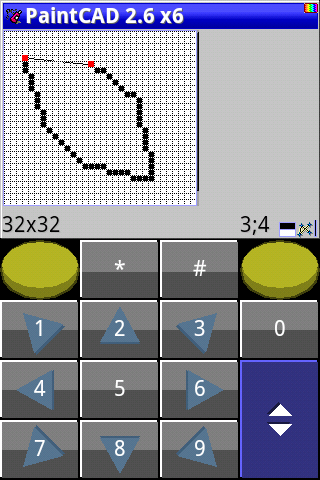
The last press and a closed loop is drawn a la “sheet”.
Palette - Grid Mode and Gradient Effect
Click the left software to go to the palette window. It will open.
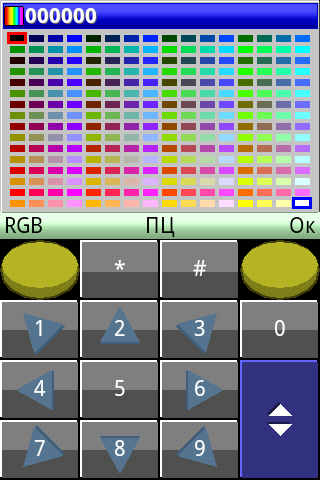
The red frame is the color of the PC. The blue frame is the color of the ZC. In 24-bit mode, you can simply select ready-made colors from the table. And in 8-bit mode, this grid is a palette, in it you can not only select colors, but also edit them.
Switching between the selection of the PC and ZC colors is done by the central button of the joystick. But we just choose a different color to fill our drawing. I choose green for the leaf. To do this, press the numeric arrows on the numeric keypad and move the cursor to green.
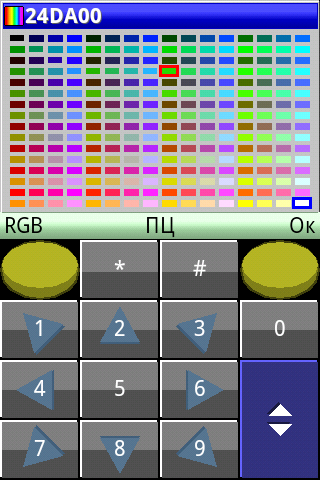
Next, click “OK” and see at the bottom of the window that the selected color is now in the PC.
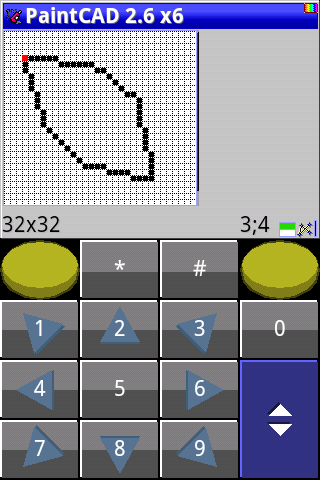
Next, click the right software and select the "Fill" tool.
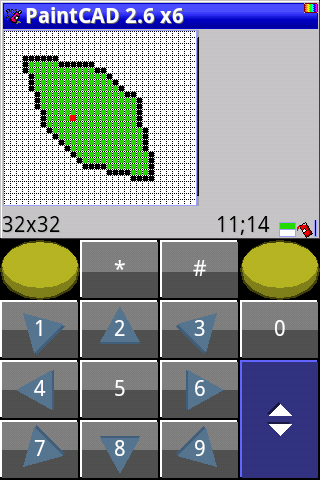
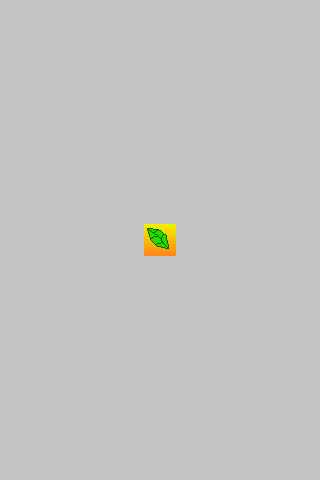
Move the cursor to a closed path, press "5" and the fill will pour green within the black outline of the sheet.
Palette - spectral selection mode
Fill the white gradient background. To do this, select two colors in the colors of the PC and ZC, between which there will be a smooth transition (gradient).
Click the left software and you will get into the grid palette.

Now press "Joy Left" and you will be taken to spectral selection.
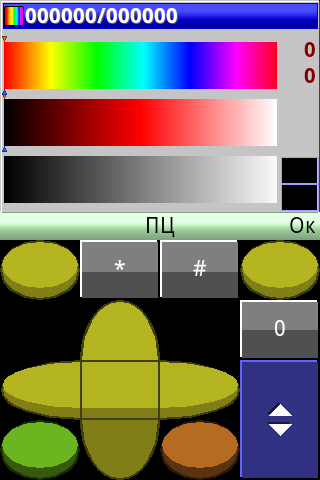
In the spectral selection, you can select the color tone (upper stripe with a rainbow). Press the “1” and “3” keys on the numeric keypad to select a tone. The red arrow moves along the top edge of the strip, showing your choice. I will choose a yellow tint.
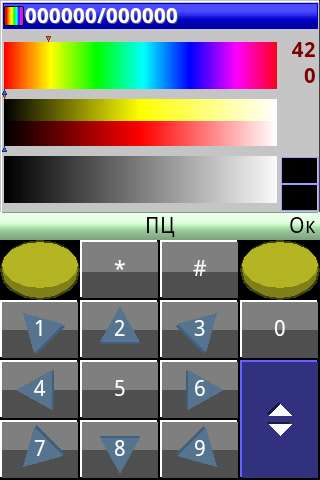
Now in the middle lane you need to select the color brightness from dark to light with the “4” and “6” keys. I will choose yellow medium brightness. It will immediately appear on the right in the color cell of the PC.
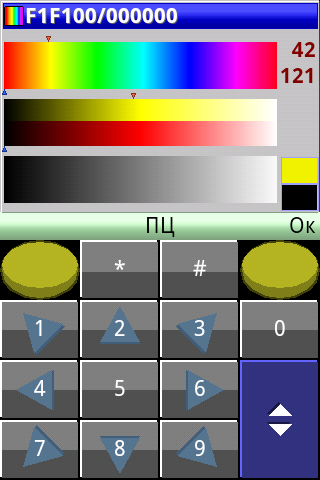
Then press the center button of the joystick on the joystick keyboard. And the inscription at the bottom of the window will change from “PC” to “ZC”. So now you are correcting the color ZTs.
Use the “1” and “3” keys to select a tone, then use the “4” and “6” keys to select a brightness. Only now, not the red arrows, but the blue arrows that are responsible for the LC, move under the stripes. I choose a red tint.

The cells with the selected colors PC (yellow) and ZC (red) are visible at the bottom right of the window. Click the right software (OK). Returning to the main window.

Selected colors appeared at the bottom of the window.
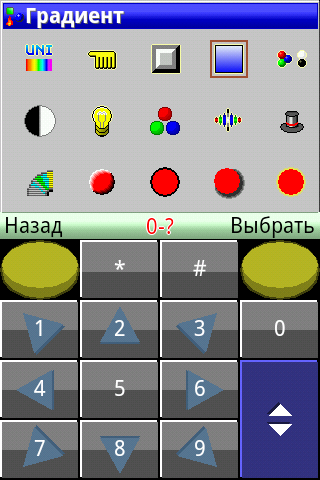
Next, run the gradient effect in the Effects menu. To do this, press the button "*" (asterisk). The Effects menu opens. Move the cursor to the item "Gradient" and select it.
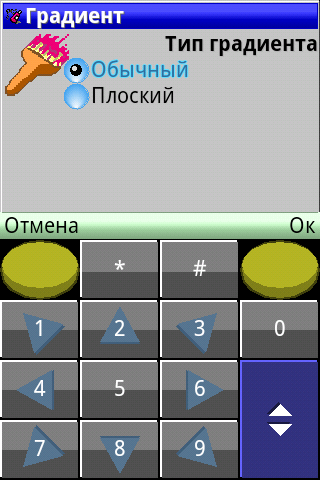
A query comes out like a gradient: plain or flat. Flat is a gradient using only two colors of the PC and the PC without intermediate shades (generated using a mixture of pixels of the color PC and the PC in the required proportions). Select Normal and click on the right software “OK”.
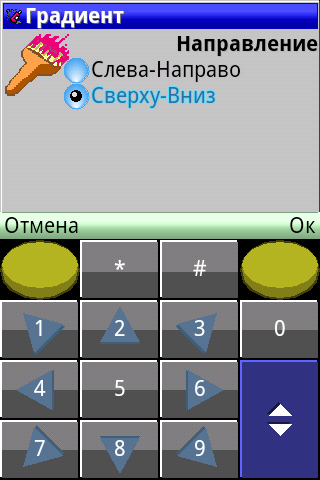
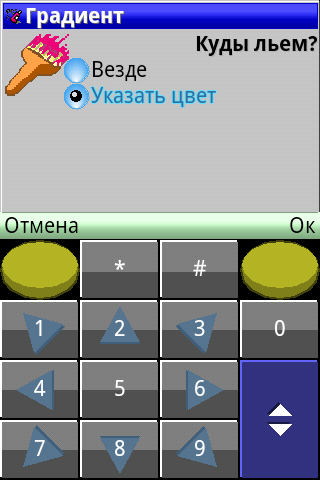
Next, the direction of the gradient is requested. Select "Top-Down" (ie vertical gradient).
Next, the fill location is requested: everywhere within the selection or to a specific color. Because we need to fill in the white background (ie a specific color), then select "Specify Color".
In the figure, without scaling, we roll the cursor with the arrow keys to a white place.
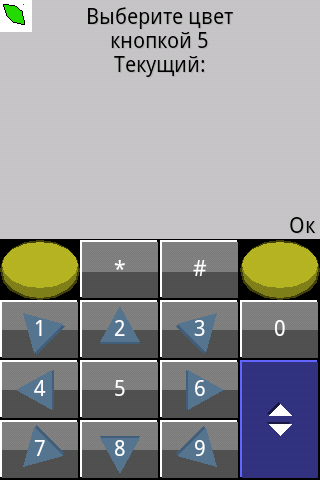
And click "5". PaintCad displays the color that was specified.

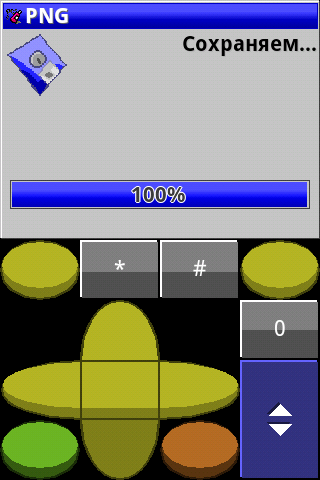
Next, click OK. A window with a progress bar and approximately the remaining time until the end of processing is displayed.
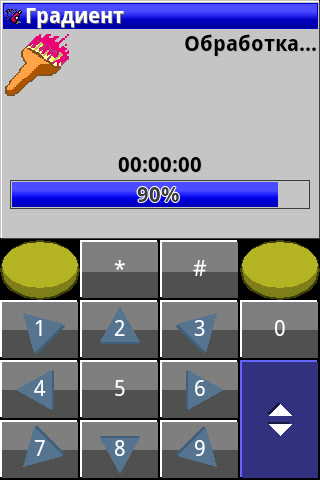
At the end of the processing, it returns to the main window. The gradient is superimposed.
Palette - RGB color selection mode
We draw a sheet of dark green veins. To do this, first place the cursor on the green color of the sheet and press "Joy Down". This will cause the Eyedropper to pick up the color under the cursor in the PC.
Note: if there is already a color in the PC that is under the cursor, then the pipette simply swaps the PC and PC. This allows you to compare the current color of the PC and the color under the cursor (equal or not equal). If they are equal, then the PC and the PC change places and you need to press "JoyVlevo" to change them back. It’s quite convenient when drawing and pixel art.

Now we’ll fit into the RGB palette mode to darken the color. To do this, click "Left software." We will be returned to spectral selection.
We’ll get out of the spectral selection into the grid palette, just as we got in there - by clicking “Joy Left”.
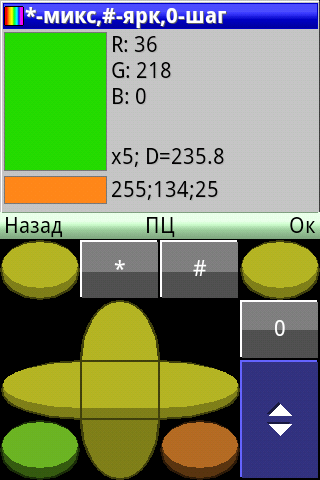
In the grid palette mode, to enter the RGB color editing mode, click Left Soft. The RGB color editing window appears.

Two color cells are drawn in the window: large is the current one being edited, small is the other color. It also displays the value of the R, G, and B components of the current color being edited (above) and a different color component (below).
In the middle, the step of changing the components is displayed (x1 - 1 at a time, x5 - 5 at a time, switched by the "0" button).
And also the color distance (which is "D = 235.8") between the PC and the PC is the square root of the sum of the squared differences of the components. The color distance allows us to understand how far the two colors are, which allows us not to make eye-catching differences in the colors of the picture with pixel art.
A boring list of control keys for the RGB color editing window
Центральной клавишей джойстика можно переключать правку ПЦ и ЗЦ.
Клавишами «1» и «3» можно менять R компоненту цвета. Клавишей «2» обнулить R компоненту цвета.
Клавишами «4» и «6» можно менять G компоненту цвета. Клавишей «5» обнулить G компоненту цвета.
Клавишами «7» и «9» можно менять B компоненту цвета. Клавишей «8» обнулить B компоненту цвета.
* — смешать ПЦ и ЗЦ, положив результат в ПЦ.
# — включить режим изменения цвета по яркости, при изменении одной компоненты — все остальные меняются пропорционально.
0 — переключить шаг изменения компонент между х1 и х5.
ДжойВлево — обменять компоненты цветов ПЦ и ЗЦ местами.
ДжойВниз — скопировать компоненты другого цвета в текущий редактируемый.
ДжойВправо — превратить текущий редактируемый цвет в соответствующий серый эквивалент
So, you need to make green darker.
Press “0” and see in the window in the middle “x5” instead of “x1” - this means that the step of changing the components is now equal to five in one click.
Press the "#" key (pound) in accordance with the prompt in the window title "# -bright". The window goes into editing mode by brightness.
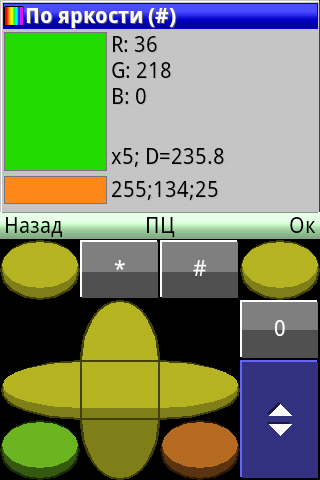
We will reduce the green component of G with the “4” key, 5 units per click. And the rest (R, B) will change proportionally. Briefly pressing “4” reduces G and, as a result, the brightness of all green.
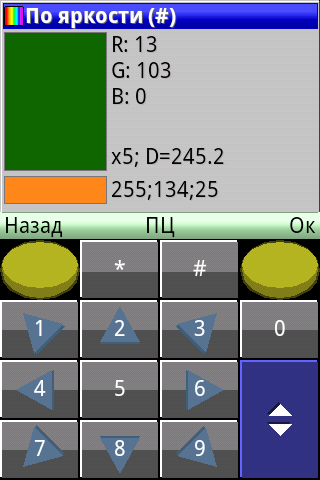
Click OK and return to the main window. We see in the HRC our freshly selected dark green color.

We select a tool, for example, “Pencil”

and draw veins pixel by pixel.
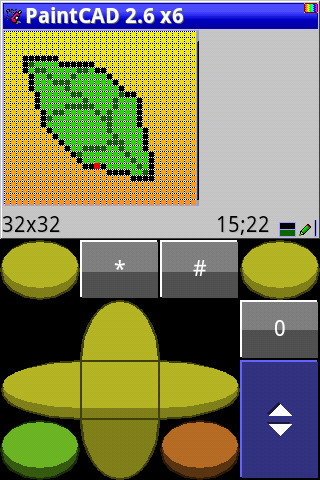
Advanced Color Swap Effect
This effect changes all points of the PC color to the color of the PC within the selection (and the whole picture is selected).
Turn the black outline of the sheet into a dark green outline.
Press “Joy Left” to exchange PC and ZC places in cells.

Now the dark green color has descended into the WZ. And in the PC, an unnecessary red tint that lay there after applying the gradient. Replace it with black.
To do this, roll the cursor to any point on the path and press "Joy Down" (eyedropper). We will see that the PC is now black.
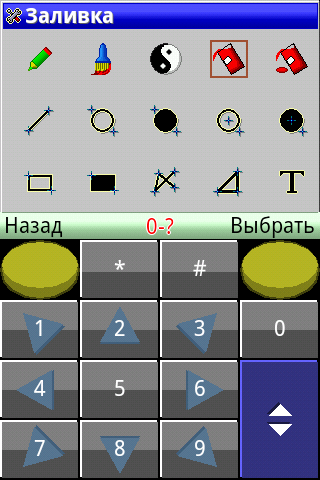
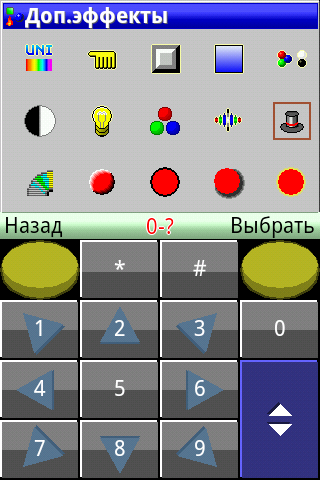
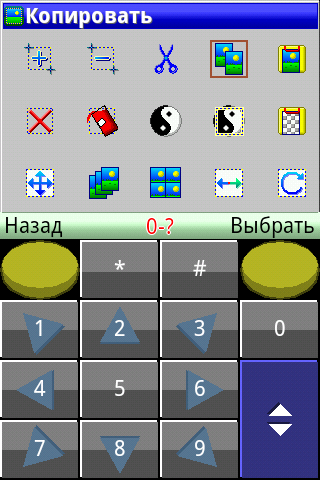
Now let's call the "Color Change". Press "*" (asterisk) to display the Effects menu. And there, select the icon of the magic cylinder with a red ribbon on the right called "Additional Effects."
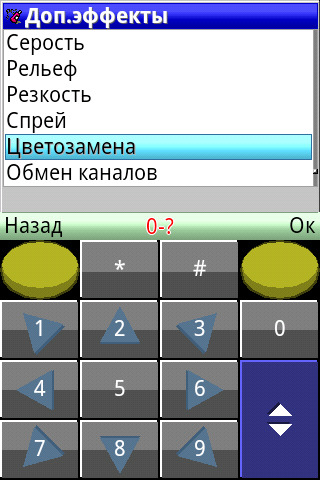
In the Additional Effects menu at the bottom, find and select the “Color Swap” item.
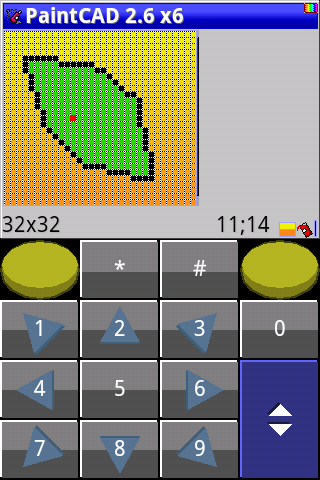
After clicking “OK” and processing the drawing, you will return to the main drawing window.
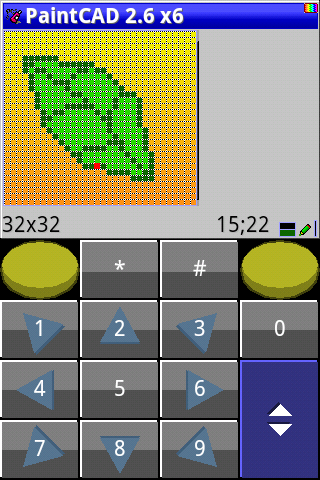
The black outline has turned green.
Preview
Press the red round button on the joystick keyboard. And the preview mode will open. Here, on a 1x1 scale, you can appreciate the beauty of your creation.
If you click on the upper half of the screen (where there is no virtual keyboard), then the virtual keyboard will disappear. So you can appreciate the large drawings.
Click again on any place on the screen - and the virtual keyboard will reappear.
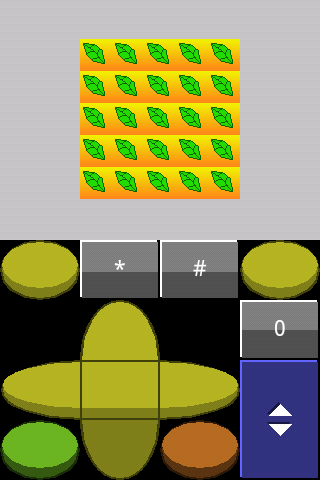
Now click "*" (asterisk) and you can see your picture as an element (tile) of a 5x5 mosaic tile. It’s convenient if you draw textures that fit together or map elements for a 2D game.
Using the “Left Soft” button, you can also switch between a preview of the picture and the buffer (if you previously copied something to the buffer, but we have not copied anything yet).
Press the red round button on the joystick keyboard again to return to the main drawing window.
File save
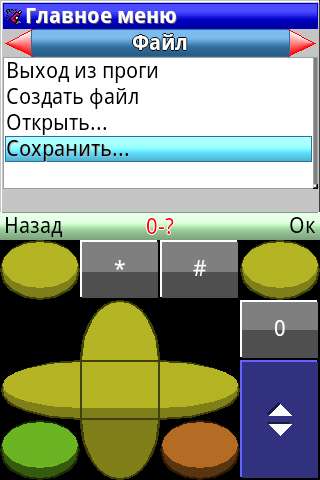
To save the picture as a file, click on the “0” in the main window. In the "File" submenu, select "Save ...".
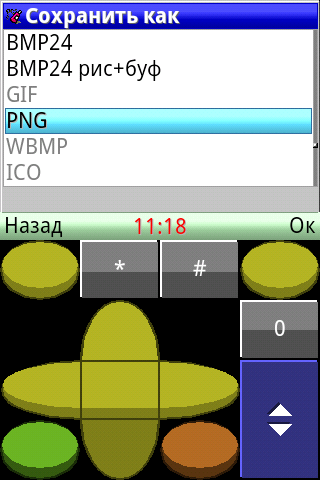
We will save in PNG. Therefore, we select the PNG format in the next window. Gray items are not a demo version or for some money, but simply items working in 8-bit (256 color) drawing mode, and we are now in 24-bit.
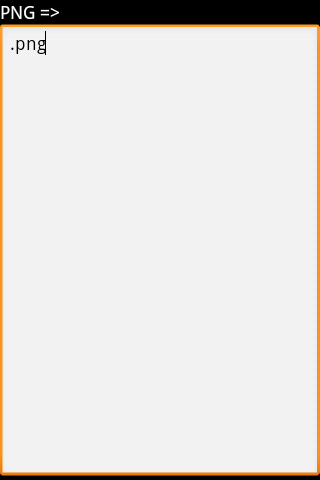
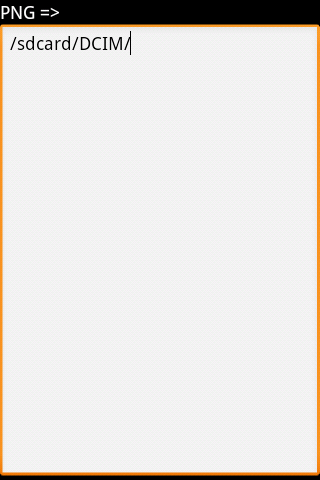
A mysterious window appears with a text input field in full screen. It waits for you to enter Path + File name into it, so the extension ".png" is already entered in it.
In order not to come up with a way - we climb into the built-in file manager. To do this, press the "Menu" button, and if you have a new phone and there is no such button, then long press on the text field - the menu will pop out.
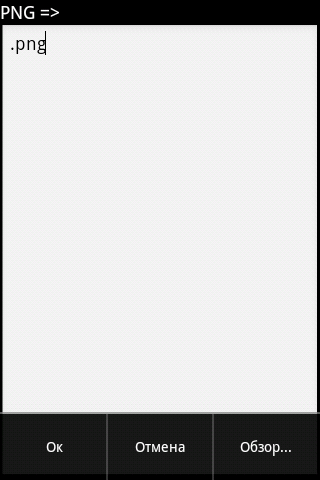
Select "Browse ..." and get into the file manager.
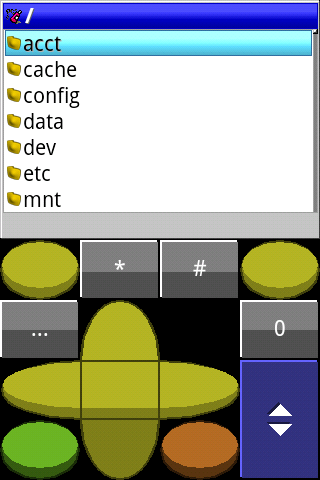
To select disks, you can press "Left" many times and get into the list of disks.
You can also create a new folder, rename the file, etc. To do this, press the "menu" button of your phone or press the "..." button on the virtual keyboard, it is visible in the upper left of the joystick in the screenshot.
We climb into the desired folder, click "..." on the joystick virtual keyboard.
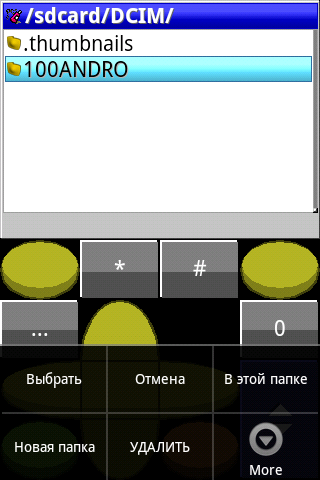
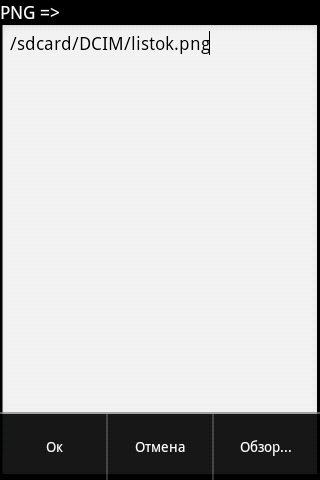
Select the item “In this folder”. You will be returned to the path + file name input field, but the path to the selected folder will be entered there.
Add the file name. Press "Menu" or long on the input field to open the menu.
Click OK. The transparency selection window appears. You can specify “no” for a picture without transparency, or specify a specific fully transparent color, or indicate that you accidentally have an alpha channel exactly the size of the picture in your buffer, then this alpha channel will be used when saving your PNG as a picture with translucency.
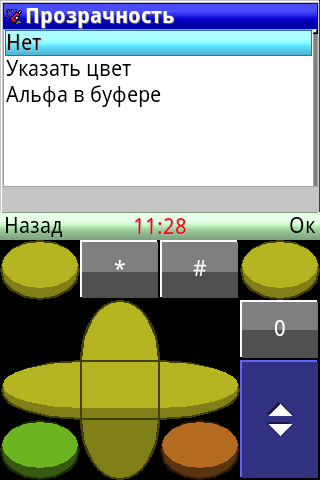
Choose "No." We are waiting for the packaging and saving PNG.
View saved files
After saving or at the subsequent opening of files, you can see the contents of the pictures directly in the file manager. To do this, call, for example, "0" - "File" - "Open ..." - "???" (to easily open the file), in the path + name input field, select in the "Browse ..." menu as did above when saving.
Next, move the cursor to the file.
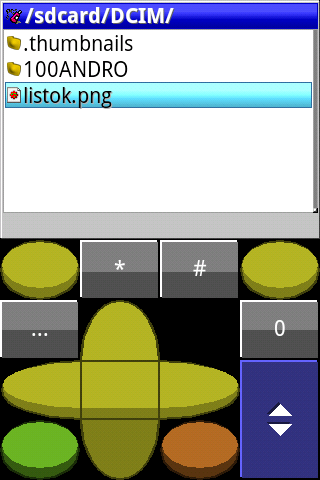
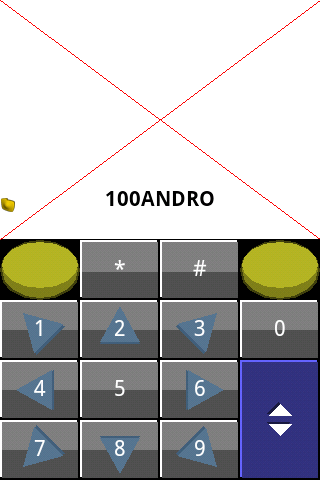
And press "1" on the number pad arrows. The file view mode is activated. For a picture - the picture itself will be drawn on the screen, and the file name and image size in pixels will be written below.

In this case, you can use the navigation keys on files and folders. If the cursor is located on a folder or on a file that cannot be opened as a picture, a screen with red lines crossed is drawn.
Another small video about drawing a simple picture
Conclusion
In this tutorial, only a few of the functions of the mobile paint path have been considered. The description of the functions can be read in the help system integrated in the paint cad in the main menu:
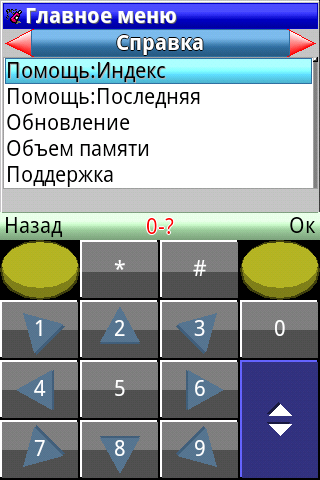
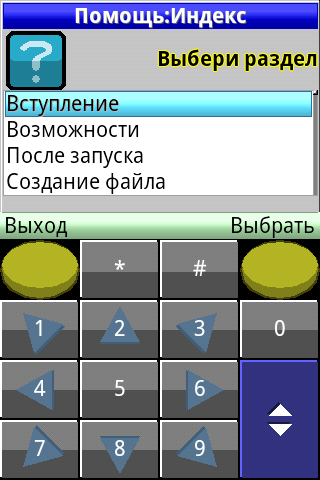
You can also hover over a function in the menu and press “0” to read the context help for this function.
Resources
You can download the free version of PaintCAD Mobile for Android, for example, on Google Play (just enter PaintCAD in the search) or from the official website of the paint path via a direct link (for those who do not have Google Play in their phone): blackstrip.ru/PaintCAD.apk
For those who have some of the latest released phones supporting j2me - you will also have the j2me version of the paintcade: blackstrip.ru/PaintCAD.jar , only it will use the physical keyboard of your phone to control it instead of the virtual one.
There is also a gallery of drawings and animations of users of the paint path: pg.blackstrip.ru
And also - a library of raster PCF fonts: fonts.blackstrip.ru. Load these fonts through "0" - "Fonts" - "Open Font" and then the "Text" tool will work with the downloaded bitmap font instead of the system font.