Beautiful and clean: tools that help achieve near-perfect code

Adil Imran is a programmer who has been working in this field for a long time, sharing experiences, lessons and observations with colleagues in his blog. Adil's new article is about tools that help write beautiful and clean code that works well.
From the author: you want to write good code, but you don’t know where to start, try to read this and that, put it into practice. But still, there are more questions than answers. Do I need to remove the "dead" code? What to do if an unused variable is detected in an already written project? How to find problem patterns and fix it? These questions are important, and many of us are trying to answer them. But the best thing is to do everything well from scratch, so that then you don’t have to look for problem areas and patch holes, losing time. To create a good code there are several tools that can be called indispensable.
Examples that we consider in this article are related to React, although what you read can be applied to almost any web project.
Skillbox recommends: Practical course "Profession web developer . "
We remind: for all readers of "Habr" - a discount of 10,000 rubles when writing to any Skillbox course on the promotional code "Habr".
The entire list of article tools is:
- Prettier
- Eslint
- Automate Format and Lint on Save
- Husky
- Lint-staged
- With Husky and Lint-staged Combined
- Editorconfig
Let's start with Prettier
This tool is a thoughtful code optimizer.
Why is it needed?
Cleans up the ready code. Just imagine that you need to optimize about 20 thousand lines. Prettier does it all automatically and quickly.
It is easy to use and easy to adapt for yourself - several teams work on improving the Prettier, so you can choose the version that is right for you.
If you are a novice programmer who wants to write beautiful code, but do not know where to start, try Prettier.
Installation
You need to create a folder called app, and type the following on the command line inside the folder:
npm init -yThis command will create a package.json file.
Next, we deal with dependencies.
yarn add --dev prettierAfter executing the command inside the file just created, the following appears:
{
"name": "react-boiler-plate",
"version": "1.0.0",
"description": "A react boiler plate",
"main": "src/index.js",
"author": "Adeel Imran",
"license": "MIT",
"scripts": {
"prettier": "prettier --write src/**/*.js"
},
"devDependencies": {
"prettier": "^1.14.3"
}
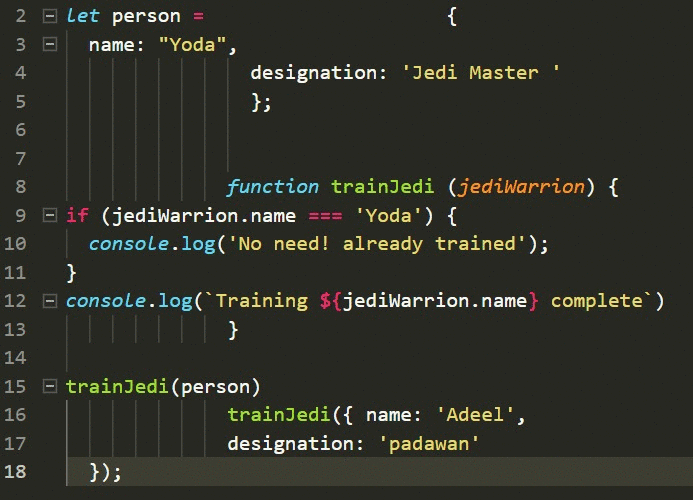
}Next, create a src / folder inside the app folder. And inside the src / index.js file. Actually, you can call him whatever you like, the main thing is to insert this into his body:
let person = {
name: "Yoda",
designation: 'Jedi Master '
};
functiontrainJedi (jediWarrion) {
if (jediWarrion.name === 'Yoda') {
console.log('No need! already trained');
}
console.log(`Training ${jediWarrion.name} complete`)
}
trainJedi(person)
trainJedi({ name: 'Adeel',
designation: 'padawan'
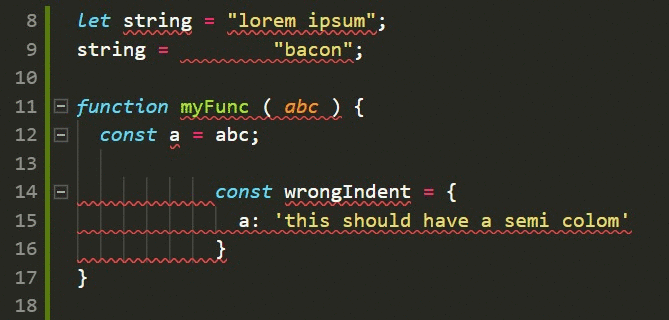
});Now we have src / app / index.js with clumsy code.
You can perform the following operations on it:
- format it manually;
- use automation;
- do nothing (Let things go and move on).
It is better not to choose the third option, otherwise why do we need code optimization tools at all? Let's choose the second option. We have a dependency and a Prettier script inside our package.json file.
Now create prettier.config.js in the app folder.
module.exports = {
  printWidth: 100,
  singleQuote: true,
  trailingComma: 'all',
  bracketSpacing: true,
  jsxBracketSameLine: false,
  tabWidth: 2,
  semi: true,
};
printWidth will make sure that the code does not exceed 100 characters;
singleQuote converts all double quotes to single quotes;
trailingComma will check for the presence of all trailing commas in the code, especially at the end of the last property of the object. This is explained here by
bracketSpacing, which controls spaces in object literals:
If bracketSpacing is true - Example: { foo: bar }
If bracketSpacing is false - Example: {foo: bar}
jsxBracketSameLine работает с форматированием JSX-элемента ">"// true example
<button
  className="prettier-class"
  id="prettier-id"
  onClick={this.handleClick}>
  Click Here
</button>
// false example
<button
  className="prettier-class"
  id="prettier-id"
  onClick={this.handleClick}
>
  Click Here
</button>
tabWidth determines the number of spaces at the indent level.
semi - if true displays; at the end of the statement.
Here is the complete list of options that Prettier can work with.
After the initial configuration is ready, you can do the script.
“Prettier”: “prettier - write src / ** / *. Js”
In the example above, the script searches for all .js files in the src / folder.
-write indicates the need to save optimized files with code.
Let's run the script:
yarn prettier
If you have any problems with an example, then here is the repository where you can find everything ready.
Eslint
This tool analyzes the code in order to help detect problem patterns that do not comply with the rules and standards. It works for most programming languages.
Why is it needed when applied to JavaScript?
Because JavaScript is a fairly loose language, developers often make mistakes. ESLint helps to find problems without executing a written program.
How does ESLint stand out among its peers?
Its easy to customize, it is very flexible. You can add and remove rules if necessary - literally everything is configured. So, you can format the code according to the set of rules that you use.
Now two style guides are most relevant:
- Google JavaScript Style Guide
- Airbnb javascript style guide
As for me, I recommend the second option. It is very popular, you can see this by going to its GitHub .
First let's update our package.json file:
{
  "name": "react-boiler-plate",
  "version": "1.0.0",
  "description": "A react boiler plate",
  "main": "src/index.js",
  "author": "Adeel Imran",
  "license": "MIT",
  "scripts": {
    "lint": "eslint --debug src/",
    "lint:write": "eslint --debug src/ --fix",
    "prettier": "prettier --write src/**/*.js"
  },
  "husky": {
    "hooks": {
      "pre-commit": "lint-staged"
    }
  },
  "lint-staged": {
    "*.(js|jsx)": ["npm run lint:write", "git add"]
  },
  "devDependencies": {
    "babel-eslint": "^8.2.3",
    "eslint": "^4.19.1",
    "eslint-config-airbnb": "^17.0.0",
    "eslint-config-jest-enzyme": "^6.0.2",
    "eslint-plugin-babel": "^5.1.0",
    "eslint-plugin-import": "^2.12.0",
    "eslint-plugin-jest": "^21.18.0",
    "eslint-plugin-jsx-a11y": "^6.0.3",
    "eslint-plugin-prettier": "^2.6.0",
    "eslint-plugin-react": "^7.9.1",
    "husky": "^1.1.2",
    "lint-staged": "^7.3.0",
    "prettier": "^1.14.3"
  }
}
What each option means:
eslint : this is the main tool for working with your own code.
babel-eslint : useful if you are working with Flow or experimental features that are not yet supported by ESLint.
eslint-config-airbnb : this package provides the developer with the configuration of Airbnb's ESLint.
eslint-plugin-babel: companion plugin for babel-eslint.
eslint-plugin-react: optimizes for react.
eslint-plugin-import: allows you to work with the syntax of ES2015 + (ES6 +) import / export.
eslint-plugin-prettier: optimizes the interaction of ESLint with Prettier.
With basic things done, let's get started. For example, create a .eslintrc.js file in the app / folder.
module.exports = {
env: {
es6: true,
browser: true,
node: true,
},
extends: ['airbnb', 'plugin:jest/recommended', 'jest-enzyme'],
plugins: [
'babel',
'import',
'jsx-a11y',
'react',
'prettier',
],
parser: 'babel-eslint',
parserOptions: {
ecmaVersion: 6,
sourceType: 'module',
ecmaFeatures: {
jsx: true
}
},
rules: {
'linebreak-style': 'off', // Don't play nicely with Windows.
'arrow-parens': 'off', // Incompatible with prettier
'object-curly-newline': 'off', // Incompatible with prettier
'no-mixed-operators': 'off', // Incompatible with prettier
'arrow-body-style': 'off', // Not our taste?
'function-paren-newline': 'off', // Incompatible with prettier
'no-plusplus': 'off',
'space-before-function-paren': 0, // Incompatible with prettier
'max-len': ['error', 100, 2, { ignoreUrls: true, }], // airbnb is allowing some edge cases
'no-console': 'error', // airbnb is using warn
'no-alert': 'error', // airbnb is using warn
'no-param-reassign': 'off', // Not our taste?
"radix": "off", // parseInt, parseFloat radix turned off. Not my taste.
'react/require-default-props': 'off', // airbnb use error
'react/forbid-prop-types': 'off', // airbnb use error
'react/jsx-filename-extension': ['error', { extensions: ['.js'] }], // airbnb is using .jsx
'prefer-destructuring': 'off',
'react/no-find-dom-node': 'off', // I don't know
'react/no-did-mount-set-state': 'off',
'react/no-unused-prop-types': 'off', // Is still buggy
'react/jsx-one-expression-per-line': 'off',
"jsx-a11y/anchor-is-valid": ["error", { "components": ["Link"], "specialLink": ["to"] }],
"jsx-a11y/label-has-for": [2, {
"required": {
"every": ["id"]
}
}], // for nested label htmlFor error
'prettier/prettier': ['error'],
},
};
Add the .eslintignore file to the app / folder.
/.git
/.vscode
node_modules
What does the .eslintrc.js file do?
Let's get a look:
module.exports = {
   env:{},
   extends: {},
   plugin: {},
   parser: {},
   parserOptions: {},
   rules: {},
};
env: the environment defines global variables that are already predefined. Available environments in our case are es6, browser and node. Es6 will make ECMAScript 6 features available except modules. Browser will add all global variables, such as Windows. Respectively node will add all global variables Node.
extends: array of strings - each additional configuration extends the previous ones. Right now we are using linting-rules with airbnb, which expand to the jest and then the jest-enzyme.
Plugins: these are the basic linting rules we want to use. We work with babel, import, jsx-a11y, react, prettier and all that I indicated above.
parser: by default ESLint uses Espree, but since we are working with babel, you need to useBabel-eslint .
parserOptions: when we change the default parser for Espree to babel-eslint, we need to specify parserOptions.
rules: we can change or replace any rules here.
If everything is clear, let's talk about .eslintignore. This option helps to specify all paths that do not need to be processed using ESLint. I use only three such paths:
/.git - when I don’t want to affect my git-files
/.vscode, because I work with VS Code, and this editor has its own configuration, which needs to be checked for each project and I don’t want to go into it here.
node_modules — I don’t touch the dependencies either, so I added them to the list.
With this all, let's talk about the newly added scripts for our package.json
"lint": "eslint --debug src /"
"lint: write": "eslint --debug src / --fix"
$ yarn lint - launching this command, you check all your files in src /, you end up with a detailed log describing the problem areas in each file, where errors will be found, which you can then manually start and fix.
$ yarn lint: write - this command does roughly the same thing as the previous one. The only difference is that here yarn already has the right to write - the command corrects errors by removing them from the code.
So, well, if you held out until that moment, then honor and praise you.

Husky
Well, here you can perform some actions during a commit or push code to a branch.
All you need is just to install Husky:
yarn add --dev husky
Next, add a snippet to the package.json file:
"husky": {
   "hooks": {
     "pre-commit": "YOUR_COMMAND_HERE",
     "pre-push": "YOUR_COMMAND_HERE"
   }
},
Now every time during a commit or push, the snippet will launch the execution of a specific script or command, for example, a code formatting command.
Lint-staged
Helps prevent bad code from getting into your git branch.
Why Lint-staged?
Verification of the code in most cases should be done before the commit. This way you can prevent errors from entering the repository and improve the overall quality of the program. But the launch of lint for the whole project is a rather slow process, and the results of processing can be irrelevant. In the end, you only need to process the files that you want to commit.
All you need to do is install the project:
yarn add --dev lint-staged
Next add this to the package.json file:
"lint-staged": {
   "*.(js|jsx)": ["npm run lint:write", "git add"]
},
So you run lint: write, then add it to the range area. The command works for .js & .jsx files, but you can do the same for other files if you want.
Combine Husky and Lint-staged
Every time you commit your code, a script called lint-staged is run. It initiates the execution of npm run lint: write, which allows you to check and format the code. Then the already verified code falls into the range area and the commit is executed.
The final package.json file should look like this:
{
  "name": "react-boiler-plate",
  "version": "1.0.0",
  "description": "A react boiler plate",
  "main": "src/index.js",
  "author": "Adeel Imran",
  "license": "MIT",
  "scripts": {
    "lint": "eslint --debug src/",
    "lint:write": "eslint --debug src/ --fix",
    "prettier": "prettier --write src/**/*.js"
  },
  "husky": {
    "hooks": {
      "pre-commit": "lint-staged"
    }
  },
  "lint-staged": {
    "*.(js|jsx)": ["npm run lint:write", "git add"]
  },
  "devDependencies": {
    "babel-eslint": "^8.2.3",
    "eslint": "^4.19.1",
    "eslint-config-airbnb": "^17.0.0",
    "eslint-config-jest-enzyme": "^6.0.2",
    "eslint-plugin-babel": "^5.1.0",
    "eslint-plugin-import": "^2.12.0",
    "eslint-plugin-jest": "^21.18.0",
    "eslint-plugin-jsx-a11y": "^6.0.3",
    "eslint-plugin-prettier": "^2.6.0",
    "eslint-plugin-react": "^7.9.1",
    "husky": "^1.1.2",
    "lint-staged": "^7.3.0",
    "prettier": "^1.14.3"
  }
}
Now every time you do this
$ git add.
The $ git commit -m "some descriptive message here"
code will be formatted automatically based on the rules in the .eslintrc.js file.
Let's talk about EditorConfig
First, create the .editorconfig file in the app / directory. Insert the following code into it:
# EditorConfig is awesome: http://EditorConfig.org# top-most EditorConfig fileroot = true
[*.md]
trim_trailing_whitespace = false
[*.js]
trim_trailing_whitespace = true# Unix-style newlines with a newline ending every file
[*]
indent_style = space
indent_size = 2
end_of_line = lf
charset = utf-8
insert_final_newline = true
max_line_length = 100
Here is a list of editors that support the work of EditorCondig . The list includes the following - Web storm, App code, Atom, eclipse, emacs, bbedit.
The code above does this:
- Cut spaces from .md and .js files.
- Sets the indent style instead of spaces.
- Sets the indent size to 2.
- Leads the end of the line to a single standard.
- Adds a new line to the end of the file.
- Sets the string length to 100 characters.
Actually, now everything is ready. If you need source code, here it is .
Skillbox recommends:
- Online course "Profession frontend-developer"
- Practical course "Mobile Developer PRO" .
- Practical annual course "PHP-developer from scratch to PRO" .