Deploying a Linux distribution with SCCM 2012

There was a need for mass deployment of the Linux user system image (using xUbuntu 14.04 as an example) through System Center 2012 Configuration Manager. Microsoft’s official answer to technet that it’s impossible and in general, SCCM was designed for Linux to maximize the deployment of applications, and vague instructions were somewhat inaccurate or wasteful on resources, a solution was found empirically.
For those who still decided to step on this difficult (very very easy) way, I ask you to go under the cat.
Of the third-party programs, we need only dd for dos . The rest can be done using standard linux and SCCM tools.
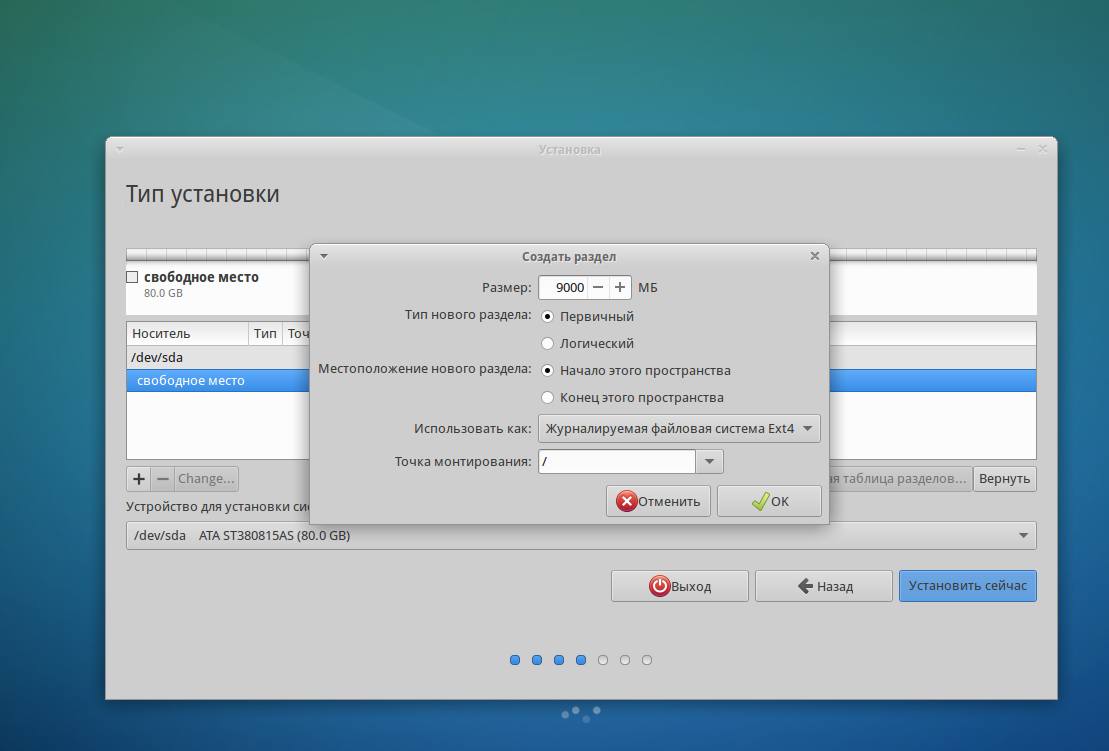
First you need to understand what size of the image we need and what size we are ready to allocate accordingly on the server (by the way, the average win 7 x64 image with installed software weighs about 10GB). We will use the standard dd utility for installation, which byte copies the contents of the entire hard disk or its partition. I used an 80GB hard drive and allocated a 9GB partition for the system without swap.

After installation, the system can (and should) be customized to the needs of users (install software, configs, etc.), the image will be removed from the configured system, I did not test the entry to the domain before the cloning stage, after 15 seconds the computer is entered into the domain with a simple script after installation .
After setting up, you will need to boot from the installation media again. The image can be copied to an external drive, or to a network share if the computer is connected to a local network:
Create a folder for mounting and mount the network share (-o if access to the share requires a username and password)
mkdir cm
mount -t cifs //сетевой путь к шаре /cm(папка которую мы создали) -o user=имя_пользователя,pass=пароль
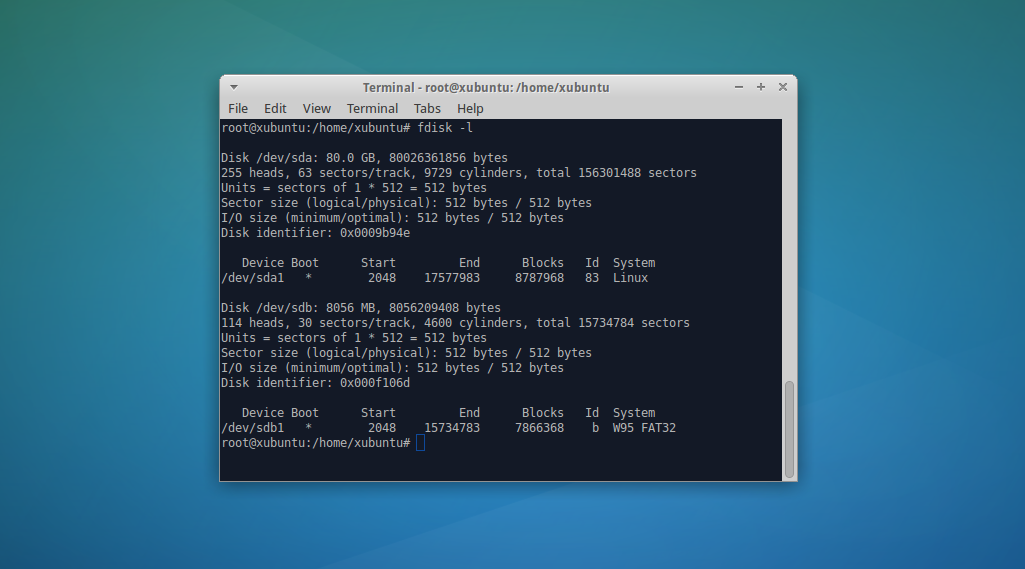
Now you need to decide on the correct image copy. Use the fdisk command to get partition information.
fdisk -l

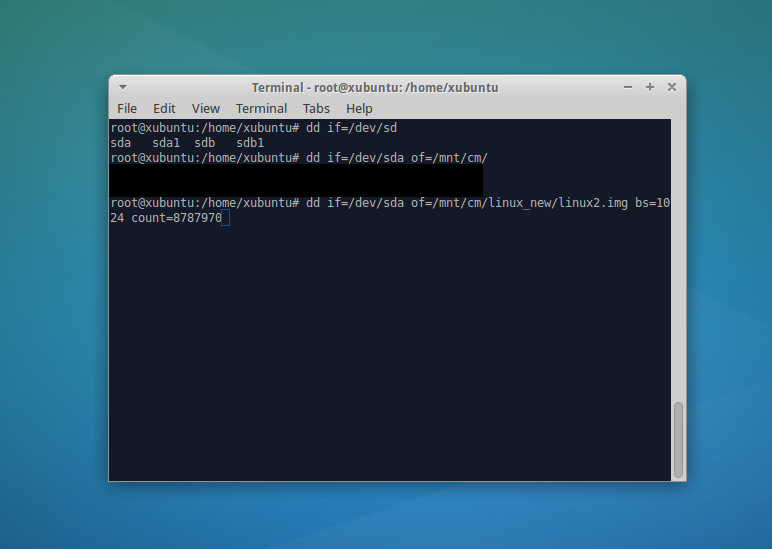
The most important part is the following - we use the dd command to copy the disk by specifying bs = 1024 (the number of bytes at a time) and count = 8787970 (this number was obtained from the number of passes of 1024 bytes to match the size of the partition we want to clone + 2 since the section starts with 2048 bytes, and we need the first bytes to save the disk layout). The difference with other methods is that if you make a separate copy of the partition, the boot loader does not get up and there is a chance that the markup will break, and making a copy of the entire disk is unprofitable in the occupied space. Thus, we will be able to keep the image size minimally necessary and at the same time we will have a full-fledged copy of the HDD without any problems deployed on any disk larger than the image size.
dd if=/dev/sda of=/путь_до_директории_на_другом_диске/имяобраза.img bs=1024 count=8787970

To monitor the status of dd, use the command in the new terminal:
watch -n5 'sudo kill -USR1 $(pgrep ^dd)'

After completion, we move on to SCCM 2012. You need to create a new task sequence (select custom task sequence). First of all, we’ll go over to the parameters of the sequence we created and it is necessary to select the boot image to use (I use the x86 image).
We proceed to editing the sequence itself. To begin with, we mount the folder on the ball as a virtual disk that will be used to deploy xubuntu (there should be a dd for the dos, the diskpart config and the system image (add Connect to Network Folder):
The next step is to clear the disk layout, the contents of diskpart.txt (select Run Command Line): And the final step is to deploy the system to disk (select Run Command Line):
select disk 0

clean
z:\dd if=z:\linux.img of=\\?\Device\Harddisk0\Partition0 bs=1024
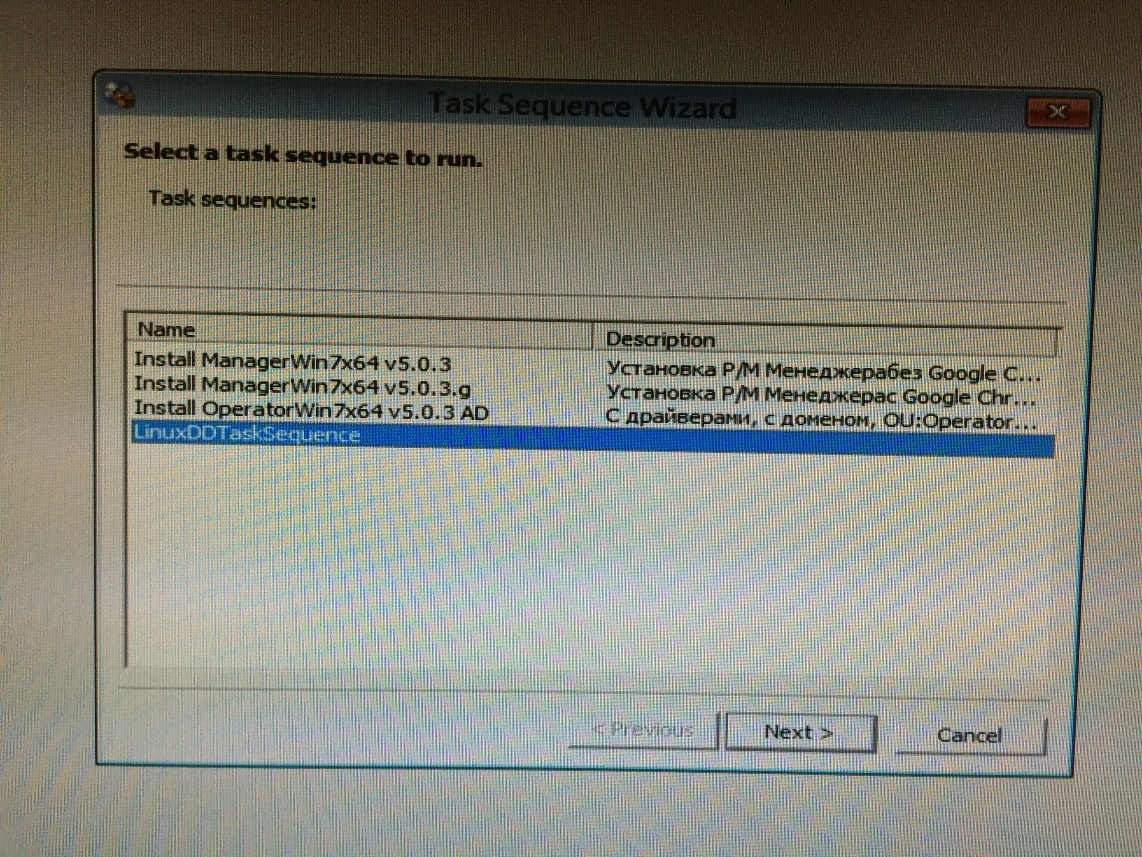
Now, when everything is prepared, we boot through the network to the boot image and select our task sequence:
Beware jackals


That's all, the image can be deployed to an unlimited number of machines and without special labor and resource costs through SCCM.
