Tricks of work in Blender. Part 2
In the preview, you don’t need to render the entire working window.
When you look from the camera, the preview even renders that area of the screen that does not fall into the camera. This is unnecessary computer work.

You can set your own render area size by pressing Ctrl + B (Render Border) in the working window . Reset dimensions of this portion Ctrl + Alt + B .
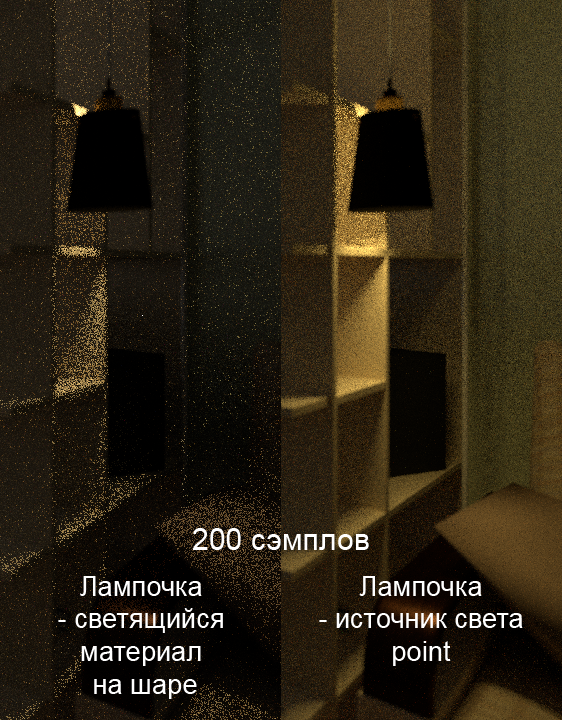
When I first saw that in Cycles the material not only glows itself, but also illuminates everything around, I thought that lamps as a class of objects are no longer needed. I was wrong.
In complex scenes, the light source (Lamp> Point)gives quality much better than an object with a luminous material. Note that the light source has a size setting (next to the brightness setting).
Pay attention to the OpenEXR format.
It allows you to save the image in 32 bits (usually 8 bits). With Photoshop, you can return the overexposed details. Open the rendered frame in Photoshop and convert it to 8 bits. When translating, a dialog appears in which you can adjust the brightness.
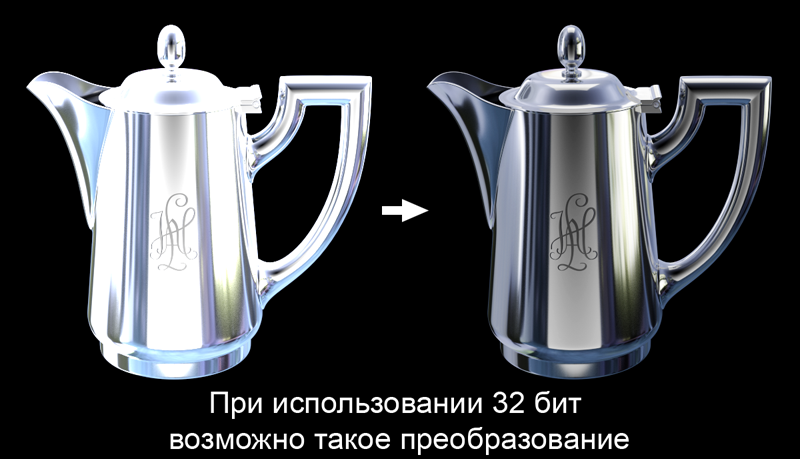
We cannot see at the same time the entire range of brightness that nature offers us. But the full range of brightness can be saved and corrected after rendering.
Why doesn't the Bevel modifier work?
Because Bevel often gets queued after the Edge Split modifier. At first, this is not obvious. It is necessary to change places.
You can animate almost any parameter or daw.
For example, you need the object to be in the first frame and disappear in the second.
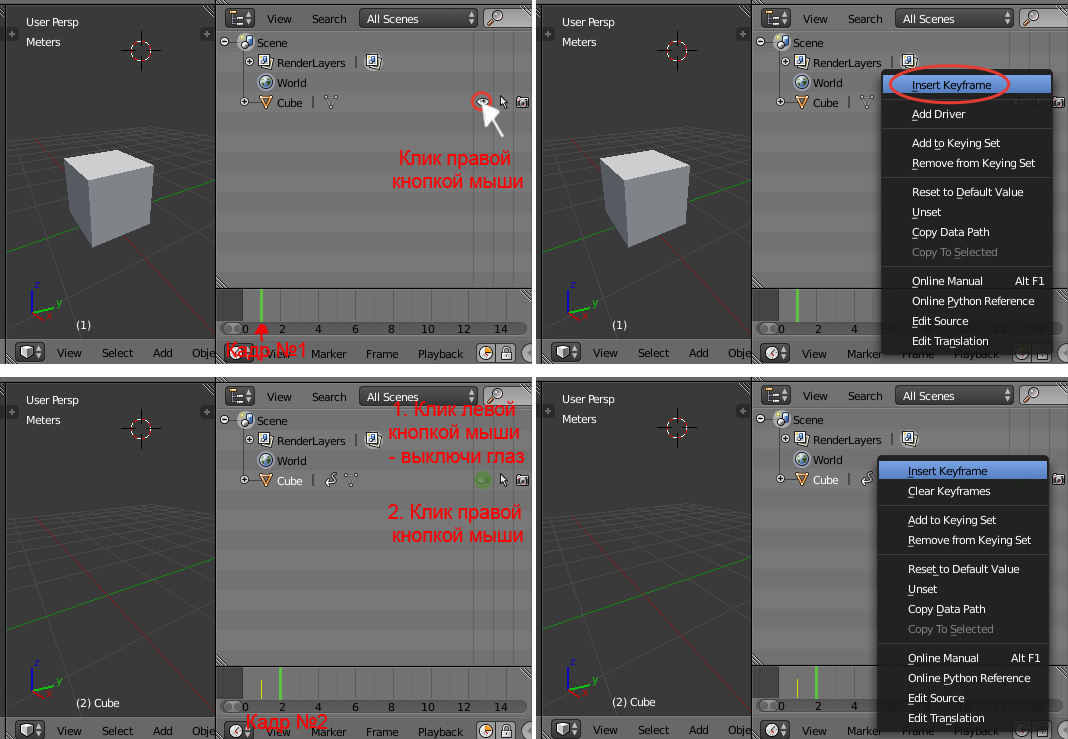
As a result, the animation of the disappearance of the cube. Please note - disappearance in the working window, and not during rendering. The camera icon is responsible for visibility when rendering.
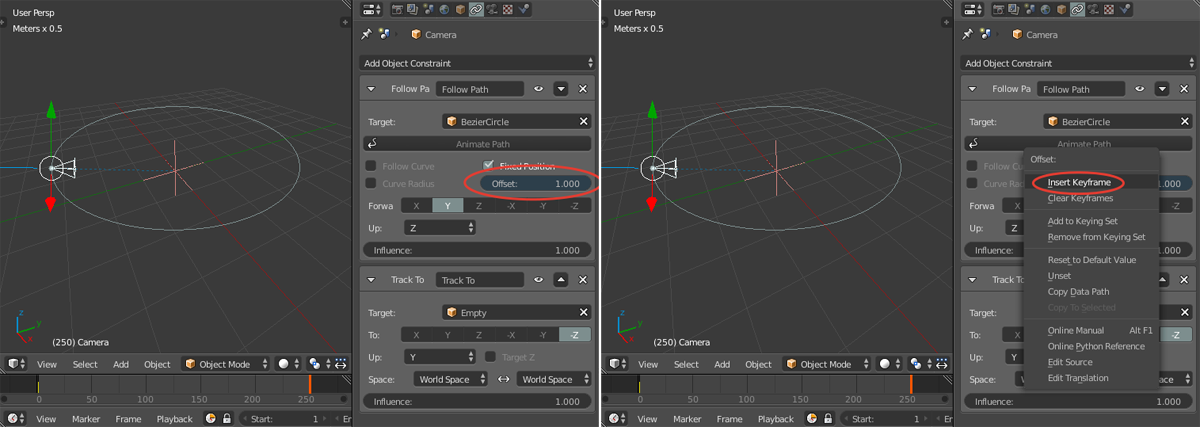
You can also animate sliders:
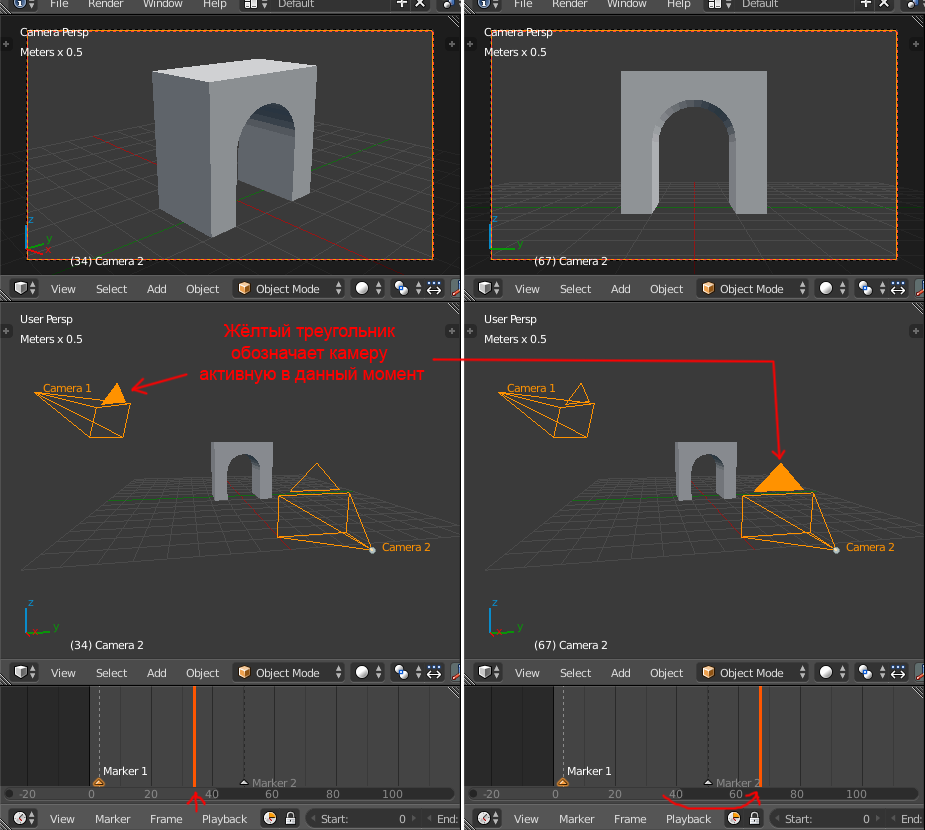
Switch cameras
- 0 (zero) (numeric keypad) - view from the active camera
- Ctrl + 0 (zero) (numeric keypad) - view from the selected camera. Makes this selected camera main, i.e. active. You can also watch from objects and light sources.
Switch cameras in animations
- In the working window we create cameras and arrange them.
- In the timeline window, press M (Marker) and add markers where we want to switch cameras.
- Choose a camera. Select a marker. In the timeline window, press Ctrl + B (Bind Camera to Markers) . We do this with every camera.
You should get something like this:
Using materials based on their number
. For example. There is a lamp cover. Outside it is black, and inside it is white. And yet the cap has a metal thickness.
- Modeling the outer shell
- Apply the Solidify modifier (Thickness)
- We create 3 materials: external (black), internal (white), metal edge (blue)

The render farms that I use
RayPump - with one click the scene is sent to the network and the result is automatically downloaded. Each day, 80 conventional monetary units are given for which 3 pictures can really be counted for free. Quality limit of 200 samples. Resolution maximum 1280x720. The fact that I have an hour, it counts a couple of minutes. There is no watermark. A small render farm logo is placed in the corner and does not spoil the image. You can put money and render without restrictions.
Sheepit-Renderfarm is a distributed freeware render farm. Everyone helps everyone. For helping others, a rating is assigned that determines the priority of your scenes in the queue.
How to set up automatic scene rendering on multiple machines?
Set up the scene:
- Assign a path to the rendered frames folder. It should be relative i.e. dance from the scene folder, not from the root of the disk.
- Uncheck Overwrite - prohibit replacing already created frames.
- Checkbox Placeholders put - when the frame is taken into processing, a fake file is created that simulates the created frame.

- You don’t need to copy the scene to each car. We open access over the network to the folder with the scene.
- The blender cannot open network folders with its own dialog. We open the scene through the explorer of the operating system and render.
- It happens for various external reasons that some frames are not calculated. It is usually easy to sort these frames in the explorer by size in megabytes. Defective frames have a small size. You just need to throw them out and start the render again, the machines themselves will fill in the gaps.