How to solder “bridges” and chips on motherboards using a soldering station
When disassembling their first computers, many saw different "bridges" - south, north, graphics chips, and often thought: how is it soldered and, most importantly, what? And those who dared to try it themselves with a soldering iron, then carried their motherboards to the service, where they soldered a new chip, unless, of course, they killed their entire motherboard with their home soldering. So, how are the chips soldered? Under the cut story, as well as photos and videos about it. The main role will be played by the ERSA IR550a soldering station.
First we solder the old chip. For this, it is heated by the station to the desired temperature. Select the desired profile in the management (there are several for different types of soldering).
The station has two “heads” - one for soldering / soldering something, the second for cooling.
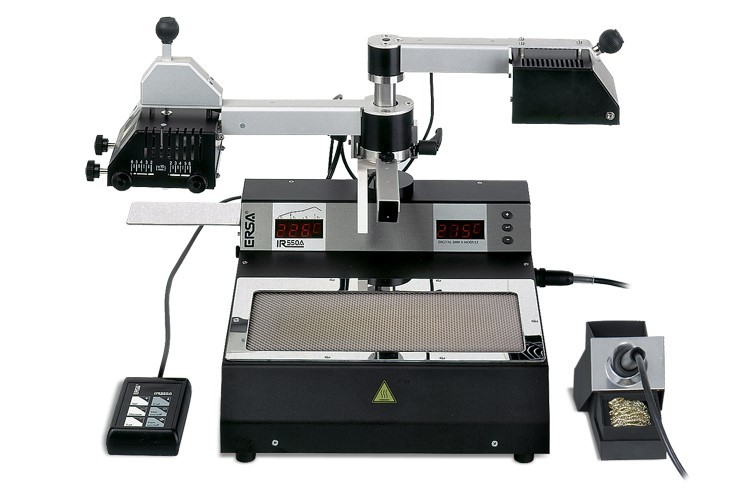
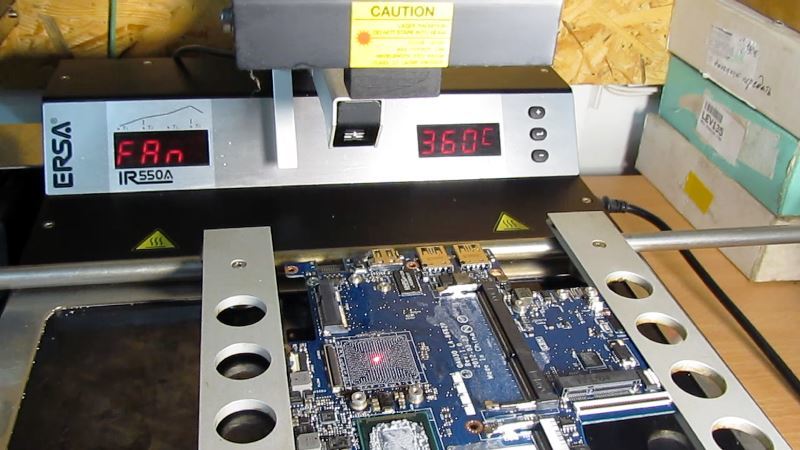
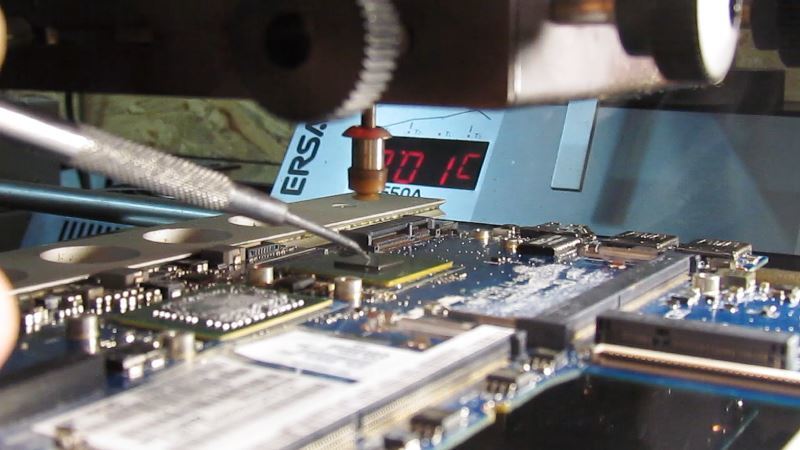
We set the “head” of the soldering station over the desired chip so as not to miss - the point of the “sight” of the station is indicated with a red laser.

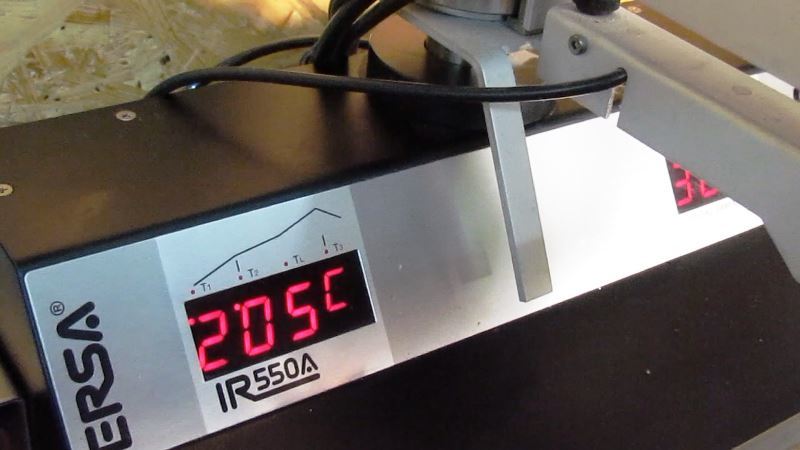
The station begins to warm the chip.
When the temperature reaches 200+ degrees, lower the suction cup, grab the chip and remove it.
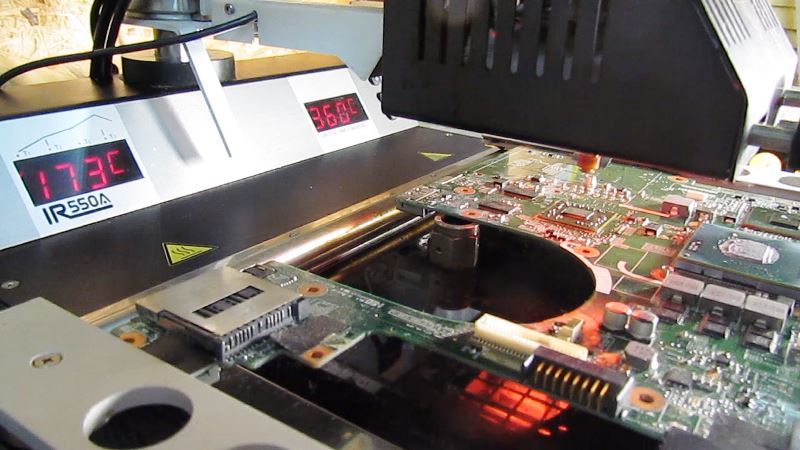
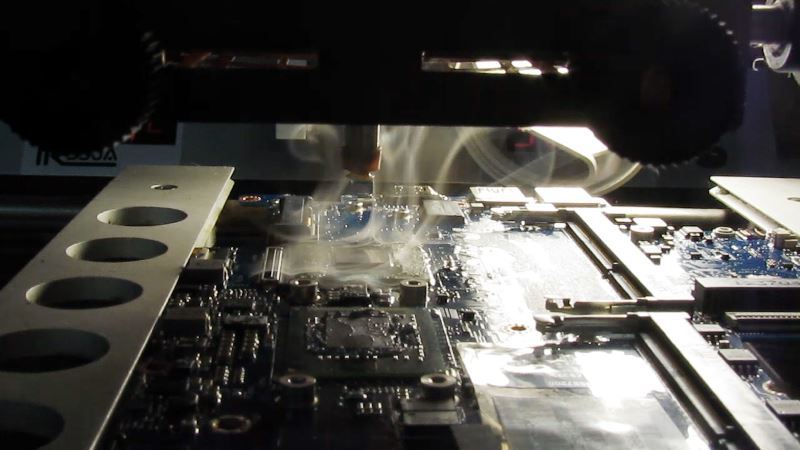
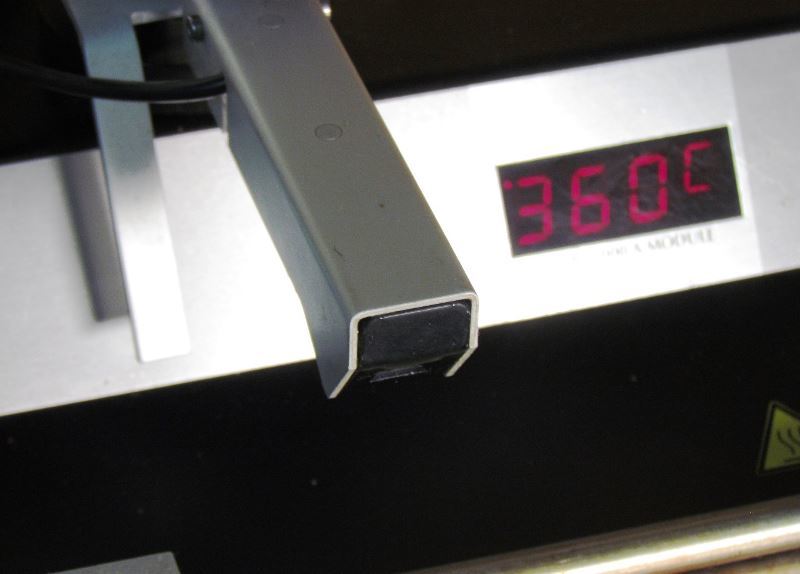
Smoke is visible due to the chip being soldered. (360 is the temperature of the auxiliary soldering iron, which stands next to the station).
Chip capture.
We transfer it to the site.
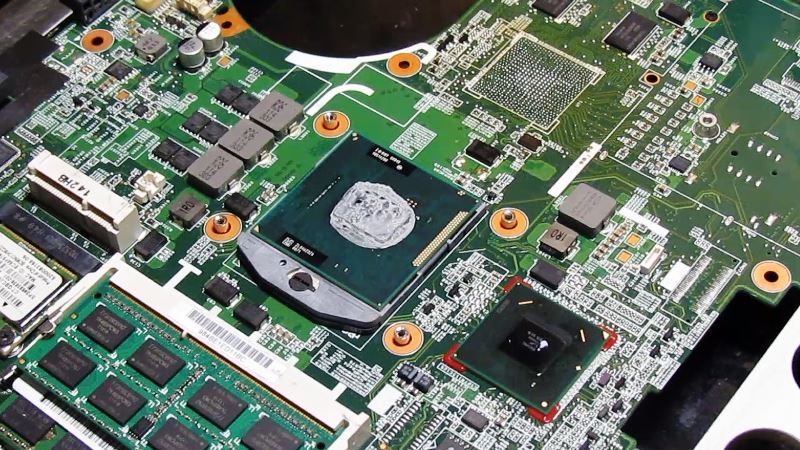
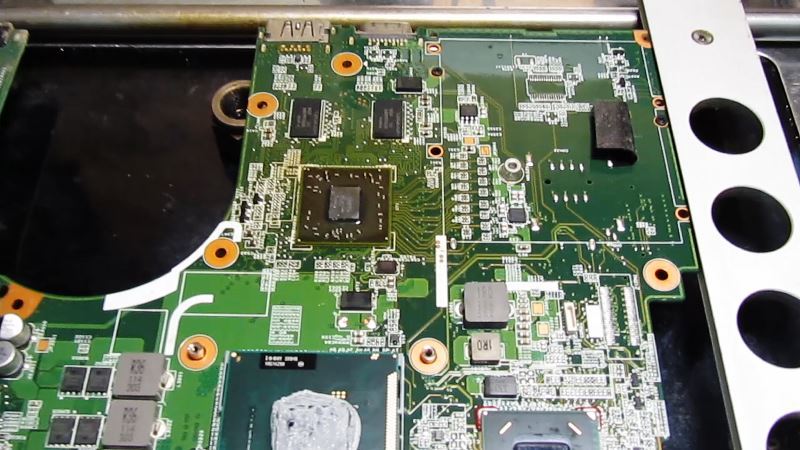
Here is a shot of the chip.

After that, we put a cooling head over the place where the chip was and the fan automatically turns on to cool the board, since it is understood that the less time the board is heated, the better. This station has very tight temperature control during the entire soldering process.
Thermal sensor for monitoring the temperature over the entire surface of the motherboard.
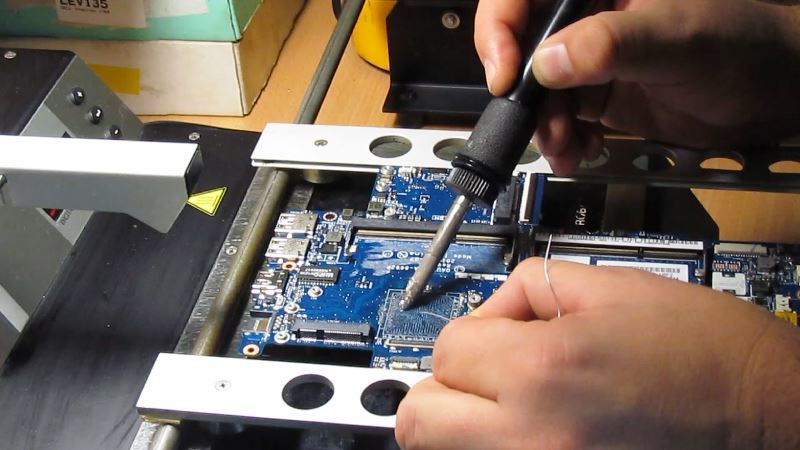
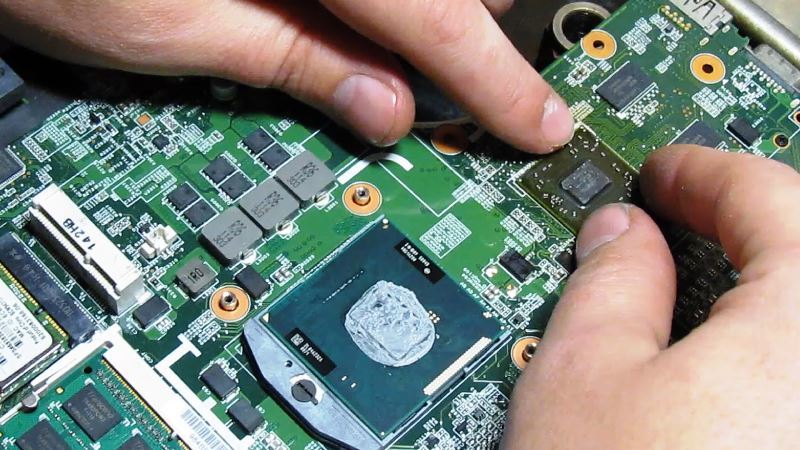
Now we are preparing a board for soldering. We remove the compound. Video process.
Then you need to clean the area under the chip (the area above the processor).
Here is a video about preparing the site.
You also need to make a reboot of the chip. Those. so that balls appear on the place of contacts that will be soldered into the seat on the board. This is a separate operation, about this video:
After the contact balls of the chip are ready, we expose it strictly by mask. Even a micron matters - you can ruin the chip if you don’t get into the connectors.
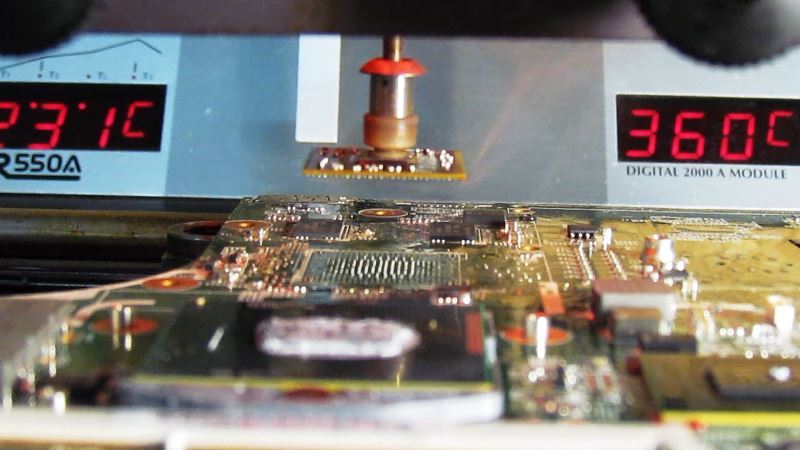
Then we begin to solder. As usual - select a soldering profile. We move our head for soldering, direct the rays strictly to the chip, and soldering is switched on.
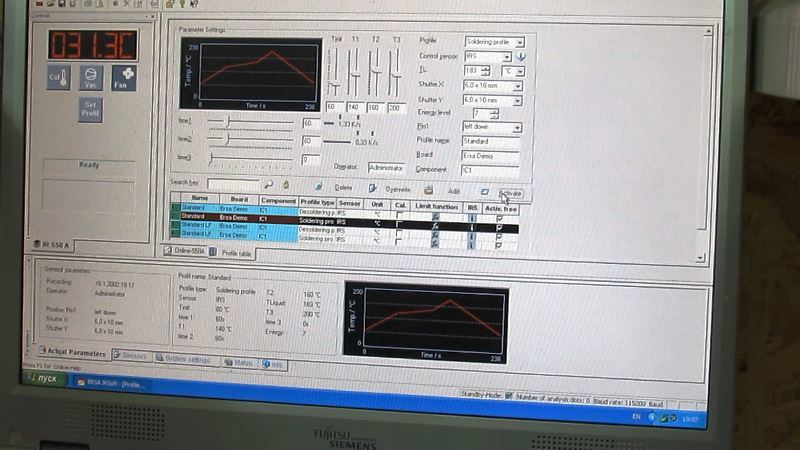
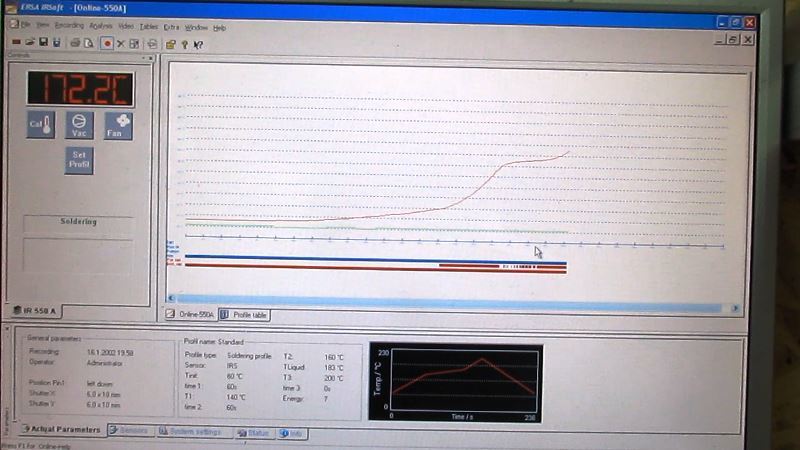
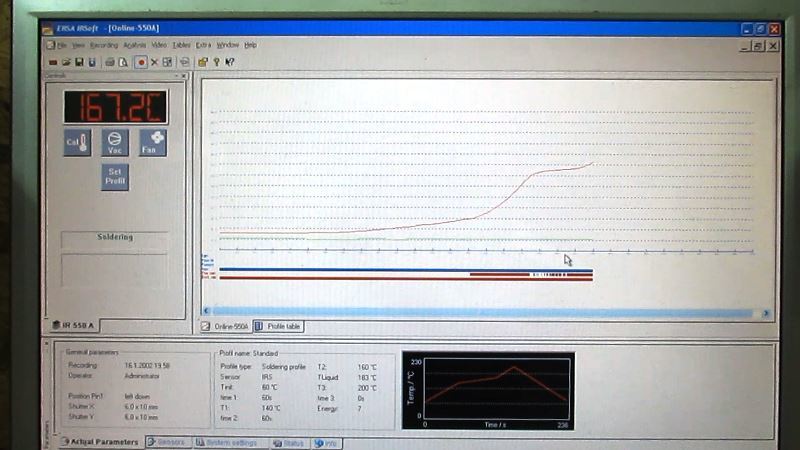
First, the lower part is heated, and it heats a strictly allocated space under the chip, and does not warm the entire surface, otherwise there would be a risk of failure of the entire board. When using the PL550A on the screen, you can observe the type of soldering in real time. Here we see the increase in temperature on the graph.
Red is the graph for heating the bottom panel.
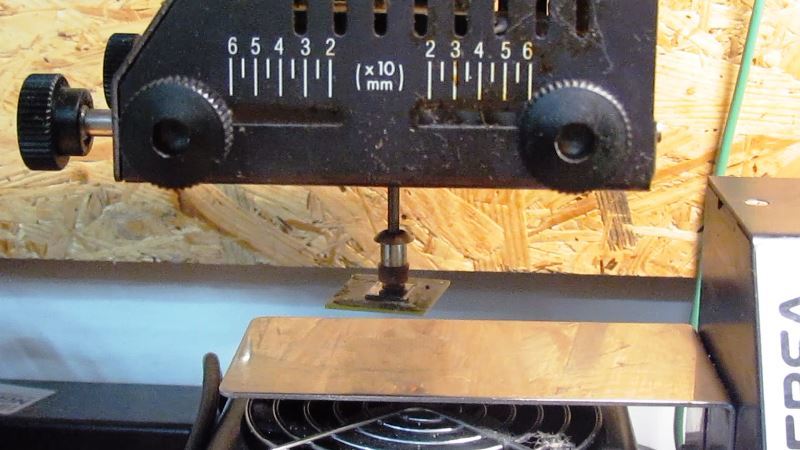
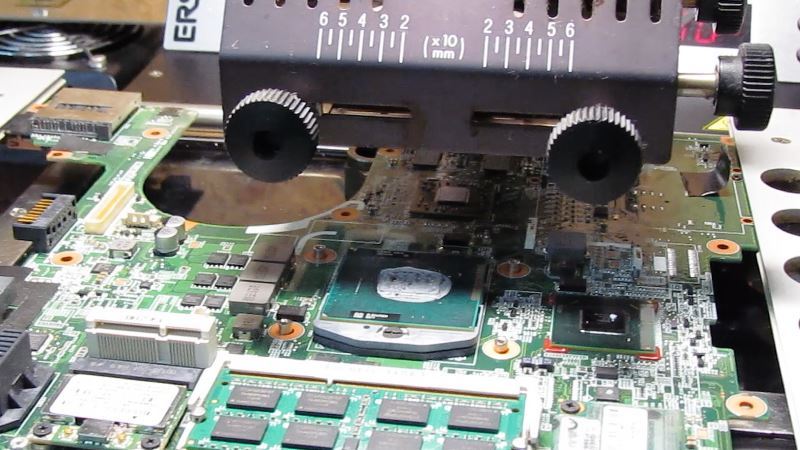
Scale of height of the "head" for soldering. The height of the “head” position depends on the board profile.

In some stations of a lower class, the lower platform heats the entire area of the board, so when soldering at such stations, you need to remove everything from the board - up to stickers with part numbers. As already mentioned, our station heats a strictly selected area from below. When the platform below heats the section of the board under the chip to 60 degrees, the upper “head” turns on and the chip itself starts to solder.
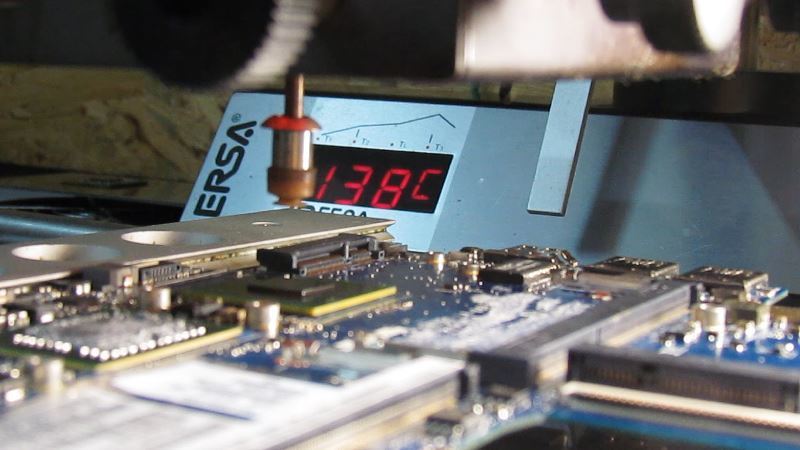
The red shade is the infrared rays that heat the contacts of the chip for soldering. In theory, the chip itself should sit in the socket of the contacts under its own weight, but in order not to overheat the board, the engineer checks the shrinkage of the chip when the contacts are completely warmed up for soldering, without waiting for the temperature limit of the chip.
When we checked that the chip was seated, we remove the heating “head” and set the cooling one.

Everything - the graphics chip is soldered.
I need to say a few words about the good qualities of our soldering station, not for advertising, but for praising a good tool. She, of course, is not cheap, but worth her money. The best thing about this station is that it’s very hard to “screw up” the board or chip - you need to try hard for this. Whereas in other stations of a lower class it is much easier to make a mistake with the risk of ruining the chip or the whole board.
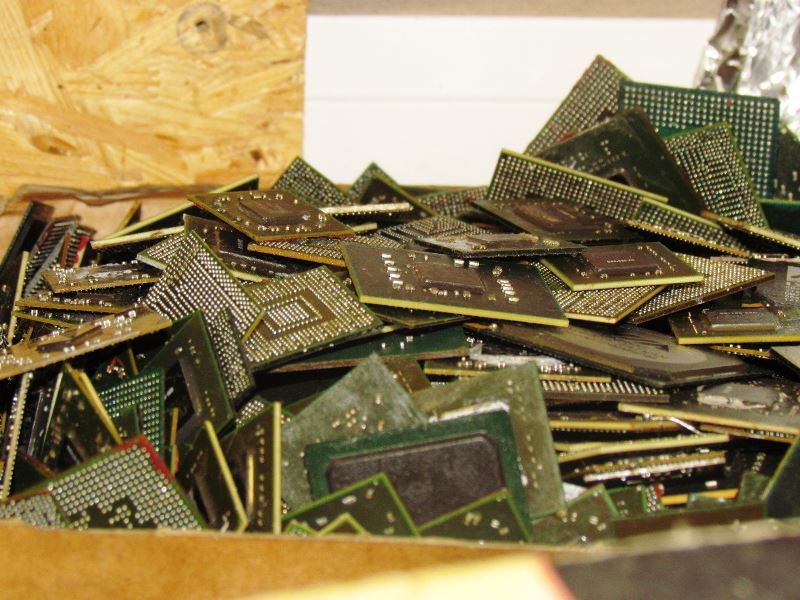
Cemetery Chips.
Description of the benefits of this station.
Why ERSA IR technology? Five key benefits:
• uniform infrared heating with local soldering as a winning alternative to air flow turbulence in convection systems. Most critical for large BGAs, and especially with lead-free soldering, which is performed at higher temperatures;
• precise testing of the thermal profile due to temperature feedback directly from the solder;
• the ability to visually monitor the soldering process (which is unattainable for convection systems, where the chip is tightly closed by the nozzle during soldering);
• universality and sufficiency (many expensive nozzles are not required for today's and tomorrow’s chip sizes, as in convection systems);
• the ability to work with complex components (screens, connectors, etc.), including plastic ones.
The presence of an integrated microprocessor block for contact soldering with the ability to connect five tools (soldering irons of different capacities MicroTool / TechTool / PowerTool, ChipTool thermal tweezers or X-Tool thermal suction pump) turns the IR550Aplus infrared station into a universal repair center.
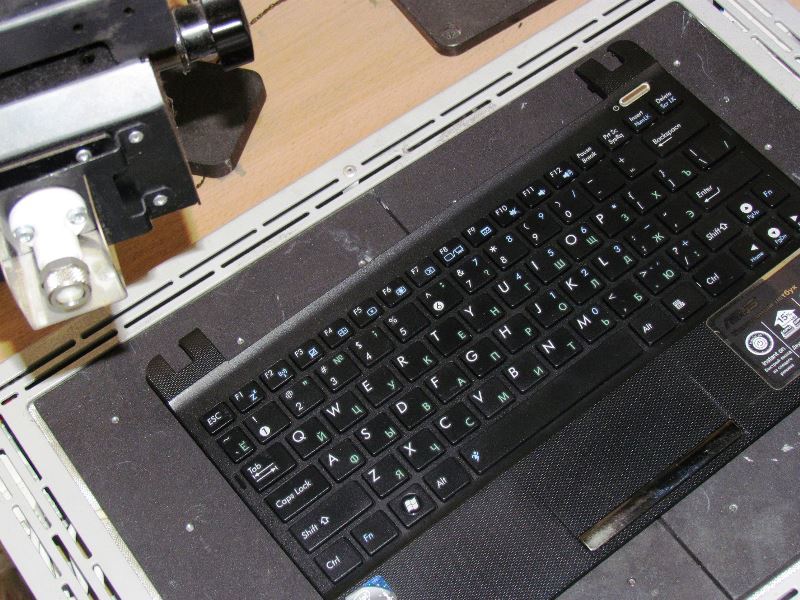
Next to it is a lower class station. They solder on it where such precision and filigree are not needed, such as soldering a keyboard (by the way, if you want us to remove / write about soldering a keyboard, monitor or something else, write and remove).
Video review of the entire process of soldering a video chip.
We also have a YouTube channel where we upload various commercials about technical operations. Subscribe - there will be new vidos.
In addition to technical videos, we record repairs for customers, because often people have doubts: didn’t they exchange good parts for “left” parts in my favorite gadget? To avoid such issues, we record the video of the repair itself at the request of the client.
Training courses / workshops in various areas of IT infrastructure - Training center MUK (Kiev)
MUK-Service - all types of IT repair: warranty, non-warranty repair, sale of spare parts, contract service
We set the “head” of the soldering station over the desired chip so as not to miss - the point of the “sight” of the station is indicated with a red laser.
The station begins to warm the chip.
When the temperature reaches 200+ degrees, lower the suction cup, grab the chip and remove it.
Smoke is visible due to the chip being soldered. (360 is the temperature of the auxiliary soldering iron, which stands next to the station).
Chip capture.
We transfer it to the site.
Here is a shot of the chip.
After that, we put a cooling head over the place where the chip was and the fan automatically turns on to cool the board, since it is understood that the less time the board is heated, the better. This station has very tight temperature control during the entire soldering process.
Thermal sensor for monitoring the temperature over the entire surface of the motherboard.
Now we are preparing a board for soldering. We remove the compound. Video process.
Then you need to clean the area under the chip (the area above the processor).
Here is a video about preparing the site.
You also need to make a reboot of the chip. Those. so that balls appear on the place of contacts that will be soldered into the seat on the board. This is a separate operation, about this video:
After the contact balls of the chip are ready, we expose it strictly by mask. Even a micron matters - you can ruin the chip if you don’t get into the connectors.
Then we begin to solder. As usual - select a soldering profile. We move our head for soldering, direct the rays strictly to the chip, and soldering is switched on.
First, the lower part is heated, and it heats a strictly allocated space under the chip, and does not warm the entire surface, otherwise there would be a risk of failure of the entire board. When using the PL550A on the screen, you can observe the type of soldering in real time. Here we see the increase in temperature on the graph.
Red is the graph for heating the bottom panel.
Scale of height of the "head" for soldering. The height of the “head” position depends on the board profile.
In some stations of a lower class, the lower platform heats the entire area of the board, so when soldering at such stations, you need to remove everything from the board - up to stickers with part numbers. As already mentioned, our station heats a strictly selected area from below. When the platform below heats the section of the board under the chip to 60 degrees, the upper “head” turns on and the chip itself starts to solder.
The red shade is the infrared rays that heat the contacts of the chip for soldering. In theory, the chip itself should sit in the socket of the contacts under its own weight, but in order not to overheat the board, the engineer checks the shrinkage of the chip when the contacts are completely warmed up for soldering, without waiting for the temperature limit of the chip.
When we checked that the chip was seated, we remove the heating “head” and set the cooling one.
Everything - the graphics chip is soldered.
I need to say a few words about the good qualities of our soldering station, not for advertising, but for praising a good tool. She, of course, is not cheap, but worth her money. The best thing about this station is that it’s very hard to “screw up” the board or chip - you need to try hard for this. Whereas in other stations of a lower class it is much easier to make a mistake with the risk of ruining the chip or the whole board.
Cemetery Chips.
Description of the benefits of this station.
Why ERSA IR technology? Five key benefits:
• uniform infrared heating with local soldering as a winning alternative to air flow turbulence in convection systems. Most critical for large BGAs, and especially with lead-free soldering, which is performed at higher temperatures;
• precise testing of the thermal profile due to temperature feedback directly from the solder;
• the ability to visually monitor the soldering process (which is unattainable for convection systems, where the chip is tightly closed by the nozzle during soldering);
• universality and sufficiency (many expensive nozzles are not required for today's and tomorrow’s chip sizes, as in convection systems);
• the ability to work with complex components (screens, connectors, etc.), including plastic ones.
The presence of an integrated microprocessor block for contact soldering with the ability to connect five tools (soldering irons of different capacities MicroTool / TechTool / PowerTool, ChipTool thermal tweezers or X-Tool thermal suction pump) turns the IR550Aplus infrared station into a universal repair center.
Next to it is a lower class station. They solder on it where such precision and filigree are not needed, such as soldering a keyboard (by the way, if you want us to remove / write about soldering a keyboard, monitor or something else, write and remove).
Video review of the entire process of soldering a video chip.
We also have a YouTube channel where we upload various commercials about technical operations. Subscribe - there will be new vidos.
In addition to technical videos, we record repairs for customers, because often people have doubts: didn’t they exchange good parts for “left” parts in my favorite gadget? To avoid such issues, we record the video of the repair itself at the request of the client.
Training courses / workshops in various areas of IT infrastructure - Training center MUK (Kiev)
MUK-Service - all types of IT repair: warranty, non-warranty repair, sale of spare parts, contract service