Build your own OpenNebula resiliency cloud with Ceph, MariaDB Galera Cluster and OpenvSwitch
- Tutorial

This time I would like to tell how to configure this subject, in particular each separate component, so that in the end I would get my own, expandable, fault-tolerant cloud based on OpenNebula. In this article I will consider the following points:
- Install Ceph, distributed storage . (I will describe the installation of a two-tier storage with a cache pool of SSDs)
- Install MySQL Galera cluster with master replication master
- Installing OpenvSwitch Software Switch
- Install directly OpenNebula itself
- Failover Cluster Configuration
- Initial configuration
The themes themselves are very interesting, so even if you are not interested in the ultimate goal, but are interested in setting up a particular component. I beg you under cat.
Small introduction
So what do we get in the end?
After reading this article, you can deploy your own flexible, extensible and, moreover, resilient cloud based on OpenNebula. What do these words mean? - Let's take a look:
- Expandable - this means that you don’t have to rebuild your cloud when expanding. At any time, you can expand your place in the cloud by just adding additional hard drives to the ceph pool. You can also configure a new node without any problems and enter it into the cluster if desired.
- Flexible - OpenNebula's motto is “Flexible Enterprise Cloud Made Simple.” OpenNebula is very easy to learn and also a very flexible system. You can easily deal with it, and also, if necessary, write your own module for it, because the entire system is designed to be as simple and modular as possible.
- Fail - safe - In the event of a hard disk failure, the cluster will rebuild itself in such a way as to provide the required number of replicas of your data. If one node fails, you will not lose control, and the cloud will continue to function until you fix the problem.
What do we need for this?
- I will describe the installation on 3 nodes , but in your case there can be as many as you like.
You can also install OpenNebula on one node, but in this case you will not be able to build a failover cluster, and your entire installation in this guide will be reduced to installing OpenNebula itself, for example, OpenvSwitch.
By the way, you can also install CentOS on ZFS by reading my previous article (not for production) and configure OpenNebula on ZFS using the ZFS driver I wrote - Also, for Ceph to function, a 10G network is highly desirable . Otherwise, it makes no sense for you to raise a separate cache pool, since the speed characteristics of your network will be even lower than the write speed to the pool from HDDs alone.
- All nodes have CentOS 7 installed .
- Each node also contains:
- 256GB 2SSD - for cache pool
- 3HDD by 6TB - for the main pool
- RAM sufficient for Ceph to function (1GB RAM per 1TB of data)
- Well, the resources necessary for the cloud itself, CPU and RAM, which we will use to run virtual machines
- I also wanted to add that the installation and operation of most components requires disabled SELINUX . So on all three nodes it is disabled:
sed -i s/SELINUX=enforcing/SELINUX=disabled/g /etc/selinux/config setenforce 0 - Each node has an EPEL repository:
yum install epel-release
Cluster diagram
To understand what is happening, here is an example diagram of our future cluster:

And a plate with the characteristics of each node:
| Hostname | kvm1 | kvm2 | kvm3 |
|---|---|---|---|
| Network interface | enp1 | enp1 | enp1 |
| IP address | 192.168.100.201 | 192.168.100.202 | 192.168.100.203 |
| HDD | sdb | sdb | sdb |
| HDD | sdc | sdc | sdc |
| HDD | sdd | sdd | sdd |
| SSD | sde | sde | sde |
| SSD | sdf | sdf | sdf |
That's it, now you can proceed with the setup! And perhaps we will start with the construction of the repository.
Ceph
About ceph on a habr already more than once wrote. For example, teraflops described in some detail its structure and basic concepts in its article . Recommended reading.
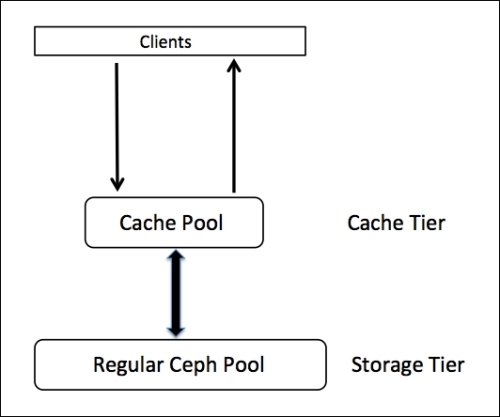
Here I will describe the setting of ceph for storing RBD block devices (RADOS Block Device) for our virtual machines, as well as setting up the cache pool to speed up I / O operations in it.
So we have three nodes kvm1, kvm2, kvm3. Each of them has 2 SSD drives and 3 HDDs. On these disks we will raise two pools, one - the main one on the HDD, the second - caching on the SSD. In total, we should get something like this:

Training
Installation will be carried out using ceph-deploy, and it implies installation from the so-called admin server.
Any computer with the installed ceph-depoy and ssh client can serve as the admin server; in our case, one of the kvm1 nodes will act as such a server .
We need to have a ceph user on each node, and also allow him to passwordlessly walk between the nodes and execute any commands through sudo also without a password.
On each node we execute:
sudo useradd -d /home/ceph -m ceph
sudo passwd ceph
sudo echo "ceph ALL = (root) NOPASSWD:ALL" > /etc/sudoers.d/ceph
sudo chmod 0440 /etc/sudoers.d/ceph
We go to kvm1.
Now we will generate a key and copy it to other nodes
sudo ssh-keygen -f /home/ceph/.ssh/id_rsa
sudo cat /home/ceph/.ssh/id_rsa.pub >> /home/ceph/.ssh/authorized_keys
sudo chown -R ceph:users /home/ceph/.ssh
for i in 2 3; do
    scp /home/ceph/.ssh/* ceph@kvm$i:/home/ceph/.ssh/
done
Installation
Add the key, install the ceph repository and ceph-depoy from it:
sudo rpm --import 'https://download.ceph.com/keys/release.asc'
sudo yum -y localinstall http://download.ceph.com/rpm/el7/noarch/ceph-release-1-1.el7.noarch.rpm
sudo yum install -y ceph-deploy
Ok, now we go behind the ceph user and create a folder in which we will store configs and keys for ceph.
sudo su - ceph
mkdir ceph-admin
cd ceph-admin
Now install ceph on all our nodes:
ceph-deploy install kvm{1,2,3}
Now create a cluster
ceph-deploy new kvm{1,2,3}
Create monitors and get the keys:
ceph-deploy mon create kvm{1,2,3}
ceph-deploy gatherkeys kvm{1,2,3}
Now, according to our initial scheme, we will prepare our disks and run the OSD daemons:
# Flush disks
ceph-deploy disk zap kvm{1,2,3}:sd{b,c,d,e,f}
# SSD-disks
ceph-deploy osd create kvm{1,2,3}:sd{e,f}
# HDD-disks
ceph-deploy osd create kvm{1,2,3}:sd{b,c,d}
Let's see what we got:
ceph osd tree
conclusion
ID WEIGHT  TYPE NAME     UP/DOWN REWEIGHT PRIMARY-AFFINITY
-1 3.00000 root default
-2 1.00000     host kvm1
   0 1.00000         osd.0                 up  1.00000          1.00000
   1 1.00000         osd.1                 up  1.00000          1.00000
   6 1.00000         osd.6                 up  1.00000          1.00000
   7 1.00000         osd.7                 up  1.00000          1.00000
   8 1.00000         osd.8                 up  1.00000          1.00000
-3 1.00000     host kvm2
   2 1.00000         osd.2                 up  1.00000          1.00000
   3 1.00000         osd.3                 up  1.00000          1.00000
   9 1.00000         osd.9                 up  1.00000          1.00000
  10 1.00000         osd.10                up  1.00000          1.00000
  11 1.00000         osd.11                up  1.00000          1.00000
-4 1.00000     host kvm3
   4 1.00000         osd.4                 up  1.00000          1.00000
   5 1.00000         osd.5                 up  1.00000          1.00000
  12 1.00000         osd.12                up  1.00000          1.00000
  13 1.00000         osd.13                up  1.00000          1.00000
  14 1.00000         osd.14                up  1.00000          1.00000
Check the cluster status:
ceph -s
Configure cache pool
So we have a full ceph cluster.
Let's set up a caching pool for it, first we need to edit the CRUSH cards to determine the rules by which we will distribute the data. So that our cache pool is located only on SSD disks, and the main pool only on the HDD.
First, we need to prevent ceph from updating the map automatically, add it to ceph.conf
osd_crush_update_on_start = false
And update it on our nodes:
ceph-deploy admin kvm{1,2,3}
We will save our current map and translate it into text format:
ceph osd getcrushmap -o map.running
crushtool -d map.running -o map.decompile
let's bring it to this form:
map.decompile
# begin crush map
tunable choose_local_tries 0
tunable choose_local_fallback_tries 0
tunable choose_total_tries 50
tunable chooseleaf_descend_once 1
tunable straw_calc_version 1
# devices
device 0 osd.0
device 1 osd.1
device 2 osd.2
device 3 osd.3
device 4 osd.4
device 5 osd.5
device 6 osd.6
device 7 osd.7
device 8 osd.8
device 9 osd.9
device 10 osd.10
device 11 osd.11
device 12 osd.12
device 13 osd.13
device 14 osd.14
# types
type 0 osd
type 1 host
type 2 chassis
type 3 rack
type 4 row
type 5 pdu
type 6 pod
type 7 room
type 8 datacenter
type 9 region
type 10 root
# buckets
host kvm1-ssd-cache {
	id -2		# do not change unnecessarily
	# weight 0.000
	alg straw
	hash 0	# rjenkins1
        item osd.0 weight 1.000
        item osd.1 weight 1.000
}
host kvm2-ssd-cache {
	id -3		# do not change unnecessarily
	# weight 0.000
	alg straw
	hash 0	# rjenkins1
        item osd.2 weight 1.000
        item osd.3 weight 1.000
}
host kvm3-ssd-cache {
	id -4		# do not change unnecessarily
	# weight 0.000
	alg straw
	hash 0	# rjenkins1
        item osd.4 weight 1.000
        item osd.5 weight 1.000
}
host kvm1-hdd {
	id -102		# do not change unnecessarily
	# weight 0.000
	alg straw
	hash 0	# rjenkins1
        item osd.6 weight 1.000
        item osd.7 weight 1.000
        item osd.8 weight 1.000
}
host kvm2-hdd {
	id -103		# do not change unnecessarily
	# weight 0.000
	alg straw
	hash 0	# rjenkins1
        item osd.9 weight 1.000
        item osd.10 weight 1.000
        item osd.11 weight 1.000
}
host kvm3-hdd {
	id -104		# do not change unnecessarily
	# weight 0.000
	alg straw
	hash 0	# rjenkins1
        item osd.12 weight 1.000
        item osd.13 weight 1.000
        item osd.14 weight 1.000
}
root ssd-cache {
	id -1		# do not change unnecessarily
	# weight 0.000
	alg straw
	hash 0	# rjenkins1
	item kvm1-ssd-cache weight 1.000
	item kvm2-ssd-cache weight 1.000
	item kvm3-ssd-cache weight 1.000
}
root hdd {
	id -100		# do not change unnecessarily
	# weight 0.000
	alg straw
	hash 0	# rjenkins1
	item kvm1-hdd weight 1.000
	item kvm2-hdd weight 1.000
	item kvm3-hdd weight 1.000
}
# rules
rule ssd-cache {
	ruleset 0
	type replicated
	min_size 1
	max_size 10
	step take ssd-cache
	step chooseleaf firstn 0 type host
	step emit
}
rule hdd {
	ruleset 1
	type replicated
	min_size 1
	max_size 10
	step take hdd
	step chooseleaf firstn 0 type host
	step emit
}# end crush map
You can see that instead of one root, I did two, for hdd and ssd, the same thing happened with rule and each host.
When editing a map manually, be extremely careful and do not get lost in id'shniks!
Now compile and assign it:
crushtool -c map.decompile -o map.new
ceph osd setcrushmap -i map.new
Let's see what we got:
ceph osd tree
conclusion
ID   WEIGHT  TYPE NAME                UP/DOWN REWEIGHT PRIMARY-AFFINITY
-100 3.00000 root hdd
-102 1.00000     host kvm1-hdd
   6 1.00000         osd.6                 up  1.00000          1.00000
   7 1.00000         osd.7                 up  1.00000          1.00000
   8 1.00000         osd.8                 up  1.00000          1.00000
-103 1.00000     host kvm2-hdd
   9 1.00000         osd.9                 up  1.00000          1.00000
  10 1.00000         osd.10                up  1.00000          1.00000
  11 1.00000         osd.11                up  1.00000          1.00000
-104 1.00000     host kvm3-hdd
  12 1.00000         osd.12                up  1.00000          1.00000
  13 1.00000         osd.13                up  1.00000          1.00000
  14 1.00000         osd.14                up  1.00000          1.00000
  -1 3.00000 root ssd-cache
  -2 1.00000     host kvm1-ssd-cache
   0 1.00000         osd.0                 up  1.00000          1.00000
   1 1.00000         osd.1                 up  1.00000          1.00000
  -3 1.00000     host kvm2-ssd-cache
   2 1.00000         osd.2                 up  1.00000          1.00000
   3 1.00000         osd.3                 up  1.00000          1.00000
  -4 1.00000     host kvm3-ssd-cache
   4 1.00000         osd.4                 up  1.00000          1.00000
   5 1.00000         osd.5                 up  1.00000          1.00000
Now we will describe our configuration in the ceph.conf config, and in particular, we will write data about monitors and osd.
I got the following config:
ceph.conf
[global]
fsid = 586df1be-40c5-4389-99ab-342bd78566c3
mon_initial_members = kvm1, kvm2, kvm3
mon_host = 192.168.100.201,192.168.100.202,192.168.100.203
auth_cluster_required = cephx
auth_service_required = cephx
auth_client_required = cephx
filestore_xattr_use_omap = true
osd_crush_update_on_start = false
[mon.kvm1]
host = kvm1
mon_addr = 192.168.100.201:6789
mon-clock-drift-allowed = 0.5
[mon.kvm2]
host = kvm2
mon_addr = 192.168.100.202:6789
mon-clock-drift-allowed = 0.5
[mon.kvm3]
host = kvm3
mon_addr = 192.168.100.203:6789
mon-clock-drift-allowed = 0.5
[client.admin]
keyring = /etc/ceph/ceph.client.admin.keyring
[osd.0]
host = kvm1
[osd.1]
host = kvm1
[osd.2]
host = kvm2
[osd.3]
host = kvm2
[osd.4]
host = kvm3
[osd.5]
host = kvm3
[osd.6]
host = kvm1
[osd.7]
host = kvm1
[osd.8]
host = kvm1
[osd.9]
host = kvm2
[osd.10]
host = kvm2
[osd.11]
host = kvm2
[osd.12]
host = kvm3
[osd.13]
host = kvm3
[osd.14]
host = kvm3
And we will distribute it to our hosts:
ceph-deploy admin kvm{1,2,3}
Check the cluster status:
ceph -s
Pooling

To create pools, we need to calculate the correct number of pg (Placment Group), they are needed for the CRUSH algorithm. The calculation formula is as follows:
            (OSDs * 100)
Total PGs = ------------
              Replicas
That is, in our case, if we plan to have only one pool on the SSD and one pool on the HDD with replica 2, the calculation formula is as follows:
HDD pool pg = 9*100/2 = 450[округляем] = 512
SSD pool pg = 6*100/2 = 300[округляем] = 512
If there are several pools planned for our root, then the obtained value should be divided into the number of pools.
We create pools, assign them size 2 - the size of the replica, which means that the data recorded in it will be duplicated on different disks, and min_size 1 - the minimum size of the replica in the moment of recording, that is, how many replicas you need to make at the time of recording in order to “release” the recording operation.
ceph osd pool create ssd-cache 512
ceph osd pool set ssd-cache min_size 1
ceph osd pool set ssd-cache size 2
ceph osd pool create one 512
ceph osd pool set one min_size 1
ceph osd pool set one size 2
rules to our pools:
ceph osd pool set ssd-cache crush_ruleset 0
ceph osd pool set one crush_ruleset 1
We configure that writing to the one pool will be done through our cache pool:
ceph osd tier add one ssd-cache
ceph osd tier cache-mode ssd-cache writeback
ceph osd tier set-overlay one ssd-cache
Ceph uses 2 basic cache flushing operations:
- Flushing: The agent detects cooled objects and flushes them to the storage pool.
- Evicting: the agent identifies unrefreshed objects and, starting with the oldest ones, dumps them into the storage pool
To determine the “hot” objects, the so-called Bloom Filter is used .
We configure the parameters of our cache:
# Включаем фильтр bloom
ceph osd pool set ssd-cache hit_set_type bloom
# Сколько обращений к объекту что бы он считался горячим
ceph osd pool set ssd-cache hit_set_count 4
# Сколько времени объект будет считаться горячим
ceph osd pool set ssd-cache hit_set_period 1200
Also customizable
# Сколько байтов должно заполниться прежде чем включится механизм очистки кэша
ceph osd pool set ssd-cache target_max_bytes 200000000000
# Процент заполнения хранилища, при котором начинается операция промывания
ceph osd pool set ssd-cache cache_target_dirty_ratio 0.4
# Процент заполнения хранилища, при котором начинается операция выселения
ceph osd pool set ssd-cache cache_target_full_ratio 0.8
# Минимальное количество времени прежде чем объект будет промыт
ceph osd pool set ssd-cache cache_min_flush_age 300
# Минимальное количество времени прежде чем объект будет выселен
ceph osd pool set ssd-cache cache_min_evict_age 300
The keys
Create user one and generate a key for him
ceph auth get-or-create client.oneadmin mon 'allow r' osd 'allow rw pool=ssd-cache' -o /etc/ceph/ceph.client.oneadmin.keyring
Since he will not write directly to the main pool, we will only give him rights to the ssd-cache pool.
This setting Ceph can be considered complete.
MariaDB Galera Cluster

Now set up a fail-safe MySQL database on our nodes, in which we will store the configuration of our data center.
MariaDB Galera Cluster is a MariaDB cluster with a master replication master that uses a galera library to synchronize .
Plus, it is quite easy to configure:
Installation
On all nodes
Install the repository:
cat << EOT > /etc/yum.repos.d/mariadb.repo
[mariadb]
name = MariaDB
baseurl = http://yum.mariadb.org/10.0/centos7-amd64
gpgkey=https://yum.mariadb.org/RPM-GPG-KEY-MariaDB
gpgcheck=1
EOT
And the server itself:
yum install MariaDB-Galera-server MariaDB-client rsync galera
run the daemon and perform the initial installation:
service mysql start
chkconfig mysql on
mysql_secure_installation
Configure the cluster:
On each node, create a user for replication:
mysql -p
GRANT USAGE ON *.* to sst_user@'%' IDENTIFIED BY 'PASS';
GRANT ALL PRIVILEGES on *.* to sst_user@'%';
FLUSH PRIVILEGES;
exit
service mysql stop
Let's bring the config /etc/my.cnf to the following form:
For kvm1:
cat << EOT > /etc/my.cnf
collation-server = utf8_general_ci
init-connect = 'SET NAMES utf8'
character-set-server = utf8
binlog_format=ROW
default-storage-engine=innodb
innodb_autoinc_lock_mode=2
innodb_locks_unsafe_for_binlog=1
query_cache_size=0
query_cache_type=0
bind-address=0.0.0.0
datadir=/var/lib/mysql
innodb_log_file_size=100M
innodb_file_per_table
innodb_flush_log_at_trx_commit=2
wsrep_provider=/usr/lib64/galera/libgalera_smm.so
wsrep_cluster_address="gcomm://192.168.100.202,192.168.100.203"
wsrep_cluster_name='galera_cluster'
wsrep_node_address='192.168.100.201' # setup real node ip
wsrep_node_name='kvm1' #  setup real node name
wsrep_sst_method=rsync
wsrep_sst_auth=sst_user:PASS
EOT
By analogy with kvm1, we write the configs for the remaining nodes:
For kvm2
cat << EOT > /etc/my.cnf
collation-server = utf8_general_ci
init-connect = 'SET NAMES utf8'
character-set-server = utf8
binlog_format=ROW
default-storage-engine=innodb
innodb_autoinc_lock_mode=2
innodb_locks_unsafe_for_binlog=1
query_cache_size=0
query_cache_type=0
bind-address=0.0.0.0
datadir=/var/lib/mysql
innodb_log_file_size=100M
innodb_file_per_table
innodb_flush_log_at_trx_commit=2
wsrep_provider=/usr/lib64/galera/libgalera_smm.so
wsrep_cluster_address="gcomm://192.168.100.201,192.168.100.203"
wsrep_cluster_name='galera_cluster'
wsrep_node_address='192.168.100.202' # setup real node ip
wsrep_node_name='kvm2' #  setup real node name
wsrep_sst_method=rsync
wsrep_sst_auth=sst_user:PASS
EOT
For kvm3
cat << EOT > /etc/my.cnf
collation-server = utf8_general_ci
init-connect = 'SET NAMES utf8'
character-set-server = utf8
binlog_format=ROW
default-storage-engine=innodb
innodb_autoinc_lock_mode=2
innodb_locks_unsafe_for_binlog=1
query_cache_size=0
query_cache_type=0
bind-address=0.0.0.0
datadir=/var/lib/mysql
innodb_log_file_size=100M
innodb_file_per_table
innodb_flush_log_at_trx_commit=2
wsrep_provider=/usr/lib64/galera/libgalera_smm.so
wsrep_cluster_address="gcomm://192.168.100.201,192.168.100.202"
wsrep_cluster_name='galera_cluster'
wsrep_node_address='192.168.100.203' # setup real node ip
wsrep_node_name='kvm3' #  setup real node name
wsrep_sst_method=rsync
wsrep_sst_auth=sst_user:PASS
EOT
Done, it’s time to launch our cluster, on the first node we launch:
/etc/init.d/mysql start --wsrep-new-cluster
On the other nodes:
/etc/init.d/mysql start
Let's check our cluster, run on each node:
mysql -p
SHOW STATUS LIKE 'wsrep%';
Output example
+------------------------------+----------------------------------------------------------------+
| Variable_name                | Value                                                          |
+------------------------------+----------------------------------------------------------------+
| wsrep_local_state_uuid       | 5b32cb2c-39df-11e5-b26b-6e85dd52910e                           |
| wsrep_protocol_version       | 7                                                              |
| wsrep_last_committed         | 4200745                                                        |
| wsrep_replicated             | 978815                                                         |
| wsrep_replicated_bytes       | 4842987031                                                     |
| wsrep_repl_keys              | 3294690                                                        |
| wsrep_repl_keys_bytes        | 48870270                                                       |
| wsrep_repl_data_bytes        | 4717590703                                                     |
| wsrep_repl_other_bytes       | 0                                                              |
| wsrep_received               | 7785                                                           |
| wsrep_received_bytes         | 62814                                                          |
| wsrep_local_commits          | 978814                                                         |
| wsrep_local_cert_failures    | 0                                                              |
| wsrep_local_replays          | 0                                                              |
| wsrep_local_send_queue       | 0                                                              |
| wsrep_local_send_queue_max   | 2                                                              |
| wsrep_local_send_queue_min   | 0                                                              |
| wsrep_local_send_queue_avg   | 0.002781                                                       |
| wsrep_local_recv_queue       | 0                                                              |
| wsrep_local_recv_queue_max   | 2                                                              |
| wsrep_local_recv_queue_min   | 0                                                              |
| wsrep_local_recv_queue_avg   | 0.002954                                                       |
| wsrep_local_cached_downto    | 4174040                                                        |
| wsrep_flow_control_paused_ns | 0                                                              |
| wsrep_flow_control_paused    | 0.000000                                                       |
| wsrep_flow_control_sent      | 0                                                              |
| wsrep_flow_control_recv      | 0                                                              |
| wsrep_cert_deps_distance     | 40.254320                                                      |
| wsrep_apply_oooe             | 0.004932                                                       |
| wsrep_apply_oool             | 0.000000                                                       |
| wsrep_apply_window           | 1.004932                                                       |
| wsrep_commit_oooe            | 0.000000                                                       |
| wsrep_commit_oool            | 0.000000                                                       |
| wsrep_commit_window          | 1.000000                                                       |
| wsrep_local_state            | 4                                                              |
| wsrep_local_state_comment    | Synced                                                         |
| wsrep_cert_index_size        | 43                                                             |
| wsrep_causal_reads           | 0                                                              |
| wsrep_cert_interval          | 0.023937                                                       |
| wsrep_incoming_addresses     | 192.168.100.202:3306,192.168.100.201:3306,192.168.100.203:3306 |
| wsrep_evs_delayed            |                                                                |
| wsrep_evs_evict_list         |                                                                |
| wsrep_evs_repl_latency       | 0/0/0/0/0                                                      |
| wsrep_evs_state              | OPERATIONAL                                                    |
| wsrep_gcomm_uuid             | 91e4b4f9-62cc-11e5-9422-2b8fd270e336                           |
| wsrep_cluster_conf_id        | 0                                                              |
| wsrep_cluster_size           | 3                                                              |
| wsrep_cluster_state_uuid     | 5b32cb2c-39df-11e5-b26b-6e85dd52910e                           |
| wsrep_cluster_status         | Primary                                                        |
| wsrep_connected              | ON                                                             |
| wsrep_local_bf_aborts        | 0                                                              |
| wsrep_local_index            | 1                                                              |
| wsrep_provider_name          | Galera                                                         |
| wsrep_provider_vendor        | Codership Oy                               |
| wsrep_provider_version       | 25.3.9(r3387)                                                  |
| wsrep_ready                  | ON                                                             |
| wsrep_thread_count           | 2                                                              |
+------------------------------+----------------------------------------------------------------+
That's all. Simple - isn't it?
Attention: if all your nodes are turned off at the same time, MySQL will not go up by itself, you will have to select the most relevant node and run the daemon with the --wsrep-new-cluster option so that the other nodes can replicate information from it.
Openvswitch
About OpenvSwitch ls1 wrote a cool article , I recommend reading it.
Installation
Since OpenvSwitch is not in the standard packages on CentOS,
Manual assembly instructions
To begin, install all the necessary dependencies:
To compile OpenvSwitch, create an ovs user and log in under him, we will perform further actions on his behalf.
Download the sources, on the recommendation of n40lab, disable openvswitch-kmod, and compile them.
Create a folder for configs
Install the RPM package we received
yum -y install wget openssl-devel gcc make python-devel openssl-devel kernel-devel graphviz kernel-debug-devel autoconf automake rpm-build redhat-rpm-config libtool
To compile OpenvSwitch, create an ovs user and log in under him, we will perform further actions on his behalf.
adduser ovs
su - ovs
Download the sources, on the recommendation of n40lab, disable openvswitch-kmod, and compile them.
mkdir -p ~/rpmbuild/SOURCES
wget http://openvswitch.org/releases/openvswitch-2.3.2.tar.gz
cp openvswitch-2.3.2.tar.gz ~/rpmbuild/SOURCES/
tar xfz openvswitch-2.3.2.tar.gz
sed 's/openvswitch-kmod, //g' openvswitch-2.3.2/rhel/openvswitch.spec > openvswitch-2.3.2/rhel/openvswitch_no_kmod.spec
rpmbuild -bb --nocheck ~/openvswitch-2.3.2/rhel/openvswitch_no_kmod.spec
exit
Create a folder for configs
mkdir /etc/openvswitch
Install the RPM package we received
yum localinstall /home/ovs/rpmbuild/RPMS/x86_64/openvswitch-2.3.2-1.x86_64.rpm
In the comments, Dimonyga suggested that OpenvSwitch is in the RDO repository and you don’t need to collect it.
Let's install it from there:
yum install https://rdoproject.org/repos/rdo-release.rpm
yum install openvswitch
Run the daemon:
systemctl start openvswitch.service
chkconfig openvswitch on
Creating a bridge
Now we will configure the network bridge in which ports will be added
ovs-vsctl add-br ovs-br0
ovs-vsctl add-port ovs-br0 enp1
Let's fix the configs of our startup interfaces:
/ etc / sysconfig / network-scripts / ifcfg-enp1
DEVICE="enp1"
NM_CONTROLLED="no"
ONBOOT="yes"
IPV6INIT=no
TYPE="OVSPort"
DEVICETYPE="OVSIntPort"
OVS_BRIDGE=ovs-br0
/ etc / sysconfig / network-scripts / ifcfg-ovs-br0
For kvm1:
DEVICE="ovs-br0"
NM_CONTROLLED="no"
ONBOOT="yes"
TYPE="OVSBridge"
BOOTPROTO="static"
IPADDR="192.168.100.201"
NETMASK="255.255.255.0"
GATEWAY="192.168.100.1"
DNS1="192.168.100.1"
HOTPLUG="no"
For kvm2
DEVICE="ovs-br0"
NM_CONTROLLED="no"
ONBOOT="yes"
TYPE="OVSBridge"
BOOTPROTO="static"
IPADDR="192.168.100.202"
NETMASK="255.255.255.0"
GATEWAY="192.168.100.1"
DNS1="192.168.100.1"
HOTPLUG="no"
For kvm3
DEVICE="ovs-br0"
NM_CONTROLLED="no"
ONBOOT="yes"
TYPE="OVSBridge"
BOOTPROTO="static"
IPADDR="192.168.100.203"
NETMASK="255.255.255.0"
GATEWAY="192.168.100.1"
DNS1="192.168.100.1"
HOTPLUG="no"
Restart the network, everything should start:
systemctl restart network
Opennebula
Installation
So it's time to install OpenNebula
On all nodes:
Install the OpenNebula repository:
cat << EOT > /etc/yum.repos.d/opennebula.repo
[opennebula]
name=opennebula
baseurl=http://downloads.opennebula.org/repo/4.14/CentOS/7/x86_64/
enabled=1
gpgcheck=0
EOT
Install the OpenNebula server, the Sunstone web interface to it and the node
yum install -y opennebula-server opennebula-sunstone opennebula-node-kvm
Run an interactive script that installs the necessary gems in our system:
/usr/share/one/install_gems
Node configuration
User one appeared on each node, you need to allow him to pass between nodes without password and run any commands through sudo without a password, just as we did with the ceph user.
On each node we execute:
sudo passwd oneadmin
sudo echo "%oneadmin ALL = (root) NOPASSWD:ALL" > /etc/sudoers.d/oneadmin
sudo chmod 0440 /etc/sudoers.d/oneadmin
Launch the Libvirt and MessageBus services:
systemctl start messagebus.service libvirtd.service
systemctl enable messagebus.service libvirtd.service
We go to kvm1
Now we will generate a key and copy it to other nodes:
sudo ssh-keygen -f /var/lib/one/.ssh/id_rsa
sudo cat /var/lib/one/.ssh/id_rsa.pub >> /var/lib/one/.ssh/authorized_keys
sudo chown -R oneadmin: /var/lib/one/.ssh
for i in 2 3; do
    scp /var/lib/one/.ssh/* oneadmin@kvm$i:/var/lib/one/.ssh/
done
On each node we perform: Let the
Sunstone listen on any IP, not just the local one:
sed -i 's/host:\ 127\.0\.0\.1/host:\ 0\.0\.0\.0/g' /etc/one/sunstone-server.conf
DB setup
We go to kvm1.
Create a database for OpenNebula:
mysql -p
create database opennebula;
GRANT USAGE ON opennebula.* to oneadmin@'%' IDENTIFIED BY 'PASS';
GRANT ALL PRIVILEGES on opennebula.* to oneadmin@'%';
FLUSH PRIVILEGES;
Now we will transfer the database from sqlite to mysql:
Download the sqlite3-to-mysql.py script:
curl -O http://www.redmine.org/attachments/download/6239/sqlite3-to-mysql.py
chmod +x sqlite3-to-mysql.py
Convert and write our database:
sqlite3 /var/lib/one/one.db .dump | ./sqlite3-to-mysql.py > mysql.sql
mysql -u oneadmin -pPASS < mysql.sql
Now let's say OpenNebula connect to our database, fix the /etc/one/oned.conf config:
replace
DB = [ backend = "sqlite" ]
on the
DB = [ backend = "mysql",
     server  = "localhost",
     port    = 0,
     user    = "oneadmin",
     passwd  = "PASS",
     db_name = "opennebula" ]
Copy it to the other nodes:
for i in 2 3; do
    scp /etc/one/oned.conf oneadmin@kvm$i:/etc/one/oned.conf
done
We also need to copy the authorization key oneadmin in the cluster to the other nodes, since all OpenNebula cluster management is performed under it.
for i in 2 3; do
    scp /var/lib/one/.one/one_auth oneadmin@kvm$i:/var/lib/one/.one/one_auth
done
Check
Now, on each node run serivis OpenNebula try and check it works or not:
Run
systemctl start opennebula opennebula-sunstone
- We check:
http://node:9869 - Check the logs for errors (
/var/log/one/oned.log /var/log/one/sched.log /var/log/one/sunstone.log).
If all is well, turn off:
systemctl stop opennebula opennebula-sunstone
Failover Cluster Configuration
It's time to set up the OpenNebula HA cluster.
For some unknown reason, pcs conflicts with OpenNebula. Therefore, we will use pacemaker, corosync and crmsh.
On all nodes:
Disable autostart of OpenNebula daemons
systemctl disable opennebula opennebula-sunstone opennebula-novnc
Add a repository:
cat << EOT > /etc/yum.repos.d/network\:ha-clustering\:Stable.repo
[network_ha-clustering_Stable]
name=Stable High Availability/Clustering packages (CentOS_CentOS-7)
type=rpm-md
baseurl=http://download.opensuse.org/repositories/network:/ha-clustering:/Stable/CentOS_CentOS-7/
gpgcheck=1
gpgkey=http://download.opensuse.org/repositories/network:/ha-clustering:/Stable/CentOS_CentOS-7/repodata/repomd.xml.key
enabled=1
EOT
Install the necessary packages:
yum install corosync pacemaker crmsh resource-agents -y
On kvm1:
Edit /etc/corosync/corosync.conf, bring it to this form:
corosync.conf
totem {
        version: 2
        crypto_cipher: none
        crypto_hash: none
        interface {
                ringnumber: 0
                bindnetaddr: 192.168.100.0
                mcastaddr: 226.94.1.1
                mcastport: 4000
                ttl: 1
        }
}
logging {
        fileline: off
        to_stderr: no
        to_logfile: yes
        logfile: /var/log/cluster/corosync.log
        to_syslog: yes
        debug: off
        timestamp: on
        logger_subsys {
                subsys: QUORUM
                debug: off
        }
}
quorum {
        provider: corosync_votequorum
}
service {
name: pacemaker
ver: 1
}
nodelist {
        node {
                ring0_addr: kvm1
                nodeid: 1
        }
        node {
                ring0_addr: kvm2
                nodeid: 2
        }
        node {
                ring0_addr: kvm3
                nodeid: 3
        }
}
Generate keys:
cd /etc/corosync
corosync-keygen
Copy the config and keys to the remaining nodes:
for i in 2 3; do
    scp /etc/corosync/{corosync.conf,authkey} oneadmin@kvm$i:/etc/corosync
ls
done
And run the HA services:
systemctl start pacemaker corosync
systemctl enable pacemaker corosync
Check:
crm status
Conclusion
Last updated: Mon Nov 16 15:02:03 2015
Last change: Fri Sep 25 16:36:31 2015
Stack: corosync
Current DC: kvm1 (1) - partition with quorum
Version: 1.1.12-a14efad
3 Nodes configured
0 Resources configured
Online: [ kvm1 kvm2 kvm3 ]
Disable STONITH (mechanism for finishing a failed node)
crm configure property stonith-enabled=false
If you have only two nodes disable quorum, in order to avoid splitbrain -situatsii
crm configure property no-quorum-policy=stop
Now create the resources:
crm
configure
primitive ClusterIP ocf:heartbeat:IPaddr2 params ip="192.168.100.200" cidr_netmask="24" op monitor interval="30s"
primitive opennebula_p systemd:opennebula \
op monitor interval=60s timeout=20s \
op start interval="0" timeout="120s" \
op stop  interval="0" timeout="120s"
primitive opennebula-sunstone_p systemd:opennebula-sunstone \
op monitor interval=60s timeout=20s \
op start interval="0" timeout="120s" \
op stop  interval="0" timeout="120s"
primitive opennebula-novnc_p systemd:opennebula-novnc \
op monitor interval=60s timeout=20s \
op start interval="0" timeout="120s" \
op stop  interval="0" timeout="120s"
group Opennebula_HA ClusterIP opennebula_p opennebula-sunstone_p  opennebula-novnc_p
exit
With these actions, we created a virtual IP (192.168.100.200), added our three services to the HA cluster and merged them into the Opennebula_HA group.
Check:
crm status
Conclusion
Last updated: Mon Nov 16 15:02:03 2015
Last change: Fri Sep 25 16:36:31 2015
Stack: corosync
Current DC: kvm1 (1) - partition with quorum
Version: 1.1.12-a14efad
3 Nodes configured
4 Resources configured
Online: [ kvm1 kvm2 kvm3 ]
 Resource Group: Opennebula_HA
     ClusterIP	(ocf::heartbeat:IPaddr2):	Started kvm1
     opennebula_p	(systemd:opennebula):	Started kvm1
     opennebula-sunstone_p	(systemd:opennebula-sunstone):	Started kvm1
     opennebula-novnc_p	(systemd:opennebula-novnc):	Started kvm1
Configure OpenNebula
Installation is complete, it remains only to add our nodes, storage and virtual networks to the cluster.
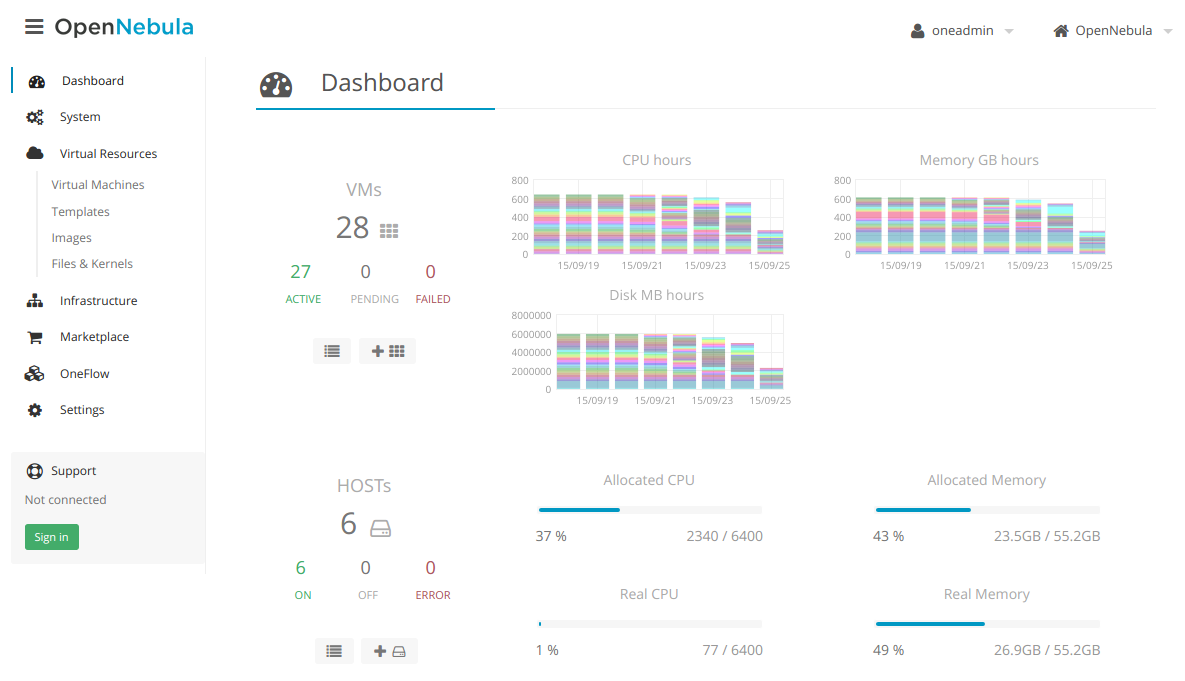
The web interface will always be available at
http://192.168.100.200:9869login : oneadmin
password in /var/lib/one/.one/one_auth
- Create a cluster
- Add Nodes
- Add your virtual network:
cat << EOT > ovs.net NAME="main" BRIDGE="ovs-br0" DNS="192.168.100.1" GATEWAY="192.168.100.1" NETWORK_ADDRESS="192.168.100.0" NETWORK_MASK="255.255.255.0" VLAN="NO" VLAN_ID="" EOT onevnet create ovs.net - Add your Ceph repository:
First you need to save the authorization key:UUID=`uuidgen` cat > secret.xml <$UUID client.libvirt secret
We replicate it on our nodes:for i in 1 2 3; do virsh --connect=qemu+ssh://oneadmin@kvm$i/system secret-define secret.xml virsh --connect=qemu+ssh://oneadmin@kvm$i/system secret-set-value --secret $UUID --base64 $(cat /etc/ceph/ceph.client.oneadmin.keyring | grep -oP '[^ ]*==') done
Now let's add the storage itself:cat << EOT > rbd.conf NAME = "cephds" DS_MAD = ceph TM_MAD = ceph DISK_TYPE = RBD POOL_NAME = one BRIDGE_LIST ="192.168.100.201 192.168.100.202 192.168.100.203" CEPH_HOST ="192.168.100.201:6789 192.168.100.202:6789 192.168.100.203:6789" CEPH_SECRET ="$UUID" CEPH_USER = oneadmin EOT onedatastore create rbd.conf - Add nodes, networks, your storages to the created cluster via the web interface
HA VM
Now, if you want to configure High Availability for your virtual machines, following the official documentation just add to /etc/one/oned.conf
HOST_HOOK = [
    name      = "error",
    on        = "ERROR",
    command   = "ft/host_error.rb",
    arguments = "$ID -m -p 5",
    remote    = "no" ]
And copy it to the other nodes:
for i in 2 3; do
    scp /etc/one/oned.conf oneadmin@kvm$i:/etc/one/oned.conf
done
Sources
- Ceph documentation
- OpenNebula Documentation
- Alexey Vyrodov - Installation of HA OpenNebula on CentOS 7 with Ceph as a datastore and IPoIB as backend network
- N40LAB - CentOS 7 - Installing Openvswitch 2.3.2 LTS
- Smovzh Aleksey - Configuring Proxmox + Ceph Failover Virtualization Solution
- Sébastien Han - Ceph: Mix SATA and SSD Within the Same Box
- Karan Singh - Ceph Performance Tuning and Benchmarking
- Zhiqiang W. (Intel) - Ceph cache tiering introduction
PS: Please, if you notice any flaws or errors, write me in private messages