Androids at the Dolphinarium
Greetings to all lovers of the devices that fit in your pocket, as well as those who hold their pocket wider than 7 ". Now we will take up the art of programming cross-platform graphics applications, that is, those applications that work on a mobile platform (Android smartphones and tablets) and under Windows (desktop PCs, laptops, netbooks, tablets). In this case, our applications will be graphical, the graphics are based on OpenGL (OGL) and its mobile version of OpenGL ES (GLES). I use Embarcadero Delphi XE7. An important feature is in this project I do not use the platform FM (FireMonkey), we will write everything ourselves and from scratch, as in the good old days. I
propose to immediately divide the work in half:
- I write a cross-platform graphics library, consider examples of its use, paint implementation details, answer questions;
- your part is no less responsible: from you I need a demo test on various mobile devices, reports on execution, reviews and criticism, new ideas andfresh meat, new users of both the library and the applications themselves.
1. The first
Android demo mc.apk 3.8 MB yadi.sk/d/n1wDuX1RhC4QX
Windows mc.zip 1.9 MB yadi.sk/d/tBKQxaV7ff8KW Sources
in the repo: sourceforge.net/p/delphioga/code/ci/default/tree
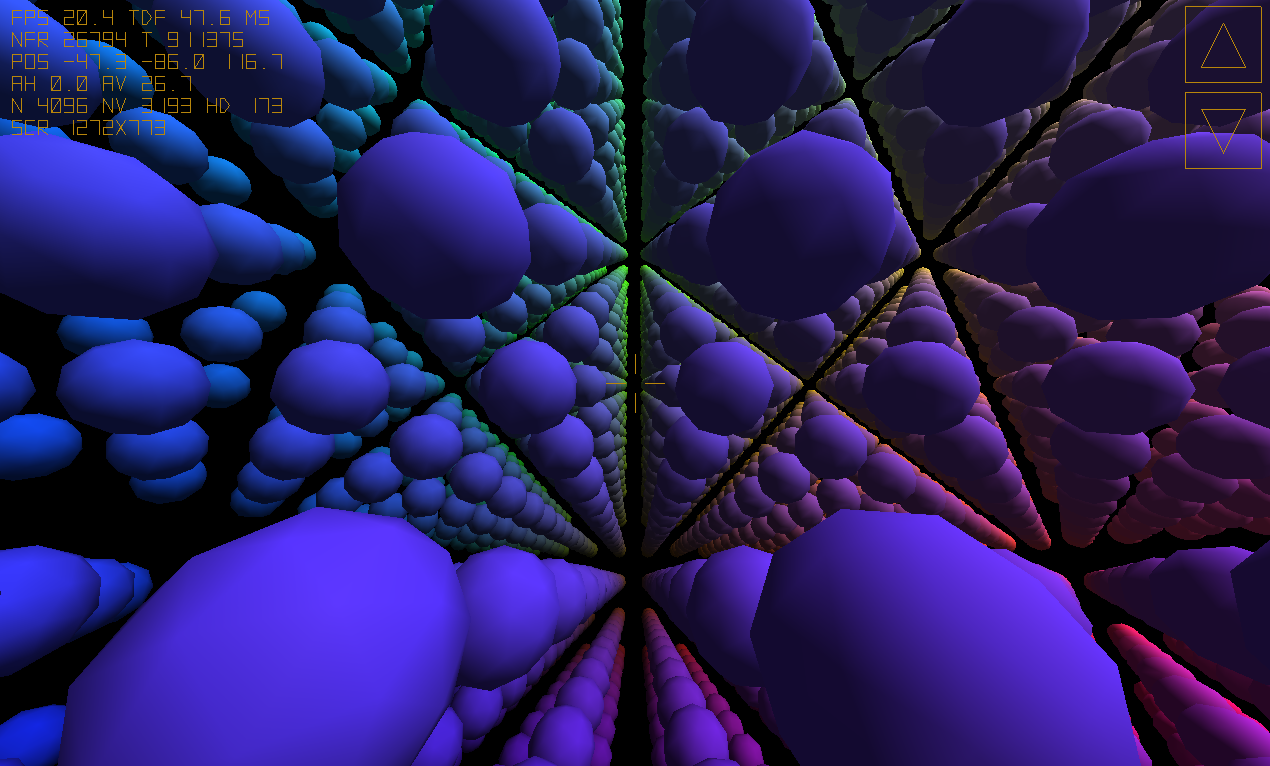
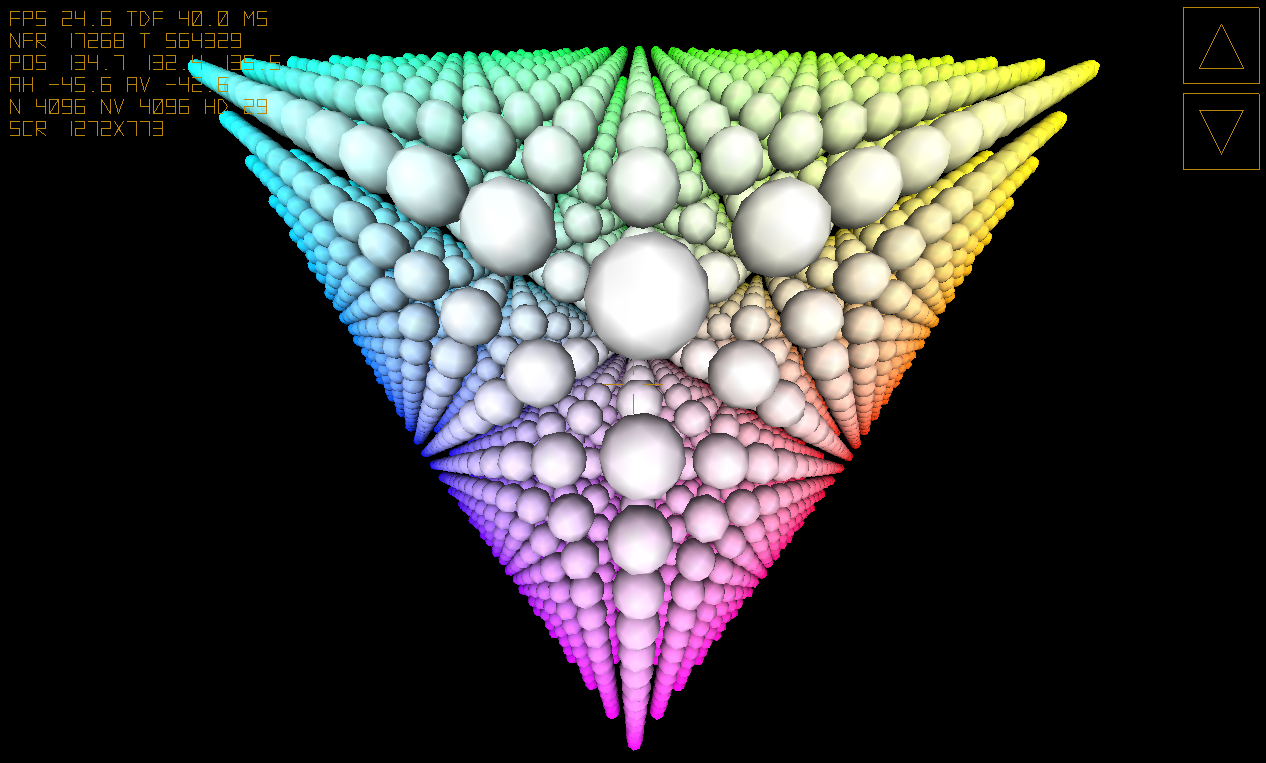
In the first version, the program is not tricky - it simply displays 4096 angular multi-colored balls on the screen and allows you to fly past them in the “free camera” mode. I painted the spheres according to the principle of the RGB color space; they also rotate. In this example, I want to consider methods for constructing 3D primitives (in particular spheres) and methods for optimizing rendering (Frustum culling, detailing objects).
But we can not do without a small introductory part.
2. Instruction manual, Android smartphone / tablet
1. Install mc.apk, this is the installation archive for the program. If you have questions about how to do this, I am ready to help.
2. When installing apk, a warning is possible that the program requires access to the Internet. In fact, the program is compiled in Debug mode, so it potentially needs access to the local network for the debugger (gdbserver) and the logcat log console to work. Logs we still need. From the program itself, I do not access the network in any way, there is only drawing graphics on the screen.
3. After installation, you will add a new shortcut on the desktop “mc”. Run the program. We admire the screensaver - the light of FM (I have not yet changed the icons of the Delphi mobile project by default). We pay attention to the launch time of the application, how much do you have in about seconds and their shares? We can compare this with the download time of examples of FM applications, so far the comparison is in our favor.
4. Here you are, welcome. Use your fingers and touchscreen to change the direction of your gaze and direction of movement. At the top right there are a couple of on-screen buttons - forward and backward. If you have 2 hands, you can move and turn at the same time. This will require a certain dexterity, something really, and I did not promise a simple life.
5. When you switch to another application or “fall asleep” the tablet (let's call the mobile device a tablet because I have a tablet), the program will stop rendering graphics (the GLES context and the application window itself are deleted, so it should be done on Android), but the program itself will not stop work. When you switch back to the application or “wake up” the tablet, the window and context will be recreated, we will continue our journey from the stopping point. You should pay attention to this nuance when testing, some games do not know how to “recover" correctly, but we must be able to.
6. Turn the tablet horizontally, then vertically. The application should be checked in each of these two modes. Of course, such a trick will work only if your device’s display orientation is set to “auto”.
7. Quitting the demo is simple - click the “back” system button.
8. Write in the comments to the article the type of mobile device that you used (manufacturer, model), I will try to find its characteristics, types of CPU and GPU, OS version. I include this data in the hardware.txt file in the repo.
3. Operating Instructions, Windows
1. Unpack the zip archive. We are not surprised by the volume of the exe file, the demo is compiled in Debug mode, in the exe release it weighs 1.5 MB. We start mc.exe.
There will be no system warnings about using the network, as in Android, because the network is not used in the demo, on the PC the debugger and logs work locally.
2. Here you are, welcome. To change the direction of your gaze and direction of movement, “drag” the screen while holding down the left mouse button (LMB). To move in space, the [WASD] keys on the keyboard work (either arrows or arrows on the NumPad). There are also on-screen buttons for moving back and forth, they are clickable. [F1] displays help, [ESC] allows you to exit the program.
3. Pay attention to the second window (when the program starts, two windows appear on the control panel), this is the debugging console. A similar console for Android (logcat) we will consider later. After the Vendor GPU, Renderer (company / type of your video card) writes Open GL version there. Let's just say that if the OpenGL version is lower than 3.0, then some future library features will not work on your old video card. However, the application may contain 2 branches of the implementation of such features and work in any case.
4. VSYNC is turned off in this example, FPS can be much more than 60 Hz (try to look away from visible objects), the load on the GPU and CPU is maximum. I do this to test the speed of rendering the frame, if you enable VSYNC, the load becomes normal.
4. Debug output to the screen
In the screenshots in the upper left there are some yellow letters and numbers.
FPS is the average number of frames per second, our main tool in evaluating the speed of drawing. VSYNC is enabled for Android, FPS is limited by the refresh rate of the screen (60 Hz), however, I adjusted the load on the GPU in the demo so that on most mobile devices FPS will “sink”. It's not scary as long as the controls and animations remain adequate. Under Windows, VSYNC is turned off, FPS has no limit;
TDF - average time to draw one frame in milliseconds, in fact, the inverse of FPS; it is needed in order to understand “timing” - what order the time intervals appear in for drawing a frame; at FPS 60 Hz this time is about 17 ms;
Nfr- the number of frames drawn from the start of the application; at FPS 60 Hz in the first second, this figure will reach 60;
T - time in ms from the start of the application, I use it as an argument for animation functions, in the example, the rotation of the spheres depends on it;
POS - camera coordinates in the 3D world of XYZ, at the start of the axis are located like this: X to the right, Y up, Z on us;
AH, AV - camera rotation angles relative to the horizontal and vertical in degrees; it is better to talk about roll angle separately;
N is the total number of objects in the universe;
NV - so many objects in whole or in part fall into the field of visibility (frustum, a truncated pyramid of the camera’s field of view);
HD- so many near objects are displayed with slightly better rendering quality, distant objects are drawn easier;
SCR - screen resolution.
5. What does the development process look like?
I connect the tablet to a PC under Windows with a USB cable (you can also use Wi-Fi). First, I write a platform-specific code of certain functions for Android, I launch the program on the tablet. This part of the work requires a lot of patience, the application compiles and runs on the tablet for a relatively long time. Debugging is available (breakpoints, step-by-step execution, viewing the status of variables). I also use the debug output of the application in logcat, I can watch the logs directly on the PC in real time. When it works on the tablet, I write a platform-specific version of the function code for Windows, it is already easier. After that, the most interesting part begins - I write the main part of the program with universal code, calling platform functions of the same name, checking it on a PC and only occasionally uploading it to a tablet, as a rule, everything works there.
6. Under the hood
Let's take a look at the source code. In the common folder, I have the actual library. Let's start with the Draw.pas file.
What is cross-platform graphics based on? On Windows, I use the OpenGL.pas module, but only those functions that have analogues in GLES for Android (Androidapi.Egl.pas, Androidapi.Gles.pas, Androidapi.Gles2.pas modules).
Where OGL and GLES are the same, there is little difference in syntax, only glOrtho had to be trimmed. Using conditional compilation directives like {$ IFDEF ANDROID} and {$ IFDEF MSWINDOWS}, we will describe a platform-specific implementation.
What else does not match? GLES does not have glBegin / glEnd and, accordingly, the entire family of functions associated with them. This is not scary, we will draw in the style of OGL 2.0 passing at one time pointers to arrays of vertices (normals, colors, texture coordinates). For example, one simple triangle can be drawn like this (the color is current, there are no normals and textures):
To draw many triangles of a 3D figure, you should not call the Triangle procedure many times. You should add all the vertices of all the triangles into one array and draw them with a single call to glDrawArrays. This function is used in the current demo to draw each sphere, with both GL_TRIANGLES and GL_TRIANGLE_STRIP:
On this we will stop, for the first acquaintance such an introductory part should be enough. If you like it, I already have an outline for the continuation of the article.
PS / 06/05/2015
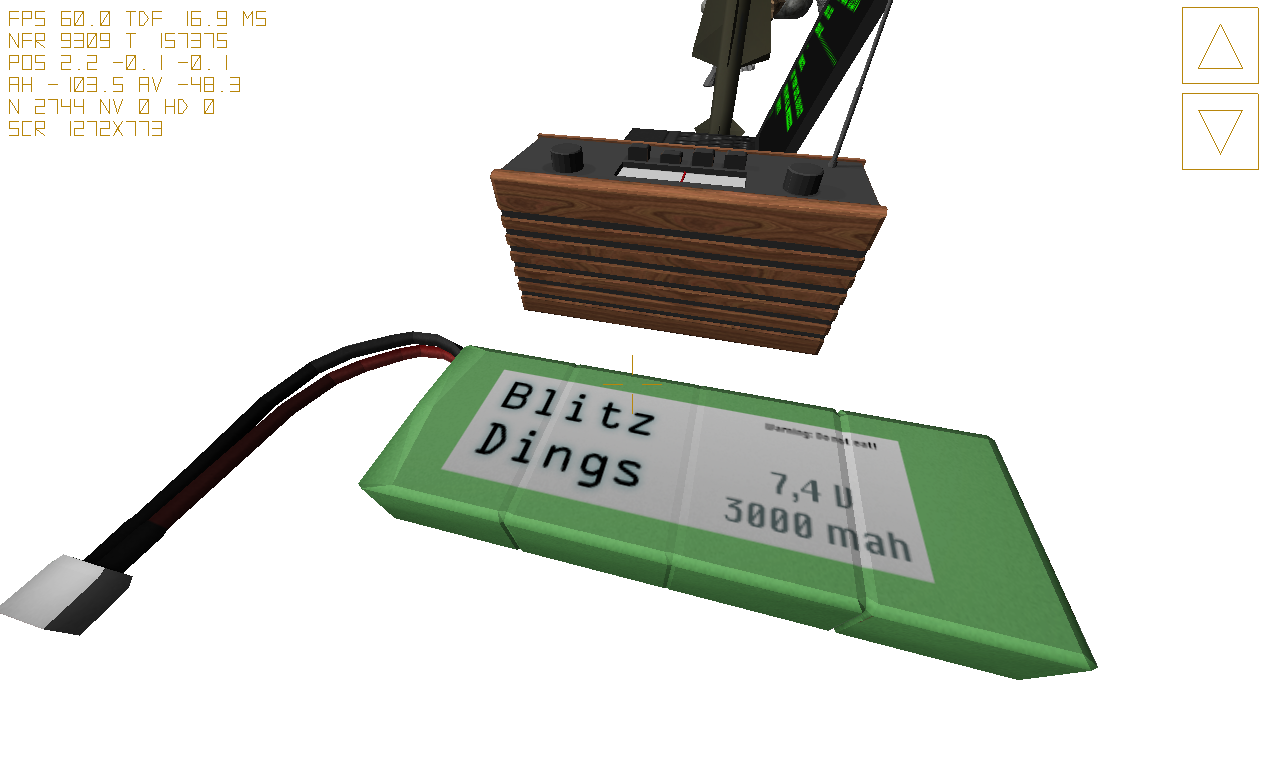
The loading of 3D models in obj format has been added to the library.
Additional source of information on the topic: forum.sources.ru/index.php?showtopic=401121
propose to immediately divide the work in half:
- I write a cross-platform graphics library, consider examples of its use, paint implementation details, answer questions;
- your part is no less responsible: from you I need a demo test on various mobile devices, reports on execution, reviews and criticism, new ideas and
1. The first
Android demo mc.apk 3.8 MB yadi.sk/d/n1wDuX1RhC4QX
Windows mc.zip 1.9 MB yadi.sk/d/tBKQxaV7ff8KW Sources
in the repo: sourceforge.net/p/delphioga/code/ci/default/tree
In the first version, the program is not tricky - it simply displays 4096 angular multi-colored balls on the screen and allows you to fly past them in the “free camera” mode. I painted the spheres according to the principle of the RGB color space; they also rotate. In this example, I want to consider methods for constructing 3D primitives (in particular spheres) and methods for optimizing rendering (Frustum culling, detailing objects).
But we can not do without a small introductory part.
2. Instruction manual, Android smartphone / tablet
1. Install mc.apk, this is the installation archive for the program. If you have questions about how to do this, I am ready to help.
2. When installing apk, a warning is possible that the program requires access to the Internet. In fact, the program is compiled in Debug mode, so it potentially needs access to the local network for the debugger (gdbserver) and the logcat log console to work. Logs we still need. From the program itself, I do not access the network in any way, there is only drawing graphics on the screen.
3. After installation, you will add a new shortcut on the desktop “mc”. Run the program. We admire the screensaver - the light of FM (I have not yet changed the icons of the Delphi mobile project by default). We pay attention to the launch time of the application, how much do you have in about seconds and their shares? We can compare this with the download time of examples of FM applications, so far the comparison is in our favor.
4. Here you are, welcome. Use your fingers and touchscreen to change the direction of your gaze and direction of movement. At the top right there are a couple of on-screen buttons - forward and backward. If you have 2 hands, you can move and turn at the same time. This will require a certain dexterity, something really, and I did not promise a simple life.
5. When you switch to another application or “fall asleep” the tablet (let's call the mobile device a tablet because I have a tablet), the program will stop rendering graphics (the GLES context and the application window itself are deleted, so it should be done on Android), but the program itself will not stop work. When you switch back to the application or “wake up” the tablet, the window and context will be recreated, we will continue our journey from the stopping point. You should pay attention to this nuance when testing, some games do not know how to “recover" correctly, but we must be able to.
6. Turn the tablet horizontally, then vertically. The application should be checked in each of these two modes. Of course, such a trick will work only if your device’s display orientation is set to “auto”.
7. Quitting the demo is simple - click the “back” system button.
8. Write in the comments to the article the type of mobile device that you used (manufacturer, model), I will try to find its characteristics, types of CPU and GPU, OS version. I include this data in the hardware.txt file in the repo.
3. Operating Instructions, Windows
1. Unpack the zip archive. We are not surprised by the volume of the exe file, the demo is compiled in Debug mode, in the exe release it weighs 1.5 MB. We start mc.exe.
There will be no system warnings about using the network, as in Android, because the network is not used in the demo, on the PC the debugger and logs work locally.
2. Here you are, welcome. To change the direction of your gaze and direction of movement, “drag” the screen while holding down the left mouse button (LMB). To move in space, the [WASD] keys on the keyboard work (either arrows or arrows on the NumPad). There are also on-screen buttons for moving back and forth, they are clickable. [F1] displays help, [ESC] allows you to exit the program.
3. Pay attention to the second window (when the program starts, two windows appear on the control panel), this is the debugging console. A similar console for Android (logcat) we will consider later. After the Vendor GPU, Renderer (company / type of your video card) writes Open GL version there. Let's just say that if the OpenGL version is lower than 3.0, then some future library features will not work on your old video card. However, the application may contain 2 branches of the implementation of such features and work in any case.
4. VSYNC is turned off in this example, FPS can be much more than 60 Hz (try to look away from visible objects), the load on the GPU and CPU is maximum. I do this to test the speed of rendering the frame, if you enable VSYNC, the load becomes normal.
4. Debug output to the screen
In the screenshots in the upper left there are some yellow letters and numbers.
FPS is the average number of frames per second, our main tool in evaluating the speed of drawing. VSYNC is enabled for Android, FPS is limited by the refresh rate of the screen (60 Hz), however, I adjusted the load on the GPU in the demo so that on most mobile devices FPS will “sink”. It's not scary as long as the controls and animations remain adequate. Under Windows, VSYNC is turned off, FPS has no limit;
TDF - average time to draw one frame in milliseconds, in fact, the inverse of FPS; it is needed in order to understand “timing” - what order the time intervals appear in for drawing a frame; at FPS 60 Hz this time is about 17 ms;
Nfr- the number of frames drawn from the start of the application; at FPS 60 Hz in the first second, this figure will reach 60;
T - time in ms from the start of the application, I use it as an argument for animation functions, in the example, the rotation of the spheres depends on it;
POS - camera coordinates in the 3D world of XYZ, at the start of the axis are located like this: X to the right, Y up, Z on us;
AH, AV - camera rotation angles relative to the horizontal and vertical in degrees; it is better to talk about roll angle separately;
N is the total number of objects in the universe;
NV - so many objects in whole or in part fall into the field of visibility (frustum, a truncated pyramid of the camera’s field of view);
HD- so many near objects are displayed with slightly better rendering quality, distant objects are drawn easier;
SCR - screen resolution.
5. What does the development process look like?
I connect the tablet to a PC under Windows with a USB cable (you can also use Wi-Fi). First, I write a platform-specific code of certain functions for Android, I launch the program on the tablet. This part of the work requires a lot of patience, the application compiles and runs on the tablet for a relatively long time. Debugging is available (breakpoints, step-by-step execution, viewing the status of variables). I also use the debug output of the application in logcat, I can watch the logs directly on the PC in real time. When it works on the tablet, I write a platform-specific version of the function code for Windows, it is already easier. After that, the most interesting part begins - I write the main part of the program with universal code, calling platform functions of the same name, checking it on a PC and only occasionally uploading it to a tablet, as a rule, everything works there.
6. Under the hood
Let's take a look at the source code. In the common folder, I have the actual library. Let's start with the Draw.pas file.
What is cross-platform graphics based on? On Windows, I use the OpenGL.pas module, but only those functions that have analogues in GLES for Android (Androidapi.Egl.pas, Androidapi.Gles.pas, Androidapi.Gles2.pas modules).
uses
  Types,SysUtils,
{$IFDEF Android}
  Androidapi.Egl, Androidapi.Gles, Androidapi.Gles2,
{$ENDIF}
{$IFDEF MSWINDOWS}
  Winapi.OpenGL,
{$ENDIF}
  Vectors, Colors, Textures, DrawPolyhedron, DrawSphere;
Where OGL and GLES are the same, there is little difference in syntax, only glOrtho had to be trimmed. Using conditional compilation directives like {$ IFDEF ANDROID} and {$ IFDEF MSWINDOWS}, we will describe a platform-specific implementation.
{$IFDEF ANDROID}
procedure glOrtho (left, right, bottom, top, zNear, zFar: GLfloat);
begin
  glOrthof(left, right, bottom, top, zNear, zFar);
end;
{$ENDIF}
What else does not match? GLES does not have glBegin / glEnd and, accordingly, the entire family of functions associated with them. This is not scary, we will draw in the style of OGL 2.0 passing at one time pointers to arrays of vertices (normals, colors, texture coordinates). For example, one simple triangle can be drawn like this (the color is current, there are no normals and textures):
procedure Triangle(p1, p2, p3: TV3); overload;
begin
  SetLength(ap3, 3);
  ap3[0] := p1;
  ap3[1] := p2;
  ap3[2] := p3;
  glVertexPointer(3, GL_FLOAT, 0, @ap3[0]);
  glDrawArrays(GL_TRIANGLES, 0, Length(ap3));
end;
To draw many triangles of a 3D figure, you should not call the Triangle procedure many times. You should add all the vertices of all the triangles into one array and draw them with a single call to glDrawArrays. This function is used in the current demo to draw each sphere, with both GL_TRIANGLES and GL_TRIANGLE_STRIP:
// отобразить готовый массив вершин c нормалями
procedure DrawAVNT(avn: TAVertexN; met:GLenum; Position,Rotation,Scale: TV3);
begin
 glPushMatrix;
 Transform(Position,Rotation,Scale);
 glVertexPointer(3, GL_FLOAT, SizeOf(TVertexN), @avn[0].V);
 glNormalPointer(GL_FLOAT, SizeOf(TVertexN), @avn[0].N);
 glDrawArrays(met,0,Length(avn));// GL_TRIANGLES
 glPopMatrix;
end;
On this we will stop, for the first acquaintance such an introductory part should be enough. If you like it, I already have an outline for the continuation of the article.
PS / 06/05/2015
The loading of 3D models in obj format has been added to the library.
Additional source of information on the topic: forum.sources.ru/index.php?showtopic=401121