Creating a HANA Application Using the Eclipse Development Environment
Authors - Bakov Rustam, Dmitrieva Lyudmila, Kulnev Dmitry, Medvedev Yuri
Hello, Habr community!
In this article we will not talk about what SAP HANA is, they talk and write so much about it, but right away we will show how you can “play around” with the system and create a simple application from the “Hello World!” Series using the Eclipse development environment.
First, set up the Eclipse development environment with the necessary plugins. Plug-ins for working with SAP HANA exist for two versions of Eclipse - Luna and Kepler. If you do not have Eclipse installed, you can download it using the links:
Luna - www.eclipse.org/luna
Kepler - www.eclipse.org/kepler
In our example, we will show all the configuration steps using the Eclipse Luna example.

The next step is to install the plugins - the standard process for Eclipse. The only “but” - the versions of the plugins for Luna and Kepler are different, so choose the one that suits your version of Eclipse.
Link to plugins for Luna - tools.hana.ondemand.com/luna
Link to plugins for Kepler - tools.hana.ondemand.com/kepler
Select Help in the top menu of Eclipse and select Install New Software.

Copy the link to the Work with: line and add it to the list of saved links.

After that, a list of plugins available for download will appear. From this list we are only interested in two plugins:
• ABAP Development Tools for SAP NetWeaver - it contains all the necessary tools for development in the ABAP language;
• SAP HANA Tools - this plugin includes all the development tools for SAP HANA, including tools for administration (at the developer level), design and development of databases based on the SAP HANA platform.
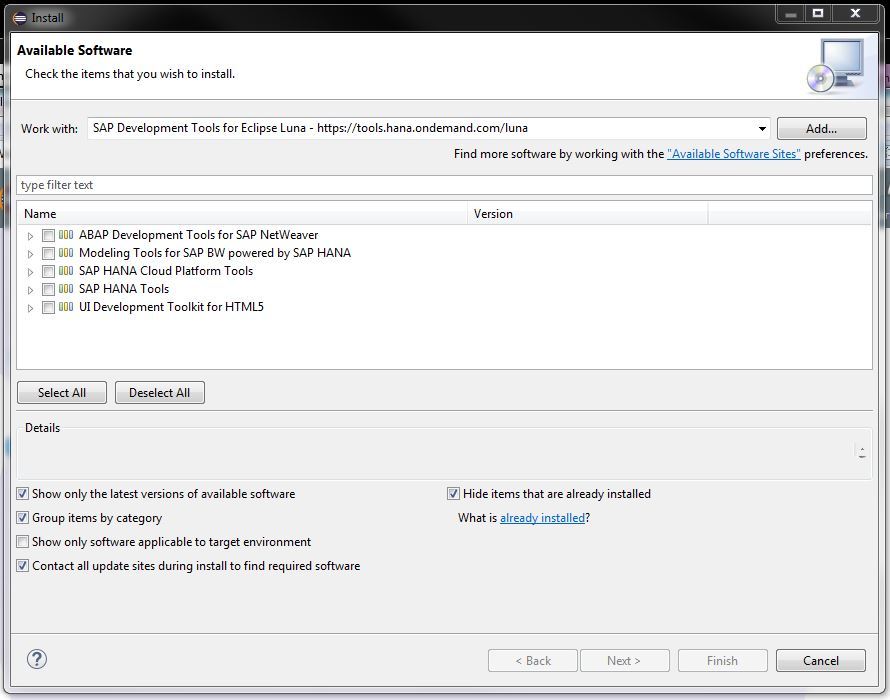
We mark these two plugins for installation and click on the Next button.
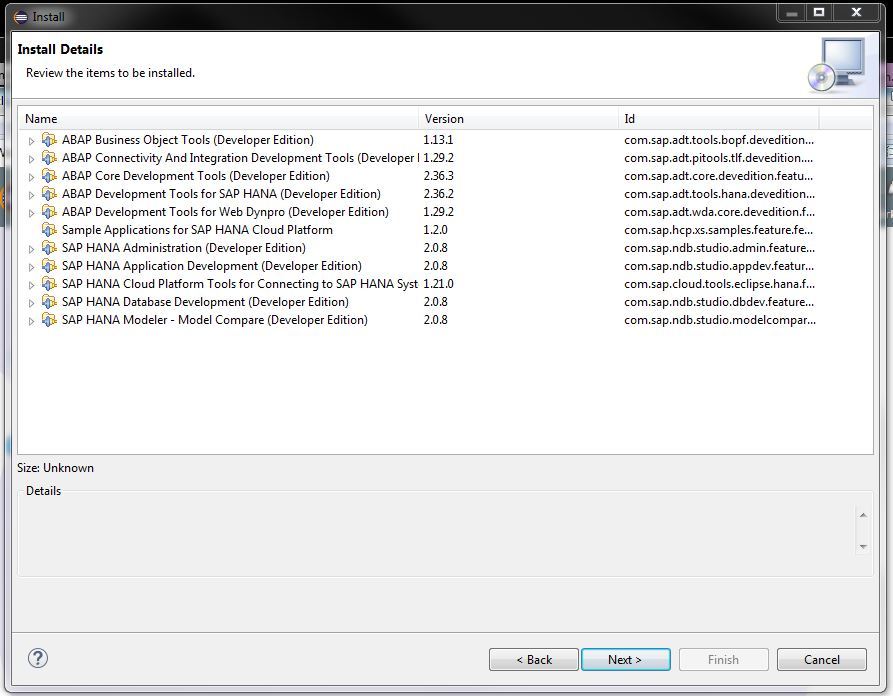
After that, having familiarized ourselves with the list of installed components and agreeing with the license agreement, we are
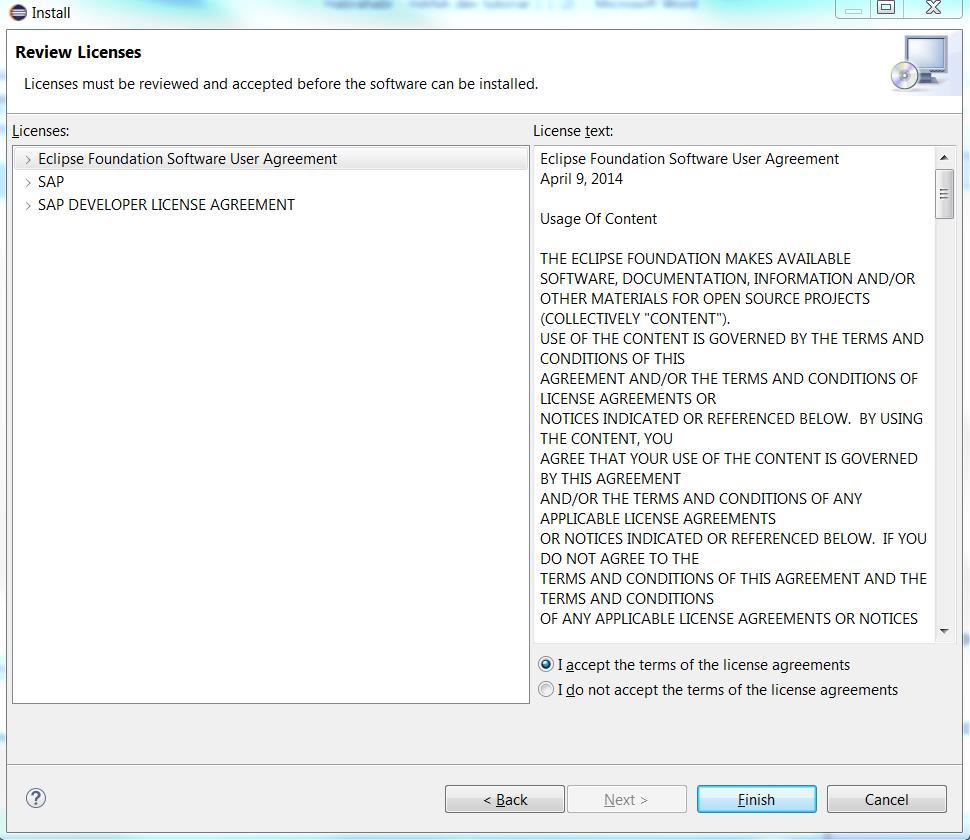
waiting for Finish.
After restarting Eclipse, you will be greeted by an updated welcome page. On it you can find links to articles on the basics of development in the ABAP language, as well as many other useful information.

We click on the Workbench button in the upper right corner and we get already into the "working area" of the development environment. The next step will be the selection of the necessary development prospects.
There are two ways to do this. The first is to go to Window-> Open Perspective-> Other ... The
second way is to click Open Perspective directly in the perspective panel.
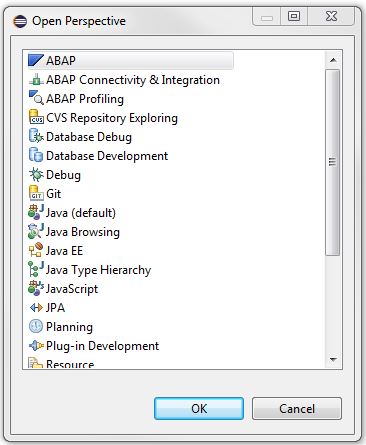
We need to add two perspectives in turn: the SAP HANA Administration Console and the SAP HANA Modeler.
This concludes the Eclipse preparation phase, now you can go directly to getting test access to the SAP HANA Cloud Platform.
Getting it is easy enough. First, go to account.hana.ondemand.com/register and register on the site. Secondly, after registering and entering the system, you need to go to the control panel of the cloud platform by clicking on the appropriate link in the site’s navigation panel or simply follow the link:
account.hanatrial.ondemand.com/cockpit
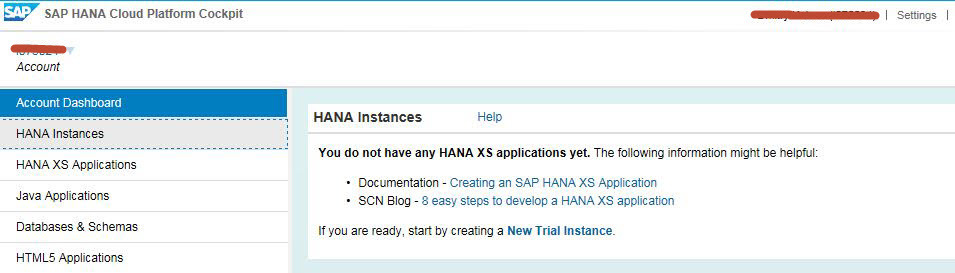
Here we see several tabs leading to viewing and setting up different parts of the cloud platform. Now we are interested in creating the so-called HANA XS application - let's create it!
Creating a new application instance
Click on HANA Instances in the quick access panel on the left.
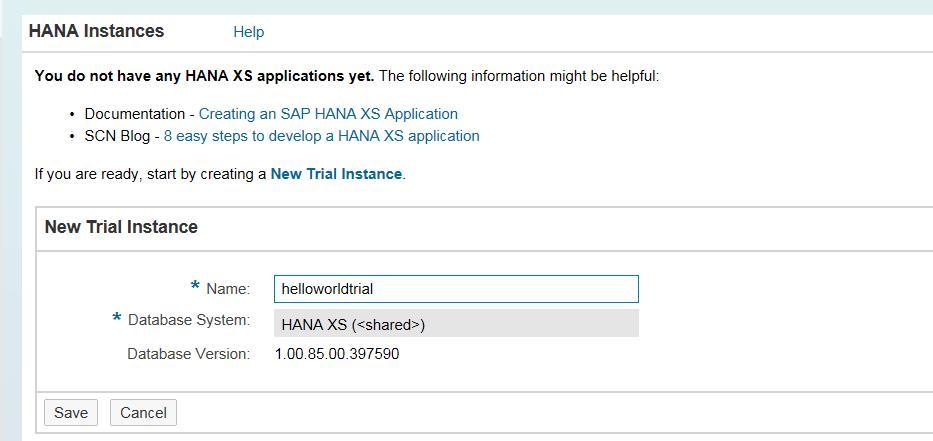
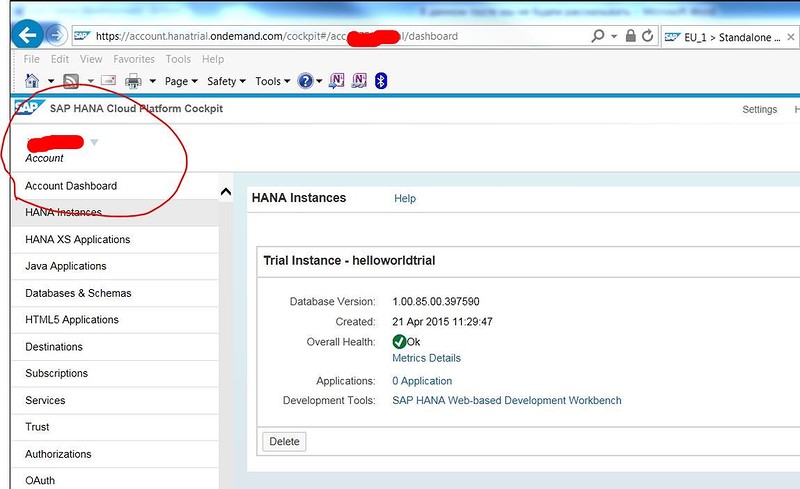
To gain access, you need to create a new trial example (New Trial Instance) and, specifying its name, save the changes.
Adding a System (Eclipse)
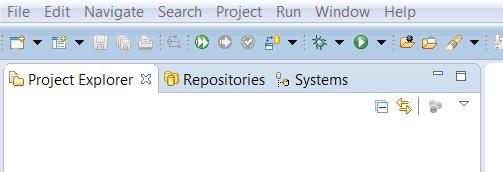
Now we will connect together Eclipse and SAP HANA. To do this, launch Eclipse and open the perspective of SAP HANA Development. Then go to the Systems tab. It will look something like this:

Right-click and select Add Cloud System. After that, you will need to enter the account name, username and password.
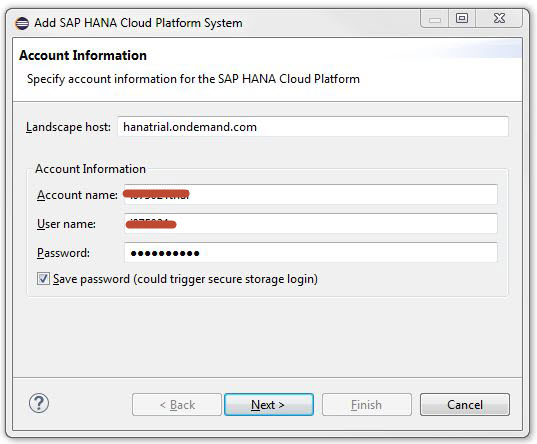
Your Account name is here.
If you have forgotten your password, you can recover it here.

After clicking on Next, Eclipse will ask which instance to select. Most likely, you will see only one available option (the one that was just created).
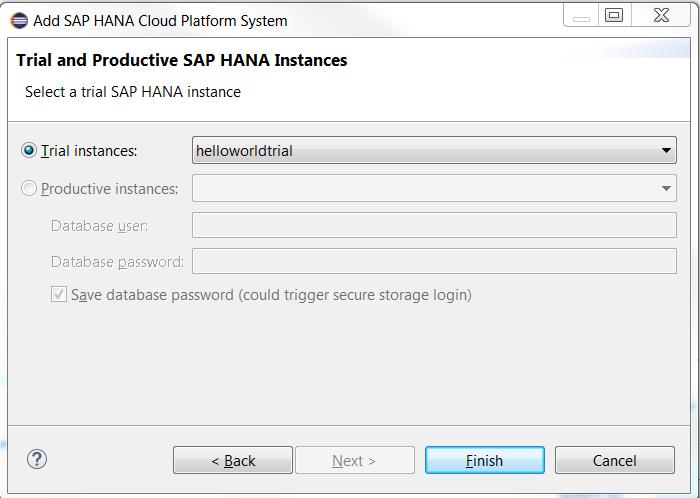
Select it and click on Finish.
Let's see what happened in the end.

Of interest are two packs - Catalog and Content. In the HANA system directory, we can use two schemes: NEO_ and DEV_. A database schema with the NEO_ prefix is a schema for development, that is, you must save all artifacts related to application development there. The scheme with the DEV_ prefix is your personal scheme, in it you can store anything you want, but only if these objects are not used in the main development.
And in the Content folder, we will see our created HANA XS application project.
So, the tools are configured, the connection to SAP HANA is established - it's time to create a new application.
Adding a new project
Go to the Project Explorer tab.
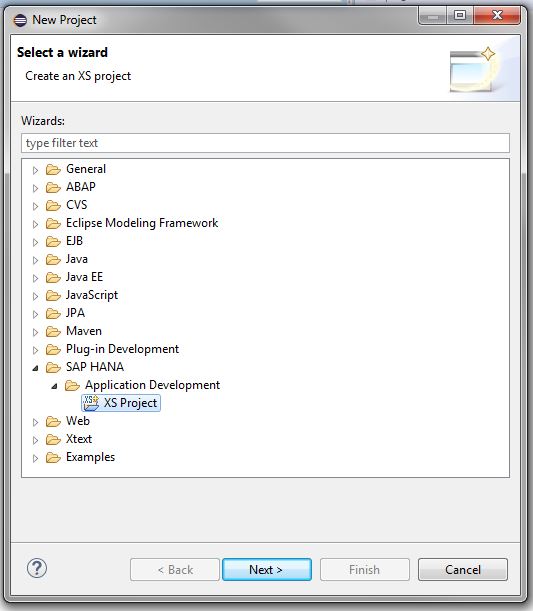
Select File-> New -> Project from the main menu and select SAP HANA-> Application Development-> XS Project.
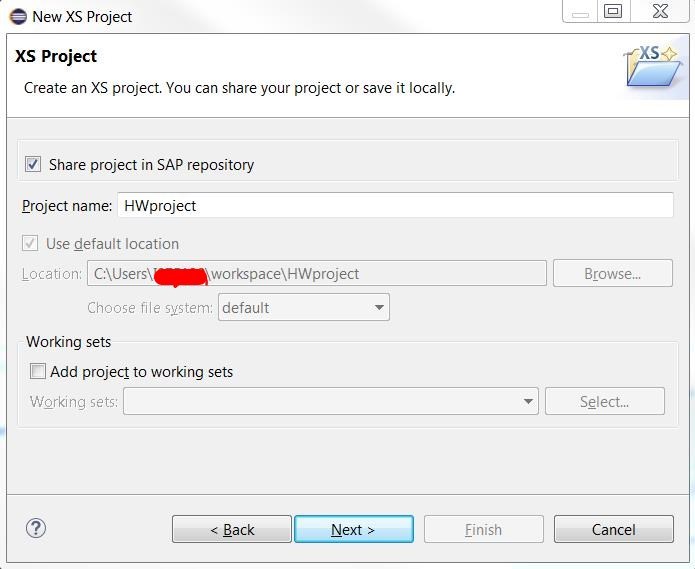
We assign a name to the project, verify that the Share project in SAP repository check box is selected, and move on.
Selecting a repository
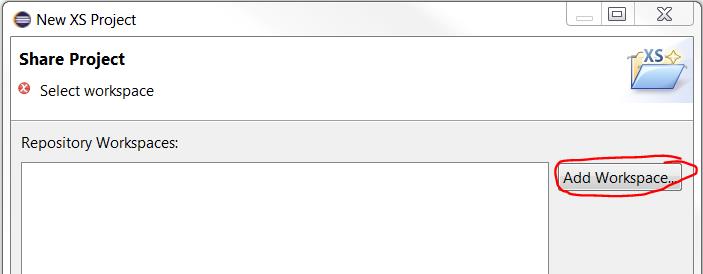
In a new window, select the current workspace (Default Workspace).

We
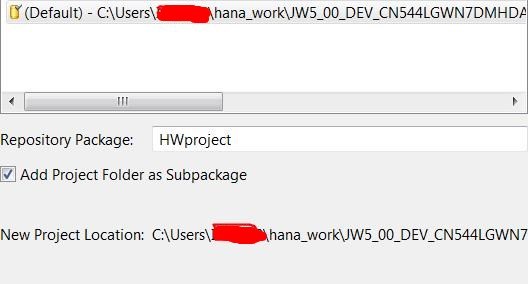
get : We choose the path for the Repository Package.

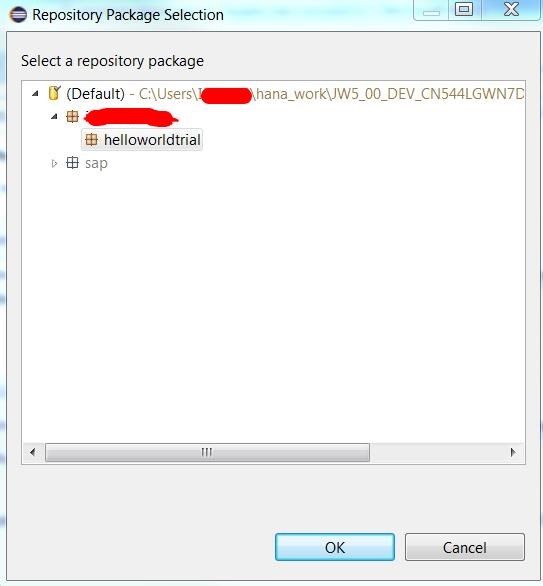
It will look like this:
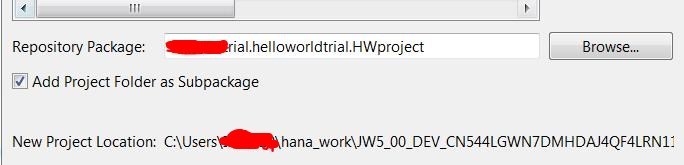
Click Next and go to the next step.
Creating the objects of our application We
fill in the XS JavaScript field.
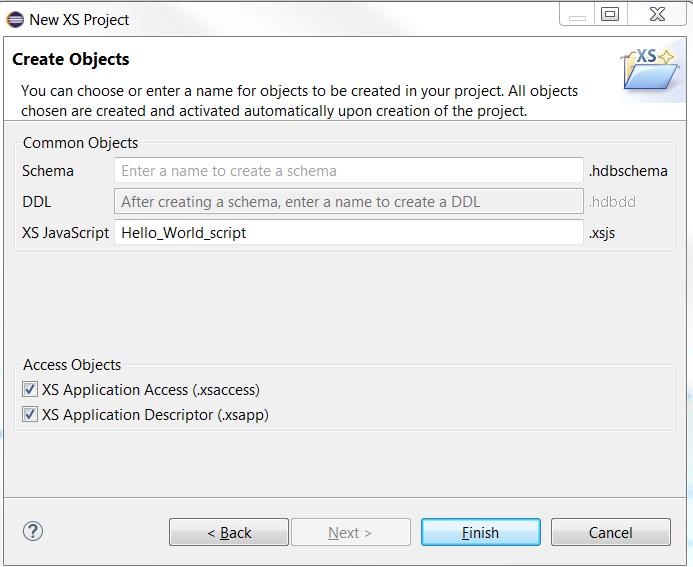
Next, click Finish.
As a result, we have a new project, within the framework of which development will take place.

The HelloWorld.xsjs
file The “HelloWorld.xsjs” file was automatically generated in the previous step and contains some code. We will clean it and add the simplest functionality that implements:
1. Reading data from SAP HANA
2. Outputting the results in HTTP format in a browser
To do this, update the file contents to the following code:
$ .response.contentType = "text / html";
var output = "Hello, World! Message from system ";
var conn = $ .db.getConnection ();
var stmt = conn.prepareStatement ("SELECT value FROM m_host_information WHERE key = 'sid'„);
var rs = stmt.executeQuery ();
if (! rs.next ())
{
$ .response.setBody (“Failed to retrieve data!”);
$ .response.status = $ .net.http.INTERNAL_SERVER_ERROR;
}
else
{
output = output + rs.getString (1);
}
rs.close ();
stmt.close ();
conn.close ();
$ .response.setBody (output);
$ .response.status = $ .net.http.OK;
We

get : The program refers to the m_host_information table to obtain information about the unique identifier of the SAP HANA system. The information received is added to the welcome text “Hello, World!”
We activate the script.

After that, go to Cockpit and see that our HelloWorld application appeared in the HANA XS Applications tab (you may have to restart Cockpit to see it). We take the URL of our application,
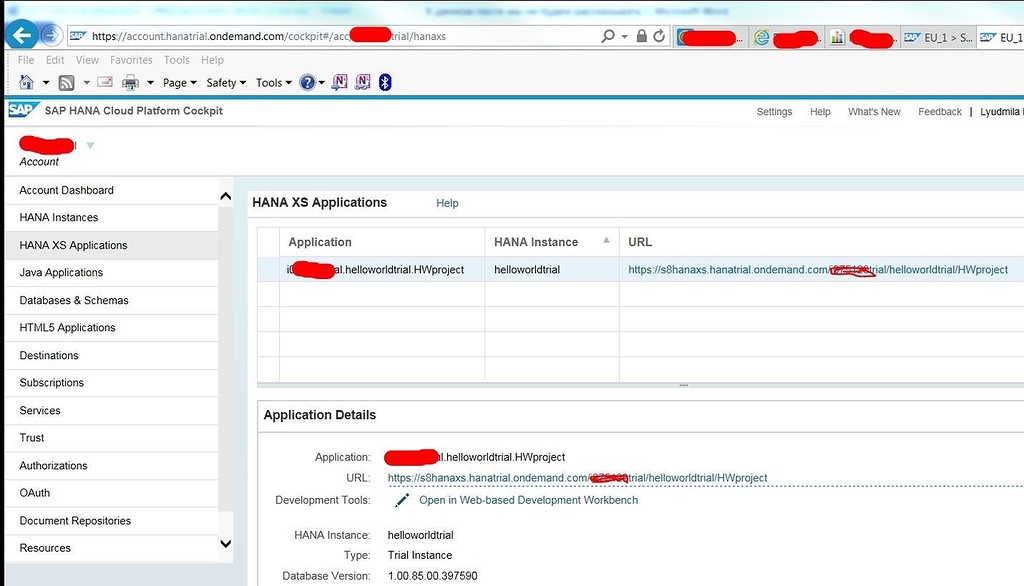
register the created script in it and run it.

The script worked successfully!
So, you are familiar with developing the simplest HANA application using the Eclipse development environment.
We are ready to discuss our post with you, answer your questions and talk about tasks that are of interest to you!
Hello, Habr community!
In this article we will not talk about what SAP HANA is, they talk and write so much about it, but right away we will show how you can “play around” with the system and create a simple application from the “Hello World!” Series using the Eclipse development environment.
First, set up the Eclipse development environment with the necessary plugins. Plug-ins for working with SAP HANA exist for two versions of Eclipse - Luna and Kepler. If you do not have Eclipse installed, you can download it using the links:
Luna - www.eclipse.org/luna
Kepler - www.eclipse.org/kepler
In our example, we will show all the configuration steps using the Eclipse Luna example.
The next step is to install the plugins - the standard process for Eclipse. The only “but” - the versions of the plugins for Luna and Kepler are different, so choose the one that suits your version of Eclipse.
Link to plugins for Luna - tools.hana.ondemand.com/luna
Link to plugins for Kepler - tools.hana.ondemand.com/kepler
Select Help in the top menu of Eclipse and select Install New Software.
Copy the link to the Work with: line and add it to the list of saved links.
After that, a list of plugins available for download will appear. From this list we are only interested in two plugins:
• ABAP Development Tools for SAP NetWeaver - it contains all the necessary tools for development in the ABAP language;
• SAP HANA Tools - this plugin includes all the development tools for SAP HANA, including tools for administration (at the developer level), design and development of databases based on the SAP HANA platform.
We mark these two plugins for installation and click on the Next button.
After that, having familiarized ourselves with the list of installed components and agreeing with the license agreement, we are
waiting for Finish.
After restarting Eclipse, you will be greeted by an updated welcome page. On it you can find links to articles on the basics of development in the ABAP language, as well as many other useful information.
We click on the Workbench button in the upper right corner and we get already into the "working area" of the development environment. The next step will be the selection of the necessary development prospects.
There are two ways to do this. The first is to go to Window-> Open Perspective-> Other ... The
second way is to click Open Perspective directly in the perspective panel.
We need to add two perspectives in turn: the SAP HANA Administration Console and the SAP HANA Modeler.
This concludes the Eclipse preparation phase, now you can go directly to getting test access to the SAP HANA Cloud Platform.
Getting it is easy enough. First, go to account.hana.ondemand.com/register and register on the site. Secondly, after registering and entering the system, you need to go to the control panel of the cloud platform by clicking on the appropriate link in the site’s navigation panel or simply follow the link:
account.hanatrial.ondemand.com/cockpit
Here we see several tabs leading to viewing and setting up different parts of the cloud platform. Now we are interested in creating the so-called HANA XS application - let's create it!
Creating a new application instance
Click on HANA Instances in the quick access panel on the left.
To gain access, you need to create a new trial example (New Trial Instance) and, specifying its name, save the changes.
Adding a System (Eclipse)
Now we will connect together Eclipse and SAP HANA. To do this, launch Eclipse and open the perspective of SAP HANA Development. Then go to the Systems tab. It will look something like this:
Right-click and select Add Cloud System. After that, you will need to enter the account name, username and password.
Your Account name is here.
If you have forgotten your password, you can recover it here.
After clicking on Next, Eclipse will ask which instance to select. Most likely, you will see only one available option (the one that was just created).
Select it and click on Finish.
Let's see what happened in the end.
Of interest are two packs - Catalog and Content. In the HANA system directory, we can use two schemes: NEO_ and DEV_. A database schema with the NEO_ prefix is a schema for development, that is, you must save all artifacts related to application development there. The scheme with the DEV_ prefix is your personal scheme, in it you can store anything you want, but only if these objects are not used in the main development.
And in the Content folder, we will see our created HANA XS application project.
So, the tools are configured, the connection to SAP HANA is established - it's time to create a new application.
Adding a new project
Go to the Project Explorer tab.
Select File-> New -> Project from the main menu and select SAP HANA-> Application Development-> XS Project.
We assign a name to the project, verify that the Share project in SAP repository check box is selected, and move on.
Selecting a repository
In a new window, select the current workspace (Default Workspace).
We
get : We choose the path for the Repository Package.
It will look like this:
Click Next and go to the next step.
Creating the objects of our application We
fill in the XS JavaScript field.
Next, click Finish.
As a result, we have a new project, within the framework of which development will take place.
The HelloWorld.xsjs
file The “HelloWorld.xsjs” file was automatically generated in the previous step and contains some code. We will clean it and add the simplest functionality that implements:
1. Reading data from SAP HANA
2. Outputting the results in HTTP format in a browser
To do this, update the file contents to the following code:
$ .response.contentType = "text / html";
var output = "Hello, World! Message from system ";
var conn = $ .db.getConnection ();
var stmt = conn.prepareStatement ("SELECT value FROM m_host_information WHERE key = 'sid'„);
var rs = stmt.executeQuery ();
if (! rs.next ())
{
$ .response.setBody (“Failed to retrieve data!”);
$ .response.status = $ .net.http.INTERNAL_SERVER_ERROR;
}
else
{
output = output + rs.getString (1);
}
rs.close ();
stmt.close ();
conn.close ();
$ .response.setBody (output);
$ .response.status = $ .net.http.OK;
We
get : The program refers to the m_host_information table to obtain information about the unique identifier of the SAP HANA system. The information received is added to the welcome text “Hello, World!”
We activate the script.
After that, go to Cockpit and see that our HelloWorld application appeared in the HANA XS Applications tab (you may have to restart Cockpit to see it). We take the URL of our application,
register the created script in it and run it.
The script worked successfully!
So, you are familiar with developing the simplest HANA application using the Eclipse development environment.
We are ready to discuss our post with you, answer your questions and talk about tasks that are of interest to you!