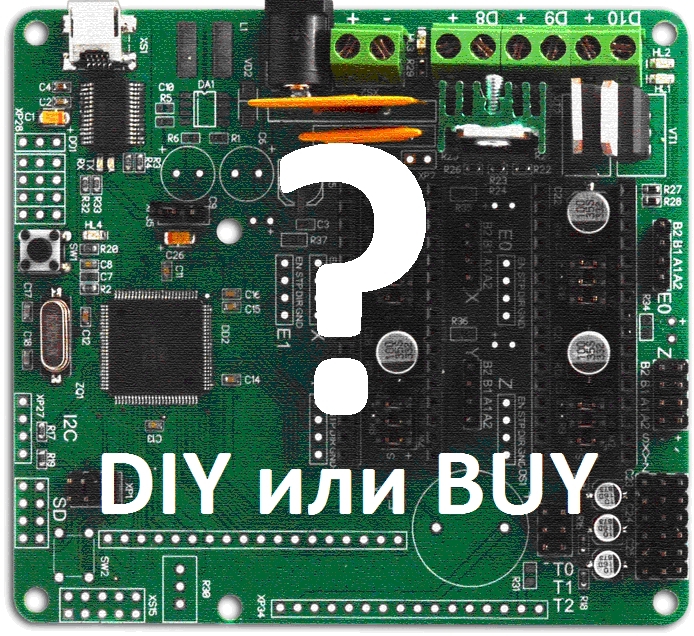
Self-assembly or purchase of finished equipment for construction. 3d printer. Part 1
Hello, Habr!
Recently I published a post about the designer Khvatohod. Now we are preparing for training people of all ages in designing and electronics in our coworking center. For this, it is also necessary to select equipment.
According to set the direction of the task, equipment design must meet the following requirements:
- the cost of not more than 30 thousand rubles
- an open architecture (hardware and software)
- ease of maintenance and availability of parts
- safe operation
- possibility of making it complex products
- fast payback
Earlier I have been working in the field of 3D printing for more than 1.5 years. Therefore, the choice was made in favor of a 3D printer.
For lessons in design and electronics, a DIY kit (Do It Yorself), an MC5 3D printer from MasterKit, created on the basis of one of the Russian manufacturers of 3D printers: the

Assembly Kit, was created in order tosell it, to assemble and train. It will be used to create parts of oneself (RepRap concept), accessories and electronics training.
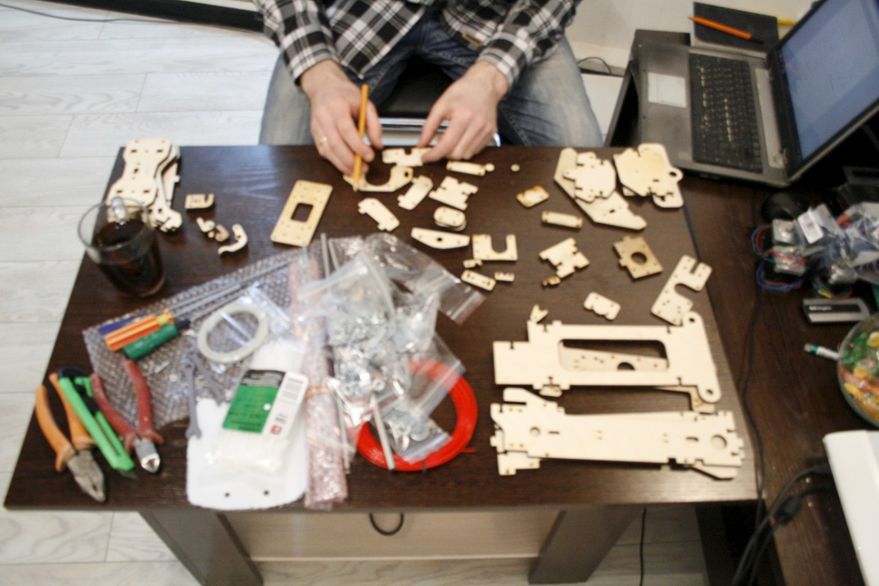
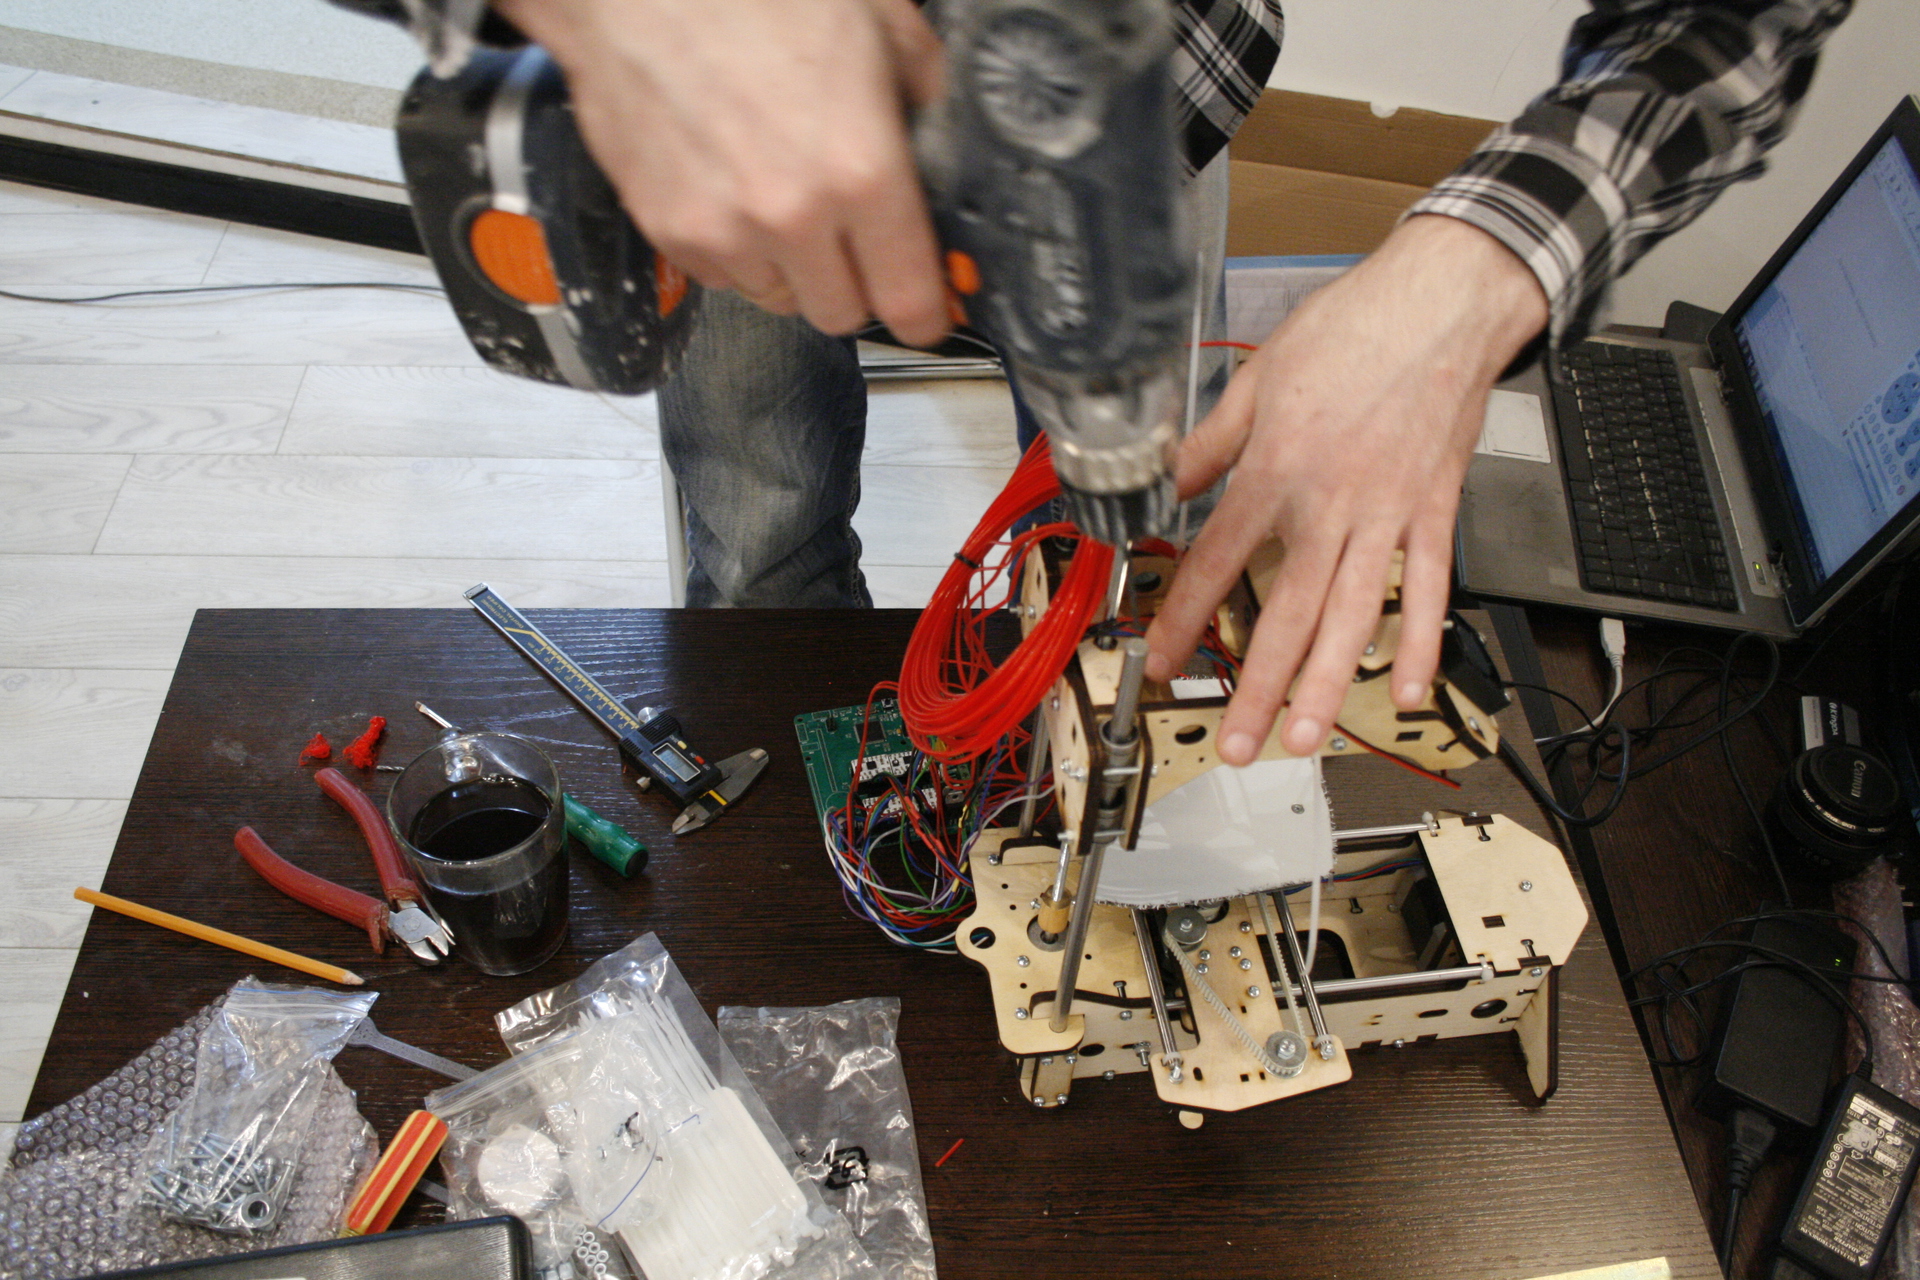
You can calculate the amount of coffee you drink in the time-lapse of the assembly process, which took only 12 hours:
The whole process is quite trivial if the weight of the screwdriver in your hand does not scare you. There is a completely understandable, Russian-language instruction . Before starting the assembly process, it is better to mark the details of plywood with a pencil for ease of perception: I
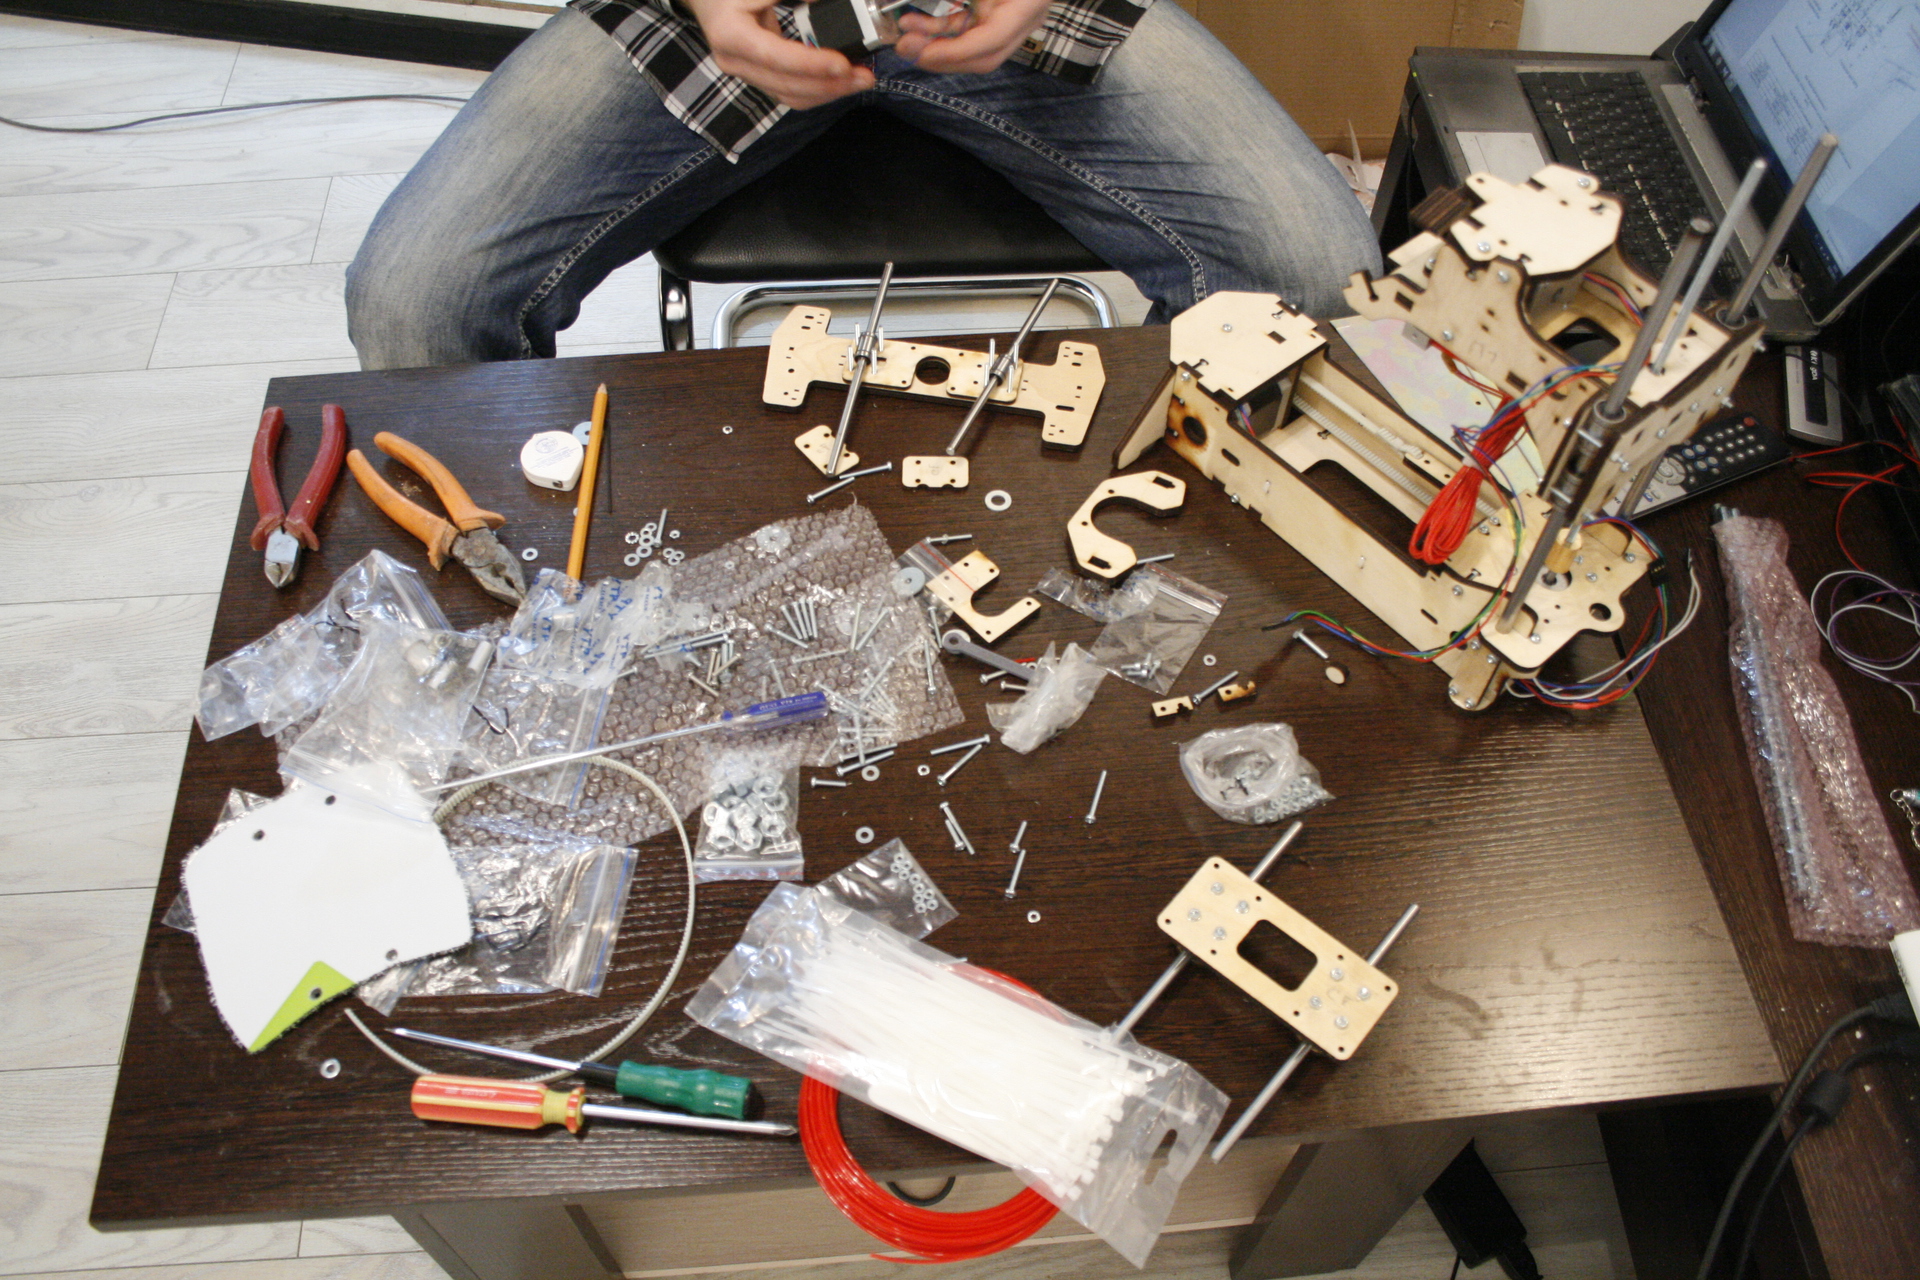
recommend putting linear bearings on the axes immediately to avoid misalignment, loss of balls and nerves:
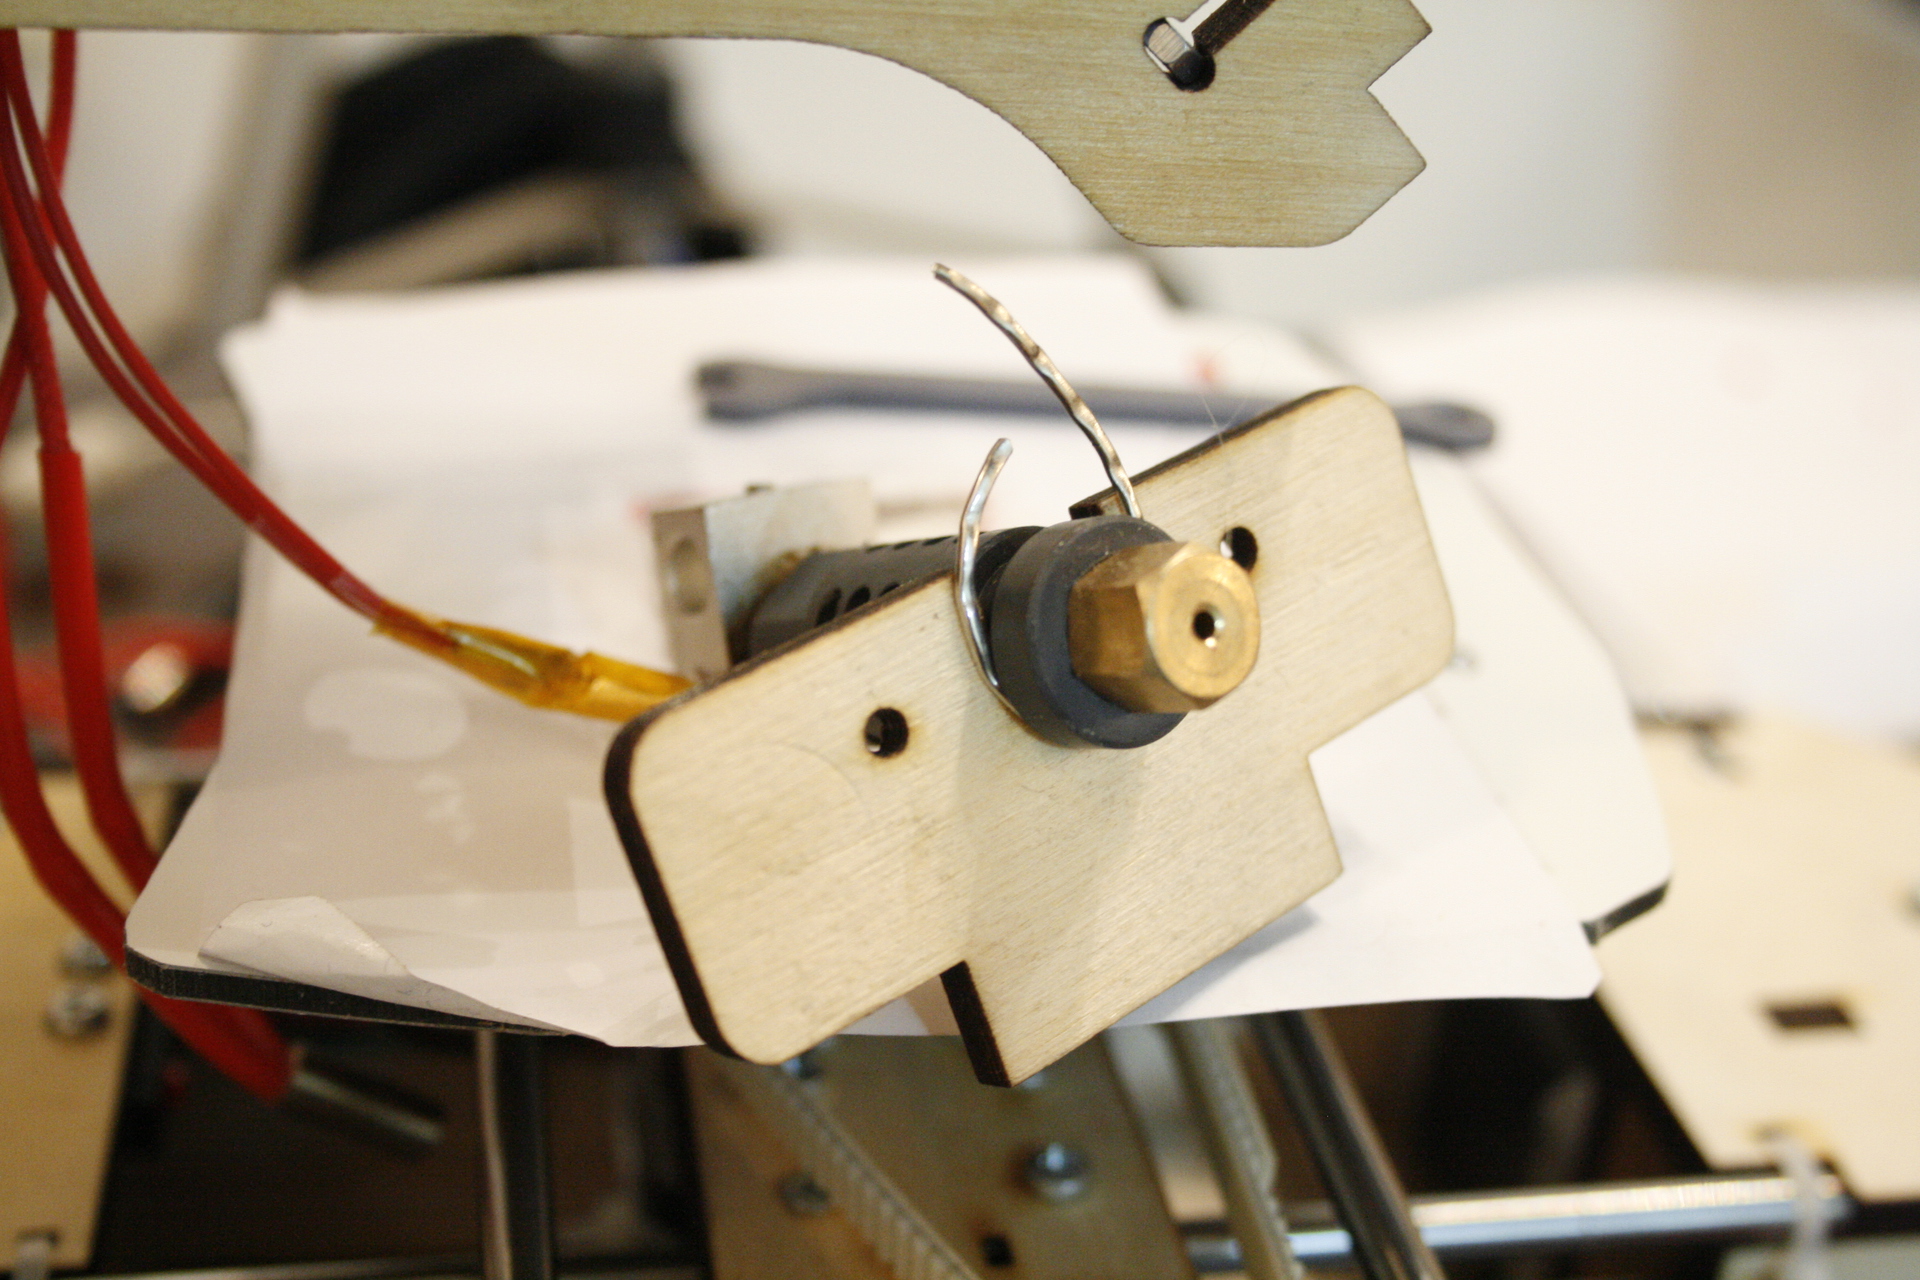
There was a controversial moment when assembling the print head assembly in connecting the J-Head extruder to the body. In the instructions, you need to attach the M8 washer, tried different options, but the J-Head still dangled:

J-Head printhead: A

temporary solution was found using the laser pointer ring, which he put in place of the specified washer:
Also, I could not find the indicated holes in the parts for fixing the nut on the pin of the vertical Z axis and for the wires from the print head:
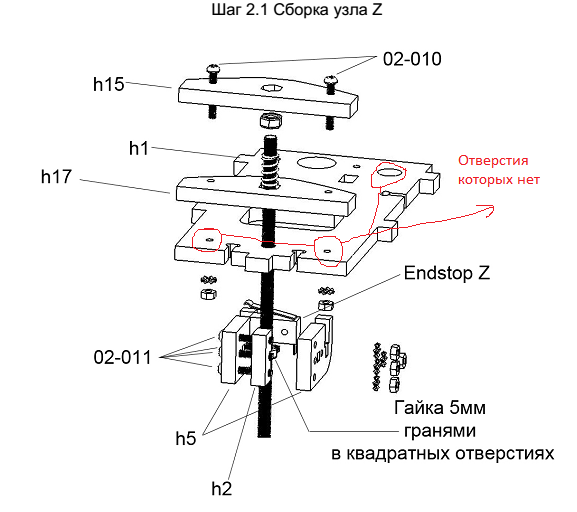
But the process cannot be stopped. With the help oflaser drills and drills of 3 mm and 8 mm, the missing 3 holes are easily made:
Next, it remains to tighten the belts on thestomachs of the XY axes and you can connect the electronics.
All wires and contacts are marked. We open the circuit and stick where it is shown:
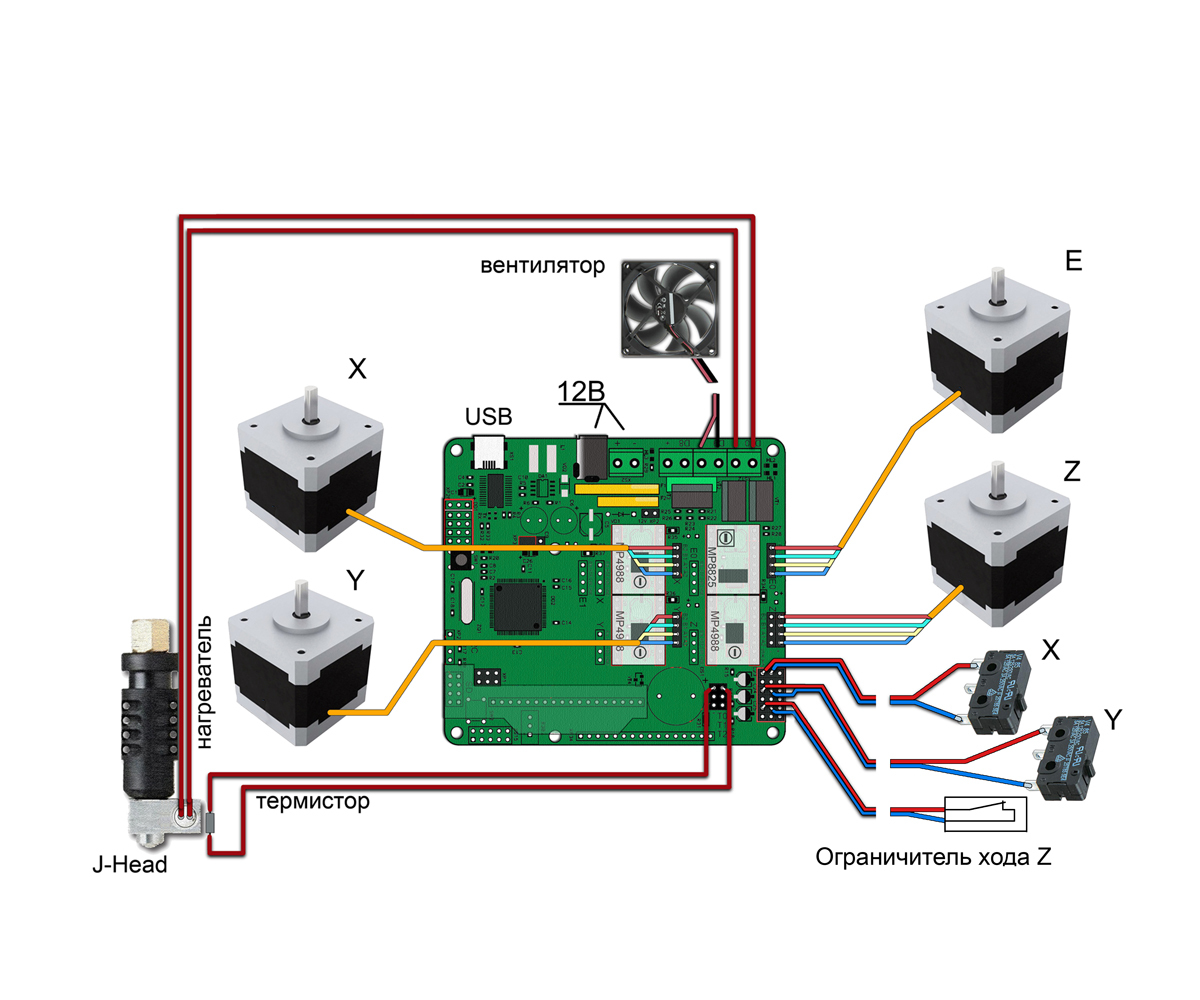
Pay attention to the driver of the extruder engine. I had all 4 drivers that were A4988 (MP4988), so they should be oriented with a tuning resistor in one direction, as shown in the diagram. Resistors do not need to be twisted.
View of the assembled 3D printer:

To hide and fasten wires at once - I do not advise. Bear with a little.
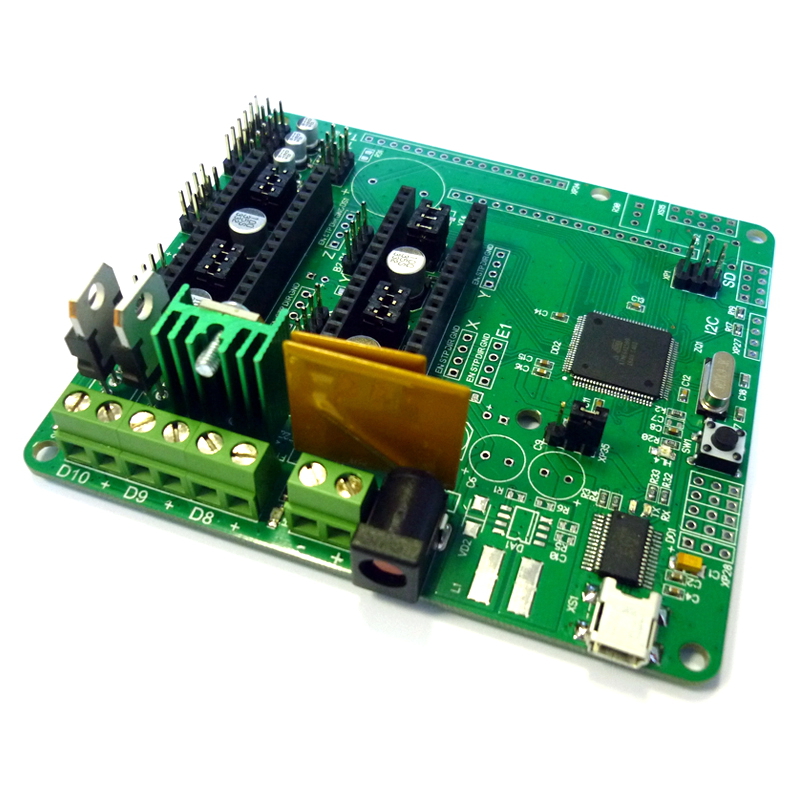
The control board uses open hardware and software architecture: Mastertronics (it was it that was included) is a hybrid of Arduino MEGA 2560 and a shield for Ramps 1.4 3D printers:
So we can safely downloadopen source free software: Repetier-host (for PC connection with the 3D control board -printer) and Arduino IDE (To finish the microcontroller firmware code). The subtleties of the configuration of this software will be described in the second part:
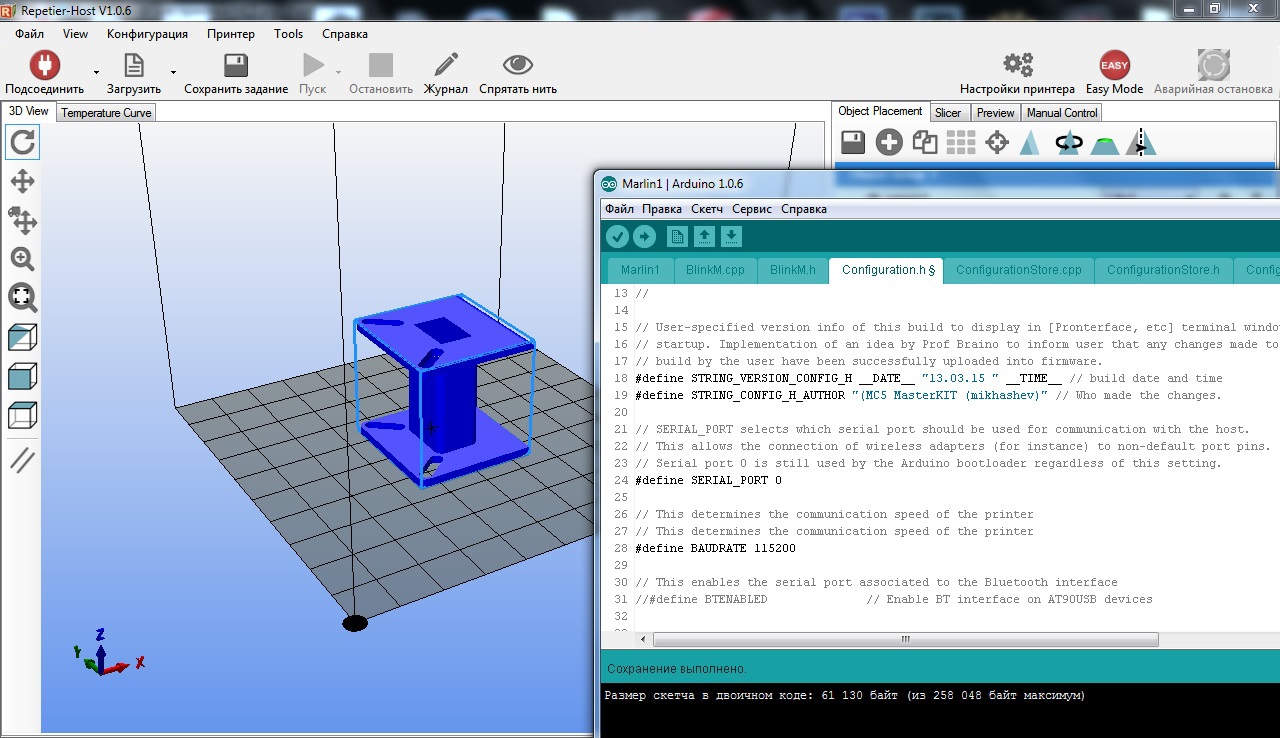
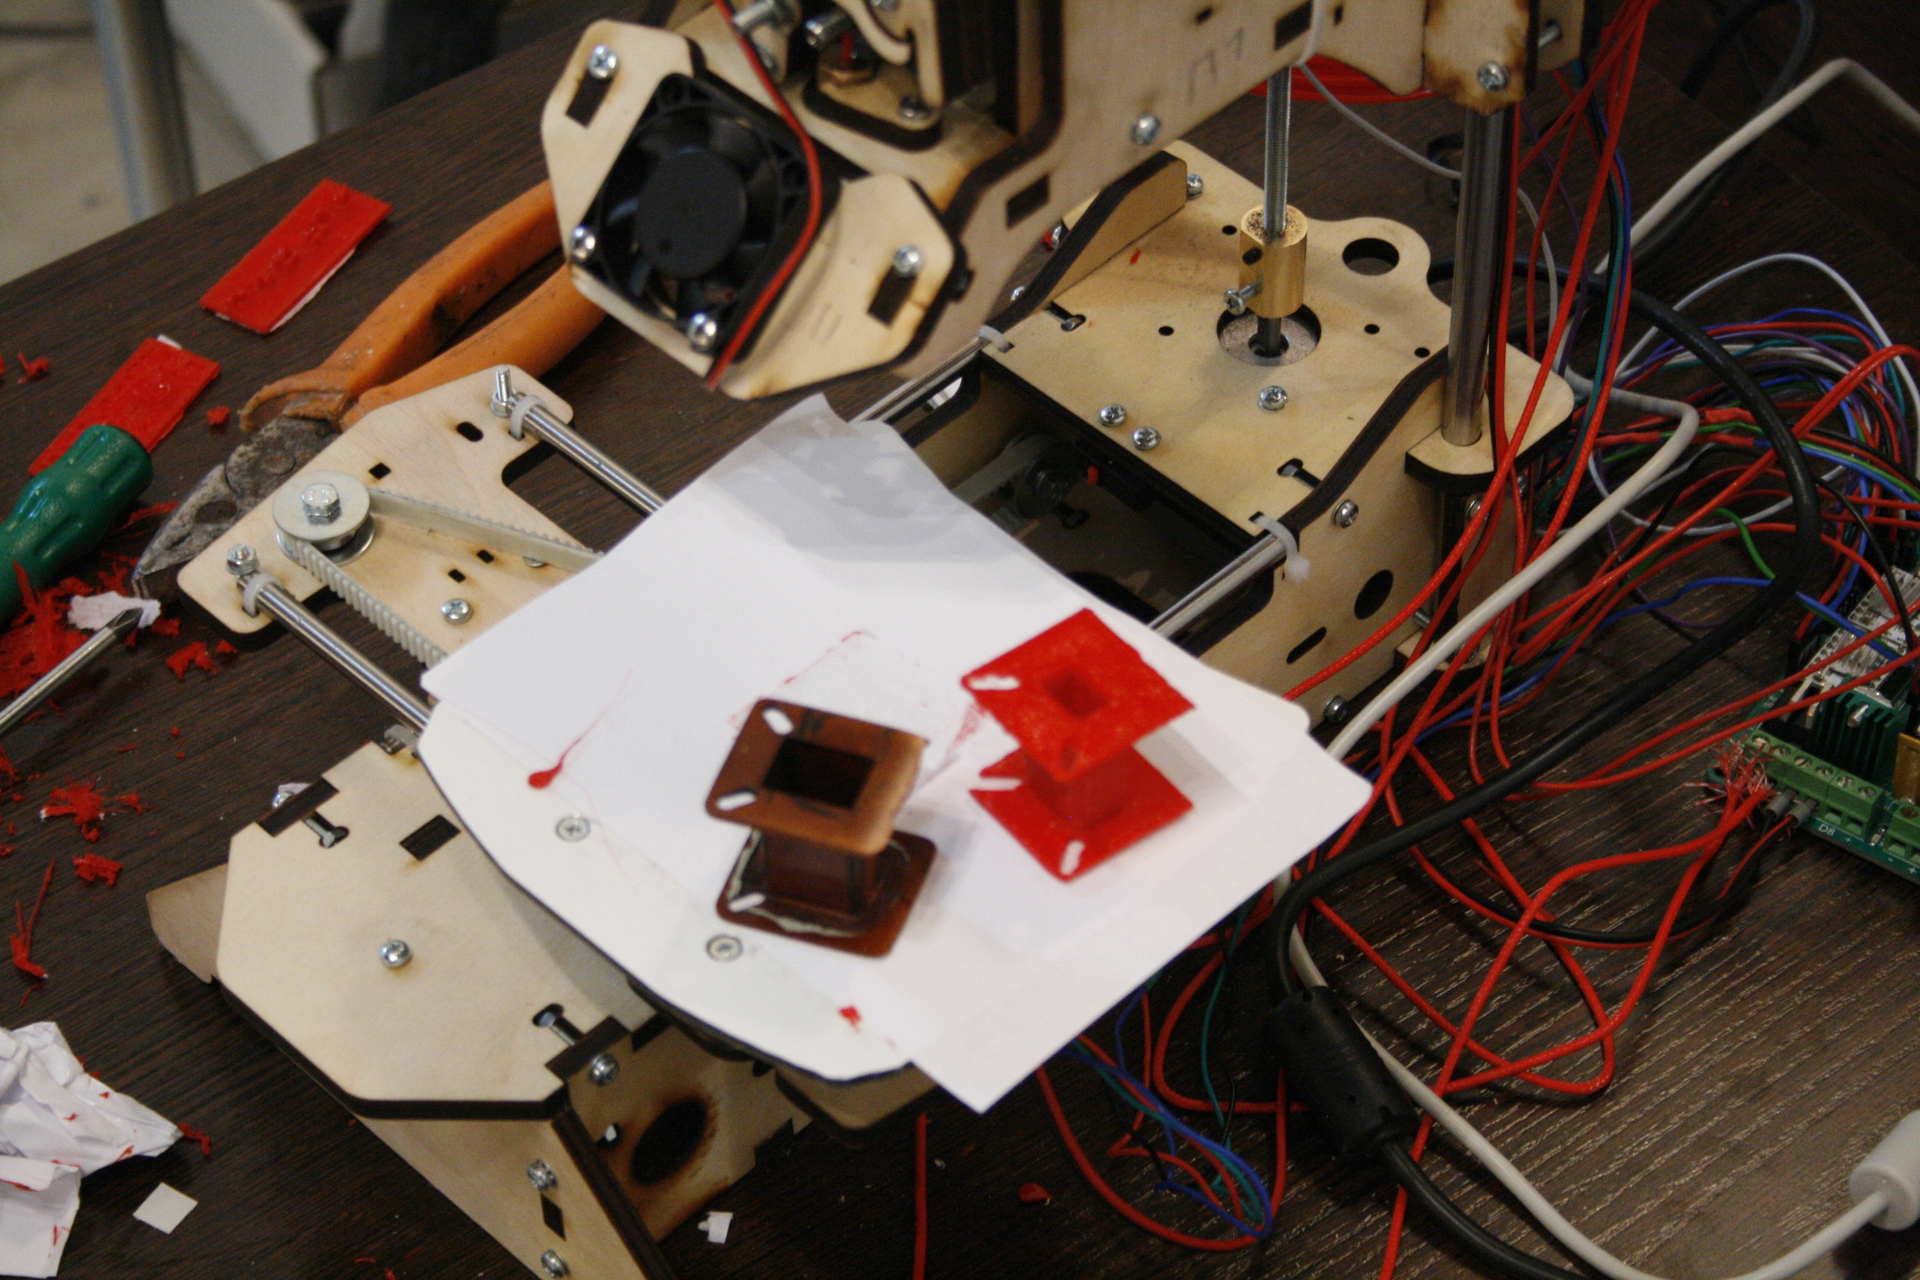
After setting up the software, it will be possible to print:
Especially for the Habr, Master Kit provided a HABR promo code, which gives a 7% discount on any order on the site3d.masterkit.ru
Recently I published a post about the designer Khvatohod. Now we are preparing for training people of all ages in designing and electronics in our coworking center. For this, it is also necessary to select equipment.
According to set the direction of the task, equipment design must meet the following requirements:
- the cost of not more than 30 thousand rubles
- an open architecture (hardware and software)
- ease of maintenance and availability of parts
- safe operation
- possibility of making it complex products
- fast payback
Earlier I have been working in the field of 3D printing for more than 1.5 years. Therefore, the choice was made in favor of a 3D printer.
For lessons in design and electronics, a DIY kit (Do It Yorself), an MC5 3D printer from MasterKit, created on the basis of one of the Russian manufacturers of 3D printers: the
Assembly Kit, was created in order to
You can calculate the amount of coffee you drink in the time-lapse of the assembly process, which took only 12 hours:
The whole process is quite trivial if the weight of the screwdriver in your hand does not scare you. There is a completely understandable, Russian-language instruction . Before starting the assembly process, it is better to mark the details of plywood with a pencil for ease of perception: I
recommend putting linear bearings on the axes immediately to avoid misalignment, loss of balls and nerves:
There was a controversial moment when assembling the print head assembly in connecting the J-Head extruder to the body. In the instructions, you need to attach the M8 washer, tried different options, but the J-Head still dangled:
J-Head printhead: A
temporary solution was found using the laser pointer ring, which he put in place of the specified washer:
Also, I could not find the indicated holes in the parts for fixing the nut on the pin of the vertical Z axis and for the wires from the print head:
But the process cannot be stopped. With the help of
Next, it remains to tighten the belts on the
All wires and contacts are marked. We open the circuit and stick where it is shown:
Pay attention to the driver of the extruder engine. I had all 4 drivers that were A4988 (MP4988), so they should be oriented with a tuning resistor in one direction, as shown in the diagram. Resistors do not need to be twisted.
View of the assembled 3D printer:
To hide and fasten wires at once - I do not advise. Bear with a little.
The control board uses open hardware and software architecture: Mastertronics (it was it that was included) is a hybrid of Arduino MEGA 2560 and a shield for Ramps 1.4 3D printers:
So we can safely download
After setting up the software, it will be possible to print:
Especially for the Habr, Master Kit provided a HABR promo code, which gives a 7% discount on any order on the site3d.masterkit.ru
Only registered users can participate in the survey. Please come in.
DIY or BUY?
- 80.8% DIY 578
- 19.1% BUY 137