DIY do-it-yourself cooling pad for laptop
Greetings to all habroyuzers, today I will tell you how I made a simple and pretty budget cooling pad for a laptop.
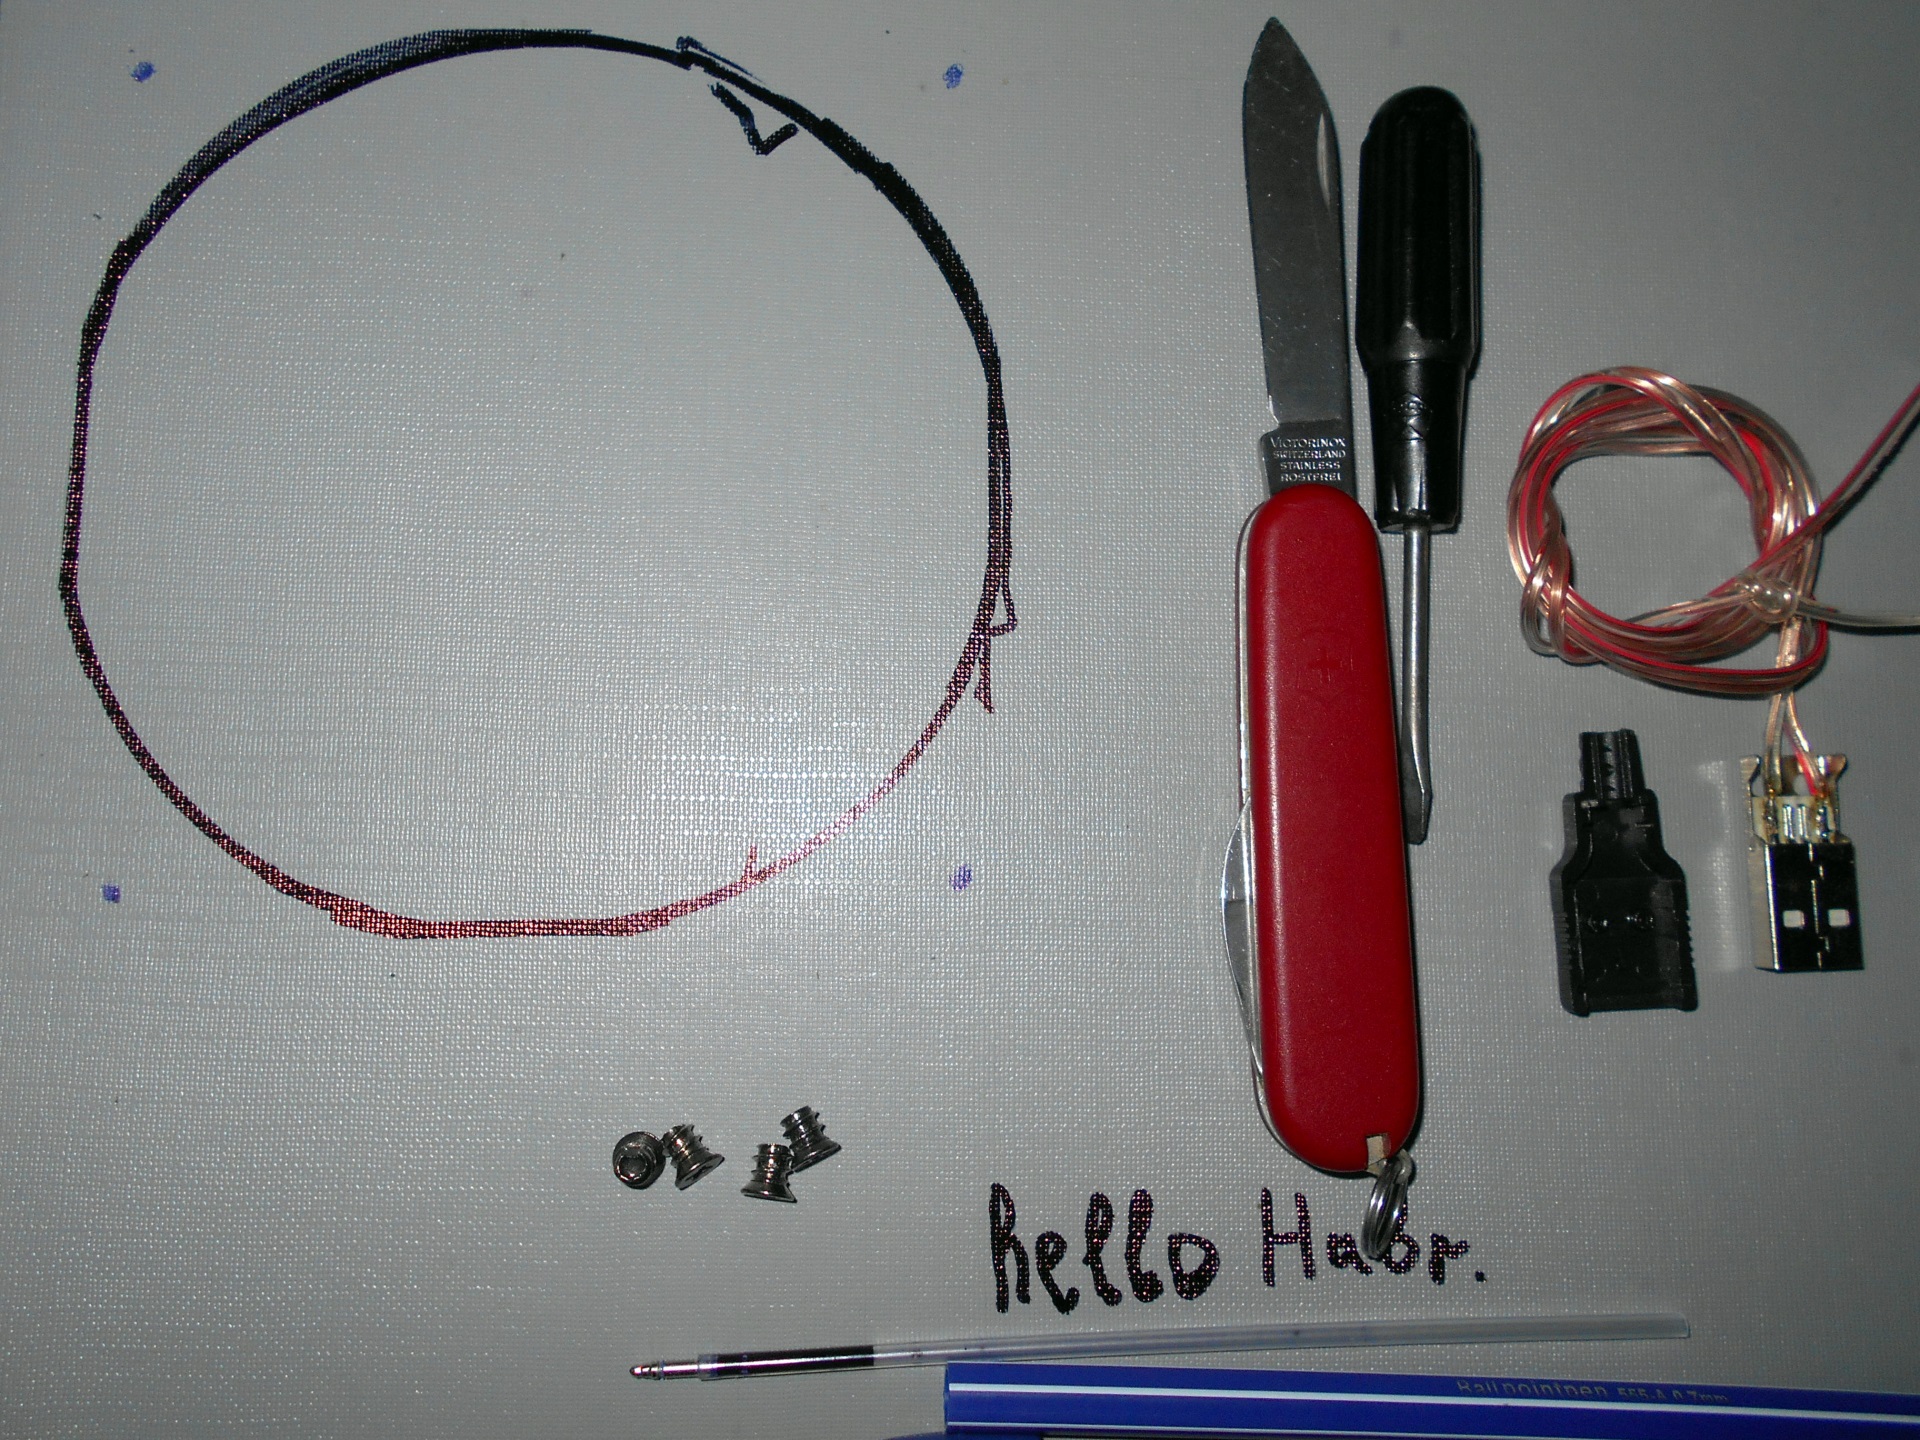
To do this, we need:
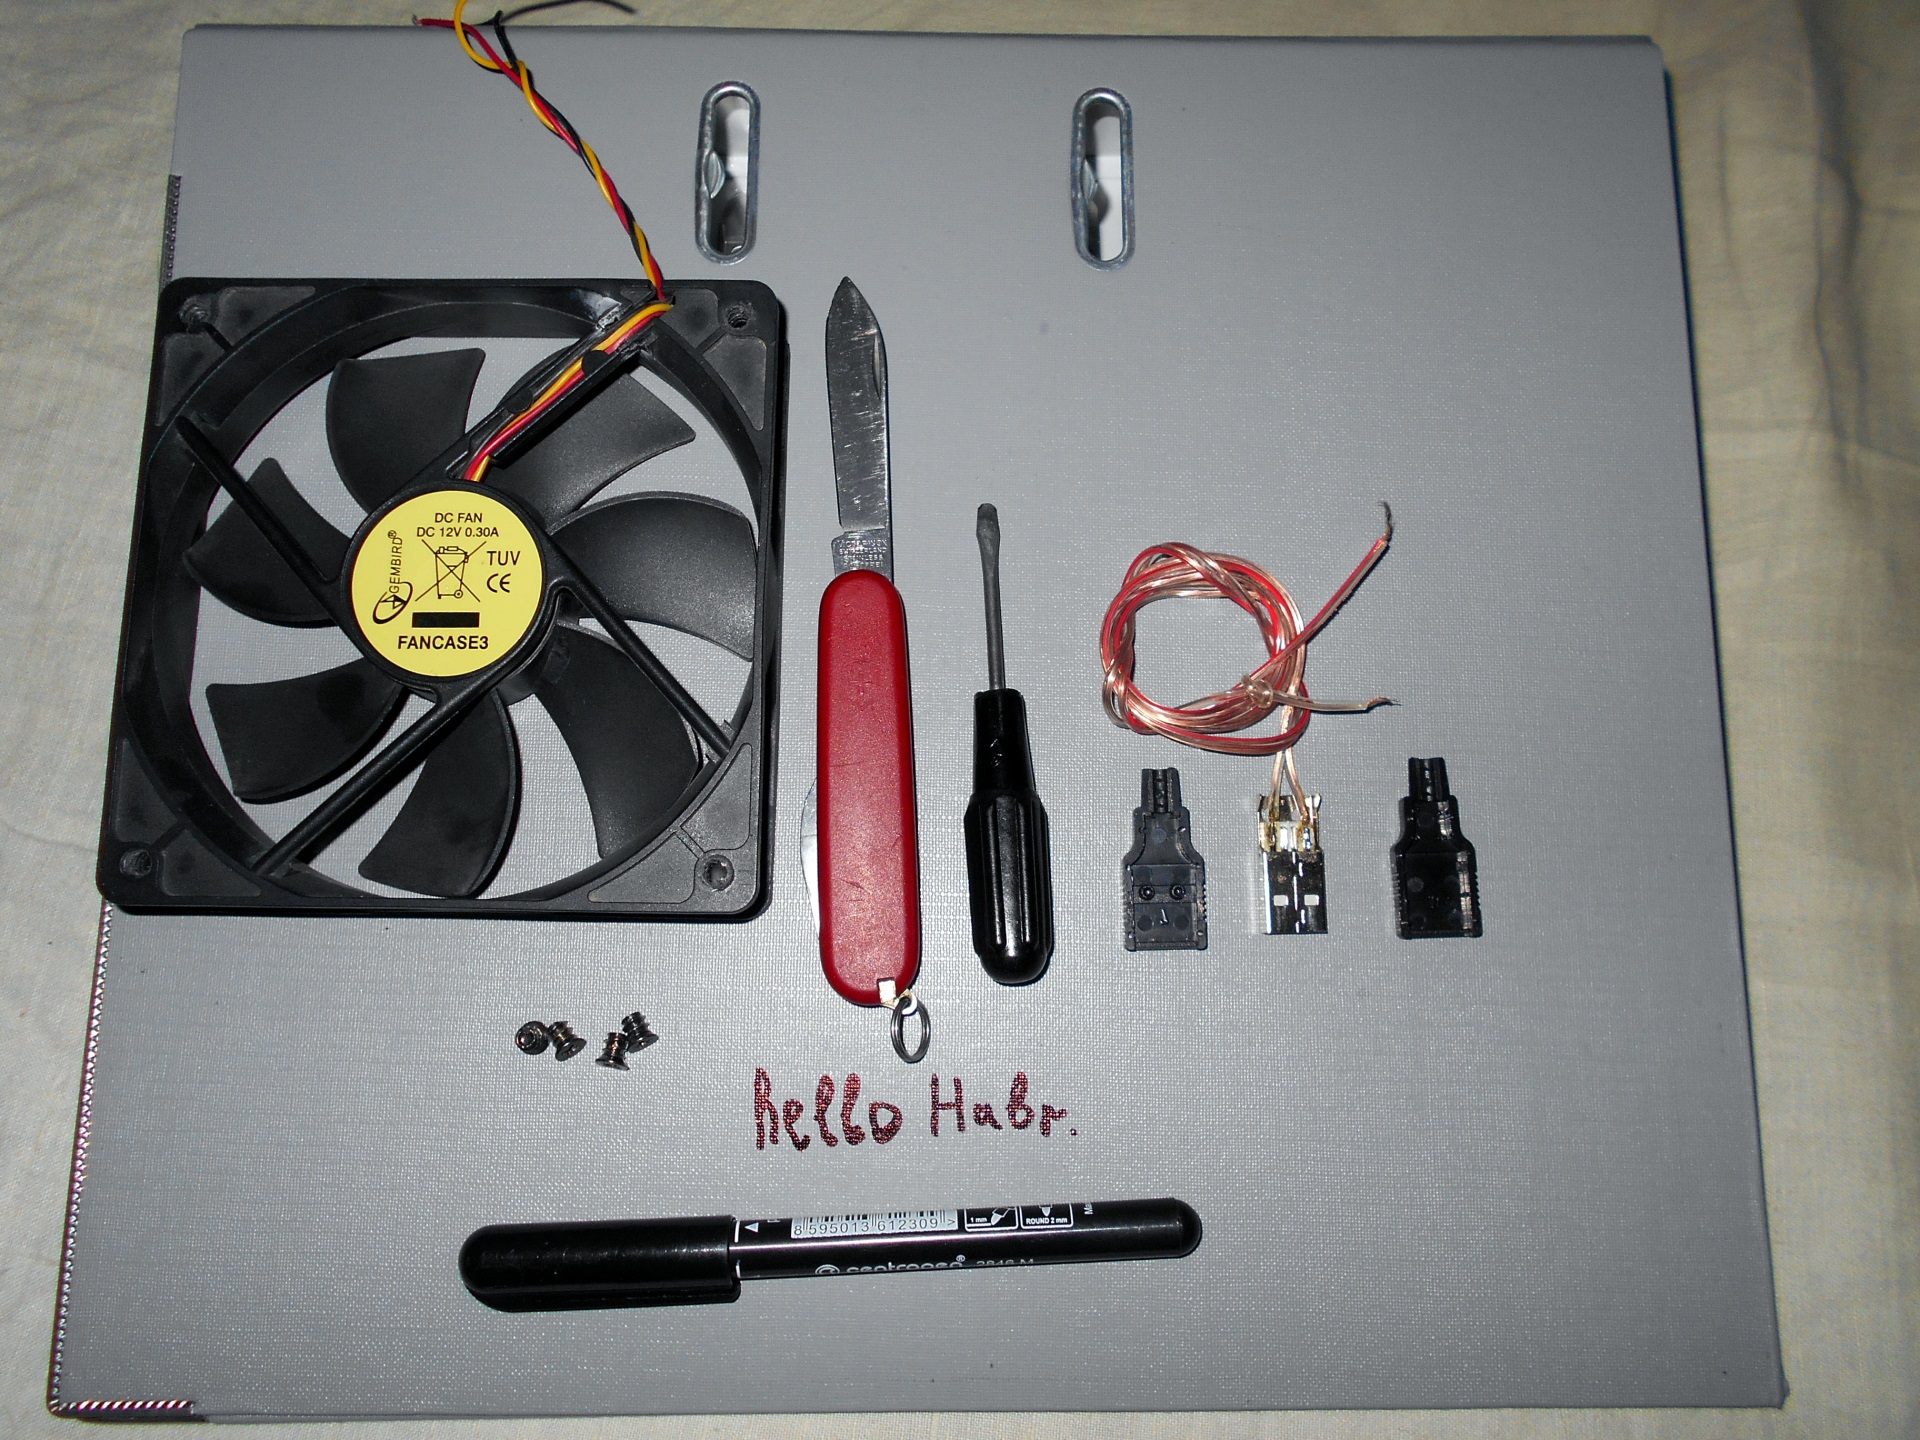
1) A folder for A4 sheets, with as coarse cardboard as possible, in my case it is a folder folder with an arch clip , it looks like this:

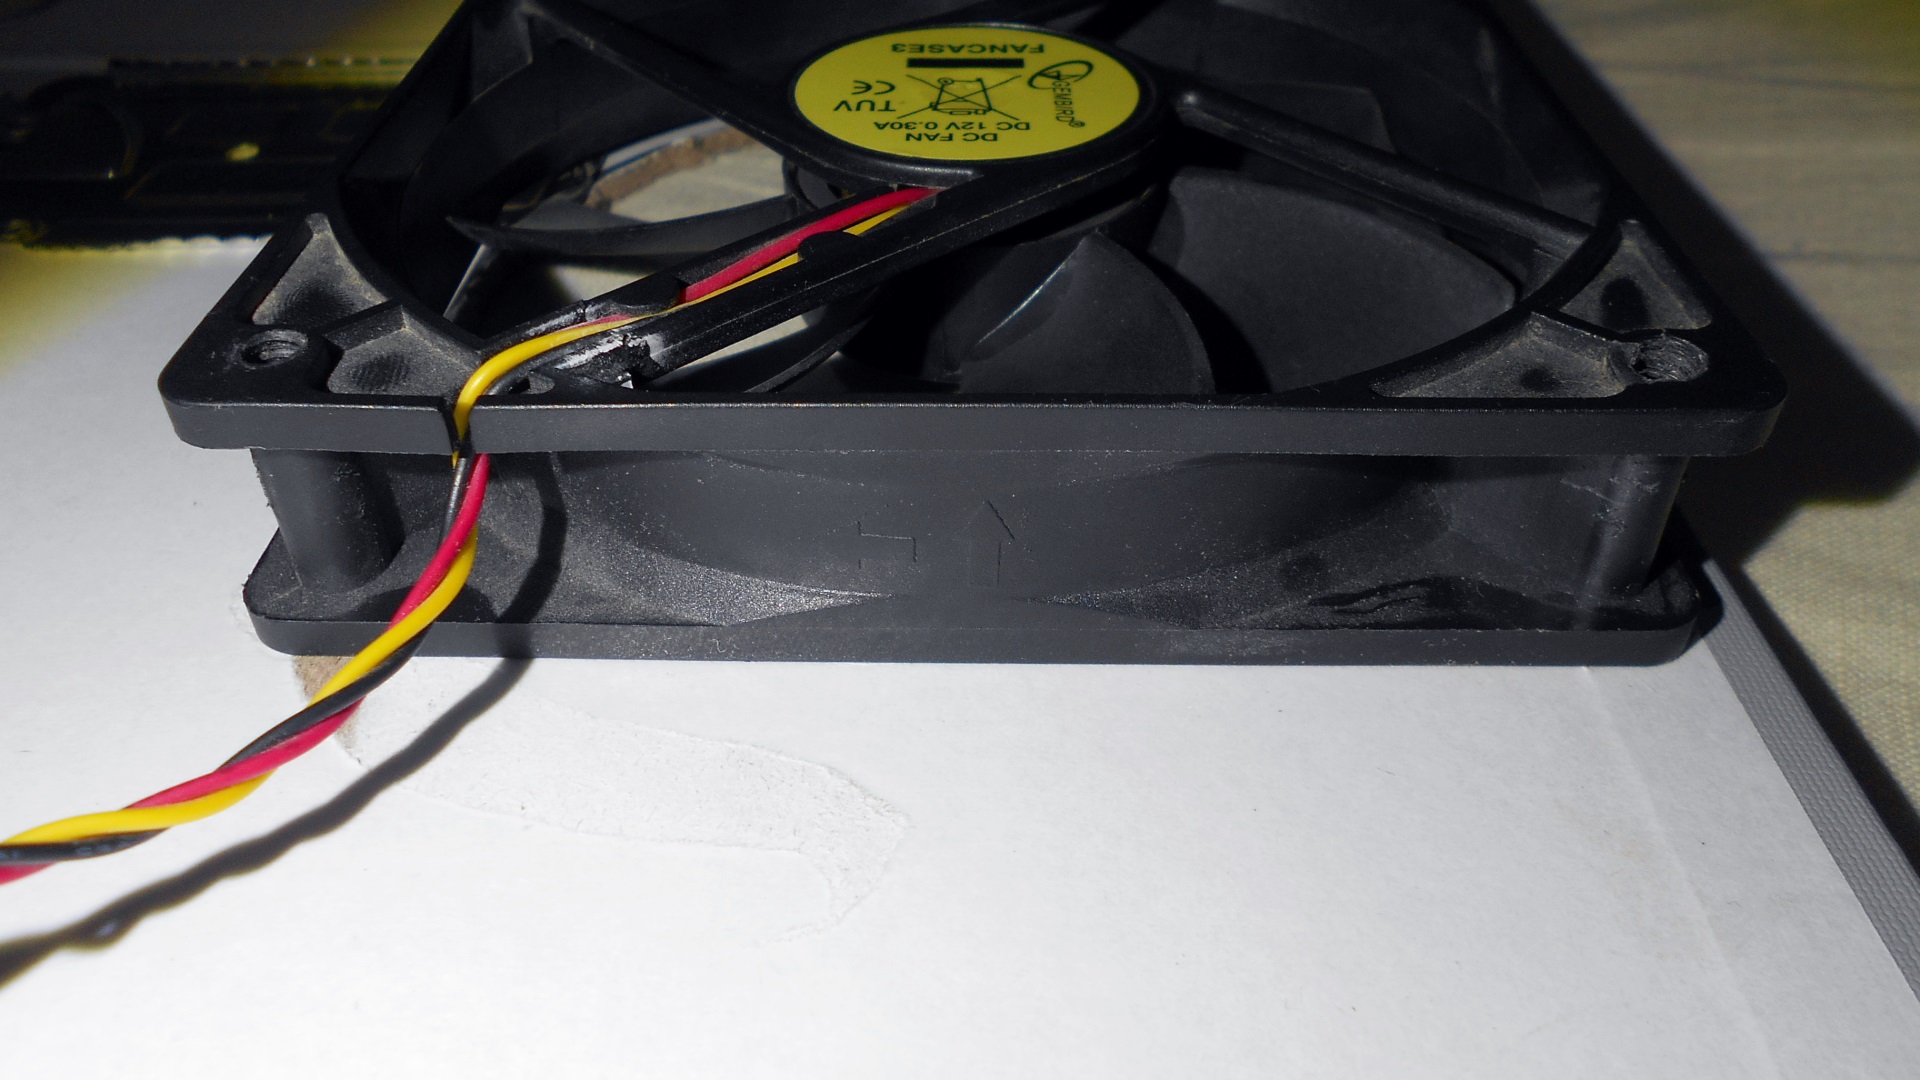
2) A fan from a computer measuring 120 by 120 mm:
In my case, this is one of Gembird FANCASE3’s most budget fans are rated at 2100 rpm, that is, “buzzing like a vacuum cleaner”, but, nevertheless, it turned off in my old computer for about three years and still works.
Of course, you can take smaller fans, but the 120s have an optimal price / performance / noise ratio.
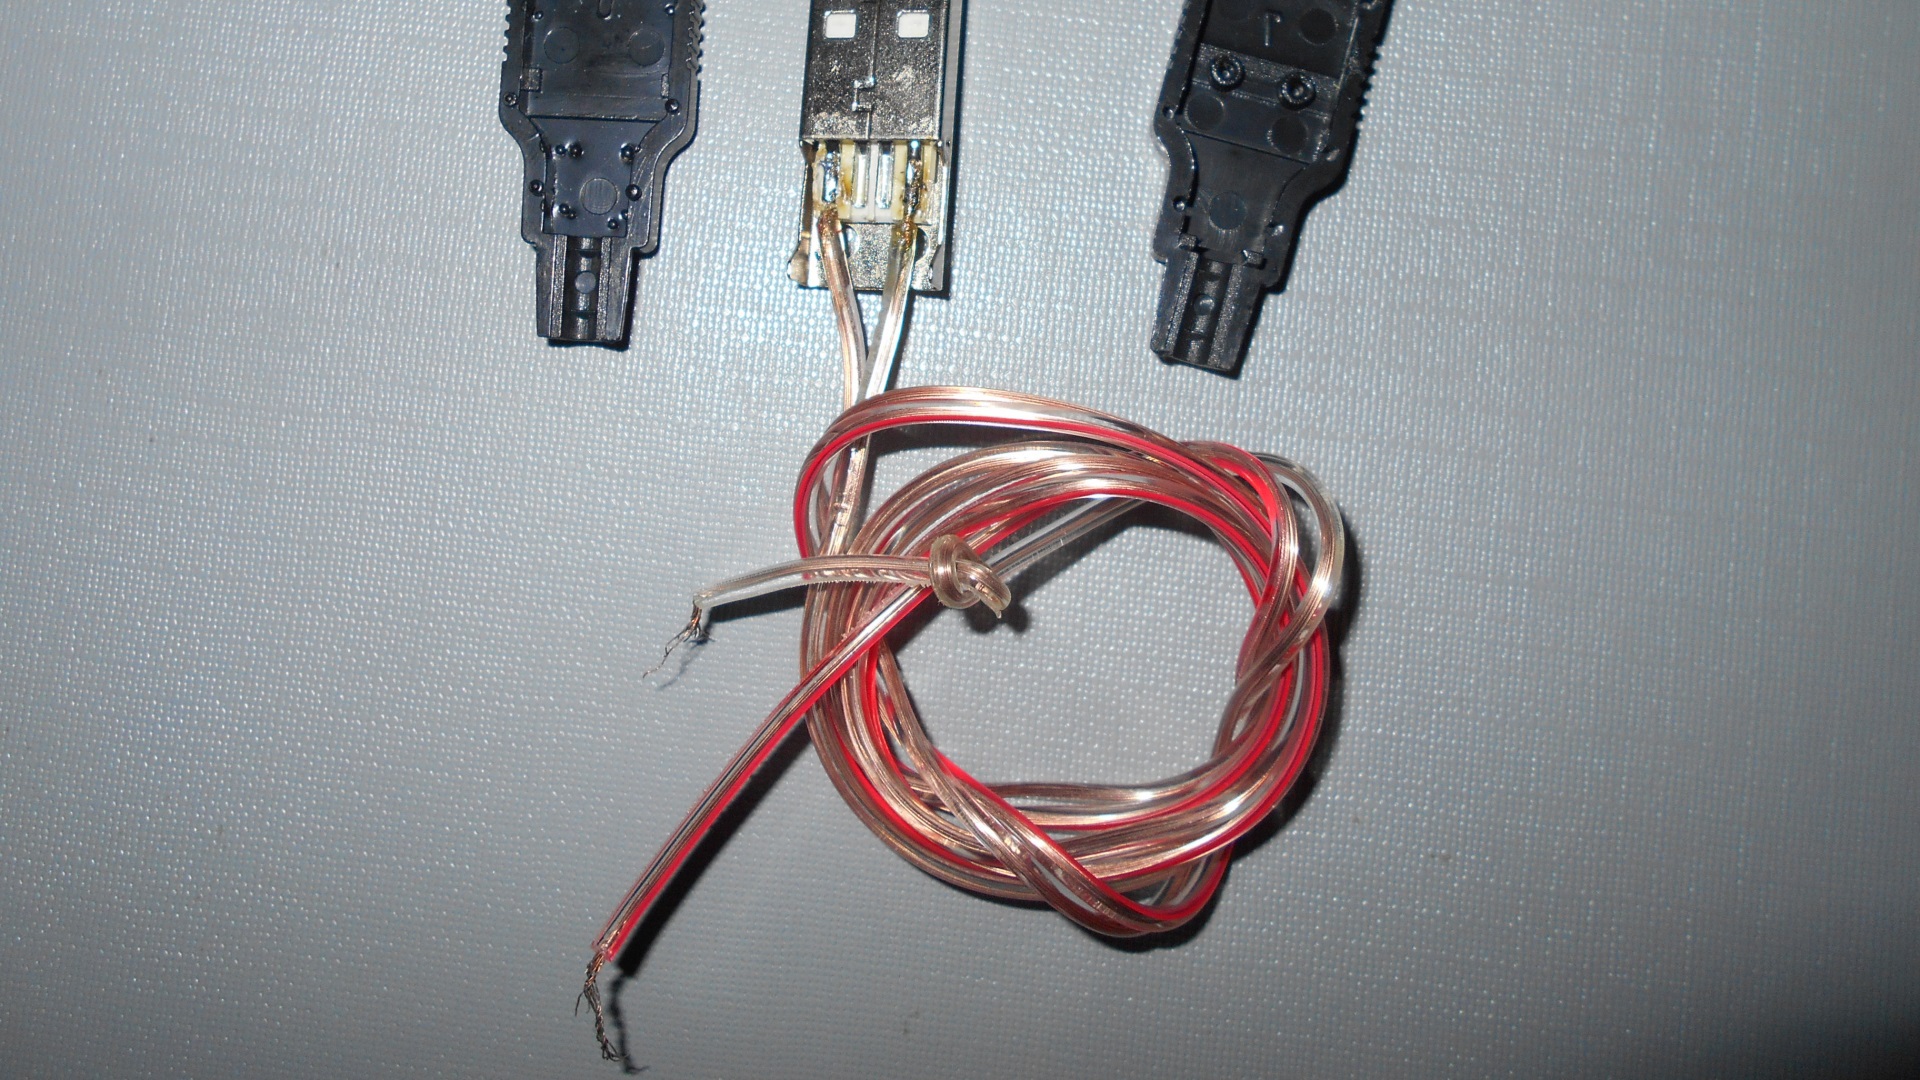
3) Collapsible USB plug type A (plug / dad):

You can of course disassemble the USB extension cord, but somehow it’s a pity to "put it under the knife."
4) Centimeters with 10 wires, if you decide to do it, because I:
5) A knife, preferably a sharp one, a screwdriver, marker / pen, electrical tape or heat shrink (they didn’t get into the lens frame, but they are).
Manufacture:
To begin with, we need to choose a place where the fan will be, I recommend choosing as close to the end of the folder as possible, and of course we take into account the location of the ventilation openings of the laptop and also, it is advisable to install the fan directly under the hottest parts of the laptop, this is usually a processor or a video card, or both in one person (video card integrated into the processor), as for example with me. Someone will probably ask if you have an integrated video card, then most likely there can be no overheating, why bother with an additional cooling system? The answer is simple - purely sporting interest, the idea is very simple, and everything except the folder I had was available.
After we have chosen the optimal location of the fan or fans (yes, yes, the size of the folder allows you to install two 120 mm fans, if there is such a need, besides it will give the whole structure a stiffness, which is obviously not enough here, but more on that later) mark out the part that needs to be cut:

Then you need to mark the holes for the fan cogs:
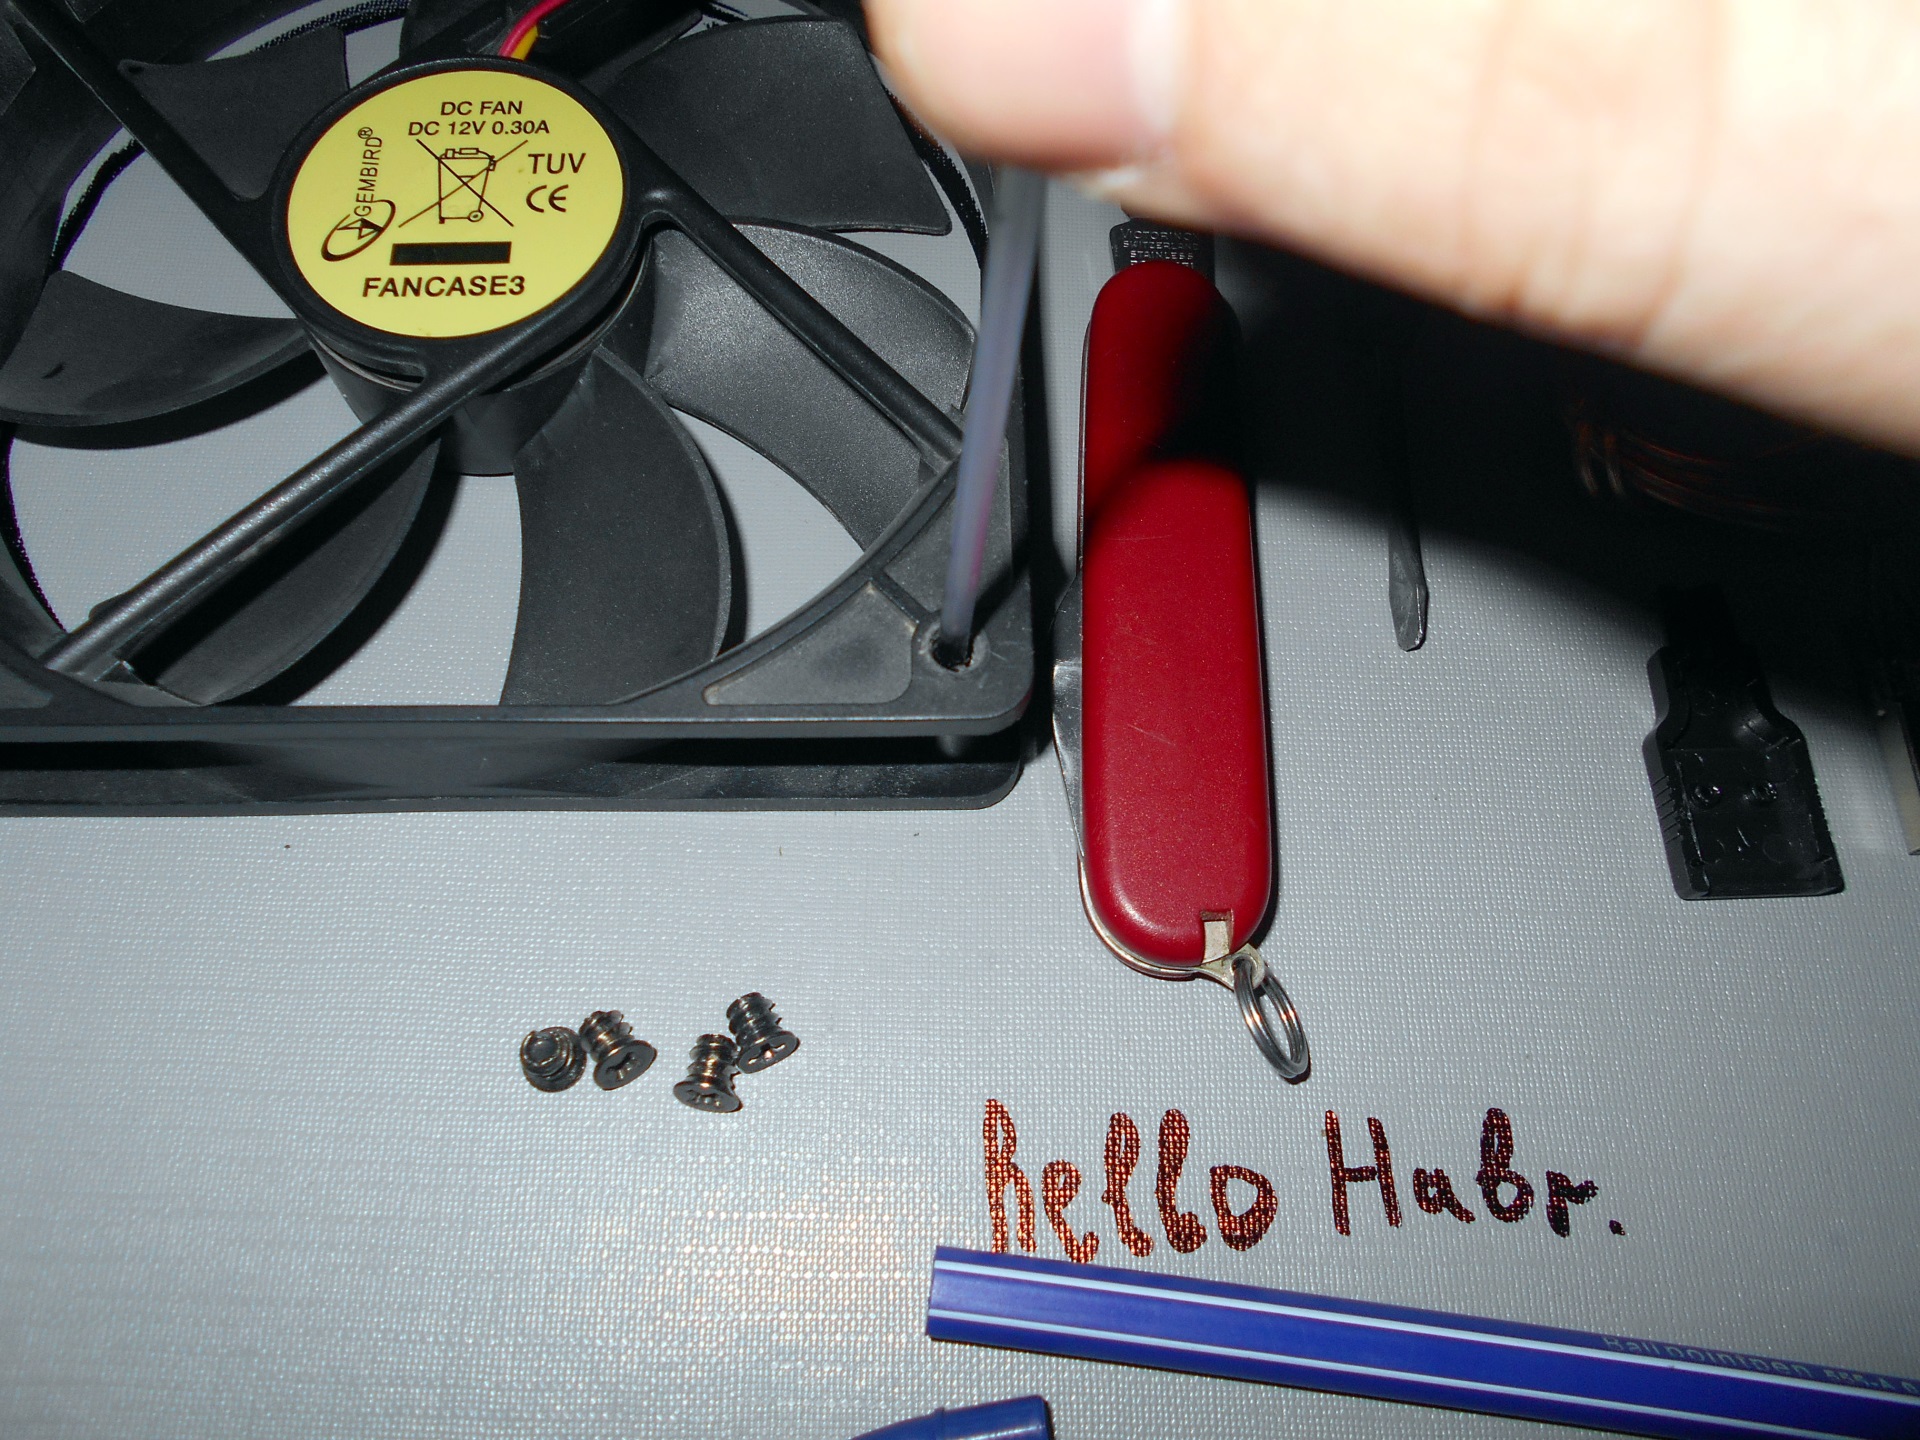
This is convenient to do with a charge from a ballpoint pen:
We wonder if we calculated correctly, both on the outside of the folder where the laptop will be and on the inside, g de will actually be a fan.
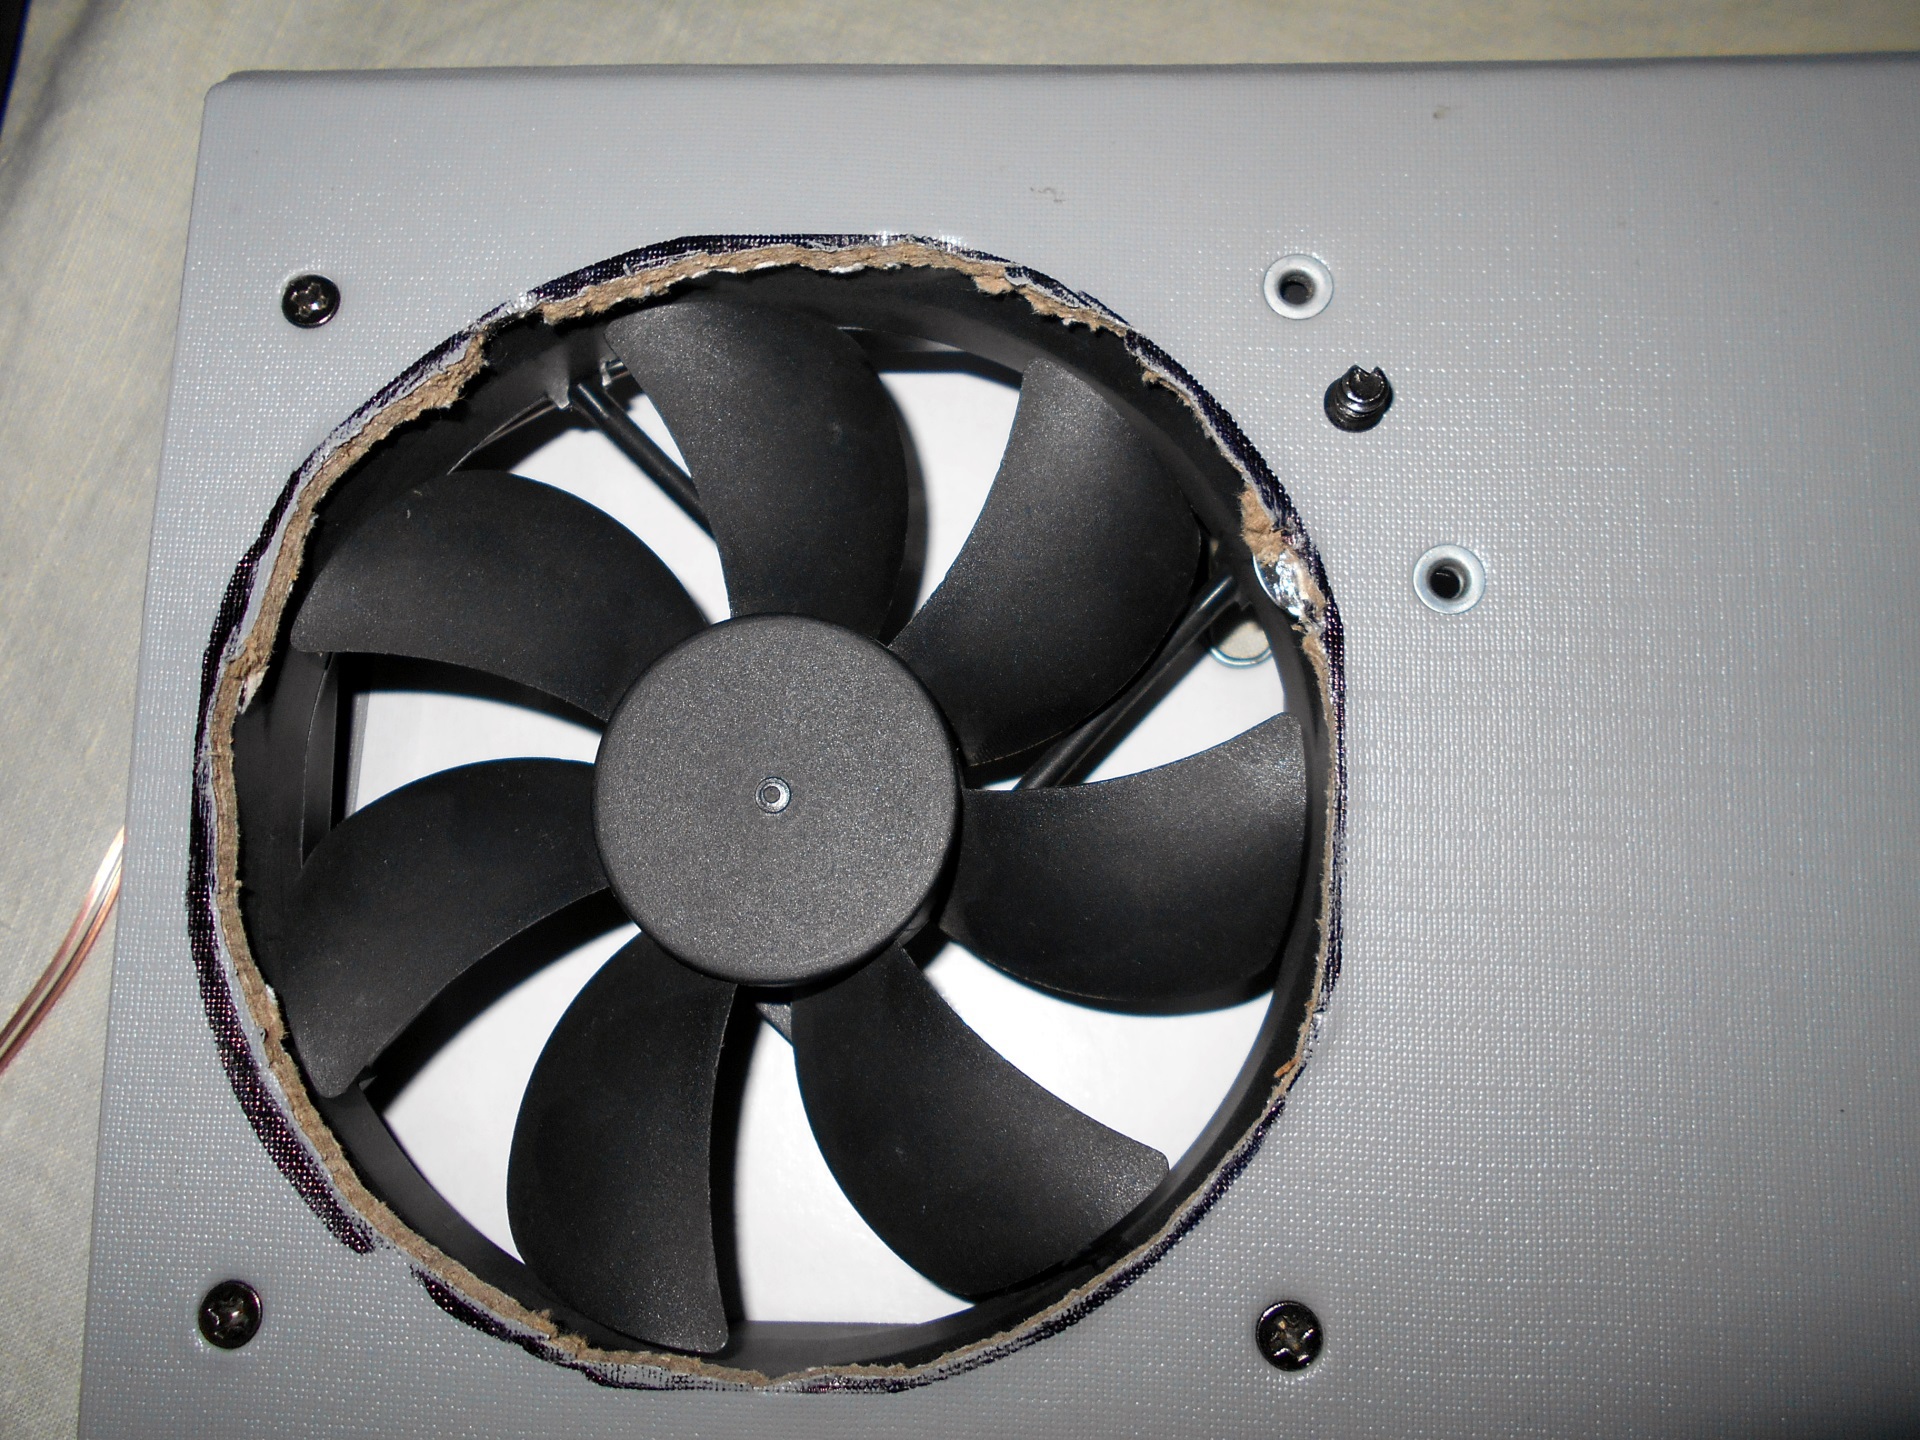
As you can see, I did not manage to make a hole for the fourth screw, so the fan holds on three.
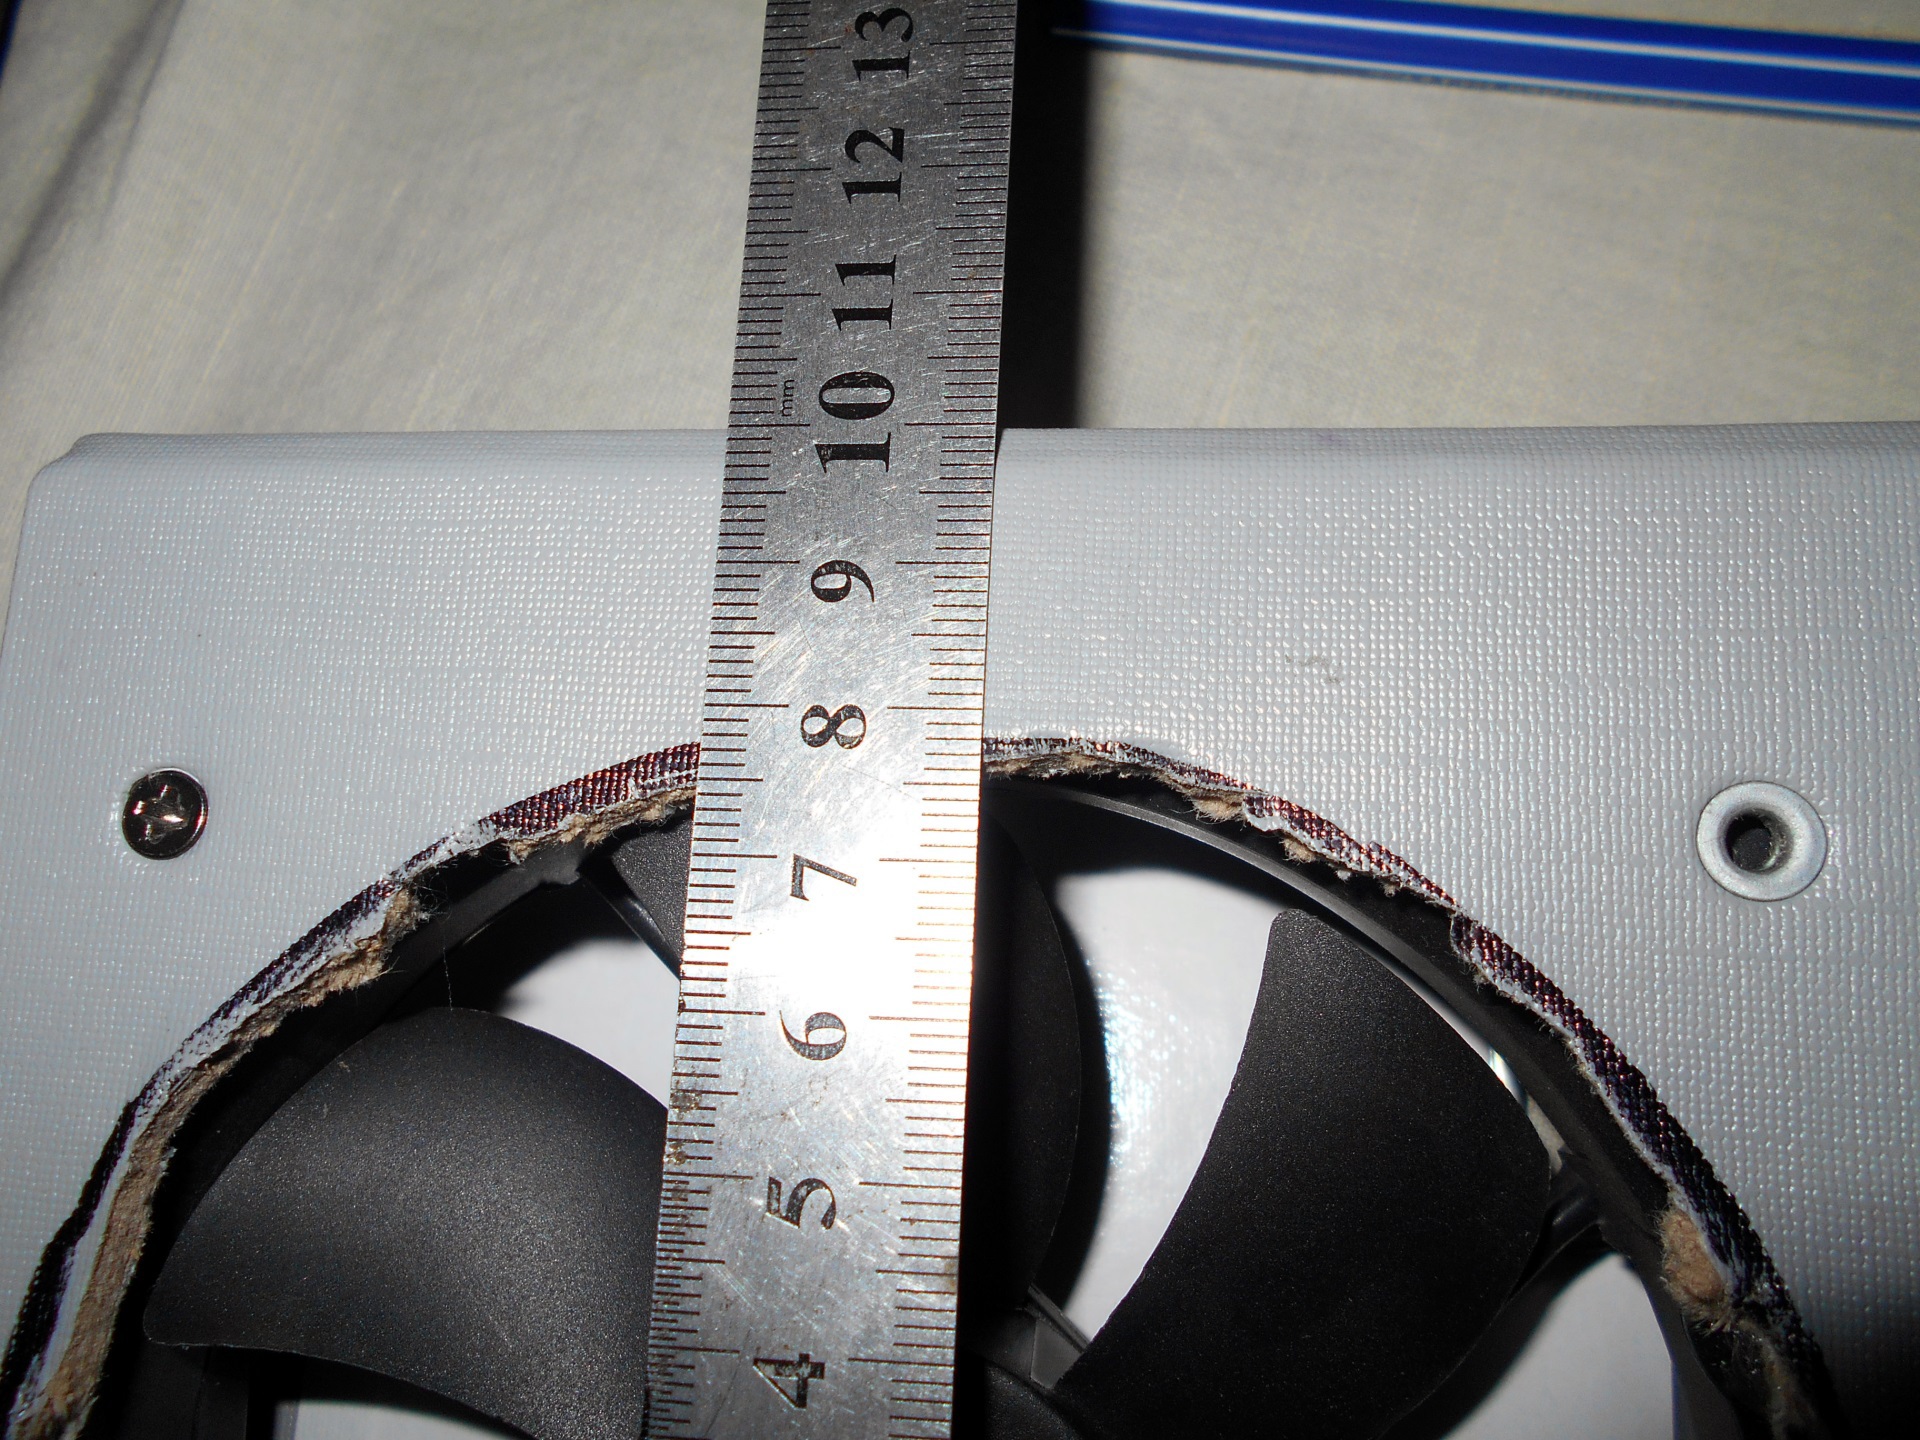
The distance from the end of the folder I got about 25 millimeters, but I did it specifically for my laptop so that the fan was as close as possible to the hot parts of the laptop.
Next, you need to connect the fan to USB, which according to the standard should provide 5 V 0.5 A, which is more than enough for starting the fan and for its operation.
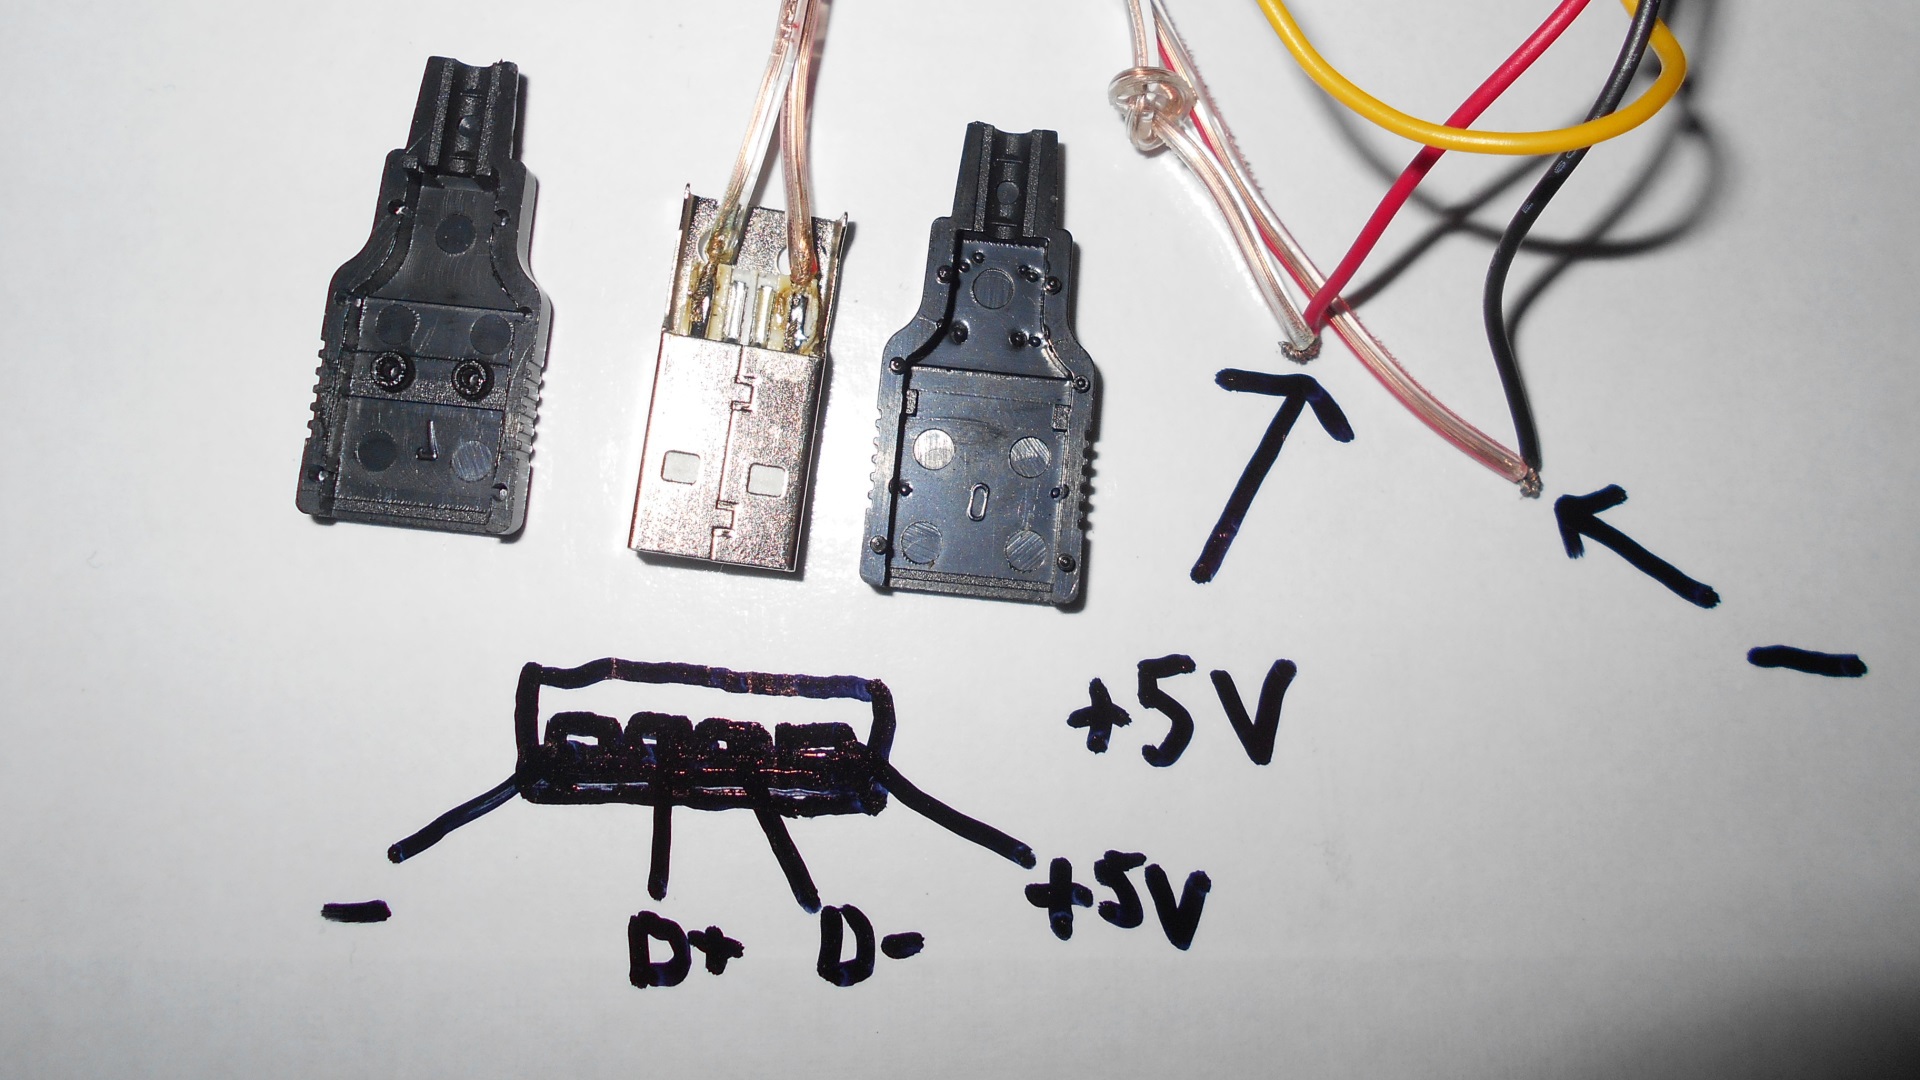
As you can see, I really can’t draw, so here is the picture from Wikipedia :
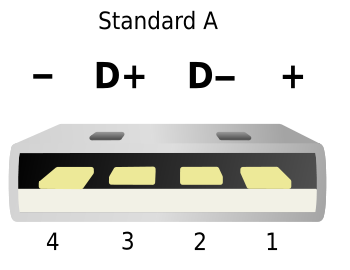
As a rule, the red wire of the fan is a plus, and the black wire is a minus , the yellow one is RPM monitoring, we are not interested in it, as are the D + and D- USB contacts. So, and here it is IMPORTANT to isolate everything after connecting the wires, so as not to accidentally arrange a short circuit on your laptop, which can adversely affect your pet, and do not say that I did not warn you.
If you still want to make a USB connector from a USB extension cable, then there, the red wire is plus and the black wire is minus.
Of course, reduced power will affect the fan speed, they will fall at least twice, so I think that the 800 rpm fans will not go for this, they may not start at all, ideally something at 1700-2500 rpm. But the noisy fans, as a rule, become quiet at such speeds and have more or less some kind of air flow.
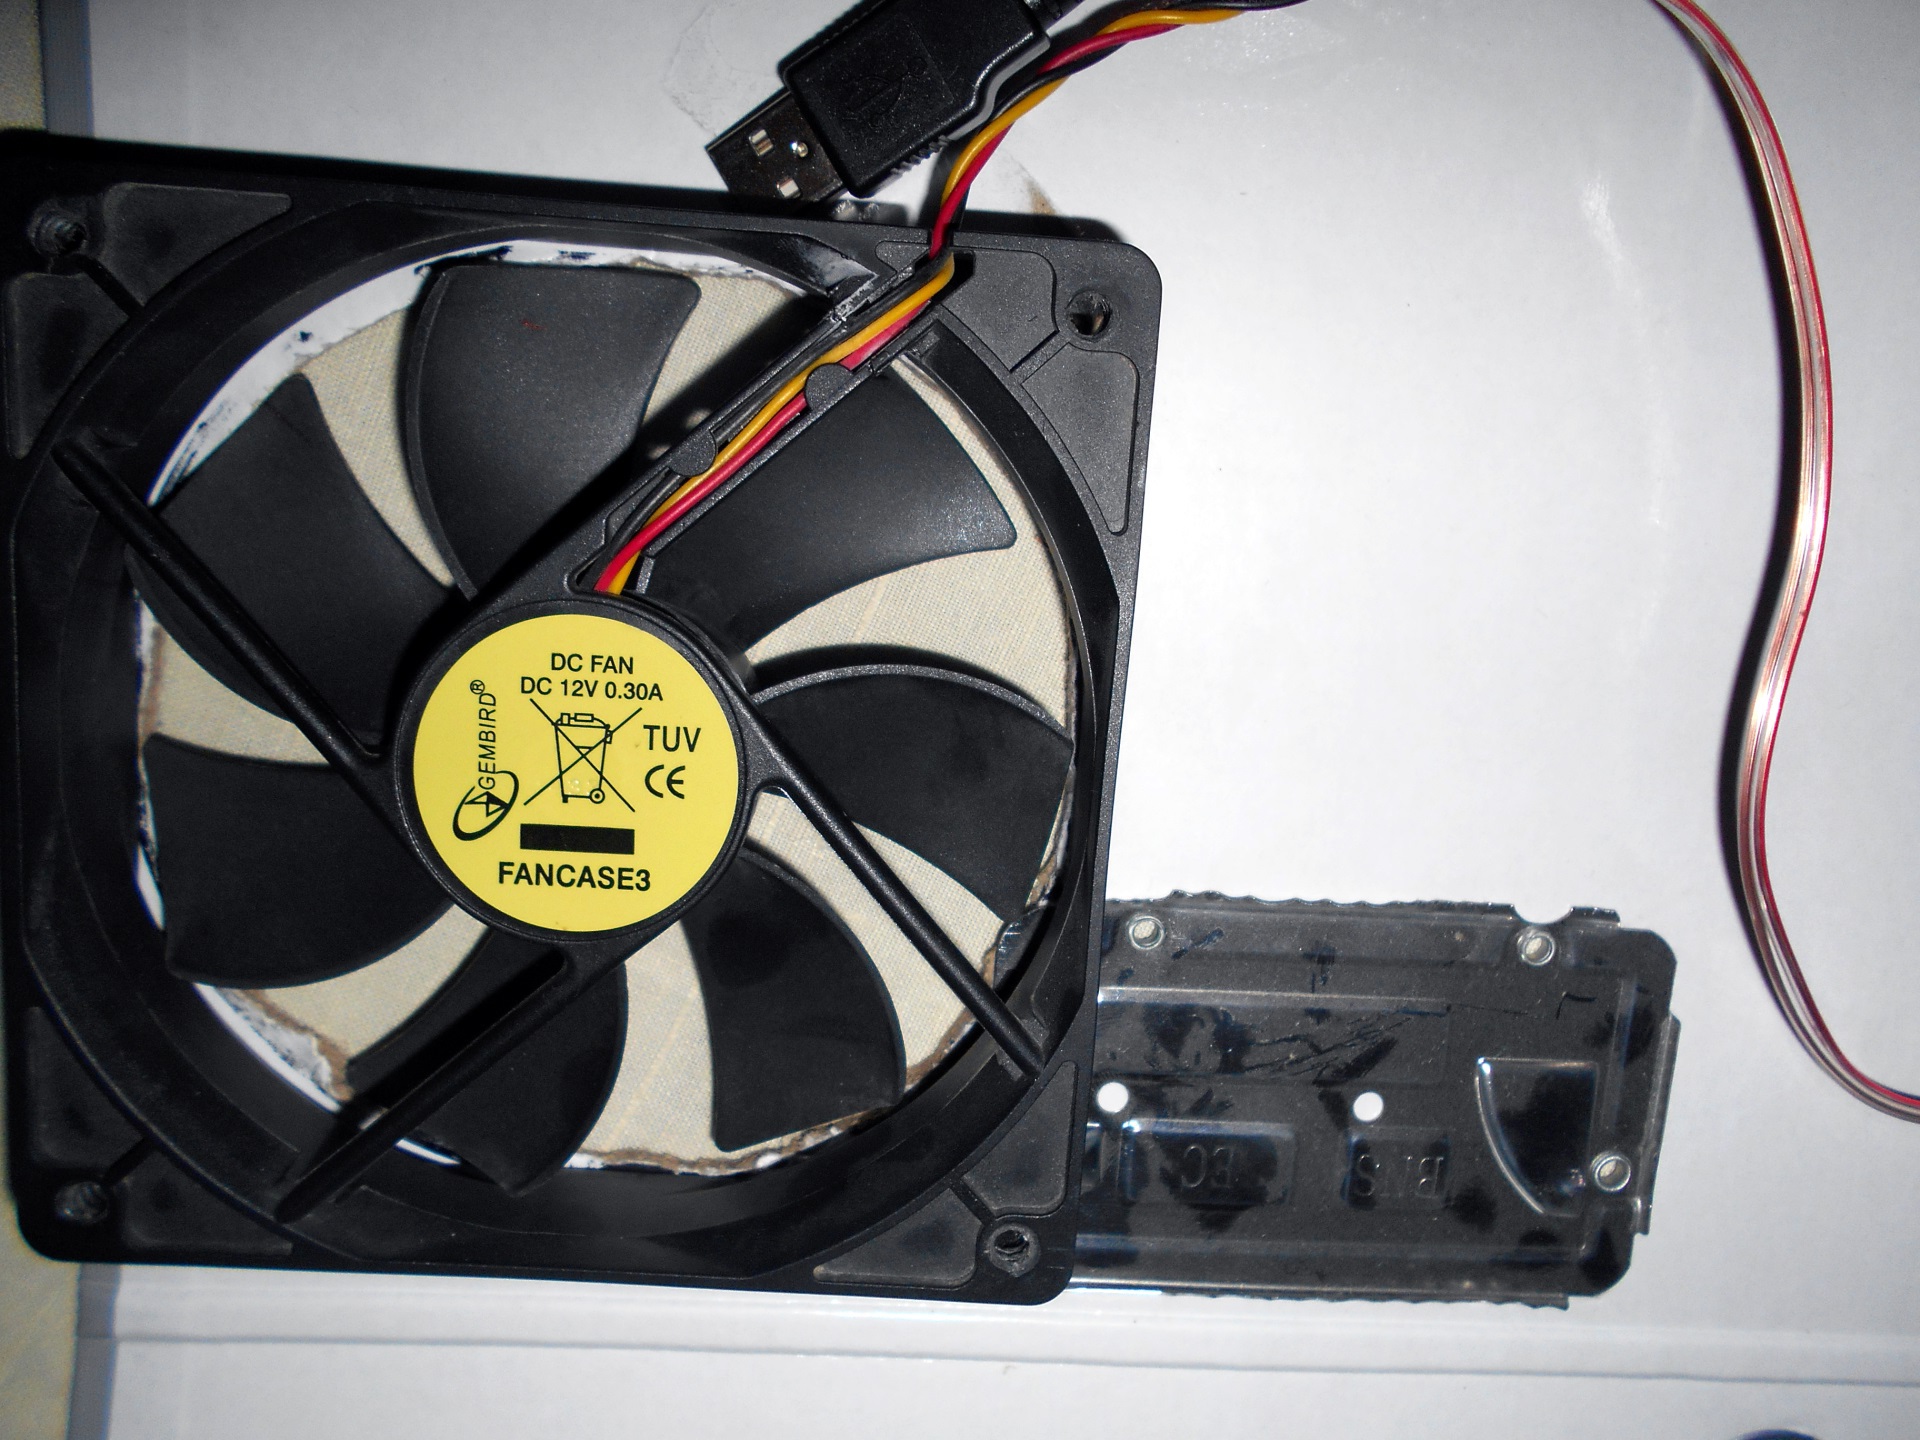
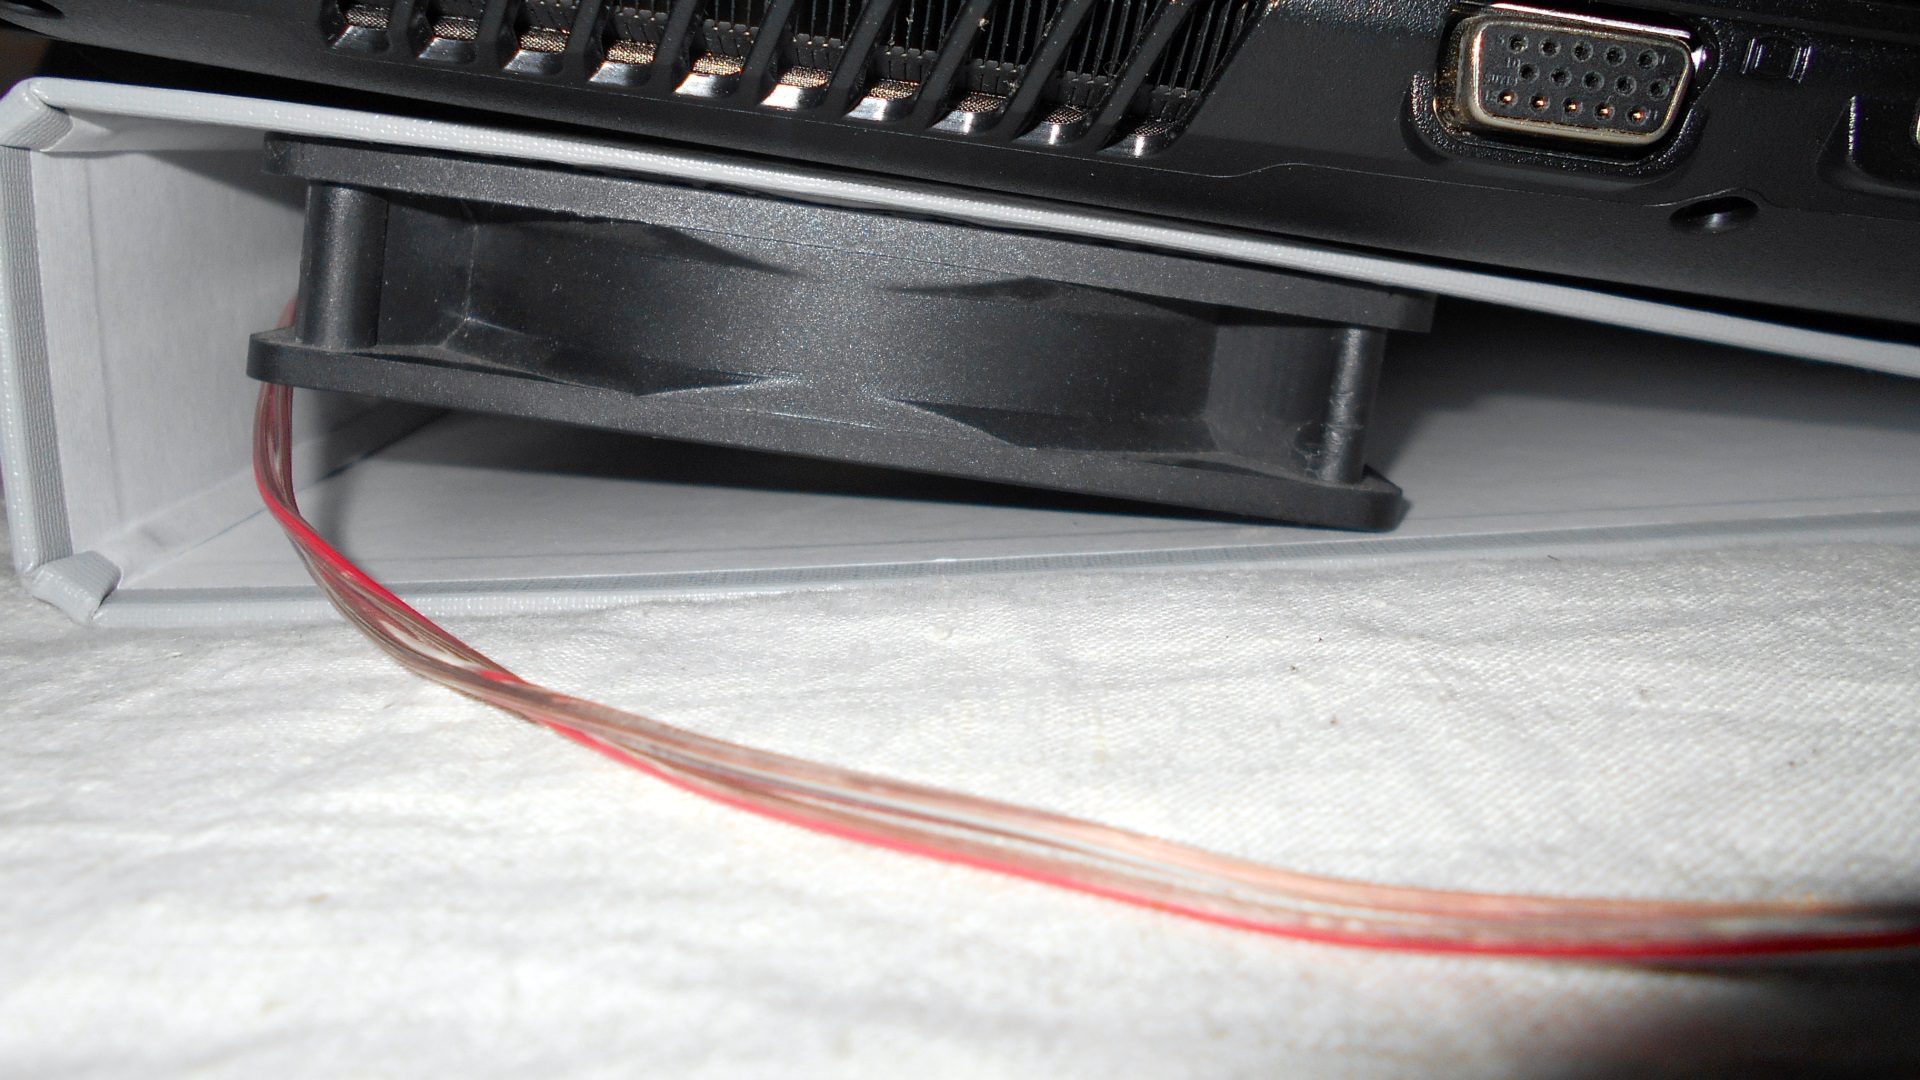
And a few words on installing the fan, I think that it is better to put the fan so that it blows air from under the bottom of the laptop, that is, it "stood on blowing," as it is customary to say between "hardware". Of course, no one forbids to put the other way around, but then he will blow all the dust into the inside of the laptop, think whether it is appropriate to bring the cleaning of the cooling system of the laptop closer or not?
The air flow, as well as the side of rotation of the fan, are indicated on it from the side.
As you can see in the photo, I removed the arch clip, it interfered with me, I believe that it will also be for you, just gently pry it with a screwdriver, however, everything is visible in the photo.
Pluses and minuses:
To plusescan be attributed to the simplicity of manufacturing, to make such a stand I think it will not be difficult for anyone, after so many pictures that I took, cheapness and flexibility, you can do it specifically for your laptop, for the location of the ventilation openings of the laptop, the pleasure of doing something with your own hands, anyone can buy.
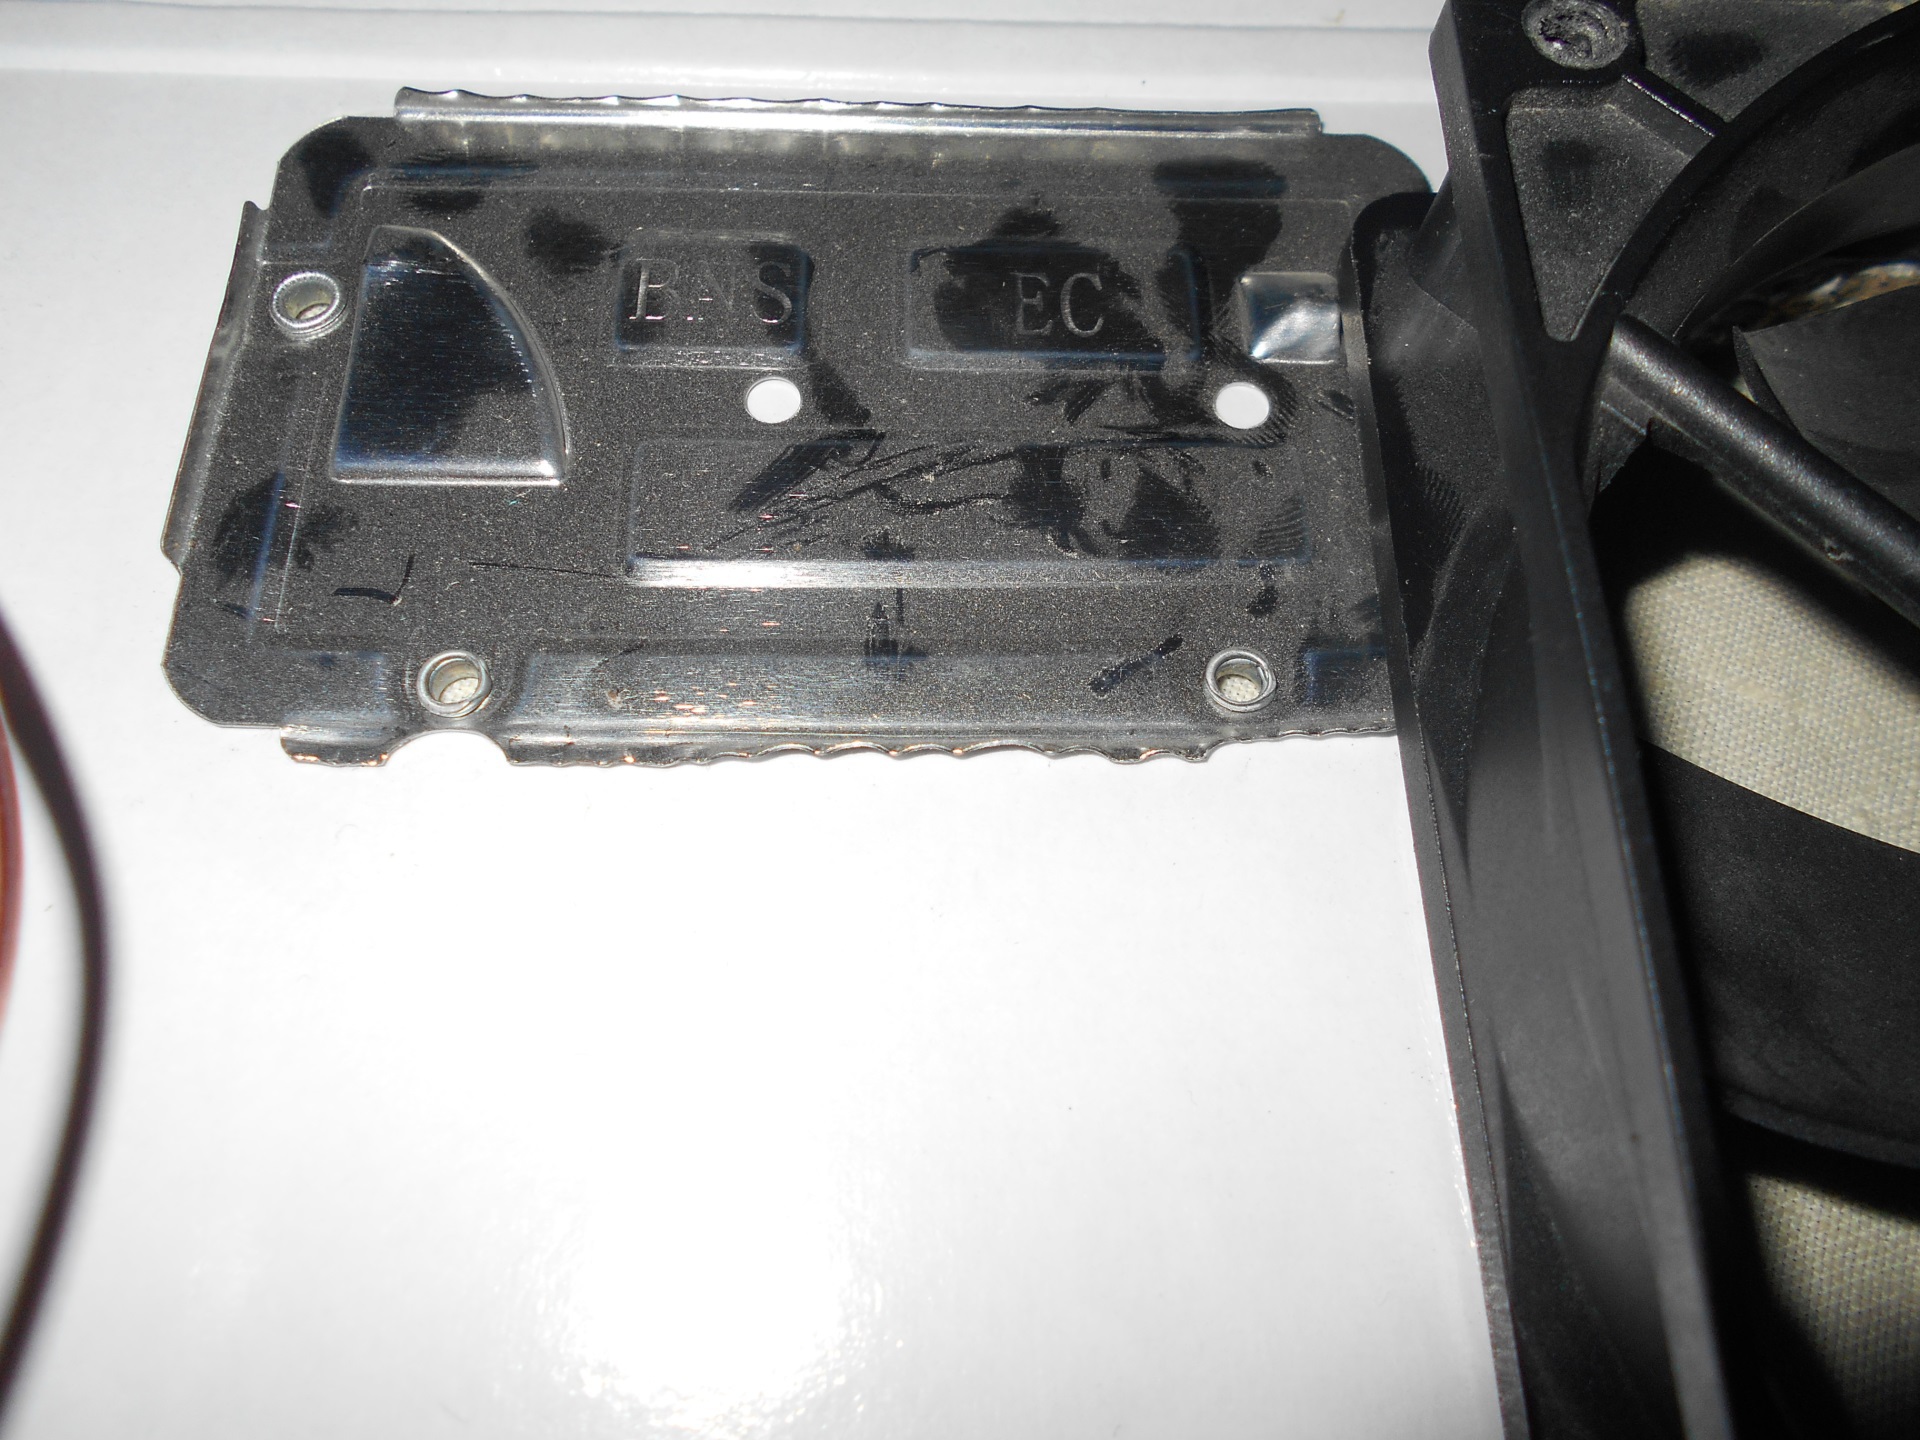
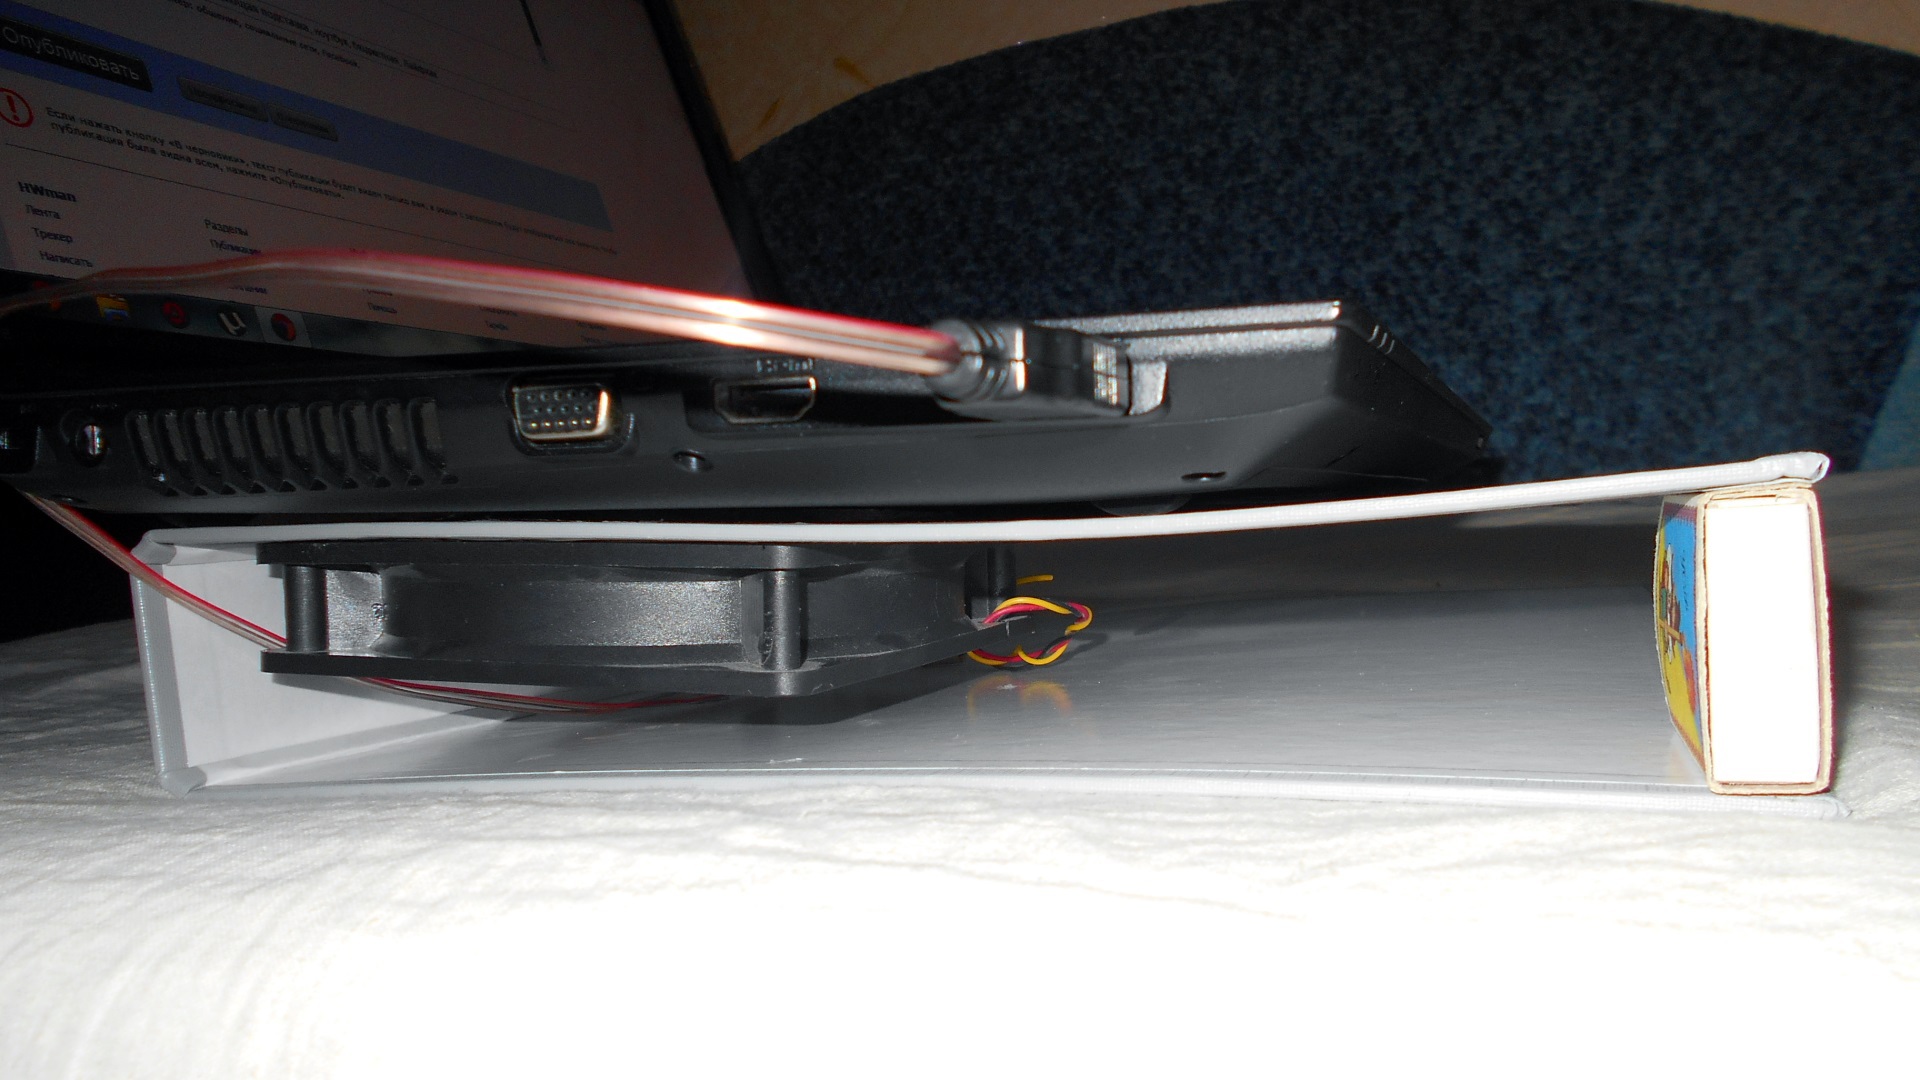
The disadvantages include the fragility of the design, just take a look:
It seems to me that this is not entirely good if you have any ideas or thoughts, write in the comments or I have links to facebook and VKontakte in my profile. So far I have decided for myself this:
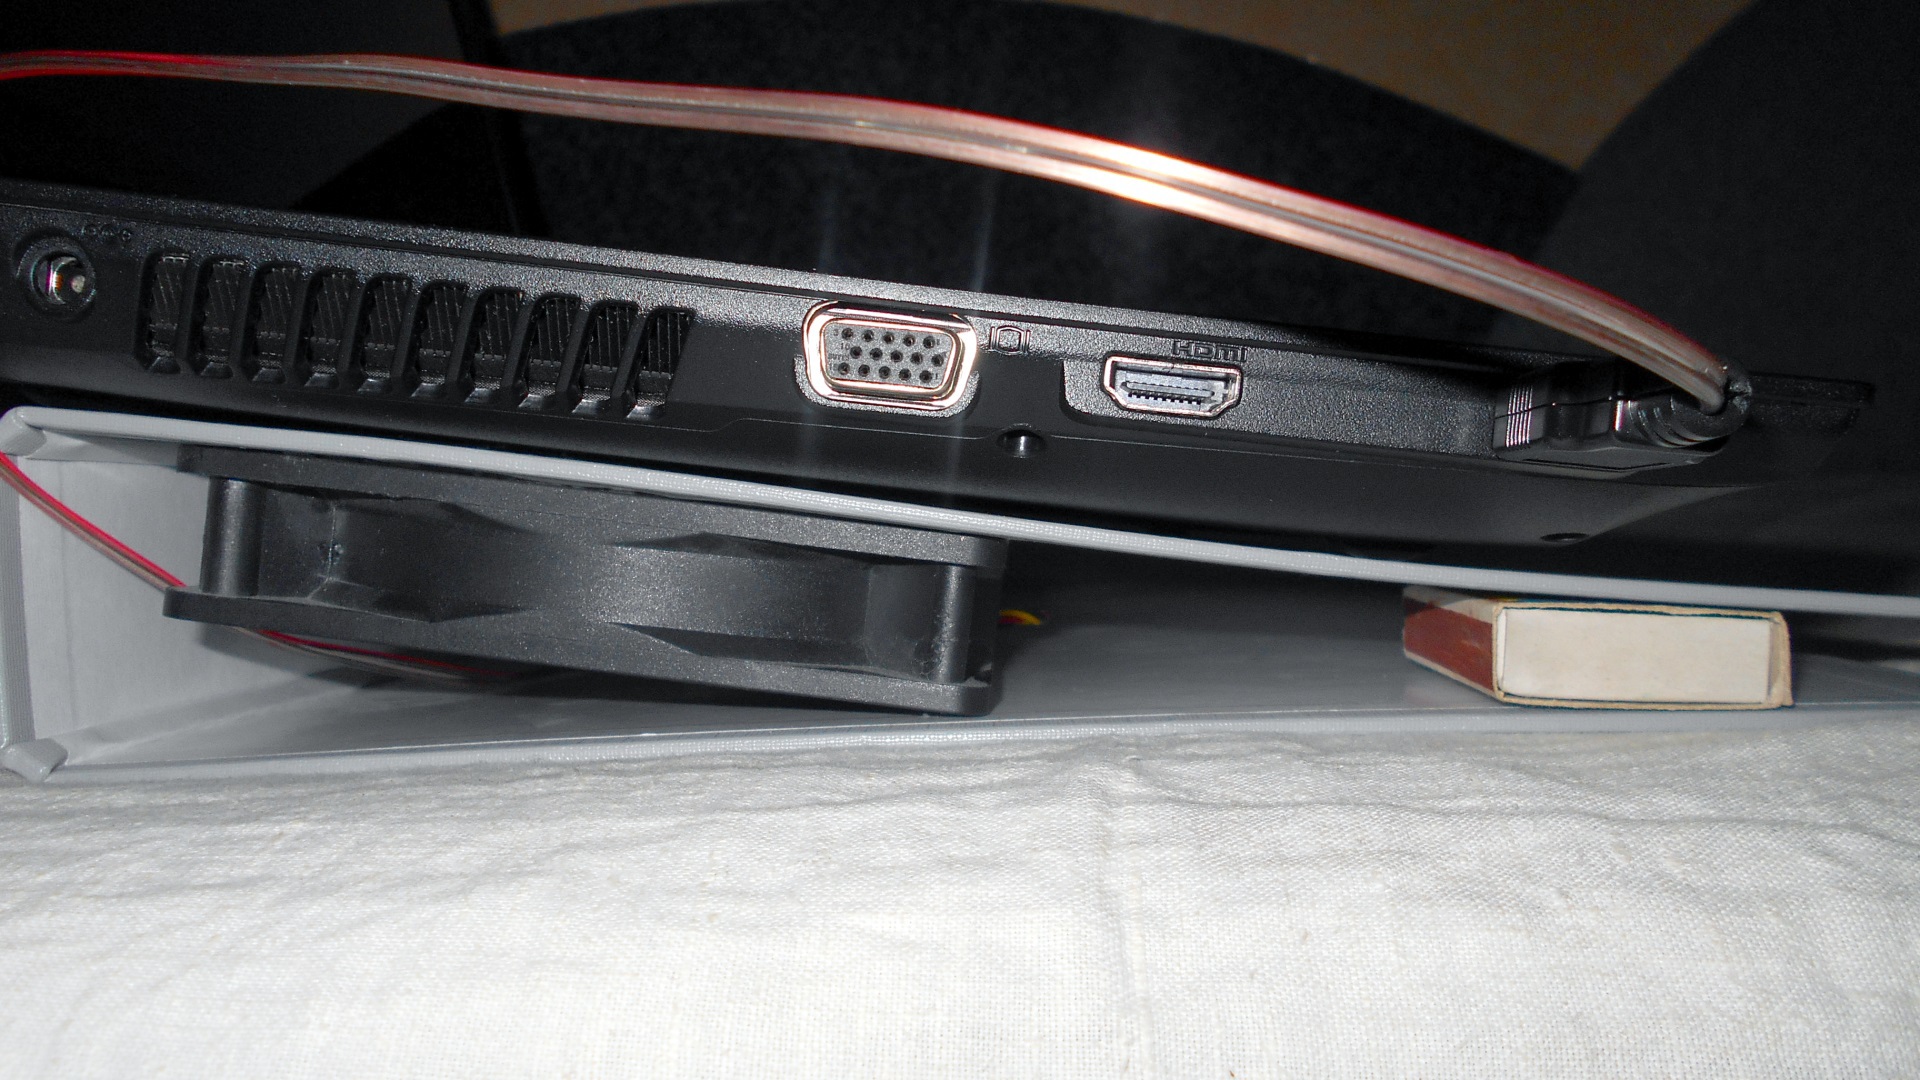
Although, I think, it would be more correct somehow like this:
In addition to the shortcomings, I will probably attribute a little efficiency, during the tests my temperature dropped by only 2 degrees, but I think that this is a drawback of the laptop cooling system itself, if you unscrew the bottom cover to draw hot air directly from the heat pipes, there will be a drop in temperature clearly taller.
And the last drawback is that since I have an old fan, 3 years after all for a motor with a plain bearing this is a big string, even for a brushless motor, I think that this is due to wear and tear of a slightly noticeable “leak”.
Links:
Wikipedia page on the USB bus ;
All my publications .
PS I’ll say right away, the idea is not new, taken from this video:
To do this, we need:
1) A folder for A4 sheets, with as coarse cardboard as possible, in my case it is a folder folder with an arch clip , it looks like this:
2) A fan from a computer measuring 120 by 120 mm:
In my case, this is one of Gembird FANCASE3’s most budget fans are rated at 2100 rpm, that is, “buzzing like a vacuum cleaner”, but, nevertheless, it turned off in my old computer for about three years and still works.
Of course, you can take smaller fans, but the 120s have an optimal price / performance / noise ratio.
3) Collapsible USB plug type A (plug / dad):
You can of course disassemble the USB extension cord, but somehow it’s a pity to "put it under the knife."
4) Centimeters with 10 wires, if you decide to do it, because I:
5) A knife, preferably a sharp one, a screwdriver, marker / pen, electrical tape or heat shrink (they didn’t get into the lens frame, but they are).
Manufacture:
To begin with, we need to choose a place where the fan will be, I recommend choosing as close to the end of the folder as possible, and of course we take into account the location of the ventilation openings of the laptop and also, it is advisable to install the fan directly under the hottest parts of the laptop, this is usually a processor or a video card, or both in one person (video card integrated into the processor), as for example with me. Someone will probably ask if you have an integrated video card, then most likely there can be no overheating, why bother with an additional cooling system? The answer is simple - purely sporting interest, the idea is very simple, and everything except the folder I had was available.
After we have chosen the optimal location of the fan or fans (yes, yes, the size of the folder allows you to install two 120 mm fans, if there is such a need, besides it will give the whole structure a stiffness, which is obviously not enough here, but more on that later) mark out the part that needs to be cut:
Then you need to mark the holes for the fan cogs:
This is convenient to do with a charge from a ballpoint pen:
We wonder if we calculated correctly, both on the outside of the folder where the laptop will be and on the inside, g de will actually be a fan.
As you can see, I did not manage to make a hole for the fourth screw, so the fan holds on three.
The distance from the end of the folder I got about 25 millimeters, but I did it specifically for my laptop so that the fan was as close as possible to the hot parts of the laptop.
Next, you need to connect the fan to USB, which according to the standard should provide 5 V 0.5 A, which is more than enough for starting the fan and for its operation.
As you can see, I really can’t draw, so here is the picture from Wikipedia :
As a rule, the red wire of the fan is a plus, and the black wire is a minus , the yellow one is RPM monitoring, we are not interested in it, as are the D + and D- USB contacts. So, and here it is IMPORTANT to isolate everything after connecting the wires, so as not to accidentally arrange a short circuit on your laptop, which can adversely affect your pet, and do not say that I did not warn you.
If you still want to make a USB connector from a USB extension cable, then there, the red wire is plus and the black wire is minus.
Of course, reduced power will affect the fan speed, they will fall at least twice, so I think that the 800 rpm fans will not go for this, they may not start at all, ideally something at 1700-2500 rpm. But the noisy fans, as a rule, become quiet at such speeds and have more or less some kind of air flow.
And a few words on installing the fan, I think that it is better to put the fan so that it blows air from under the bottom of the laptop, that is, it "stood on blowing," as it is customary to say between "hardware". Of course, no one forbids to put the other way around, but then he will blow all the dust into the inside of the laptop, think whether it is appropriate to bring the cleaning of the cooling system of the laptop closer or not?
The air flow, as well as the side of rotation of the fan, are indicated on it from the side.
As you can see in the photo, I removed the arch clip, it interfered with me, I believe that it will also be for you, just gently pry it with a screwdriver, however, everything is visible in the photo.
Pluses and minuses:
To plusescan be attributed to the simplicity of manufacturing, to make such a stand I think it will not be difficult for anyone, after so many pictures that I took, cheapness and flexibility, you can do it specifically for your laptop, for the location of the ventilation openings of the laptop, the pleasure of doing something with your own hands, anyone can buy.
The disadvantages include the fragility of the design, just take a look:
It seems to me that this is not entirely good if you have any ideas or thoughts, write in the comments or I have links to facebook and VKontakte in my profile. So far I have decided for myself this:
Although, I think, it would be more correct somehow like this:
In addition to the shortcomings, I will probably attribute a little efficiency, during the tests my temperature dropped by only 2 degrees, but I think that this is a drawback of the laptop cooling system itself, if you unscrew the bottom cover to draw hot air directly from the heat pipes, there will be a drop in temperature clearly taller.
And the last drawback is that since I have an old fan, 3 years after all for a motor with a plain bearing this is a big string, even for a brushless motor, I think that this is due to wear and tear of a slightly noticeable “leak”.
Links:
Wikipedia page on the USB bus ;
All my publications .
PS I’ll say right away, the idea is not new, taken from this video:
Only registered users can participate in the survey. Please come in.
Is it worth shaking photos to sizes of 640 by 480?
- 25.8% Yes, the page is perhaps a bit heavy 44
- 74.1% No, top quality 126