McPaintio - a program that converts an image into a set of mouse commands that draw this image
 Hi, Habrahabr!
 This time we will focus on a purely entertaining experiment. The article claims only Friday readings and there is nothing phenomenal in it. It tells the story of the creation and development of the McPaintio application, which can draw images in any * context of any ** paint program. The article will be interesting to people who are fond of bot programming and graphic animation. Ave, welcome!
Instead of entry.
 Once upon a time, in one social network I came across an interesting application. It was a collaborative (collaborative multi-user) online draftsman. Something like flockdraw.com and webcanvas.com, only at any given time there were many users online ... very many ... much more than now. Just now such games are no longer relevant; rarely, one or two people come in, paint something, and, having not spent a minute, leave. Boredom. Such entertainment in our days has died as a class, but before the people hawala such fun with a bang! Ah, these golden times of one-megabyte flash toys and gif animations.
  So, what am I talking about ?! I about thisI’m talking to the game. Now, of course, almost nobody is there. And in 2007, every room was literally teeming with people. Well, a hundred people were definitely online. Day and night. And people this entertainment really entertained, and from young to old. It was cool to draw something really beautiful. Everyone saw the very process of your drawing, they could express enthusiasm, they could draw something, or they could spoil it. Of the tools - it’s ridiculous to remember — then there was only a pencil and a hand (pan) for scrolling through an endless canvas. Even the straight lines could not be drawn, everything was handwritten. Neither gum, nor color or line thickness settings. There was no chat, so we talked like this: they wrote text directly on the canvas, it turned out terribly long and very clumsy, because the mouse is far from an ideal tool for freehand drawing. The other players below answered under your inscription, even lower - the following, and the canvas turned into a solid wall of text. Fortunately, the wall is endless. It was fun.
Especially cool were those who had a graphic tablet at home . They wrote by hand beautifully, quickly, cleanly, and their drawings were much better. No one could beat them. Personally, I didn’t have a tablet, so your humble servant had a mouse fun for the first three weeks. But then I got tired of such a course of affairs. I wanted to be
At first I started training “on cats”: I took possession of the meta-scripting language AutoITunder Windows and wrote a couple of simple programs in it. The first painted just a circle, and the second a straight line. Well, as I painted ... programmatically put the mouse cursor in a specific place, programmatically clamped the left mouse button and programmatically moved the cursor in a straight or curved line. The application in which such actions were carried out “thought” that this user moves the mouse and presses the buttons. In fact, everything was drawn by the AutoIT robot (something like a cnc machine ). The browser interpreted movements and clicks in the context of the game as a drawing process, and the game broadcast the drawing to the server. Other users do not see that it’s not me who draws, but a robot. Here's a trick =) In fact - a bot!
 Thus, I learned how to draw perfect circles and straight lines. For schoolchildren (and the vast majority of those playing were just schoolchildren) who were sitting in the game, I was, frankly, a kind of deity. I was a deity even for people with a tablet, because even on a tablet, using a stylus, you can’t draw a perfect circle. And in my hands now there were alien drawing technologies! A whole crowd of painters attacked every ideal circle I painted, and turned it into a painted smesharik, now into a watch, then into a mug, and into any other drawing based on a circle. The remaining ones were divided into two camps: those who envied, and those who admired. Envious of anger wrote " cheater"," Schmuck "and so on, but admirers crossed out the statements of envies and expressed enthusiasm in writing:" wow cool "," how do you get it? "," Is this a tablet? "," What program? " and so on ... flooded!
 Literally in a week I achieved such popularity that not one of my touches in the game went unnoticed. But amusements with circles and lines bothered me pretty quickly, because the perfectionist’s soul always wants something more and the trumpeter of creating the perfect tool. I wanted this so that any drawing, any file, any graphics could be transferred to the canvas. Then I sat down to create what is now called McPaintio.
McPaintio is a program that converts an image into a set of mouse commandspainting this very image. A kind of meta-draftsman. And since any image can be analytically redrawn, that is, the ability to draw anything in any outline of any application! Imagine that you take a drawing with an intricate ornament and immediately draw a complex spline that describes this ornament, right in the 3DMax window! Isn't that really cool ?!
 I really got confused and equipped McPaintio with cool chips. For example, if the drawing that you want to draw is larger than the canvas for drawing that the application provides, and the application supports the pan operation, then McPaintio can draw the image in blocks, switching pan and pen tools at the right time and drawing the correct fragments of the large image in the right ones places of the canvas! Further. In McPaintio there are already three different drawing algorithms designed to perform all sorts of image traces and transfer it to another canvas. These algorithms to varying degrees satisfy the classic trade-off between the speed of drawing and the accuracy of drawing. I also equipped McPaintio with the ability to draw grayscale imagesseveral different algorithms. For example, if you want to draw an image in shades of gray and the canvas provides a tool for choosing a color, then you can configure McPaintio to open the palette in the application, select the desired color, close the palette and continue the process of drawing with the desired color. McPaintio also knows how to write custom text. McPaintio has in its arsenal a flexible configuration of control buttons and timings, allowing you to adjust the drawing process to the most demanding applications.
 In general, I worked wonderfully. True, the application turned out with a very crumpled interface. This is the result of his incorrect planning: over time, more and more new functions were added in a random order, all of them were reflected one way or another in the interface, it turned out to be a lot, and redo laziness.
Example 1.
Let's start with the simplest. We downloaded the application (checked its size) and open a simple small black and white bmp file. It is necessary to broadcast what is drawn in black from the file to another canvas. So far, for the experimental canvas, let's choose a simple Microsoft Paint. We will draw the first of the presented algorithms - “to the nearest point”. This algorithm moves the pen from the current pixel to the side of the nearest unpainted pixel, filling all intermediate ones along the path. If there are several such nearby unfilled pixels, then a random one is selected. Drawing begins in a random pixel that has not yet been shaded. At certain points in time, a jump occurs to a new random pixel that has not yet been painted over (this specially programmed artifact serves the purpose of adjusting the interface of the first program of co-color drawing, in which the length of the maximum line that the user can draw is limited). Set the broadcast start button to F10 (by default), and the stop button to F12. First, we try to draw right in McPaintio itself (for clarity). We put the mouse approximately in the upper left corner of the picture and press F10. We see how the mouse moves. In the header, the program shows the number of parts (line breaks, left mouse button lifts) that it produced. At this moment, the program completely took control of the mouse, and even if I try to move it, nothing will come of it, since at the next time slice the mouse will be programmatically moved to the point needed by the program. Purple shows already filled pixels of the image. The filling process takes place, which we can stop at any time by pressing F12. You may notice that the distance between the nearest shaded pixels is not equal to unity. It seems that the program skips some pixels. In fact, this is indeed so. And this is not a mistake, but another specially programmed artifact, which serves the purpose of adjusting to the interface of the color-coded drawing program, in which the pen radius was 2 pixels. And if so, then, filling the pixel (x, y), it makes no sense to paint the pixels (x + 1, y) and (x, y + 1); they can simply be skipped, since they are already painted over on the canvas. To ignore this artifact and force processing of absolutely all pixels, use the checkbox “exactly”.
When the demonstration run shows an acceptable result, without waiting for the end of the drawing, we stop the program and go to Paint. Once again: you need to translate from the file what is drawn in black (and not white). Black are pixels with intensity0. White - these are pixels with an intensity of 255. 50% gray - these are pixels with an intensity of 127. McPaintio allows you to select those intensities of pixels that you want to consider portable (drawn, processed). And not just one specific intensity (say, 0), but even a range. This was done in order to correctly render even those unprocessed images that contain color fluctuations in the zero region and the black color in them does not always have an intensity of 0, but is scattered from 0 to, say, 8. Then, indicating the range [0 .. 8] the program will correctly render “black”. To specify the range, the “delaminate” fields are used - indicate black as [0..8] and paint our file with a brush in Paint.
Example 2.
Here I show more clearly what it means to select different ranges for drawing. Consider a simple gradient: black on the left, white on the right. If you select the range [0..8], then, as I already said and showed, the left area of the gradient will be drawn. If we select, say, [128..132], then pixels from approximately the middle will be drawn. And finally, if you select [242..255], then the rightmost sections of the gradient will be drawn. Select the range [0..32] and enable painting in Paint. Pay attention to how wide a portion of the strip is drawn. Pay attention also to the fact that the right edge of the strip is not even, but ragged. This is because the gradient was prepared in Photoshop using dithering. See how the pen wraps around the already drawn areas.
Example 3.
In this example, I demonstrate the exact drawing mode that I mentioned earlier. Please note that the image is now processed pixel by pixel, without taking into account the shaded neighbors.
Example 4.
Now open a new image, which is the outline of the previous one. I want to demonstrate drawing in the “fast” mode, in which there are no additional delays in the drawing code. They are needed so that "slow" programs like Photoshop without errors hawl a drawing script. It has been noticed that some drawing programs discard some of the window messages sent to them. So, open the file, put a tick “quickly” and draw for clarity in McPaintio itself. Pay attention to the speed of drawing. This is the maximum speed McPaintio draws in this mode.
Example 5
It is time to demonstrate a new drawing algorithm - “line dynamics”. This algorithm moves the pen from the current pixel in the direction of the most distant yet unpainted pixel, filling all the intermediate ones along the way. The most distant yet unpainted pixel is not chosen arbitrarily, but with some restriction: from it to the current pixel there should be a straight line, passing a) only along the processed pixels b) the number of already filled pixels in the line should not exceed 30% of the total number of pixels lines. Such a technique resembles human hand-drawing as much as possible and was invented and introduced instead of the old “to the nearest point” algorithm, which too clearly revealed the fact of drawing not by a person, but by a robot in a co-color drawing program.
Example 6
I will now demonstrate this algorithm using an example of a gradient. I will draw twice, in two different ranges. And if so, then, so that the final picture is obtained without gaps, it is necessary in the first and second case of drawing to put the mouse cursor exactly in a certain position. I will call this position the anchor point. I’ll mark the so-called anchor point in Paint with a red cross. First, open the gradient and select the range [0..8]. This will draw the leftmost fragment of the gradient. I remove the checkbox "quickly" and set the mouse at about the anchor point. Look at the process of drawing, or rather, filling up a large rectangle. Very reminiscent of the movement of a person’s hand. After finishing the drawing, I select the range that follows exactly the current one - [9..12]. For clarity, I choose a different color in Paint. Again I put the pointer at the anchor point and draw. Please note that the new lines are located strictly to the right of the previous figure, and end to end. This is the essence of the choice of the drawn range in this mode.
Example 7
I will now demonstrate two such parameters as “pause of raising the mouse” and “line time”. McPaintio allows you to set the time that the drawing program needs to perceive the line and draw it. This parameter is called “pause mouse up” and is expressed in milliseconds. He actually says McPaintio: “after the next line, release the left mouse button and wait n milliseconds”, where n is the parameter to be set. The business is that such programs as, for example, Paint do not skip, do not drop and do not discard window messages that were sent to them. Paint is a super-simple and super-fast drawing program, so you can set it at least 0. There are load and slow programs, for example, Photoshop, which draw lines very slowly (especially with Gaussian soft brushes) that lead the story, which can drop window messages sent to them. For such programs, a “pause of raising the mouse" should be set even 100 milliseconds, so that they have time to figure out what to do and do it.
The “line time” parameter serves similar purposes. He speaks for himself: this is the time in which one straight line is drawn, in milliseconds. For example, for Paint, you can set this parameter to 10 or even 5, while for Photoshop it should be 50 or even 100. Otherwise, it simply will not have time to draw this line, as window messages have already arrived about drawing the next line in As a result, Photoshop will tear the current line, dropping part of the window messages.
In the video, I first set these parameters to 0 and 1, respectively. Pay attention to how quickly the image is drawn. Then, for demonstration, I set these parameters to 200 200. Now drawing is very slow. Finally, in the end I put the average values for most programs - 25 25. Now everything is in order.
Example 8.
Now let's play with the text, because McPaintio can write it too! This function was used to realize the possibility of stress-free writing for the very first collaborative drawing program. McPaintio has a special “text” field where you can enter text. First, select a font size of 40 and press the "write" button. The program generated an image of the written text, and now on a common basis will draw it. Turn on the exact mode and see what happens. It turned out very average. Now change the font size to 80 and write the same with a bold brush. So much better!
Example 9
Now I will demonstrate one of the most interesting drawing modes - drawing by blocks. Looking ahead, I’ll say that this mode was introduced to draw huge images on an endless canvas through a very small “hole” (window) for drawing. For the very same first collaborative drawing program. For experimental experiments, let's take Photoshop. So, there is a small program window (actually no more than 512 x 512 pixels) through which we can have access to a large canvas (actually 2000 x 2000 pixels). It is necessary to draw an image much larger than the viewing window. We open in McPaintio a huge image to match the canvas. Create a new document in size of 2000 x 2000 pixels in Photoshop. We see the entire canvas only in 30% form, in 100% form we see only a small part of it. Next, you need to show McPaintio those points on the screen where the buttons for turning on the pan tool and brush tool are located. Once you specify them, now McPaintio will be able to draw images in blocks, scrolling the canvas to the desired position. For training, first check the “blocks” box and indicate the size of one block, like, say, 256 x 256 pixels. That is, McPaintio will draw an image of 1025 x 1024 pixels through a viewing window measuring only 256 x 256 pixels. Now you need to become the mouse cursor on the pan button of Photoshop and McPaintio will remember it (the checkbox next to the star will become marked). Similarly, you need to do for the brush button. Set the correct timings for Photoshop 20 and 20. Let's start drawing and enjoy block-by-block rendering. First, the upper left corner of the image is drawn. After rendering is complete, McPaintio enters panning mode and drags the canvas so that a new piece of data is drawn back to back with the old. And so on for all blocks. At the end of the video you can admire the finished image.
Example 10.
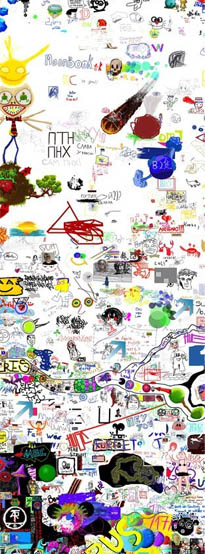
It's online time! Now we will do the same, only in that collaborative drawing room. Let's set the block size this time to 512 x 480 and retrain the pan and pen buttons with a little retraining of McPaintio. We admire the result. Please note that not a single room has a soul! This suggests that after 7 years, people found themselves more interesting games than collaborative drawing.
Example 11.
Now we turn to a serious example! It is necessary to draw a full-fledged image in shades of gray, and not black and white, as it was until now. We will use VKontakte graffiti wall as a canvas for drawing. Open the image and turn on the “delayed technique” drawing mode. This algorithm is actually the same as the "line dynamics", but with one exception. In this algorithm, at the beginning, McPaintio draws the longest series of lines, and in the end - the shortest ones, while in the “line dynamics” this depends purely on randomness. That is, “deferred technique” is “line dynamics” sorted by the length of a series of lines. That's all.
So, we opened the image. But earlier we saw that McPaintio can draw only one range. Yes, and only one color selected in the drawing program. Really, in order to draw the image in shades of gray we have to manually set the range [0..0], set the desired brush color (black) in the drawing program, draw all black, then set the range [1..1], again set in the drawing program desired brush color, draw, and so on up to 255?!?! In fact, of course not! First, no one requires such sub-band accuracy. That is, instead of a set of ranges {[0. 0..0], [1..1], [2..2], ..., [255..255]}, you can use a range with a step of not one, but, say, eight : {[0..8], [9..16], [17..24], ..., [248..255]}. Or even 16. Or even 32. There will be less fuss. True, the final image will also undergo the effect of posterization, but within reasonable limits this is completely permissible. For example, in increments of 8, you won’t even notice the difference. And finally, secondly: you can train the McPaintio program to open the color palette itself (!), Choose the color you want (!!), close the palette yourself (!!!), and switch the ranges yourself (!!!!) with a certain step.
A curious viewer probably already noticed these strange “+0” near the delamination ranges. This is the step setting. It works like this: set, as usual, the delamination range, in this case [0..32]. A +0 +0 this time is replaced by +32 +32. This means that the step of the lower and the step of the upper edge of the ranges after each drawing will change to +32 intensity. That is, first the program will draw the range [0..32], then [32..64] and so on up to 255. It is reasonable to assign the step so that the ranges do not overlap, but go joint to joint. Next, configure the timings 10 10 (due to the fact that VKontakte graffiti is pretty playful) and check the “gradient” box! This includes the ability to automatically step and select colors from the palette. Auto color learning is to point 4 points on the screen to McPaintio: where is the “open palette” button in the drawing application, where is the white color in the open palette, where is the black color in the open palette, where is the “close palette” button in the drawing application. By specifying these 4 buttons, McPaintio will be able to choose the color of the current range himself. I note that in some simple programs the slider for selecting the intensity (black - white) has already been moved to the interface, so in this case you need to specify only 2 points: "which pixel of the screen must be clicked to select white color" and "which pixel of the screen you need to click to select the black color. " McPaintio shows with check marks “o”, “w”, “b” and “x” that he remembered the location of the opening, choosing white, choosing black and closing, respectively. So, we begin to draw and see how the robot automatically selects the desired color and draws.
Example 12.
Now let's do the same feint, but in Photoshop. Here you already need to open and close the palette. Teach McPaintio how to do it. Set the timings 200 10 and enjoy the wonderful process of drawing.
Example 13.
It's online time again, and this time we will visit FlockDraw! Let's draw the “AM” logo right on the canvas. To do this, select a familiar technique and configure the timings. Then everything is simple.
Example 14.
Well, lastly, I propose to look at the process of accurately drawing a fairly large picture to order.
Afterword
Please write in the comments about your experience with similar graphical automation. Very interesting.
Thanks for attention!
Only registered users can participate in the survey. Please come in.
Now you understand what * and ** mean at the beginning of the article?
- 33.3% Yes, of course 72
- 66.6% No, explain 144