Nexus 5 + JavaScript + 48 hours = touch surface?
A few weeks ago in Minsk the WTH.BY hackathon was held, in which I decided to take part. His main idea was that it was a hackathon for developers. We could do anything we want to make it fun and interesting. No monetization, investment or mentors. Everything is fun and cool!
I had a lot of ideas for implementation, but they all did not reach some kind of “Wow!”. That is why, on the eve of the event, I flipped through the old Habr article from the DIY section and stumbled upon the article " Experience in creating a multitouch table ." This was what caused the very missing “Wow!” And I decided to make a distant analogue from what was at hand.
At my fingertips I found glass of about A3 format, plain paper, marker, mobile phone and laptop. I quickly found an accomplice for Yegor and began active work.

In general, it was decided to make a touch surface on which touch would be recognized by our system. To do this, I stole a piece of ordinary glass, paper and a marker from the house. We put the glass on two stacks of books, glued a sheet of paper with tape on it, and laid the phone down with the front camera up. The camera captures the image from below, recognizes the image of the place of contact and transfers them to the laptop. Already along the way, the idea was slightly transformed: to recognize the buttons drawn with a marker on paper and to determine the clicks on them. First of all, this happened due to the fact that it is problematic to recognize the exact place of touch due to the shadow of the hand. But the buttons drawn with the marker are clearly visible and it was easy to select them on the image.
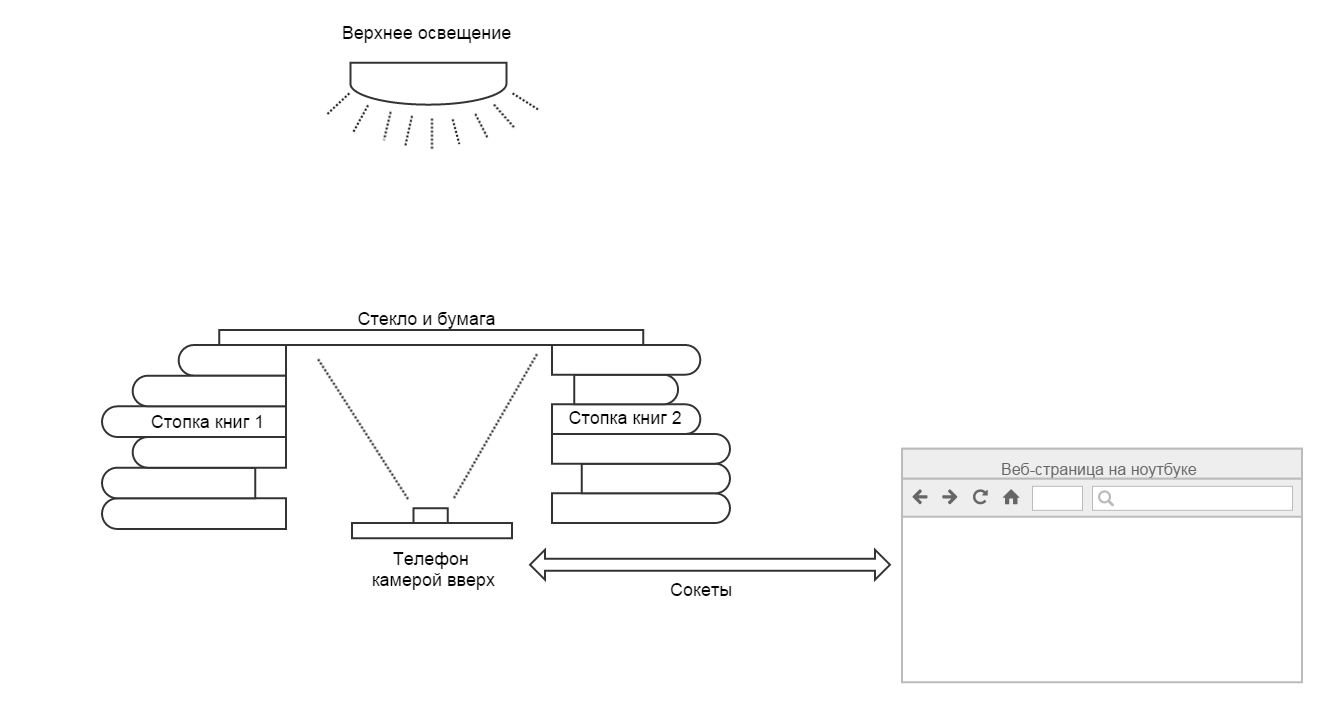
Considering that my programming profile is JavaScript, we decided that it would be a web page that opens on the phone. A video image from the front camera is captured on it, buttons are recognized and clicks are expected. When an event occurs, information is transmitted using sockets to another page on the laptop, which does what itlikes to be ordered.
Such a system can be divided into several logical parts:
Consider each part in a bit more detail.
I am sure that it will not be a secret for you that using the getUserMedia method you can get an image from a video camera and broadcast it in the video tag. Therefore, we create the video tag, ask the user for permission to capture video and see ourselves in the camera.
To get a single frame from the video, we will use canvas and the drawImage method. This method can take the video tag as the first parameter and draw the current frame from the specified video in canvas. This is just what we need. We will repeat this operation at regular intervals.
Now we have the canvas element, and in it the current frame from the video stream. The next task is the recognition of drawn buttons.
In fact, the view in which the ctx.getImageData (...) method returns data is completely inconvenient for solving the task. Therefore, before proceeding with a direct search for contours, we bring the image to a convenient format.
The getImageData method returns a large data array, where the channels of each pixel are sequentially described. And by a convenient format, I mean a two-dimensional array of pixels. It is intuitive and much more pleasant to work with.

We will write a small function that converts the data into a form convenient for us. It should be borne in mind that the image passing through the paper is very similar to black and white. Therefore, for each pixel, we calculate the average amount of channels and write it to the resulting array. As a result, we get an array where each pixel is represented by a value from 0 to 255. By coordinates, you can refer to the desired pixel and get its value: data [y] [x].
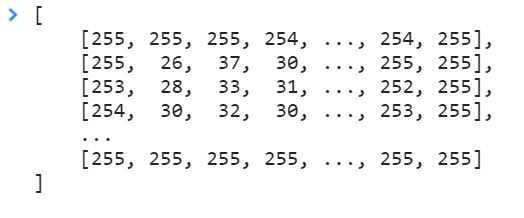
We went even further and decided that for each pixel 255 possible values are too many. For recognition of contours and clicks, two values are enough - 1 and 0. So in our project, the getContours function appeared, which received an array of pixels and a variable limit as input. If the value of a specific pixel is greater than the variable limit, then it turns into zero (light sheet), otherwise it becomes one (part of the outline or finger).
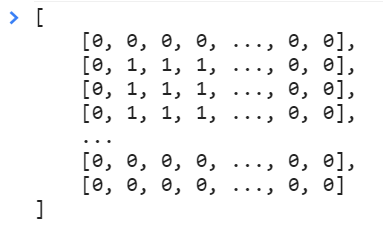
Now the image is presented in a convenient form and is ready for us to find buttons on it.

Have you ever recognized the contours and objects in an image? I've never done this before. Quick google showed that OpenCV should solve these problems without any problems. In fact, it turned out that ported libraries have some limitations, and classifiers need to be trained. It was all like using Grails to create a landing page.
That is why we continued the search for simpler solutions and came across a bug algorithm (I'm not sure that this is a common name, but in the article it was called that way).
The algorithm allows to recognize closed loops in an array of zeros and ones. An important requirement was that the borders should be at least two pixels thick. Otherwise, the logic of the algorithm fell into an infinite loop with all the ensuing consequences. But the button border drawn by the marker was much thicker than two pixels, so this did not become a problem for us. The rest of the algorithm is very simple:

So, we have a function that receives input and finds a circuit. To simplify, the tasks were limited only to rectangular shapes. Therefore, we find two bounding points from the contour points. Regardless of the shape of the button, we get the rectangle in which it is inscribed.

But who needs a one-button interface? If you do, then in full! So the task arose of finding all the drawn buttons. The solution turned out to be simple: we find the button, store it in an array, fill the rectangle with the button in the data with zeros. Repeat the search until the array becomes empty. As a result, we get an array containing all the buttons found.

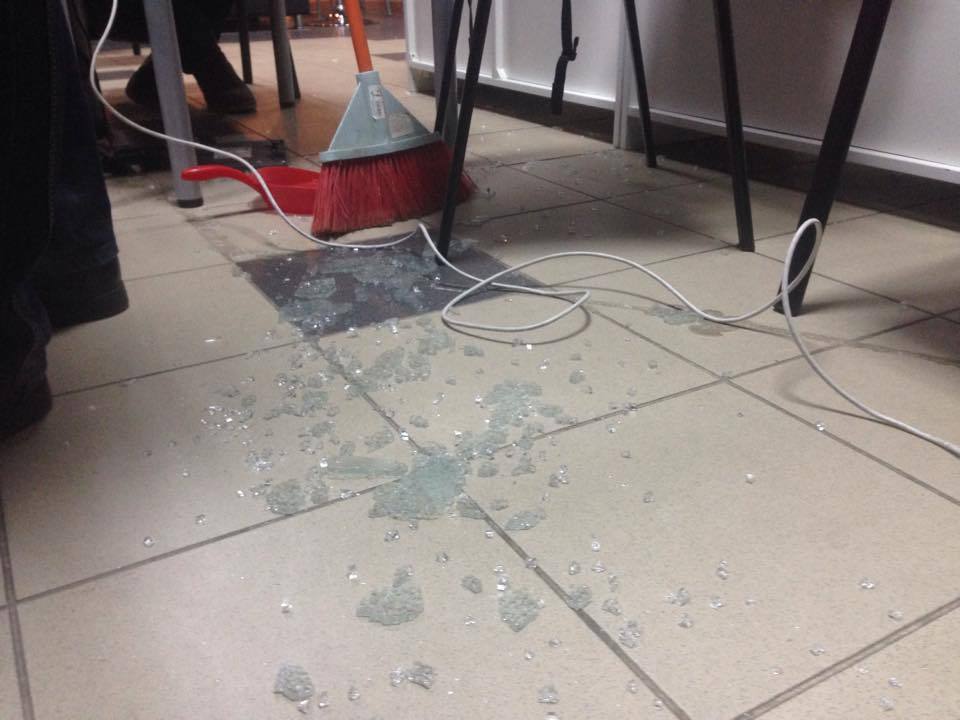
By the way, during the testing of the algorithm, one glass was damaged. Fortunately it was late evening and I was going home. In the morning, Ipulled out another window from the window at home and set off to continue development.
What about the push of a button? Everything turned out to be simple. When the button is found, we calculate the sum of the black dots inside it. I called this button hash for myself. So, if a button is pressed, then the hash of the button grows by a noticeable amount, which clearly exceeds random noise, interference and minimal movements of paper and phone relative to each other. It turns out that in each frame you need to read the hash of the existing button and compare it with the original value:
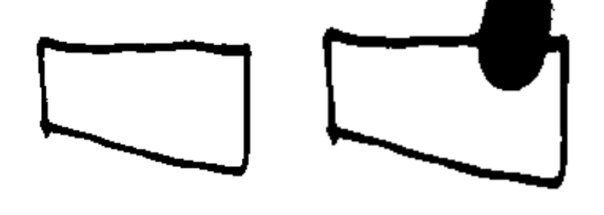
Such is the touch screen.
I am sure that everyone knows what Socket.io is. And if you still do not know, then you can read from them on the site http://socket.io/ . In short, this is a library that enables the exchange of data between the node.js server and the client in a two-way manner. In our case, we use them to send event information to another web page through the server with minimal delay.
Without waiting for the question in the comments, where is the video, I present to you a video demonstrating the operation of the system.
I had a lot of ideas for implementation, but they all did not reach some kind of “Wow!”. That is why, on the eve of the event, I flipped through the old Habr article from the DIY section and stumbled upon the article " Experience in creating a multitouch table ." This was what caused the very missing “Wow!” And I decided to make a distant analogue from what was at hand.
At my fingertips I found glass of about A3 format, plain paper, marker, mobile phone and laptop. I quickly found an accomplice for Yegor and began active work.

In general, it was decided to make a touch surface on which touch would be recognized by our system. To do this, I stole a piece of ordinary glass, paper and a marker from the house. We put the glass on two stacks of books, glued a sheet of paper with tape on it, and laid the phone down with the front camera up. The camera captures the image from below, recognizes the image of the place of contact and transfers them to the laptop. Already along the way, the idea was slightly transformed: to recognize the buttons drawn with a marker on paper and to determine the clicks on them. First of all, this happened due to the fact that it is problematic to recognize the exact place of touch due to the shadow of the hand. But the buttons drawn with the marker are clearly visible and it was easy to select them on the image.

Considering that my programming profile is JavaScript, we decided that it would be a web page that opens on the phone. A video image from the front camera is captured on it, buttons are recognized and clicks are expected. When an event occurs, information is transmitted using sockets to another page on the laptop, which does what it
Such a system can be divided into several logical parts:
- Video capture
- Image preprocessing
- Contour search
- Determining whether a finger is in the loop
- Passing events to the client page
Consider each part in a bit more detail.
Video capture
I am sure that it will not be a secret for you that using the getUserMedia method you can get an image from a video camera and broadcast it in the video tag. Therefore, we create the video tag, ask the user for permission to capture video and see ourselves in the camera.
Some code
var video = (function() {
        var video = document.createElement("video");
        video.setAttribute("width", options.width.toString());
        video.setAttribute("height", options.height.toString());
        video.className = (!options.showVideo) ? "hidden" : "";
        video.setAttribute("loop", "");
        video.setAttribute("muted", "");
        container.appendChild(video);
        return video
    })(),
    initVideo = function() {
        // initialize web camera or upload video
        video.addEventListener('loadeddata', startLoop);
        window.navigator.webkitGetUserMedia({video: true}, function(stream) {
            try {
                video.src = window.URL.createObjectURL(stream);
            } catch (error) {
                video.src = stream;
            }
            setTimeout(function() {
                video.play();
            }, 500);
        }, function (error) {});
    };
//...
initVideo();
To get a single frame from the video, we will use canvas and the drawImage method. This method can take the video tag as the first parameter and draw the current frame from the specified video in canvas. This is just what we need. We will repeat this operation at regular intervals.
var captureFrame = function() {
    ctx.drawImage(video, 0, 0, options.width, options.height);
    return ctx.getImageData(0, 0, options.width, options.height);
};
window.setInterval(function() {
    captureFrame();
}, 50);
Image preprocessing
Now we have the canvas element, and in it the current frame from the video stream. The next task is the recognition of drawn buttons.
In fact, the view in which the ctx.getImageData (...) method returns data is completely inconvenient for solving the task. Therefore, before proceeding with a direct search for contours, we bring the image to a convenient format.
The getImageData method returns a large data array, where the channels of each pixel are sequentially described. And by a convenient format, I mean a two-dimensional array of pixels. It is intuitive and much more pleasant to work with.

We will write a small function that converts the data into a form convenient for us. It should be borne in mind that the image passing through the paper is very similar to black and white. Therefore, for each pixel, we calculate the average amount of channels and write it to the resulting array. As a result, we get an array where each pixel is represented by a value from 0 to 255. By coordinates, you can refer to the desired pixel and get its value: data [y] [x].

We went even further and decided that for each pixel 255 possible values are too many. For recognition of contours and clicks, two values are enough - 1 and 0. So in our project, the getContours function appeared, which received an array of pixels and a variable limit as input. If the value of a specific pixel is greater than the variable limit, then it turns into zero (light sheet), otherwise it becomes one (part of the outline or finger).

GetContours function code
var getContours = function(matrix, limit) {
    var x, y;
    for (y = 0; y < options.height; y++) {
        for (x = 0; x < options.width; x++) {
            matrix[y][x] = (matrix[y][x] > limit) ? 0 : 1;
        }
    }
    return matrix;
};
Now the image is presented in a convenient form and is ready for us to find buttons on it.

Contour search
Have you ever recognized the contours and objects in an image? I've never done this before. Quick google showed that OpenCV should solve these problems without any problems. In fact, it turned out that ported libraries have some limitations, and classifiers need to be trained. It was all like using Grails to create a landing page.
That is why we continued the search for simpler solutions and came across a bug algorithm (I'm not sure that this is a common name, but in the article it was called that way).
The algorithm allows to recognize closed loops in an array of zeros and ones. An important requirement was that the borders should be at least two pixels thick. Otherwise, the logic of the algorithm fell into an infinite loop with all the ensuing consequences. But the button border drawn by the marker was much thicker than two pixels, so this did not become a problem for us. The rest of the algorithm is very simple:
- Find the boundary point. A boundary point is a transition from a white point to a black one. You can just go through the array and find the first one.
- We begin the circuit traversal according to two simple rules:
- If we are at the white dot, then turn right
- If we are at a black dot, then turn left
- We complete the circuit traversal at the boundary point from which we started.

So, we have a function that receives input and finds a circuit. To simplify, the tasks were limited only to rectangular shapes. Therefore, we find two bounding points from the contour points. Regardless of the shape of the button, we get the rectangle in which it is inscribed.

But who needs a one-button interface? If you do, then in full! So the task arose of finding all the drawn buttons. The solution turned out to be simple: we find the button, store it in an array, fill the rectangle with the button in the data with zeros. Repeat the search until the array becomes empty. As a result, we get an array containing all the buttons found.

By the way, during the testing of the algorithm, one glass was damaged. Fortunately it was late evening and I was going home. In the morning, I

Determining whether a finger is in the loop
What about the push of a button? Everything turned out to be simple. When the button is found, we calculate the sum of the black dots inside it. I called this button hash for myself. So, if a button is pressed, then the hash of the button grows by a noticeable amount, which clearly exceeds random noise, interference and minimal movements of paper and phone relative to each other. It turns out that in each frame you need to read the hash of the existing button and compare it with the original value:
- If the difference between the values is greater than the specified value, then we assume that the button is pressed and raise the touchstart event.
- If before that the button was pressed, and now the amount has returned to normal, then we believe that the pressing has stopped and the touchend event has occurred.

Such is the touch screen.
Boring mode
Of course, an inquiring mind will understand that such an approach is a huge scope for false positives. If you accidentally create a shadow above a nearby button, then it will also be pressed.
Well, actually, yes. You can try to deal with this by setting additional checks. For example, you can create a second array of data from zeros and ones, but with a more stringent black limit. Then only the “blackest” color will remain in the image. This will make it possible to assume that only the place where the finger touches the paper will remain in the data, eliminating the shadow.
Well, or you can use the rules of the hackathon "do what you want" and say that it is intended.
Passing events to the client page
I am sure that everyone knows what Socket.io is. And if you still do not know, then you can read from them on the site http://socket.io/ . In short, this is a library that enables the exchange of data between the node.js server and the client in a two-way manner. In our case, we use them to send event information to another web page through the server with minimal delay.
Video
Without waiting for the question in the comments, where is the video, I present to you a video demonstrating the operation of the system.
conclusions
- In two days we can develop an arbitrarily useless system
- and get a prize for her in the nomination "The Most Effective Hack"
- The system runs on Nexus 5 in the Google Chrome browser. I have not tested it on other devices and in other browsers.
- Our development does not reach the original, but cheap. Touch table for the poor.
