Mouse Programming in Xcode 6 for Swift
Hi, Habrahabr!
Due to a recent need, I had to write for iOS, and I noticed a strong lack of guides in Russian even for elementary actions like “attach some action to a button click”, “read data from a text box”. An article for beginning developers for iOS, I ask for such under cat.
So, for starters to practice examples
So, we now have two windows, one of which the user simply cannot get into.
This is the easiest part, done like everywhere else.
We set the Placeholder property to the text field, it allows you to display a "prompt for input", which is visible only until you enter any text. But we won’t talk about the properties much in the framework of this article, so as not to overload.
First you need to select the icon at the top, we need it to simultaneously see the controller in the visual editor and the class code of the same controller. Then we simply “drag” the required controller element with the right mouse button in the visual half onto its code. You will be offered an arbitrary variable name, by which an element is now available for all functions of the controller.
For this, small preparations are needed. First, click on the desired item, you get this window:
I will not describe the list of events here, they, IMHO, are self-evident. Select the one you need and left -click and drag it into the code.
Here, at the click of a button, we change the Label text to the one entered by the user. With a demonstration of the simulator for iPhone 6
As the most attentive readers could already notice, our editor swears at the inability to get into SpecialView. And he is right! It is to solve this problem through a visual editor that there is such a thing as Segue. Thanks to them, we can clearly show where the user can get from.
The easiest option is an unconditional jump. To do this, add the “Go to” button to our project, click on it with RMB and drag the line that appears to the View we want to go to (SpecialView in our case). We get a request for the Segue type, select show there - you can experiment with the rest yourself. Similarly, add the back button to SpecialView, and attach the transition to MainView to it.
As you can see, the simplest transitions can be created without writing a single line of code. But, of course, unconditional transitions are far from always enough.
The easiest way to do this is to invoke our transition through the code. But in the code it is not there. Yes, and at the touch of a button it will still work, but I would not want to. The solution is quite simple: we delete the old version of the transition, and we’re moving the new one not from our button, but from the yellow circle of the ViewController itself, let's name our transition MainToSpecial
So, let us want to let the user into SpecialView only if the input field and Label contain the same text.
To do this, we need to create a button event for the button in the controller, check this condition in it. If it is executed, we will perform the transition using the following code:
Checking ...
As you can see, it launches on SpecialView only with the same values in the fields, but on the contrary, in any case, which is what we need.
This can be finished, but still I will show finally an asynchronous check of the transition conditions, because IMHO it is no less important.
In general, there are not too many differences from the synchronous version:
Firstly, all the application logic that does not have an interface must be in separate classes, so we will create the Server class in the Server.swift file with a single function (of course, the code is not very good, but I do not want to complicate the example):
The server is not specified, as habraeffect. So you can test this part of the application only with your server, or using someone else’s public webAPI for testing. See UPD.
In this code we make a request, and if we receive a response, we send it to the callback sent to us from the UI.
The MainViewController code changes to this:
And there remains one unpleasant, but important point - to show the user a delay. For this, there is a special component UIActivityIndicatorView , and we immediately set the HidesWhenStopped property to it so that it is visible only during animation, when the asynchronous request starts, we turn on its animation, and turn it off when we receive a response in our callback.
There is much more to write about Swift programming in Xcode, but for now let's dwell on this.
I hope that the article will benefit beginners, and maybe not only them (hehe).
UPD Added a server for testing the asynchronous version in the server class code, you can test)
Well, upload such a PHP file to your hosting and change apiURL to the link to your file.
Due to a recent need, I had to write for iOS, and I noticed a strong lack of guides in Russian even for elementary actions like “attach some action to a button click”, “read data from a text box”. An article for beginning developers for iOS, I ask for such under cat.
So, for starters to practice examples
Create a SingleView Application Project
If you know how to create yourself, then this stage can be skipped
- Choose project type
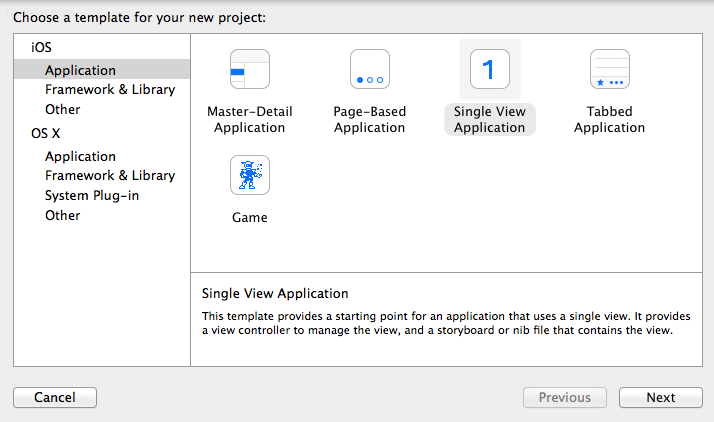
- Choose a name
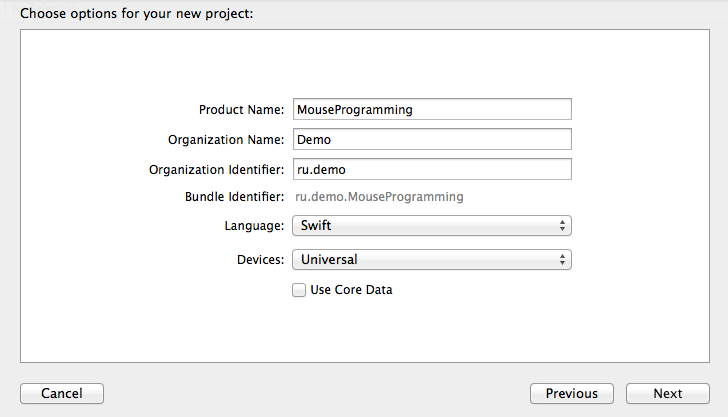
- Done, you can proceed
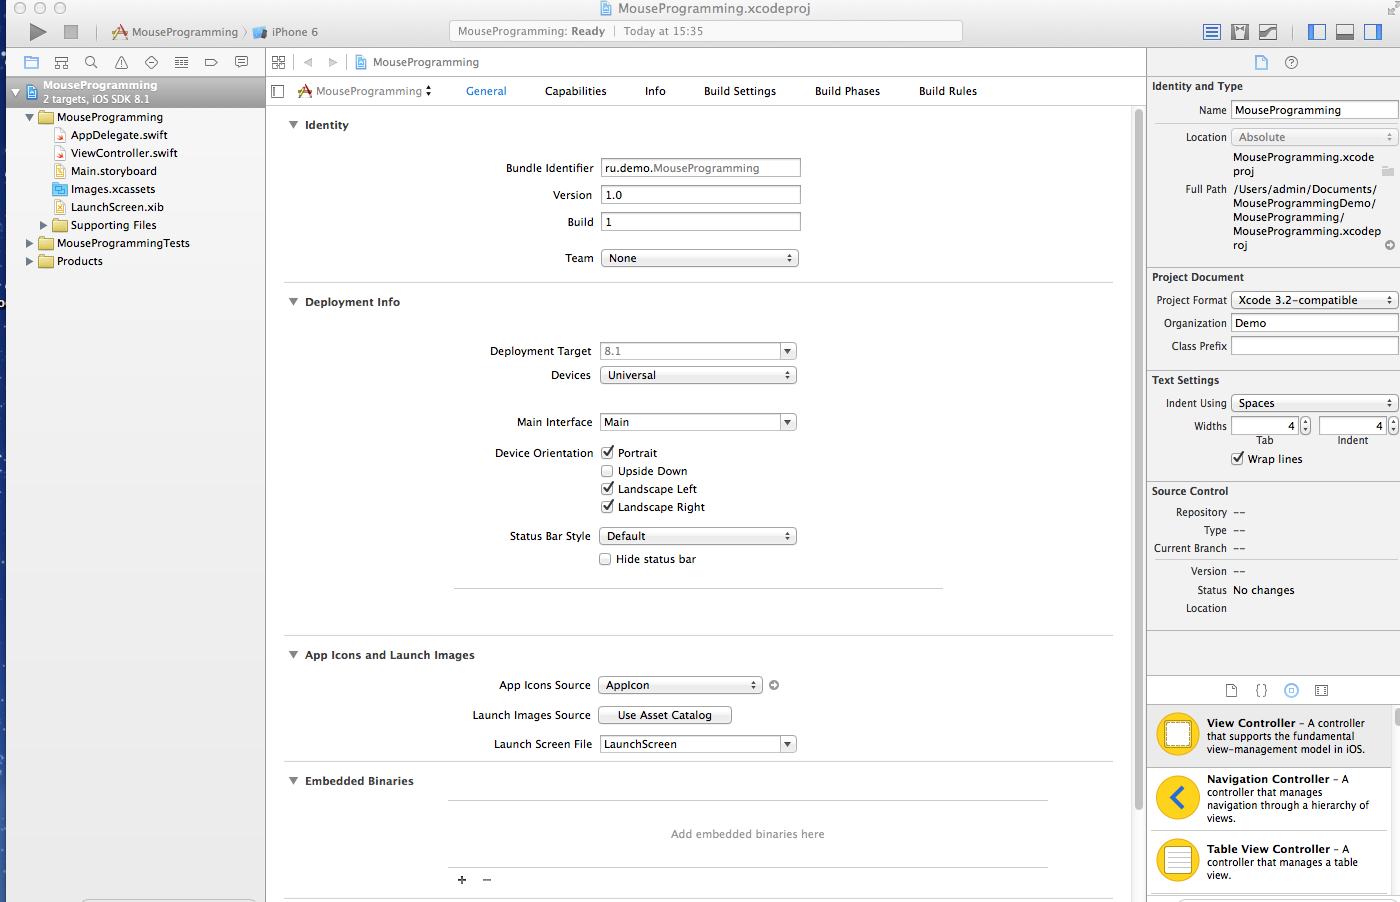
Further we complicate our application a little
- Change the controller class of our first View to MainViewControllerLike thisДо:

После(меняем название класса и файла):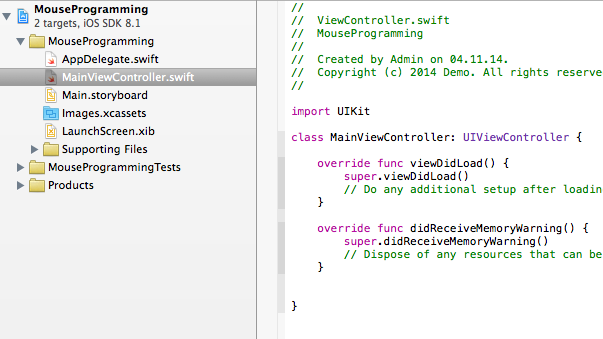
До:
После(CustomClass справа сверху меняем на новый)):
- Add a second View and ViewController for it (let's call it SpecialViewController)Like thisНаводим мышку на нужный на тип контроллера(ViewController), и перетаскиваем на вкладку интерфейса(Drag-n-Drop), затем создаем класс для нашего нового контроллера SpecialViewController(базовый код стандртен и аналогичен коду главного контроллера на этом этапе) в новом файле под названием SpecialViewController.swift. Затем выбираем наш контроллер в визуальном редакторе и в его свойствах в вкладке CustomClass в поле Class выбираем из списка наш свежесозданный класс контроллера.
So, we now have two windows, one of which the user simply cannot get into.
Let's move on to programming with the mouse
1. Add items to the visual editor
This is the easiest part, done like everywhere else.
We set the Placeholder property to the text field, it allows you to display a "prompt for input", which is visible only until you enter any text. But we won’t talk about the properties much in the framework of this article, so as not to overload.
2. Add our elements to the controller class, to work with them directly
First you need to select the icon
 at the top, we need it to simultaneously see the controller in the visual editor and the class code of the same controller. Then we simply “drag” the required controller element with the right mouse button in the visual half onto its code. You will be offered an arbitrary variable name, by which an element is now available for all functions of the controller.
3. Add event handling of window elements
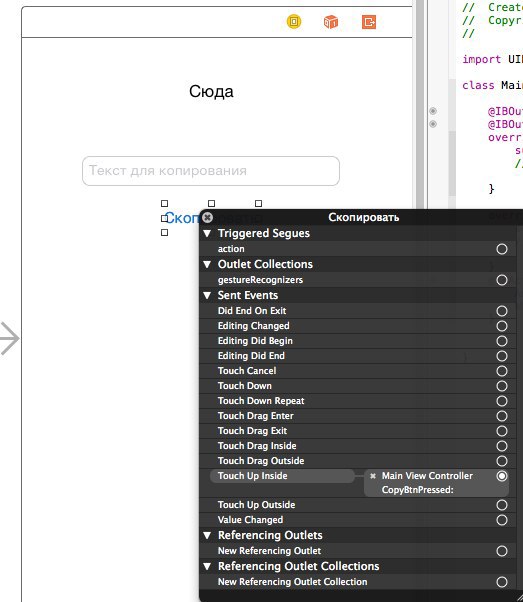
For this, small preparations are needed. First, click on the desired item, you get this window:

I will not describe the list of events here, they, IMHO, are self-evident. Select the one you need and left -click and drag it into the code.
4. A small example
Here, at the click of a button, we change the Label text to the one entered by the user. With a demonstration of the simulator for iPhone 6
As the most attentive readers could already notice, our editor swears at the inability to get into SpecialView. And he is right! It is to solve this problem through a visual editor that there is such a thing as Segue. Thanks to them, we can clearly show where the user can get from.
Transitions between windows
1. The simplest option
The easiest option is an unconditional jump. To do this, add the “Go to” button to our project, click on it with RMB and drag the line that appears to the View we want to go to (SpecialView in our case). We get a request for the Segue type, select show there - you can experiment with the rest yourself. Similarly, add the back button to SpecialView, and attach the transition to MainView to it.
Here's how it looks in a running application
As you can see, the simplest transitions can be created without writing a single line of code. But, of course, unconditional transitions are far from always enough.
2. Add a conditional jump
The easiest way to do this is to invoke our transition through the code. But in the code it is not there. Yes, and at the touch of a button it will still work, but I would not want to. The solution is quite simple: we delete the old version of the transition, and we’re moving the new one not from our button, but from the yellow circle of the ViewController itself, let's name our transition MainToSpecial
So, let us want to let the user into SpecialView only if the input field and Label contain the same text.
To do this, we need to create a button event for the button in the controller, check this condition in it. If it is executed, we will perform the transition using the following code:
self.performSegueWithIdentifier("MainToSpecial", sender: self)//вместо MainToSpecial название любого из созданных вами переходовThis code is added like this
Checking ...
Everything is working
As you can see, it launches on SpecialView only with the same values in the fields, but on the contrary, in any case, which is what we need.
This can be finished, but still I will show finally an asynchronous check of the transition conditions, because IMHO it is no less important.
3. Asynchronous transition with checking conditions on the server
In general, there are not too many differences from the synchronous version:
- The condition check does not happen instantly and cannot be in the button click handler directly
- It is necessary to somehow show the user that he is waiting
- I have to use callbacks
Firstly, all the application logic that does not have an interface must be in separate classes, so we will create the Server class in the Server.swift file with a single function (of course, the code is not very good, but I do not want to complicate the example):
Hidden text
import UIKit
let server=Server()
class Server {
    private let apiURL="http://worldteam-m.com/test.php?"
    func tryCheck(data:String,callback:(NSDictionary)->Void)
    {
        let request=(self.apiURL+data)
        let encoded = request.stringByAddingPercentEscapesUsingEncoding(NSUTF8StringEncoding)
        var url: NSURL = NSURL( string: encoded!)!
        var session = NSURLSession.sharedSession()
        var task = session.dataTaskWithURL(url, completionHandler: {data, response, error -> Void in
            println("Task completed")
            if((error) != nil) {
                println(error.localizedDescription)
            }
            var err: NSError?
            var jsonResult = NSJSONSerialization.JSONObjectWithData(data, options: NSJSONReadingOptions.MutableContainers, error: &err) as NSDictionary
            if (err? != nil) {
                println(error.localizedDescription)
            }
            dispatch_async(dispatch_get_main_queue(), {
                callback(jsonResult)
            })
        })
        task.resume()
    }
}
In this code we make a request, and if we receive a response, we send it to the callback sent to us from the UI.
The MainViewController code changes to this:
Hidden text
    @IBAction func MtoS(sender: AnyObject){
        server.tryCheck( WhereLbl.text! + FromText.text!, callback: onResponse)
    }
    func onResponse(json:NSDictionary){
        if json["code"] as String == "ok" { //допустим, что если сервер считает переход корректным, он пошлет нам {"code":"ok"}
            self.performSegueWithIdentifier("MainToSpecial", sender: self)//все ок, делаем переход
        } else {
            self.WhereLbl.text="Forbidden!"//иначе сообщаем о неудаче
        }
    }
And there remains one unpleasant, but important point - to show the user a delay. For this, there is a special component UIActivityIndicatorView , and we immediately set the HidesWhenStopped property to it so that it is visible only during animation, when the asynchronous request starts, we turn on its animation, and turn it off when we receive a response in our callback.
There is much more to write about Swift programming in Xcode, but for now let's dwell on this.
I hope that the article will benefit beginners, and maybe not only them (hehe).
UPD Added a server for testing the asynchronous version in the server class code, you can test)
Well, upload such a PHP file to your hosting and change apiURL to the link to your file.
<?php
sleep(4);
if(rand()%2==0)
{
	print json_encode(["code"=>"ok"]);
} elseprint json_encode(["code"=>"fail"]);
return;
?>