Deploy Go Servers Using Docker
- Transfer
Introduction
This week, the Docker team announced official base images for Go and other major languages, providing developers with an easy and reliable way to create containers for Go programs.
In this article, we will go through the creation of a Docker container for a simple web application on Go, as well as the deployment of this container to the Google Compute Engine. If you are new to Docker, you should read the Understanding Docker article before reading further.
Demo app
For our example, we will use the outyet program from the Go sample repository , which is a simple web server that reports whether the next version of Go has been released. This program has no dependencies other than the standard library and does not require any additional data files at run time.
Use “go get” to download and install outyet in your work environment:
$ go get github.com/golang/example/outyet
Create a Dockerfile
Create a file called Dockerfile in the outyet directory with the following contents:
# Start from a Debian image with the latest version of Go installed
# and a workspace (GOPATH) configured at /go.
FROM golang
# Copy the local package files to the container's workspace.
ADD . /go/src/github.com/golang/example/outyet
# Build the outyet command inside the container.
# (You may fetch or manage dependencies here,
# either manually or with a tool like "godep".)
RUN go install github.com/golang/example/outyet
# Run the outyet command by default when the container starts.
ENTRYPOINT /go/bin/outyet
# Document that the service listens on port 8080.
EXPOSE 8080
This Dockerfile tells you how to build a container that will run outyet, starting with the base dependencies (Debian systems with Go installed, the official golang image ). and ending with the outyet source code, its assembly, and finally the launch.
The steps ADD, RUN, and ENTRYPOINT are common to any Go project. There is a simpler option: onbuild from the golang image, which automatically copies the package source code, loads application dependencies, compiles the program, and sets it up to start at startup.
Using the onbuild option makes the Dockerfile much easier:
FROM golang:onbuild
EXPOSE 8080
Build and run the image
Call docker from the application directory to build the image from the Dockerfile:
$ docker build -t outyet .
In this case, the basic golang Docker Hub image will be taken, the contents of the application will be copied to it. The resulting image will be tagged with an outyet tag.
To start the container with the created image, execute the command:
$ docker run --publish 6060:8080 --name test --rm outyet
The flag
--publishtells Docker that it is necessary to forward port 8080 from the container to 6060 in the host system. The flag
--namegives our container the specified name in order to facilitate subsequent work with it. The flag
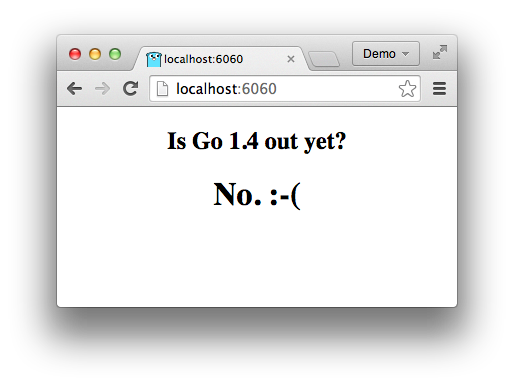
--rmindicates that you need to remove the container upon completion of its work. Launch the container and open the localhost address : 6060 / in the browser . You should see something like this:
(If Docker is running on another machine (or in a virtual machine), you should replace localhost with the address of this machine. If you use boot2docker on OS X or Windows, you can find this address using
boot2docker ip. Now that we are made sure that the image works, let's close the working container from another terminal window:
$ docker stop test
Creating a repository in the Docker Hub
The Docker Hub , the container repository from which we took the golang image before, has an Auto Build feature that can collect the image from the repositories on GitHub or BitBucket.
After committing Dockerfile to the repository and creating an automatic assembly for it, anyone with Docker installed can download and run our image with just one command. (We will see how useful this is in the next section.)
To configure automatic assembly, you need to commit the Dockerfile to your repository on GitHub or BitBucket, create an account on the Docker Hub, and follow all the instructions for creating an automated assembly .
When everything is ready, you can start your container using the name of the automated assembly:
$ docker run goexample/outyet
(Replace goexample / outyet with the name of the automated assembly you created)
Deploy container in Google Compute Engine
Google provides container-optimized Google Compute Engine images that make it easy to pick up a virtual machine that will work with an arbitrary Docker container. At startup, the running program reads the configuration file, which determines which container to run, obtains the image of the container, and launches it.
Create a container.yaml file that determines which Docker image to run and which ports to forward:
version: v1beta2
containers:
- name: outyet
  image: goexample/outyet
  ports:
  - name: http
    hostPort: 80
    containerPort: 8080
Please note that we forward the port of the 8080 container to the external 80 port, the default port for serving HTTP traffic. And again, you have to replace goexample / outyet with the name of your automatic build.
Use gcloud to create a virtual machine instance for the container:
$ gcloud compute instances create outyet \
    --image container-vm-v20140826 \
    --image-project google-containers \
    --metadata-from-file google-container-manifest=containers.yaml \
    --tags http-server \
    --zone us-central1-a \
    --machine-type f1-micro
The first argument (outyet) specifies the name of the instance, which will later be conveniently used for administrative purposes.
Flags
--imageand --image-projectspecify a special container-optimized image of the system (just copy these flags verbatim). The flag
--metadata-from-filepasses the containers.yaml file to the virtual machine. The flag
--tagsmarks the VM instance as an HTTP server, telling the firewall to open port 80. Flags
--zoneand --machine-typeflags indicate the zone in which you want to start the VM and the type of machine. (To see a list of machine types and zones, execute gcloud compute machine-types) When finished, the gcloud command should display information about the created instance. In the output, find the section
networkInterfaces, there will be indicated the IP address of the VM instance. After a couple of minutes, you should be able to open this IP through a browser and see: “Has Go 1.4 been released yet?” (To see what is happening in the virtual machine, you can connect to it via SSH using
gcloud compute ssh outyet. Having gone there, try sudo docker psto see which docker containers work)Additional Information
What we did is just the tip of the iceberg and you can do a lot more with a bunch of Go, Docker, and Google Compute Engine.
- To learn more about Docker, see their detailed documentation .
- To learn more about Docker and Go, take a look at the official golang repository in the Docker Hub .
- To learn more about Docker and the Google Compute Engine , see the Container-optimized VM page and google / docker-registry repository .
Andrew Gerrand
From the translator: all comments on the accuracy of translation, spelling and style, please transmit through personal messages. I will be glad to fix it.