Working folders: files that are always with you
Today, it is often necessary to access corporate files during trips, business trips, and also during meetings outside the office. It is not always convenient to use a working device included in the domain. Sometimes access to corporate data needs to be obtained from personal devices. On the one hand, the solution to this problem lies on the surface - let's give the user access to work files from personal devices. But there is a problem: how to ensure the proper level of security for these files? Windows Server 2012 R2 and Windows 8.1 provide a way out - this is the use of Work Folders.

Traditionally, for his work, the user uses a device issued to him at work and included in the domain. At the same time, each house has a laptop, smartphone, tablet (sometimes all at once), and everything is new, modern, configured for maximum convenience of the owner and storing all the necessary information. In this situation, the need to take a working computer (laptop, tablet) everywhere is depressing. Often there is a need to connect to work files from the outside precisely from a personal device. To date, there are three possibilities for this:
One of the ways to synchronize work files on different devices - both personal and included in the domain - is Work Folders.
Working folders are configured on the local file server of the organization. And it is the data in these folders that can be synchronized with various devices - both those included in the organization’s domain and with the user's personal devices. The data located in the Working folders is always stored on the server, and they can be accessed from any device on which there are Working folders. Working folders are available for the following operating systems: Windows 7 SP1, Windows 8.1, Windows RT 8.1, Windows Server 2012 R2. There are also plans to make working folders available for iOS.
What features do working folders provide?
The IT administrator gets the ability to centrally control corporate information and regulate user data. Moreover, if the user decides to delete the Working Folders from his device, the files will still be saved on the organization’s server. This simplifies life even in the event of the loss or theft of the device on which the Working Folders were synchronized. Using Windows Intune, a system administrator can destroy working folders on a lost device.
The user gets access to his work data from his personal devices. However, they should not be registered in any way in the corporate domain or connected to the corporate network. Files stored in the working folder are synchronized to the organization’s server and from there to other working folders of this user on another device. During synchronization, files are transferred in encrypted form. Another feature of working folders is that they do not provide the ability to organize group work on a file.
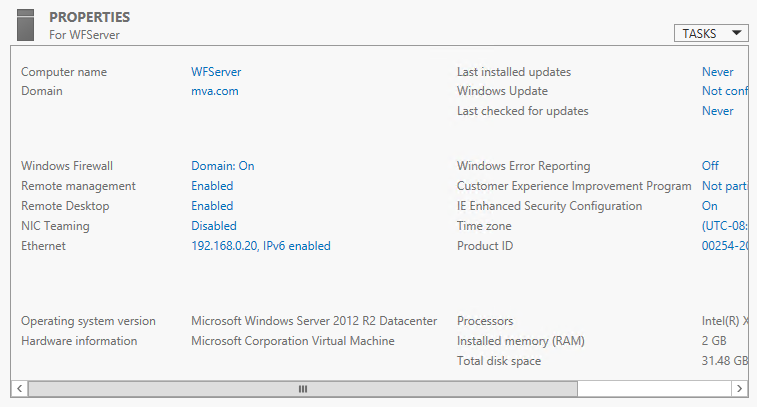
Let’s now analyze in detail how to configure working folders on the server, the user's working computer and on his personal device. For this, I use three machines - a server and two client hosts. The server and one of the hosts are included in the domain, the second host is the user's personal device. Server and host specifications are presented below:

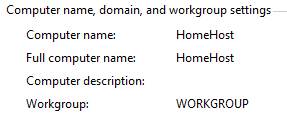
A Sales group has been created in the domain , to which the User 2. Test user has been added with the alias tuser2 using OfficeHost . On his HomeHost device , the same user uses the name user2 .
The process of creating and configuring working folders consists of several stages:
Also make sure that both the server and the client have the following updates installed, which are necessary for the working folders to work correctly (updates can be said here ):
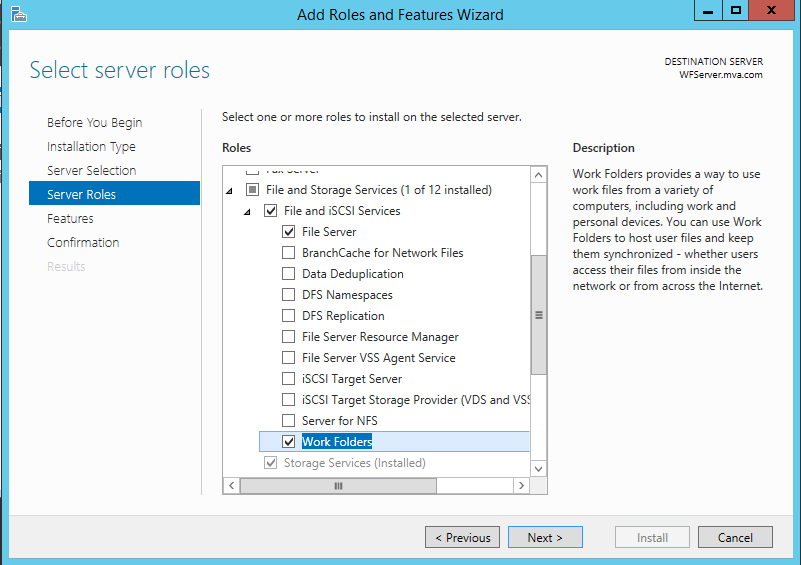
First of all, you need to install the Work Folders role on the server. You can do this using the Add Roles and Features Wizard:
This operation can also be performed using the PowerShell command :
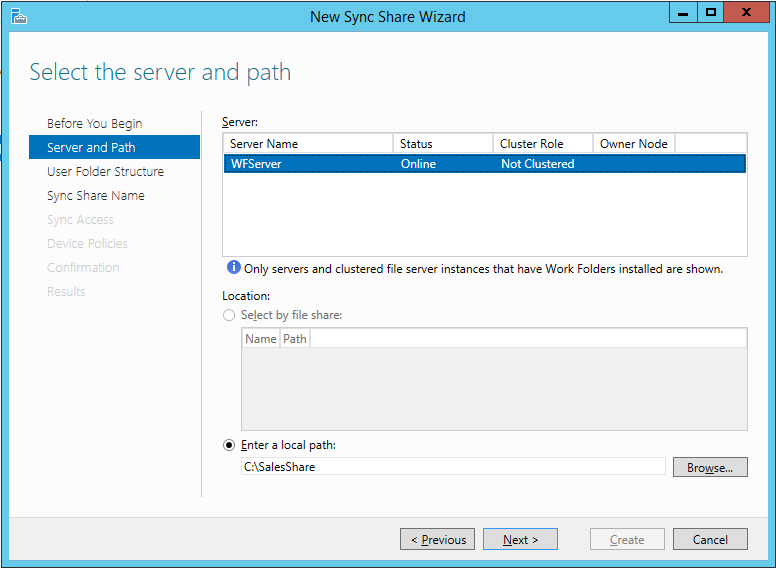
After Working folders are installed on the server, they must be configured for users. To do this, in the Server Manager (Server Manager) go to the tab File Services and Storage Services (File and Storage Services) and from there to the Work Folders (Work Folders) . Next, you need to create a new synchronization share (Sync Share) . The synchronization share (Sync Share) maps the local path to the location of the user folders and user groups that have access to the synchronization share. In the resource creation wizard, you need to select a server (we have it WFServer ) and indicate the local one to the place on the disk where the user folders will be stored (C: \ SalesShare ).
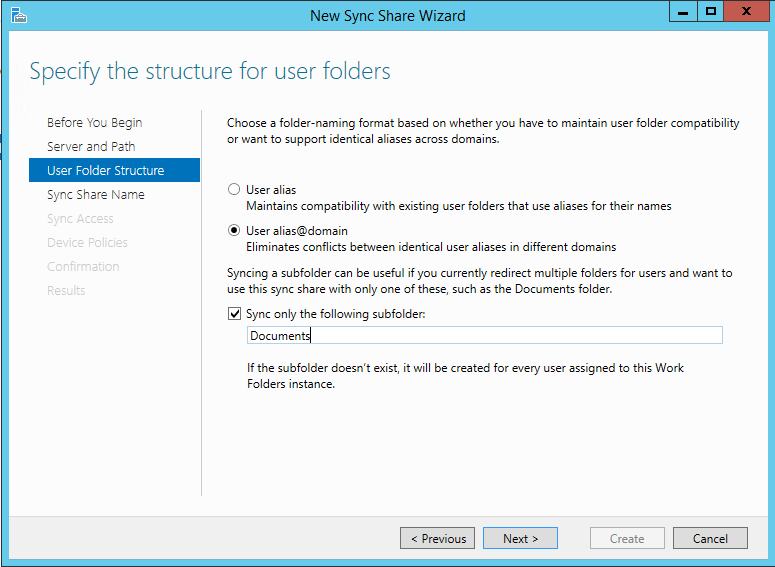
Next, select the format of the user folder name. We can choose, depending on the need, to use just the alias of the user tuser2 or the address of the user tuser2@mva.com (if we want to eliminate the conflict of the same aliases of users in different domains).
In addition, the administrator can set that only a specific subfolder should be synchronized on devices. To do this, select the item “Sync only the following subfolder” and enter the name of the folder.
Next, specify a name for the synchronization share:

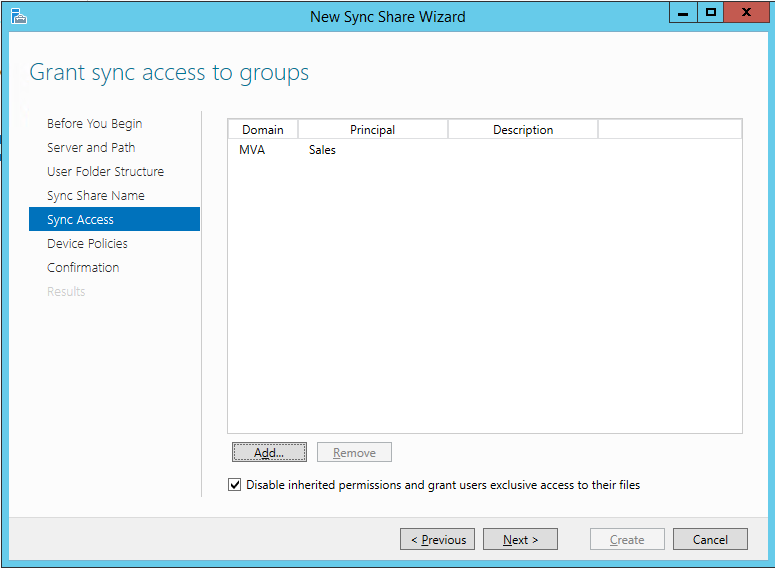
At the next stage, you need to specify the user group to which will be granted access to the created resource. In our case, this is the previously created Sales group . By default, the administrator does not have permission to access user data on the server.
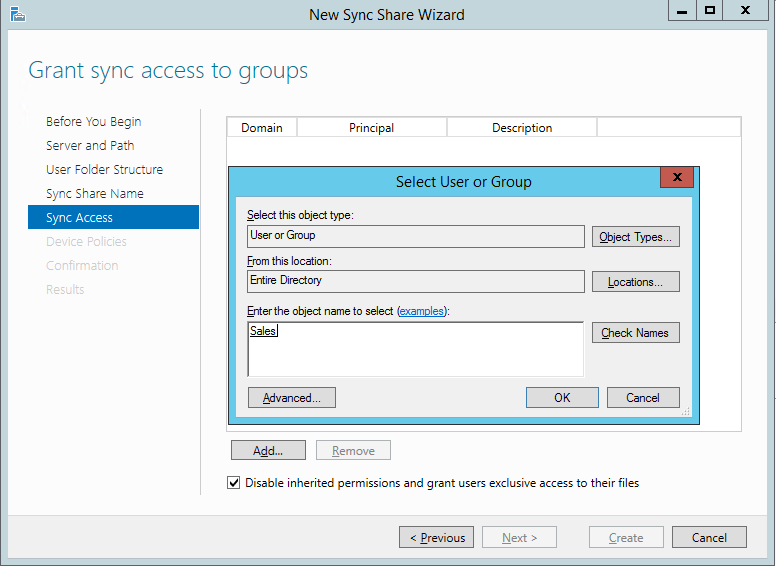
If you want to make this feature available, you need to make the “Disable inherited permission and grant users exclusive access to their files” option inactive .
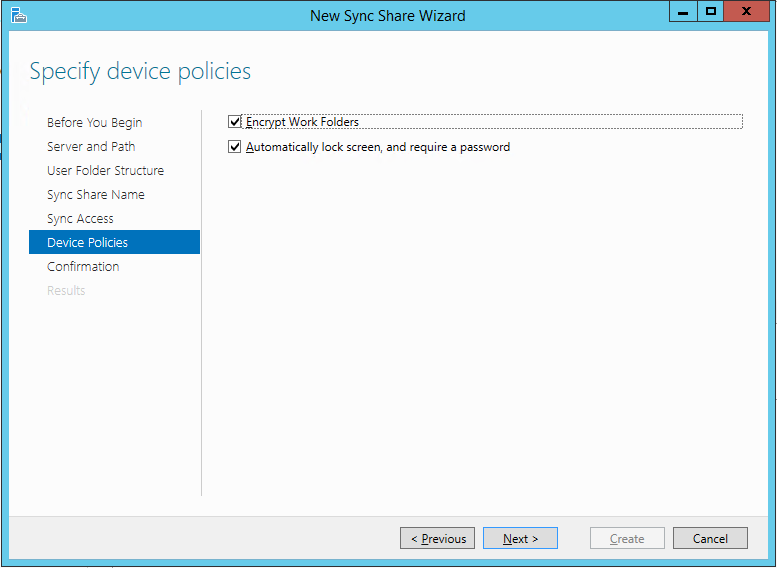
Next, we determine the security rules we need for the devices on which Work Folders will be used.
Check the information again.
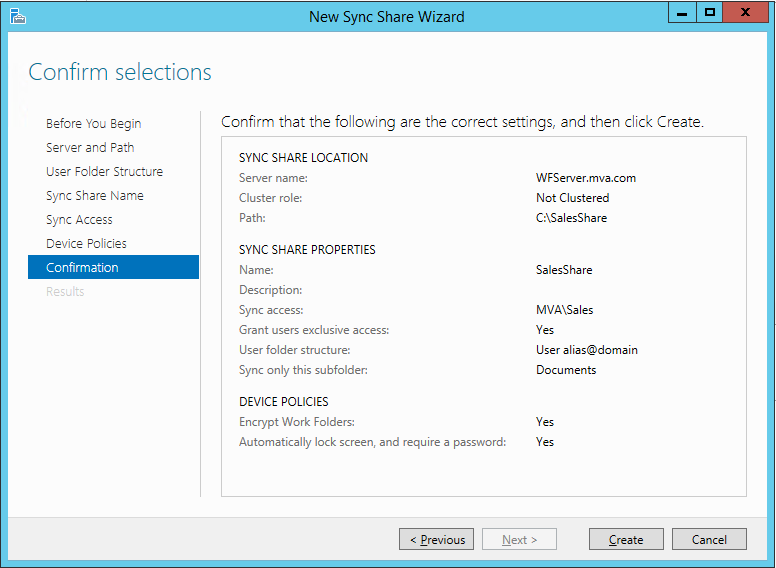
And let's move on to the installation.
You can also create a synchronization share using the PowerShell command :
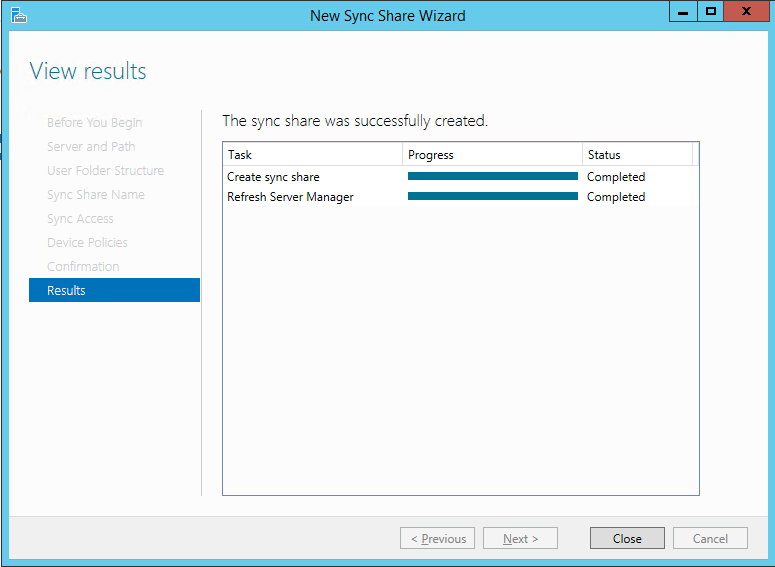
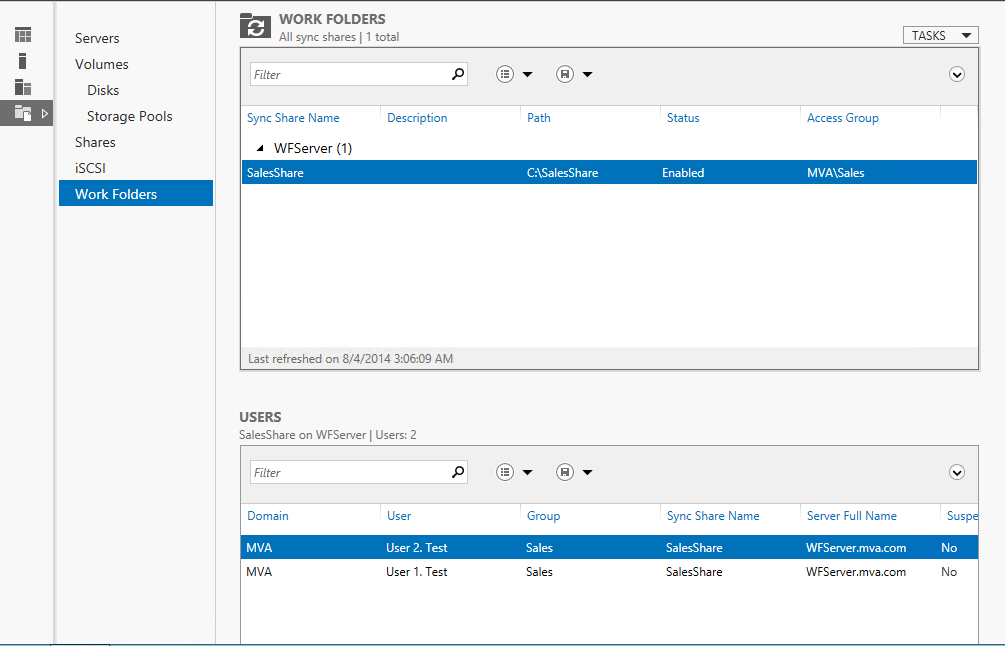
As a result, we should get this result:
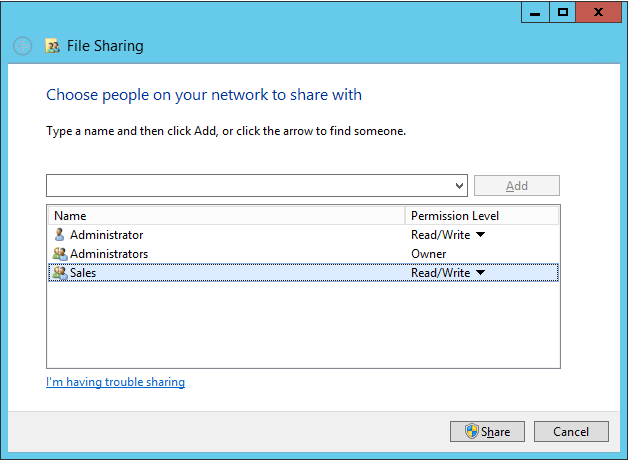
If you want to enable access to the folder via SMB, you must go to the location of the SalesShare folder via Explorer and select the “Share with” -> “Specific people” item with the right mouse button . Add the MVA \ Sales group and change the permissions to "Read / Write" :
By the way, after you turned on access to the folder via SMB, the synchronization time was set by default for every 5 minutes. To change this, you can use the following PowerShell command:
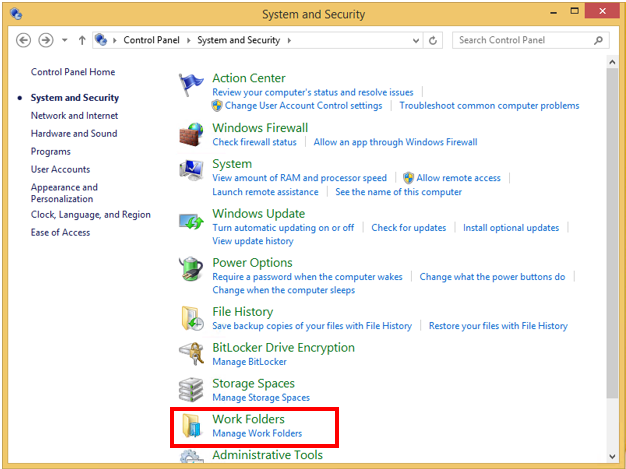
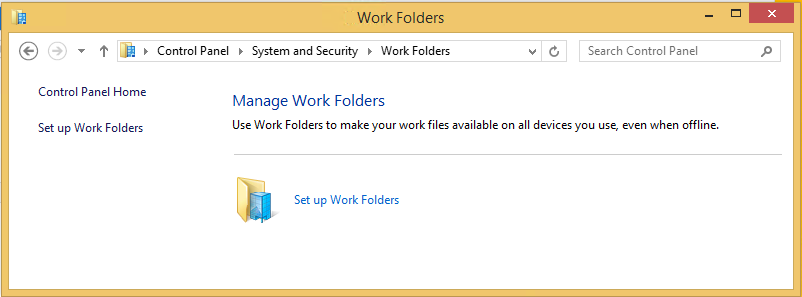
Now let's move on to setting up Work Folders on client machines. You can install Work folders using: Control Panel -> System and Security -> Work Folders .
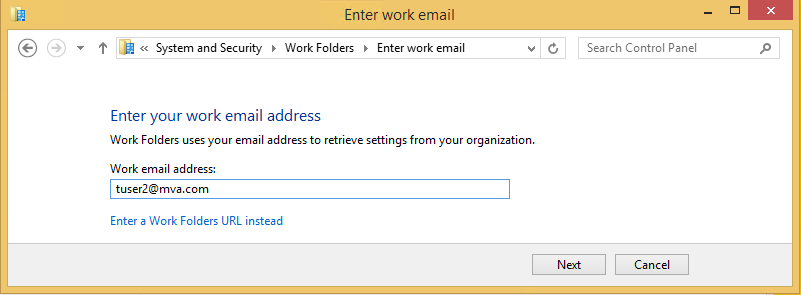
Enter the email address of the user.
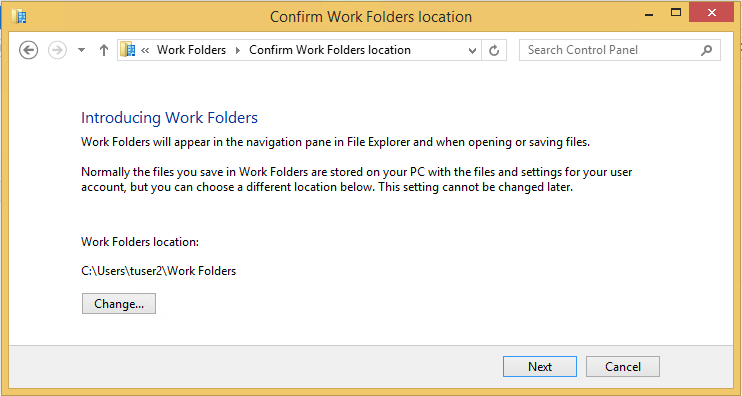
Indicate where the working folders should be located on the device.
Confirm compliance with the required safety rules. By the way, I want to add here that the files will be encrypted even if the device’s operating system is Windows RT 8.1.

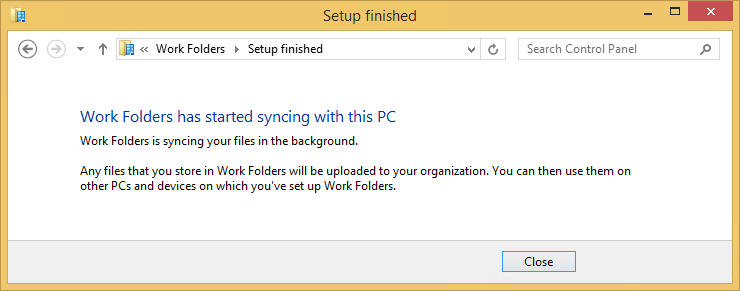
Now the working folders are installed on the device.
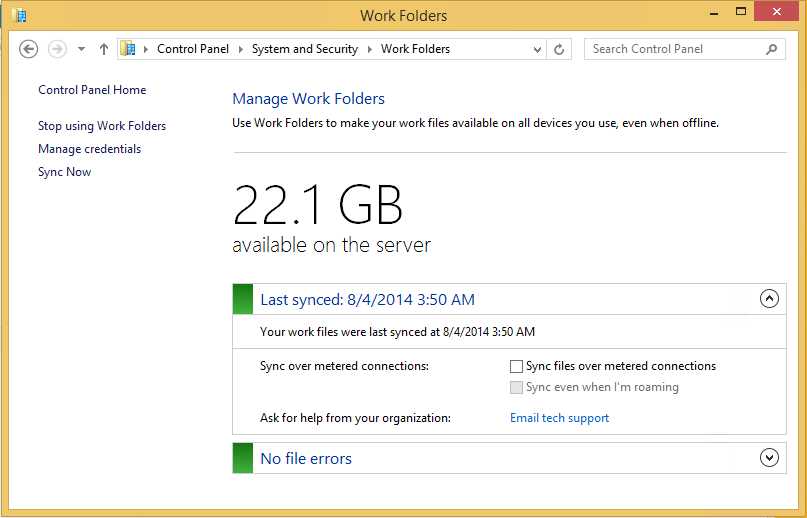
The administrator at the same time controls how much space is available on the server to the user, and therefore how much information can be synchronized.
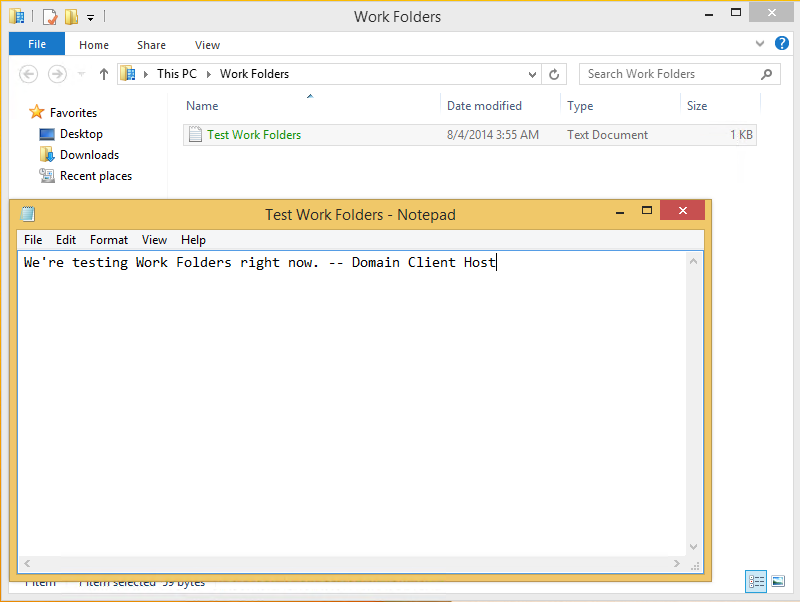
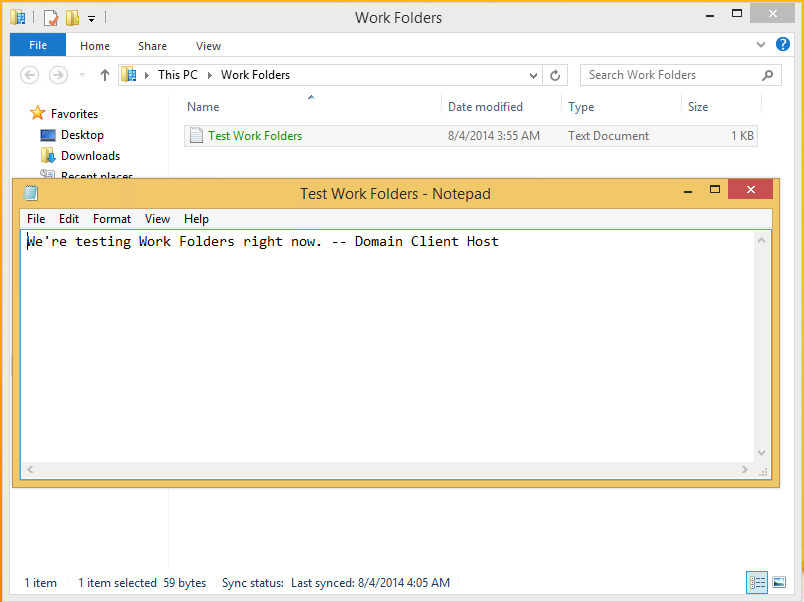
Now we can create a file in the Working folder, then to see how the synchronization will be carried out.
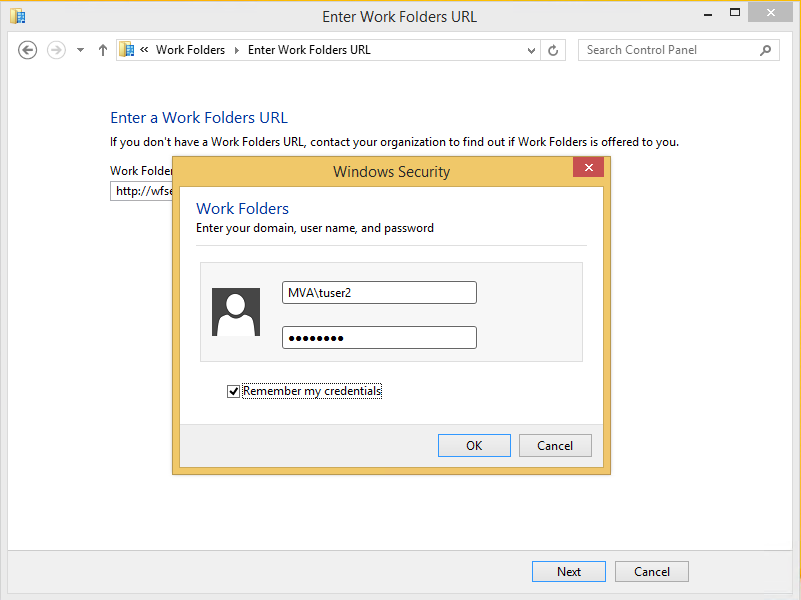
Setting up work folders on personal devices differs in only one step. At the stage of adding a user on a personal device, the domain login and password of the user will be requested.
After the installation is completed, by opening the Working folder we will see a synchronized file created by us on the domain client:
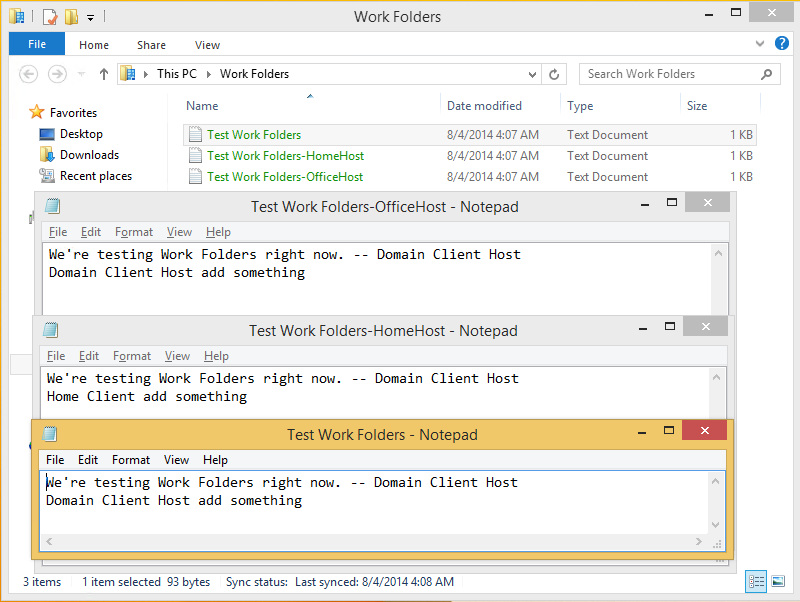
Now let's see how the files in Work Folders are synchronized if the same file is edited on two machines at the same time.
In this case, both files will be saved and synchronized with the name of the computer on which the changes were made. Next, the user must decide whether to merge these files, or which one must be deleted.
I hope the information will be useful!
Thanks!
Working folders - what is it?
Traditionally, for his work, the user uses a device issued to him at work and included in the domain. At the same time, each house has a laptop, smartphone, tablet (sometimes all at once), and everything is new, modern, configured for maximum convenience of the owner and storing all the necessary information. In this situation, the need to take a working computer (laptop, tablet) everywhere is depressing. Often there is a need to connect to work files from the outside precisely from a personal device. To date, there are three possibilities for this:
- Connect to the corporate application through a browser;
- Installing applications from the corporate portal on devices (personal and work);
- Synchronize work files on different devices.
One of the ways to synchronize work files on different devices - both personal and included in the domain - is Work Folders.
Working folders are configured on the local file server of the organization. And it is the data in these folders that can be synchronized with various devices - both those included in the organization’s domain and with the user's personal devices. The data located in the Working folders is always stored on the server, and they can be accessed from any device on which there are Working folders. Working folders are available for the following operating systems: Windows 7 SP1, Windows 8.1, Windows RT 8.1, Windows Server 2012 R2. There are also plans to make working folders available for iOS.
What features do working folders provide?
The IT administrator gets the ability to centrally control corporate information and regulate user data. Moreover, if the user decides to delete the Working Folders from his device, the files will still be saved on the organization’s server. This simplifies life even in the event of the loss or theft of the device on which the Working Folders were synchronized. Using Windows Intune, a system administrator can destroy working folders on a lost device.
The user gets access to his work data from his personal devices. However, they should not be registered in any way in the corporate domain or connected to the corporate network. Files stored in the working folder are synchronized to the organization’s server and from there to other working folders of this user on another device. During synchronization, files are transferred in encrypted form. Another feature of working folders is that they do not provide the ability to organize group work on a file.
Installation and setup
Let’s now analyze in detail how to configure working folders on the server, the user's working computer and on his personal device. For this, I use three machines - a server and two client hosts. The server and one of the hosts are included in the domain, the second host is the user's personal device. Server and host specifications are presented below:
A Sales group has been created in the domain , to which the User 2. Test user has been added with the alias tuser2 using OfficeHost . On his HomeHost device , the same user uses the name user2 .
The process of creating and configuring working folders consists of several stages:
- Server Tuning
- Setting the Work Folders role
- Creating a sync share (Sync Share)
- Enabling SMB Access (Optional)
- Configure a client included in the domain
- Setting up Work Folders on a personal device
- Syncing Files in Work Folders
Also make sure that both the server and the client have the following updates installed, which are necessary for the working folders to work correctly (updates can be said here ):
- KB2883200
- KB2894179
- KB2894029
1. Server setup
1.1. Setting the Work Folders role
First of all, you need to install the Work Folders role on the server. You can do this using the Add Roles and Features Wizard:
This operation can also be performed using the PowerShell command :
PS C:\> Add-WindowsFeature FS-SyncShareService
1.2. Creating a sync share (Sync Share)
After Working folders are installed on the server, they must be configured for users. To do this, in the Server Manager (Server Manager) go to the tab File Services and Storage Services (File and Storage Services) and from there to the Work Folders (Work Folders) . Next, you need to create a new synchronization share (Sync Share) . The synchronization share (Sync Share) maps the local path to the location of the user folders and user groups that have access to the synchronization share. In the resource creation wizard, you need to select a server (we have it WFServer ) and indicate the local one to the place on the disk where the user folders will be stored (C: \ SalesShare ).
Next, select the format of the user folder name. We can choose, depending on the need, to use just the alias of the user tuser2 or the address of the user tuser2@mva.com (if we want to eliminate the conflict of the same aliases of users in different domains).
In addition, the administrator can set that only a specific subfolder should be synchronized on devices. To do this, select the item “Sync only the following subfolder” and enter the name of the folder.
Next, specify a name for the synchronization share:
At the next stage, you need to specify the user group to which will be granted access to the created resource. In our case, this is the previously created Sales group . By default, the administrator does not have permission to access user data on the server.
If you want to make this feature available, you need to make the “Disable inherited permission and grant users exclusive access to their files” option inactive .
Next, we determine the security rules we need for the devices on which Work Folders will be used.
Check the information again.
And let's move on to the installation.
You can also create a synchronization share using the PowerShell command :
PS C:\>New-SyncShare SalesShare –path C:\SalesShare –User MVA\Sales -RequireEncryption $true –RequirePasswordAutoLock $true
As a result, we should get this result:
1.3. Enabling SMB Access (Optional)
If you want to enable access to the folder via SMB, you must go to the location of the SalesShare folder via Explorer and select the “Share with” -> “Specific people” item with the right mouse button . Add the MVA \ Sales group and change the permissions to "Read / Write" :
By the way, after you turned on access to the folder via SMB, the synchronization time was set by default for every 5 minutes. To change this, you can use the following PowerShell command:
PS C:\> Set-SyncServerSetting -MinimumChangeDetectionMins 2. Configuring a client included in the domain
Now let's move on to setting up Work Folders on client machines. You can install Work folders using: Control Panel -> System and Security -> Work Folders .
Enter the email address of the user.
Indicate where the working folders should be located on the device.
Confirm compliance with the required safety rules. By the way, I want to add here that the files will be encrypted even if the device’s operating system is Windows RT 8.1.
Now the working folders are installed on the device.
The administrator at the same time controls how much space is available on the server to the user, and therefore how much information can be synchronized.
Now we can create a file in the Working folder, then to see how the synchronization will be carried out.
3. Configuring Work Folders on a personal device
Setting up work folders on personal devices differs in only one step. At the stage of adding a user on a personal device, the domain login and password of the user will be requested.
After the installation is completed, by opening the Working folder we will see a synchronized file created by us on the domain client:
4. Synchronization of files in Work Folders (Work Folders)
Now let's see how the files in Work Folders are synchronized if the same file is edited on two machines at the same time.
In this case, both files will be saved and synchronized with the name of the computer on which the changes were made. Next, the user must decide whether to merge these files, or which one must be deleted.
I hope the information will be useful!
Thanks!