HybridAuth for UMI.CMS. Authorization through social networks on UMI.CMS
- From the sandbox
- Tutorial
For a very long time I wanted to make a script for UMI different from loginza, because I think that it is not entirely successful, for a number of reasons (purely subjective). I can be mistaken, if so, do not throw stones.
Was inspired by one of the articles on habrahabr, unfortunately the article was deleted. In any case, I’ll leave a link to every fireman with this article . This article described in general how to connect HybridAuth to your site, and is ripe for implementing the method and writing your article.
I will try to consider authorization implementation on UMI.CMS through the popular HybridAuth library.
Authorization for UMI.CMS will be implemented through providers:
HybridAuth article for UMI.CMS will be divided into several articles:
1) Customizing user fields
2) Installing and configuring HybridAuth
3) Installing HybridAuth + UMI.CMS script
4) Template adjustment
First you need to go into the data templates (module) and find the “User” data type there: Add a new field “Avatar” and “User ID from social. Network ”: User configuration is complete.


You can download the library here (these are original files), and here add. providers. According to this link, you can download already added vk.com (suggest to use this archive).
First you need to create applications for your site. I will not paint the process of creating the application, I'm sure you will figure it out on your own. In order for you to figure it out faster, I give links to the creation of the application:
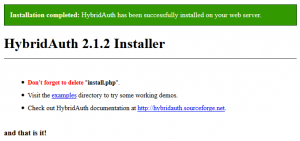
Next, you need to configure HybridAuth. To do this, open _http: //your_site/hybridauth/install.php and select the necessary services. I want to draw attention to the fact that the guys who developed hybridauth immediately provided links to the creation of applications.
After you have made all the settings and saved, you should see something like this: Now you need to add a new provider. If you used the original files from the repository, you need to install the provider for vk.com (if you took the finished archive, skip the vk.com setup). You should follow this link and download the file. It must be placed in the \ hybridauth \ Hybrid \ Providers directory. In the hybridauth \ config.php file, add a section of code and enter the id and secret that VKontakte provide.
Next, you need to place the auth_with_social.php file in the root with the following contents:
Next, add the line to the .htaccess file:
Next, you need to add links to the template for authorization through social. network. You need to take this code:
That's all with the setup.
Now I want to pay attention to if an error occurred during authorization. If this happens, then the script redirects to the page / authorization / with the get parameter error.
In order to show the user errors, you need to create a page in the site structure and make its url / authorization /. Next, use xslt to work out the error parameter. I do not consider the TPL template language.
References:
PS If you have questions and incomprehensible moments, write comments.
PSS If you find a mistake, let me know, I will fix it right away. I tried to quickly share my experience, maybe someone will come in handy.
Thanks for attention.
Was inspired by one of the articles on habrahabr, unfortunately the article was deleted. In any case, I’ll leave a link to every fireman with this article . This article described in general how to connect HybridAuth to your site, and is ripe for implementing the method and writing your article.
I will try to consider authorization implementation on UMI.CMS through the popular HybridAuth library.
Authorization for UMI.CMS will be implemented through providers:
- Google+
- In contact with
HybridAuth article for UMI.CMS will be divided into several articles:
1) Customizing user fields
2) Installing and configuring HybridAuth
3) Installing HybridAuth + UMI.CMS script
4) Template adjustment
Customizing user fields
First you need to go into the data templates (module) and find the “User” data type there: Add a new field “Avatar” and “User ID from social. Network ”: User configuration is complete.


Install and configure HybridAuth
You can download the library here (these are original files), and here add. providers. According to this link, you can download already added vk.com (suggest to use this archive).
First you need to create applications for your site. I will not paint the process of creating the application, I'm sure you will figure it out on your own. In order for you to figure it out faster, I give links to the creation of the application:
- Google+
- Vkontakte , I immediately provide a link to create an application, it’s easiest there
- Linkedin.com , link immediately to the creation of the application
Next, you need to configure HybridAuth. To do this, open _http: //your_site/hybridauth/install.php and select the necessary services. I want to draw attention to the fact that the guys who developed hybridauth immediately provided links to the creation of applications.
After you have made all the settings and saved, you should see something like this: Now you need to add a new provider. If you used the original files from the repository, you need to install the provider for vk.com (if you took the finished archive, skip the vk.com setup). You should follow this link and download the file. It must be placed in the \ hybridauth \ Hybrid \ Providers directory. In the hybridauth \ config.php file, add a section of code and enter the id and secret that VKontakte provide.

"Vkontakte" => array (
	"enabled" => true,
	"keys"    => array ( "id" => "", "secret" => "" )
),
HybridAuth + UMI.CMS Script Installation
Next, you need to place the auth_with_social.php file in the root with the following contents:
session_start();
require_once('standalone.php');
$config = CURRENT_WORKING_DIR . '/hybridauth/config.php';
require CURRENT_WORKING_DIR . '/hybridauth/Hybrid/Auth.php';
$domain = cmsController::getInstance()->getCurrentDomain()->getHost(); // Получение домена
$users = cmsController::getInstance()->getModule("users"); // "Подключение" к модулю users
$data = cmsController::getInstance()->getModule("data"); // "Подключение" к модулю data
/*
* /auth_with_social.php?login_with=_fb
* /auth_with_social.php?login_with=_vk
* /auth_with_social.php?login_with=_in
* /auth_with_social.php?login_with=_gp
* /auth_with_social.php?login_with=_tw
* */
if( isset( $_GET["login_with"] ) ) {
$login_with = $_GET["login_with"];
try {
$hybridauth = new Hybrid_Auth($config);
$adapter = false;
switch ($login_with) {
case "_fb":
$adapter = $hybridauth->authenticate( "facebook" );
break;
case "_vk":
$adapter = $hybridauth->authenticate( "vkontakte" );
break;
case "_in":
$adapter = $hybridauth->authenticate( "linkedin" );
break;
case "_gp":
$adapter = $hybridauth->authenticate( "google" );
break;
case "_tw":
$adapter = $hybridauth->authenticate( "twitter" );
break;
}
// Если в параметр передана "чушь" выдаем ошибку
if(!$adapter) die( "Ошибка про авторизации! Попробуйте еще раз. ");
$profile = $adapter->getUserProfile();
// Если пользователь не залогинен - редирект
if( !isset( $profile ) ){
/* Редирект $profile случае запроса auth_with_social.php без параметров */
$domain = cmsController::getInstance()->getCurrentDomain()->getHost();
header ("Location: http://" . $domain);
// Если пользователь залогинен, продолжаем работу :)
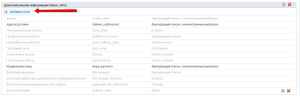
} else {
echo "Отладочная информация";
echo "";
print_r($profile);
echo "";
$objectTypes = umiObjectTypesCollection::getInstance();
$objectTypeId = $objectTypes->getBaseType("users", "user");
$objectType = $objectTypes->getType($objectTypeId);
$provider = $login_with; // Провайдер через который авторизовался пользователь
$identifier = $profile->identifier;
$login = $profile->email;
$email = $profile->email;
if(iconv_strlen($login) == 0) {
$login = transliterate($profile->firstName);
$login .= $profile->identifier;
$email = $login . '@'. $domain;
}
$fname = $profile->firstName;
$lname = $profile->lastName;
$password = md5(generate_password(10));
$sel = new selector('objects');
$sel->types('object-type')->name('users', 'user');
$sel->where('e-mail')->equals($email);
$user = $sel->first;
if( $user instanceof iUmiObject ) {
permissionsCollection::getInstance()->loginAsUser($user);
session_commit();
header ("Location: http://" . $domain);
} else {
if(!preg_match("/.+@.+\..+/", $email)) {
while(true) {
$email = $login.rand(1,100)."@".getServer('HTTP_HOST');
if($this->checkIsUniqueEmail($email)) {
break;
}
}
}
$object_id = umiObjectsCollection::getInstance()->addObject($login, $objectTypeId);
$object = umiObjectsCollection::getInstance()->getObject($object_id);
$object->setValue("login", $login);
$object->setValue("password", md5($password));
$object->setValue("e-mail", $email);
$object->setValue("fname", ($fname));
$object->setValue("lname", $lname);
$object->setValue("loginza", $provider);
$object->setValue("social_identifier", $identifier);
$object->setValue("register_date", time());
$object->setValue("is_activated", '1');
$object->setValue("activate_code", md5(uniqid(rand(), true)));
/* Создание аватара пользователя */
$user_pic = "./files/users_upload/social_avatars/";
$user_pic .= $identifier . $provider;
$png_pos = strpos($profile->photoURL , '.png');
$gif_pos = strpos($profile->photoURL , '.gif');
if ( $png_pos !== false )
$user_pic .= ".png";
elseif ( $gif_pos !== false )
$user_pic .= ".gif";
else
$user_pic .= ".jpeg";
// How to save facebook profile picture using php graph Api
// http://goo.gl/zgL3iR
// Сохранение изображения с заданного URL-адреса
// http://goo.gl/VHeXk1
$data = file_get_contents($profile->photoURL);
$file = fopen($user_pic, 'wb');
fputs($file, $data);
fclose($file);
if( file_exists("$user_pic") ) {
$oFile = new umiFile($user_pic);
if (!$oFile->getIsBroken()) {
$object->setValue("avatar", $oFile);
}
}
/* // Создание аватара пользователя */
$_SESSION['cms_login'] = $login;
$_SESSION['cms_pass'] = md5($password);
$_SESSION['user_id'] = $object_id;
session_commit();
$group_id = regedit::getInstance()->getVal("//modules/users/def_group");
$object->setValue("groups", Array($group_id));
$data_module = cmsController::getInstance()->getModule('data');
$data_module->saveEditedObject($object_id, true);
$object->commit();
header ("Location: http://" . $domain);
}
}
} catch( Exception $e ) {
/*$html = "Ошибка при авторизации. Информация об ошибки ниже:
";
$html .= "" . $e->getMessage() . "";
die( $html );*/
header ("Location: http://" . $domain . '/authorization/?error=' . $e->getMessage());
}
} else {
/* Редирект в случае запроса auth_with_social.php без параметров */
header ("Location: http://" . $domain);
}
/*
* Генератор пароля
* */
function generate_password($number) {
$arr = array('a','b','c','d','e','f',
'g','h','i','j','k','l',
'm','n','o','p','r','s',
't','u','v','x','y','z',
'A','B','C','D','E','F',
'G','H','I','J','K','L',
'M','N','O','P','R','S',
'T','U','V','X','Y','Z',
'1','2','3','4','5','6',
'7','8','9','0','-');
// Генерируем пароль
$pass = "";
for($i = 0; $i < $number; $i++)
{
// Вычисляем случайный индекс массива
$index = rand(0, count($arr) - 1);
$pass .= $arr[$index];
}
return $pass;
}
/*
* Транслит руского языка
* */
function transliterate($input) {
$gost = array(
"Є"=>"YE","І"=>"I","Ѓ"=>"G","і"=>"i","№"=>"-","є"=>"ye","ѓ"=>"g",
"А"=>"A","Б"=>"B","В"=>"V","Г"=>"G","Д"=>"D",
"Е"=>"E","Ё"=>"YO","Ж"=>"ZH",
"З"=>"Z","И"=>"I","Й"=>"J","К"=>"K","Л"=>"L",
"М"=>"M","Н"=>"N","О"=>"O","П"=>"P","Р"=>"R",
"С"=>"S","Т"=>"T","У"=>"U","Ф"=>"F","Х"=>"Kh",
"Ц"=>"C","Ч"=>"CH","Ш"=>"SH","Щ"=>"SHH","Ъ"=>"'",
"Ы"=>"Y","Ь"=>"","Э"=>"E","Ю"=>"YU","Я"=>"YA",
"а"=>"a","б"=>"b","в"=>"v","г"=>"g","д"=>"d",
"е"=>"e","ё"=>"yo","ж"=>"zh",
"з"=>"z","и"=>"i","й"=>"j","к"=>"k","л"=>"l",
"м"=>"m","н"=>"n","о"=>"o","п"=>"p","р"=>"r",
"с"=>"s","т"=>"t","у"=>"u","ф"=>"f","х"=>"kh",
"ц"=>"c","ч"=>"ch","ш"=>"sh","щ"=>"shh","ъ"=>"",
"ы"=>"y","ь"=>"","э"=>"e","ю"=>"yu","я"=>"ya",
" "=>"-","—"=>"-",","=>"-","!"=>"-","@"=>"-",
"#"=>"-","$"=>"","%"=>"","^"=>"","&"=>"","*"=>"",
"("=>"",")"=>"","+"=>"","="=>"",";"=>"",":"=>"",
"'"=>"","\""=>"","~"=>"","`"=>"","?"=>"","/"=>"",
"\\"=>"","["=>"","]"=>"","{"=>"","}"=>"","|"=>"", "."=>"-"
);
$string = strtr($input, $gost);
return strtolower($string);
}
Next, add the line to the .htaccess file:
###### SOCIAL #####
RewriteRule ^hybridauth/(.*)*$ hybridauth/index.php?%{QUERY_STRING} [L]
###### // SOCIAL #####
Template Adjustment
Next, you need to add links to the template for authorization through social. network. You need to take this code:
That's all with the setup.
Now I want to pay attention to if an error occurred during authorization. If this happens, then the script redirects to the page / authorization / with the get parameter error.
In order to show the user errors, you need to create a page in the site structure and make its url / authorization /. Next, use xslt to work out the error parameter. I do not consider the TPL template language.
References:
PS If you have questions and incomprehensible moments, write comments.
PSS If you find a mistake, let me know, I will fix it right away. I tried to quickly share my experience, maybe someone will come in handy.
Thanks for attention.