Traffic Inspector in action: monitor network activity through VPN
- Tutorial
- Recovery mode
Introduction
As you know, VPN technology is used to organize a direct secure connection between clients (end-user and corporate office) or two local networks via a public Internet channel. Using a VPN, remote users can access the servers of the enterprise and communicate with various offices of their company.
VPN does not need leased lines, so anyone who has access to the Internet can use it. Once the connection is established, the employee can work with all network resources, as if he was in the office. But perhaps the most important advantage of this technology is that, despite the public infrastructure, a direct VPN connection (the so-called VPN tunnel) is so secure that it is almost impossible to steal data or gain unauthorized access to a geographically distributed network.
In this article, we will look at how to use Traffic Inspector to control collaboration over a VPN in a corporate network and monitor network activity.
Configuration
Let our company have a head office in Moscow and a branch in St. Petersburg. Suppose we need to combine the St. Petersburg office with the Moscow office into a single corporate network via VPN, as well as organize Internet access through the Moscow office and monitor network activity in both offices. Assume also that a VPN is created programmatically and that each client machine connects individually.
General principle
In its most general form, the tuning algorithm will be as follows:
- Create and configure a VPN server at the head office.
- Create and configure VPN connections to the head office from the branch.
- Check VPN operation.
- Install and activate the Traffic Inspector on the gateway in the head office.
- Create permissions in the Traffic Inspector in an external firewall for VPN.
- Add users from the branch to the Traffic Inspector.
- Assign rules to individual users and their groups (for example, deny access to certain resources, configure accounting and billing of daily traffic, etc.).
- Check the operation of the rules and the correctness of the settings.
VPN server setup
So, now we know the general setup procedure and can proceed to the description of specific actions. For example, we took the Windows Server 2012 system, but the same applies to earlier versions (Windows 2003 and 2008).
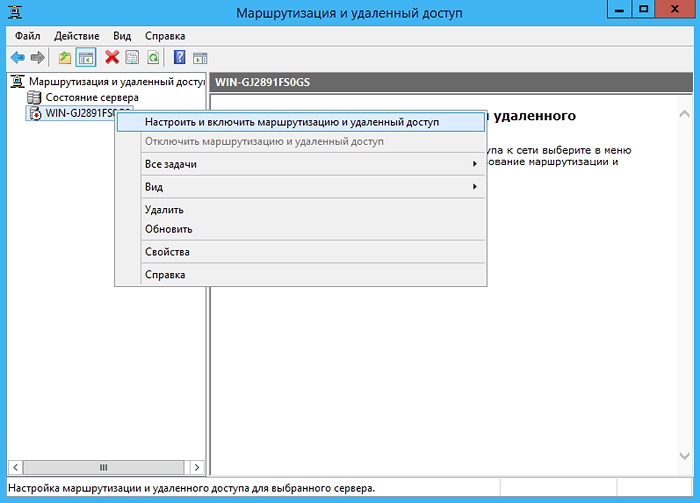
In the Routing and Remote Access service, right-click your server and select Configure and enable routing and remote access.
- In the opened Routing and Remote Access Server Setup Wizard, click Next and select the Custom configuration option .
- In the next window, select Virtual Private Network (VPN) Access, Network Address Translation (NAT), LAN Routing, and click Next.
- In the last wizard window, click Finish and start the service.
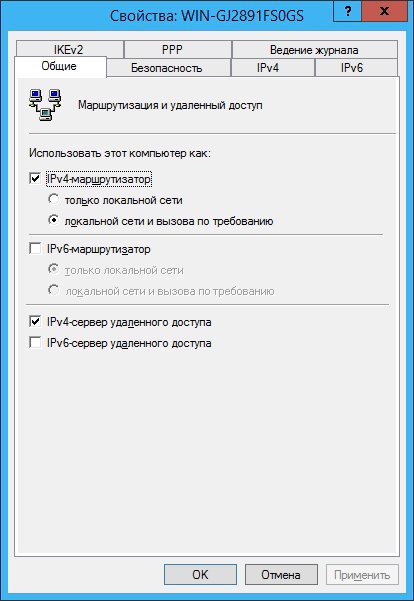
- Now go to server properties:

and on the General tab , set the following parameters:
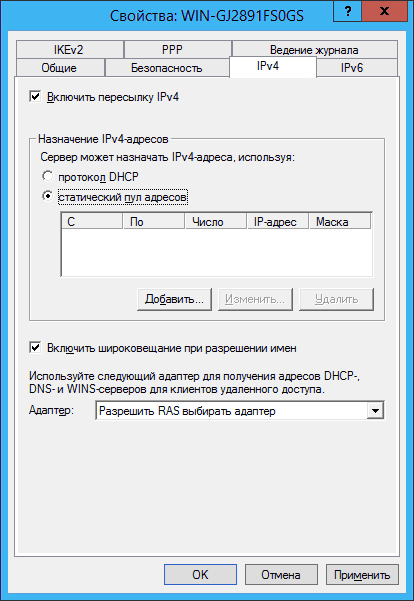
Go to the IPv4 tab and select the static address pool: 4
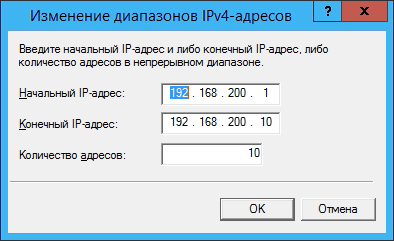
Click the Add button and assign an address pool (in this case, the subnet 192.168.200.1—192.168.200.10 consisting of 10 addresses is selected , and the server receives the address 192.168 .200.1):
Go to the Logging tab and check the box for Log errors and warnings.
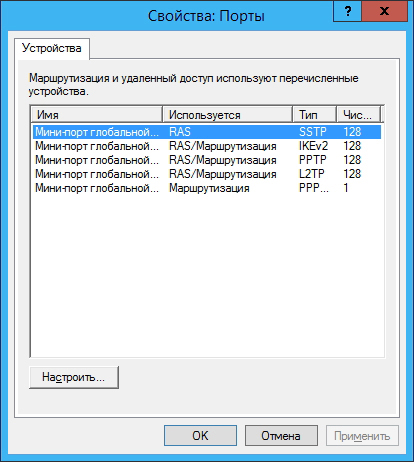
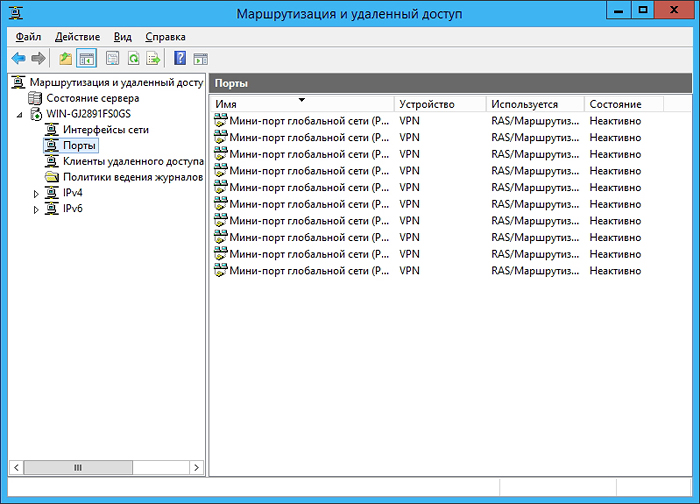
Right-click Ports and select Properties:

For stable server operation, it is recommended to remove unnecessary ports (SSTP, PPOE, L2TP, IKEv2) and create the required number of PPTP ports (in our case, 10 such ports are needed):
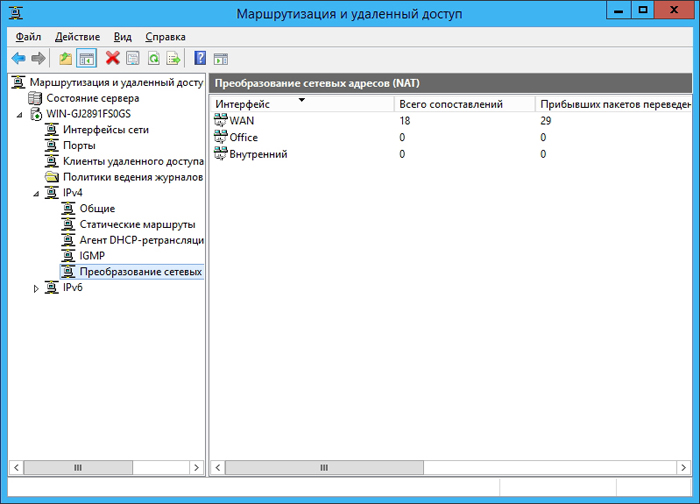
Go to the Network Address Translation (NAT) element and add a new interface:
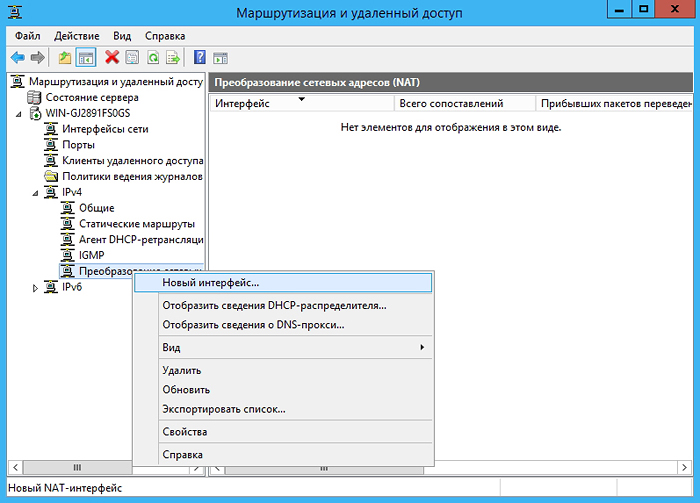
Select a connection to Internet and check the boxes in the fields the general interface is connected to the Internet and Enable NAT on this interface.
Then mark the LAN interface as “The private interface is connected to the private network ” and the internal interface as the Private interface is connected to the private network. You get something like the following:
This completes the configuration of the VPN server in the head office, and you can proceed to configure the VPN clients in the branch.
Configure VPN Clients
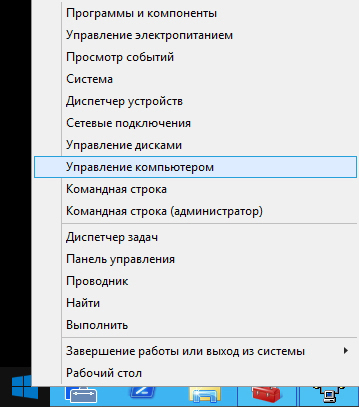
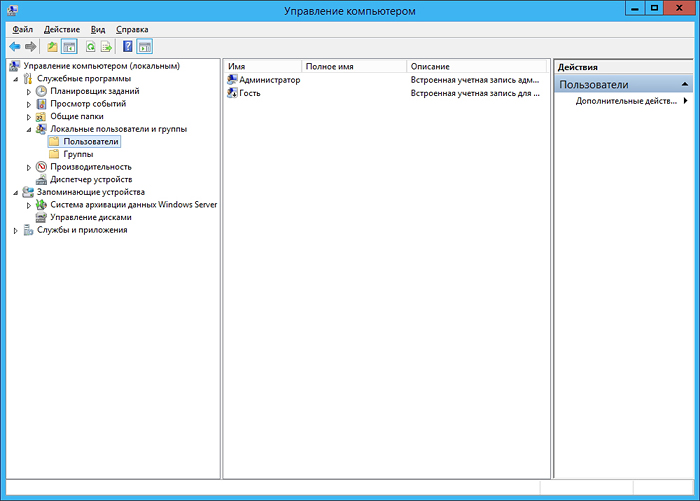
On the server side, start computer management:
and in the Local users and groups - Users section, add a new user and specify his credentials:

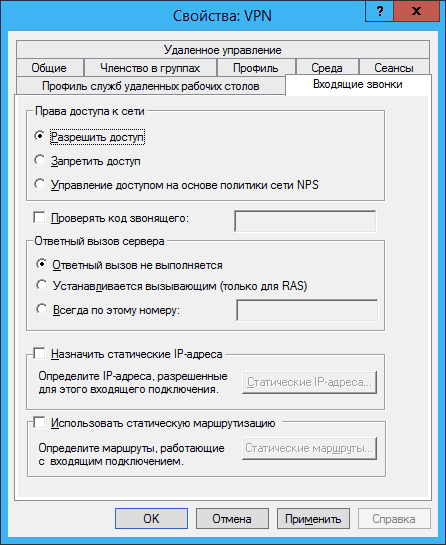
Go to the user properties on the Incoming calls tab and specify the settings as shown in the figure (you can also assign a static IP to the user):
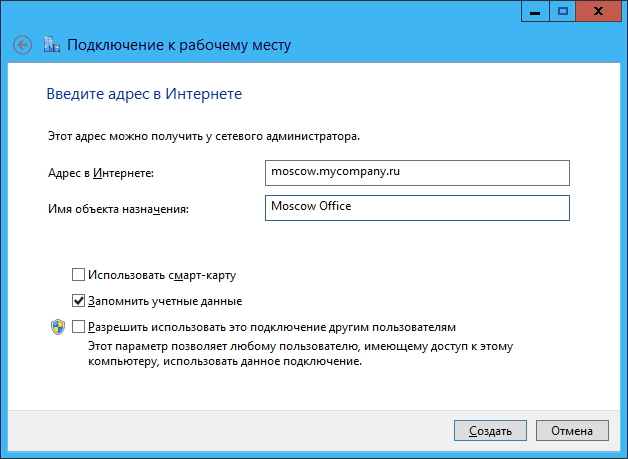
Now, on the client side, create a VPN connection using the operating system (take Windows 8 as an example). To do this, in the Network and Sharing Center, select the Configure a new connection or network option and in the setup wizard that opens, select Connect to a workplace:

SelectUse my Internet connection (VPN) and click Next :

Then enter the URL or IP address of the VPN server, specify the name of its location and click Create :
Configure Traffic Inspector on the VPN server
After setting up the VPN server and clients, you can proceed to installing and configuring the Traffic Inspector itself. Please note that the Traffic Inspector is installed only at this stage, so the VPN should be checked in advance using standard Windows tools (ping, netstat, tracert, etc.).
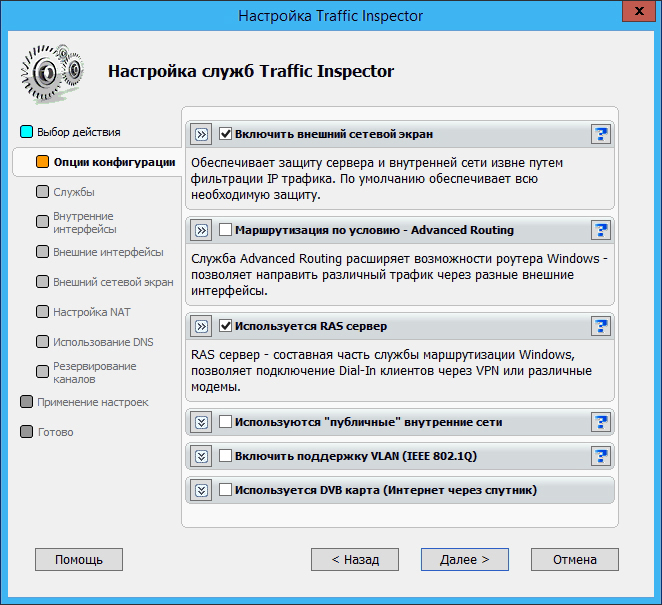
In the Traffic Inspector configurator, in the service settings, check the Use RAS server box :
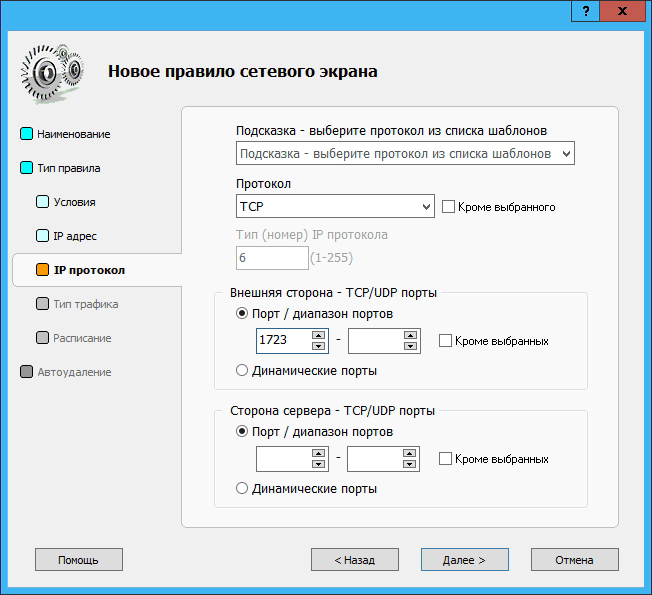
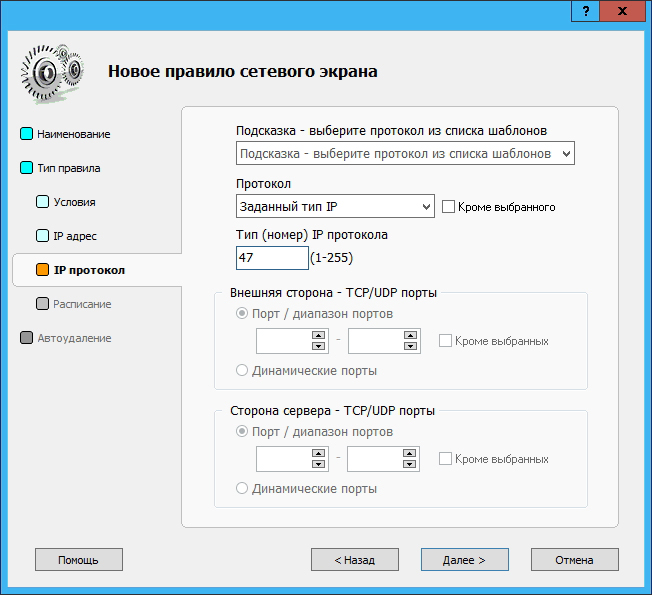
In the External firewall rules section of the Traffic Inspector, create two rules: in one rule, allow TCP connections to port 1723 for external clients, and in the second rule, allow GRE connections ( option Set IP type , number 47 ):
Other parameters can be left unchanged and left at their default values.
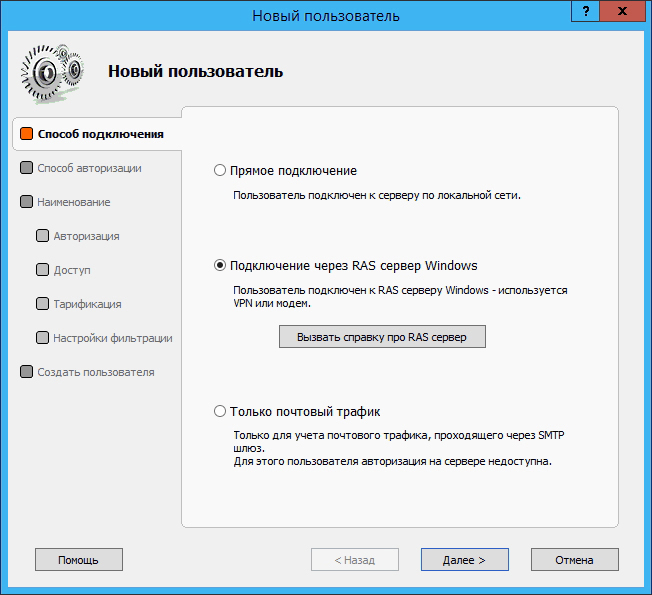
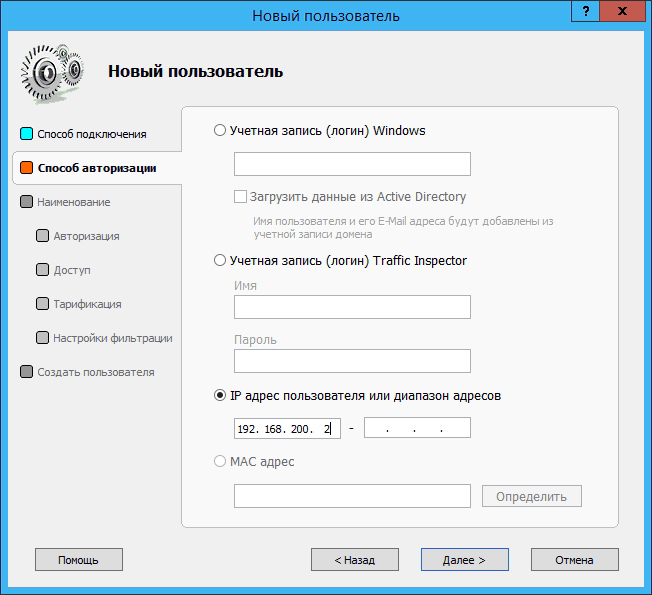
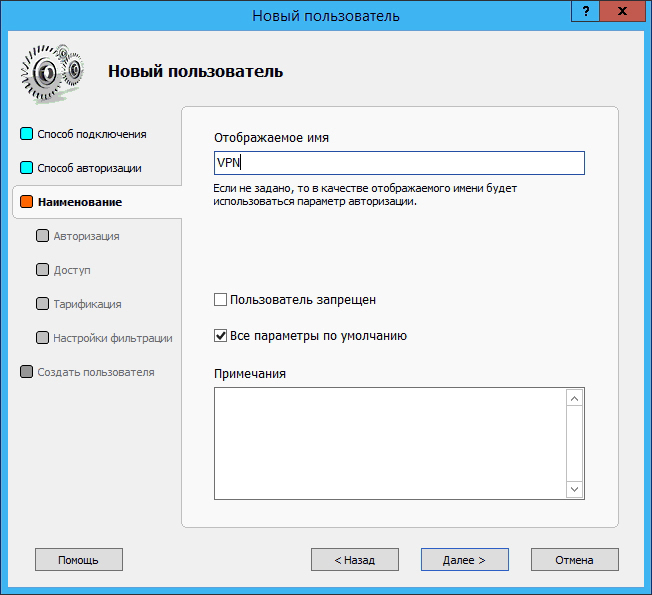
Add a new client to the program and specify the connection method. Connection through the Windows RAS server :
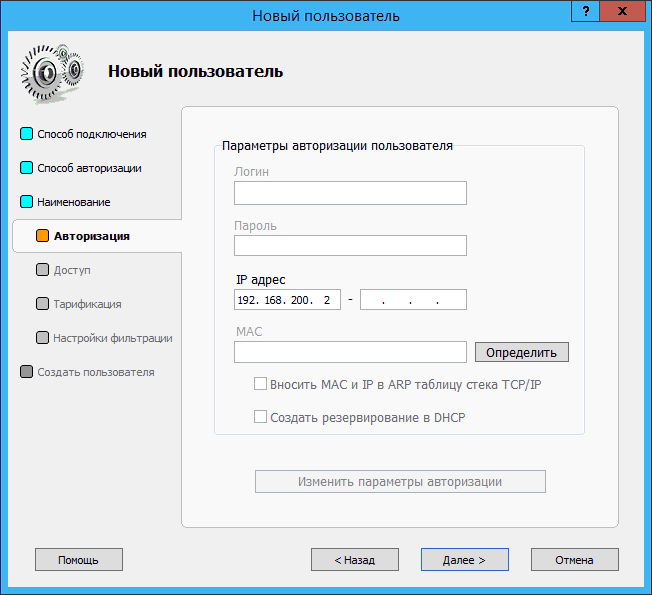
The rest of the settings are similar to the settings of program clients. In this case, IP authorization was used:
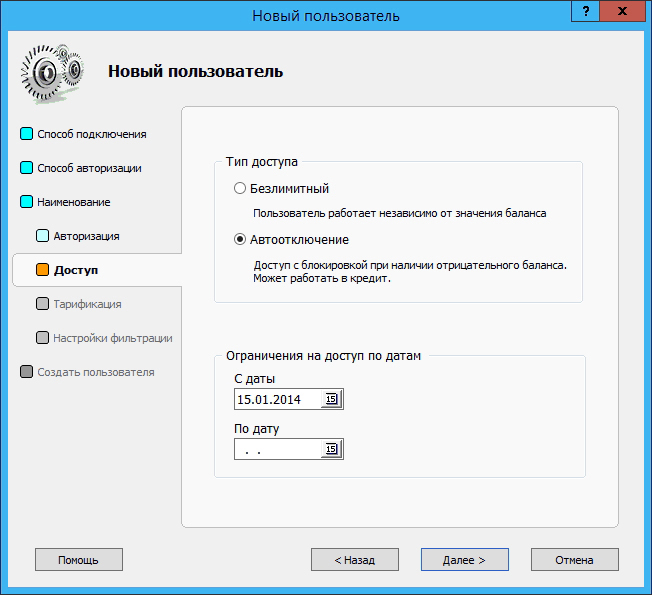
If necessary, you can configure the client to automatically disconnect if the acceptable balance is exceeded, or you can restrict access to the server on certain days:
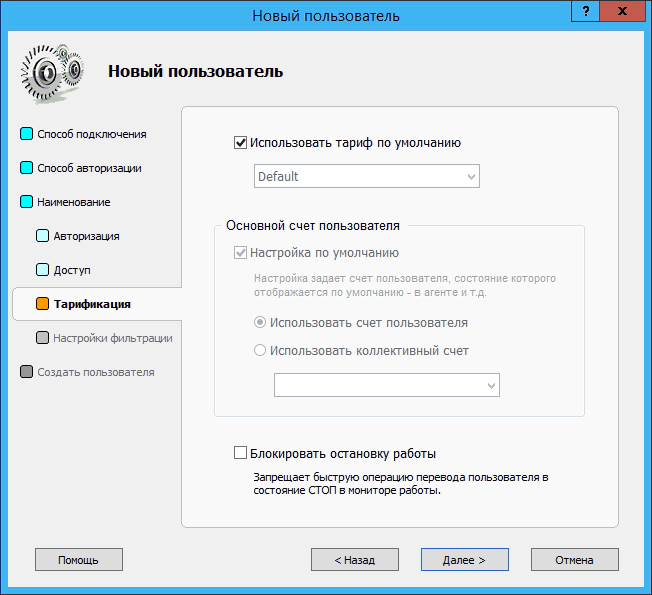
Traffic Inspector provides 4 levels of traffic filtering for users - banners, multimedia, graphics, and text only. To select one of them, check the Set individual minimum filtering level for user box :

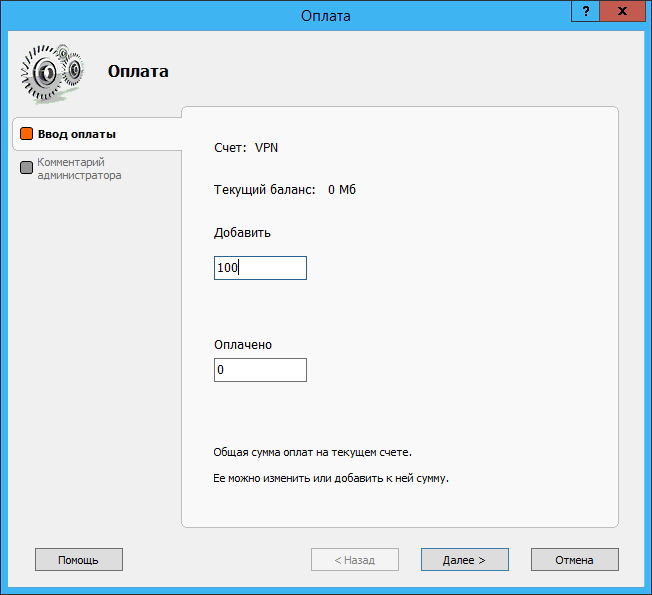
In addition, a user can be allocated a certain traffic quota (for example, 100 MB):
After the configuration is completed, a new RAS server (dial in) network will appear in the main Traffic Inspector window:
Conclusion
The organization of a VPN tunnel can provide high speed and security connections in the corporate network, guaranteed bandwidth, as well as cost savings on network infrastructure. At the same time, the problem of network security remains relevant for VPNs. The Traffic Inspector fills this gap, allowing you to quickly monitor users on the Internet and connect to a corporate server, including setting quotas for traffic , restricting access to certain resources, setting various filtering levels for users, and much more. In this case, the system administrator does not require any special knowledge - all configuration is performed in the Windows Management Console (MMC) using convenient step-by-step wizards.