To be in 3d or not to be? How I scanned myself and printed on a 3d printer
“Since time immemorial, people have sought to reduce what they use.” Erlich Bachmann, Silicon Valley, episode 7
Now, at the junction of 3d-scanning and 3d-printing technologies, a service appeared (the harm began in Japan in 2012) for the production of 3d figures.
In cinema 3d-printers flashed in the TV series "Elementary" (ibid villain printed Liberator but Habreprinted painted in Photoshop Liberator before in the movies) and "The Big Bang Theory" (whistle made many, but about figures still nobody wrote).
In pursuit of the post that it is worth developing various 3d services in Russia , I want to share how the process of creating 3d figures from and to occurs.
So, I went to visit the guys on Tsvetnoy Boulevard and the conquest of the 3rd dimension began.
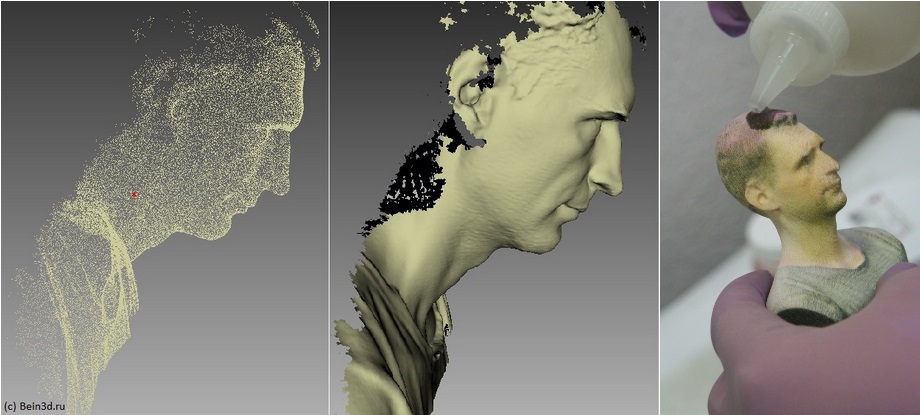
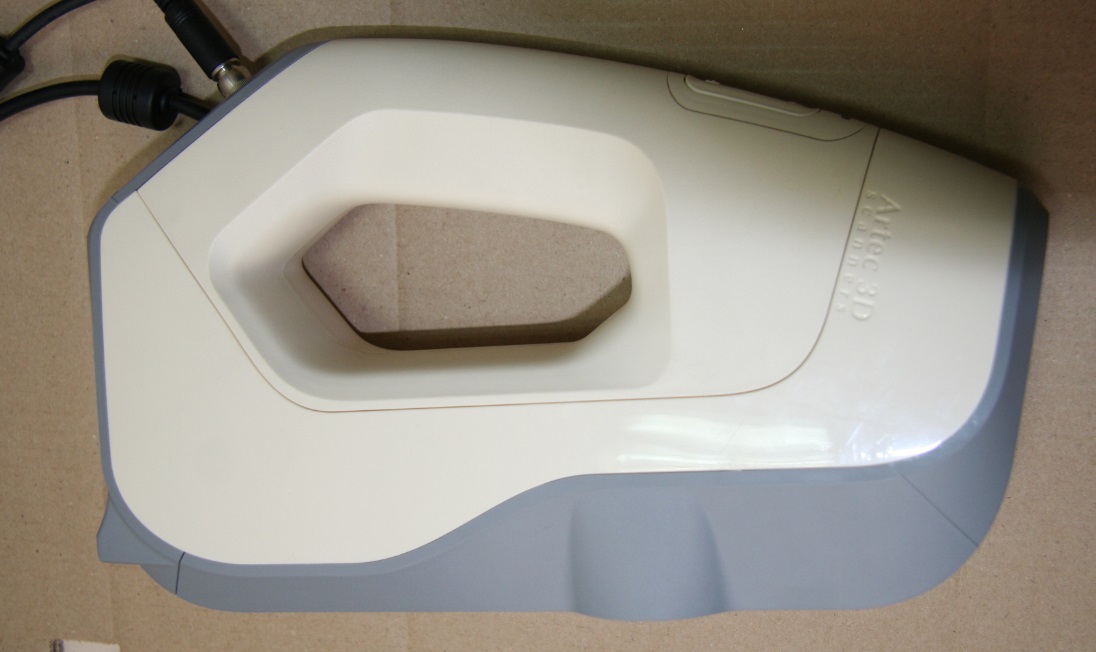
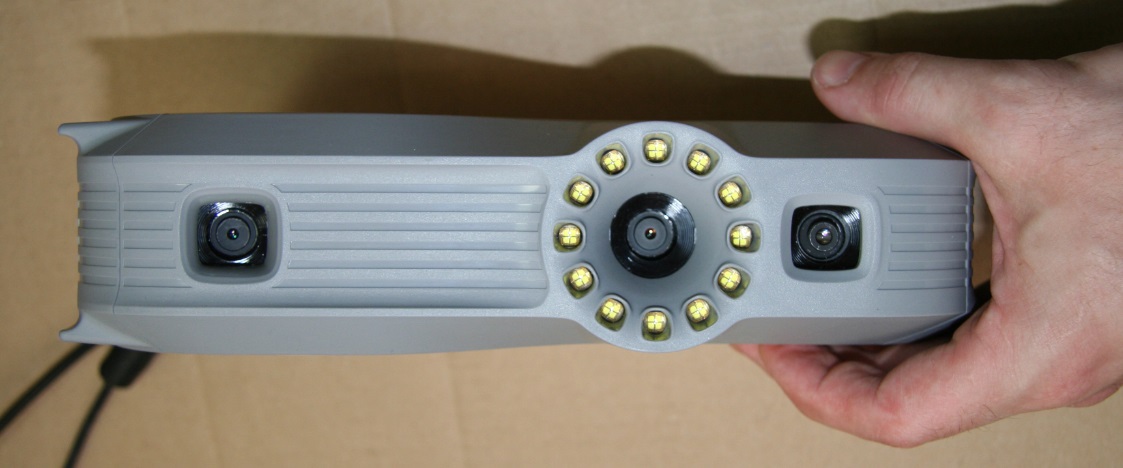
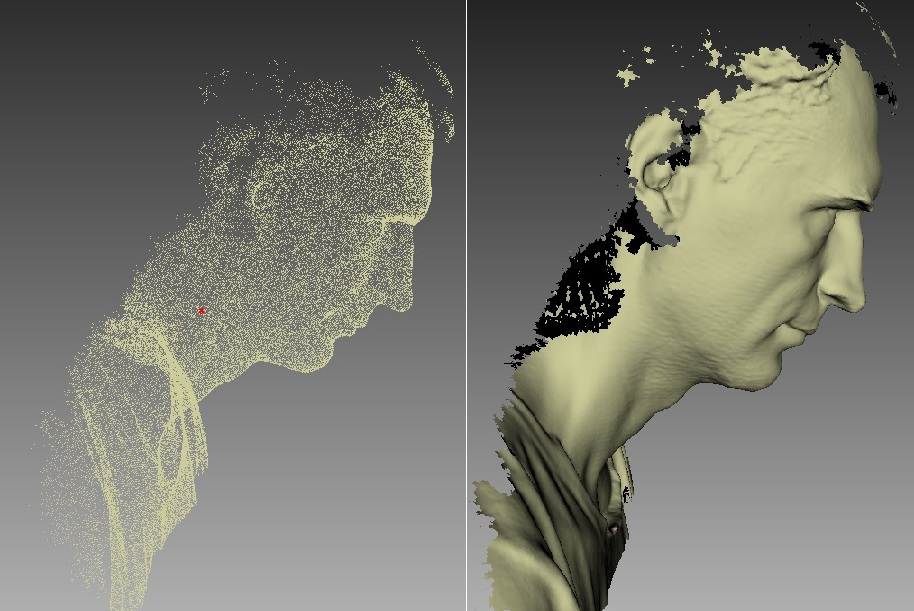
Scanning is done using the Artec Eva 3d scanner.
The scanner consists of cameras and a backlight, and the 3D image is “generated from photographs”
ATTENTION! a look under the spoiler is worth mental health:
Scanning takes about 10 minutes.
It usually happens on a turntable, but it’s possible that the operator runs around you.
Scanning looks like a bunch of flashes from the camera (see the video at the end of the review)
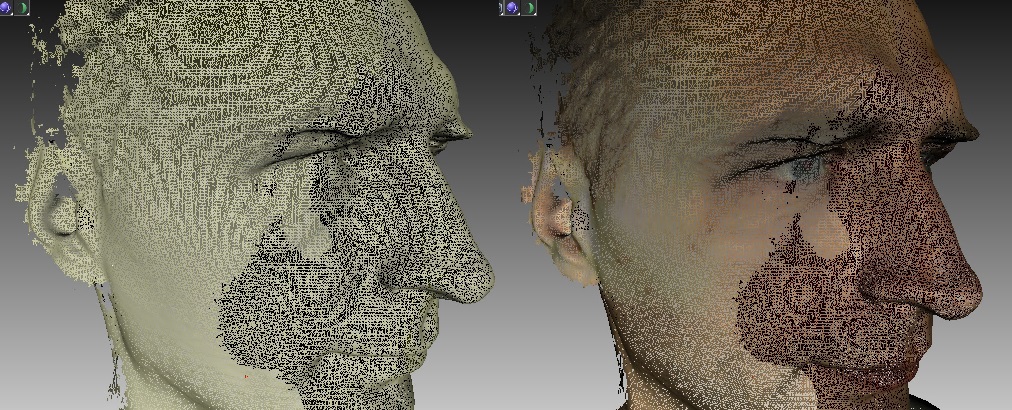
Editing takes a maximum of an hour if a demanding user asks to “reduce belly” or “remove folds” in various places.
An editing program is included with the scanner.
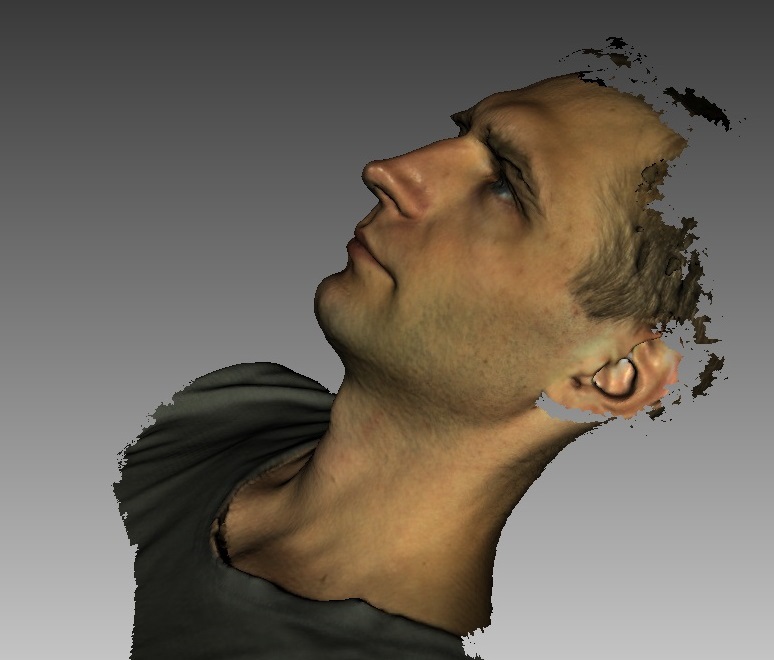
What is noteworthy, texture processing is possible with space resolution: A
lot of RAM is required.
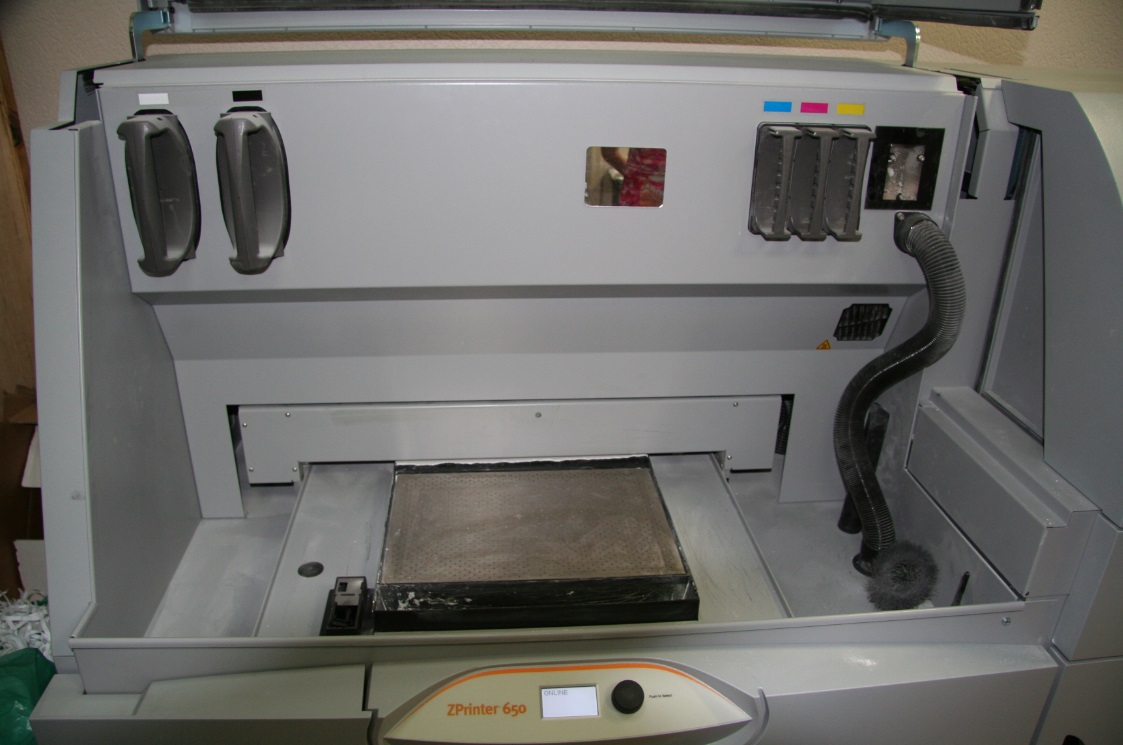
My first impression is that the printer is a mixture of a gigantic inkjet, a bread machine and a vacuum cleaner.
The printer weighs 340 kg and lives its own life, sometimes it turns on itself and carries out cleaning.
The printer requires a constant connection to the network.
Layer thickness - 89-102 microns.
Printing speed 2-4 layers per minute.
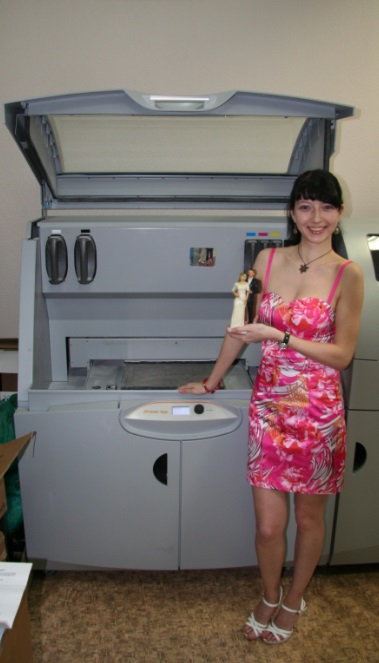
For scale - a living girl:
Consumable - gypsum, from which the model is printed:

Print head ("head"):

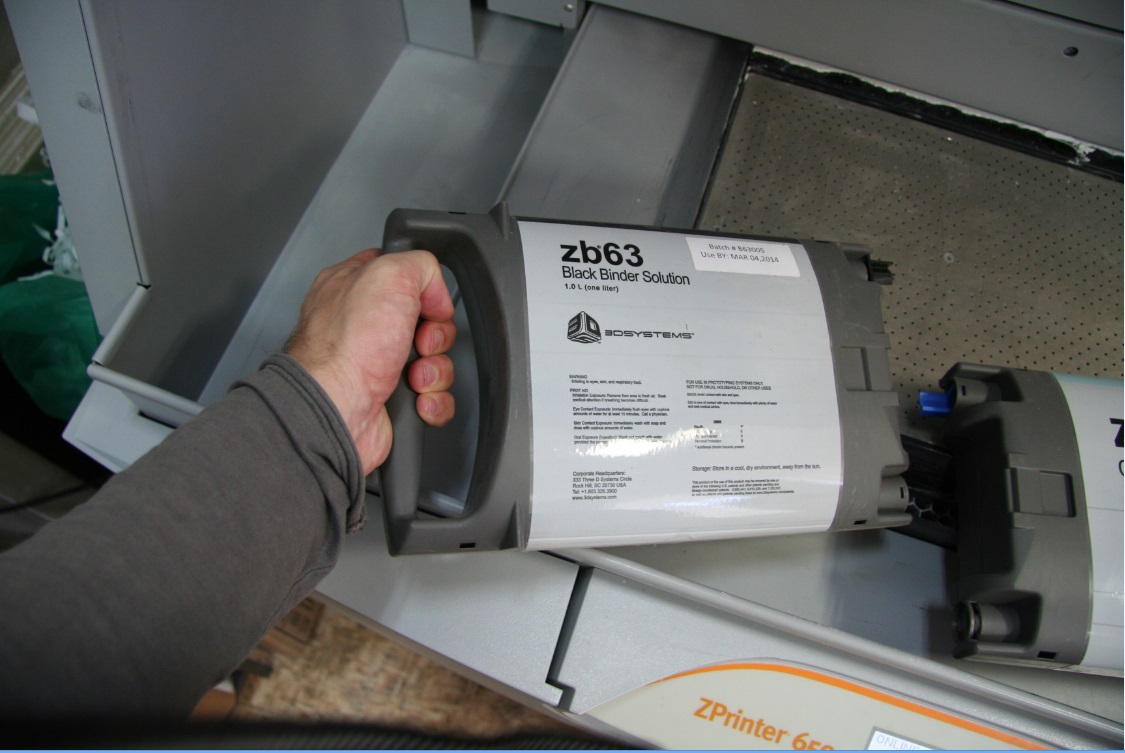
Ink cartridge : Ink
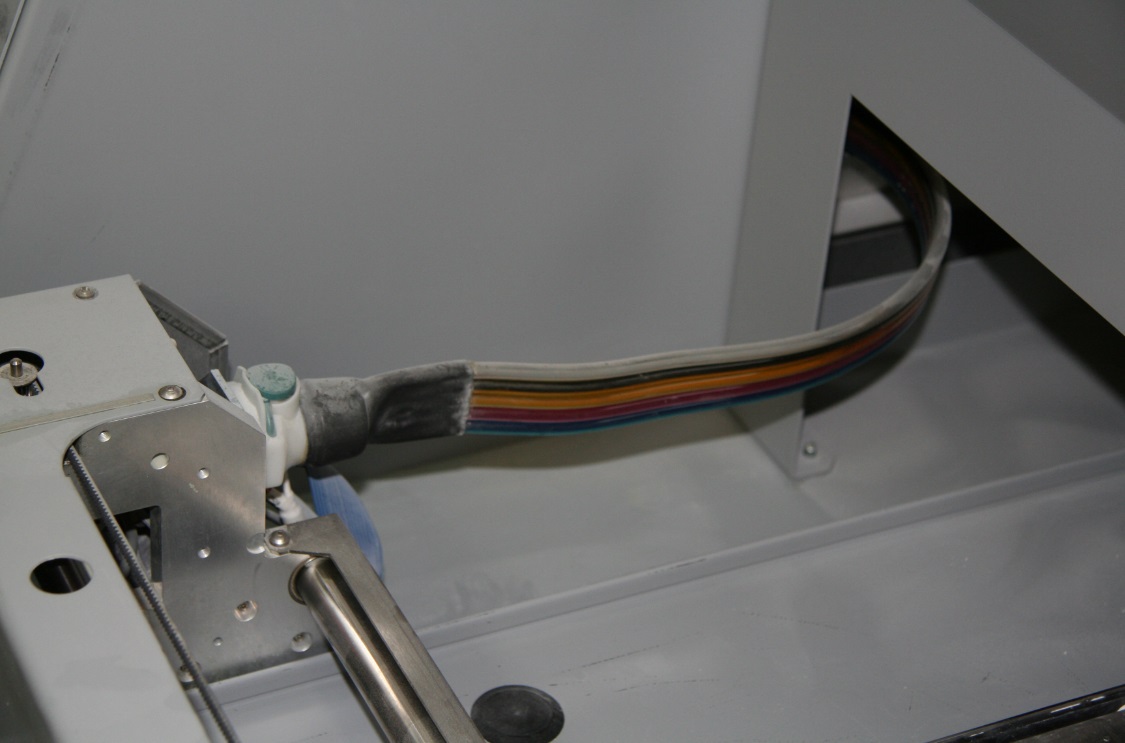
supply to the print head:
ATTENTION! A look under the spoiler is worth mental health:
Print
Management and preview program

Preview in several projections.
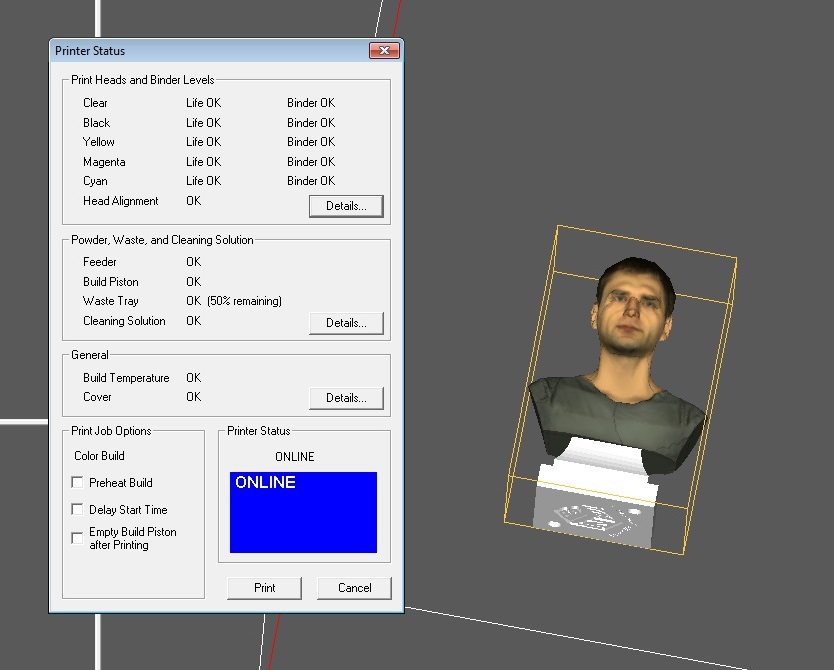
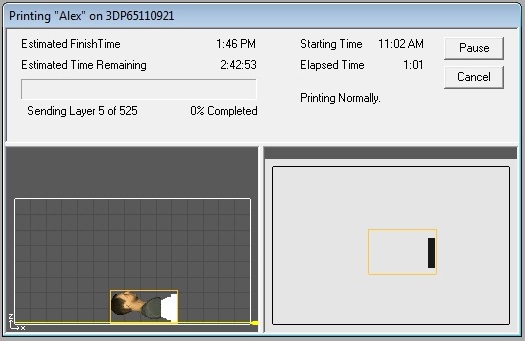
Estimated print time and display of the current print layer.
First, a thin layer of gypsum powder is applied to the base. After that, the print head applies a special resin that glues gypsum in the right places, and ordinary ink. Then the next layer of gypsum is applied, etc.
After printing, excess gypsum is removed with a special vacuum cleaner, and from hard-to-reach places with compressed air.
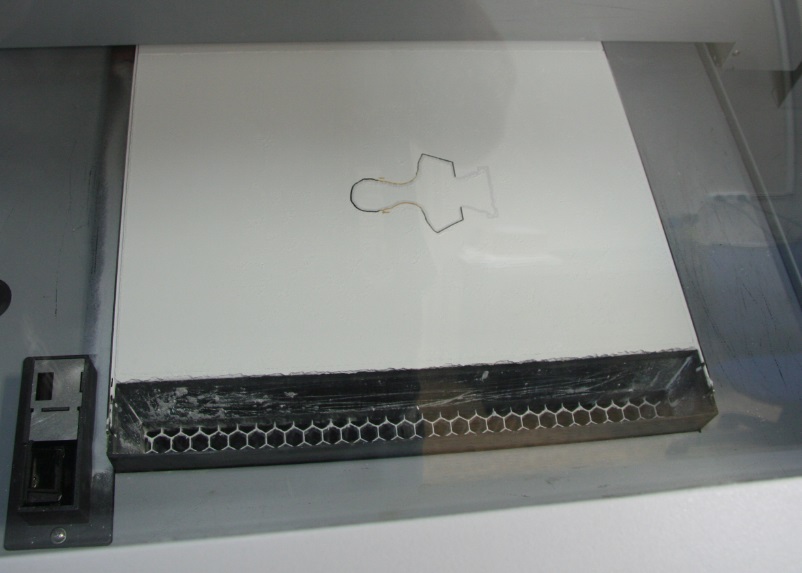
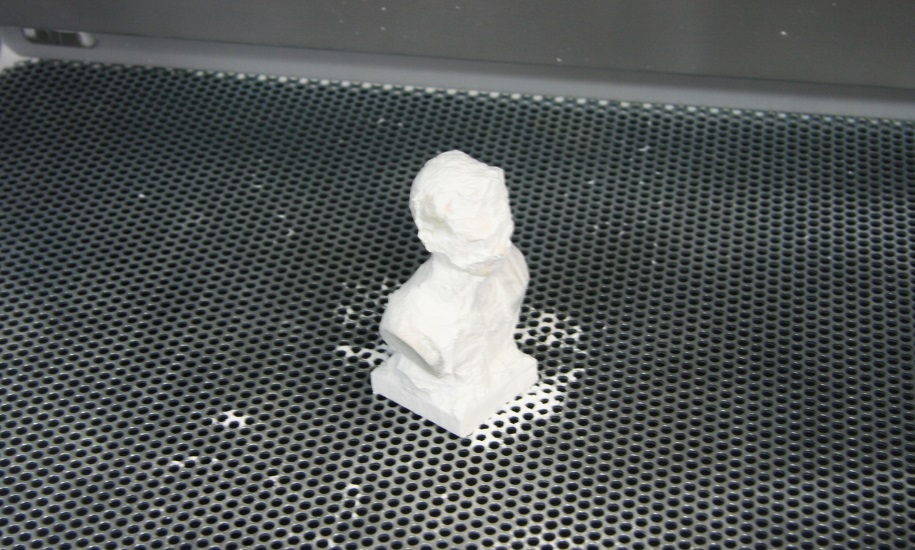
237 (out of 525) print layer as the program displays:

237 layer in reality:
After the printer has completely printed the model, it takes some time to dry.
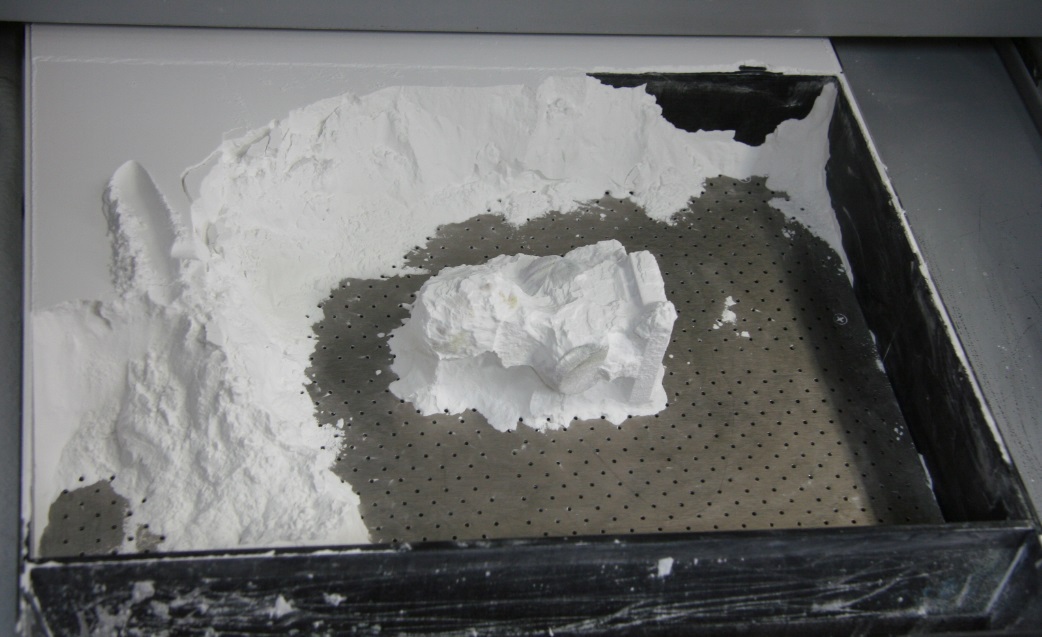
1.5 hours have passed, now we will “pull out of the stove”:
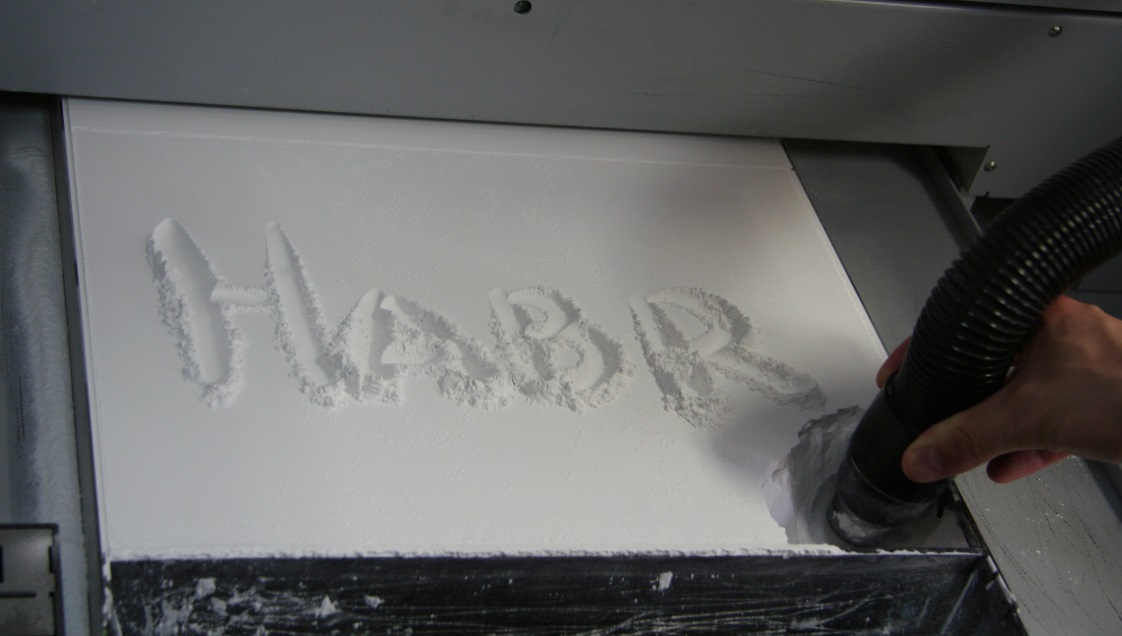
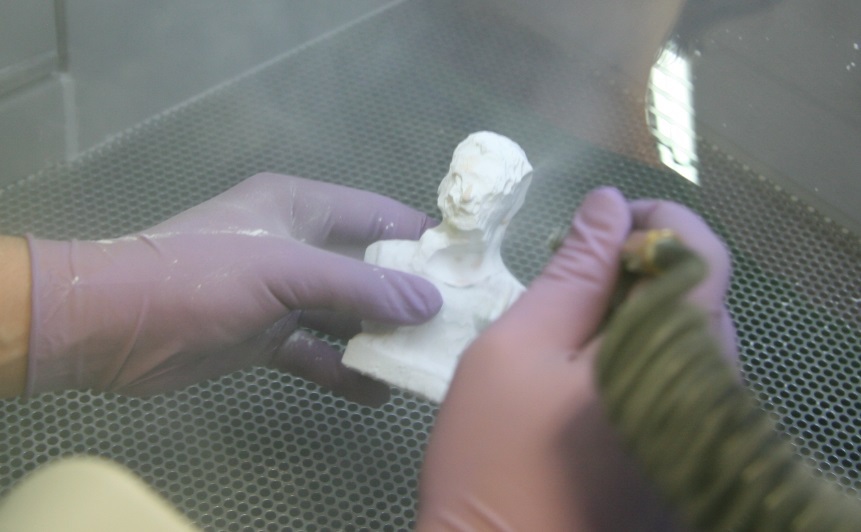
We remove excess gypsum using the “suction” method:
Gypsum is re-cleaned \ filtered and goes into business.
Now we remove the excess using the “blowing” method:
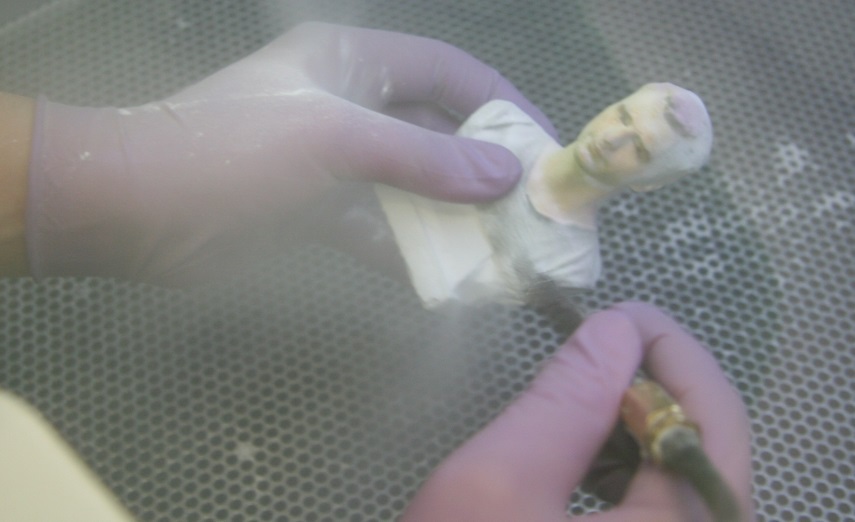
There are 2 holes below - we also blow gypsum out - the figure is hollow inside They
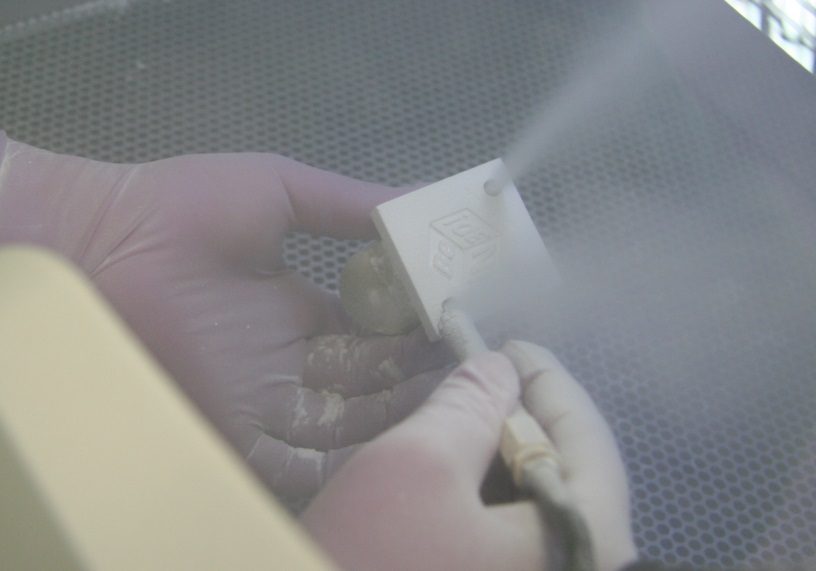
cover me with cyanoacrylate (“fixer”):
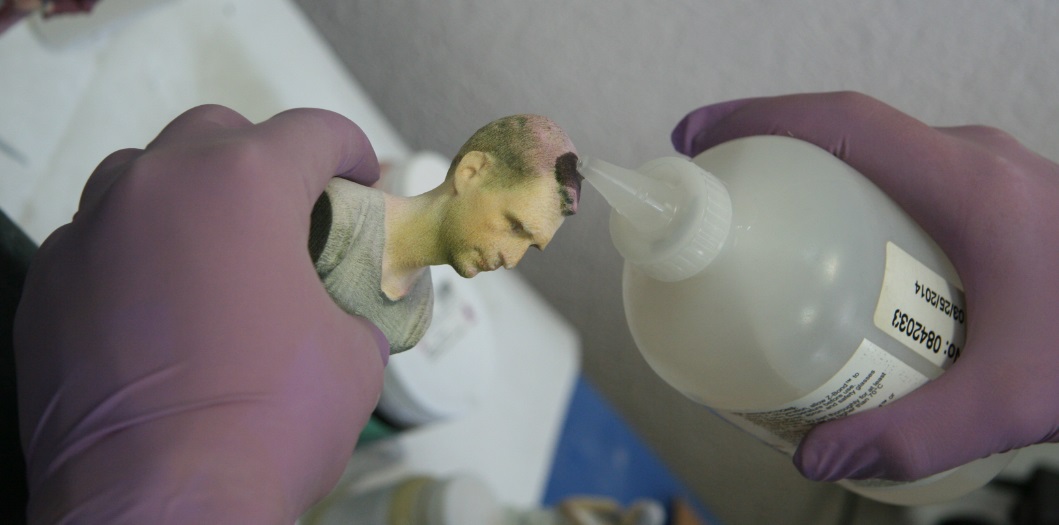
Dry me for half an hour and go to the hall of fame:
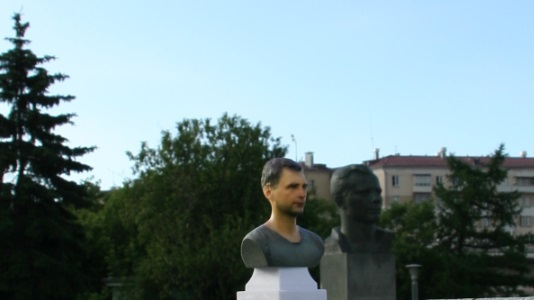
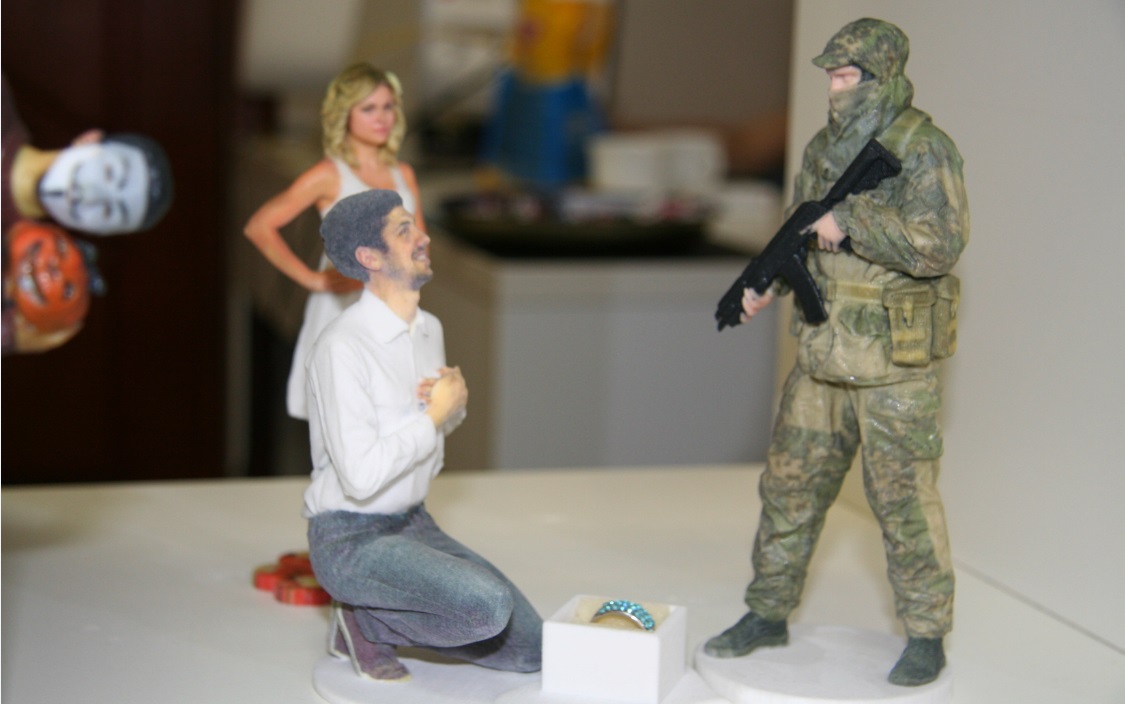
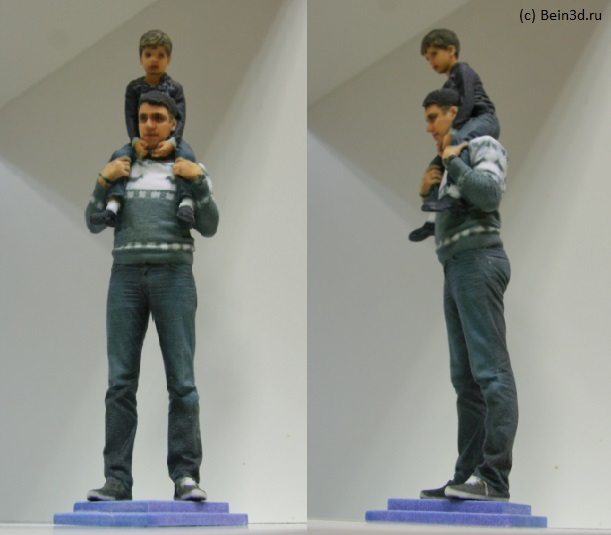
Capture a memorable moment, a memorable form.

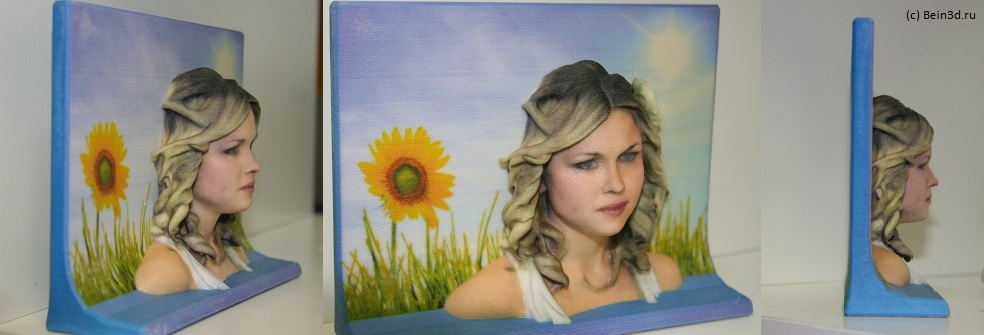
You can experiment with the design.
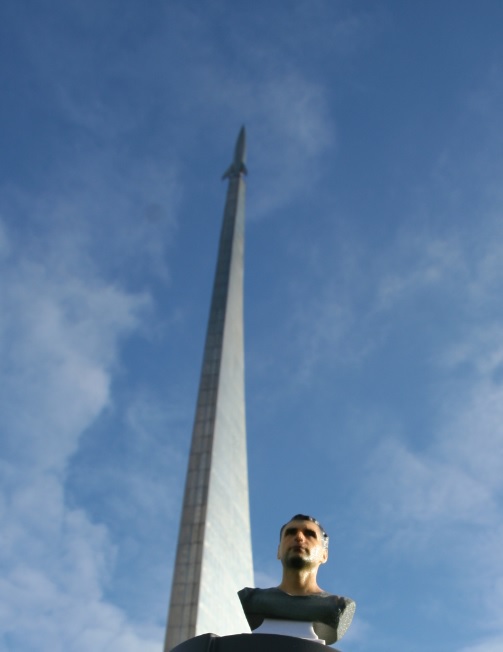
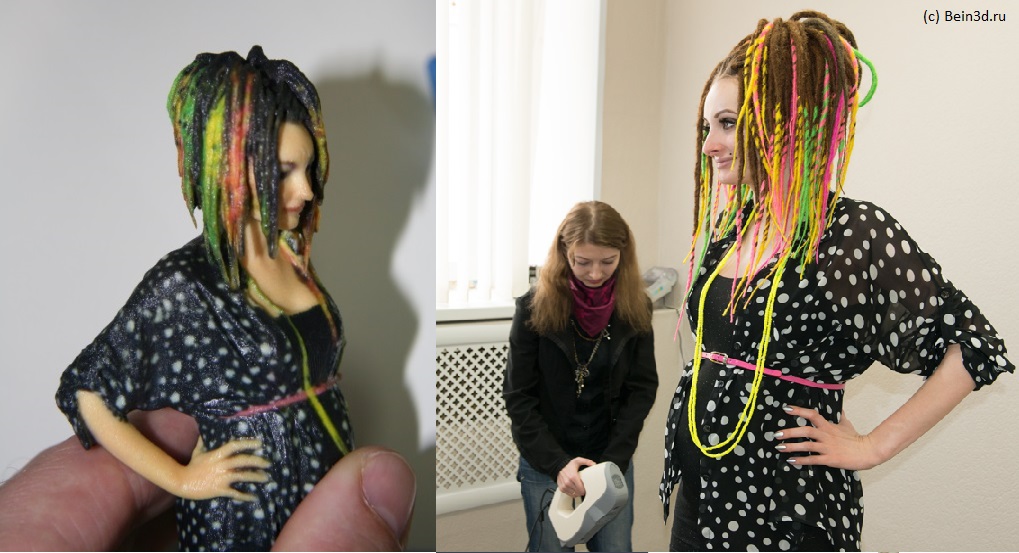
In my opinion, the most original figure.

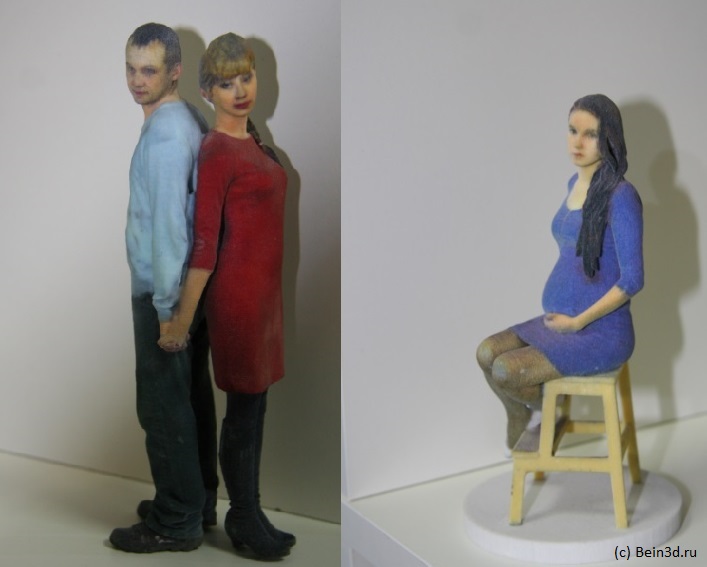
Quality allows you to print even small patterns of clothing.
Conclusion
While playing Quake2, I wanted to make a skin with my face.
The stage is not far off when, along with photo albums, there will also be 3d albums .
So far, the figures cause a wow effect, what you can use and make a cool gift.
PS
Now, at the junction of 3d-scanning and 3d-printing technologies, a service appeared (the harm began in Japan in 2012) for the production of 3d figures.
In cinema 3d-printers flashed in the TV series "Elementary" (ibid villain printed Liberator but Habre
In pursuit of the post that it is worth developing various 3d services in Russia , I want to share how the process of creating 3d figures from and to occurs.
So, I went to visit the guys on Tsvetnoy Boulevard and the conquest of the 3rd dimension began.
Scanner
Scanning is done using the Artec Eva 3d scanner.
The scanner consists of cameras and a backlight, and the 3D image is “generated from photographs”
Specifications
Ability to read textures - there is
3D resolution - 0.5 mm
3D degree of accuracy - 0.1 mm
3D degree of accuracy at a distance of up to - 0.15% per 100 mm
Texture resolution - 1.3 MP
Color - 24 bit
Parallel processing - yes
Productivity - 40,000,000 polygons per 1GB RAM
Output format OBJ, STL, WRML, ASCII, AOP, CSV, PTX
Calibration less than 1 min, does not require special equipment
Data acquisition rate, up to 288,000 dots / s
Exposure time - 0,0002 sec
Frequency video shooting, up to 16 frames / sec.
Operating distance 0.4 - 1 m
Light source - lamp flash (not laser)
Other:
Dimensions, HxLxW - 261.5 x 158.2 x 63.7 mm
Weight - 0.85 kg
Power Consumption - 12V, 48W
Minimum System Requirements
IntelCore 2 duo, 2Gb RAM, NVIDIA Quadro / GeForce 9000
ATTENTION! a look under the spoiler is worth mental health:
Price
Scanning
Scanning takes about 10 minutes.
It usually happens on a turntable, but it’s possible that the operator runs around you.
Scanning looks like a bunch of flashes from the camera (see the video at the end of the review)
Editing takes a maximum of an hour if a demanding user asks to “reduce belly” or “remove folds” in various places.
An editing program is included with the scanner.
What is noteworthy, texture processing is possible with space resolution: A
lot of RAM is required.
a printer
My first impression is that the printer is a mixture of a gigantic inkjet, a bread machine and a vacuum cleaner.
The printer weighs 340 kg and lives its own life, sometimes it turns on itself and carries out cleaning.
The printer requires a constant connection to the network.
Layer thickness - 89-102 microns.
Printing speed 2-4 layers per minute.
For scale - a living girl:
Consumable - gypsum, from which the model is printed:
Print head ("head"):
Ink cartridge : Ink
supply to the print head:
ATTENTION! A look under the spoiler is worth mental health:
Price
Some video
Management and preview program
Preview in several projections.
Estimated print time and display of the current print layer.
First, a thin layer of gypsum powder is applied to the base. After that, the print head applies a special resin that glues gypsum in the right places, and ordinary ink. Then the next layer of gypsum is applied, etc.
After printing, excess gypsum is removed with a special vacuum cleaner, and from hard-to-reach places with compressed air.
237 (out of 525) print layer as the program displays:
237 layer in reality:
After the printer has completely printed the model, it takes some time to dry.
1.5 hours have passed, now we will “pull out of the stove”:
We remove excess gypsum using the “suction” method:
Gypsum is re-cleaned \ filtered and goes into business.
Now we remove the excess using the “blowing” method:
There are 2 holes below - we also blow gypsum out - the figure is hollow inside They
cover me with cyanoacrylate (“fixer”):
Dry me for half an hour and go to the hall of fame:
Work examples
Capture a memorable moment, a memorable form.
You can experiment with the design.
In my opinion, the most original figure.
Quality allows you to print even small patterns of clothing.
Conclusion
While playing Quake2, I wanted to make a skin with my face.
The stage is not far off when, along with photo albums, there will also be 3d albums .
So far, the figures cause a wow effect, what you can use and make a cool gift.
PS