Enchanting arrangement of all points over the Lumia 1020 or what should be a real camera phone with RAW support

It's time to gather in one place all-all-all myths and exposures of one of the most controversial camera phones from the point of view of readers - Lumia 1020. ( Attention, a lot of photos , beautiful photos)
And also the highlight of the program, for the first time in the hub, before everyone's eyes: work with RAW sources received from 1020 , and their processing.
Sit back, we begin;)
What questions most often come to mind when the reader hears the expression: “Lumia 1020 camera phone with a 41 megapixel camera”?
- 41 megapixels, how does it fit there?
- Does the rest of the iron meet the declared level of the photomodule?
- And yet, there really are so many megapixels?
- Yes, even if so, what is the use of them? Why so many?
- Suppose this makes sense, but RAW in a smartphone is too much, what's the use of it with such a matrix ?!
- Anyway, a SLR is better!
PS Yes, the author still had the attack “People Love Offended” and he is still desperately trying to restore the honor of Finnish engineers, whose achievements, according to the author, were undeservedly ignored in the light of recent events.

Let's go in order.
1. 41 megapixels, how does it fit there?
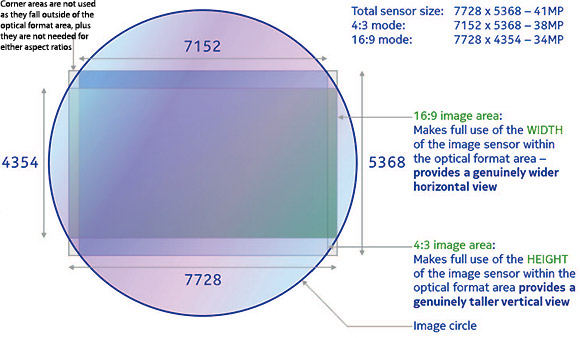
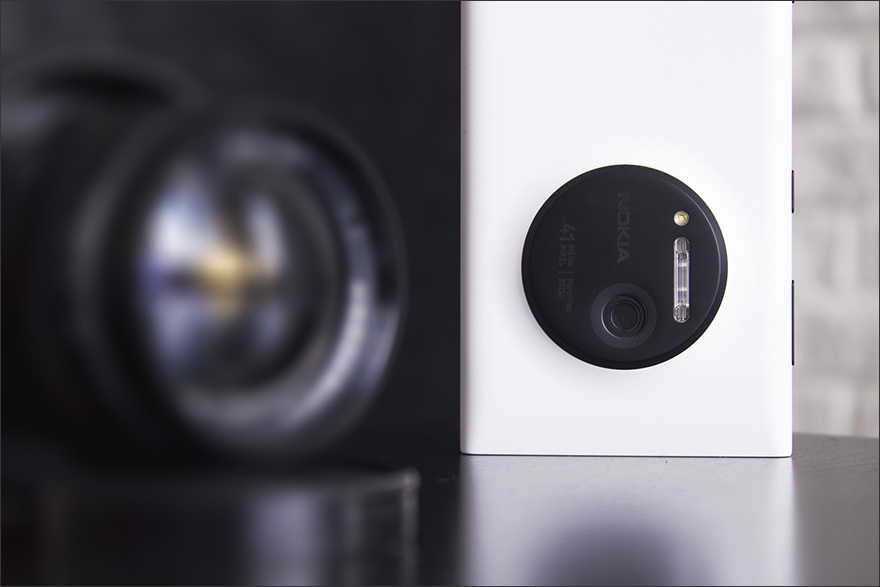
The 41-megapixel Lumia 1020 matrix has a size of 1 / 1.5 ", a pixel size of 1.12 microns. Total resolution: 7712 × 5360, part of the pixels is needed for the photomodule to work, so when shooting in 4: 3 format, the image resolution is 7136 × 5360 px (38 MP ), and 16: 9 - 7712 × 4352 px (33.5 MP). An explanation of this phenomenon:
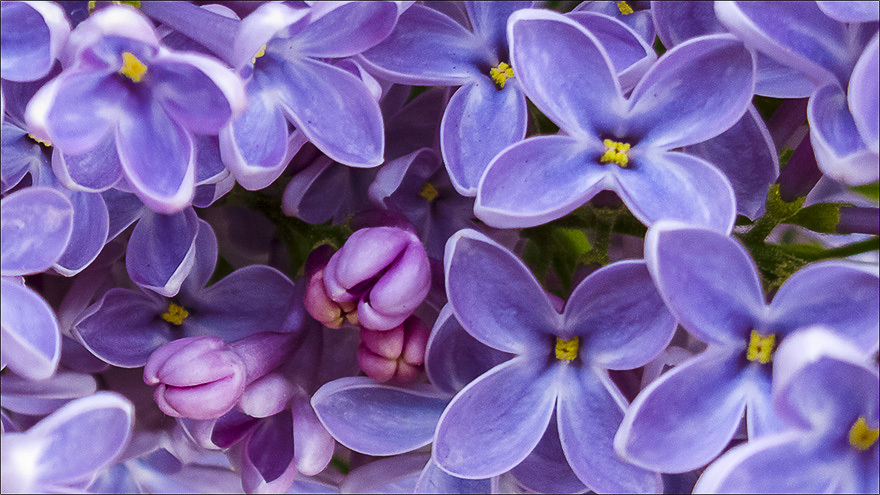
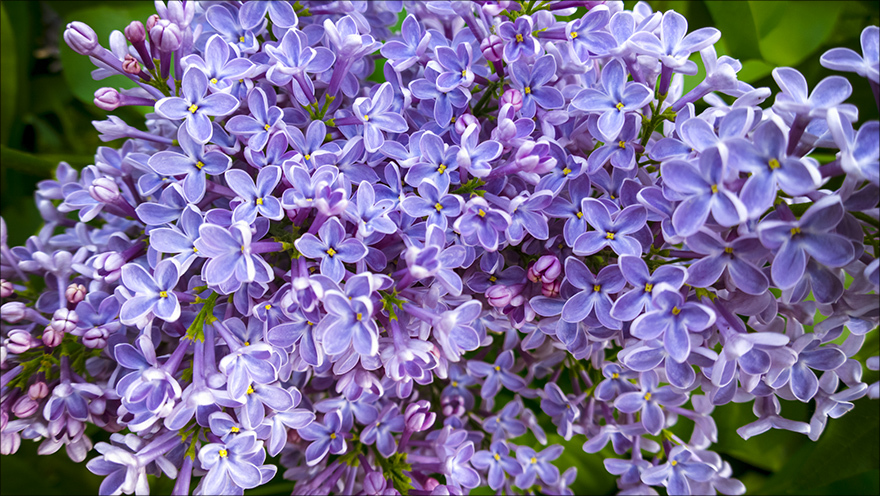
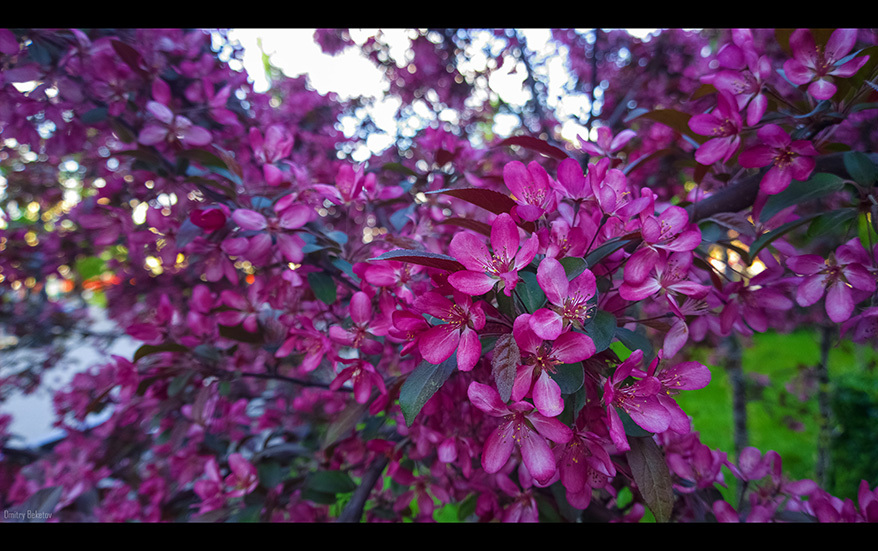
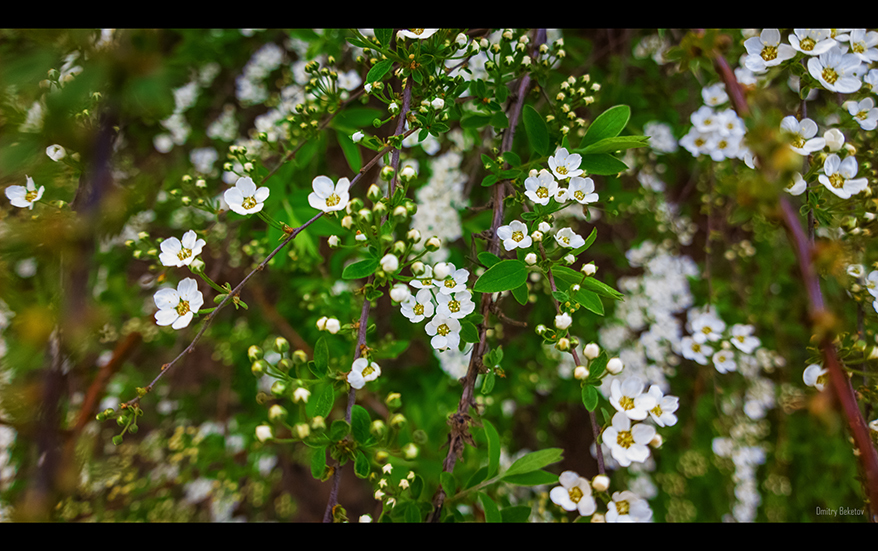
The Zeiss lens has a fixed focal length of 26 mm and an aperture of f / 2.2. Given the large size of the sensor and such a high-aperture lens, the camera is capable of producing fairly good bokeh, which is now so fashionable in photography.
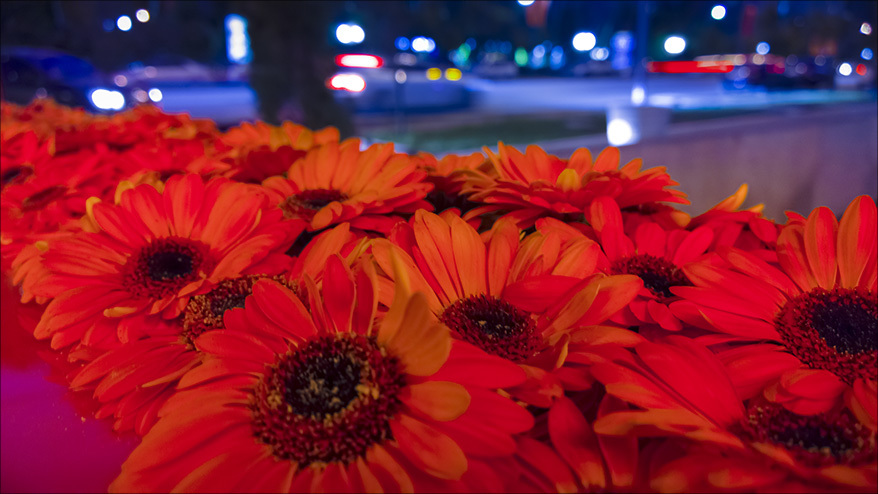
Due to the large size of the matrix and a good fast lens, you can observe a high-quality bokeh effect. Download RAW.
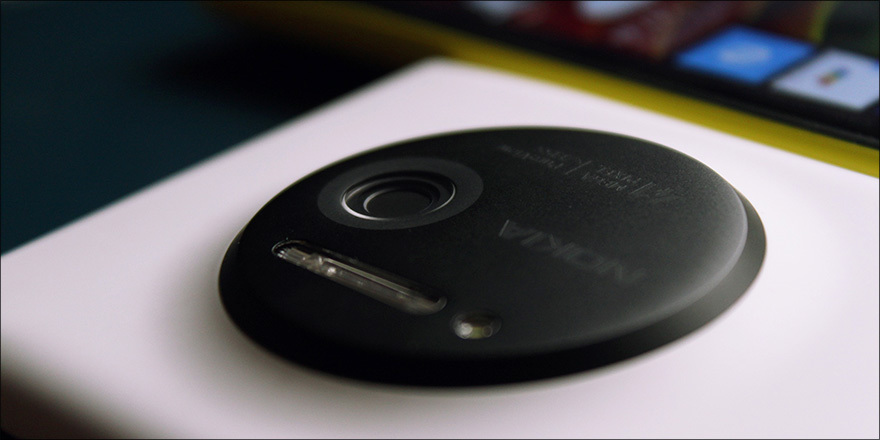
Unfortunately (or fortunately), the laws of physics cannot yet be overcome, so to achieve such high performance, the engineers had to compromise and make the device in one place a little more than usual. The thickness of the Lumia 1020 at its widest point is 10.4 mm.

In my opinion, this is not such a critical indicator, given the opportunities that this camera phone provides. Designers Nokia tried to beat this ledge as accurately as possible. In life, the smartphone does not look as intimidating as it might seem on the renders presented on the sites.
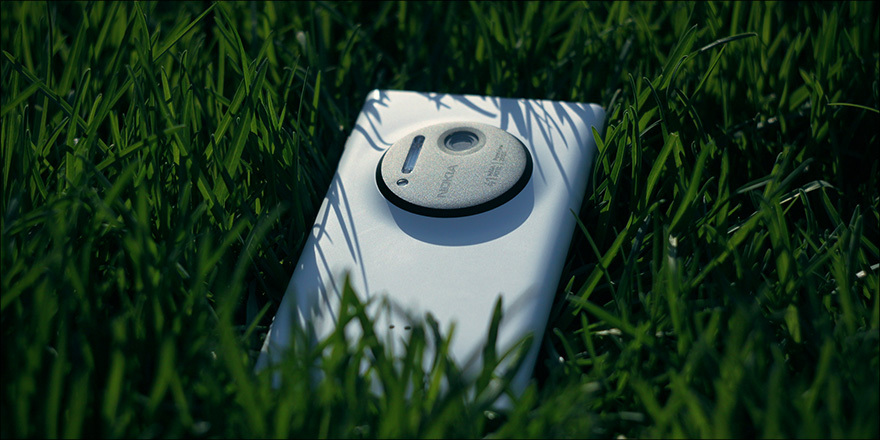
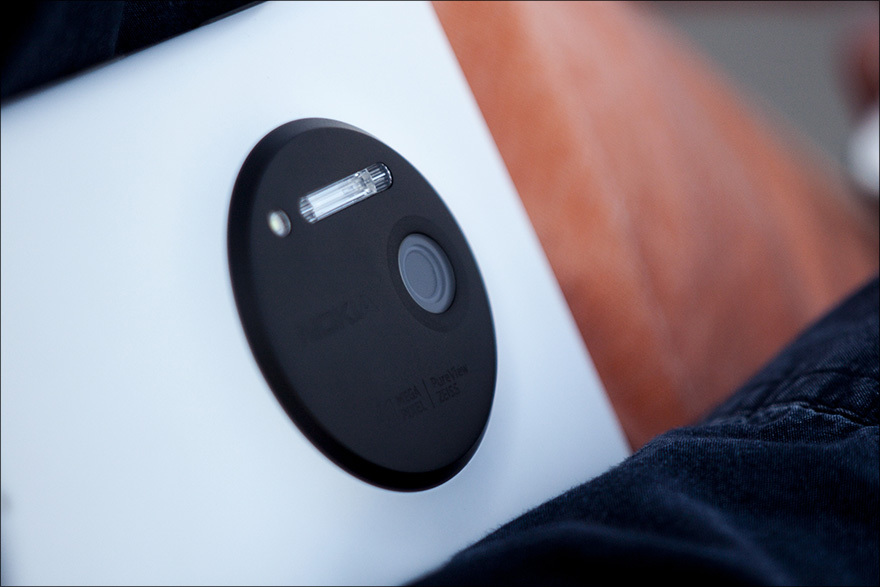
Also, if you put the “back” on the table in 1020, the smartphone will lie slightly at an angle, as a result of which the optics will not touch the surface.
PS Already now you can upgrade your smartphone to Windows Phone 8.1 Developer Preview and enjoy the new features of the fresh OS. Actual for readers who are annoyed by the monotonous color of the tiles on the screen.

2. Does the rest of the iron meet the declared level of the photomodule?
The smartphone runs on the SOC Snapdragon S4 with 2 gigabytes of RAM, 32 GB of fast memory are installed on board, there is no support for flash cards. It is probably correct, when working with such huge pictures, the system needs a very fast memory with a short response time. Not all SD cards available on the market meet these requirements. Also on board there is a xenon flash, which together with the LED perfectly copes with its task.
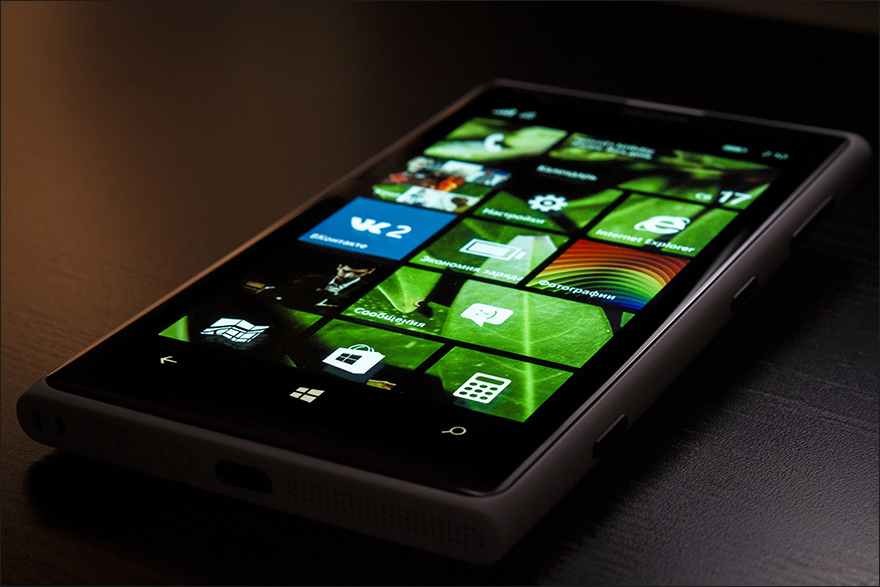
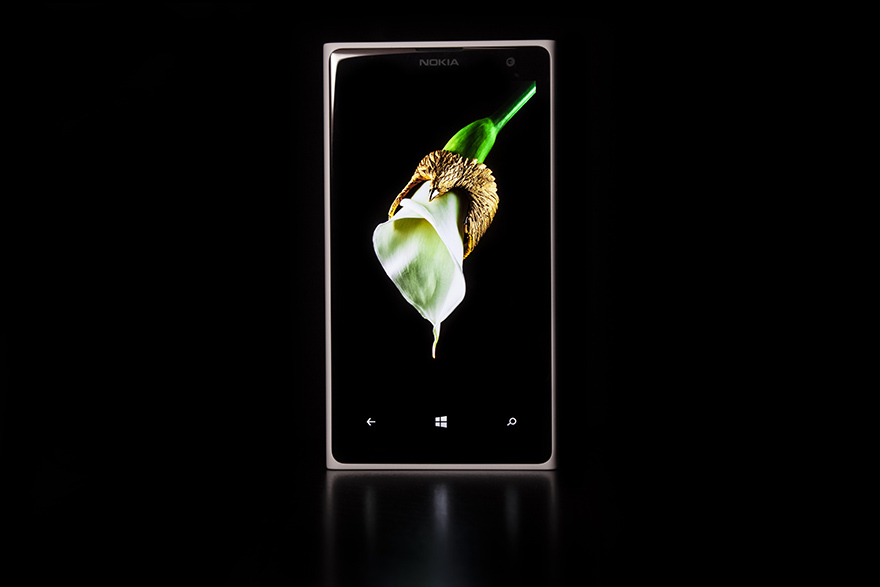
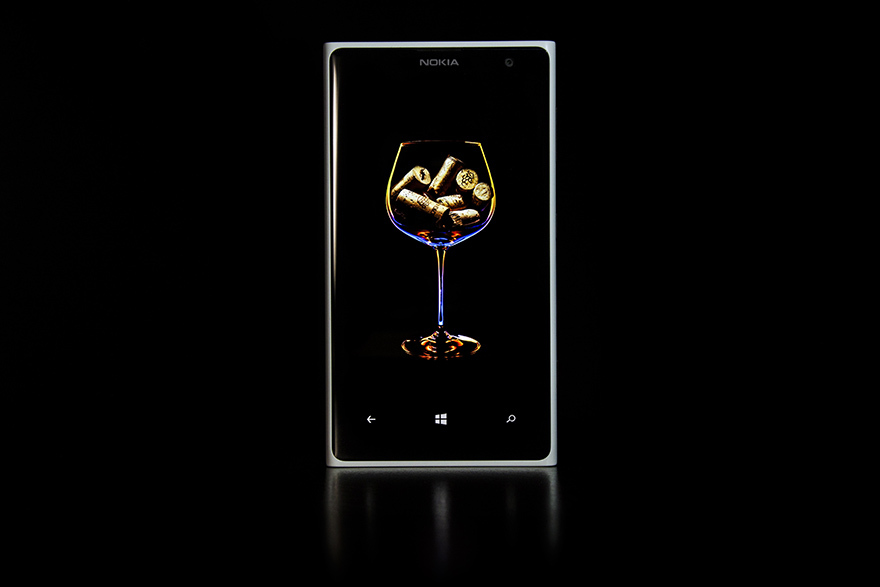
Screen. It deserves a special mention. Even more, a separate photo shoot! For the sake of demonstrating AMOLED display capabilities alone! And all because this technology together with Nokia ClearBlack gives an incredibly beautiful picture and, most importantly, a damn deep black color, which creates the illusion of a complete merger of the display with the glass. Someone may argue that AMOLED produces acid colors, I do not agree with this statement, moreover, in Lumia 1020 you can independently calibrate colors and shades to your taste.
Take a short pause. Take a look at this beautiful mix of art and technology.
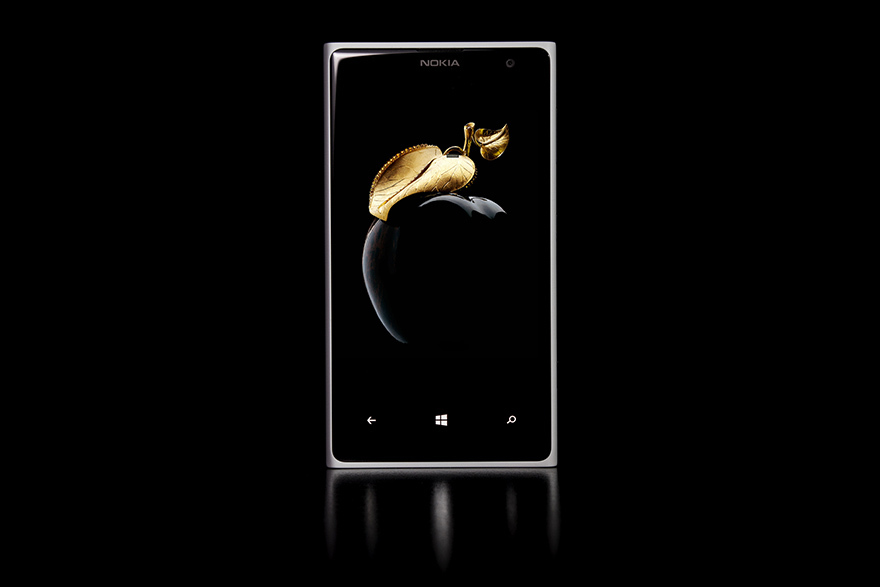


Glance Screen. Just a modest clock screensaver, but very necessary in everyday clutter.
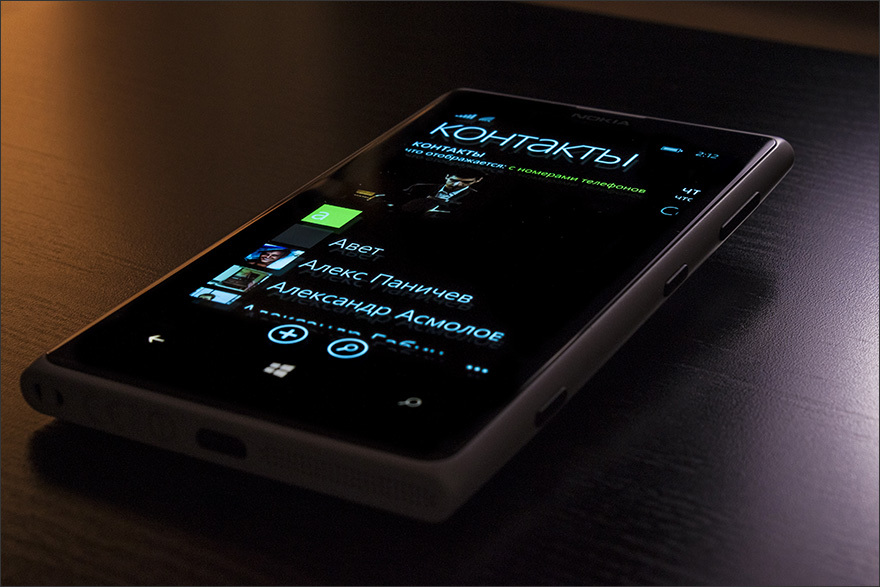
And, as always, the font content of the Windows Phone interface blends in perfectly with the appearance of the Lumia 1020.
3. And yet, there really are so many megapixels?
Surprisingly, yes. It just so happened that I live near VDNKh, and I don’t know of another place where I could photograph letters from a long distance, I will repeat the photo from the already sensational angle.
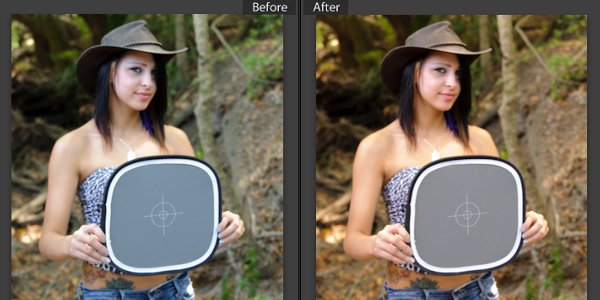
With only one BUT. Many readers were thrilled with the new Lumia 1020 feature - taking photos in RAW. Looking ahead, I’ll present to you the difference between JPEG issued by smartphone automation and RAW processed in a couple of clicks.
Compare:
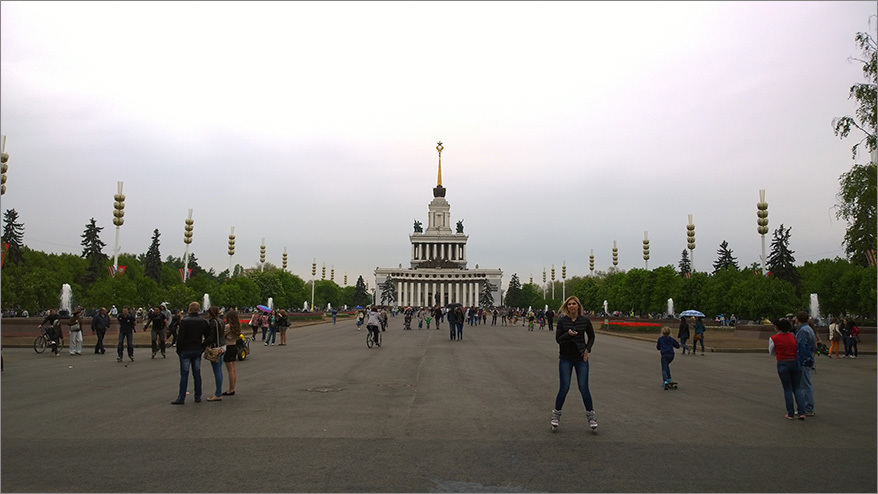
Photo captured in cloudy weather, processed by smartphone automation for optimal auto-exposure of elements below the horizon. (The sky is overexposed)
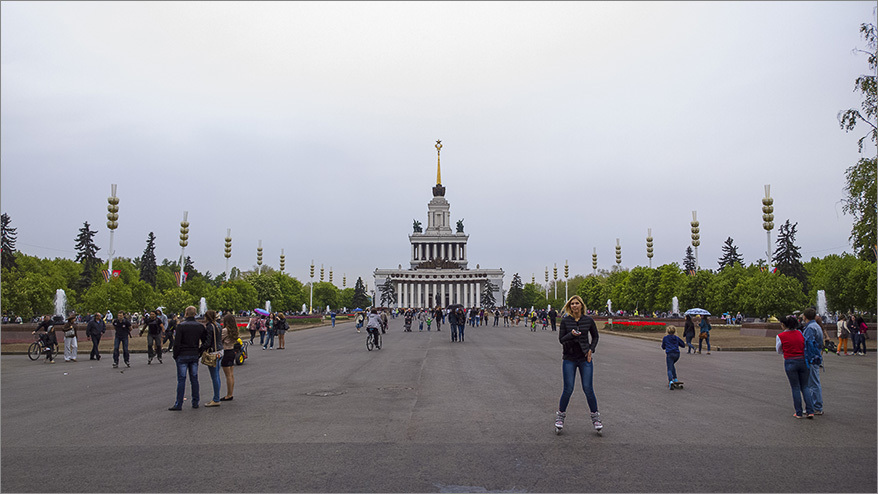
The same frame, only saved by the phone in RAW format and processed later in Camera RAW.
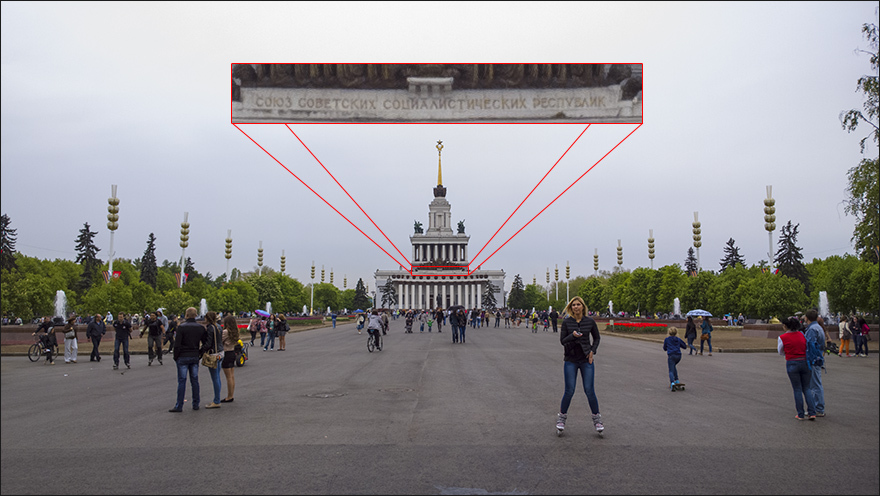
And yes, even from such a distance the letters can still be read calmly.
I suggest that you study the 41-megapixel RAW file of this frame, perhaps you will be able to process it better: download.
4. Yes, even if so, what is their use? Why so many?
Firstly , having a supply of megapixels, the camera can oversample from a 41-megapixel frame to 5 (a resolution suitable for everyday needs and printing).

The system analyzes 5-6 noisy pixels and combines them into one "clean" pixel with a stable indicator of color and brightness.
Secondly , you have a wide scope for experiments with cropping and zoom, since the matrix has a large supply of pixels.

4x digital zoom with no loss of quality. And 6x zoom when shooting at 720p.
Here's what it looks like when shooting 720p video.
Download the original video in 720p from Yandex.Disk.
When shooting in 1080p, the zoom is limited to 4.
But in this case, the result holds the bar for quality. Download the original video in 1080p from Yandex.Disk.
But the main advantage of this technology over optical zoom is the ability to resume, to see the frame completely after shooting.
Suppose you decide to capture an art macro shot, take 4x zoom, focus, click, and the frame is ready.
But at home, you understand that it was possible to crop differently, for the integrity of the composition, or maybe even completely leave the frame without zoom. Having an apparatus with optical zoom, you would have to put up with the irreparable. But the owners of the Lumia 1020 have an excellent cheat. You simply open the original and see the whole scene. After shooting, when it’s already dark outside the window and you are sitting in your armchair at the computer and studying the photos accumulated during the day.
I do not pretend to be a professional in the field of processing RAW photographs, there is no limit to perfection in this area, download the original RAW file and play with it. Download from Yandex.Disk.
5. Suppose that this is useful, but RAW in a smartphone is too much, what's the use of it with such a matrix? !!
It is known that photographers never work with JPEG, as it is very difficult to process. All shoot in RAW. And yes, everyone is post-processing to achieve the best quality. Automation is not able to predict your preferences in artistic shooting. Partly because of RAW support, SLRs are priced at a completely different level than ordinary soap dishes. Of course, the ability to change lenses and a large matrix are the main priorities, but without RAW you cannot reach the full potential of iron.
What is RAW? This is a format that contains the whole range of data received by the matrix at the time of shooting. In JPEG, most of this data is missing. Obviously, the more data, the larger the file size. Typically, the weight of the RAW file is comparable to the number of megapixels of the matrix. So, for example, a Canon 5D Mark III RAW with a 23.4 MP module weighs 23.3 megabytes. The Lumia 1020 has 41 megapixels, RAW weighs ~ 41.6 megabytes.
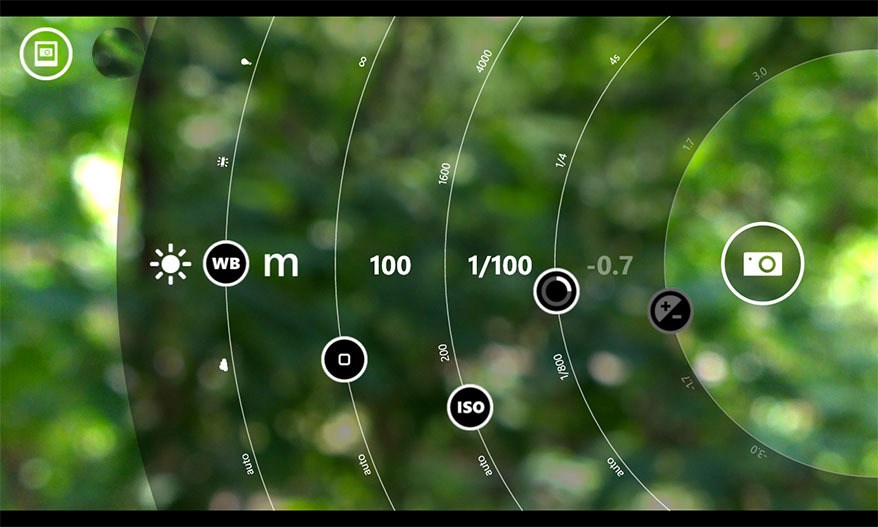
Now we will go through all the stages of creating an artistic picture, starting directly from the settings for photography, cropping, and ending with post-processing in Camera RAW. For professionals in photography, this material may seem too simple, but for beginners it can serve as a good starting point.
So, you found an interesting shot, when shooting in the daytime, it is recommended to set the ISO sensitivity to 100, the exposure according to the situation can be adjusted to 0.3 EV.
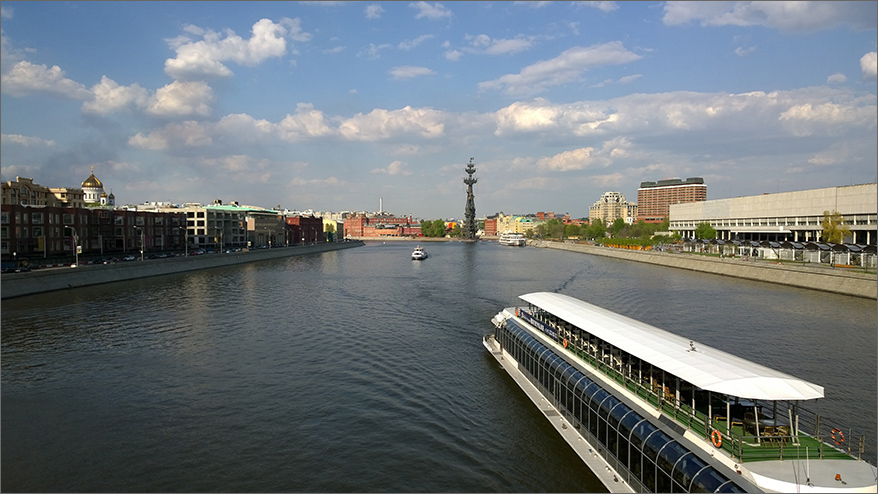
5 megapixel photo processed by smartphone automation. Not bad, but there is a slight overexposure in the clouds (loss of details, continuous filling with white), the roof of the ship is also lit up, buildings are underexposed. Let's try to improve it by enhancing colors and adjusting brightness in the desired areas.
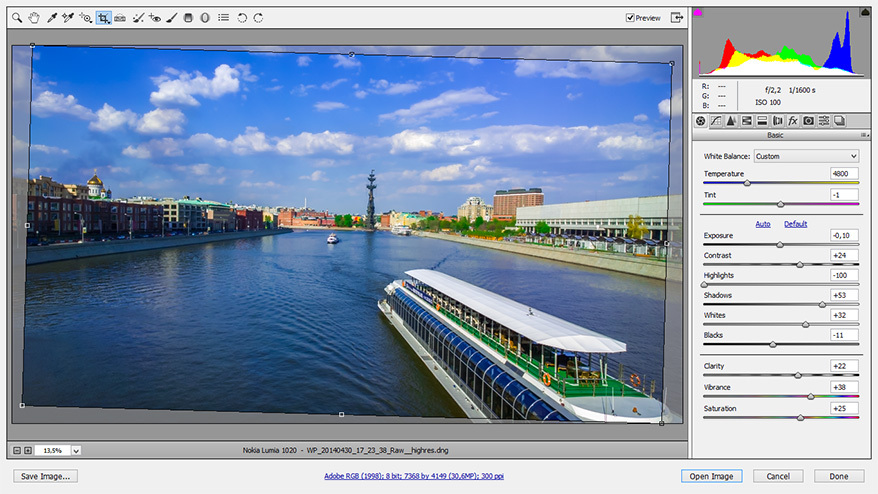
We drop RAW from the phone ( Download from Yandex.Disk ) and open it in Adobe Camera RAW (included in any modern Photoshop package).

Hello, I am Camera RAW, and I should not be afraid.
First, set the white balance (the first subsection is White Balance). Here, everyone is free to experiment and select indicators that he likes best. The first slider directly sets the temperature of the image, the second allows you to remove the purple or green tones. It is also possible to set the BB automatically using a pipette. It's simple, take a dropper, click on the area, which, in our opinion, should have a neutral gray tint, and the program will automatically adjust the BB. Of course, professionals use this function for this, coupled with special gray plates made of expensive high-quality material, but in the field, in this way, you can also choose the optimal BB using the pump method.
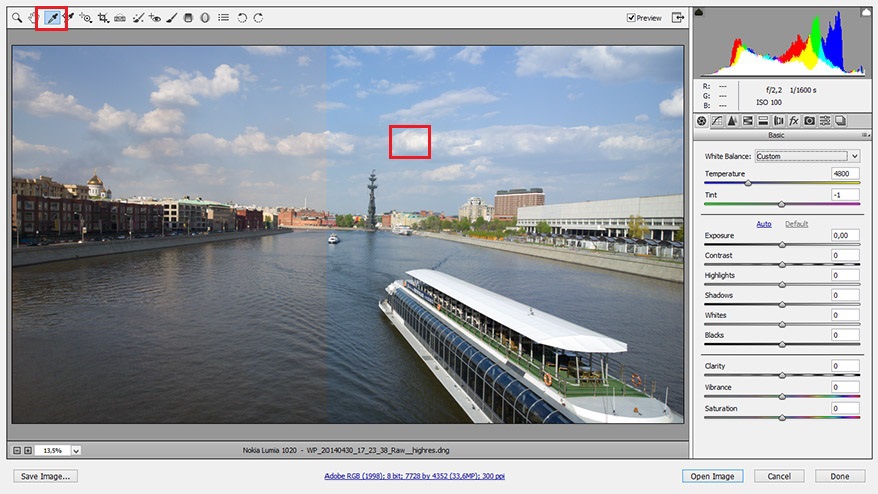
I like cool colors more. In this case, I set the BB to a gray tint on the clouds with a tool.
Next, proceed to the basic settings for exposure, light and shadows. At this stage of the first acquaintance with Camera RAW, it's enough just to intuitively move the sliders, to feel which one is responsible for what. In short: Exposure brightens or darkens the frame completely. Contrast enhances the difference between the transitions, Highlights and Shadows are responsible for adjusting the midtones (light gray and dark gray shades), Black and Whites directly control the saturation of white and black areas of the photo.
During processing, it is highly advisable to try to avoid overexposure and overexposure, when a fragment of the photo is filled with solid white / black, information is lost. Unless, of course, this is not your artistic idea. To track this effect, press the U and O keys (to track the black and white points, respectively).
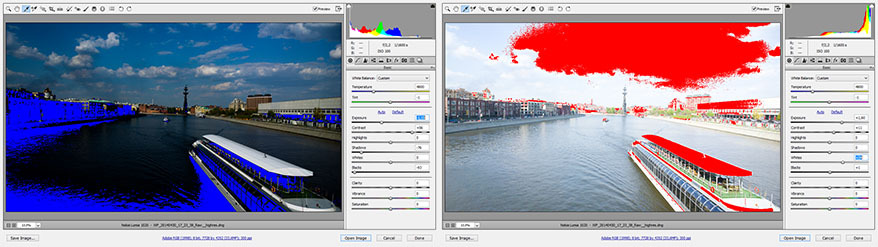
Photoshop itself will tell you when you went too far with exposure and risk losing details.
The last subsection of the sliders allows you to adjust the clarity, color and saturation. Very useful features, but the main thing is not to overdo it and not give out acid colors. You can always press the “P” key (or the Preview checkbox at the top) in order to compare the original image and the result of your work in this section.

The first stage is completed.
Next, go to the third tab “Detail”. Here we work on noise and sharpness. All cameras have one level or another of noise. When working with RAW, you have the opportunity to do very delicate work to reduce noise. Remember that noise processing and sharpening is always a compromise.
Set the scale to 100%. First, we reset all the sliders in the Sharpening and Noise Reduction blocks. The first step is to remove the noise. Let's turn to the “Color” slider, which is responsible for color noise. Typically, the “Color Detail” and “Color Smoothness” indicators do an excellent job at levels of around 50%. Move the first Color slider until we remove the color noise.
Next, we proceed to the light noise. Again, in this case, you need to experiment a lot and select the “poke method”, determining by eye an acceptable level of noise smoothing. For convenience, you can hold down the Alt key, in shades of gray it is easier to determine details and the degree of noise. Also, do not forget that ahead of us is still waiting for work with sharpness, so you will still return to the adjustment of noise.
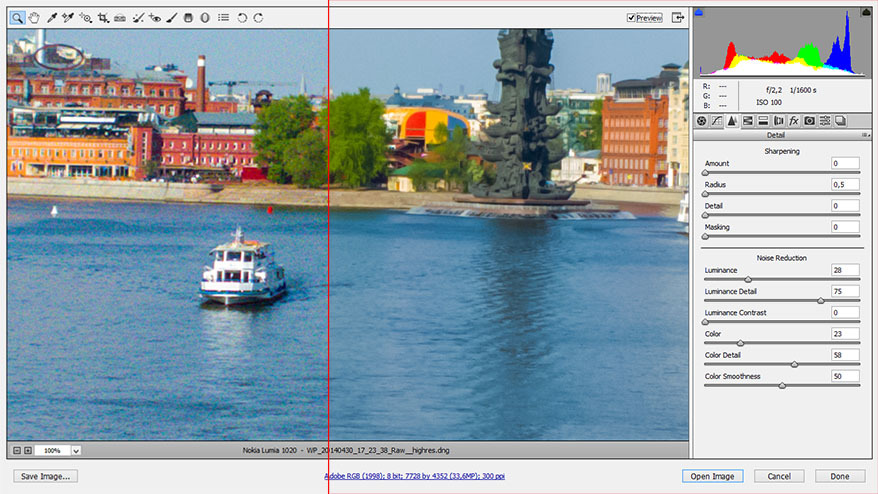
Before and after cleaning color and light noise.
Now let's work on the sharpness. To see the sharpness filter, temporarily set the “Amount” slider to the maximum.
Again, hold down "Alt" and begin to move the sliders in turn. Radius - is responsible for the radius of halos of contrast transitions. Detail - adds details throughout the image. Masking - a mask that hides the effect of the filter in those places where it is not needed, for example, in the sky. When the Alt key is held down, the filter zones are displayed in white, the filter will not be applied in black areas. After that, you can adjust the strength of the entire Sharpness filter by returning the Amount slider to an acceptable level.

Before and after noise processing and sharpening.
In the fourth tab, HSL / Grayscale, you can very finely adjust the brightness, hue, saturation of specific colors. Again, move the sliders and select the most interesting picture to your taste. For example, there is a lot of blue in the frame (water, sky). You can make it more contrast.

You can stop there. This basic knowledge of working in RAW is enough to carry out the first stage of photo processing. Maximum, you can level the horizon, use the Straighten tool for this. In this case, the landmark and its platform can serve as a guide.
Compare what happened in the end.
Photo taken in automatic mode.
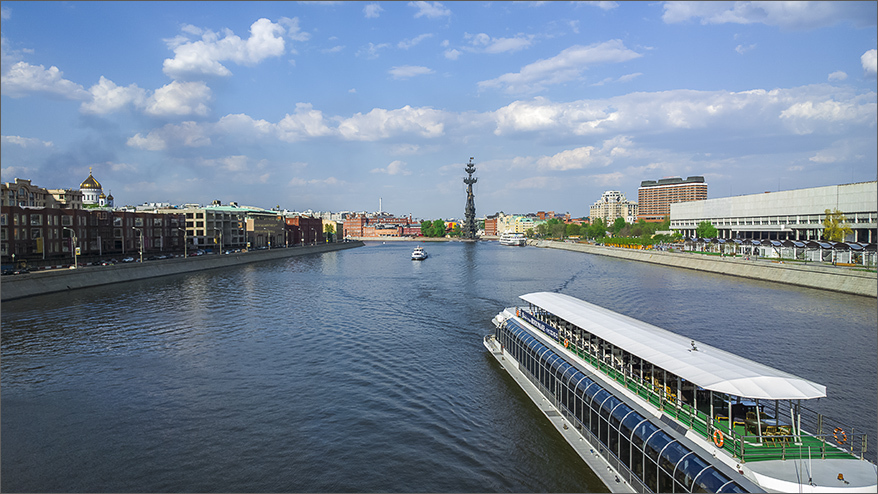
Photo after RAW manual processing.
This is my vision of photography, to some it may seem to be oversaturated with a cold tint, no one bothers you to process it differently, to your taste. As you can see, the capabilities of RAW are quite wide. This is what the Lumia 1020 can produce in the capable hands of photographer Dmitry Beketov .

Someone will object that it is too long and dreary to do photo processing. For social networks, there have long been applications with instagram filters, for these cases and ordinary everyday photos, auto mode is also quite suitable. If you decide to shoot an artistic plot or accidentally notice a decent shot while walking in the park, nothing prevents you from capturing a moment on the Lumia 1020 and later making a decent print out of it thanks to RAW processing.
6. The SLR is better anyway!
So we got to one of the most common theses that can be heard as opposed to the advantages of the Lumia 1020 over other smartphones and soap holders.
The only problem is that no one quotes her as a killer of DSLRs. Yes, the matrix is larger in the DSLR, yes, you can change the lenses of the DSLR, but the Lumia 1020 has 41 megapixels not for spitting in the garden of DSLRs, but a la “We have more!” This is a necessary measure to enable zoom and an alternative technology to reduce noise through oversampling in one compact device.
But for that matter, let's make a little comparison.

You can’t put an average DSLR in your pocket, going for an evening walk around the city. At the same time, as you know, the most interesting shots and ideas appear completely spontaneously. If you are even interested in photography, this happened to you when you saw an incredibly beautiful composition, and there’s nothing to photograph. And given the RAW capabilities of the Lumia 1020, you can not worry about the limitations of smartphone automation. At home, you can bring your idea to the end.
The lens at 1020 is much smaller than any “glass” for DSLRs.
You can do an interesting test. Lumia 1020 can be purchased at the official Nokia N-store.ru store for 19 900 rubles. If you limit the purchase of SLRs to this budget, then you can buy an average budget 16-megapixel DSLR, with a whale lens, a focal length of 18-55 and aperture of 3.5-5.6. At the same time, Lumia's last indicator is 2.2. And you know what?
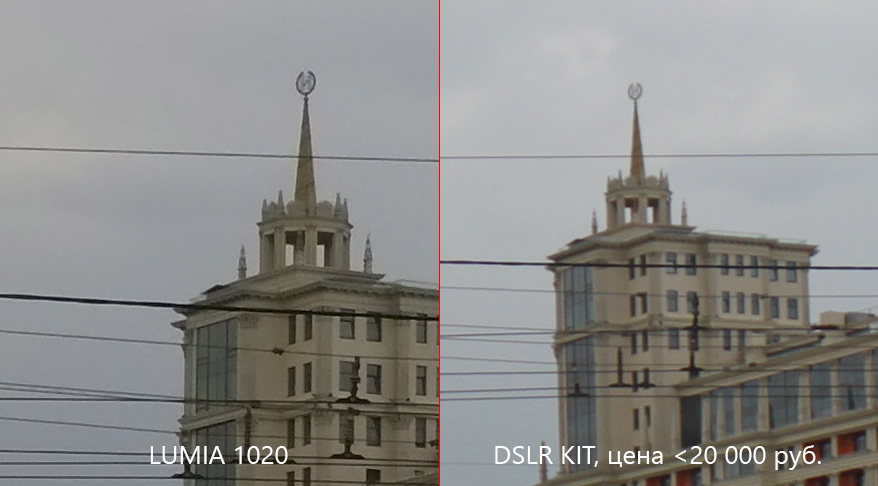
Scale 100%, pixel to pixel. Download the original Lumia , DSLR.
Yes, if you put a good expensive lens on the DSLR, you can expect an increase in detail, color reproduction, and contrast, but the budget of our comparison does not allow . Yes, the DSLR has a wider dynamic range due to the larger size of the matrix, the Lumia 1020 boasts compactness and quite serious capabilities for its size.
Of course, the number of megapixels is not the only indicator of the quality of cameras, and this test is just a humorous echo of holivars hovering around 1020, but if you learn how to use them correctly, you can get a very impressive result.
Lumia 1020 is notable for the fact that it is perfect for any class of users. If you are new to photography, then in auto mode, this camera phone will already give a better result than any other smartphones. On top of that, this is a great opportunity to touch the world of photography at a higher level.
As soon as you experiment another day with the Lumia 1020, you will already begin to understand and feel what exposure, photosensitivity, exposure, white balance and many others are for, thereby increasing your overall level of photography skills. With a DSLR every day you are not like, and the camera phone is always in your pocket and ready for experiments. And as you know, knowledge comes with experience.
If you are a professional and want more control over the process, please, and here Lumia 1020 shows itself as a very delicate tool that allows you to bring your art idea to life as accurately as possible. In addition to the basic settings of the above shooting parameters, you have an excellent opportunity to control literally every pixel from the RAW source, expanding the boundaries of what is allowed. So far, in the smartphone market, I have not seen a single device that provides such wide opportunities.
Thanks for attention.