New features FLProg - ESP8266 as a controller, not a modem
Source
Good afternoon.
I haven't talked about my FLProg project for a long time. The last post was still on Geektimes.
It's time to fix this mess. With this post I begin a series of lessons on the use of new features of the program.
If you are not familiar with the project, you can see its history in the blog .
The program is currently testing the pre-release version number 3.1.4 . Starting with version 3.1, the program has added support for ESP8266 controllers as a full-fledged controller.
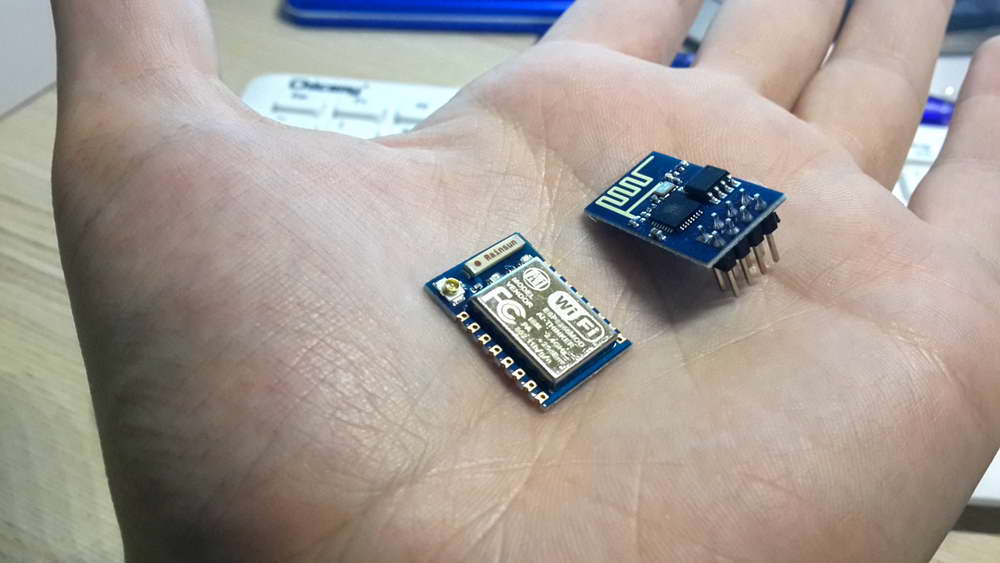
For those who are not familiar with these controllers, a short description
ESP8266 создан для использования в умных розетках, mesh-сетях, IP-камерах, беспроводных сенсорах, носимой электронике и так далее. Одним словом, ESP8266 появился на свет, чтобы стать мозгом грядущего «Интернета вещей».
Предусмотрено два варианта использования чипа:
1) в виде моста UART-WIFI, когда модуль на базе ESP8266 подключается к существующему решению на базе любого другого микроконтроллера и управляется AT-командами, обеспечивая связь решения с инфраструктурой Wi-Fi;
2) реализуя новое решение, использующее сам чип ESP8266 в качестве управляющего микроконтроллера.
Первый сценарий был реализован в проекте FLProg достаточно давно. Реализуется он с помощью любого из недорогих китайских ESP8266-модулей. Хорошо подходит любителям ардуино и тем, у кого уже есть в руках готовая схематика и отлаженная прошивка на базе чего-то своего, горячо любимого.
Второй вариант сценария предусматривает написание индивидуальной прошивки для управления чипом «изнутри». (До выхода FLProg 3.1 прошивка должна быть написана для фирменного компилятора. Начиная с этой версии, появилась возможность писать прошивки на языках FBD и LAD в среде FLProg).
Сценарий использования чипа в качестве управляющего микроконтроллера интересен тем, что позволяет создать устройства, действительно небольшие и реально долго работающие от батарей. Для работы с периферией на борту ESP8266 есть все необходимые возможности.
Ключевые характеристики
Чип ESP8266 является одним из самых высокоинтегрированных решений для работы с WiFi. Внутри чипа уместилась куча всего того, что в конкурирующих решениях часто является частью внешней обвязки:
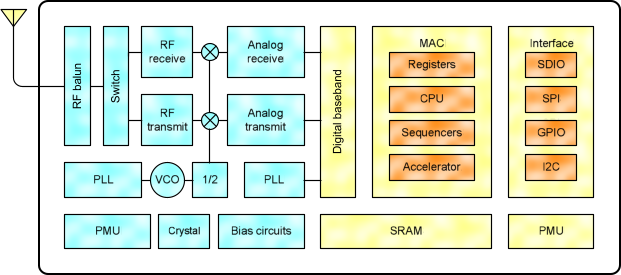
В итоге типовая обвязка чипа состоит всего из нескольких элементов. Меньше элементов = меньше цена компонентов, меньше стоимость пайки, меньше площадь размещения, меньше стоимость печатной платы. Что прекрасно подтверждается актуальными ценами модулей на базе героя нашего сегодняшнего обзора.
Управляет всем этим интегрированным хозяйством расширенная версия 32-битного процессора Tensilica’s L106 Diamond series. Что же интересного внутри?
• 802.11 b/g/n protocol
• Wi-Fi Direct (P2P), soft-AP
• Integrated TCP/IP protocol stack
• Integrated TR switch, balun, LNA, power amplifier and matching network
• Integrated PLL, regulators, and power management units
• +20.5dBm output power in 802.11b mode
• Supports antenna diversity
• Power down leakage current of < 10uA
• SDIO 2.0, SPI, UART
• STBC, 1x1 MIMO, 2x1 MIMO
• A-MPDU & A-MSDU aggregation & 0.4μs guard interval
• Wake up and transmit packets in < 22ms
• Standby power consumption of < 1.0mW (DTIM3)
Ultra Low Power Technology
Энергопотребление — одна из самых важных характеристик решения, претендующего стать мозгом миллиардов устройств Интернета вещей. С чем связана популярность BLE и различных собственных реализаций радио интерфейсов? Ведь, в конечном счете, все устройства на базе этих реализаций все равно стремятся попасть в обычный Wi-Fi с помощью специальных устройств-мостов.
Секрет прост — сложно создать устройство, подключенное к WiFi, достаточное время, работающее на автономном питании. Потребители не готовы менять батареи в датчиках каждые два-три месяца. Поэтому «выход в сеть» приходилось обеспечивать мостами, подключенным к постоянному электричеству. ESP8266 должен решить эту проблему. Теперь Wi-Fi можно использовать даже в автономных датчиках, работающих на небольших батареях. Благодаря использованию продвинутых механизмов управления энергопотреблением решения.
Если бегло посмотреть на характеристики потребления чипа, можно остаться в неведении. 215mA в режиме передачи — ничего особенного? Да, но стоит вчитаться в даташит и начинаешь понимать перспективы решения. ESP8266 потребляет около 60uA в режиме глубокого сна (с работающими часами реального времени) и меньше 1.0mA (DTIM=3) или меньше 0.5mA (DTIM=10) в режиме поддержания
Источник
Предусмотрено два варианта использования чипа:
1) в виде моста UART-WIFI, когда модуль на базе ESP8266 подключается к существующему решению на базе любого другого микроконтроллера и управляется AT-командами, обеспечивая связь решения с инфраструктурой Wi-Fi;
2) реализуя новое решение, использующее сам чип ESP8266 в качестве управляющего микроконтроллера.
Первый сценарий был реализован в проекте FLProg достаточно давно. Реализуется он с помощью любого из недорогих китайских ESP8266-модулей. Хорошо подходит любителям ардуино и тем, у кого уже есть в руках готовая схематика и отлаженная прошивка на базе чего-то своего, горячо любимого.
Второй вариант сценария предусматривает написание индивидуальной прошивки для управления чипом «изнутри». (До выхода FLProg 3.1 прошивка должна быть написана для фирменного компилятора. Начиная с этой версии, появилась возможность писать прошивки на языках FBD и LAD в среде FLProg).
Сценарий использования чипа в качестве управляющего микроконтроллера интересен тем, что позволяет создать устройства, действительно небольшие и реально долго работающие от батарей. Для работы с периферией на борту ESP8266 есть все необходимые возможности.
Ключевые характеристики
Чип ESP8266 является одним из самых высокоинтегрированных решений для работы с WiFi. Внутри чипа уместилась куча всего того, что в конкурирующих решениях часто является частью внешней обвязки:
В итоге типовая обвязка чипа состоит всего из нескольких элементов. Меньше элементов = меньше цена компонентов, меньше стоимость пайки, меньше площадь размещения, меньше стоимость печатной платы. Что прекрасно подтверждается актуальными ценами модулей на базе героя нашего сегодняшнего обзора.
Управляет всем этим интегрированным хозяйством расширенная версия 32-битного процессора Tensilica’s L106 Diamond series. Что же интересного внутри?
• 802.11 b/g/n protocol
• Wi-Fi Direct (P2P), soft-AP
• Integrated TCP/IP protocol stack
• Integrated TR switch, balun, LNA, power amplifier and matching network
• Integrated PLL, regulators, and power management units
• +20.5dBm output power in 802.11b mode
• Supports antenna diversity
• Power down leakage current of < 10uA
• SDIO 2.0, SPI, UART
• STBC, 1x1 MIMO, 2x1 MIMO
• A-MPDU & A-MSDU aggregation & 0.4μs guard interval
• Wake up and transmit packets in < 22ms
• Standby power consumption of < 1.0mW (DTIM3)
Ultra Low Power Technology
Энергопотребление — одна из самых важных характеристик решения, претендующего стать мозгом миллиардов устройств Интернета вещей. С чем связана популярность BLE и различных собственных реализаций радио интерфейсов? Ведь, в конечном счете, все устройства на базе этих реализаций все равно стремятся попасть в обычный Wi-Fi с помощью специальных устройств-мостов.
Секрет прост — сложно создать устройство, подключенное к WiFi, достаточное время, работающее на автономном питании. Потребители не готовы менять батареи в датчиках каждые два-три месяца. Поэтому «выход в сеть» приходилось обеспечивать мостами, подключенным к постоянному электричеству. ESP8266 должен решить эту проблему. Теперь Wi-Fi можно использовать даже в автономных датчиках, работающих на небольших батареях. Благодаря использованию продвинутых механизмов управления энергопотреблением решения.
Если бегло посмотреть на характеристики потребления чипа, можно остаться в неведении. 215mA в режиме передачи — ничего особенного? Да, но стоит вчитаться в даташит и начинаешь понимать перспективы решения. ESP8266 потребляет около 60uA в режиме глубокого сна (с работающими часами реального времени) и меньше 1.0mA (DTIM=3) или меньше 0.5mA (DTIM=10) в режиме поддержания
Источник
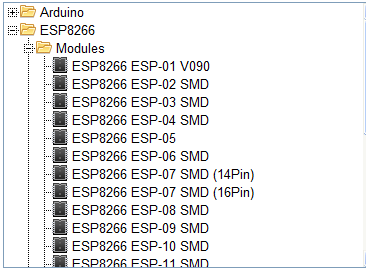
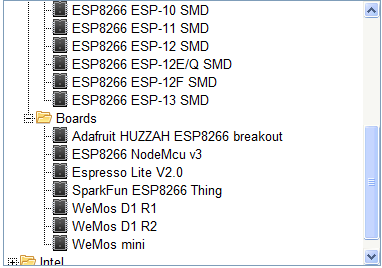
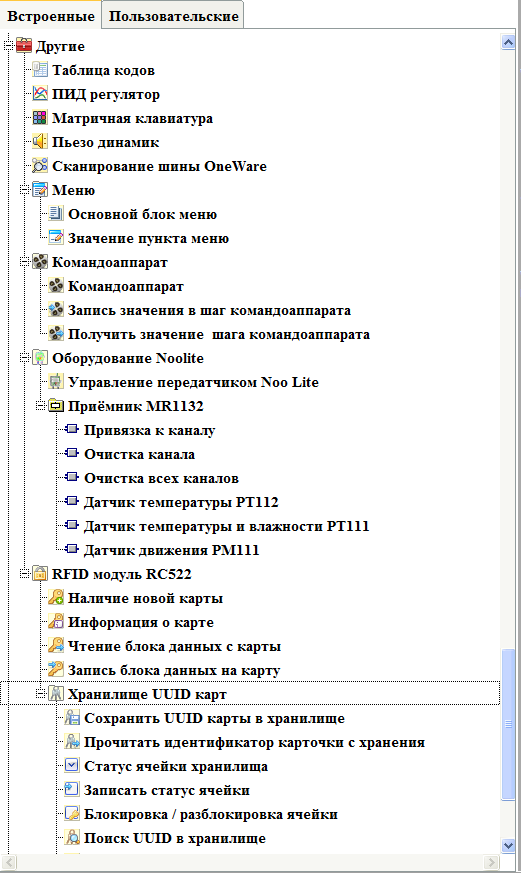
The program supports most of the existing boards based on the ESP8266 controller.
Virtually all functional blocks and peripheral devices that are applicable for programming arduino boards are available for creating firmware.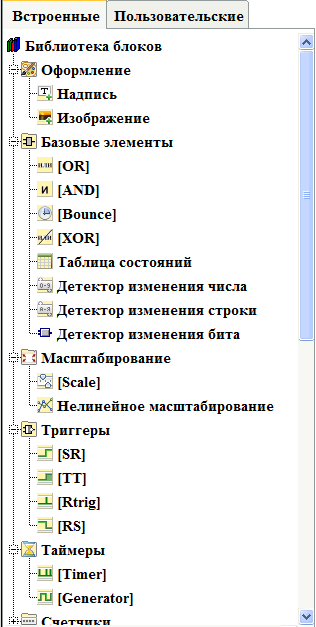
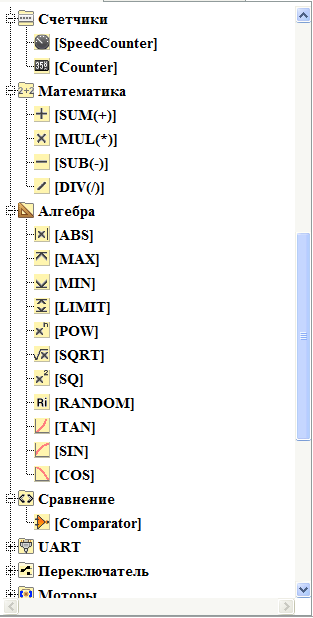
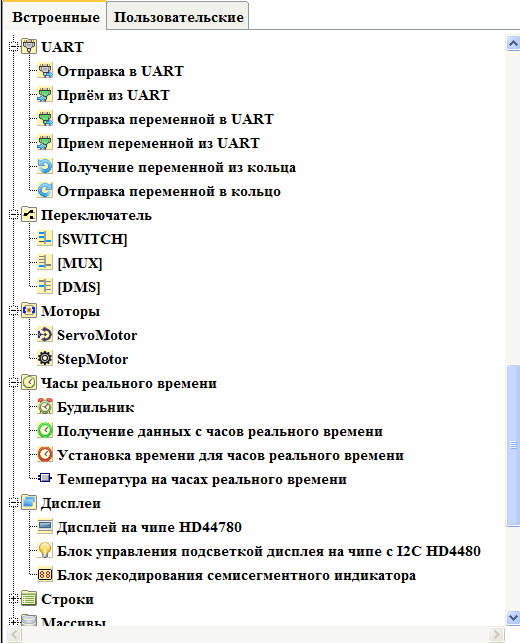

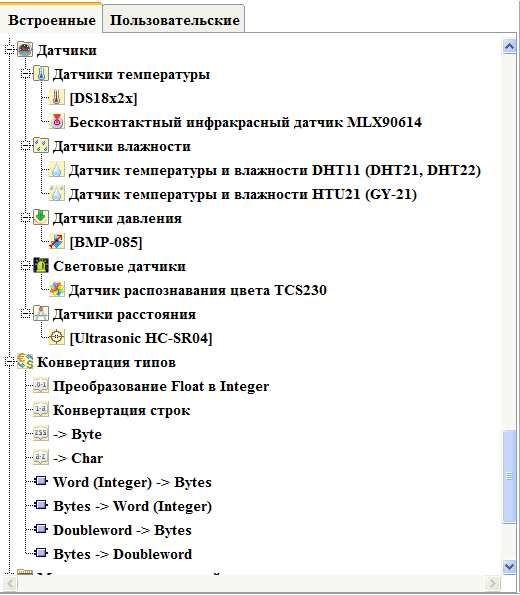
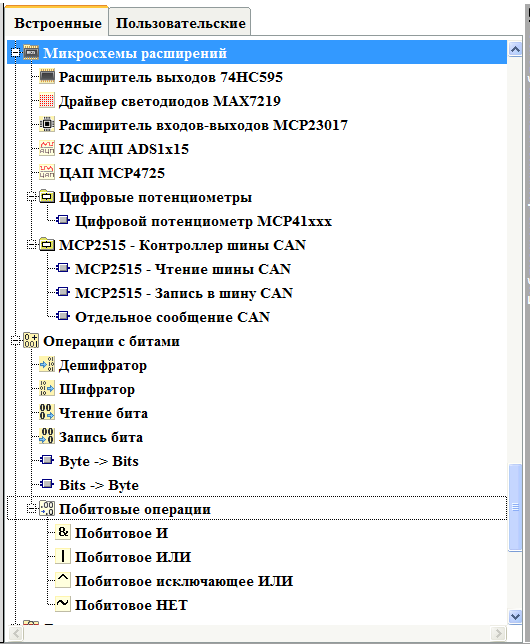

In addition, when choosing an ESP8266 controller, new blocks appear specific to it.
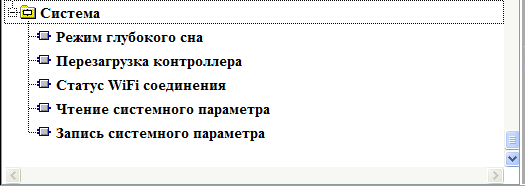
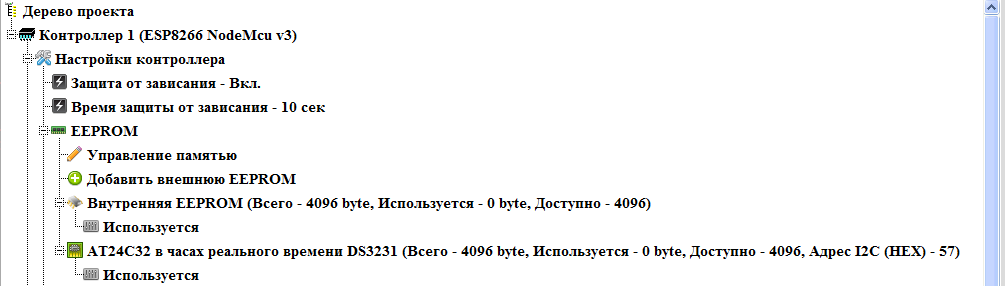
Due to the presence of a WiFi controller onboard, the project tree also changes.
First of all, as for all controllers, there are branches for managing anti-freeze, and EEPROM memory.
Then there are more specific settings.
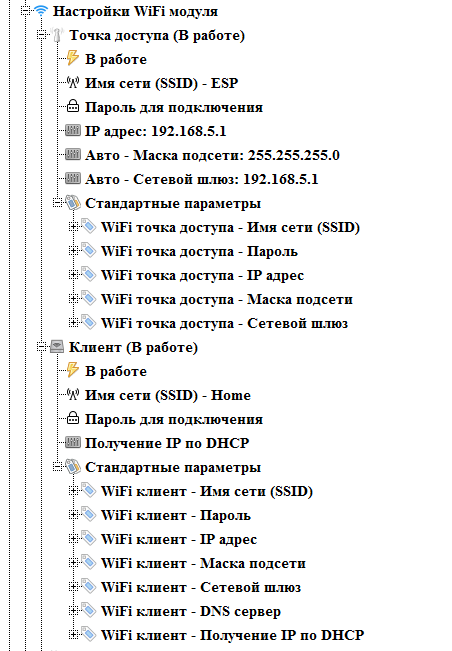
Configure the WiFi client and the access point (they can work simultaneously).
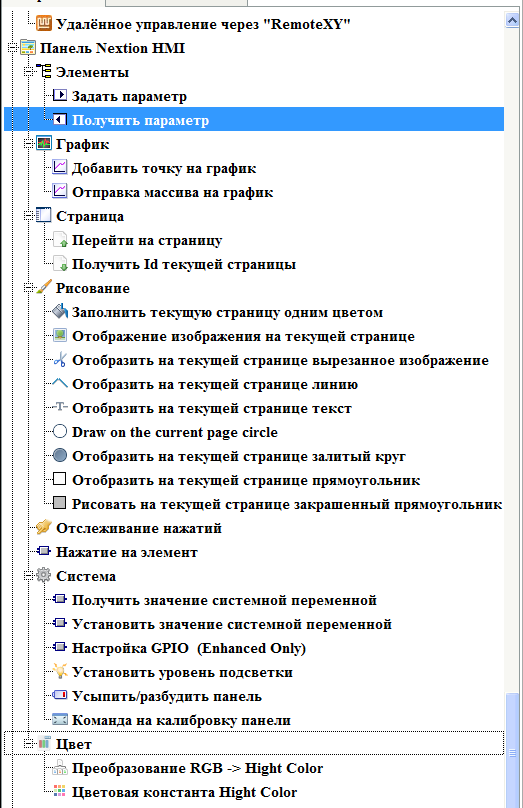
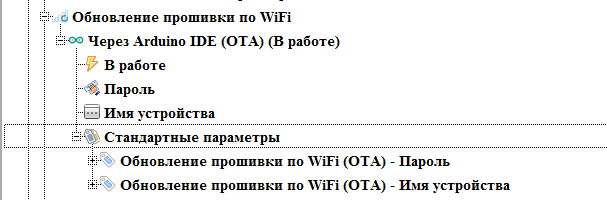
Setting the wireless update mode (for now, only the Arduino OTA, but plans to implement and update via the browser and automatically download the firmware from the update server)
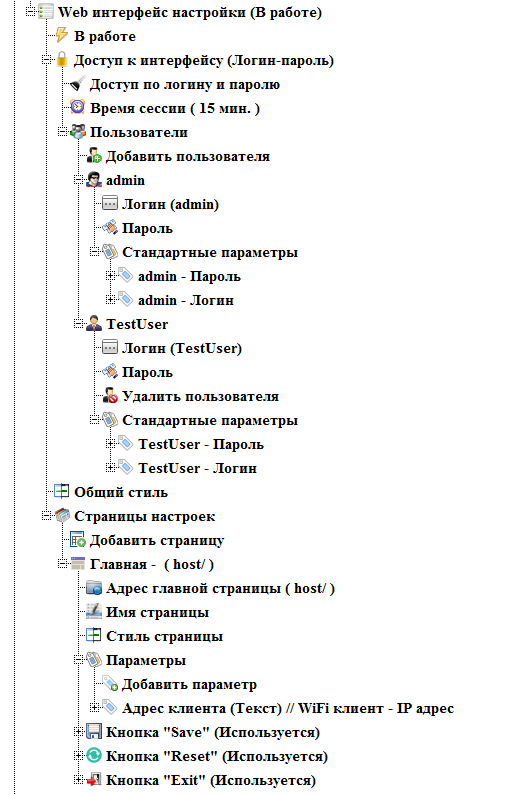
Implemented the ability to create a web interface controller settings. You can create an unlimited number of settings pages, with the required number of parameters. The parameters are used as the standard system parameters of the controller (see screenshots above), and any number of user used for communication between the firmware and the configuration interface. All pages (except the main one), as well as individual parameters, can be set to access only to certain users (the number of created users is not limited).
And of course, like for Arduino, support is provided for the Modbus RTU, Modbus TCP and Modbus RTU over TCP exchange protocols.
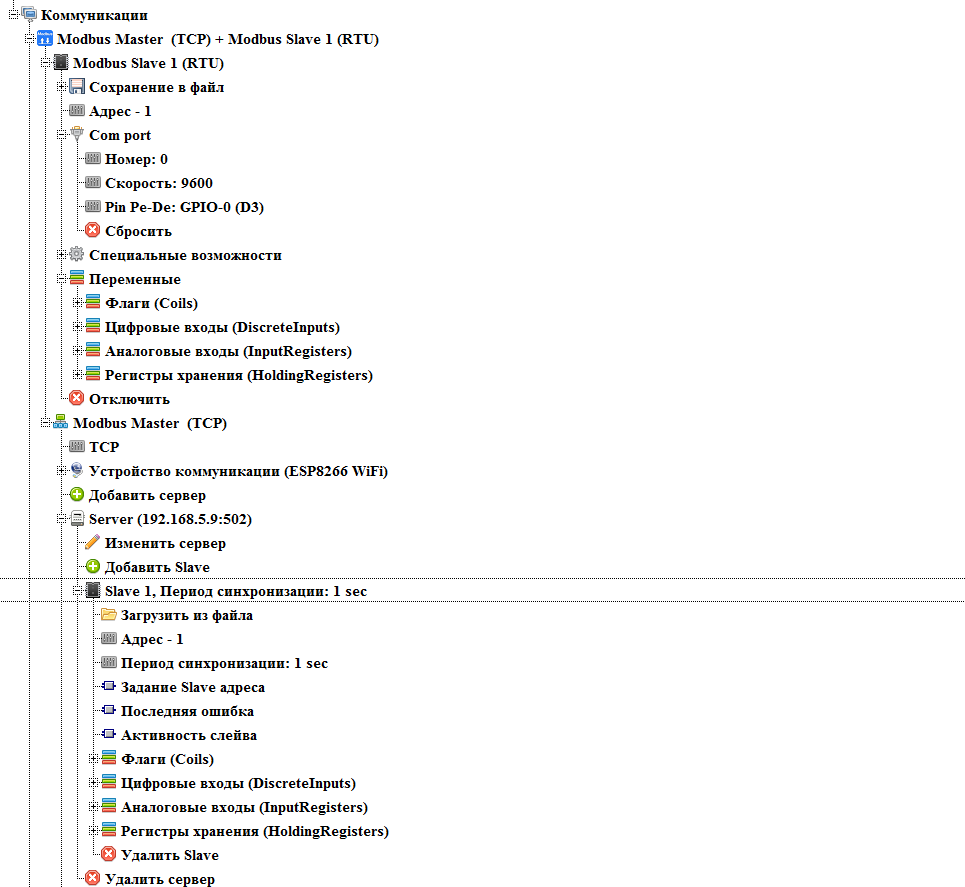
Bridge mode between Modbus RTU and Modbus TCP is also implemented.

In general, I tried to maximize the capabilities of this wonderful controller. Something succeeded.
This post is an overview, and starting in a series, and next we will look at creating a web-based settings interface, and getting time from time servers.
FLProg project is a non-commercial project, and you can download the program from the project site as they say “free of charge and without SMS” . There are no restrictions in the program. Versions are presented for Windows OS and Linux OS.
PS
After numerous complaints about my diction and the way of presenting the material, I abandoned the idea of recording video lessons (teaching and announcer talents were not given to me).
But one of the program users came to my aid.
I want to introduce you to the channel“Arduino Prom” and the site “Arduino Prom” . They are completely devoted to the FLProg project, and today there are about a hundred video lessons on the program.
Here is the latest video, just about creating a clock with synchronization via the Internet.