Forwarding iSCSI disk from NAS via Internet to MAC OS X
- Tutorial
Good time of day! On duty, I am engaged in storage systems and administration of OS X, in this regard, I want something strange.
Let's decide what it was for? Firstly, it was interesting to try such a design. Secondly, with this scheme, you do not need to use a VPN. Thirdly, for specific things, when you need to see a hard drive in the system, and not a network one. Of the small pluses, you can always see the size of the occupied / free space, which cannot be said about a network drive without climbing into the NAS administration panel.
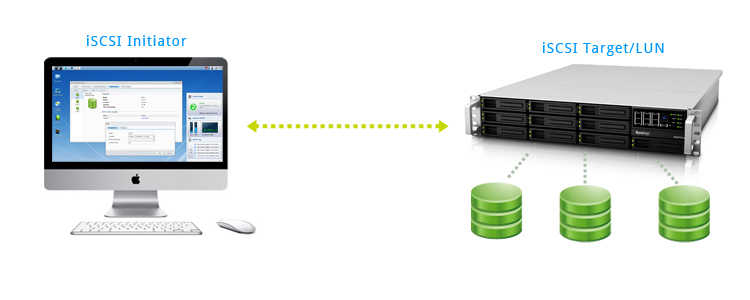
For this operation, we need the iSCSI Initiator and iSCSI Target. We will build this onwhat was at hand the example of the GlobalSan iSCSI Initiator and Synology 1812+ (iSCSI Target).
First, prepare the storage system. I’ll try to tell you step by step for those who want to repeat on similar storage systems.
First, we cut the desired number of LUNs.
1. Select "Storage Manager".

2. Select the “iSCSI LUN” tab.
3. Click “Create."

4. For example, select the first item, iSCSI LUN (Regular Files).

5. Fields.
5.1 Name - The name of the LUN.
5.2 Location - The place on the storage where the piece of the required volume will bite off from.
5.3 Thin Provision - Select “Yes” to consume data space as it grows, rather than immediately occupying the entire volume. Of the minuses, a slightly reduced performance when the disk grows to its maximum size.
5.4 Advanced LUN Features - Needed to support VMware, clone and create snapshots. Cannot be changed later.
5.5 Capacity (GB) - The required size of the new disk in gigabytes.
5.6 iSCSI Target Mapping - Binding an iSCSI Target to a specific LUN (creating a new one, or binding to an existing one).

6. Select a name and copy the IQN (iSCSI Qualified Name).
6.1. Optionally, you can enable authentication.

7. Confirm the correct creation of the LUN.

8. We proceed to configure the GlobalSan iSCSI Initiator.

9. Click the plus sign and select “Portal / Group”.

10. Enter the local Synology storage address or white IP, leave the port standard, Group Name any (I selected 123).

11. After adding, you should get something like this. Let’s take a closer look.
11.1 I recommend entering the iSCSI Name and iSCSI Alias from clause 6.1 here, if this did not happen automatically.
11.2 It should be determined automatically.
11.3 Alias - Enter the iSCSI Target Mapping name from clause 6.1.
11.4 The local address will be added automatically, and a white IP will appear nearby (when configuring via the Internet).
11.5 Check the box next to the address if you need a permanent connection to the disk (Persistent).

12. Click the “Connect” button, the color of the status icon will change to green and you will see the following window.

13. Click the “Initialize ...” button, a disk utility window will open.
13.1 Select the desired drive.
13.2 Select the desired file system.
13.3 Select a name for the disk.

14. After some time (depending on disk speed, volume, etc.) on the OS X desktop, you should see such an icon.

15. Done! Time to open the champagne.
Used software versions:
OS X - 10.8.5
GlobalSan iSCSI Initiator - 5.1.1.423
Synology OS - 4.3
PS Criticism, tips, interesting finds, etc., please leave in the comments.
Let's decide what it was for? Firstly, it was interesting to try such a design. Secondly, with this scheme, you do not need to use a VPN. Thirdly, for specific things, when you need to see a hard drive in the system, and not a network one. Of the small pluses, you can always see the size of the occupied / free space, which cannot be said about a network drive without climbing into the NAS administration panel.
For this operation, we need the iSCSI Initiator and iSCSI Target. We will build this on
First, prepare the storage system. I’ll try to tell you step by step for those who want to repeat on similar storage systems.
First, we cut the desired number of LUNs.
1. Select "Storage Manager".
2. Select the “iSCSI LUN” tab.
3. Click “Create."
4. For example, select the first item, iSCSI LUN (Regular Files).
5. Fields.
5.1 Name - The name of the LUN.
5.2 Location - The place on the storage where the piece of the required volume will bite off from.
5.3 Thin Provision - Select “Yes” to consume data space as it grows, rather than immediately occupying the entire volume. Of the minuses, a slightly reduced performance when the disk grows to its maximum size.
5.4 Advanced LUN Features - Needed to support VMware, clone and create snapshots. Cannot be changed later.
5.5 Capacity (GB) - The required size of the new disk in gigabytes.
5.6 iSCSI Target Mapping - Binding an iSCSI Target to a specific LUN (creating a new one, or binding to an existing one).
6. Select a name and copy the IQN (iSCSI Qualified Name).
6.1. Optionally, you can enable authentication.
7. Confirm the correct creation of the LUN.
8. We proceed to configure the GlobalSan iSCSI Initiator.
9. Click the plus sign and select “Portal / Group”.
10. Enter the local Synology storage address or white IP, leave the port standard, Group Name any (I selected 123).
11. After adding, you should get something like this. Let’s take a closer look.
11.1 I recommend entering the iSCSI Name and iSCSI Alias from clause 6.1 here, if this did not happen automatically.
11.2 It should be determined automatically.
11.3 Alias - Enter the iSCSI Target Mapping name from clause 6.1.
11.4 The local address will be added automatically, and a white IP will appear nearby (when configuring via the Internet).
11.5 Check the box next to the address if you need a permanent connection to the disk (Persistent).
12. Click the “Connect” button, the color of the status icon will change to green and you will see the following window.
13. Click the “Initialize ...” button, a disk utility window will open.
13.1 Select the desired drive.
13.2 Select the desired file system.
13.3 Select a name for the disk.
14. After some time (depending on disk speed, volume, etc.) on the OS X desktop, you should see such an icon.
15. Done! Time to open the champagne.
Used software versions:
OS X - 10.8.5
GlobalSan iSCSI Initiator - 5.1.1.423
Synology OS - 4.3
PS Criticism, tips, interesting finds, etc., please leave in the comments.