Unity: Introduction to Scriptable Objects
- Transfer
In this tutorial, you will learn how to create and use Scriptable Objects in Unity. Scriptable Objects will help improve your workflow, reduce the amount of memory used, and even allow you to separate the code architecture.
According to the Unity documentation , ScriptableObject is a class code that allows you to create large amounts of shared data in the game Scriptable Objects that do not depend on script instances.
There are many reasons for using Scriptable Objects in Unity. They can reduce the amount of memory used for each additional prefab, because at its core Scriptable Object follows the Flyweight design pattern .
Another advantage of Scriptable Objects, which will be the main theme of this tutorial, is in their use for convenient data transfer. We will look at this property using the example of creating a sword merchant's shop, in which the parameters, prices and descriptions of various swords will be displayed.
Note: this tutorial assumes that you are familiar with the Unity editor. You need to understand how to edit the code in the code editor and have basic knowledge of C #. If you need to improve your Unity skills, study other Unity tutorials .
Getting Started
Let's start with the download materials that we need.
Unzip the downloaded file in a convenient place for you and open the project Scriptable Object Tutorial-Starter in Unity .
You should see the following folder created as part of the project's stock:
- _Setup : for tutorial this folder is not needed.
- Scenes : contains the Sword Merchant scene , which we will deal with throughout the tutorial. Open this scene.
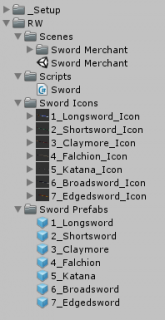
- Scripts : so far there is only one script here, but during the tutorial we will create new ones.
- Sword Icons : contains still images of individual swords.
- Sword Prefabs : contains the prefabs of all swords in the Sword Merchant scene.
Creating a Scriptable Object
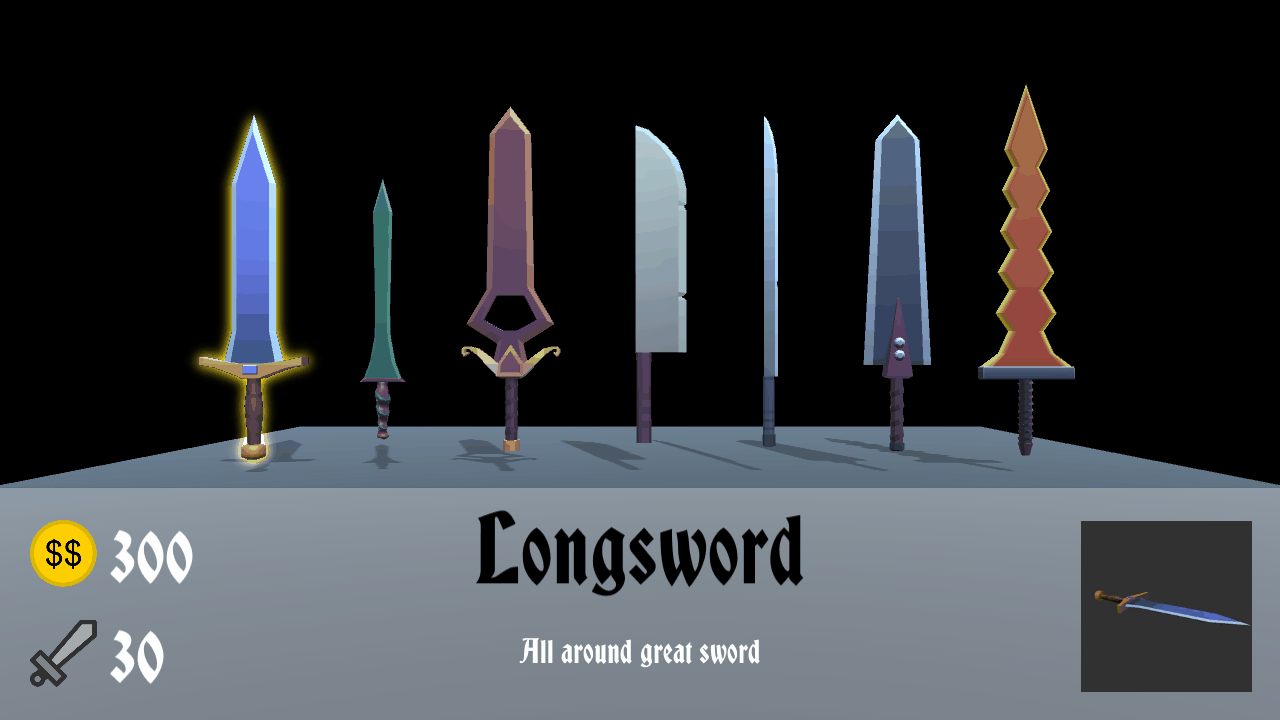
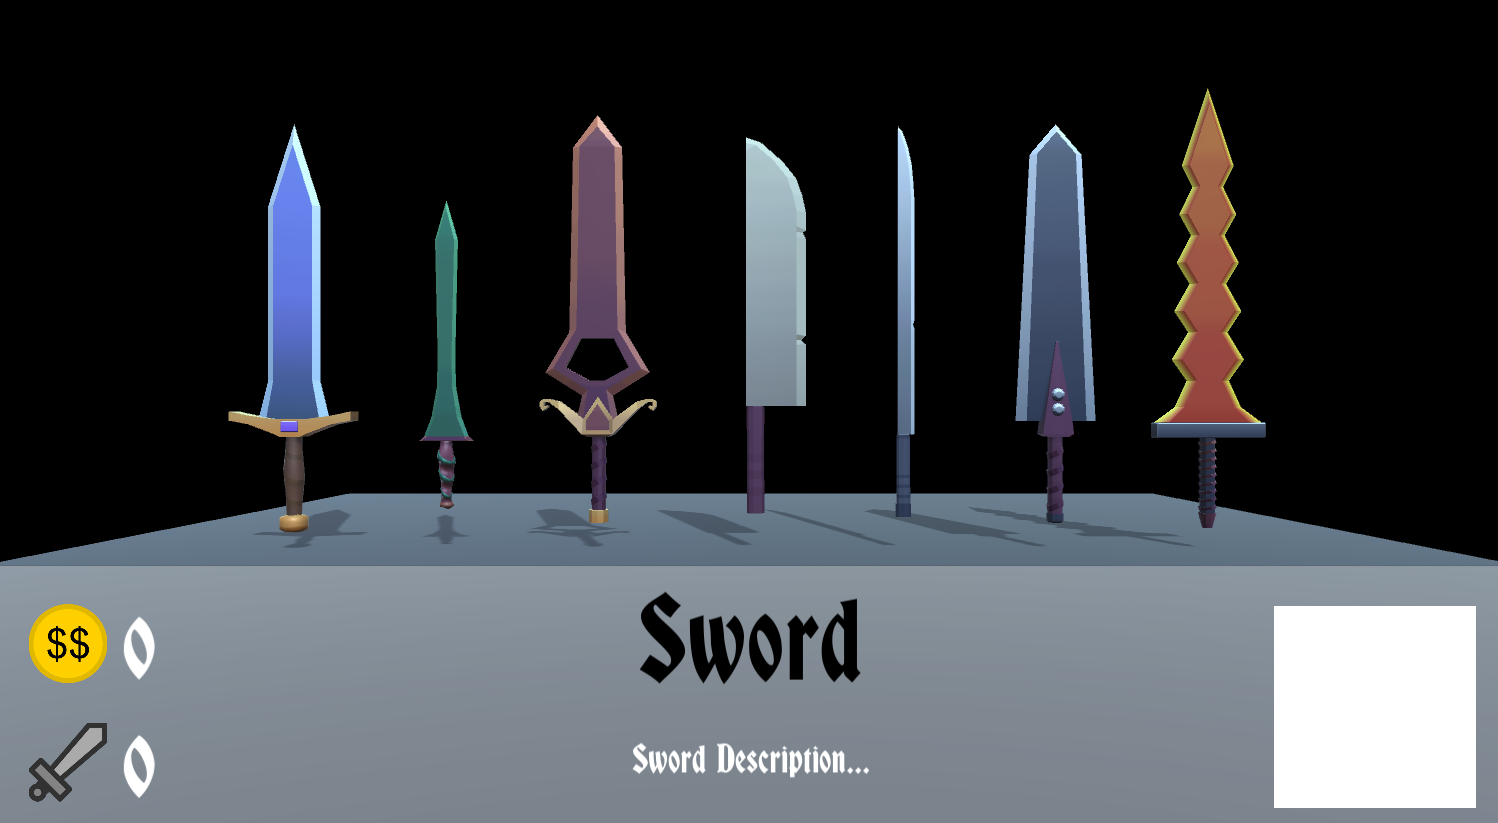
To get started, go to the Sword Merchant scene . It should look like this:
Scriptable Object Preparation
It's time to create the first Scriptable Object!
In the Scripts folder, create a new script called SwordData . This class will be used as a container for all the sword data displayed in the sword merchant's shop.
Inside this class, let's start by inheriting from
ScriptableObjectinstead of MonoBehaviour:publicclassSwordData : ScriptableObject
{
}This action tells Unity that we still want to use the features and methods of Unity, just like a regular MonoBehaviour, but we no longer need to attach this script to the GameObject. Instead, it will be processed like any normal asset that can be created in the same way as creating a prefab, stage or material.
Fill the script with serialized fields, which will contain all the data corresponding to the information displayed in the UI Sword Merchant.
publicclassSwordData : ScriptableObject
{
    [SerializeField]
    privatestring swordName;
    [SerializeField]
    privatestring description;
    [SerializeField]
    private Sprite icon;
    [SerializeField]
    privateint goldCost;
    [SerializeField]
    privateint attackDamage;
}- swordName :
stringwhere the name of the sword will be stored. - description :
stringwhere the sword description will be stored. - icon : sprite, which will contain the sword icon.
- goldCost :
intto store the value of a sword in gold. - attackDamage :
intfor storing damage when attacking with a sword.
Note: SerializeField
In the Unity attribute, the SerializeField allows you to have private script variables available in the Inspector. It will allow you to set values in the editor without providing access to the variable from other scripts.
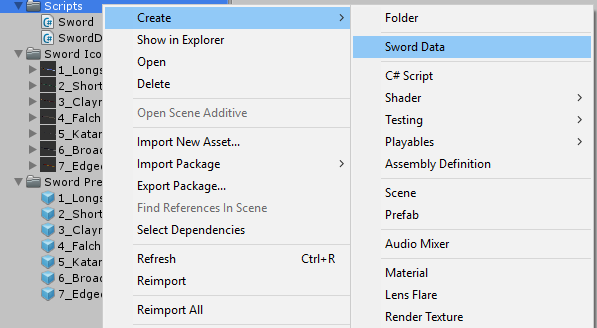
Each sword will need its own unique implementation of Scriptable Object SwordData . But before we can create these implementations, we need to add a Scriptable Object to the Asset Menu.
Add our Scriptable Object to the Asset Menu, adding the following attribute to the SwordData class :
[CreateAssetMenu(fileName = "New SwordData", menuName = "Sword Data", order = 51)]
publicclassSwordData : ScriptableObject- fileName : the default name when creating an asset.
- menuName : asset name displayed in the Asset Menu.
- order : location of the asset in the Asset Menu. Unity divides assets into subgroups with a multiplier of 50. That is, a value of 51 will place the new asset in the second Asset Menu group.
If everything is done correctly, then you can go into Assets >> Create and see the new asset Sword Data in the menu . It should be located in the second group under the Assistant Folder:

You can also right-click in the Project window and also see the new Sword Data asset:
Adding data
We will arrange the project by creating a folder in the Scripts folder with the name Scriptable Objects , and inside this folder another folder called Sword Data .
Inside the newly created Sword Data folder, create our first Sword Data asset.
The new Sword Data asset should still have the previously specified default name fileName . Select an asset and duplicate it six times ( Ctrl / Cmd + D ) to create seven Sword Data assets, one for each of the swords. Now rename each asset according to the prefabs:

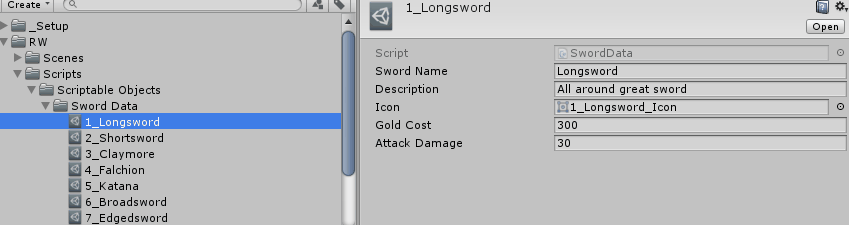
Click on the first Sword Data asset in the Sword Data folder and look at the Inspector window :

Here we see an asset that stores information about a particular sword. Fill out the information for each sword. Try to give them a unique description, value in gold and damage when attacking. In the Icon Sprite field, use the appropriate sprites located in the Sword Icons folder :
Congratulations! You created a Scriptable Object and set up several assets with this Scriptable Object.
Using Scriptable Object
We will now begin to retrieve data from these Scriptable Objects.
First, we need to add some public recipient methods (getter methods) so that other scripts can access private fields within the Scriptable Object. Open SwordData.cs and add the following under the fields added earlier:
publicstring SwordName
    {
        get
        {
            return swordName;
        }
    }
    publicstring Description
    {
        get
        {
            return description;
        }
    }
    public Sprite Icon
    {
        get
        {
            return icon;
        }
    }
    publicint GoldCost
    {
        get
        {
            return goldCost;
        }
    }
    publicint AttackDamage
    {
        get
        {
            return attackDamage;
        }
    }
Open Sword.cs and add the following code:
    [SerializeField]
    private SwordData swordData; // 1privatevoidOnMouseDown() // 2
    {
        Debug.Log(swordData.name); // 3
        Debug.Log(swordData.Description); // 3
        Debug.Log(swordData.Icon.name); // 3
        Debug.Log(swordData.GoldCost); // 3
        Debug.Log(swordData.AttackDamage); // 3
    }
Here is what we added with this code:
- The data container for this sword's data.
- OnMouseDown is a built-in MonoBehaviour function that is called when the user presses the left mouse button.
- Examples of how to get data from our Scriptable Object asset
Let's go back to Unity and go to the Hierarchy window . Select the game object 1_Longsword in the prefab of the sword. Add the corresponding 1_Longsword Data asset to the Sword Data variable in the Sword.cs script in the Inspector window:

Click on Play ( Ctrl / Cmd + P ) in the Unity editor, and then click the leftmost sword:
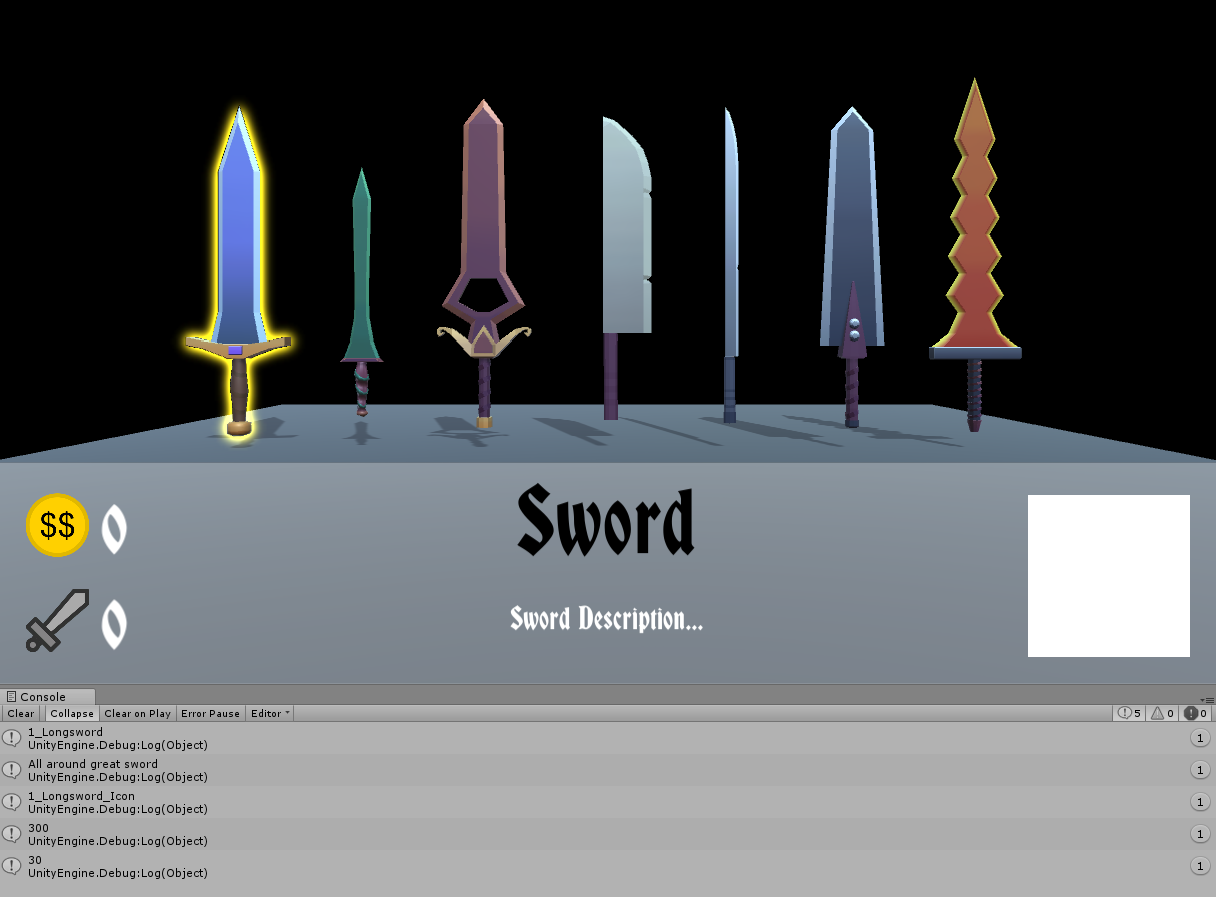
Information similar to the data transferred from the Sword Data asset should be displayed in the console.
Scriptable Objects make it easy to replace this data. Try inserting different Sword Data Scriptable Object into the Sword Data field of the sword.
Event-Based Scriptable Objects
So, we created a Scriptable Object, and you saw how you can access its data within the game. But we still need to integrate Sword Data with the UI!
To do this, you can use the quick and dirty pattern Singleton . However, we now have other capabilities ...
... namely Scriptable Objects! Use them to create clean and neatly divided code.
In this section, you will learn how to create Game Events using the UnityEvent class .
Game Events and Listeners
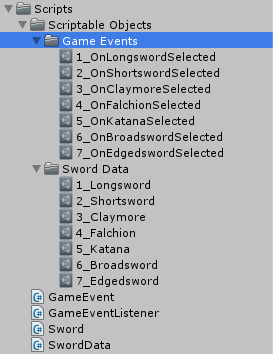
In the Scripts folder create two scripts: GameEvent.cs and GameEventListener.cs . They depend on each other, so to get rid of the errors, you need to create both.
using System.Collections.Generic;
using UnityEngine;
[CreateAssetMenu(fileName = "New Game Event", menuName = "Game Event", order = 52)] // 1publicclassGameEvent : ScriptableObject// 2
{
    private List<GameEventListener> listeners = new List<GameEventListener>(); // 3publicvoidRaise() // 4
    {
        for (int i = listeners.Count - 1; i >= 0; i--) // 5
        {
            listeners[i].OnEventRaised(); // 6
        }
    }
    publicvoidRegisterListener(GameEventListener listener) // 7
    {
        listeners.Add(listener);
    }
    publicvoidUnregisterListener(GameEventListener listener) // 8
    {
        listeners.Remove(listener);
    }
}
Here is what the above code does:
- Adds a GameEvent as an asset to the Asset Menu.
- GameEvent is a Scriptable Object, so it must inherit from ScriptableObject.
- A list of GameEventListeners that will be subscribed to GameEvent.
- Method to call all GameEvent subscribers.
- The last signed GameEventListener will be the first to be called (the last to come, the first to go out).
- Call each UnityEvent GameEventListeners.
- A method that allows GameEventListeners to subscribe to this GameEvent.
- A method that allows GameEventListeners to unsubscribe from this GameEvent.
using UnityEngine;
using UnityEngine.Events; // 1publicclassGameEventListener : MonoBehaviour
{
    [SerializeField]
    private GameEvent gameEvent; // 2
    [SerializeField]
    private UnityEvent response; // 3privatevoidOnEnable() // 4
    {
        gameEvent.RegisterListener(this);
    }
    privatevoidOnDisable() // 5
    {
        gameEvent.UnregisterListener(this);
    }
    publicvoidOnEventRaised() // 6
    {
        response.Invoke();
    }
}
In the code shown above, further development of the project takes place:
- Requirement to use the UnityEvent class.
- GameEvent to which this GameEventListener will be subscribed.
- The response of the UnityEvent that will be called when the GameEvent event is generated by this GameEventListener.
- Binding a GameEvent to a GameEventListener when this GameObject is enabled.
- Untie GameEvent from GameEventListener when this GameObject is disabled.
- Called when a GameEvent is generated, which causes the listener to call GameEventListener on an UnityEvent event.
Complicated? Nothing will figure it out in time!
Editor preparation
Return to the Unity editor and create a new Game Events folder in Scripts >> ScriptableObjects. Then create seven Game Events from the Asset Menu, as we did for each Sword Data asset. Place them in the new Game Events folder.
Replace the code inside the Sword.cs script with the following lines:
    [SerializeField]
    private GameEvent OnSwordSelected; // 1privatevoidOnMouseDown()
    {
        OnSwordSelected.Raise(); // 2
    }
This code adds two possibilities to the sword merchant's shop:
- Generate a Game Event when choosing a sword.
- Generate events when you click on the sword.
Save the script. Now in each GameObject of the sword in the Hierarchy connect the corresponding OnSwordSelected event.

Now each sword has a link to the event that is triggered when clicking on the sword.
Integration with UI
Now you need to make the UI work. Our goal is to display the relevant Sword Data data when you click on each sword.
UI links
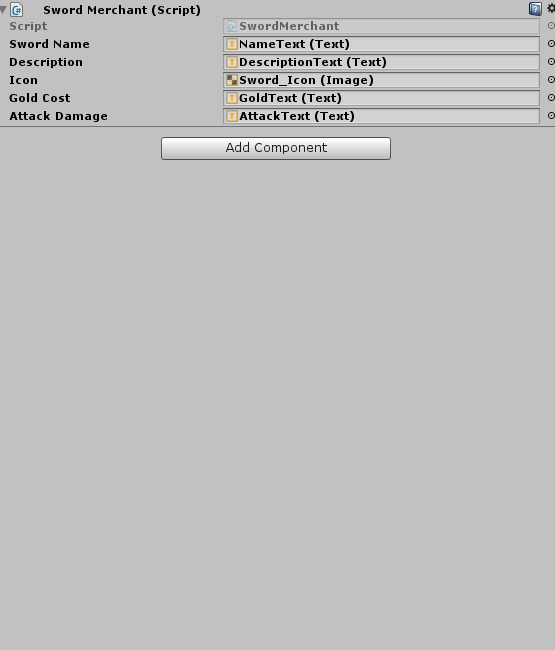
Before updating the UI, you need to get a link to each UI element. Let's start by creating a new script called SwordMerchant.cs and adding the following code to this new script:
using UnityEngine;
using UnityEngine.UI;
publicclassSwordMerchant : MonoBehaviour
{
    [SerializeField]
    private Text swordName; // 1
    [SerializeField]
    private Text description; // 2
    [SerializeField]
    private Image icon; // 3
    [SerializeField]
    private Text goldCost; // 4
    [SerializeField]
    private Text attackDamage; // 5
}
With this code, we added the following:
- A link to the Text component of the NameText game object .
- A link to the Text component of the DescriptionText game object .
- A link to the Image component of the game object Sword_Icon .
- A link to the Text component of a GoldText game object .
- A link to the Text component of the AttackText game object .
The above game objects are located in the SwordMerchantCanvas >> SwordMerchantPanel Hierarchy window. Add the script to GameObject SwordMerchantCanvas , and then configure all links:

Listeners and UI Responses
All swords have an event that the UI can subscribe to using the GameEventListener script . Add a GameEventListener for each OnSwordSelected event to the GameObject SwordMerchantCanvas event :
As you can see, our Game Event Listener has two fields: the Game Event event that it listens to and the response that is triggered when the Game Event is generated.
In our case, the response will update the UI. Add the following method to the SwordMerchant.cs script :
publicvoidUpdateDisplayUI(SwordData swordData)
    {
        swordName.text = swordData.SwordName;
        description.text = swordData.Description;
        icon.sprite = swordData.Icon;
        goldCost.text = swordData.GoldCost.ToString();
        attackDamage.text = swordData.AttackDamage.ToString();
    }
This method gets the Sword Data asset, and then updates each UI field with the value of the corresponding Sword Data field. Note that GoldCost and AttackDamage return
int, so for text you need to convert it to string. Using our new method, we can add a response to each GameEventListener .
For each added response, you need as a value of the None (Object) field a link to our game object SwordMerchantCanvas . After that, choose SwordMerchant.UpdateDisplayUI from the drop-down menu to the right of the Runtime Only drop-down list .
Be careful and use the correct Sword Data asset for each OnSwordSelected event .

Now we can start the game, click on the sword and see that the UI has been updated accordingly!
Since we are using Game Events, you can just SwordMerchantCanvas , and everything will still work, but without the UI. This means that the prefabs of the swords are separated from SwordMerchantCanvas .
Where to go next?
If you have missed something in the process of the story, you can download the finished project , which is in the tutorial materials.
If you want to move on, try to make each sword reproduce its own sound. Try extending Scriptable Object Sword Data and listening to events
OnSwordSelected. Want to know more about Unity? Watch our Unity video series or read the Unity tutorials .