Compaq LTE Lite
For a long time, myhands were scratching,I wanted to write about a machine that introduced me to the PC world, but myhandsdidn’t get enough time, especially since the computer had been lying in my parents' garage for more than a year, and driving to them was not so close. But a number of articles recently on Habré about old iron did provoke me to remove the computer from the garage and try to start it.
Yes, since this is not only old hardware, but also a laptop, and in addition to the docking station, it is also a desktop computer, I placed the article in these hubs as well. Correct if not right.
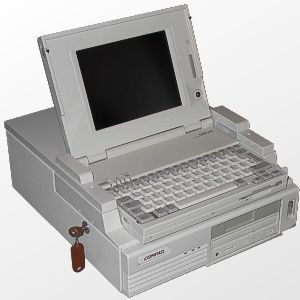
So, we will talk about Compaq LTE Lite 4/25 C. It should have looked like the one shown in the picture on the left. In this case, the laptop is inserted into the docking station, but the external monitor, keyboard and mouse are not used.
Background.
Once in the distant 1996, a handsome man (see photo above) came to our family thanks to a wonderful combination of circumstances, fully equipped, though without an external monitor. Was made in 1993. Assembly, judging by the stickers, Canadian. Those who were interested in computers in the 90s will understand my pride in this device after I voiced the characteristics. In addition to the laptop itself, there is a docking station that turned a compact laptop into a full-fledged workstation.
So:
* Notebook:
- Intel 486DX processor 25 MHz;
- LCD screen 8 '', VGA 640x480 256 colors;
- 12 MB of RAM (4 on the motherboard and 8 on a plank the size of a plastic credit card);
- NMH battery with a capacity of 2.2Ah;
- 200 MB HDD;
- floppy 1.44 MB;
- expansion slot;
* Docking station:
- two 16-bit expansion slots of the ISA standard;
- two compartments for floppy or HDD;
- the ability to connect an external monitor, keyboard, mouse, printer;
- the design allowed to install an external monitor on top of the docking station;
- theoretically it was possible to connect two HDDs and one floppy, on this instance one external HDD with a capacity of 200 MB was installed, there was no external drive.
In addition, our Compaq (docking station) was equipped with an expansion card for a handheld scanner, and the Logitech scanner itself was present. Although it was difficult to get a normal scan from him without dexterity, but in the 96th, and even in the village, such equipment was incredibly cool. I immediately abandoned my Spectrum and began to study new hardware and software.
System software consisted of MS DOS 5.0, revised by Compaq. Also present was Windows 3.1. All this was in German. Looking ahead, I’ll say that in the future it was possible to successfully install PC DOS 7.0 and Windows 95. Also later, an external single-speed CD-ROM drive appeared working via the LPT port, but I hope I will tell about it in the next part. And if there is a scanner, then about the scanner.
Years passed, the equipment worked properly. But at one point, the cable connecting the screen and the motherboard exploded at the bend. I decided to reconnect using wiring in enamel insulation. And at first everything worked, but then one careless movement, a circuit, and the screen stopped showing signs of life. I had to buy an external monitor. I disconnected the display for repair, and then it got lost somewhere. Over time, the internal hard drive began to fail, then the floppy failed. Glands carried to the garage.
That was the backstory.
Actually, the story began last weekend when I came to my parents and first of all asked my brother to help me find iron.
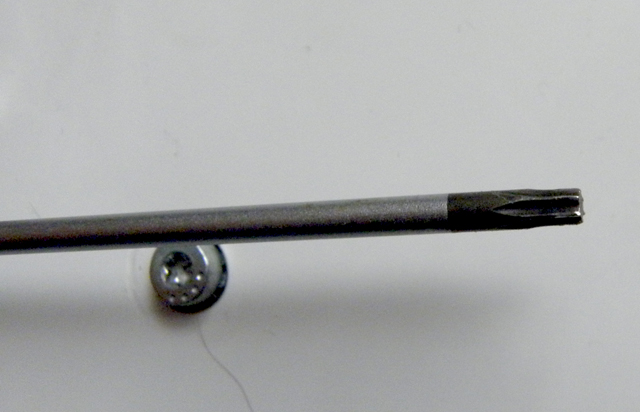
Almost all Lte Lite bolts have a special star-shaped screwdriver, with two calibers. Fortunately, we have two branded screwdrivers specifically for these bolts.
We begin to disassemble.
I apologize for the quality of the photos right away, maybe there were ways to get better results.
Photo of what we discovered
Docking station with the cover removed

The case itself is made of at least 2 mm metal sheet. A plastic monitor stand cover with numerous stiffeners. It is understandable: it is necessary to support the weight of a heavy CRT monitor.
In the upper left, under the plastic, there is a board on which the ports are soldered and, as I understand it, the main logic. The ports are as follows: two PS / 2 (mouse, keyboard), COM, LPT, VGA. There are also a power connector and a letter switch external drive. This is necessary so that you can boot from an external drive. At the top right is a power supply with a fan. At the bottom right there are two 5.25 slots for drives or HDDs.
He removed the cover of the PSU. The fan is a little dusty, but manually spins up like new. As if he was not 20 years old and had not had several years of inactivity in an unheated garage.
Left view.

Under the board with external ports there is a board with expansion slots. At the top in the center is a connector for connecting a laptop. Under it and to the right below are the contacts for supplying power to the HDD, a loop to the floppy. Next to the top ISA connector is a DIP switch for configuring external drives.
The case itself is made of at least 2 mm metal sheet. A plastic monitor stand cover with numerous stiffeners. It is understandable: it is necessary to support the weight of a heavy CRT monitor.
In the upper left, under the plastic, there is a board on which the ports are soldered and, as I understand it, the main logic. The ports are as follows: two PS / 2 (mouse, keyboard), COM, LPT, VGA. There are also a power connector and a letter switch external drive. This is necessary so that you can boot from an external drive. At the top right is a power supply with a fan. At the bottom right there are two 5.25 slots for drives or HDDs.
He removed the cover of the PSU. The fan is a little dusty, but manually spins up like new. As if he was not 20 years old and had not had several years of inactivity in an unheated garage.
Left view.
Under the board with external ports there is a board with expansion slots. At the top in the center is a connector for connecting a laptop. Under it and to the right below are the contacts for supplying power to the HDD, a loop to the floppy. Next to the top ISA connector is a DIP switch for configuring external drives.
Nothing is already installed in the dock itself. We look at the smallest HDD we have. We find on 20 GB. A lot, but nothing remains. Install.
Then came the turn of the laptop itself. Now it looks like this:

Left battery. Now she performs the role of an exclusively aesthetic. Although in the mid-90s I kept, if I am not mistaken, more than an hour in the mode of working with text. Keyboard with a German layout. The glued Cyrillic letters are clearly visible. The display lid, as I mentioned, is missing.
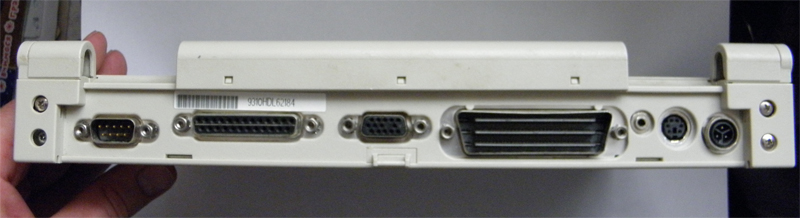
Visas from behind. The abundance of interfaces. It is a pity the current laptops are deprived of such luxury. From left to right: COM, LPT, VGA, docking station connection, PS / 2, power.
We disassemble the laptop. A photo.
The cover, which is around the keyboard, on the latches, for their snap-off, a special tool is provided that must be inserted between the cover and the body, pressing in places of the latches.
Even with such a tool, removing the cover is not so simple. But the cover is removed.
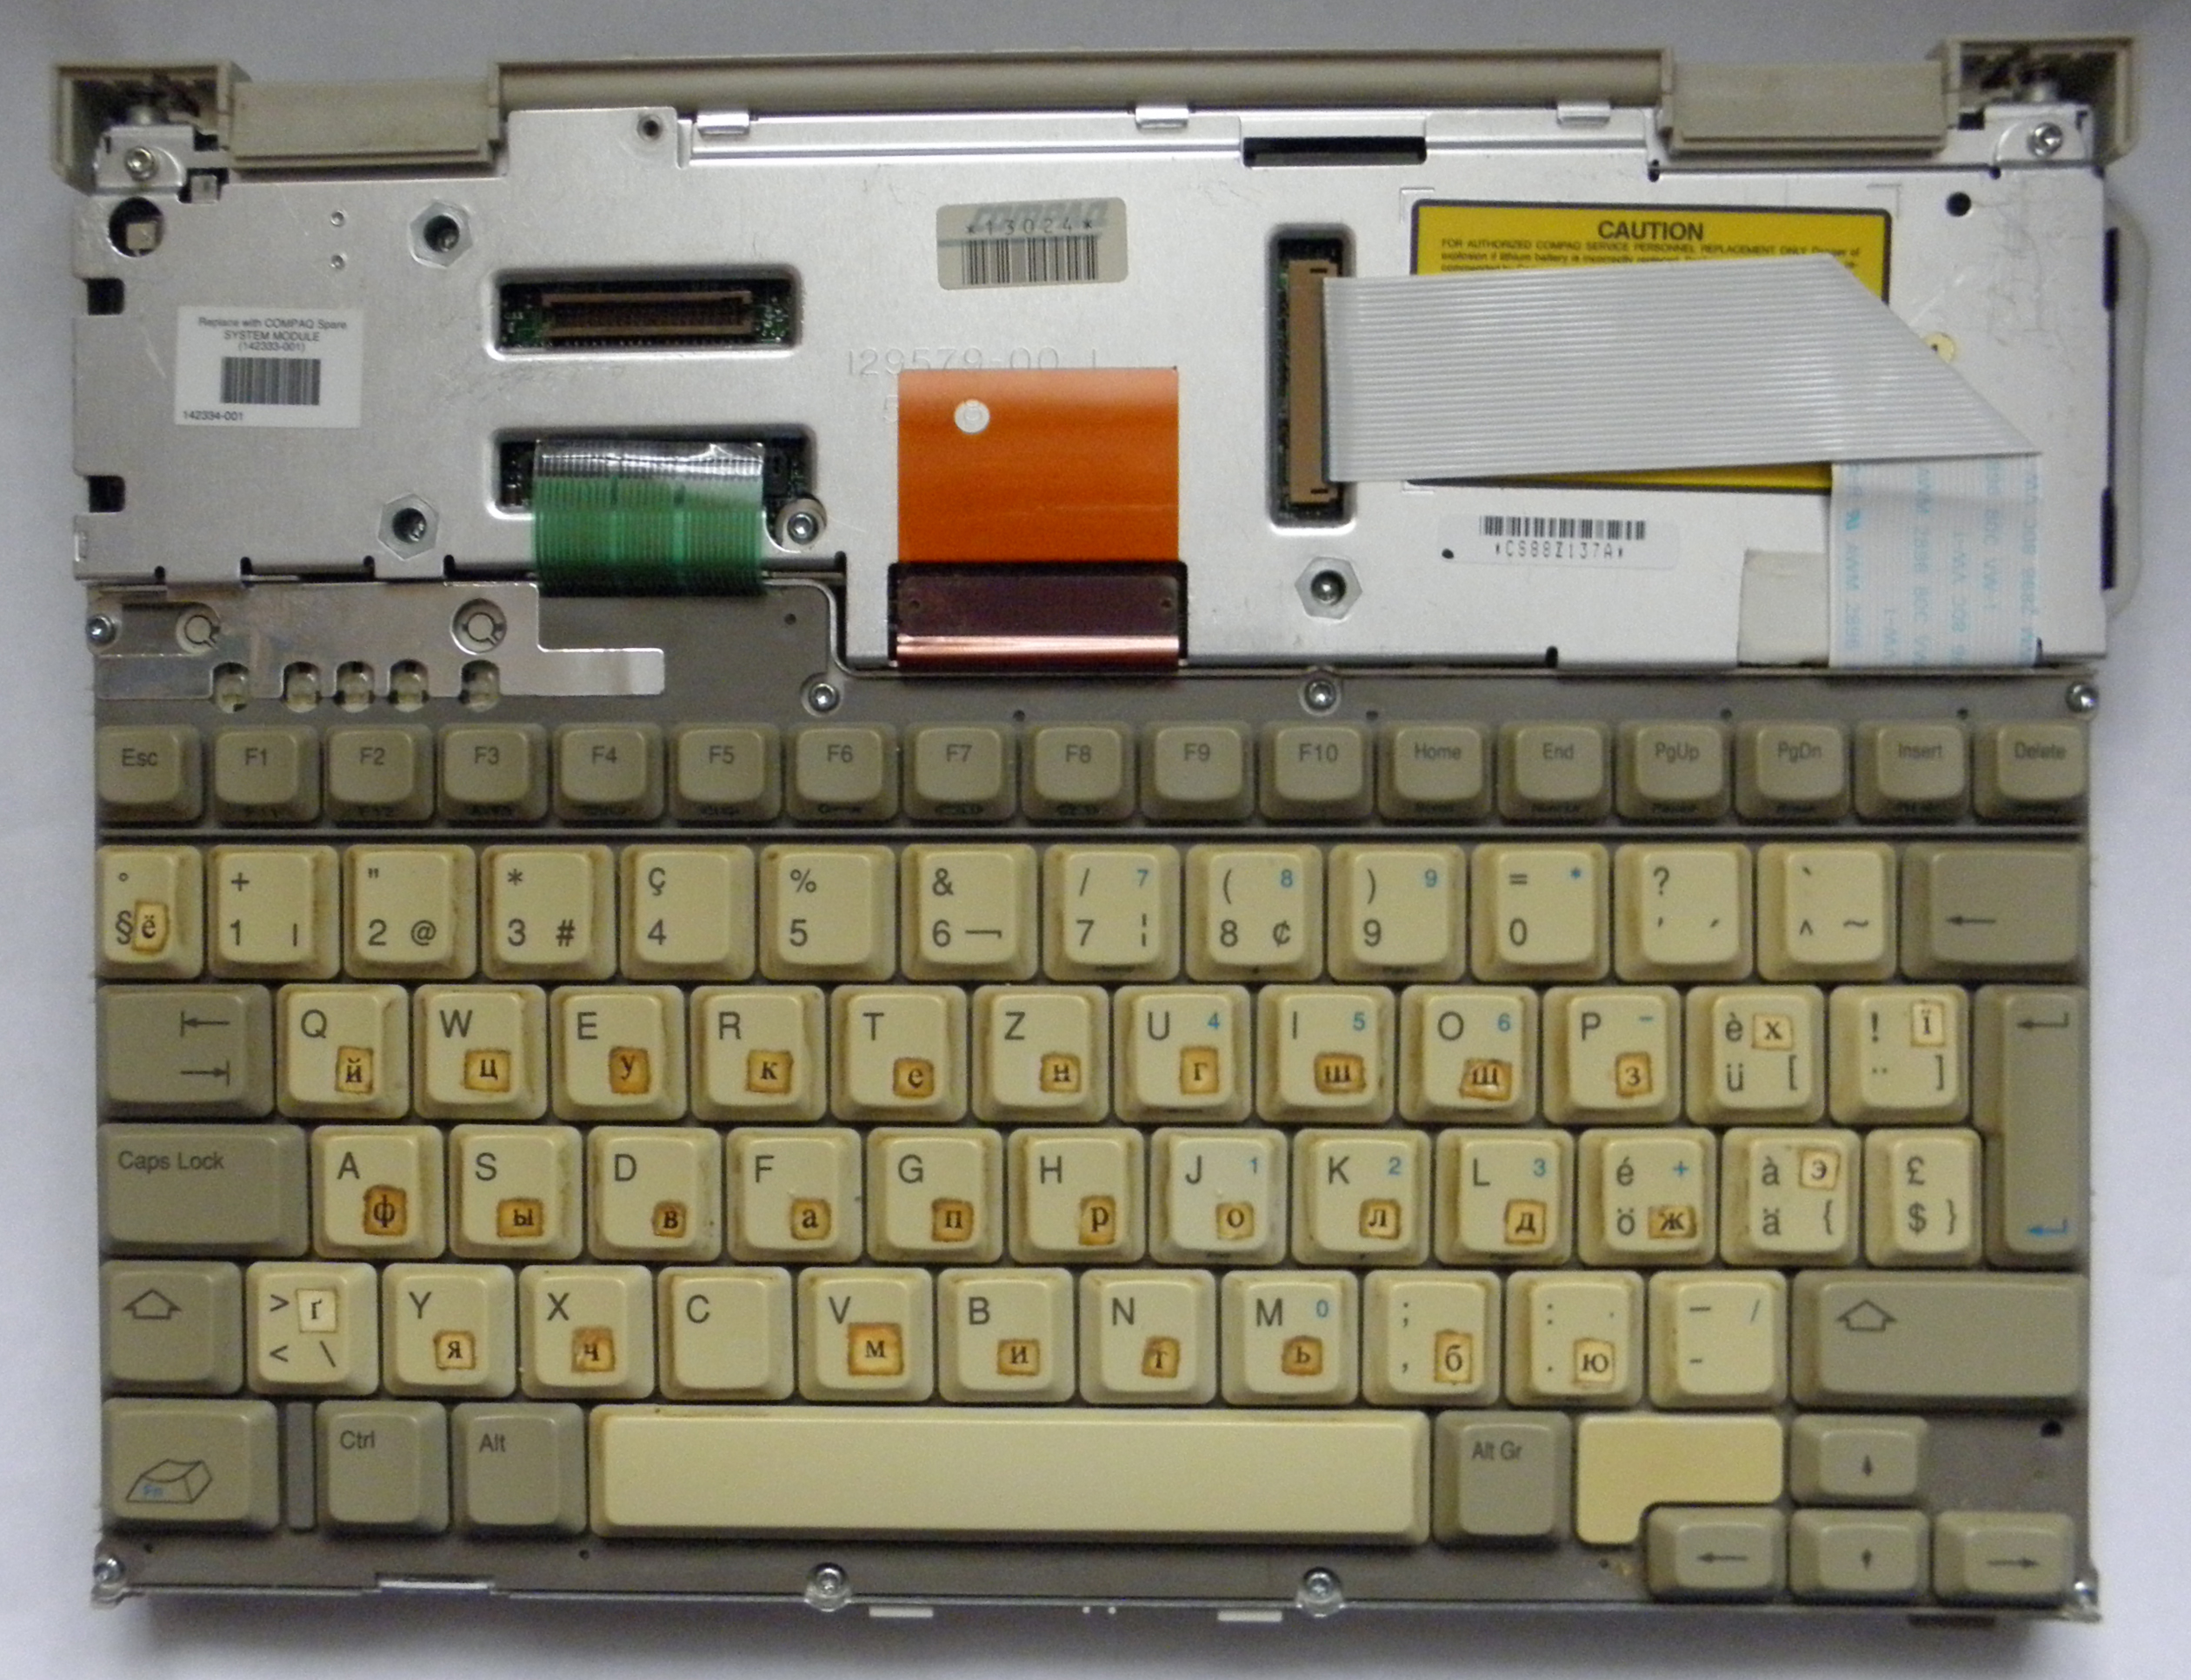
At the top left is the brown connector for the display loop. Nothing interesting so far.
We disassemble further

Already more interesting. Left empty space - battery compartment. In the middle of the hard drive. On the right is a floppy.
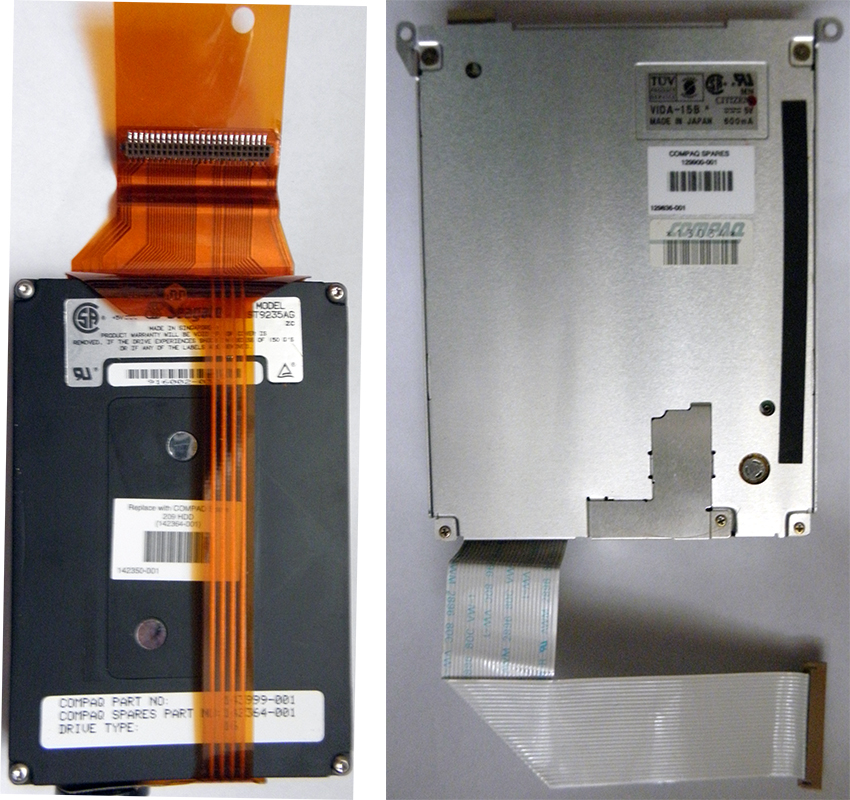
HDD & FDD. The first maid in Singapore, the second in Japan. And the first and second ordered to live long. But hard is not defined at all, and the floppy tries to read, but to no avail. By the way, the LED on this reader and writer on magnetic floppy disks lights up red when reading double-density disks (720 Kb, who doesn’t know HD) and green when 2HD (i.e. twice double density, 1.44 MB). And the usual density is 360 KB.
Remove the cover over the motherboard.
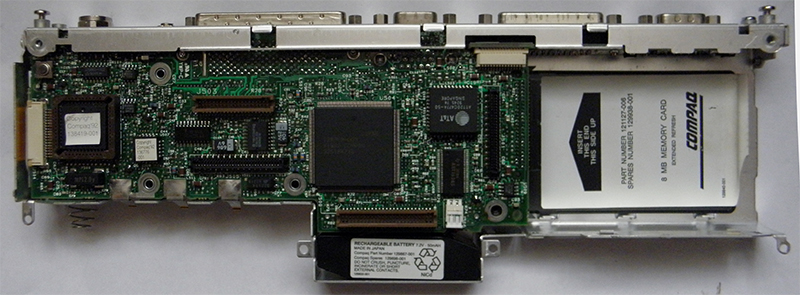
On the left, as I understand it, the BIOS. The purpose of the other chips is unknown to me. Below is a rechargeable battery with a voltage of 7.5 (it is also unclear why). On the right is an 8 MB memory card. Maximum could put a card at 32 MB. The motherboard is two-story. Then I did not disassemble. But judging by how the metal cover is heated, the processor is on the left on the bottom board. No fans! Only hardcore, only natural convection.
There is free space above the memory card in height. According to rumors, a 14.4 Kbps modem could be connected there. Which connector? I do not know. Maybe branded Compaq.
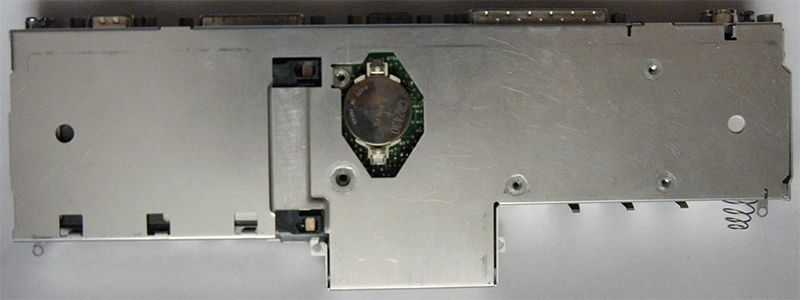
Below is a regular CMOS battery. Naturally long sat down.
Putting it all back.
Even with such a tool, removing the cover is not so simple. But the cover is removed.
At the top left is the brown connector for the display loop. Nothing interesting so far.
We disassemble further
Already more interesting. Left empty space - battery compartment. In the middle of the hard drive. On the right is a floppy.
HDD & FDD. The first maid in Singapore, the second in Japan. And the first and second ordered to live long. But hard is not defined at all, and the floppy tries to read, but to no avail. By the way, the LED on this reader and writer on magnetic floppy disks lights up red when reading double-density disks (720 Kb, who doesn’t know HD) and green when 2HD (i.e. twice double density, 1.44 MB). And the usual density is 360 KB.
Remove the cover over the motherboard.
On the left, as I understand it, the BIOS. The purpose of the other chips is unknown to me. Below is a rechargeable battery with a voltage of 7.5 (it is also unclear why). On the right is an 8 MB memory card. Maximum could put a card at 32 MB. The motherboard is two-story. Then I did not disassemble. But judging by how the metal cover is heated, the processor is on the left on the bottom board. No fans! Only hardcore, only natural convection.
There is free space above the memory card in height. According to rumors, a 14.4 Kbps modem could be connected there. Which connector? I do not know. Maybe branded Compaq.
Below is a regular CMOS battery. Naturally long sat down.
Putting it all back.
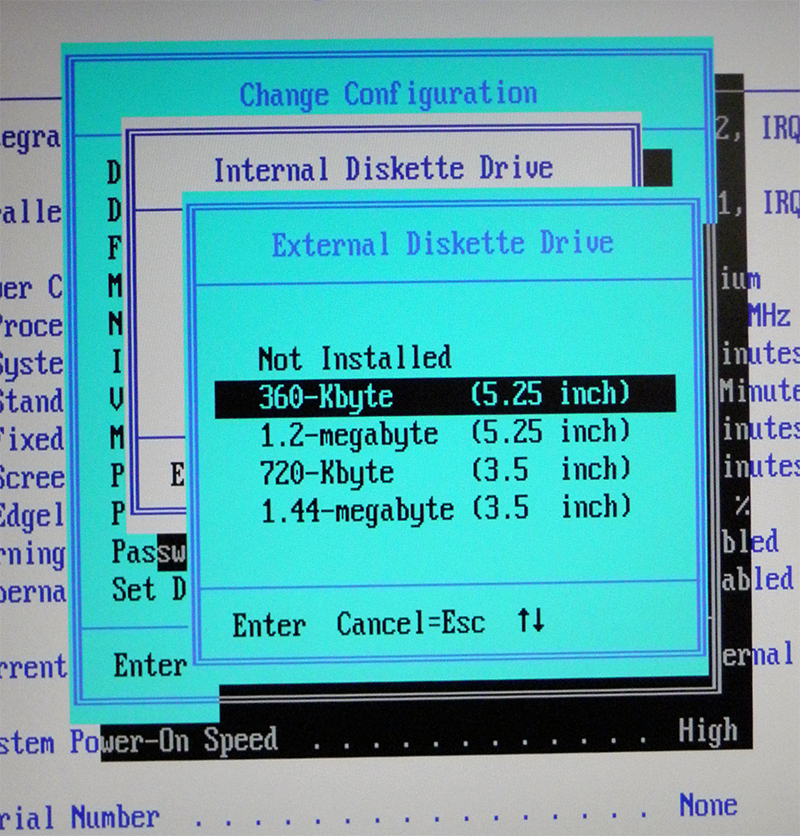
Now comes the fun part. I insert the laptop into the dock. We connect a 19 '' monitor-TV to the VGA connector. Not connected - there is no one of the holes in the connector on the docking station. On the cable all the legs. We break out. We connect. And oh, a miracle! The screen came to life. F10 - in the BIOS. Set the date and time and go to the settings. BIOS translated into English, German, French and Spanish.
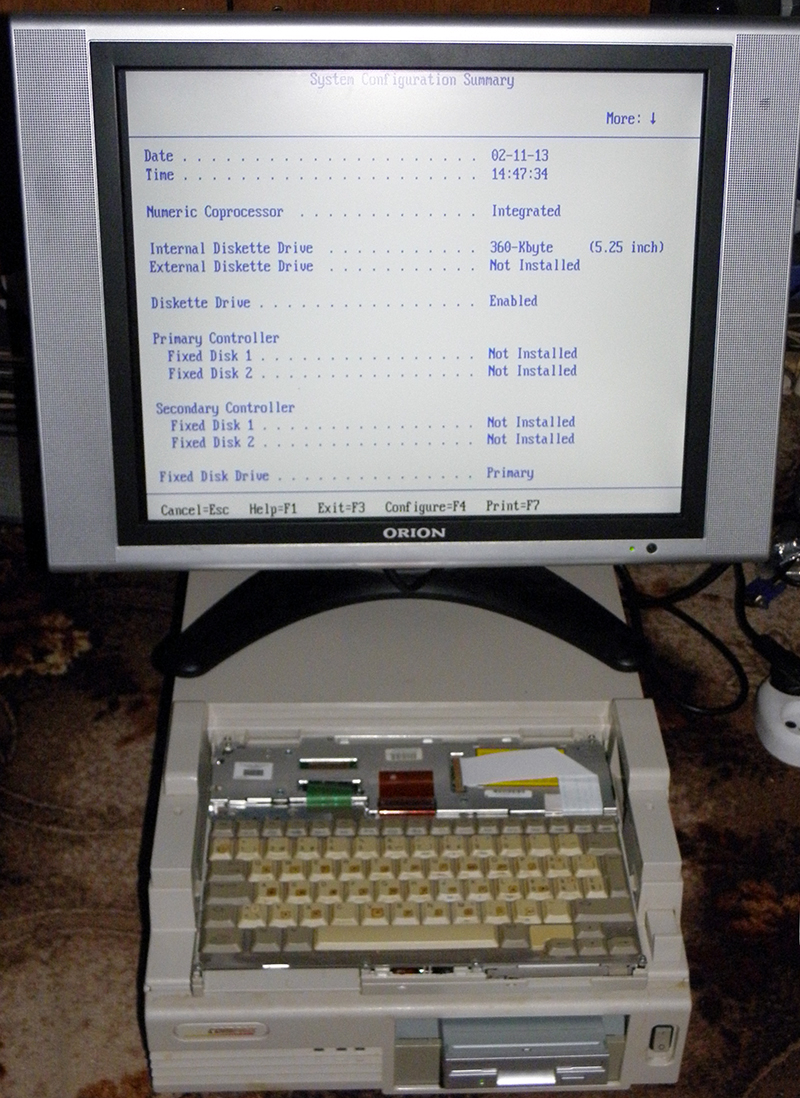
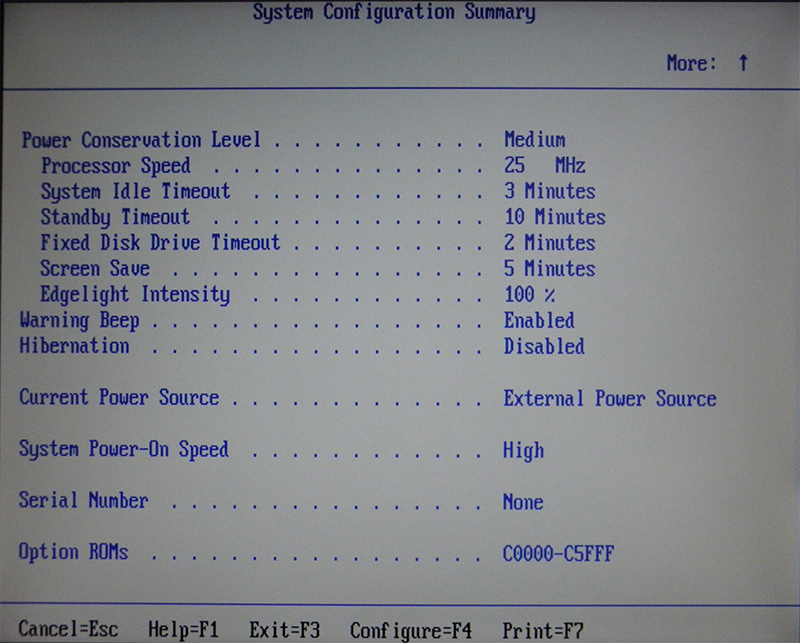
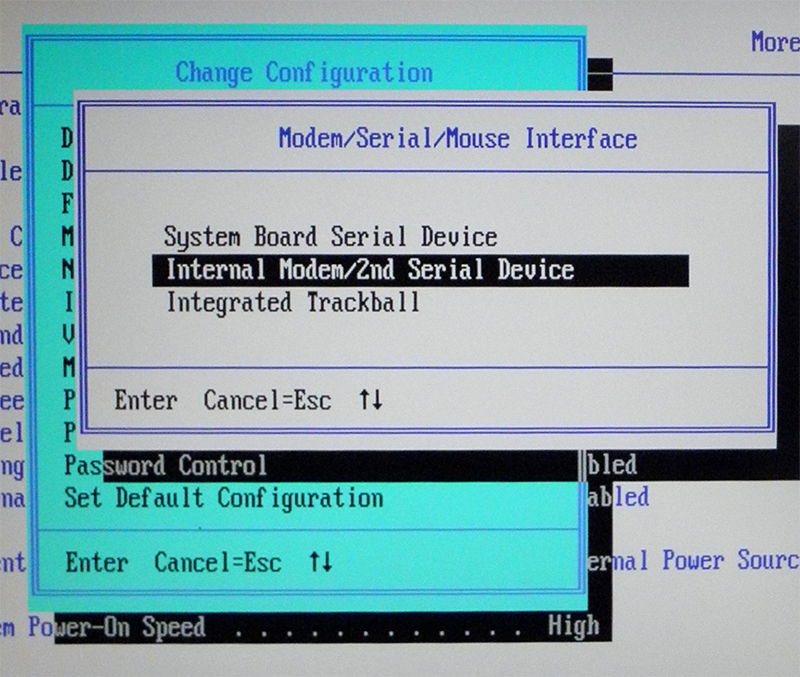
There are fewer variable parameters than in the modern BIOS. You can change the processor frequency (from low to hight four gradations, the maximum is 25 MHz, the minimum, if I'm not mistaken, is 12 (or 8?)); set the time to go to sleep, turn off the drive, screen; screen brightness configure ports by assigning them interrupts; indicate which HDD and FDD are installed, etc ...
More BIOS

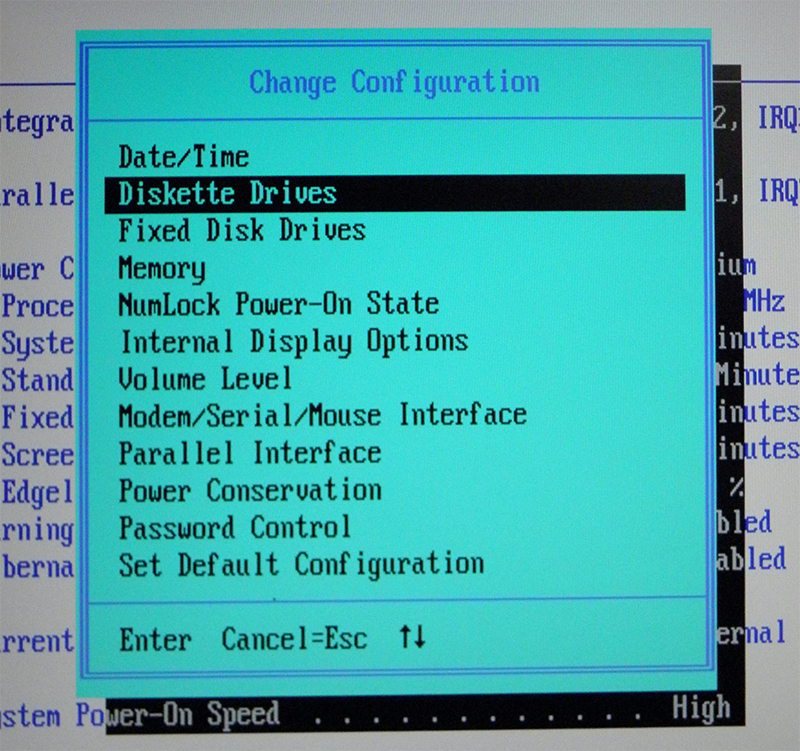
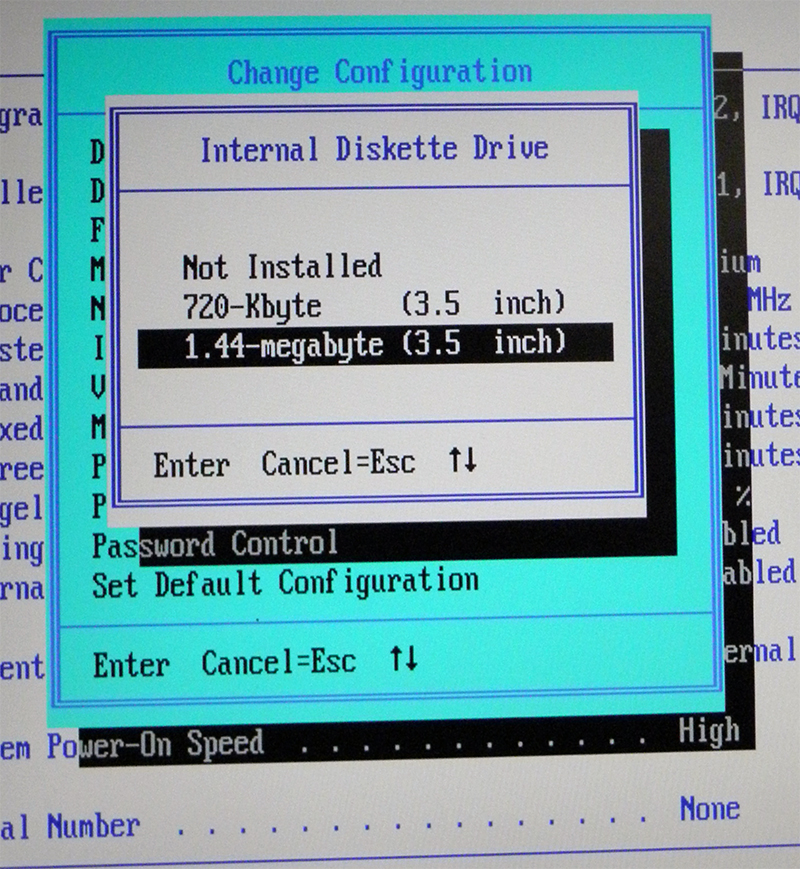


But you need at least a drive to boot. We try from the inside - puffs, puffs, tries to read floppy disks in different modes - the LED is either green or red - but there are no results. We disassemble. We connect an external FDD to the docking station, since there is a corresponding loop. We connect - the indicator on the floppik lights up constantly. The train is on the wrong side? I turn it over. Off, but also does not read a floppy disk. We played, played (by DIP on the docking station, setting the type of drive in the BIOS), until my brother noticed that the cable on one side has twisted wires. We connect the flop no longer to the last connector, but in the middle.

At the dock, put the disk "A", and, Oh! Miracle! the drive comes to life when it is turned on.
But you need a bootable diskette. I ask my brother to find DOS, remembering in parallel that his brother once started writing his OS, but quit. However, the bootloader and command line work. Insert, load
and, here it is: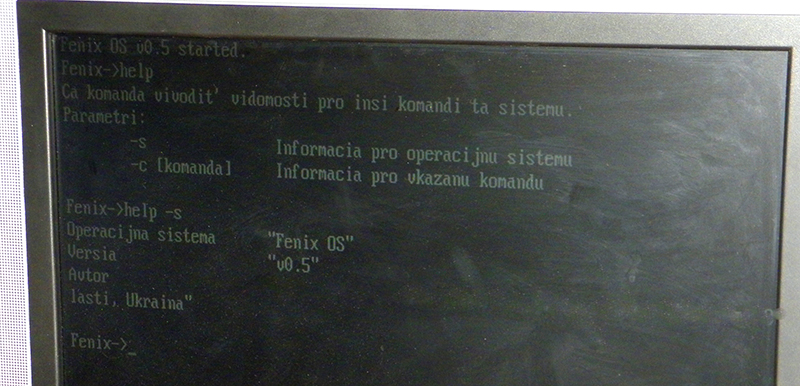
We write the DOS boot.
DOS, everything came out under DOS ...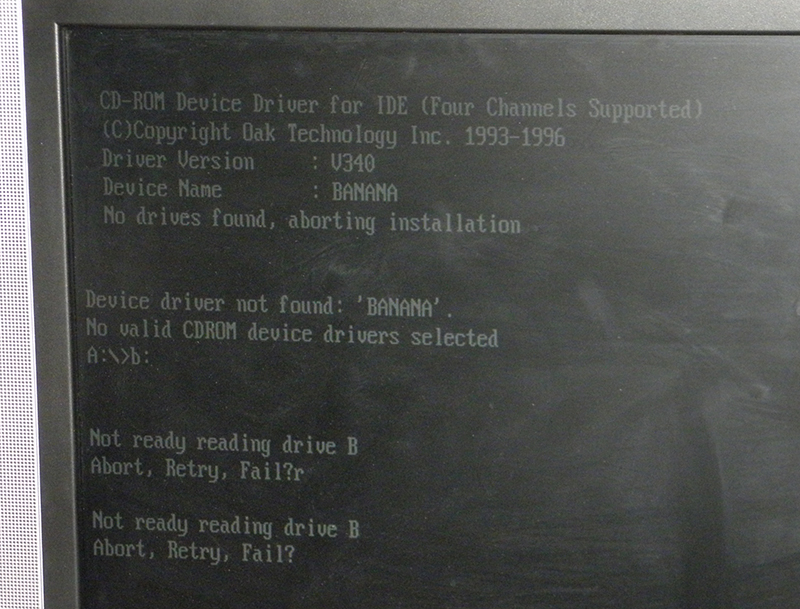
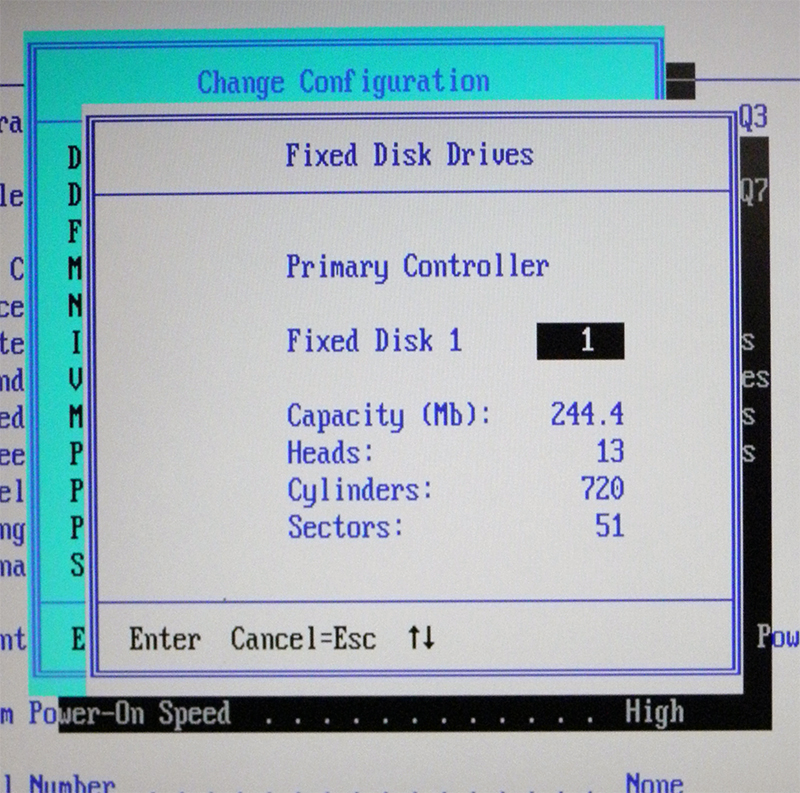
But the BIOS does not see a 20 GB screw installed in the dock. In DIOS, you can choose from only 61 predefined disk types, but you cannot specify your number of sectors, heads and cylinders. Accordingly, it does not see the disk and DOS. Exit? Linux And between DOS and Linux, they tried to run KolibriOS, but even the earliest version caused a 100% reboot of the floppy disk.
I had to download a boot + 5 installation diskette Slackware 8.1. ABOUT! It wasn’t easy ... it’s not easy to find 5 floppy disks without bads. It took more than an hour. But we did it! ;-)
And here is the result: the disk is visible. It has NTFS. I launch fdisk, sleight of hand and no fraud © Then mk2fs and the final picture:

Things didn’t go further due to the fact that a package disk is required for installation. And for this you need to connect an IDE CD-ROM. And for this you need to find him first, but for this you need ... but the weekend has already ended.
If nothing hurts, then next time I’ll talk about installing CD-ROM and Linux. And if you're lucky, then about the external "sidyuk", and about the scanner. This is if the second is found, but for the first a diskette with firewood is preserved.
PS And if I find the appropriate FDD, HDD for the laptop, not to mention the screen, then I will talk about Win 3.1, and about the animation on the screen of changing system settings, and about expansion cards :)