Astrophotography in every home
 I think any person who is interested in space has an idea to buy a telescope in order to personally see everything.
 However, harsh reality always spoils all raspberries: within the city - the whole sky is lit up by street lighting and air turbulence is high. This means that you will either have to confine yourself to the largest and brightest objects (like the Moon and Jupiter), or carry a telescope far beyond the city.
A possible solution to the problem is remote-controlled large-sized telescopes located in the mountains. Of course, this will not replace the opportunity to see everything with your own eyes - but astrophotographs obtained in this way will be difficult to surpass. It is on this method that I want to stop in this article.
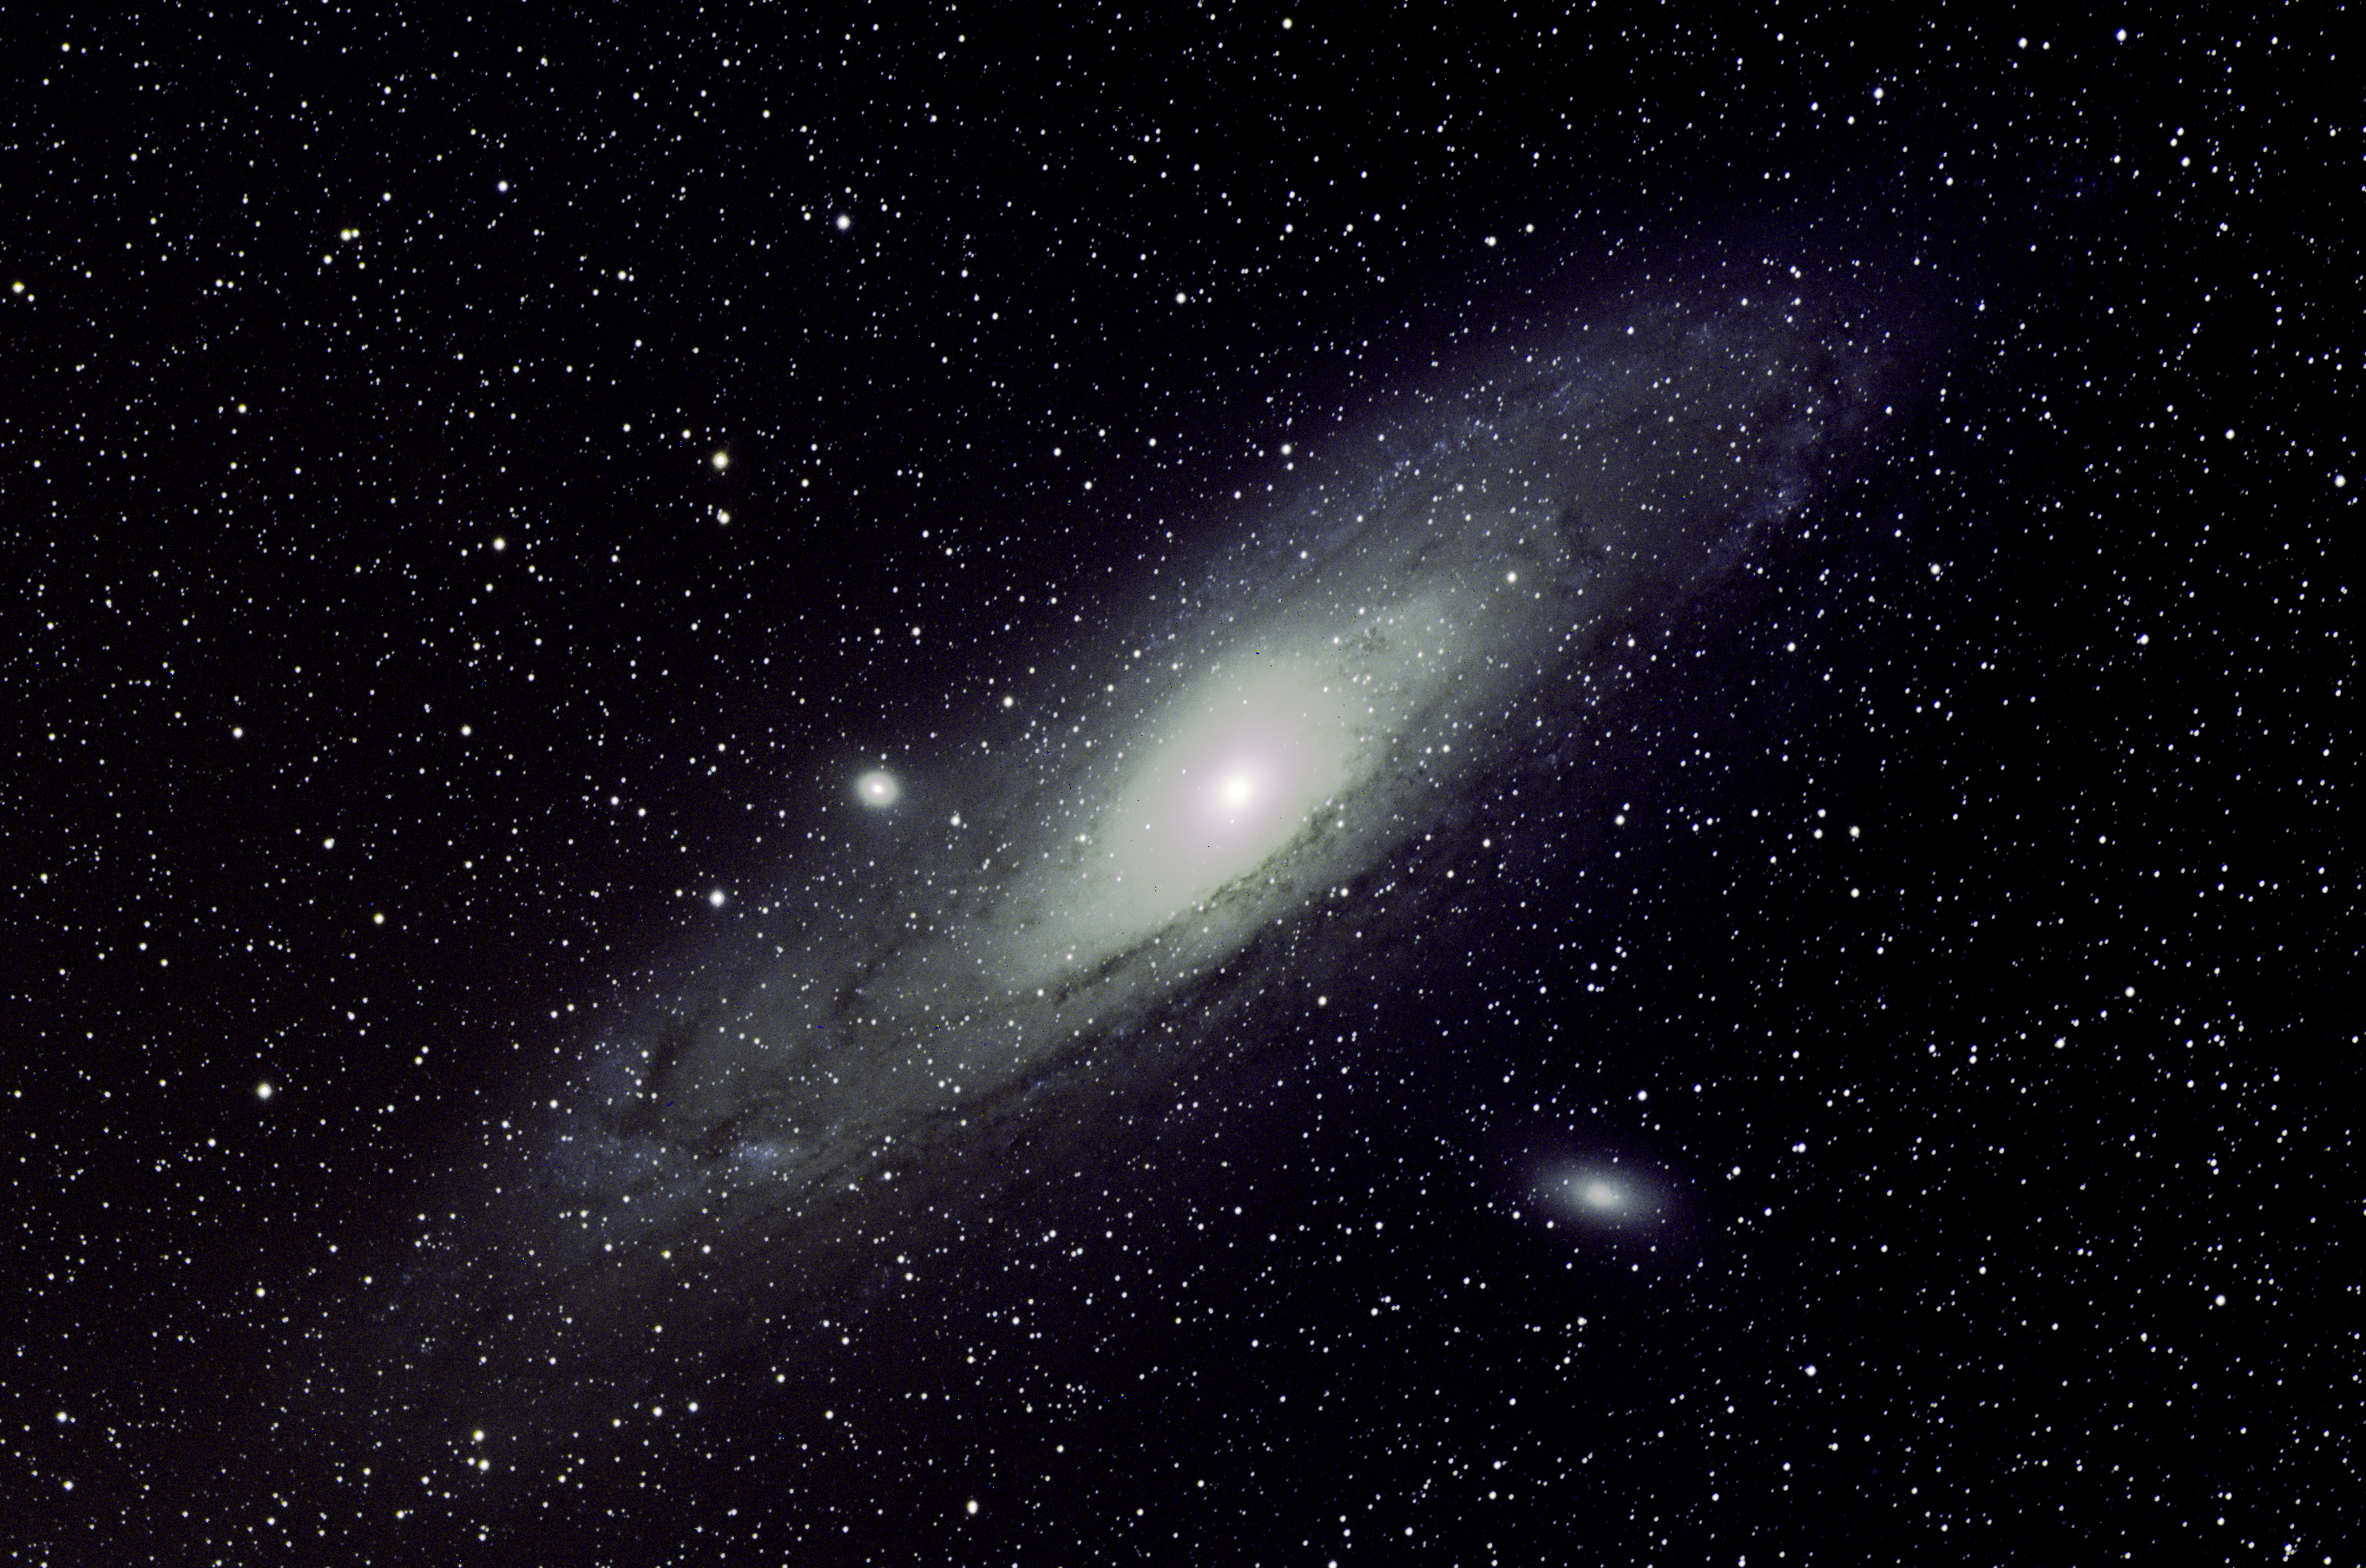
An example of what happened: Andromeda Galaxy, M31 on the T20 telescope
When I had a desire to buy a telescope - I decided to remember the golden rule: before buying an expensive toy - it is always useful to rent it, maybe it will be possible to satisfy the interest at the cost of much less crap and costs. I searched for paid remote access services for telescopes - and found iTelescope.net. There are also free ones - but there are very long lines, but give us everything here and now :–)
iTelescope has 19 remote-access telescopes installed at sites in Australia, Spain and the USA. All of them are located away from cities, in the mountains. The smallest telescope to be allowed at all for free ( T3) - with a diameter of 150mm, taking into account its location already surpasses everything that can be seen in urban conditions. Steeper telescopes - they have a mirror diameter of up to 70 centimeters with huge cooled digital matrices and a bunch of light filters (IR, RGB, narrow-band for research).
The price of the issue - with a free account, we are given 40 “points” and access to the simplest telescope, and for $ 5 (I paid with a mastercard yandex. money) - another +30 points and access to “large” telescopes. Operating time on the largest accessible telescope costs 99 points per hour - only exposure time is considered. Those. if you shoot a galaxy, and take 3 pictures of 10 minutes each (R + G + B), then 50 points will be written off from you. Pictures of planets and other bright objects with a fast shutter speed will cost 1 point on any telescope (less than 1 cannot be spent). Thus, for these $ 5 you can make a couple of good pictures of galaxies / nebulae from deep space and / or a bunch of photos of planets. Buying extra points will cost much more - about $ 1 for 1 point. But the initial 70 may be enough to satisfy the interest.
Features of work with "large" telescopes:
Most telescopes have a huge (in area) cooled black and white matrix, and a wheel with light filters. This allows you to use unusual filters (for example, narrow-band) or to shoot a black and white image to collect more light. Therefore, color photographs have to be done in several exposures. You can make 1 exposure of brightness more (Luminosity), and 3 less for color (RGB / RVB).It is also necessary to pay attention to the type of matrix (indicated in the description of the telescope) - there are ABG (Anti-blooming gate) and NABG (not ABG). On long-exposure NABG matrices, bright stars will increase in area (in vertical lines), but they can be more useful for scientific purposes (because they are more linear). NABG matrices also have a slightly higher sensitivity. In my opinion, if we pursue aesthetic goals and we need maximum picture quality, it is better to use telescopes with an ABG matrix.
Telescopes are very slow - it can take up to 5 minutes to turn and focus on 1 shot, so it can be difficult to remove the ISS :-)
More on how to work with telescopes:
After login on the site you will be taken to the control panel: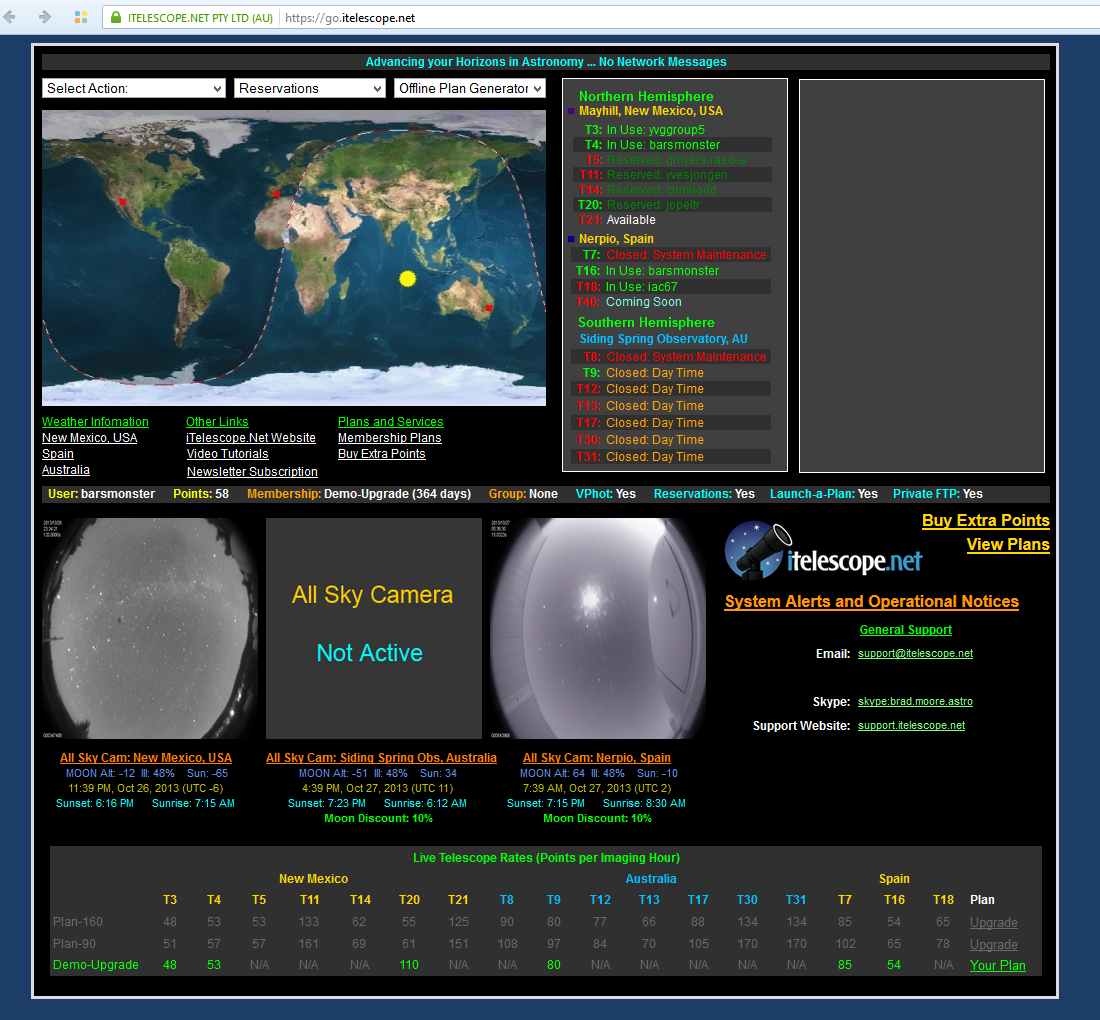
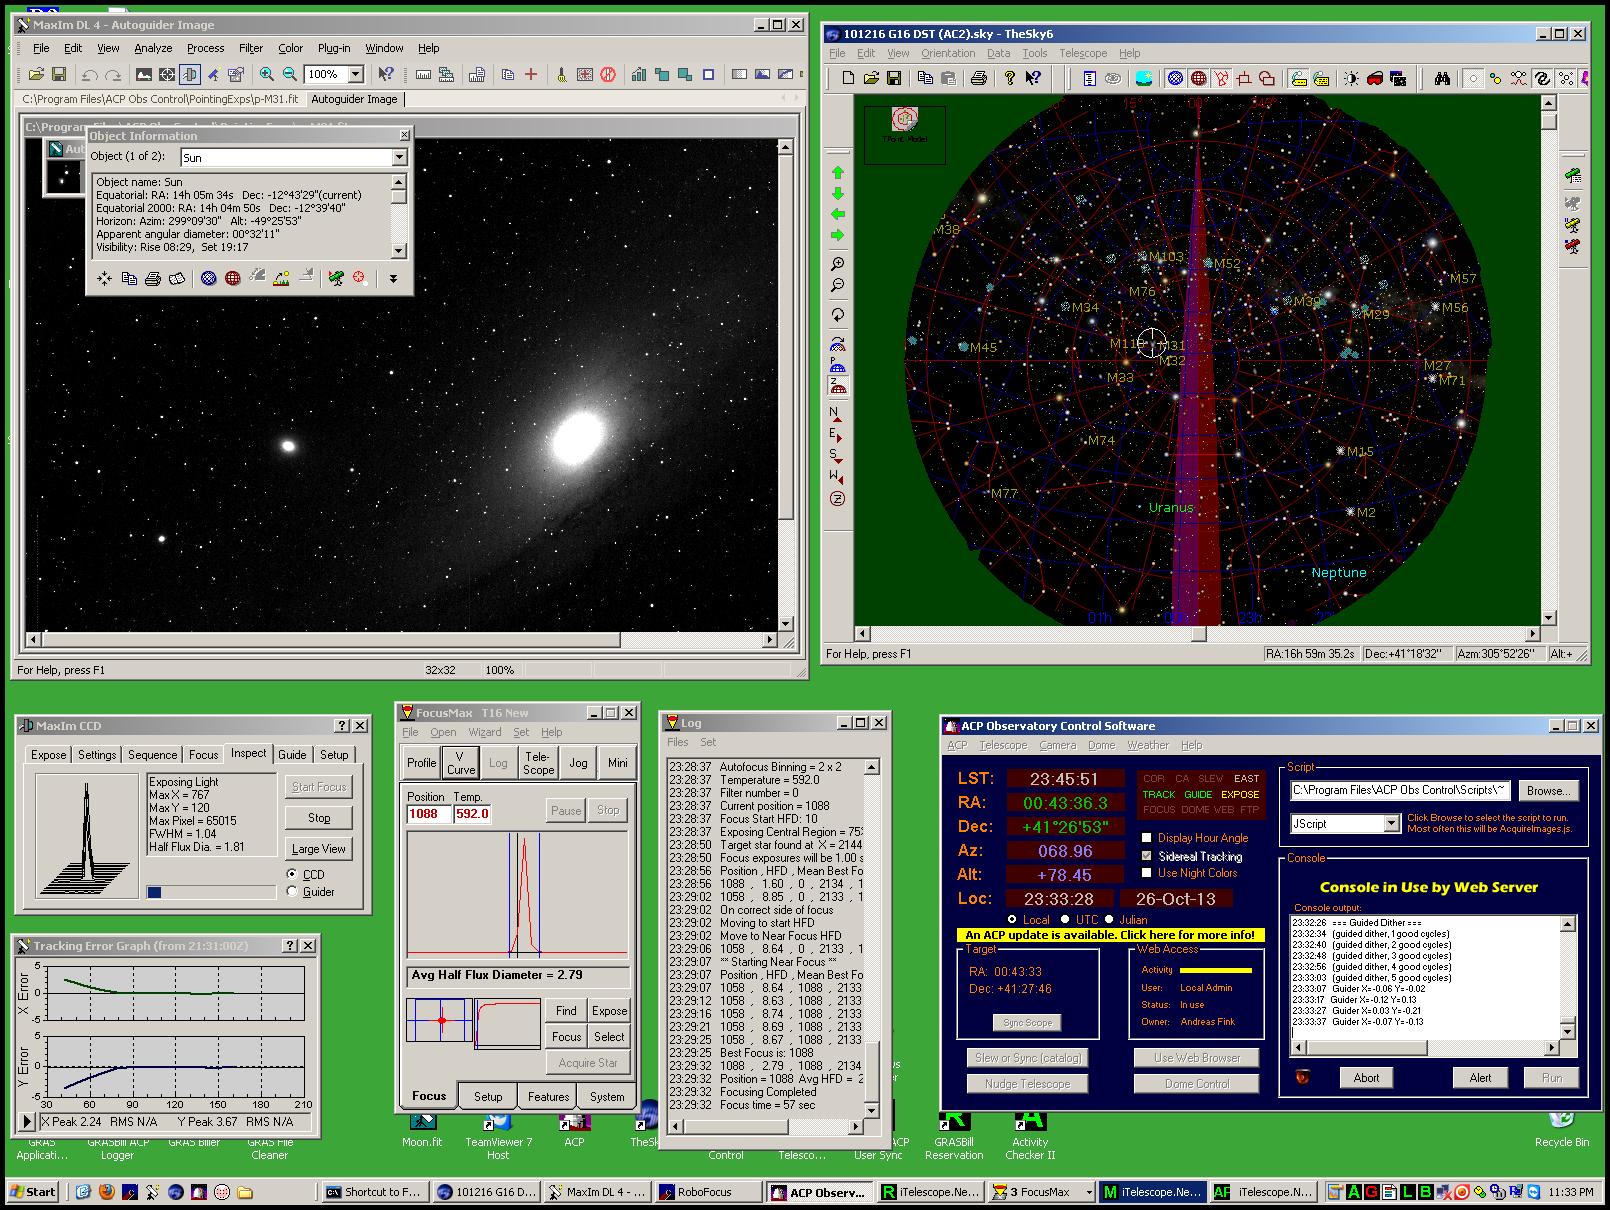
There you can see free and busy telescopes. By clicking on the inscription “available” next to the desired telescope, you can log in to a specific telescope. Next, click on the Run Image Series, in the Target Name write the name of the object that we will photograph (for example, Jupiter, m33, m31, etc.) and click Get Coordinates. If there is an object in the database, there will be coordinates immediately. There is no moon in the database - in order to photograph it, you will need to know its exact coordinates at the time of shooting. You can find them in Stellarium (there you can find the coordinates in the upper left corner “RA / DE"). If you wish, you can also see the current screenshot of the control computer .
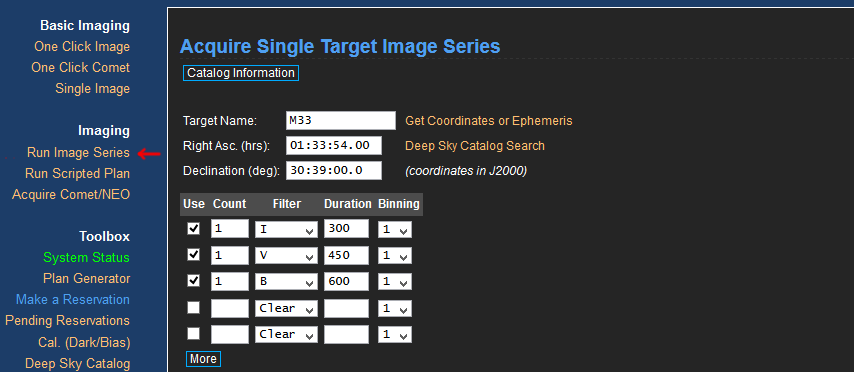
Then there is a list of pictures that need to be taken and their settings:
Filters:
| R, G, B | Colored |
| V | Same as G |
| I | Infrared |
| Luminosity | Brightness (cut off IR and UV) |
| Clear | Transparent (a decrease in clarity due to enhanced chromatic aberration is possible) |
| Ha | H-alpha . Narrow-band filter of the excited hydrogen line. It is used to see details in galaxies and nebulae in more contrast. |
| Oiii | Line of doubly ionized oxygen . Allows you to see the details in diffuse and planetary nebulae. |
| Sii | Line of ionized sulfur . Allows you to see the details in the nebulae. |
The use of narrow-band filters require an increase in exposure by 10-15 times.
Planets - require very short shutter speeds, in 0.1–0.01 seconds + you can use narrow-band filters (Ha, Sii, Oiii). From an economic point of view, using small telescopes (150-200 mm) with slow shutter speeds is not beneficial - it is easier to squeeze onto a large telescope (500 mm) and take a brighter photo in less time. Last - all of these telescopes are generally sharpened to collect the maximum amount of light, and not a high angular resolution. When comparing telescopes, it is necessary to pay attention to the “Resolution” parameter - how many angular seconds are in each pixel, what is the angular size of the frame (FOV) - does it fit what we want to photograph, or vice versa, if the object is too small.
When choosing an object for shooting, look at the magnitude. If it is a galaxy of the 15th magnitude magnitude, then even the coolest ground-based telescope will have a hard time. I would recommend starting with the Messier catalog , selecting objects of 7th magnitude and brighter there.
If the desired telescope is currently occupied, you can also create a survey plan in the interface and schedule a survey in automatic mode (no later than 4 hours before the appointed time).
Photo processing
Shooting results - add up to FTP (data.itelescope.net). By default, photos are saved in FIT format, with a 16-bit brightness depth. FIT - contains not only the image itself, but also detailed information about the shooting parameters. 2 versions are saved - directly data from the matrix and Calibrated version. Calibrated - already passed the basic processing steps (subtracting a dark frame, correcting different cell sensitivity), it is usually easier to use it.Next, the images will need to be converted from the FIT format to TIFF using the FITS Liberator program :

 Then, you can immediately into Photoshop, or glue individual RGB frames into a single color picture (for this you need CCDStack or DeepSkyStacker). Links to these and other useful programs here .
You can combine several pictures in CCDStack like this: Open all the pictures, Stack–> Register, move the settings until all the frames match. Then Color–> Create, specify which picture is which color - and you're done :–)
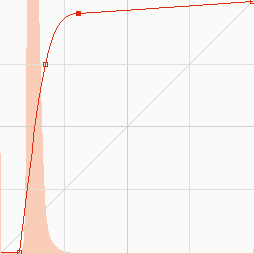
When processing the brightness of nebula and galaxy photos with curves in the editor, I recommend trying something like the graph on the right (for each channel separately).
Conclusion and several resulting shots:
I hope this protracted post will either allow you to satisfy your cosmo-interest with little blood, or understand that you really need your telescope :–) Isuggest sharing my best resulting astrophotographs in the comments, if possible, upload archives with the original files - in case anyone you can handle it better.
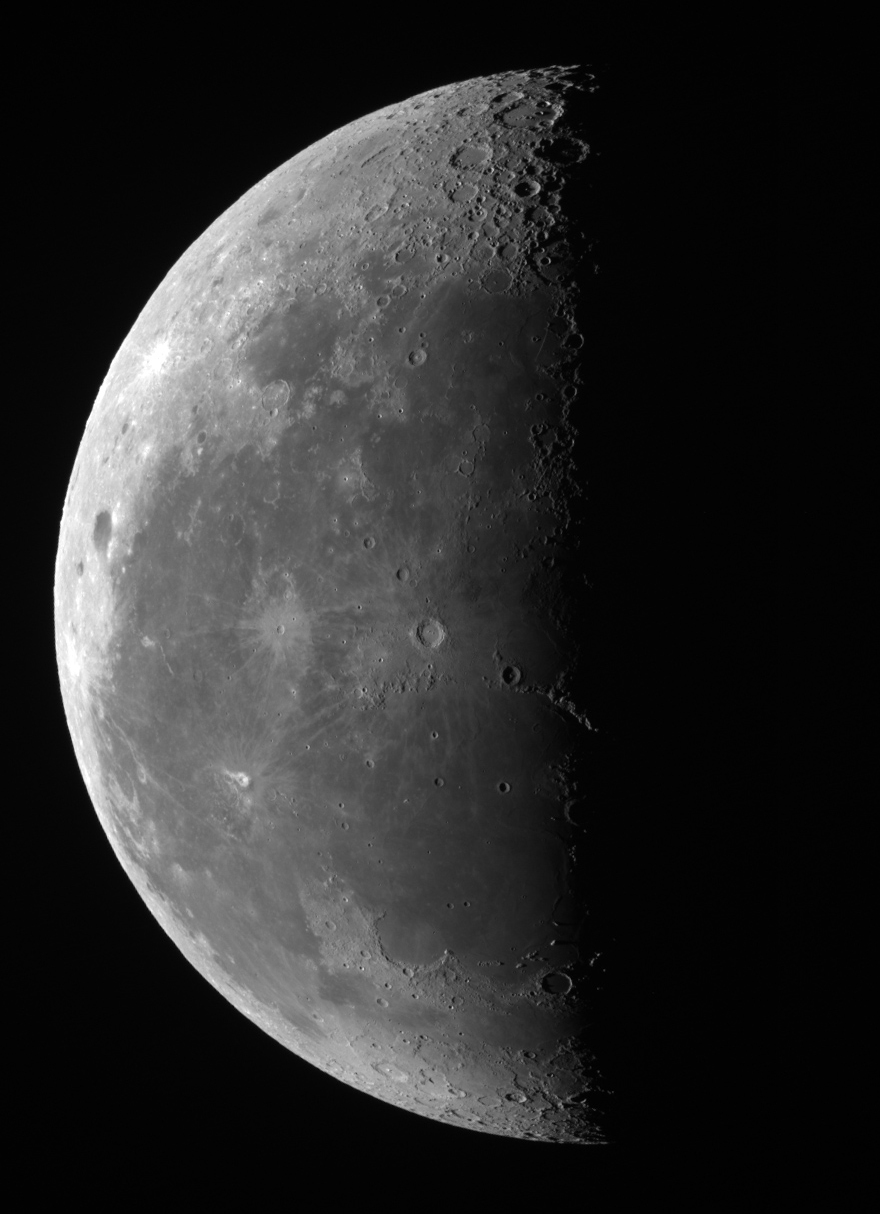
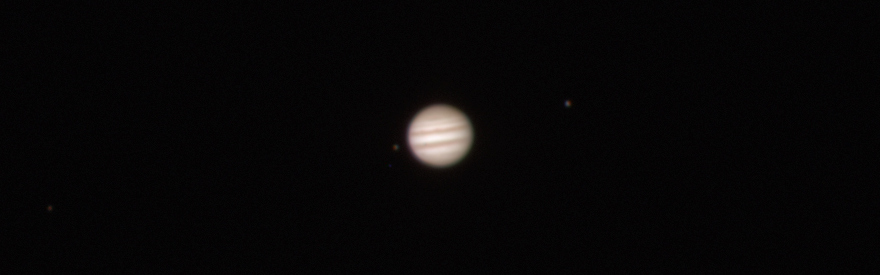
Galaxy of the Triangle, M33 . 4 snapshots of LGB + Ha, 5 + 3 + 3 + 15 minutes on T7. Moon (0.1 sec with Ha filter at T16 - 150mm): Jupiter Telescope T7 - 430mm. Also visible are the moons of Jupiter and even the shadow of Io on the planet. By the way, regarding other planets - I looked at the graphs of the distances to the planets in order to get the best photos, and the shortest distance from the earth to the planets is obtained the following time:

Mars: closest 1st of April 2014. This is especially important for Mars - now you can’t see anything there, the distance difference is ~ 4 times.
Jupiter: 1st of January 2014
Saturn: 1st of July 2014 - Now he is on the side of the sun - and at night he cannot be caught.
Uranus: Now
Neptune: 1st of August 2014
Pluto: 1st of June / July 2014 (Distance difference - 5%, it is too far away)
PS. On the site they try to ensure that 1 person does not create several free / $ 5 accounts. We are all smart here, of course, but let's not abuse hospitality.